I made my annual pilgrimage to Asheville, North Carolina, to see Biltmore Estate's latest costume exhibit. This year it's A Vanderbilt House Party - The Gilded Age.
The country home of George and Edith Vanderbilt, completed in 1895, hosted a constant stream of wealthy friends and family, who stayed for months at a time to relax and play in the cool, isolated, mountain landscape.
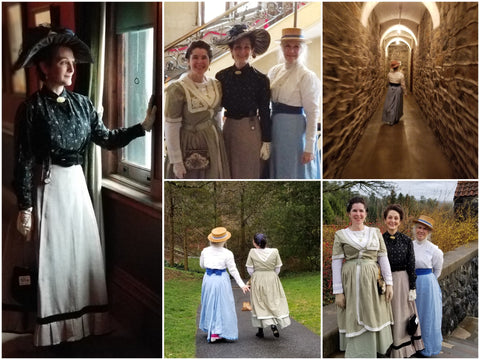
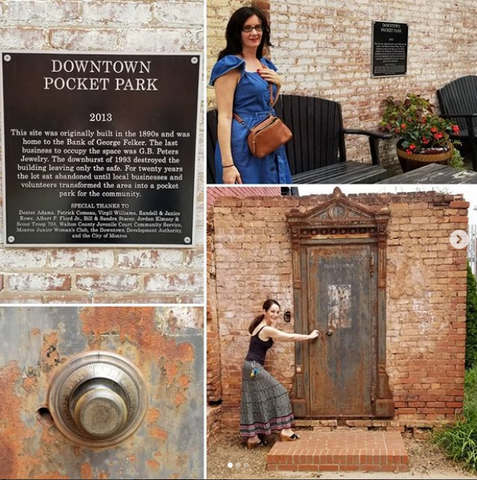
This year, in addition to meeting my knowledgeable (and fun) companion, Lizzie (a.k.a. The Vintage Traveler), a couple of my fellow Atlanta Time Travelers joined in for a dress-up adventure.
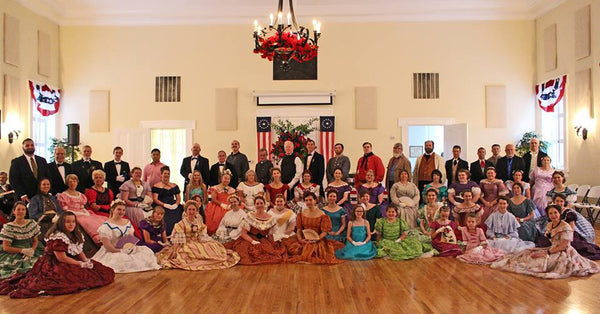
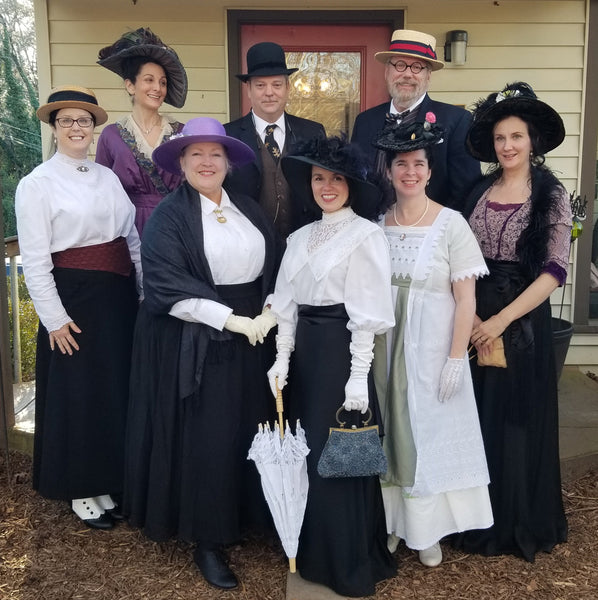
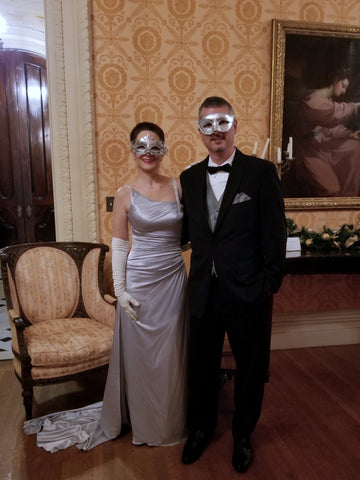
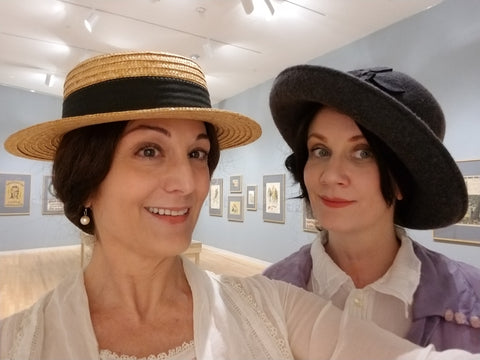
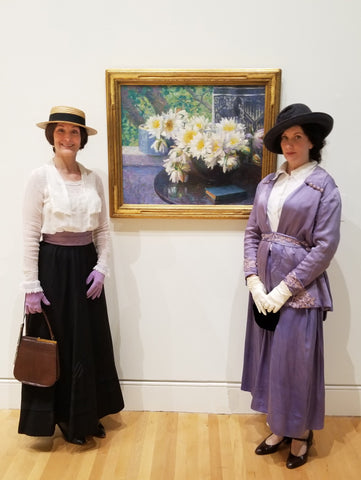
Here we are, just before heading over to the country's largest private home to see what sartorial treasures Oscar-winning British designer John Bright and his crew of period-costume magicians at Cosprop had in store.
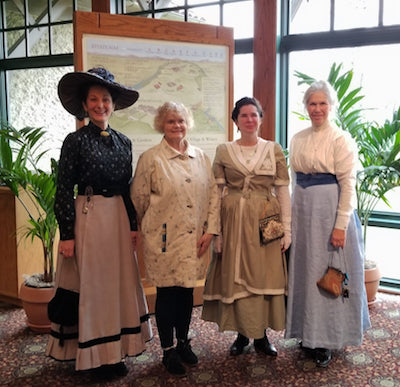 Liza, Lizzie, Bobbie Jo, Randi
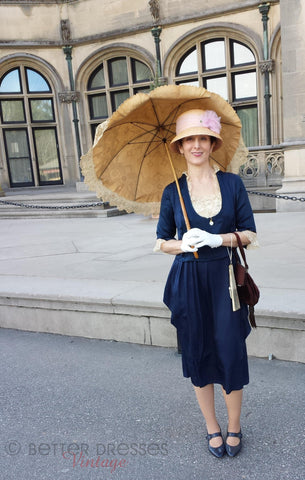
Lizzie doesn't dress in period costume, but she wore a beautiful linen coat she'd recently made. The photo doesn't do it justice. And I don't know why I look like a sunburned pumpkin. But you get the idea. I'll tell you about my ensemble after the tour.
The weather was gloomy, but we were in high spirits as we headed inside the house. As annual pass holders, Randi and I were handed free audio-tour gadgets. The recorded program was billed as essential to the immersive experience, but once we discovered it held no additional intel on the clothing, we returned them.
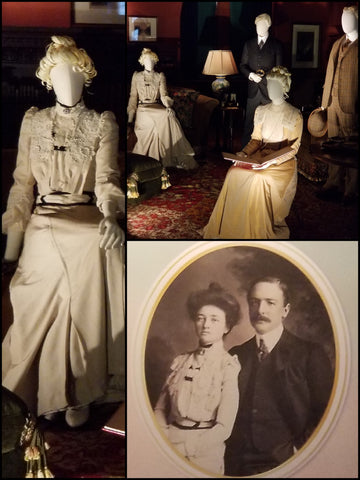
What made this exhibit special was that Cosprop had used original photographs and family records to faithfully recreate the clothing worn by George and Edith Vanderbilt, their family, houseguests, and servants.
The reference photos were black and white, so wardrobe palettes were a best guess based on each person's known preferences, the popular colors of the time, and other clues such as receipts and diary entries.
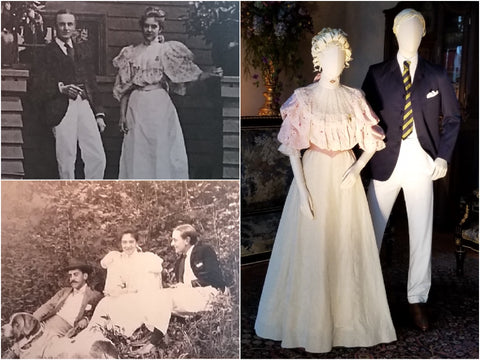
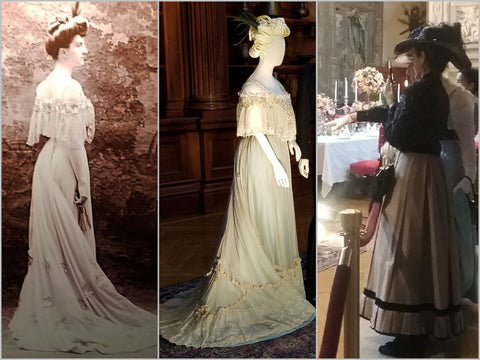
This pink and cream dress, worn by newlywed Adele Burden while honeymooning at the estate just after its completion, was my personal favorite. I wish my photo were clearer, but Biltmore's display lighting is challenging.
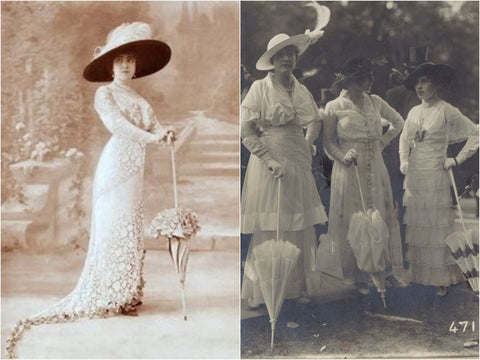
As Lizzie points out in her own review and you can see in the original photo, the reproduction's sleeves are not nearly poofy enough. That year was the pinnacle of the giant-sleeve craze. Only the sleeves of the 1830s could outdo those of 1895 in wacky ginormity. Bonus: really big sleeves make your waist look tiny. More on that, later.
Doesn't husband James look as if he should be walking in the parade of athletes at the modern summer Olympic games, decked out in custom Ralph Lauren? Very modern preppy.
The main floor's formal hallway and sitting area, paralleling the veranda, always features beautiful vignettes. First up was George holding infant Cornelia wearing what appears to be her Christening gown.
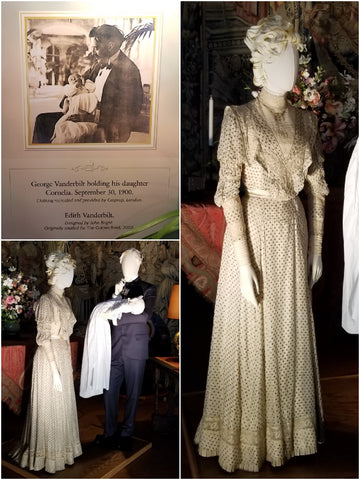
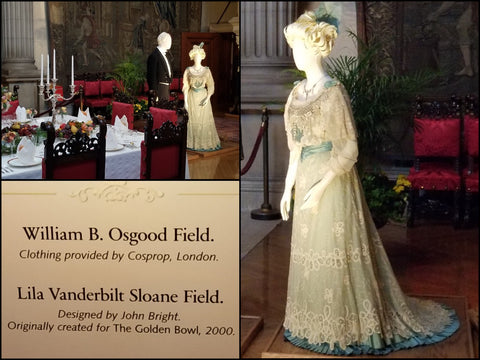
Edith's relatively simple dress above was my other favorite. It's not a photo recreation, but one of several Belle Epoque fashions borrowed from Cosprop's collection. The majority of those, including this one, are from the Merchant-Ivory film, The Golden Bowl (2000).
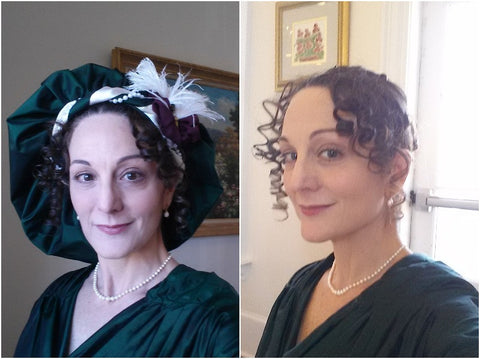
I wore one quite similar to dance in the upcoming film Bolden! (see it May 3). Grab your magnifying glass. Here I am:
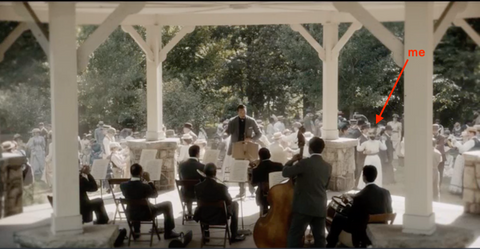 Yours truly, dancing in the movies, in original Edwardian clothes.
Our film costumes were Edwardian originals, and of course I was in heaven. It helped that I was wearing my own comfy cotton corset, while the other women suffered in their heavy, ill-fitting, polyester contraptions.
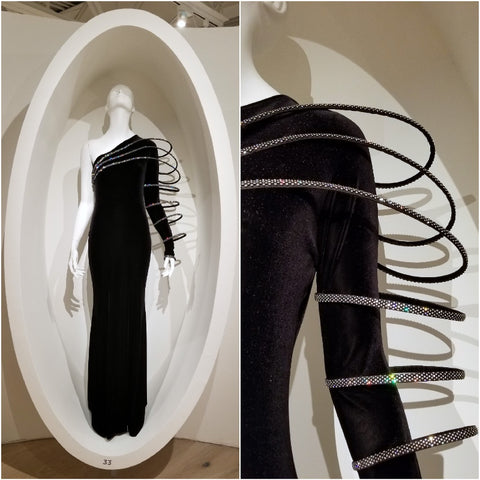
But back to the exhibit and a recreation of a black velvet evening dress worn by Edith in 1898.
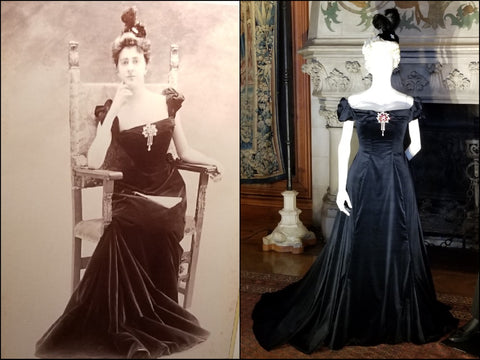
Let's talk about her impossibly small waist. Yes, she's been wearing a corset all her life. No, that doesn't mean her ribs were broken, her internal organs damaged, or that she regularly keeled over. It does mean that her ribs, unlike ours, have been molded into a more conical shape. Think orthodonture, not plastic surgery. Yes, her waist is probably smaller than yours. But, maybe not.
She's almost certainly wearing bust improvers to widen and plump her upper body, and pads to bolster her hips. When combined with an S-bend corset forcing chest forward and derriere back, the effect is a tiny waist. Also, look how she's posed -- strategically!
Compare the reproduction dress on its uncorseted, unpadded, stock-straight mannequin. More evidence that underpinnings make the silhouette. And look how much lower the entire bodice sits on Edith's frame.
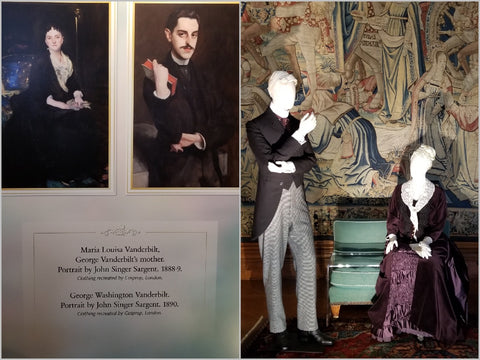
John Singer Sargent portraits brought to life by Cosprop at Biltmore.
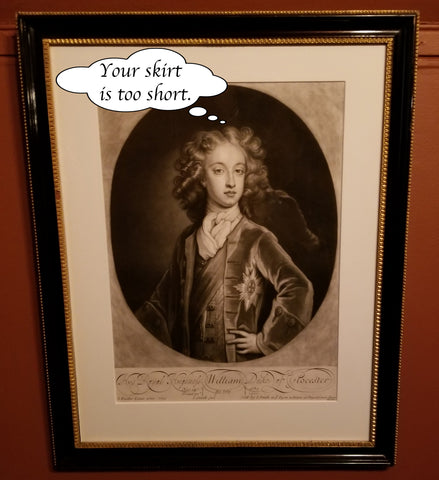
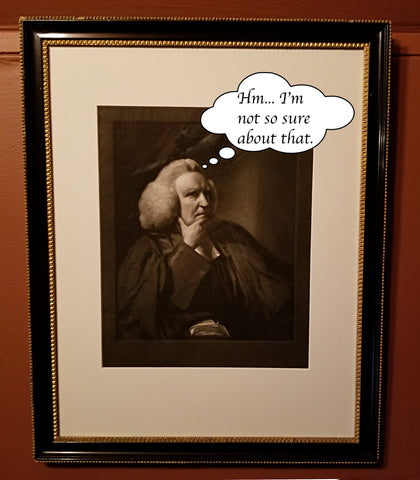
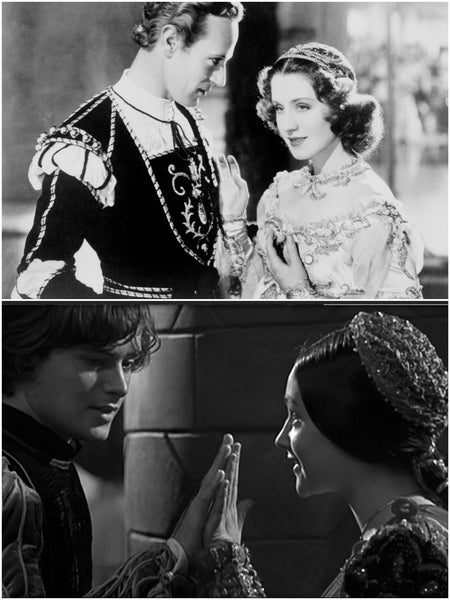
The last hallway vignette featured George Vanderbilt and his mother, Maria Louisa, in portraits by John Singer Sargent. Note that George is shown holding a book. A studious man, George was an avid reader and book collector. His library of more than 20,000 volumes contains many first editions by noted authors, including several newly popular at the turn of the 20th century. A previous exhibit at Biltmore showcased several of these books with fashions from their film versions.
Upstairs in the main foyer sitting area -- site of last year's "shoe debacle" -- we found Lila Vanderbilt Sloane Field, William B. Osgood Field, and friends, lounging about, in 1902.
Once again, note how the overall effect is slightly thwarted by mannequins without the proper undergarments and posture. Lila's beautifully recreated dress needs a pigeon-bust silhouette to look precisely right.
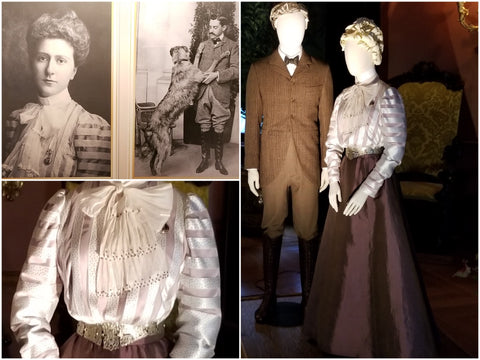
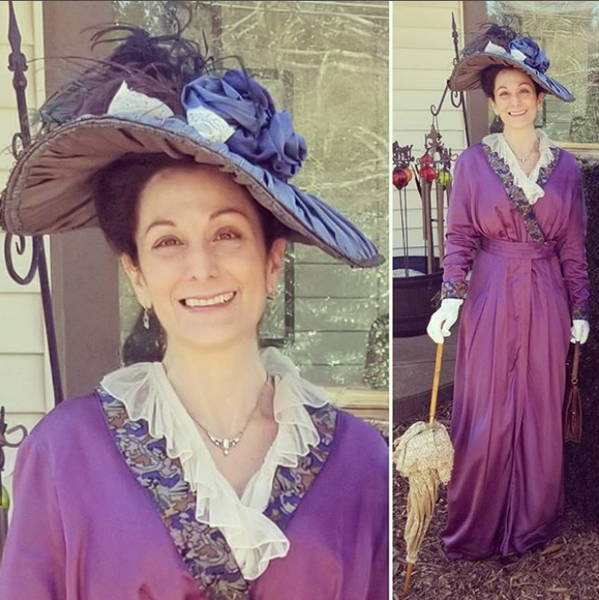
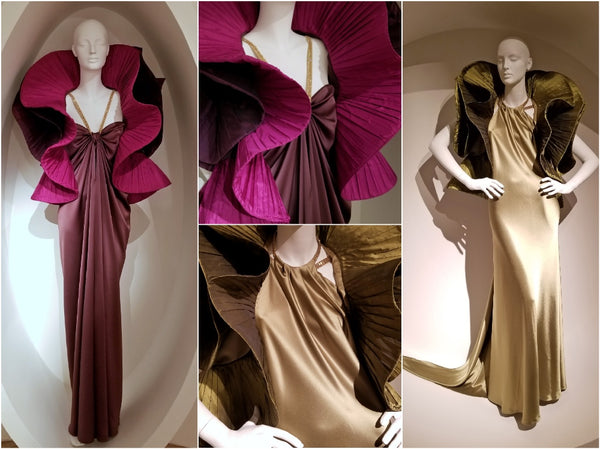
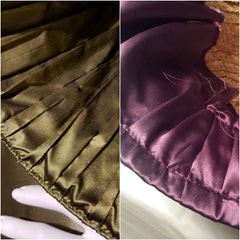
This beautiful mauve ensemble, worn by Edith in 1900, was a group favorite. I didn't care for the oddly wide ribbons at the elbows. We know they're ribbons, because an informative film about the making of the costumes was showing in the basement. The polka dots were applied to the ribbons, and the ribbons to the blouse. I loved the jabot, the belt, and the soft purple hues.
George is shown with Russian wolfhound Iwan in 1902. His recreated look seems a bit slimmer and tighter than the original. Sporting clothes are meant for active use. Some ease would be needed.

While family and friends socialize, the servants are busy putting the guest's belongings away. We couldn't get close enough to see if the maid is holding a real gown or a dressing gown. And doesn't that trunk just scream for a "rom-com makeover montage"? Put me in, coach.
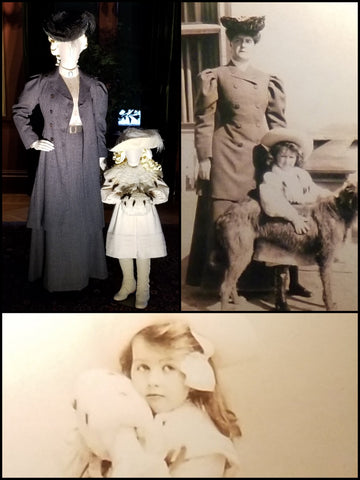
Also in the sitting area, little Cornelia and maternal aunt Pauline Dresser Merrill stand ready for a 1904 outing. Perhaps Pauline's jacket is open to show the lines of her skirt? The original image provides another real-life example debunking the "everyone was skinny back then" myth. Lizzie and I wished they'd recreated doggy Iwan for the tableau.
For the wealthy, each activity and time of day required a change of clothing. The Vanderbilts' personal servants must have spent considerable time gathering and preparing each ensemble.
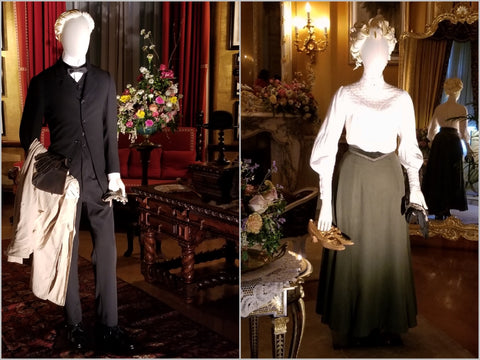
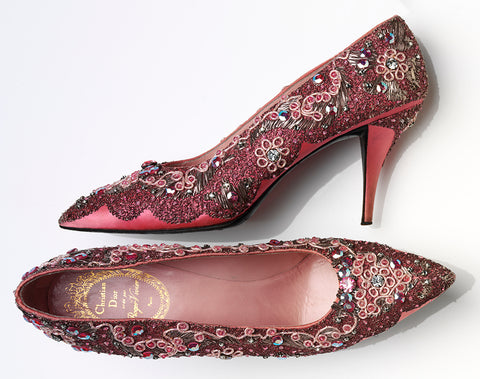
In George's room, his butler holds driving essentials, including goggles and duster coat. Edith's lady's maid, Martha Laube, carries beautiful shoes (all the shoes in this exhibit were lovely). She wears a skirt the same length as mine. I'd thought mine was 5" too short on me. Perhaps not.
At the time, skirt fronts were smooth and sleek, while the backs were still gathered to accommodate a small bustle pad or wire frame. When shorter-than-floor-length, these skirts may be easier to move in efficiently, but the silhouette becomes odd and unflattering.
We headed down the long, portrait-lined hallway and convinced the friendly operator to let us take a ride in Biltmore's antique elevator. Click for a video.
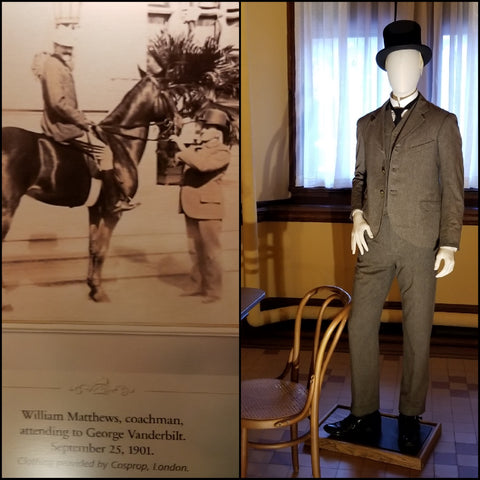
On the lower level, in the servants' dining room, we find George's coachman William Matthews. His seems to be another more-sleek-and-snug-than-the-photo-suggests ensemble.
We saw sporting ensembles modeled in the bowling alley and swimsuits modeled at the pool. You can see images of those on Lizzie's blog. Biltmore's indoor pool terrifies me, even empty. The room is windowless, with an oddly low ceiling. Have you ever seen the movie The Legacy? I saw it in a theater in 1978 and this scene has stuck with me. It comes to mind and makes my heart pound every time I visit the Vanderbilts' oddly claustrophobic pool.
The tour wended its way through the various service areas of the lower floor, including the laundry room and a butler's pantry none of us had ever visited.
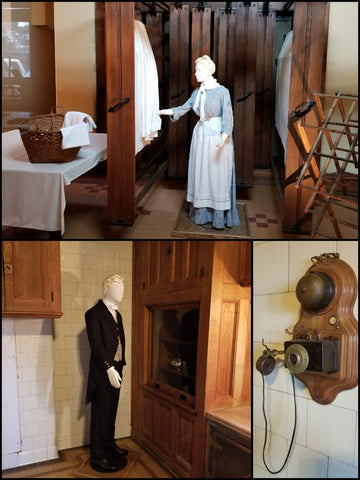
A well-dressed servant sends refreshments upstairs from one of several dumbwaiters. The original telephone is protected behind plexiglass. By this point, I'm getting a bit tired.
Heading upstairs for the last leg of the tour, we are directed into the dining room. The table is lushly decorated with fruits and flowers. I've never seen it so lovely. Guests assemble for dinner.

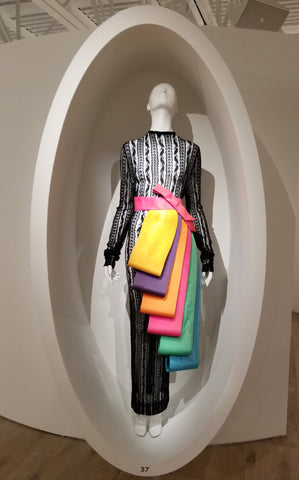
I like Florence Vanderbilt Twombly's smile in the original photo. She seems genuinely happy. The recreation of her butterfly gown from 1900 is one of the projects detailed in Cosprop's short film. The photo shows only the gown's upper bodice, so I don't know what the skirt looked like. If I had my druthers, the butterflies would form a less-symmetrical, swirling arc up and around the skirt, rather than the somewhat static oval. Then again, no one asked me.
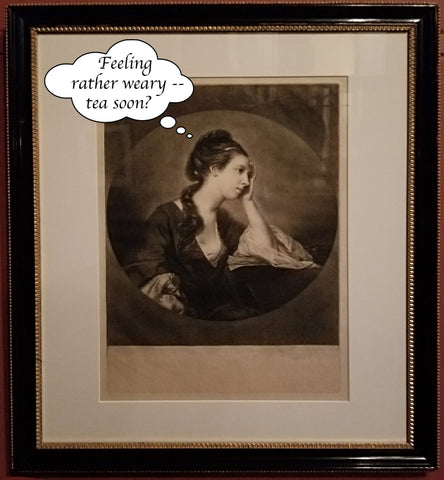
Just because it's pretty and I thought you might like to see it, here's another dress from The Golden Bowl.
On the other side of the enormous room was another recreated dress.
Bobbie Jo noticed that the new dress had net insets and straps at the shoulders. We were unable to tell if the original had them. At right, Randi and I discuss how we'd go about giving a mannequin the S-bend posture, to more accurately recreate Edith's 1903 look.
I point to the blue underskirt showing unevenly and suggest it should be completely covered by the lace. Perhaps a sewing miscalculation came into play. Randi didn't agree.
UPDATE: Cosprop confirms our suspicions that yes, the net overskirt should and does completely cover the blue underskirt, all the way around. I feel compelled to make another 7-hour round-trip to jump that velvet rope and set things right. Just kidding (sort of). I'll let the folks at Biltmore handle it.
One fun thing about this exhibit was the addition of costumed mannequins in unusual spots. In addition to servants at work and guests at play in the normally empty lower-level rooms, we saw guests in other places we'd never before seen occupied.
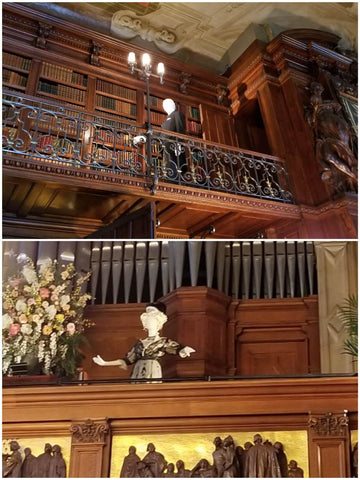
Someone is browsing the books on the upper level of the magnificent library. In the dining room, a guest (do I recognize that dress from Titanic?) looks down from the pipe organ balcony. This scattering of additional mannequins helped bring the "house party" theme to life, showing servants working and guests enjoying themselves as they would have at the time.
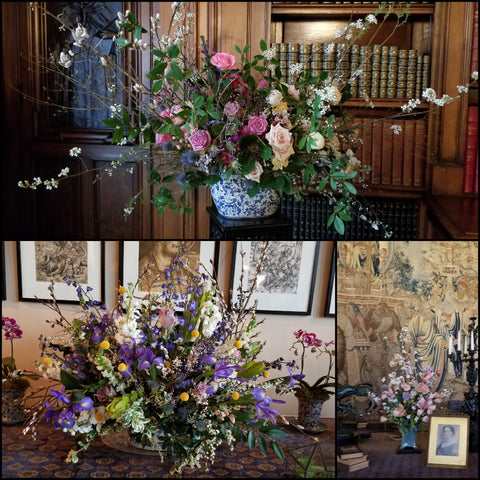
Last, but not least, a few views of the truly splendid floral arrangements that decorate nearly every room of the house. From what I've been told, the flowers are grown and arrangements created on site. For me, they're always a highlight.
After the tour, we headed to lunch and a spin around the gift shop. Lizzie set off to see the exhibits on the other side of the property, while my dress-up friends and I went outside and headed toward the gardens.
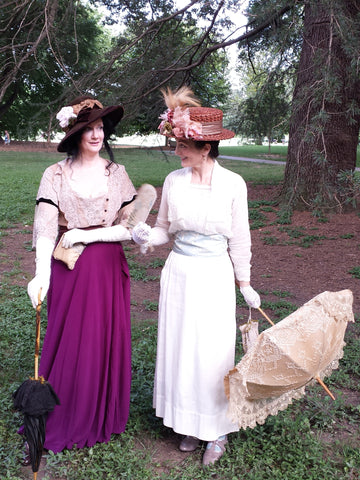
 No longer raining, but still cloudy.

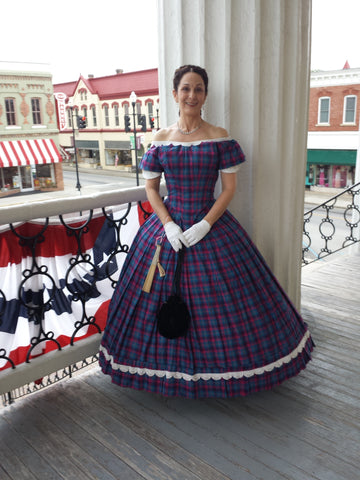
My ensemble, from the inside out, consisted of:
- antique one-piece underwear (cotton, open crotch)
- modern cotton corset (Playgirl brand)
- antique white cotton combination corset cover + petticoat (like a full slip)
- antique black polished cotton petticoat
- black cotton knee socks (in lieu of stockings)
- modern flat shoes with a mid-19th century silhouette (best I could do)
- antique taupe wool skirt with black velvet trim
- antique black cotton blouse with fleur-de-lis pattern
- antique chatelaine with antique watch, button hook, and pencil (all purchased separately, and all fully functional)
- antique brooch (my great-grandmother's) over a slim, black velvet ribbon
- vintage kid gloves
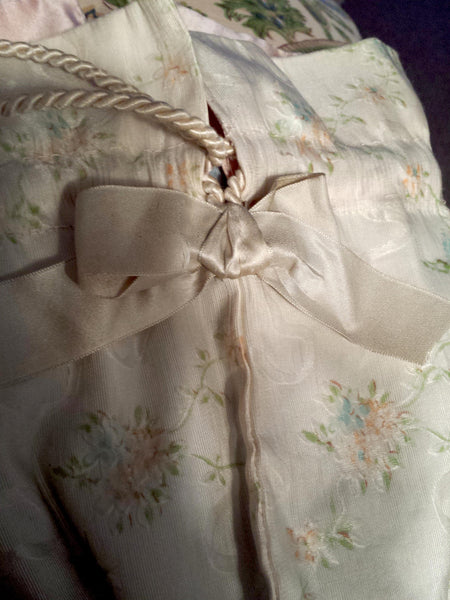
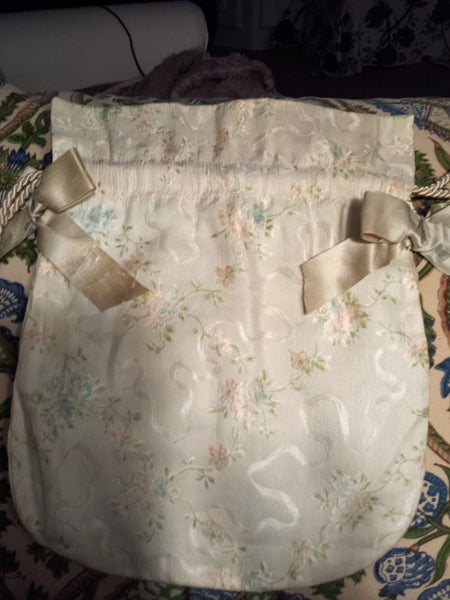
- antique black velvet frame purse
- relatively modern earrings with an antique vibe
- about 45 hairpins (really)
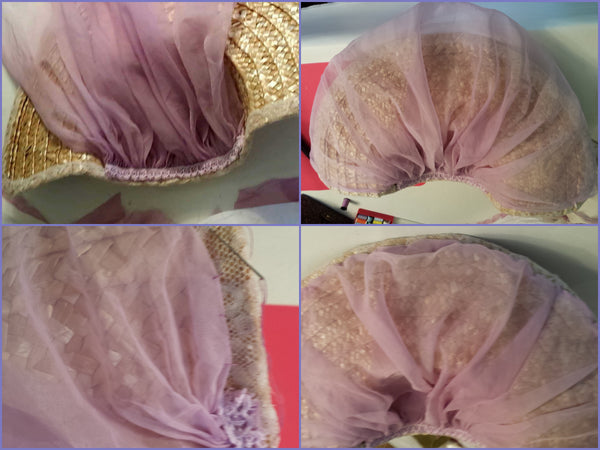
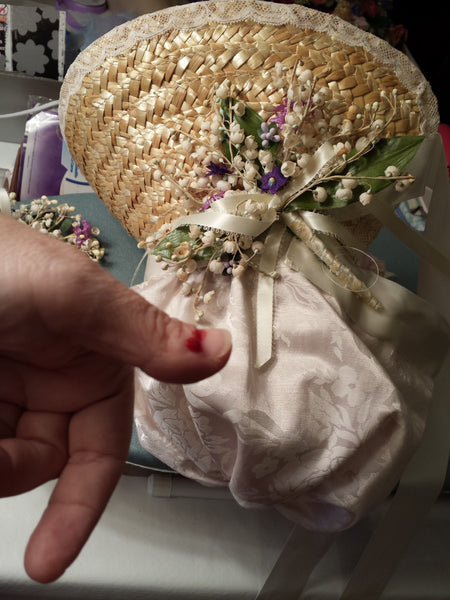
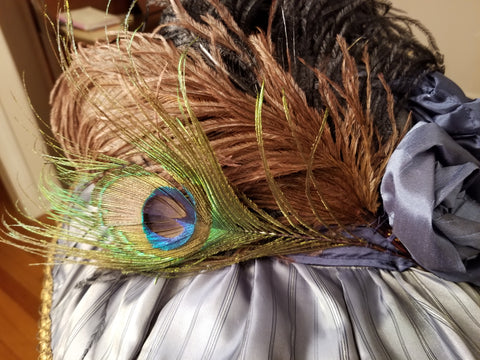
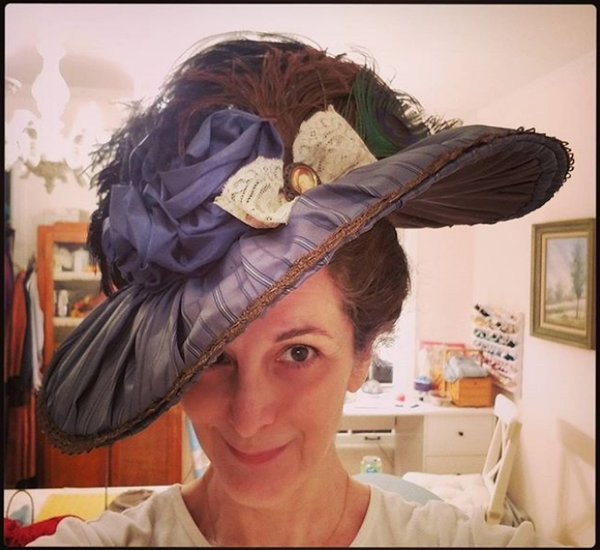
- modern straw hat from thrift store "cobbled" with a mix of modern, vintage, and antique ingredients (to be described in a future post)
- antique hat pin of illegal length (one must be on guard)
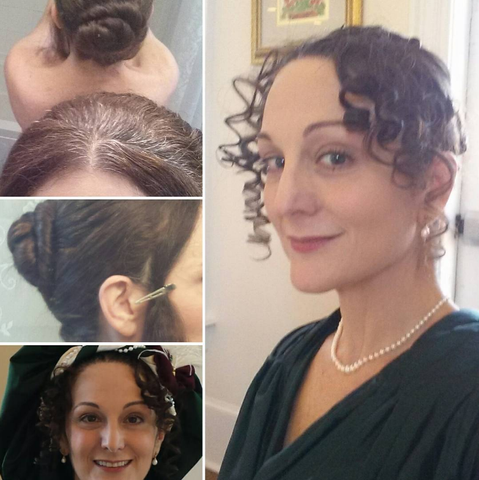
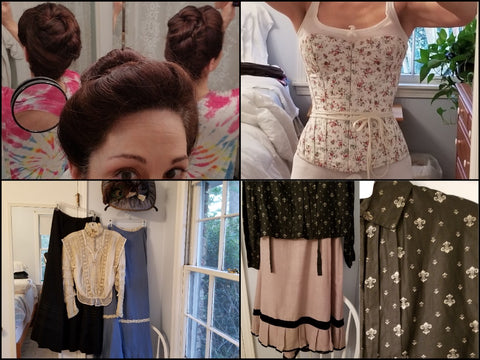 Doing my hair. All laced up. Some wardrobe options. The final selection.

]]>


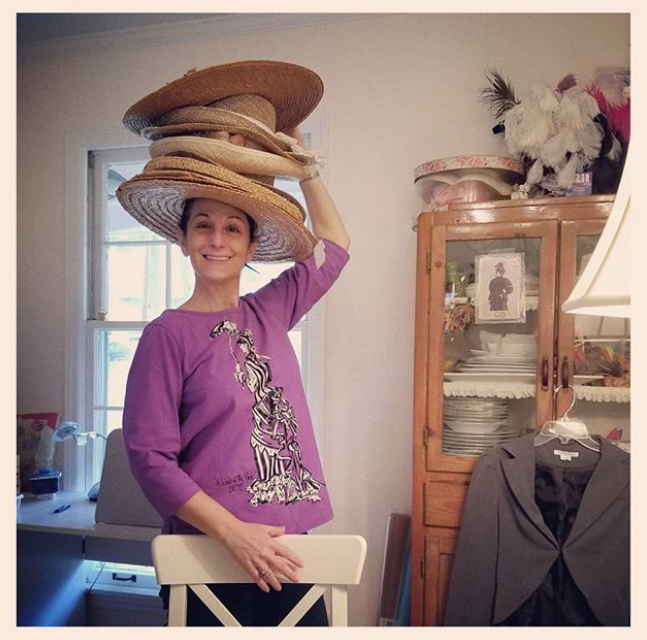 When you can't wear a bustle dress, wear an unflattering bustle-dress t-shirt!
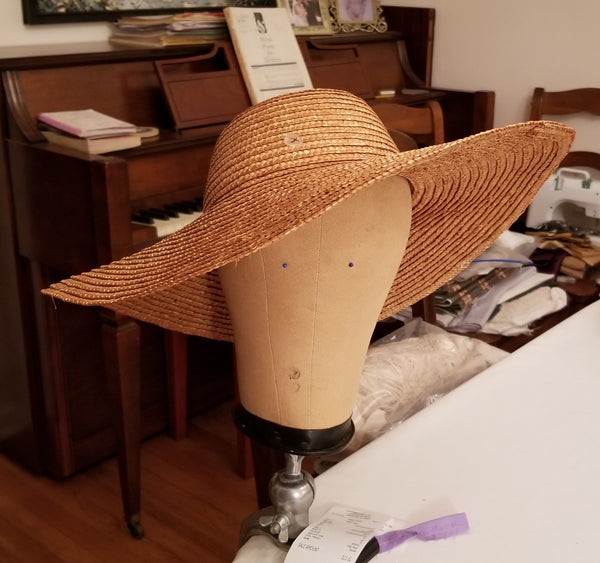
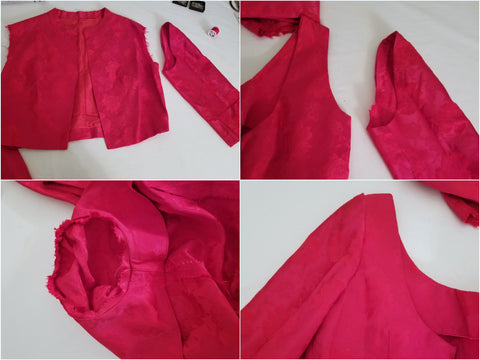
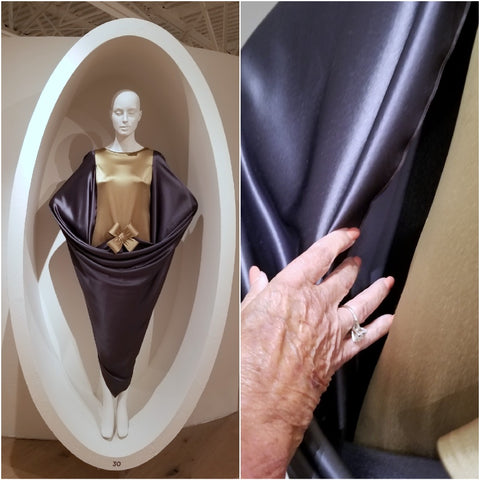
 L: The dress I planned to wear. R: Potential fabrics.
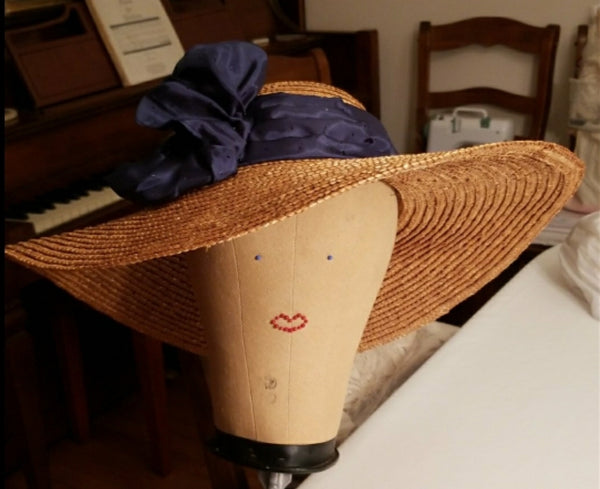

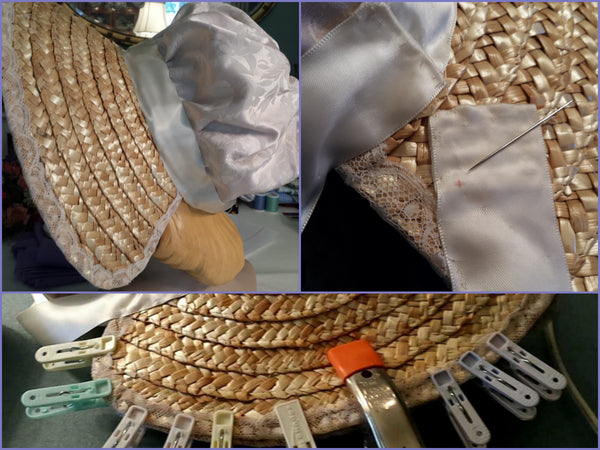
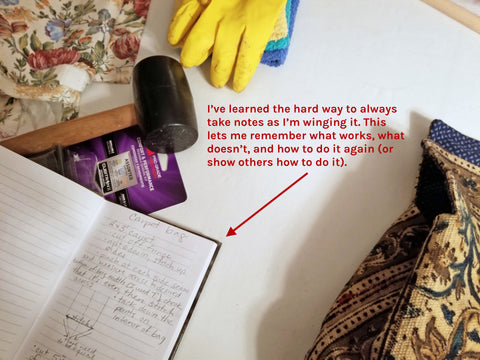
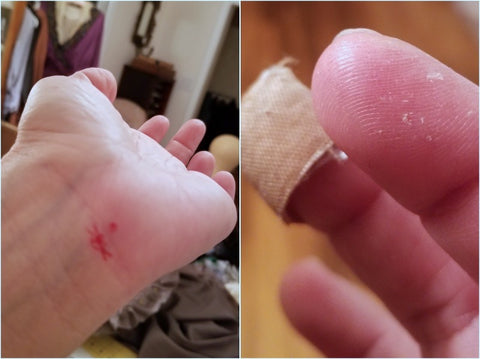 The roughness of my index finger is from poking myself repeatedly with various needles,
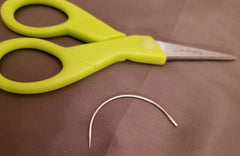

 Dumb and dumber.
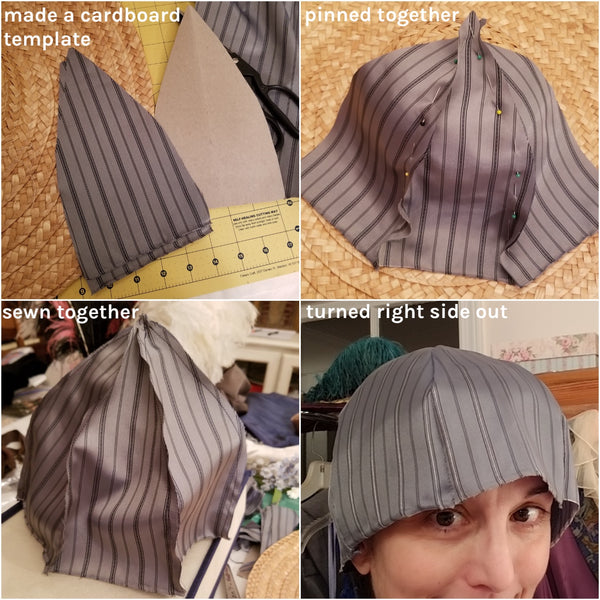 Yay, high-school math! Yay, cheese!
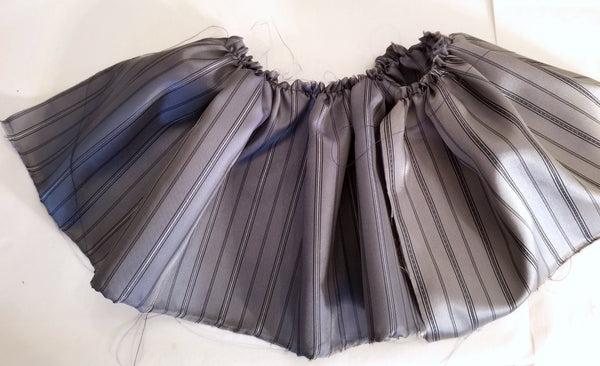
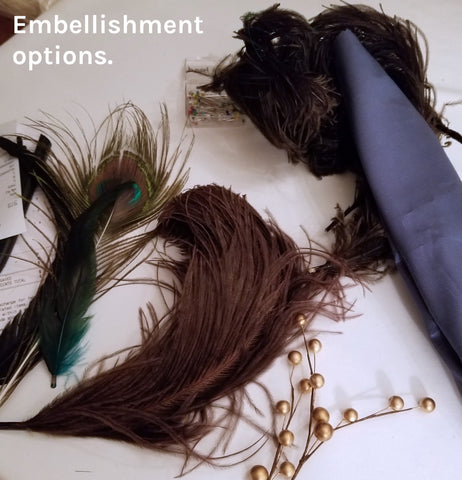
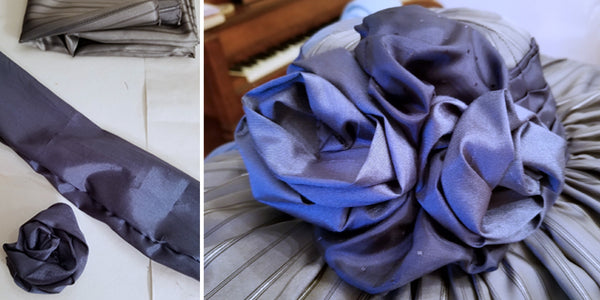 Four mediocre flowers in two fabrics.
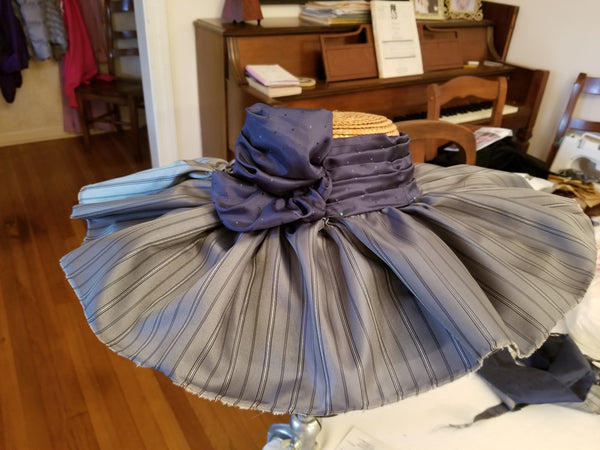
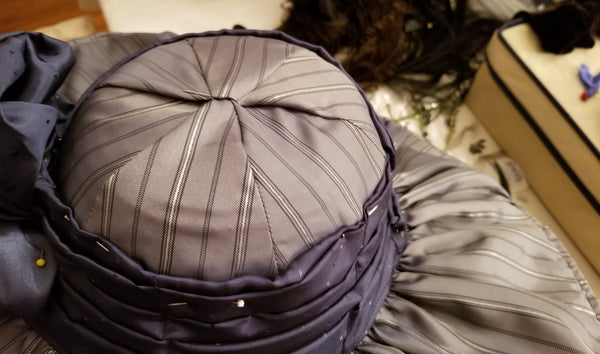 Ready to be stitched with a curved needle (or glued) to the hat.
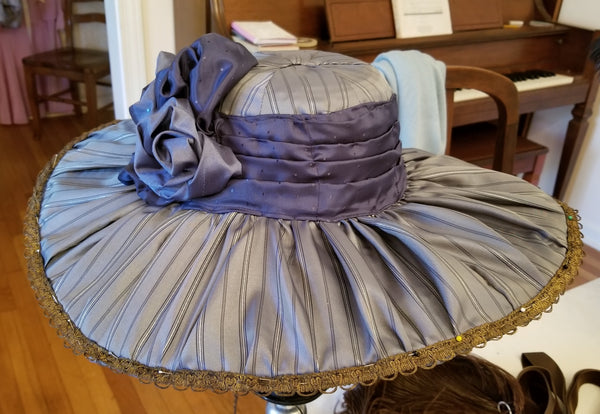
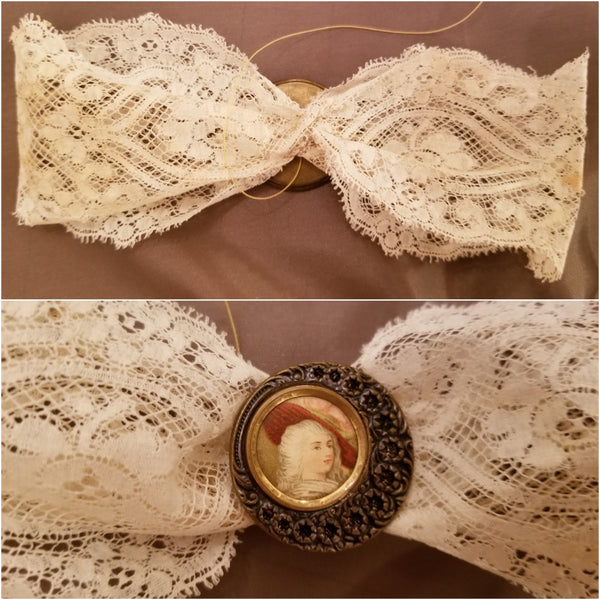
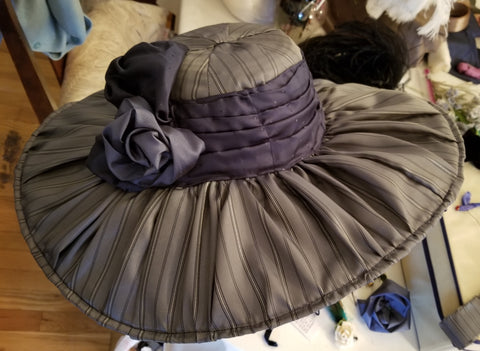 It's starting to look like something!
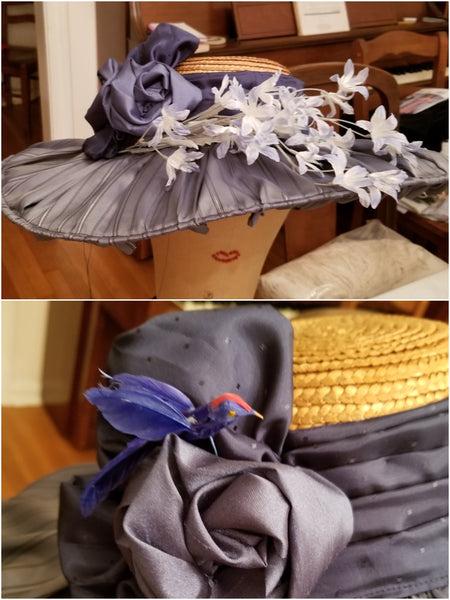
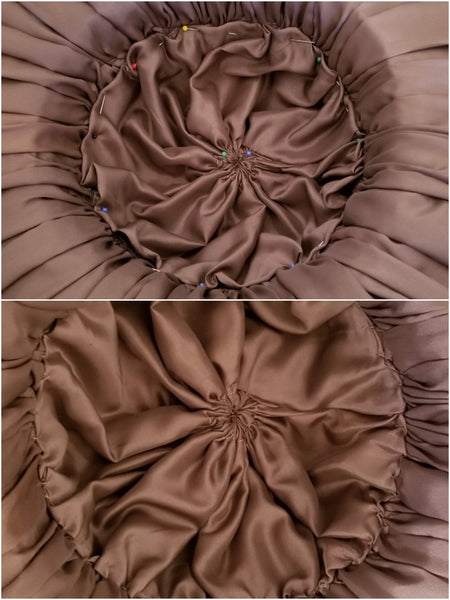
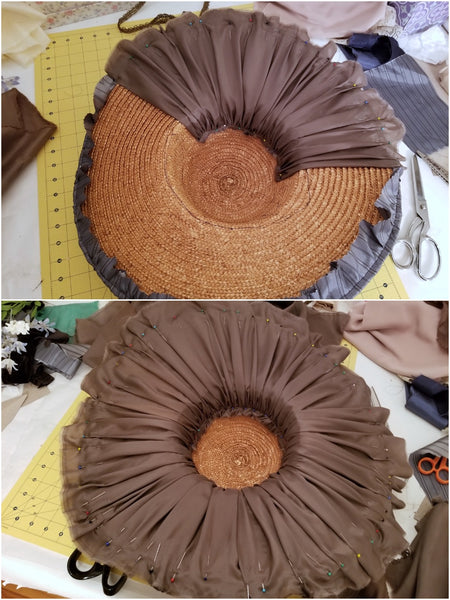 Pinned far up inside the crown and also along the edge of the brim.
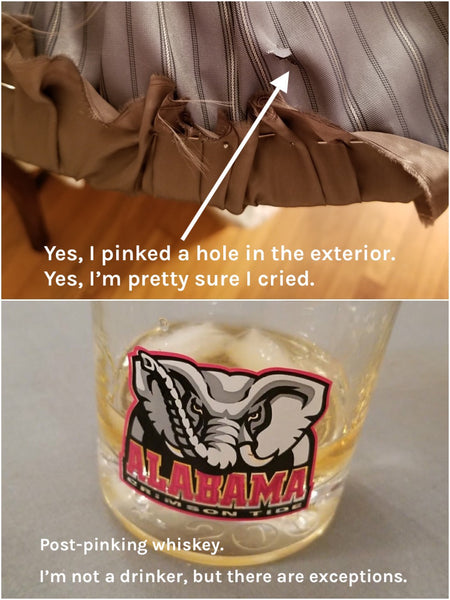 I concealed the hole with a tuck and a stitch. But my OCD self was gutted.
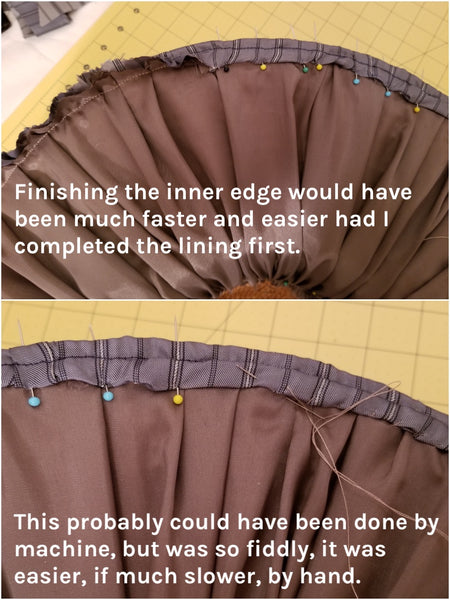
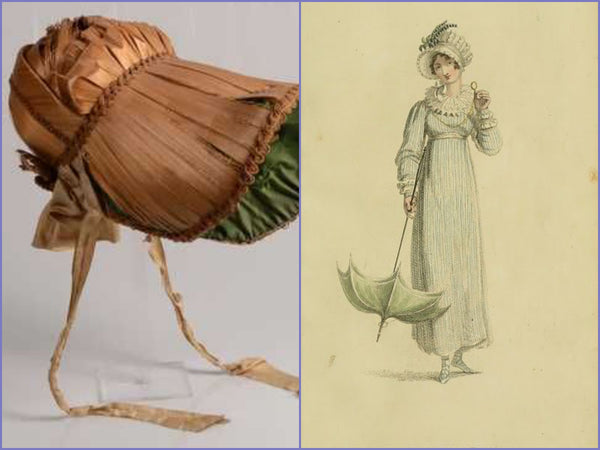
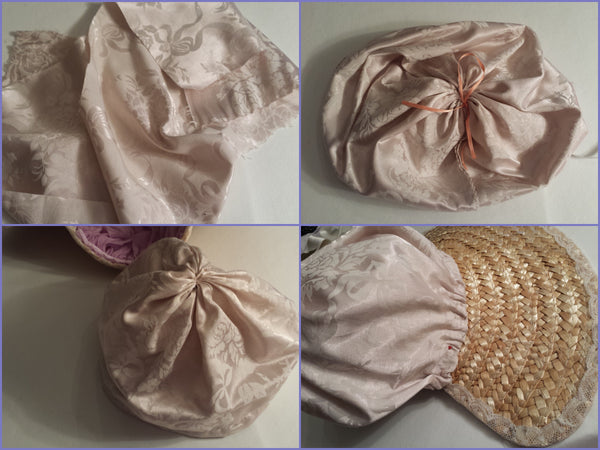
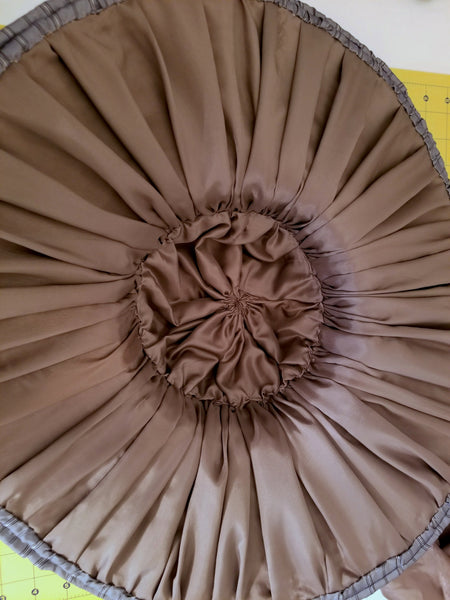
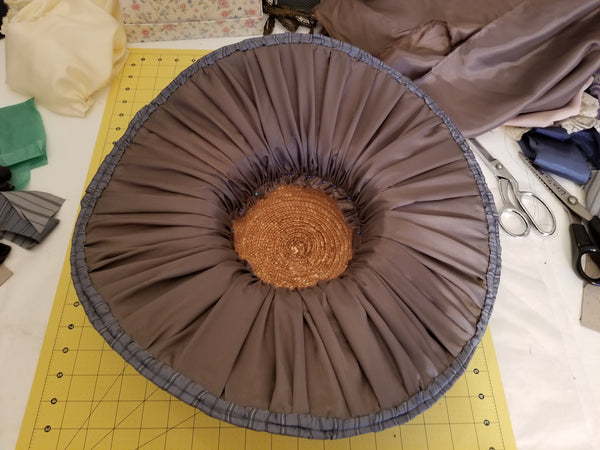 Looks good enough to eat, no? Like a giant mushroom.
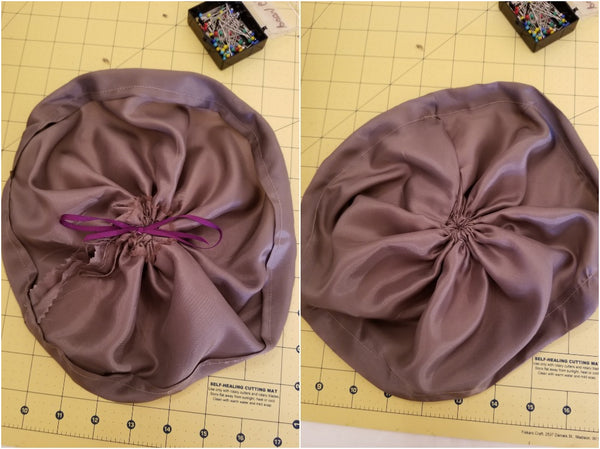


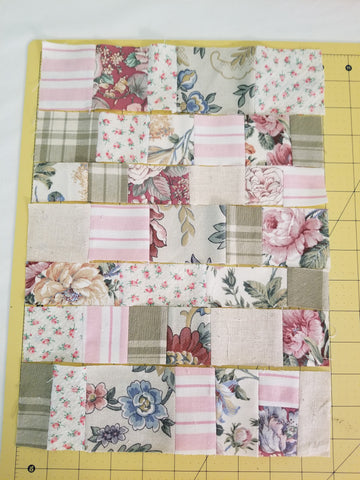
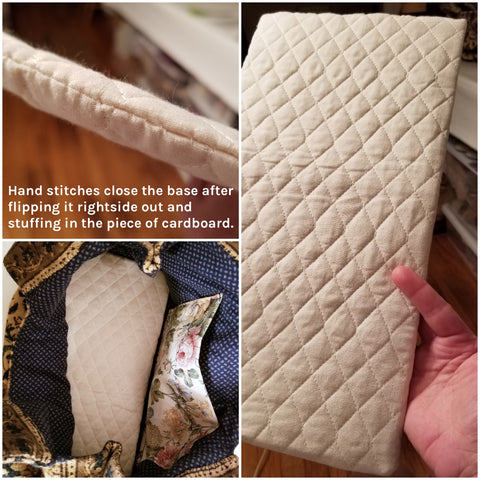
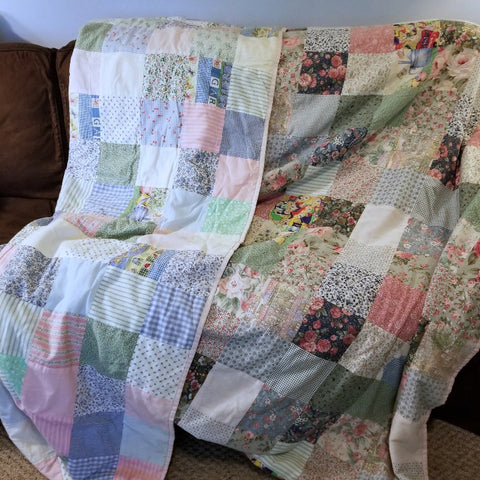 Basic patchwork quilt by mom and me. I cut and assembled, she finished.
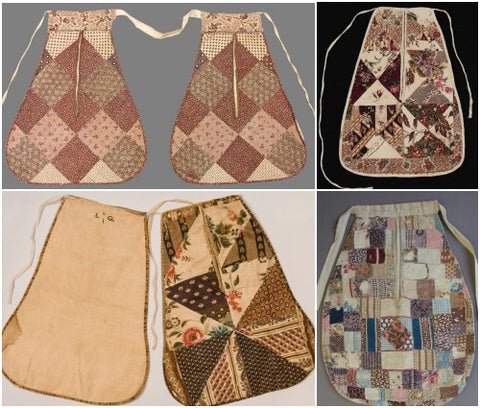
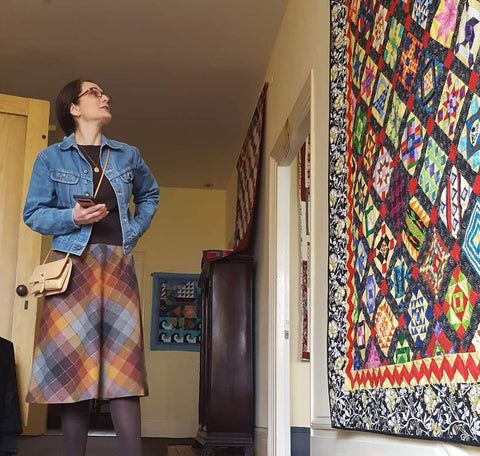 Admiring the real thing at
 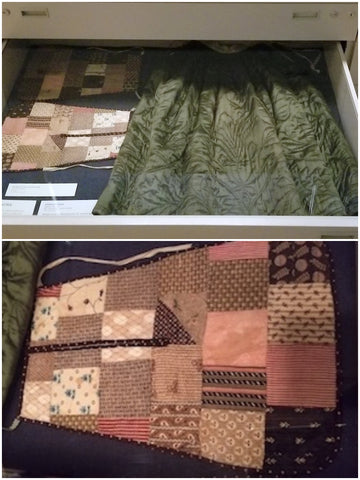 18th century pockets (and quilted petticoat/skirt) at Colonial Williamsburg.
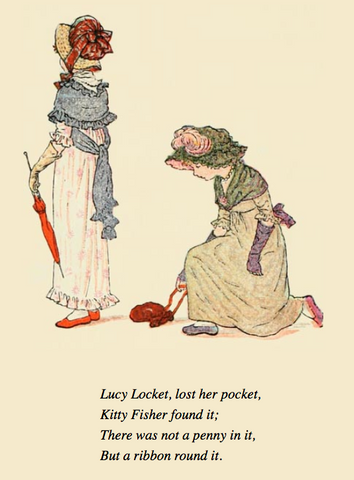
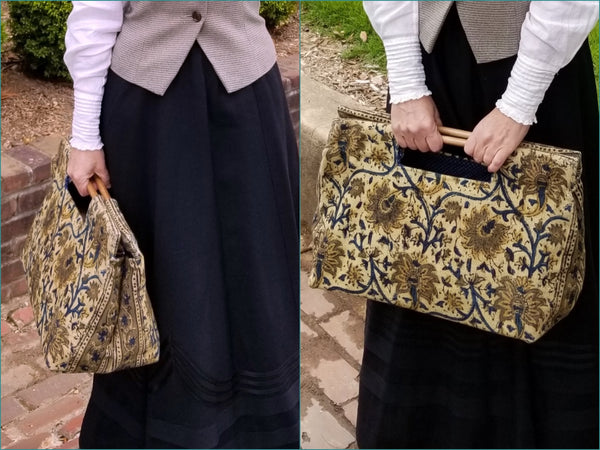
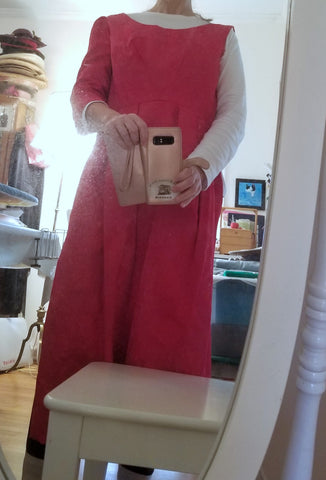
 Liza, hiding cellphone behind back, to Mr. BDV: "Hold this for me, would you?"
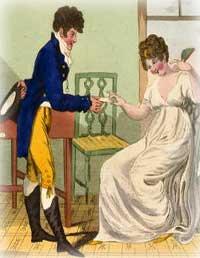 Regency lady to gentleman: "Hold this for me, would you?"
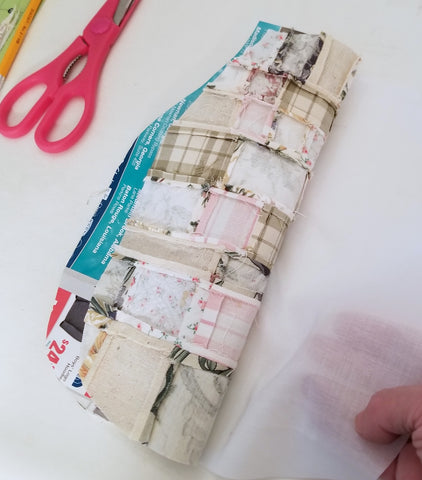
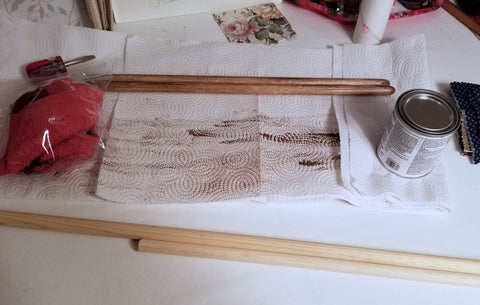
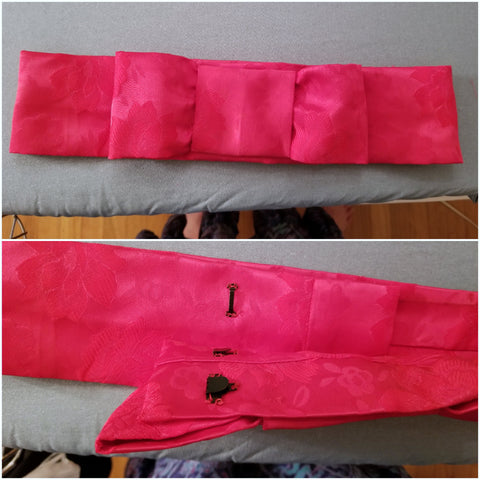
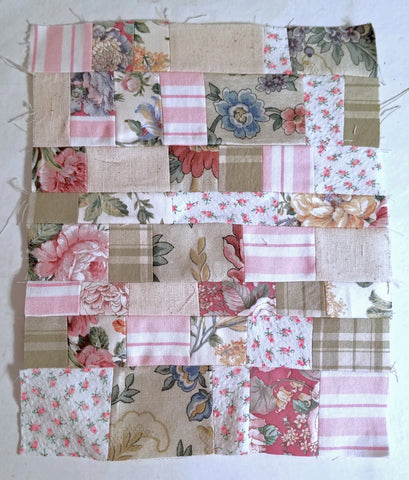 Terrible photo of the completed second panel, awaiting cutting.
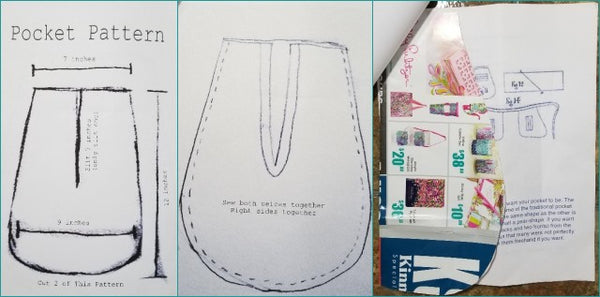
 Pocket front interior view, with lining, cut out using not-yet-perfected pattern.
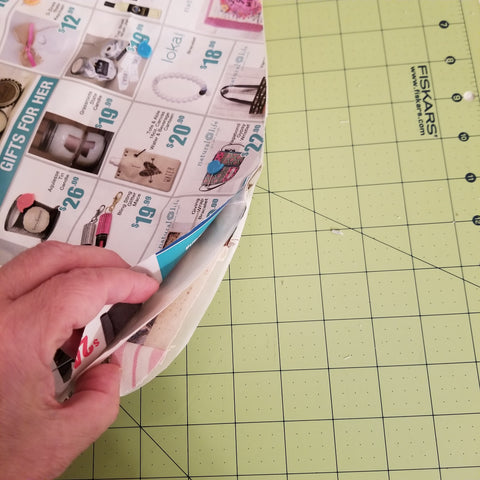 All three layers (exterior+lining counts as one), pinned together and cut out.
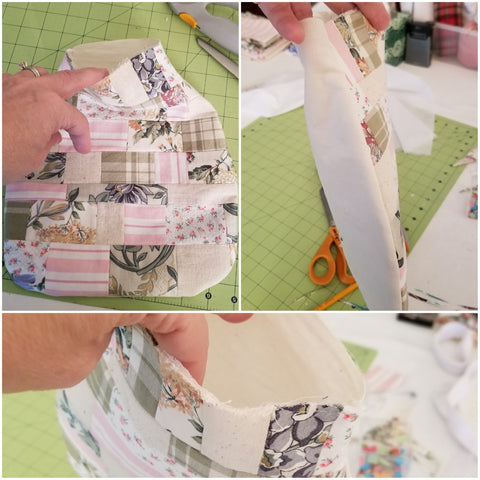 Pocket layers sewn together and flipped right-side-out.
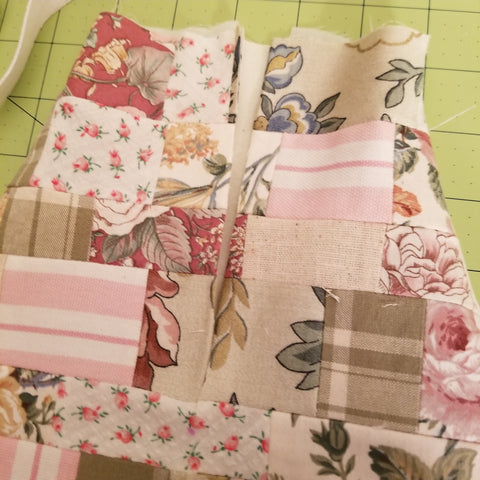
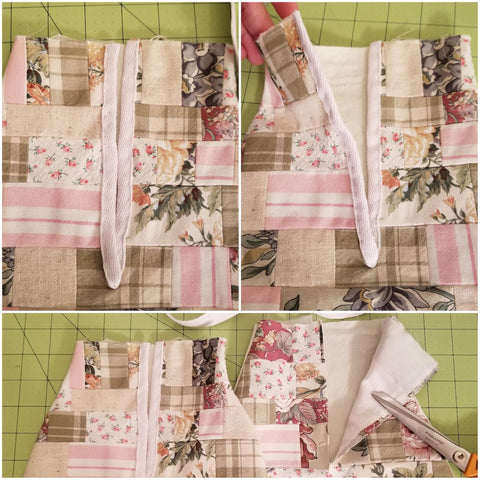 Before and after finishing the slits with twill tape.
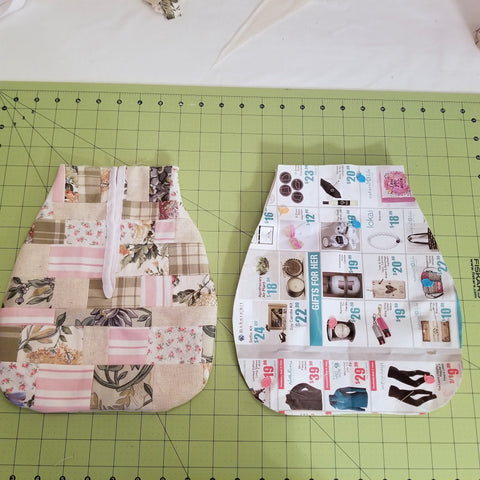 Pocket and pattern, side-by-side. Nope, my sewing is not perfect.
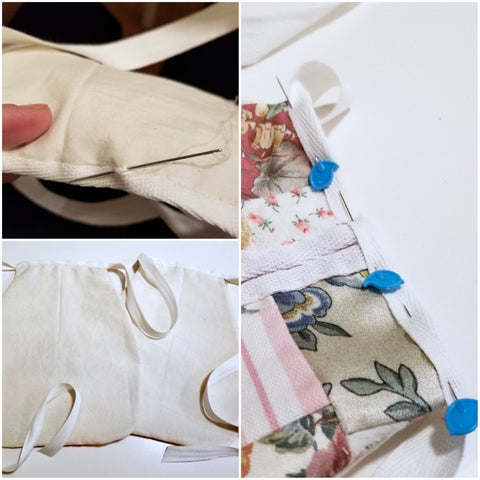
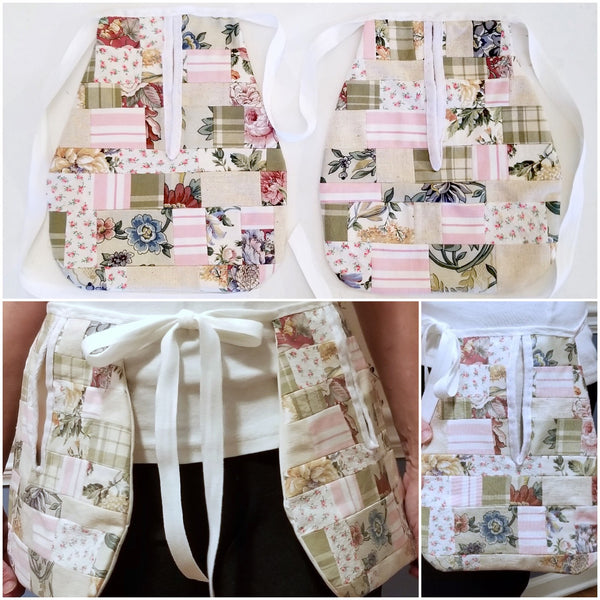 The completed pockets.
 That's the actual color of the "red Georgia clay" between the logs.
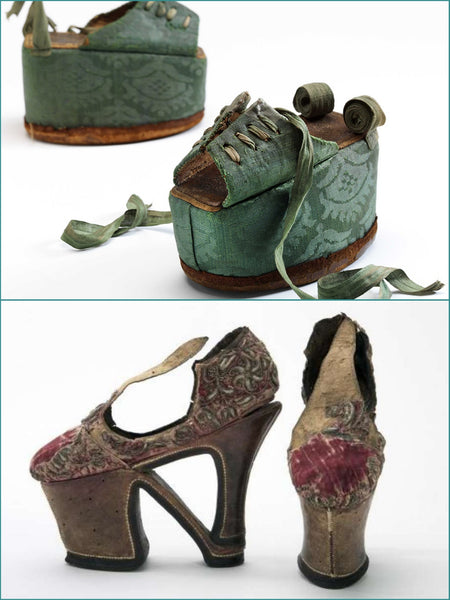
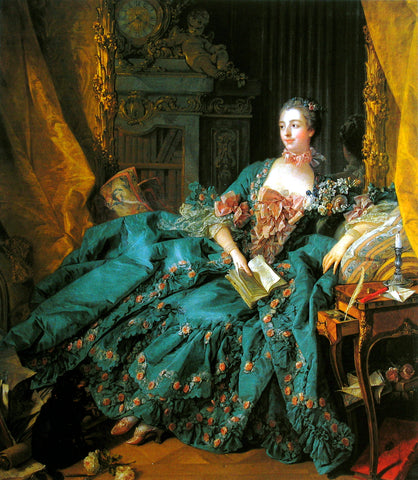
 French, 1775 (LACMA via Wikimedia)
 Playing dress-up for the Fort Yargo 18th century event.
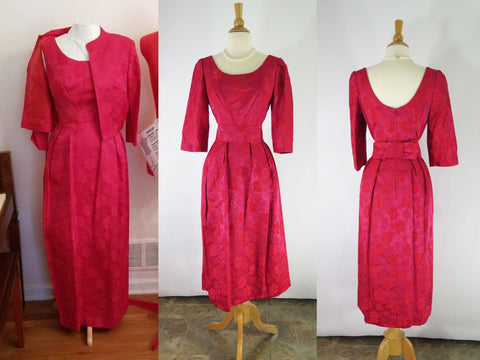
 L: Original Edwardian dress purchased at
  Repro 18th Century stays by


 Liza, Lizzie, Bobbie Jo, Randi

 Yours truly, dancing in the movies, in original Edwardian clothes.


 No longer raining, but still cloudy.
 Doing my hair. All laced up. Some wardrobe options. The final selection.
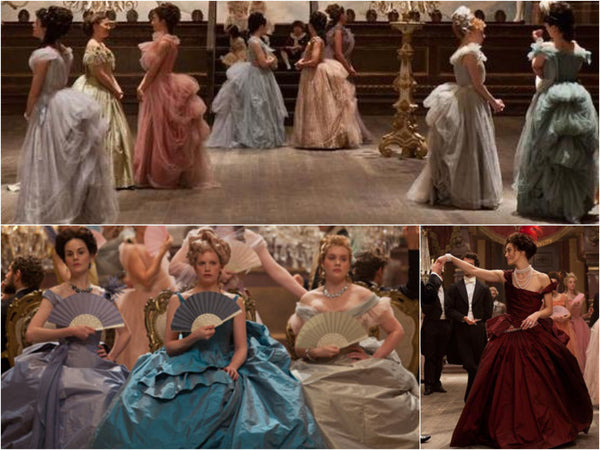 Durran's version of the 1870s.
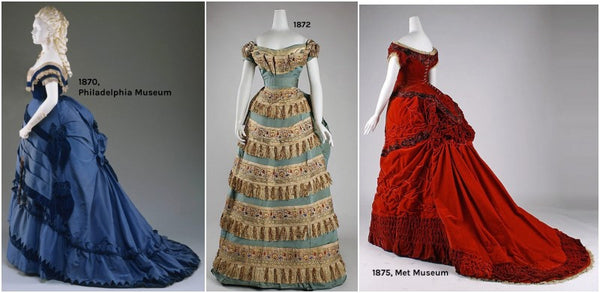
 Scarlett O'Hara's dress is only marginally more historically accurate
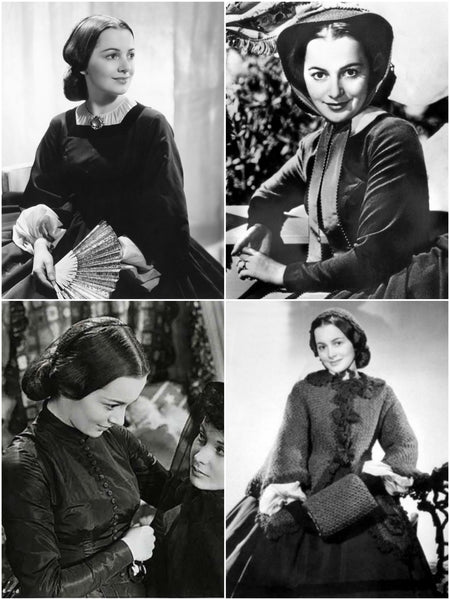
 These
These 


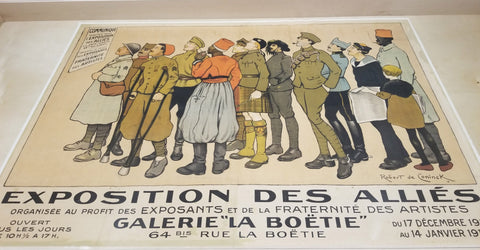
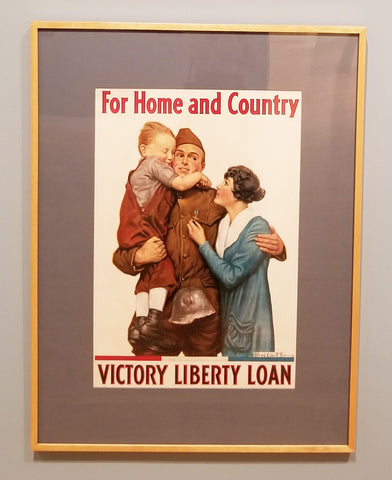 Alfred Everett Orr, USA, 1918
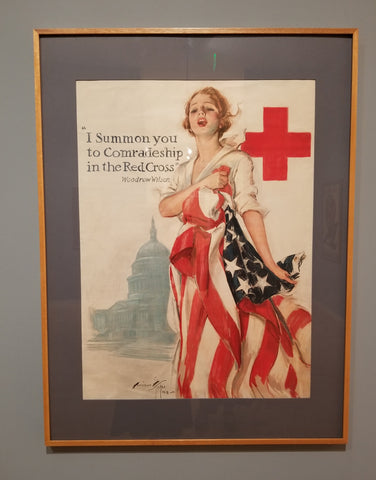 Harrison Fisher, USA, 1918


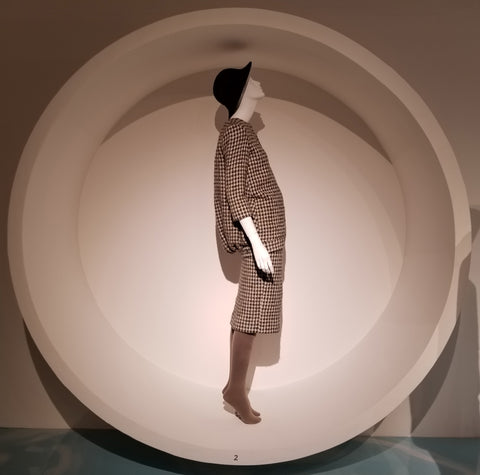
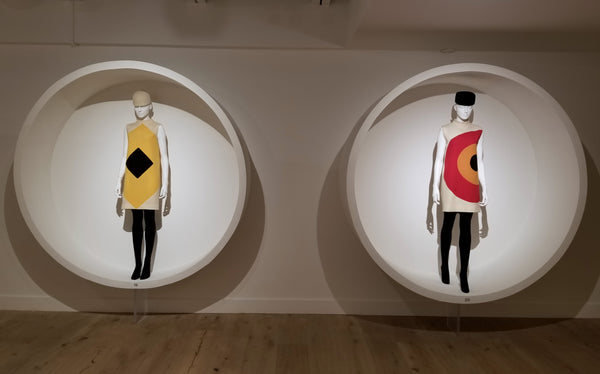
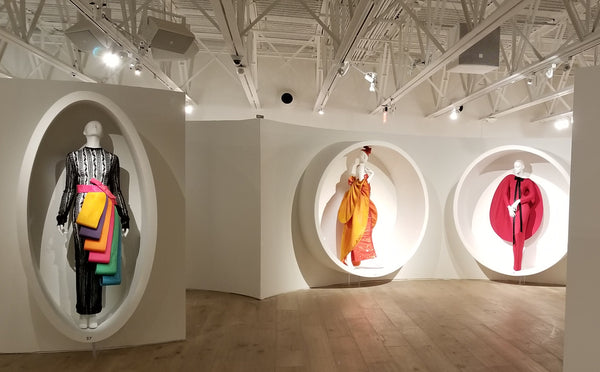


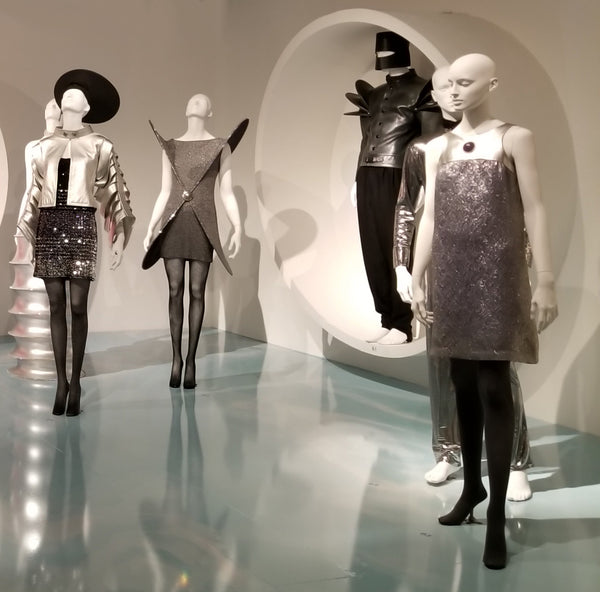


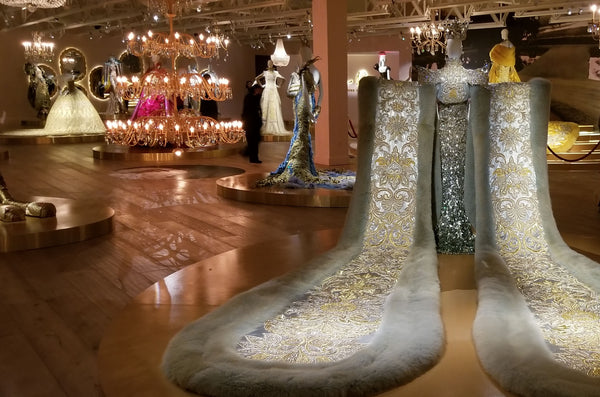
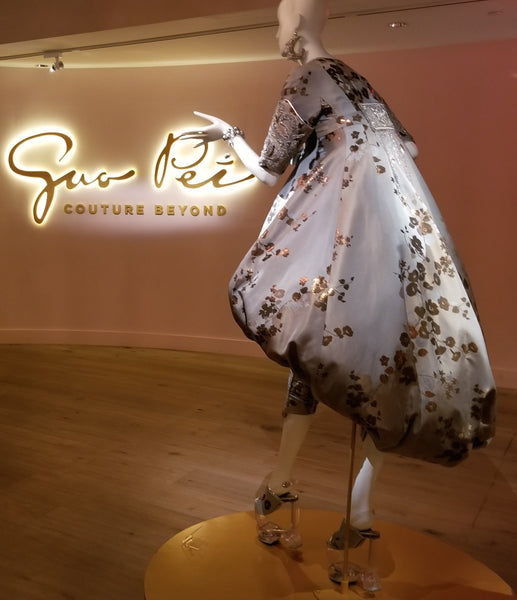
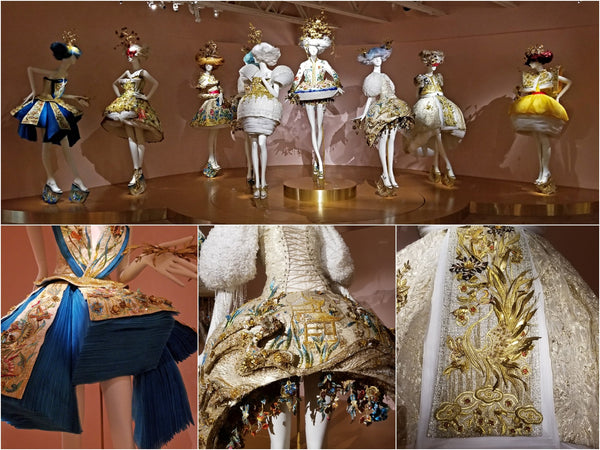
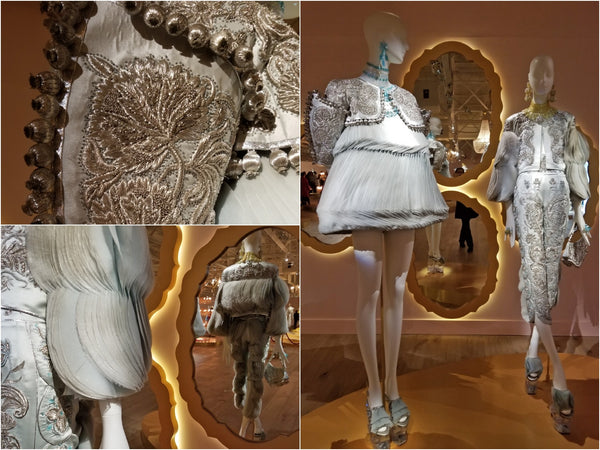
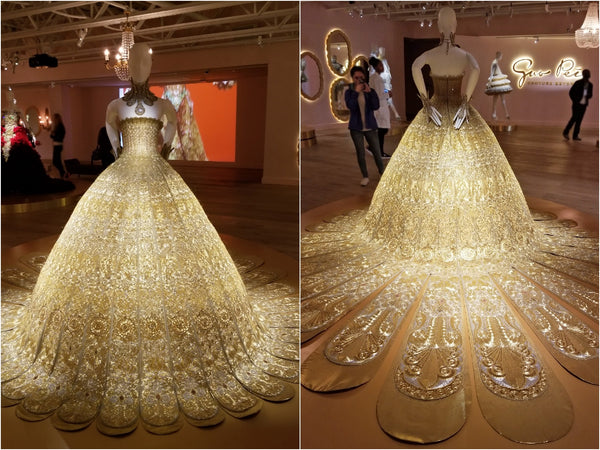 SCAD's thoughtful display enabled easy, 360-degree viewing. Bravo!
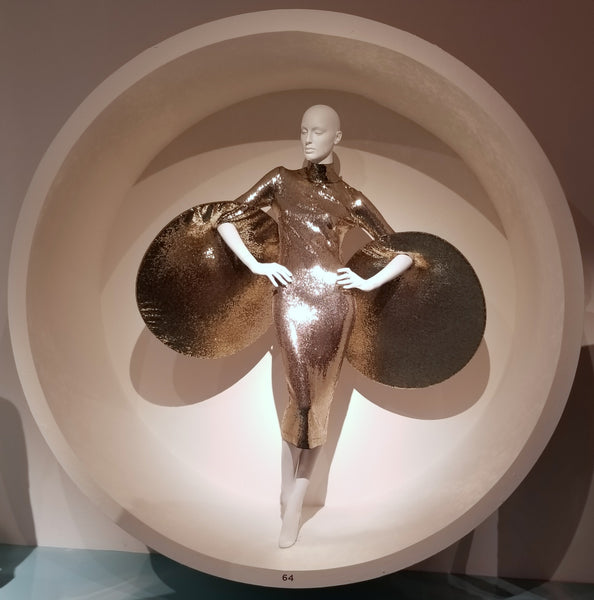
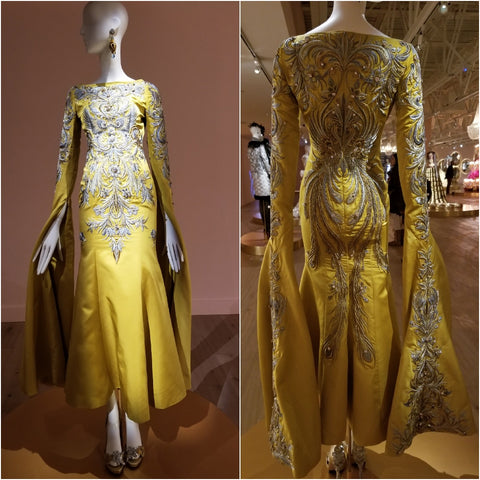
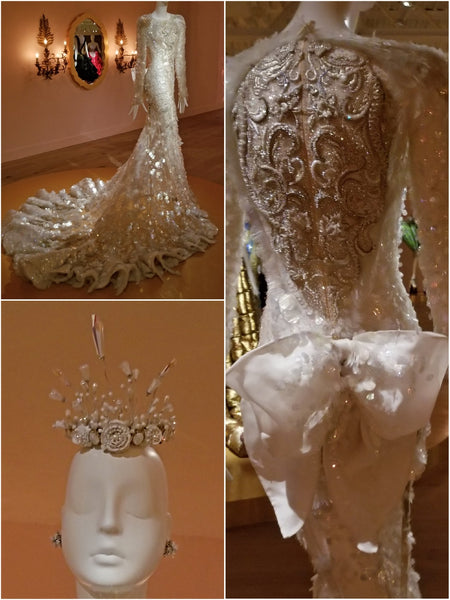
 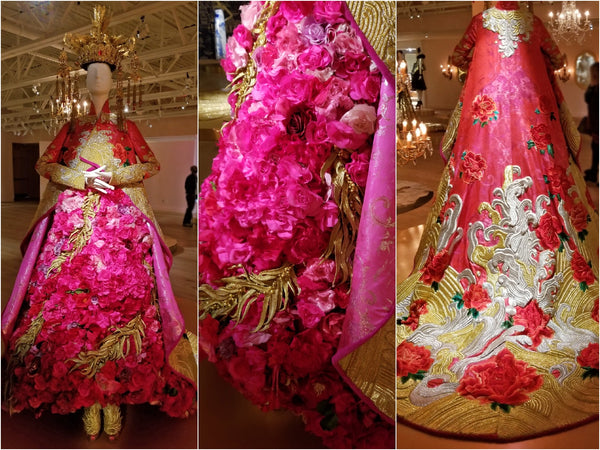 Docents explained that this garment's hundreds of lush peonies -- the national


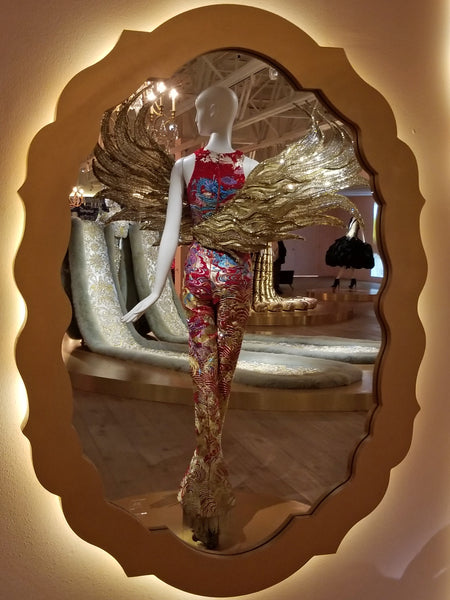
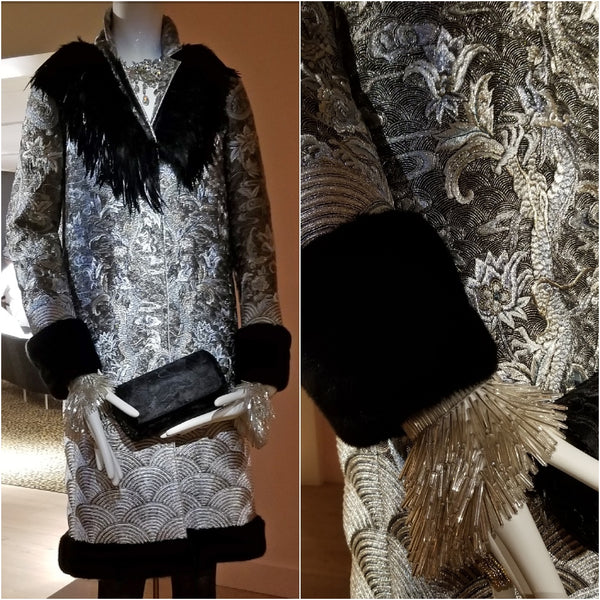
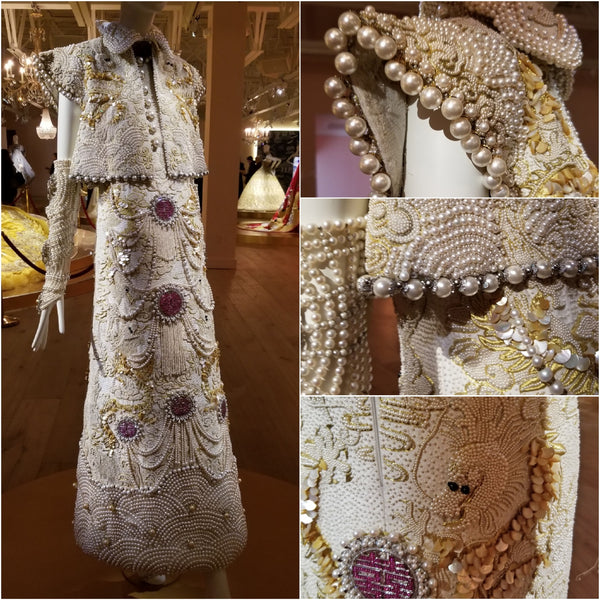 Note the dragon motifs in the hand-beaded pearls. The student-docents said the pearls were genuine, but I'm skeptical.

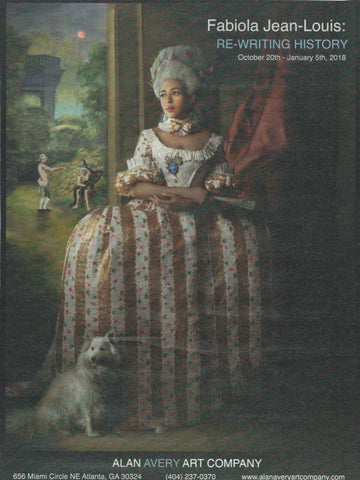 From the October 2017 issue of The Atlantan magazine.
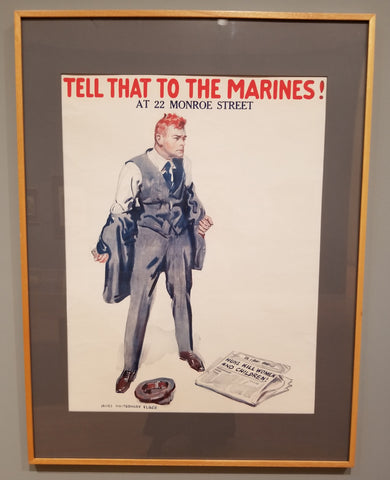
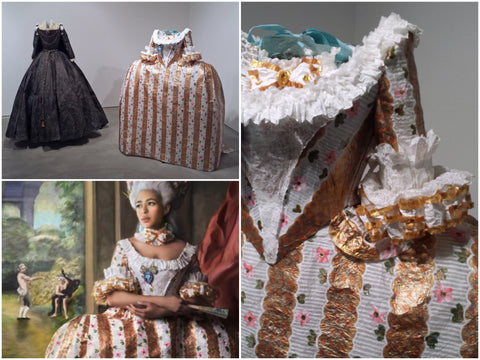 The framed print is titled, "They'll Say We Enjoyed It."
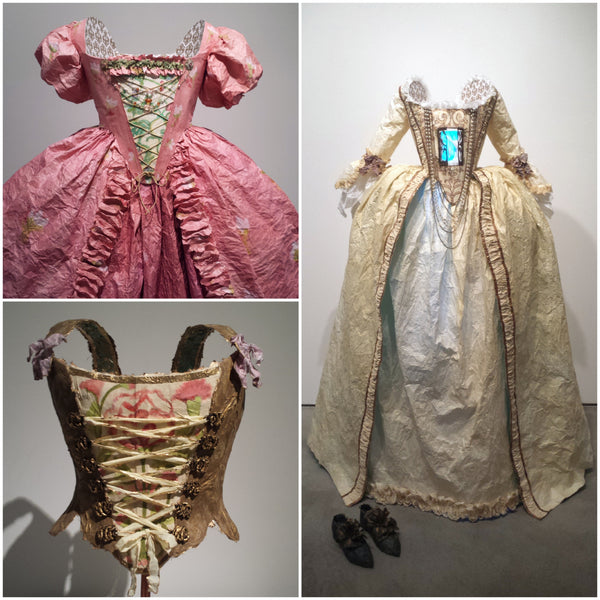
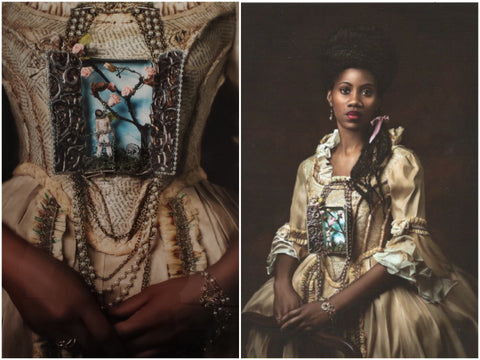 "Rest in Peace" and "Madame Leroy" prints. The paper Robe a l'Anglaise
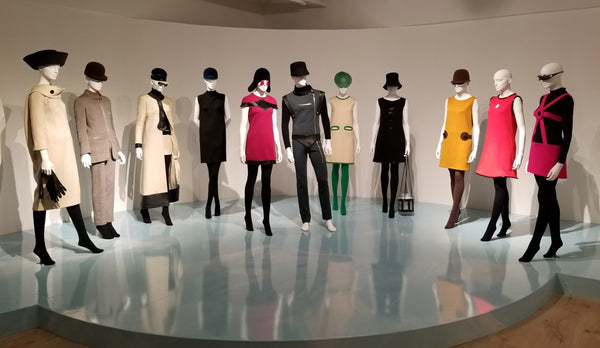
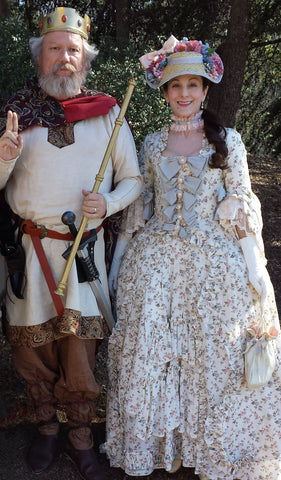 With Steve at AnachroCon 2017: The 60s Through the Ages


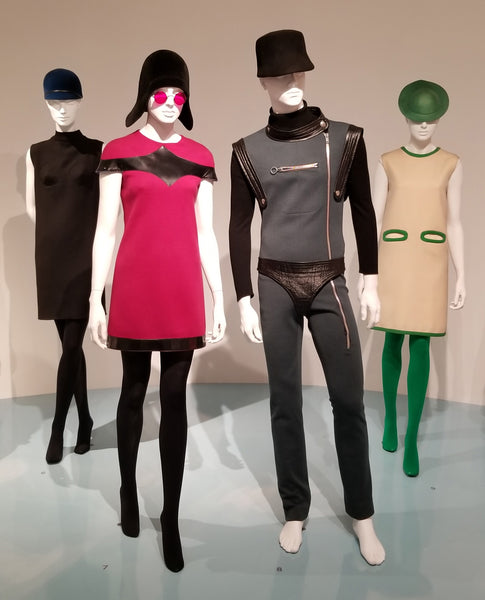
 Personal favorite (I am nothing if not consistent).
 Also not me at all, but quiet interesting:
 One of the many antique books on display (photo: Emory University)
 Temple of Minerva (the Roman name for Athena) or, The Parthenon,
 Venetian artist's take on the destruction of the Parthenon
 Earliest known photo of the Parthenon, taken in 1839.

 With and without my Regency Tam (aka Crazy Hat)
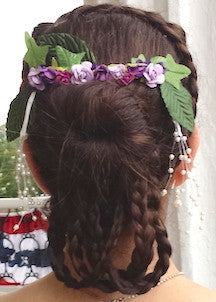

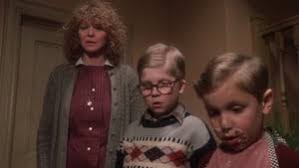
 The look you give your father-in-law for picking at the picnic prematurely.


 My goodness, hot and cold? And are the Walkers short on linens?

 Mustard company booklet, 1930.


 (images from 1-Hour Dress pattern booklet, Witness2Fashion, GlamourDaze)


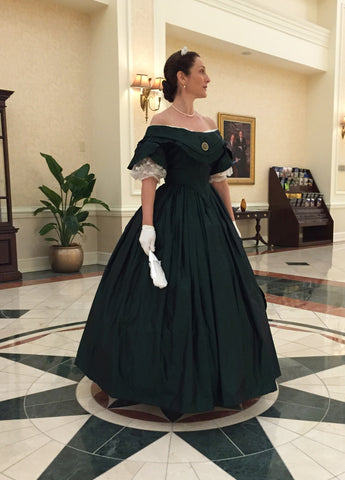
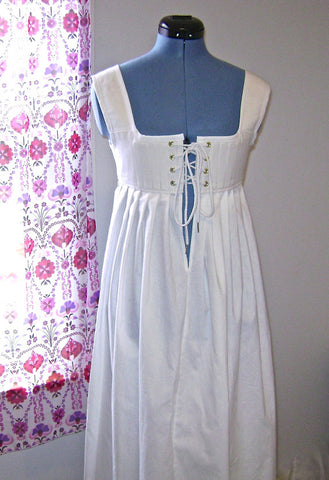


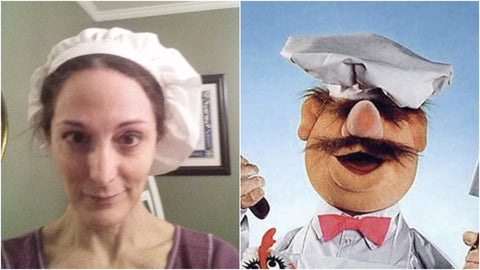

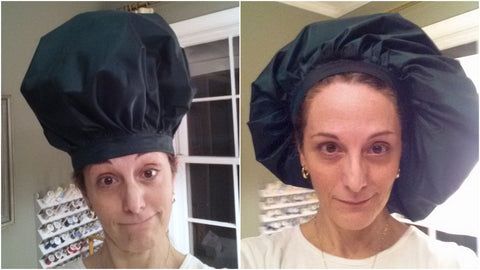
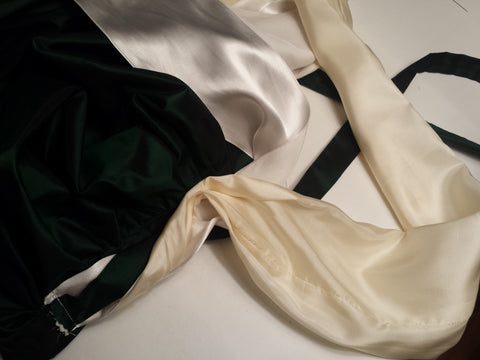
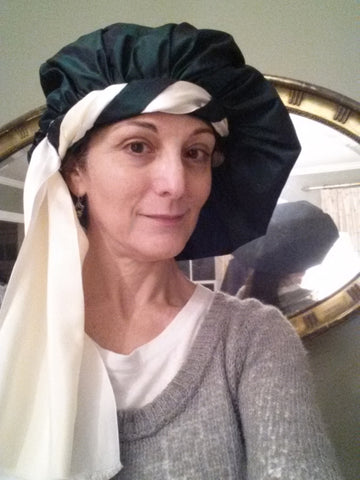

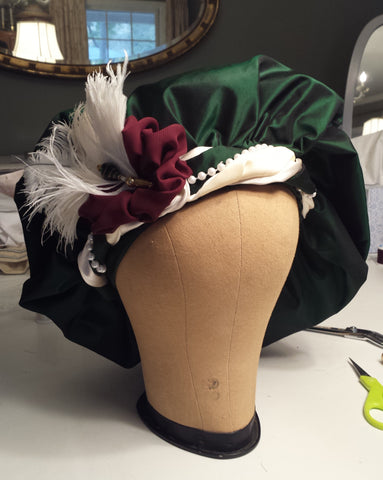
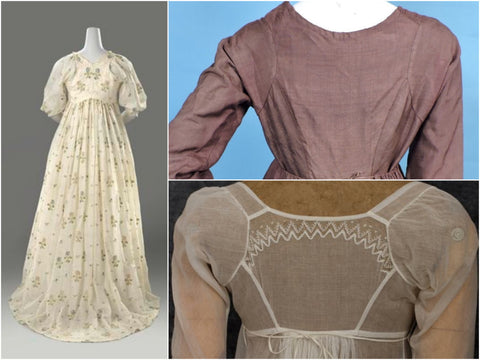

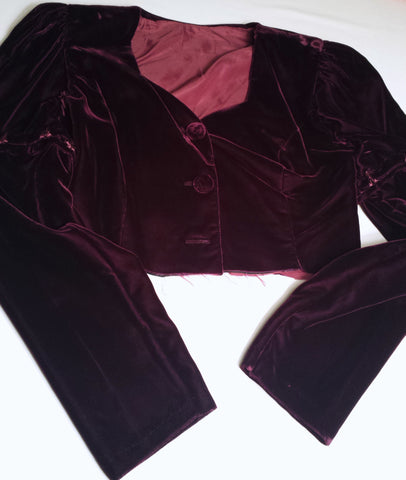


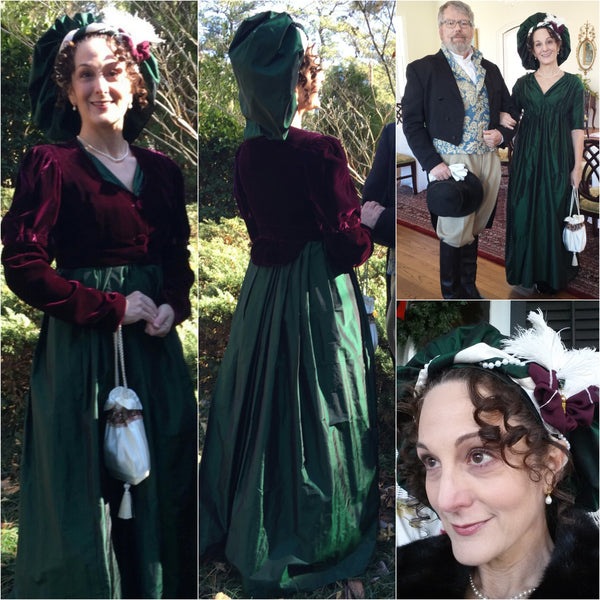

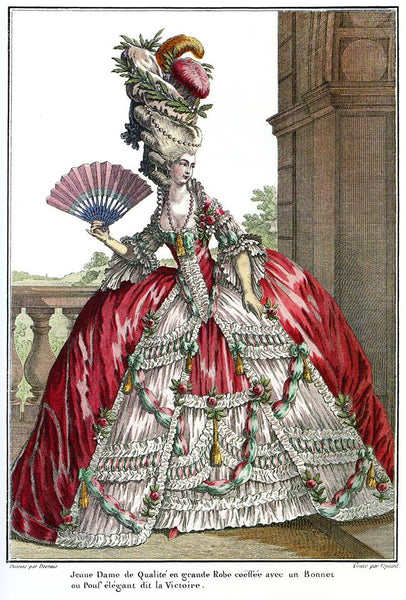

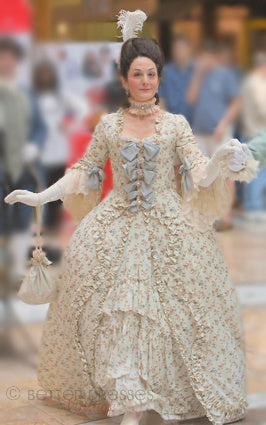
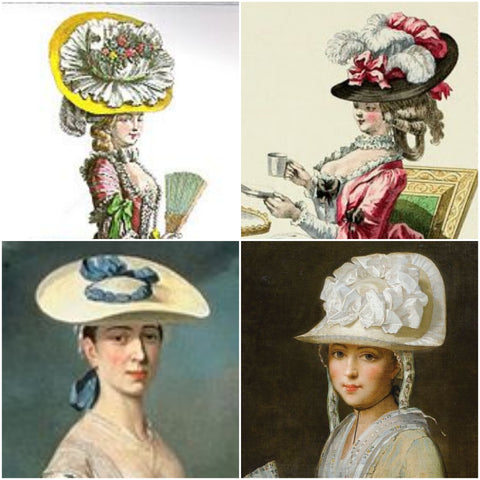
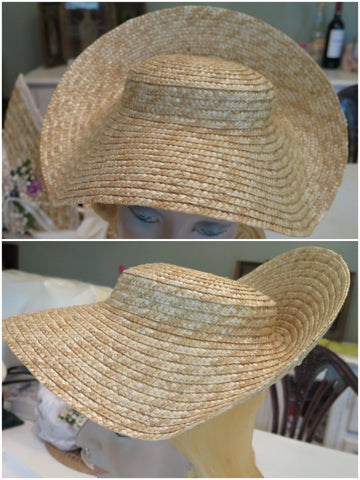
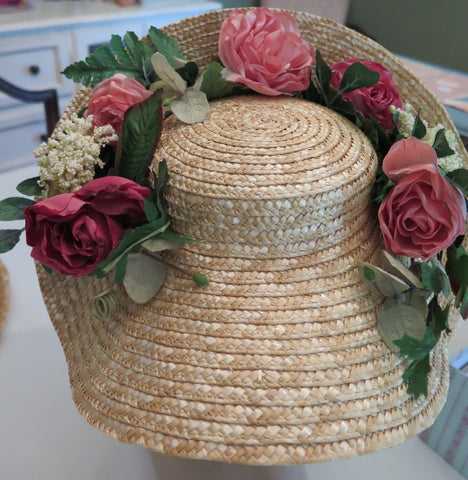
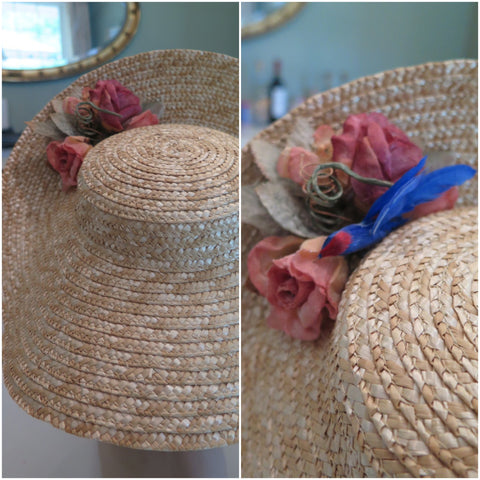
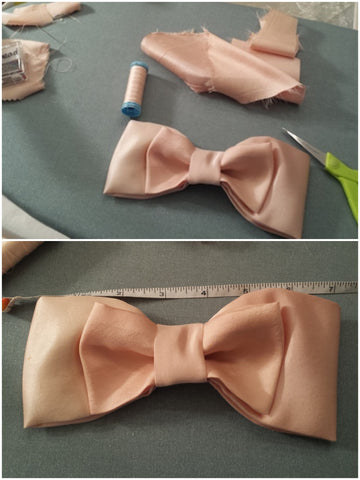
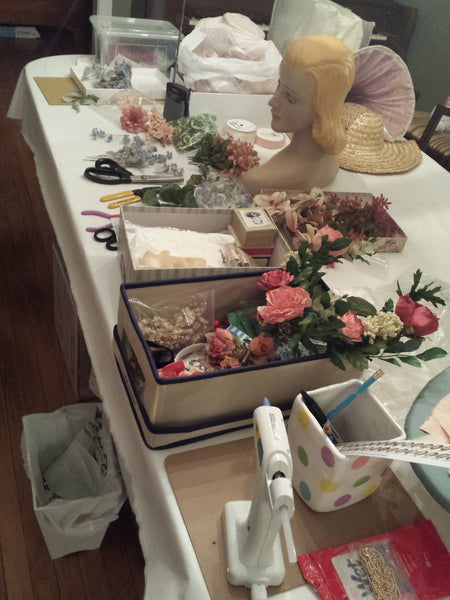
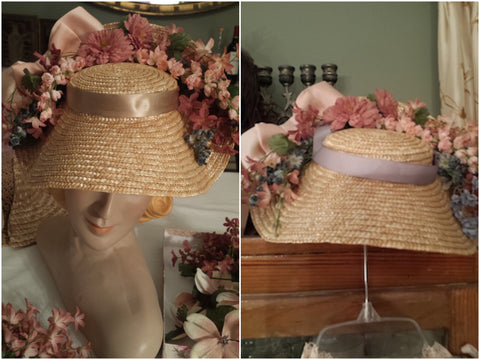
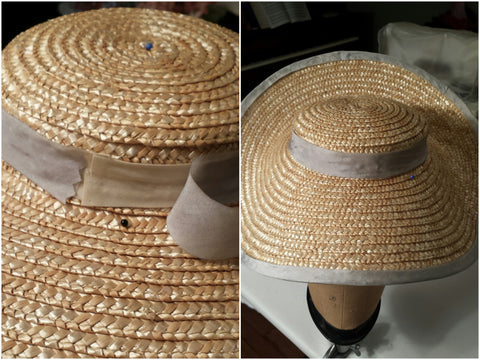
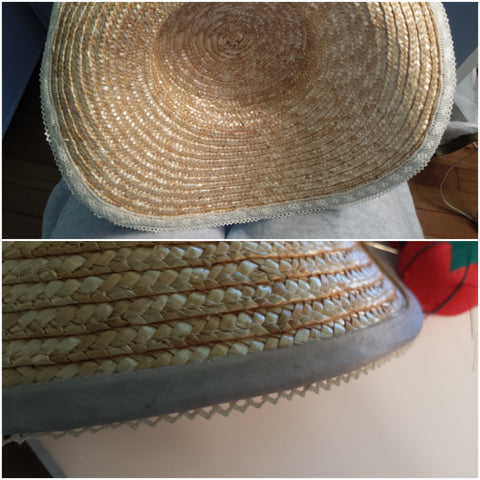

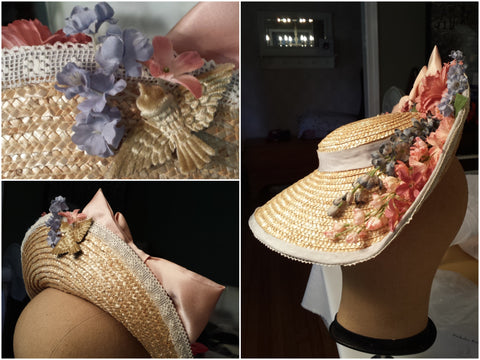
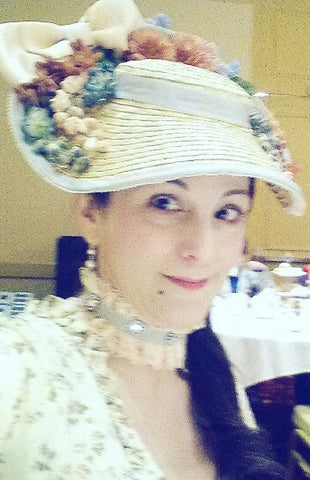
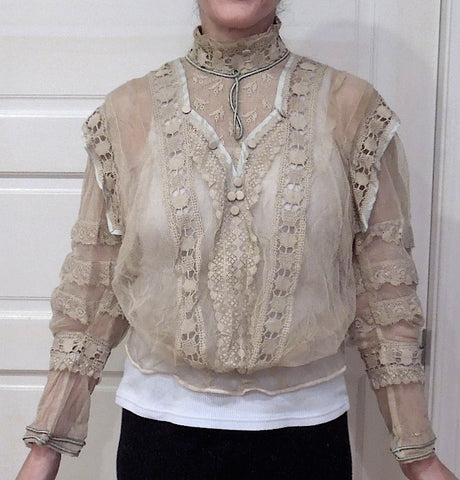
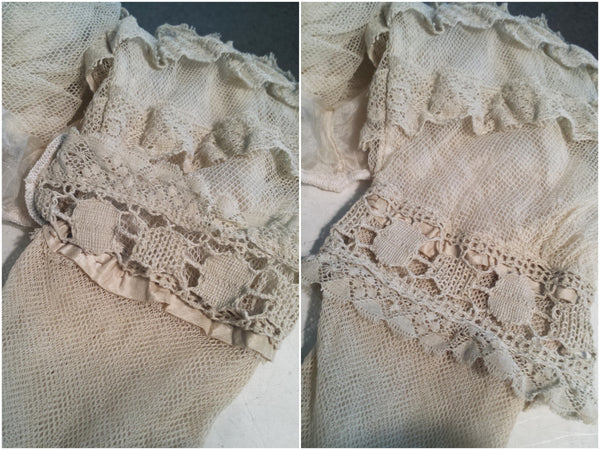
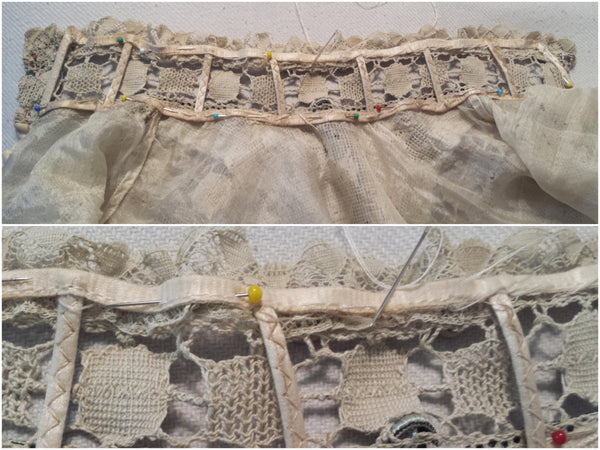
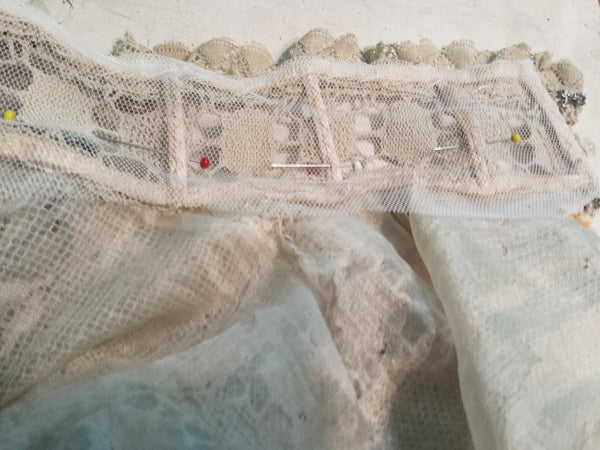
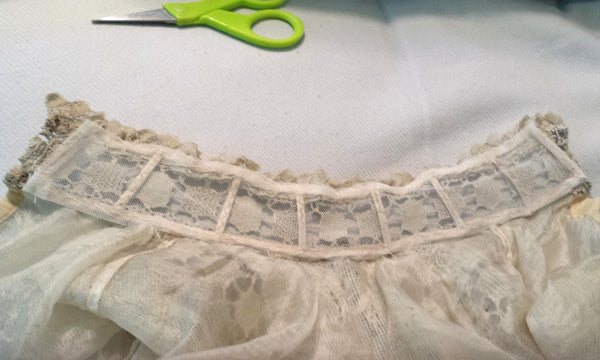
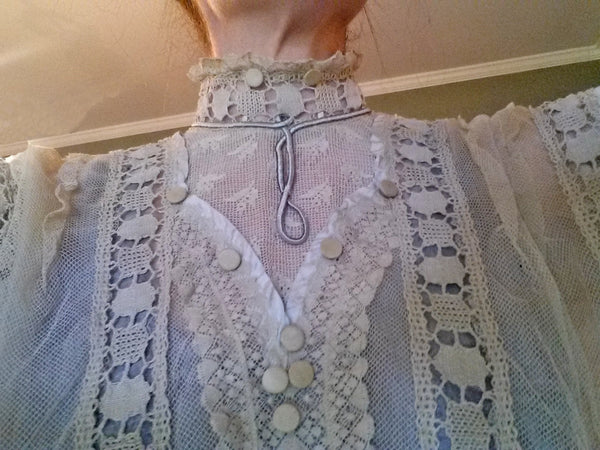
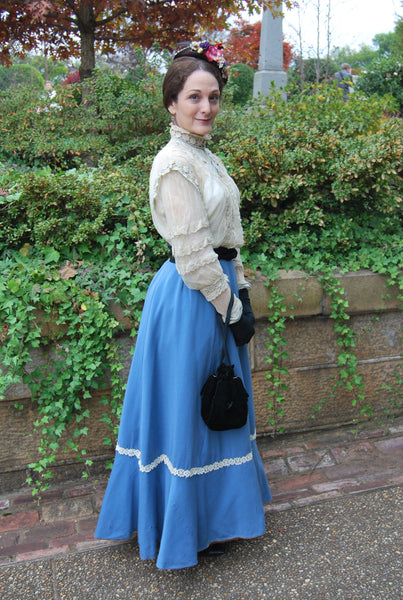 photo: (c) Philip Walker Photography