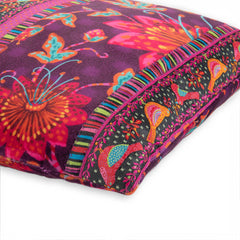
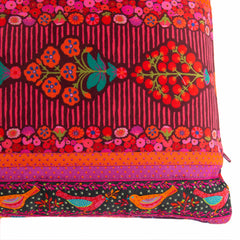
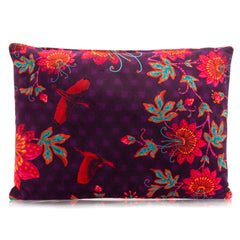
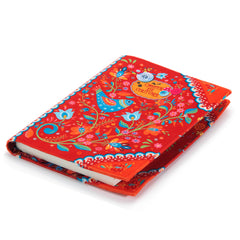
<?xml version="1.0" encoding="UTF-8"?>
<feed xml:lang="en" xmlns="http://www.w3.org/2005/Atom" xmlns:opensearch="http://a9.com/-/spec/opensearch/1.1/" xmlns:s="http://jadedpixel.com/-/spec/shopify">
  <id>https://renaissanceribbons.com/blogs/ribbon-crafts.atom</id>
  <link rel="alternate" type="text/html" href="https://renaissanceribbons.com/blogs/ribbon-crafts"/>
  <link rel="self" type="application/atom+xml" href="https://renaissanceribbons.com/blogs/ribbon-crafts.atom"/>
  <title>Renaissance Ribbons  - Creating &amp; Sewing with Renaissance Ribbons</title>
  <updated>2026-01-09T07:44:59-07:00</updated>
  <author>
    <name>Renaissance Ribbons </name>
  </author>
  <entry>
    <id>https://renaissanceribbons.com/blogs/ribbon-crafts/handmade-gift-bow-tutorial</id>
    <published>2026-01-09T07:44:59-07:00</published>
    <updated>2026-01-09T07:45:01-07:00</updated>
    <link rel="alternate" type="text/html" href="https://renaissanceribbons.com/blogs/ribbon-crafts/handmade-gift-bow-tutorial"/>
    <title>Handmade Gift Bow Tutorial</title>
    <author>
      <name>Hilary Jordan</name>
    </author>
    <content type="html">
      <![CDATA[<p>We love the surge of reusable gift wrap and bags, and there is no better way to top off a lovingly wrapped gift than with a custom made fabric bow. The following tutorial is by one of our wonderful influencers <a role="link" href="https://www.instagram.com/SaraBQuilts/" class="x1i10hfl xjbqb8w x1ejq31n x18oe1m7 x1sy0etr xstzfhl x972fbf x10w94by x1qhh985 x14e42zd x9f619 x1ypdohk xt0psk2 x3ct3a4 xdj266r x14z9mp xat24cr x1lziwak xexx8yu xyri2b x18d9i69 x1c1uobl x16tdsg8 x1hl2dhg xggy1nq x1a2a7pz notranslate _a6hd" tabindex="0">@SaraBQuilts</a> and we can't wait to see all the versions you'll create!  </p>
<p><img src="https://cdn.shopify.com/s/files/1/2355/9259/files/Cover_Image.jpg?v=1763956743" alt=""></p>
<p><span>1. Cut your fabric strips (and ribbon) with the following measurements: <br><br><strong>Fabric Version</strong>: 3x (14.5”x3”), 3x (12.5”x3”), 3x (10.5”x3”), 1x (6”x3”)<br><img src="https://cdn.shopify.com/s/files/1/2355/9259/files/Fabric_Version_Cutting.jpg?v=1763956569" alt=""><br></span><span><strong>Ribbon Version</strong>: fabric strips- 3x (14.5”x2.25”), 3x (12.5”x2.25”), 3x (10.5”x2.25”), 1x (6”x2.25”) plus ribbon- 3x 14.5”, 3x 12.5”, 3x 10.5”, 1x 6”<br><img alt="" src="https://cdn.shopify.com/s/files/1/2355/9259/files/Ribbon_Version_Cutting.jpg?v=1763956542"></span><br><span>2. <strong>For the fabric version:</strong> [a] Mark .25” seam allowances on the long sides of the fabric strip. [b] Fold and iron raw edges to the inside. Fold in half so your strip measures 1.25” wide. [c] Top stitch on both sides of the strip. Do this for all strips.<br><br></span><span><strong>For the ribbon version:</strong> [a] Mark .5” seam allowances on the long sides of the fabric strip. [b] Fold and iron raw edges to the inside. [c] Place ribbon centered on the fabric strip and covering the raw fabric edges. Top stitch on both sides of the ribbon, securing the ribbon to the fabric. Do this for all strips.<br><br><img src="https://cdn.shopify.com/s/files/1/2355/9259/files/Step_2.jpg?v=1763956645" alt=""></span><br><span>3. [a] Mark the center of the strip. [b] Fold and twist both sides of the strip in opposite directions to make an infinity symbol with your strip, centered over the center line. [c] Sew where the two fabric edges overlap to secure them in place. Do this with all strips except the 6” ones.<br><br><img src="https://cdn.shopify.com/s/files/1/2355/9259/files/Step_3.jpg?v=1763956720" alt=""></span><br><span>4. Take the 3 large infinity symbols and layer one on top of the other so they are evenly spread out in a circular fashion. Sew them together. Do this with the medium and small infinity symbols as well. Take the 6” strip and make a loop with it. You may need to adjust the size of the loop based on how your bow looks! Sew loop seam to secure it. Fidn a video of this step <a href="https://www.instagram.com/p/DMNQ0KIsPv8/?img_index=6" target="_blank" rel="noopener">HERE.</a></span><br><br><span>5. Using a strong needle and size 8 thread, connect the loop to the small cluster, the medium cluster to the large cluster, and then the two parts together. 2-3 stitches will hold the parts together.</span></p>
<p><span><img alt="" src="https://cdn.shopify.com/s/files/1/2355/9259/files/In_Progress_Bows.jpg?v=1763956804"></span><br><span>Your bow is finished!! Admire it and think of something fun to do with it! Be sure to tag me, </span><a class="x1i10hfl xjbqb8w x1ejq31n x18oe1m7 x1sy0etr xstzfhl x972fbf x10w94by x1qhh985 x14e42zd x9f619 x1ypdohk xt0psk2 x3ct3a4 xdj266r x14z9mp xat24cr x1lziwak xexx8yu xyri2b x18d9i69 x1c1uobl x16tdsg8 x1hl2dhg xggy1nq x1a2a7pz notranslate _a6hd" href="https://www.instagram.com/SaraBQuilts/" role="link" tabindex="0">@SaraBQuilts</a><span>, so I can see your makes!</span><span></span></p>]]>
    </content>
  </entry>
  <entry>
    <id>https://renaissanceribbons.com/blogs/ribbon-crafts/ditty-bags-2-0-wonder-jungle-fabrics-by-pip-and-lo-for-cloud9-fabrics</id>
    <published>2025-11-07T09:31:47-07:00</published>
    <updated>2025-11-07T09:31:50-07:00</updated>
    <link rel="alternate" type="text/html" href="https://renaissanceribbons.com/blogs/ribbon-crafts/ditty-bags-2-0-wonder-jungle-fabrics-by-pip-and-lo-for-cloud9-fabrics"/>
    <title>Ditty Bags 2.0 - Wonder Jungle Fabrics by Pip and Lo for Cloud9 Fabrics</title>
    <author>
      <name>Hilary Jordan</name>
    </author>
    <content type="html">
      <![CDATA[<p><span>Wonder Jungle is a one-of-a-kind cotton quilting collection, where the wild heart of the jungle meets the kaleidoscope of dreams. Bring that kaleidoscope to life with our <a href="https://renaissanceribbons.com/collections/kits-couture/products/sewing-kit-ditty-bags-2-0-wonder-jungle">Wonder Jungle Ditty Bags 2.0 Sewing Kit</a>. </span></p>
<p><img src="https://cdn.shopify.com/s/files/1/2355/9259/files/SEPT-DITTY-1.jpg?v=1761802794" alt=""></p>
<p><span>This complete sewing kit makes 2 stunning and functional bags using quilting cotton fabrics (exterior and lining) with woven ribbons as embellishment. The ByAnnie Ditty Bag 2.0 has steps already written for ribbon inclusion, so it's a perfect small project to use up your favorite ribbons! You’ll love sewing these up in an afternoon! </span></p>
<p><img src="https://cdn.shopify.com/s/files/1/2355/9259/files/SEPT-DITTY-4.jpg?v=1761802794" alt=""></p>
<p><span>Can't get enough of the Ditty Bags 2.0? Join our monthly </span><a href="https://renaissanceribbons.com/products/kitclub-renaissance-ribbons-bag">Ditty Bag Kit Club</a><span> and e</span><span>ach month, you will receive a wonderful hand-curated selection of fabrics and notions to create 2 Ditty bags using the Ditty Bags 2.0 pattern from ByAnnie.</span></p>
<p><img src="https://cdn.shopify.com/s/files/1/2355/9259/files/SEPT-DITTY-3.jpg?v=1761802794" alt=""></p>
<p><span>Follow along with us on </span><a href="https://www.instagram.com/renaissanceribbons/">Instagram</a><span>, and be sure to tag us in your makes. </span><a href="https://www.instagram.com/renaissanceribbons/">@renaissanceribbons</a></p>]]>
    </content>
  </entry>
  <entry>
    <id>https://renaissanceribbons.com/blogs/ribbon-crafts/ditty-bags-2-0-brookside-fabrics-by-1-canoe-2-for-moda-fabrics</id>
    <published>2025-11-07T09:31:35-07:00</published>
    <updated>2025-11-07T09:31:38-07:00</updated>
    <link rel="alternate" type="text/html" href="https://renaissanceribbons.com/blogs/ribbon-crafts/ditty-bags-2-0-brookside-fabrics-by-1-canoe-2-for-moda-fabrics"/>
    <title>Ditty Bags 2.0 - Brookside Fabrics by 1canoe2 for Moda Fabrics</title>
    <author>
      <name>Hilary Jordan</name>
    </author>
    <content type="html">
      <![CDATA[<p><span>The Brookside collection by 1canoe2 is a celebration of the quiet magic found in nature’s hidden corners. Capture that magic with the <a href="https://renaissanceribbons.com/collections/kits-couture/products/sewing-kit-ditty-bags-2-0-brookside">Ditty Bags 2.0 Sewing Kit.</a> </span></p>
<p><img alt="" src="https://cdn.shopify.com/s/files/1/2355/9259/files/Ditty-Brookside-IG-13.jpg?v=1761231324"></p>
<p><span>The ByAnnie Ditty Bag 2.0 has steps already written for ribbon inclusion, so it's a perfect small project to use up your favorite ribbons! You’ll love sewing these up in an afternoon! </span></p>
<p><img alt="" src="https://cdn.shopify.com/s/files/1/2355/9259/files/OCT_DITTY_PREVIEW_-_Web.jpg?v=1761800575"></p>
<p><span>This complete sewing kit makes 2 stunning and functional bags using quilting cotton fabrics (exterior and lining) with woven ribbons as embellishment. </span></p>
<p><img alt="" src="https://cdn.shopify.com/s/files/1/2355/9259/files/Ditty-Brookside-IG-21.jpg?v=1761800574"></p>
<p><span>This kit has an extra-easy zipper/ribbon installation and a beautifully finished interior with no unfinished seams or bindings!</span></p>
<p><img alt="" src="https://cdn.shopify.com/s/files/1/2355/9259/files/Ditty-Brookside-IG-23.jpg?v=1761800574"></p>
<p>Can't get enough of the Ditty Bags 2.0? Join our monthly <a href="https://renaissanceribbons.com/products/kitclub-renaissance-ribbons-bag">Ditty Bag Kit Club</a> and e<span>ach month, you will receive a wonderful hand-curated selection of fabrics and notions to create 2 Ditty bags using the Ditty Bags 2.0 pattern from ByAnnie. </span></p>
<p><img alt="" src="https://cdn.shopify.com/s/files/1/2355/9259/files/Ditty-Brookside-IG-22.jpg?v=1761800575"></p>
<p><span>Follow along with us on </span><a href="https://www.instagram.com/renaissanceribbons/">Instagram</a><span>, and be sure to tag us in your makes. </span><a href="https://www.instagram.com/renaissanceribbons/">@renaissanceribbons</a></p>]]>
    </content>
  </entry>
  <entry>
    <id>https://renaissanceribbons.com/blogs/ribbon-crafts/two-little-totes-in-branch-manager</id>
    <published>2025-11-07T09:30:26-07:00</published>
    <updated>2025-11-07T09:30:28-07:00</updated>
    <link rel="alternate" type="text/html" href="https://renaissanceribbons.com/blogs/ribbon-crafts/two-little-totes-in-branch-manager"/>
    <title>Two Little Totes in Branch Manager Sewing Kit</title>
    <author>
      <name>Hilary Jordan</name>
    </author>
    <content type="html">
      <![CDATA[<p>There's no such thing as having too many totes, or too much Tula Pink fabrics, ribbons, and notions. The Two Little Totes in Branch Manager <a href="https://renaissanceribbons.com/collections/kits-couture/products/sewing-kit-two-little-totes-in-branch-manager">Sewing Kit</a> combines them all! </p>
<p><img alt="" src="https://cdn.shopify.com/s/files/1/2355/9259/files/Two_Little_Totes_Starlight_AUG_25-39-Web.jpg?v=1760730174"></p>
<p><span>Practical, stylish, and perfectly sized for everyday use—the Two Little Totes kit includes everything you need to make the Medium size compact, versatile bag using the popular ByAnnie pattern.</span></p>
<p><img src="https://cdn.shopify.com/s/files/1/2355/9259/files/Two_Little_Totes_Starlight_AUG_25-26-Web.jpg?v=1760730174" alt=""></p>
<p><span>With wide openings for easy packing and access, plus a mix of slip and zippered pockets inside and out, these totes are thoughtfully designed to keep your essentials organized. Perfect for quick overnight trips, quilt retreats, or guild meetings. </span></p>
<p><span><img alt="" src="https://cdn.shopify.com/s/files/1/2355/9259/files/Two_Little_Totes_Starlight_AUG_25-30-Web.jpg?v=1760730174"></span></p>
<p><span>The sturdy over-the-shoulder handles ensure comfort, while the reinforced base offers long-lasting durability and protection from everyday wear. The kit features all the details and supplies you have come to know and love from our curated sewing kits. High quality ribbons, webbing, hardware, and more!  </span></p>
<p><span><img alt="" src="https://cdn.shopify.com/s/files/1/2355/9259/files/Two_Little_Totes_Starlight_AUG_25-34-Web.jpg?v=1760730174"></span></p>
<p><span>Can't get enough Tula Pink? Shop our full selection of Tula ribbons and sewing kits <a href="https://renaissanceribbons.com/collections/tula-pink-designer">HERE</a>.</span></p>
<p><span>Follow along with us on </span><a href="https://www.instagram.com/renaissanceribbons/">Instagram<span> </span></a><span>and be sure to tag us in your makes! </span><a href="https://www.instagram.com/renaissanceribbons/">@renaissanceribbons</a></p>]]>
    </content>
  </entry>
  <entry>
    <id>https://renaissanceribbons.com/blogs/ribbon-crafts/bowl-me-over-in-tula-pinks-roar</id>
    <published>2025-11-07T09:14:15-07:00</published>
    <updated>2025-11-07T09:14:19-07:00</updated>
    <link rel="alternate" type="text/html" href="https://renaissanceribbons.com/blogs/ribbon-crafts/bowl-me-over-in-tula-pinks-roar"/>
    <title>Bowl Me Over in Tula Pink&apos;s Roar Sewing Kit</title>
    <author>
      <name>Hilary Jordan</name>
    </author>
    <content type="html">
      <![CDATA[<p>A fun to make classic bowler silhouette with easy-to-grab handles!</p>
<p>For this kit, we just fell head over heels for the Trifecta print in Blush so we combined it with the coordinating Northern Lights and Dino Eggs prints to complete this <a href="https://renaissanceribbons.com/collections/kits-couture/products/sewing-kit-bowl-me-over-in-tula-pinks-roar">gorgeous bag.</a></p>
<p><img src="https://cdn.shopify.com/s/files/1/2355/9259/files/PBA-249-2-Roar-Front-Diagonal.png?v=1736000699" alt=""></p>
<p>This fun-to-make bag features a classic bowler silhouette with easy-to-grab handles and an adjustable, detachable carrying strap. The main compartment opens wide for easy access to the bag's contents.</p>
<p><span>The kit features all the details and supplies you have come to know and love from our curated sewing kits. High quality ribbons, webbing, hardware, and more!  </span></p>
<p><img src="https://cdn.shopify.com/s/files/1/2355/9259/files/PBA_249-2_Roar_Laid_Down.png?v=1761800019" alt=""></p>
<p><span>Follow along with us on </span><a href="https://www.instagram.com/renaissanceribbons/">Instagram</a><span>, and be sure to tag us in your makes. </span><a href="https://www.instagram.com/renaissanceribbons/">@renaissanceribbons</a></p>
<p> </p>]]>
    </content>
  </entry>
  <entry>
    <id>https://renaissanceribbons.com/blogs/ribbon-crafts/altoona-tote-in-washi-plus</id>
    <published>2025-10-20T07:58:19-06:00</published>
    <updated>2025-10-20T07:58:21-06:00</updated>
    <link rel="alternate" type="text/html" href="https://renaissanceribbons.com/blogs/ribbon-crafts/altoona-tote-in-washi-plus"/>
    <title>Altoona Tote in Washi Plus</title>
    <author>
      <name>Hilary Jordan</name>
    </author>
    <content type="html">
      <![CDATA[<p><span>This beginner-friendly tote bag pattern is about to become your new best friend. Featuring the spectacular Washi Plus fabric collection from Rashida Coleman-Hale of Ruby Star Society it's sure to be your go to tote bag. </span></p>
<p><img src="https://cdn.shopify.com/s/files/1/2355/9259/files/SEPT-RSS-KIT-CLUB---ALTOONA-8.jpg?v=1760726921" alt=""></p>
<p><span>The <a href="https://renaissanceribbons.com/collections/kits-couture/products/sewing-kit-altoona-tote-in-washi-plus">Altoona Tote</a> is sleek. sturdy, and endlessly versatile-perfect for fat quarter storage, market runs. or a day at the beach. Inspired by the encouragement of a talented group of women in Altoona, WI, this bag is all about practicality with heart.</span></p>
<p><img src="https://cdn.shopify.com/s/files/1/2355/9259/files/SEPT-RSS-KIT-CLUB---ALTOONA-10.jpg?v=1760726920" alt=""></p>
<p>With straightforward construction techniques, this kit is a great option for a beginner bag maker. Plus, the addition of Salutations and Woodland Park <a href="https://renaissanceribbons.com/collections/designer-rashida-coleman-hale">Renaissance Ribbons</a> will elevate this basic tote bag to the next level. ✨</p>
<p><img src="https://cdn.shopify.com/s/files/1/2355/9259/files/SEPT-RSS-KIT-CLUB---ALTOONA-5.jpg?v=1760726921" alt=""></p>
<p><span>Want to make a Ruby Star Society bag every month or every other month? Join our Ruby Star Society Kit Club. </span></p>
<p><span>They feature monthly project kits with Ruby Star Society fabrics and Renaissance Ribbons - pick between the mini and mega subscriptions, based on your level of ambition!<br></span></p>
<p style="text-align: center;"><span>Join the Ruby Star Society Mega Kit Club <a href="https://renaissanceribbons.com/products/ruby-star-society-monthly-kit-club-mega">HERE</a></span></p>
<p style="text-align: center;"><span>Join the Ruby Star Society Mini Kit Club <a href="https://renaissanceribbons.com/products/ruby-star-society-monthly-kit-club-mini">HERE</a></span></p>
<p><img src="https://cdn.shopify.com/s/files/1/2355/9259/files/SEPT-RSS-KIT-CLUB---ALTOONA-11.jpg?v=1760726921" alt=""></p>
<p><span>Follow along with us on </span><a href="https://www.instagram.com/renaissanceribbons/">Instagram</a><span>, and be sure to tag us in your makes. </span><a href="https://www.instagram.com/renaissanceribbons/">@renaissanceribbons</a></p>]]>
    </content>
  </entry>
  <entry>
    <id>https://renaissanceribbons.com/blogs/ribbon-crafts/ultimate-travel-bag-in-tibetan-peony</id>
    <published>2025-10-20T07:58:01-06:00</published>
    <updated>2025-10-20T07:58:03-06:00</updated>
    <link rel="alternate" type="text/html" href="https://renaissanceribbons.com/blogs/ribbon-crafts/ultimate-travel-bag-in-tibetan-peony"/>
    <title>Ultimate Travel Bag in Tibetan Peony</title>
    <author>
      <name>Hilary Jordan</name>
    </author>
    <content type="html">
      <![CDATA[<p>Travel in style and show off your love of Kaffe Fassett with the <a href="https://renaissanceribbons.com/collections/kaffe-fassett/products/sewing-kit-ultimate-travel-bag-in-tibetan-peony">Ultimate Travel Bag in Tibetan Peony</a>! </p>
<p><img src="https://cdn.shopify.com/s/files/1/2355/9259/files/Ultimate-Travel-Bag-Kaffe-Tibetan-Peony.jpg?v=1760722922" alt=""></p>
<p><span>This bag features side handles, a detachable adjustable strap, a handy trolley sleeve for slipping over rolling luggage handles, and pockets galore inside and out to keep everything in its place.</span></p>
<p><img alt="" src="https://cdn.shopify.com/s/files/1/2355/9259/files/Ultimate-Travel-Bag-Kaffe-Tibetan-Peony-15.jpg?v=1760722922"></p>
<p>The kit features all the details and supplies you have come to know and love from our curated sewing kits. High quality ribbons, webbing, hardware, and more!  </p>
<p><img src="https://cdn.shopify.com/s/files/1/2355/9259/files/Ultimate-Travel-Bag-Kaffe-Tibetan-Peony-9.jpg?v=1760722921" alt=""></p>
<p>Can't get enough Kaffe Fassett? Shop our full selection of Kaffe ribbons and sewing kits <a href="https://renaissanceribbons.com/collections/kaffe-fassett">HERE</a>. </p>
<p><img src="https://cdn.shopify.com/s/files/1/2355/9259/files/Ultimate-Travel-Bag-Kaffe-Tibetan-Peony-11.jpg?v=1760723361" alt=""></p>
<p>Follow along with us on <a href="https://www.instagram.com/renaissanceribbons/">Instagram</a>, and be sure to tag us in your makes. <a href="https://www.instagram.com/renaissanceribbons/">@renaissanceribbons</a></p>]]>
    </content>
  </entry>
  <entry>
    <id>https://renaissanceribbons.com/blogs/ribbon-crafts/ruby-star-kit-club</id>
    <published>2025-10-17T13:24:01-06:00</published>
    <updated>2025-10-17T13:24:04-06:00</updated>
    <link rel="alternate" type="text/html" href="https://renaissanceribbons.com/blogs/ribbon-crafts/ruby-star-kit-club"/>
    <title>Ruby Star Kit Club - Patchwork Duffle in Selvedge Magic</title>
    <author>
      <name>Hilary Jordan</name>
    </author>
    <content type="html">
      <![CDATA[<p><span>Our collaboration with the wonderful team at Ruby Star Society launched almost a year ago, and we are so thrilled to now offer the <a rel="noopener" href="https://renaissanceribbons.com/collections/kits-couture/products/sewing-kit-patchwork-duffle-in-selvedge-magic" target="_blank">Ruby Star Kit Club</a>! Just like our Tula Pink Kit Club and Kaffe Fasset Kit Clubs, there will be Mega and Mini kit options for our Ruby Star Society Kit Club. Allowing you to choose exactly the bag making experience you're looking for! </span></p>
<p><span><img alt="" src="https://cdn.shopify.com/s/files/1/2355/9259/files/RSS_Kit_Club-Patchwork_Duffle-Selvedge-Web-1.jpg?v=1757566768"></span><span></span></p>
<p><span>Our inaugural RSS Kit Club project is sure to help you carry all the necessities! Featuring Selvedge Magic from Ruby Star Society, you'll get the look of intricate patchwork without all the piecing. With two handy exterior pockets and plenty of room to pack it all in, this stylish bag is ready for your next adventure! 🚢🧳 </span></p>
<p><span><img src="https://cdn.shopify.com/s/files/1/2355/9259/files/RSS_Kit_Club_-_What_s_Included_-_MEGA_Mo_1_1_-_Web.jpg?v=1760720449" alt=""></span></p>
<p><span>In addition to the gorgeous Ruby Star Society fabrics you'll receive exclusive hardware and webbing currently only available from Renaissance Ribbons. And of course you'll receive gorgeous coordinating <a href="https://renaissanceribbons.com/collections/collection-ruby-star-society">Ruby Star Society ribbons</a>! </span></p>
<p><span><img src="https://cdn.shopify.com/s/files/1/2355/9259/files/RSS_Kit_Club-Patchwork_Duffle-Selvedge-Web-24.jpg?v=1760720872" alt=""></span></p>
<p><span>We cannot wait to see your amazing bags made from the RSS Kit Club! Ready to join the fun? </span></p>
<p style="text-align: center;"><span>Join the Ruby Star Society Mega Kit Club <a href="https://renaissanceribbons.com/products/ruby-star-society-monthly-kit-club-mega">HERE</a></span></p>
<p style="text-align: center;"><span>Join the Ruby Star Society Mini Kit Club <a href="https://renaissanceribbons.com/products/ruby-star-society-monthly-kit-club-mini">HERE</a></span></p>
<p><span><img src="https://cdn.shopify.com/s/files/1/2355/9259/files/RSS_Kit_Club-Patchwork_Duffle-Selvedge-Web-12.jpg?v=1760720872" alt=""></span></p>
<p><span>Follow along with us on <a href="https://www.instagram.com/renaissanceribbons/">Instagram </a>and be sure to tag us in your makes! <a href="https://www.instagram.com/renaissanceribbons/">@renaissanceribbons</a></span></p>]]>
    </content>
  </entry>
  <entry>
    <id>https://renaissanceribbons.com/blogs/ribbon-crafts/la-dolce-vita-sewing-kits</id>
    <published>2025-09-05T08:52:43-06:00</published>
    <updated>2025-09-05T08:53:03-06:00</updated>
    <link rel="alternate" type="text/html" href="https://renaissanceribbons.com/blogs/ribbon-crafts/la-dolce-vita-sewing-kits"/>
    <title>La Dolce Vita Sewing Kits</title>
    <author>
      <name>Hilary Jordan</name>
    </author>
    <content type="html">
      <![CDATA[<p><span>Escape to the breathtaking Amalfi Coast with the vibrant La Dolce Vita collection from artist </span><a role="link" href="https://www.instagram.com/stacyjpeterson/" class="x1i10hfl xjbqb8w x1ejq31n x18oe1m7 x1sy0etr xstzfhl x972fbf x10w94by x1qhh985 x14e42zd x9f619 x1ypdohk xt0psk2 x3ct3a4 xdj266r x14z9mp xat24cr x1lziwak xexx8yu xyri2b x18d9i69 x1c1uobl x16tdsg8 x1hl2dhg xggy1nq x1a2a7pz notranslate _a6hd" tabindex="0">@stacyjpeterson</a><span>. 🌞🏖 </span><span>Imagine sun-soaked fields of bold sunflowers in radiant yellows and oranges, nestled into a non-directional print that adds a big, cheerful pop to any project.</span></p>
<p><img alt="" src="https://cdn.shopify.com/s/files/1/2355/9259/files/La-Dolce-Vita-Banner.jpg?v=1736003386"><span></span></p>
<p><span>As you journey along the coastal cliffs, picture colorful homes perched high above the Mediterranean's sparkling blue waters. From striped beach umbrellas and timeless villas to iconic palms, cypress trees, and juicy citrus, these prints capture the heart of Italy. </span><span>✨✈️</span></p>
<p><span>Elevate Your Coastal Style with the La Dolce Vita Poolside Tote! 🏝️</span></p>
<p><span><img alt="" src="https://cdn.shopify.com/s/files/1/2355/9259/files/La_Dolce_Vita_Samples-Web-42.jpg?v=1756834942"><br>Designed by Anna Graham of Noodlehead, this chic and spacious tote is perfect for beach days, poolside lounging, or everyday adventures. Crafted with high-quality fabrics and an easy-to-follow sewing pattern, this kit makes it effortless to create a stylish and functional bag.<br><br>Why You’ll Love It:<br>✔️ Available in two stunning colorways<br>✔️ Durable, designer-inspired fabric<br>✔️ Roomy enough for all your essentials<br>✔️ Beginner-friendly sewing kit—stress-free and fun!</span></p>
<p><img src="https://cdn.shopify.com/s/files/1/2355/9259/files/La_Dolce_Vita_Samples-Web-17.jpg?v=1756955769" alt=""></p>
<p><span>Need something to keep all your travel necessities organized? The Travel Essentials 2.0 kit has you covered!</span></p>
<p><span><img src="https://cdn.shopify.com/s/files/1/2355/9259/files/La_Dolce_Vita_Samples-Web-30.jpg?v=1756955844" alt=""></span></p>
<p><span>This stylish organizer—made with the vibrant La Dolce Vita ribbons and fabrics from Stacy Peterson—is perfect for storing your travel toiletries, art supplies, or sewing tools on the go. 🌞🎨</span></p>
<p><span><img src="https://cdn.shopify.com/s/files/1/2355/9259/files/La_Dolce_Vita_Samples-Web-26.jpg?v=1756955892" alt=""></span></p>
<p><span>🧵 The kit includes everything you need (minus the pattern) to sew your own travel clutch—beautiful, functional, and full of color! Includes the ByAnnie Travel Essentials 2.0 pattern for a polished, professional finish.</span></p>
<p><span><img src="https://cdn.shopify.com/s/files/1/2355/9259/files/La_Dolce_Vita_Samples-Web-27.jpg?v=1756955892" alt=""></span></p>
<p><span>💼 Ribbon details make all the difference. Ready to ship—just in time for your next adventure!<br></span></p>]]>
    </content>
  </entry>
  <entry>
    <id>https://renaissanceribbons.com/blogs/ribbon-crafts/christmas-in-july-project-feature</id>
    <published>2025-07-31T14:28:31-06:00</published>
    <updated>2025-07-31T14:29:19-06:00</updated>
    <link rel="alternate" type="text/html" href="https://renaissanceribbons.com/blogs/ribbon-crafts/christmas-in-july-project-feature"/>
    <title>Christmas in July Ribbon Projects</title>
    <author>
      <name>Hilary Jordan</name>
    </author>
    <content type="html">
      <![CDATA[<p>As we finish out the month of July we're so incredibly inspired by the gorgeous projects a few of our influencers created during our Christmas in July celebration. </p>
<p>Check out their projects below and be sure to snag a few of our <a href="https://renaissanceribbons.com/collections/holiday-ribbons" target="_blank">Holiday ribbons</a> for your own makes. There's still plenty of time before the Holiday season to make something lovely! 🎄</p>
<p style="text-align: center;">----</p>
<p>I had so much fun with these Christmas ribbons bringing the holiday spirit during the summer heat!! Bob &amp; Bean Christmas in July can be ordered via DM on Instagram limited availability. <a href="https://www.instagram.com/bob.nd.bean/" target="_blank">@bob.nd.bean</a></p>
<p><img src="https://cdn.shopify.com/s/files/1/2355/9259/files/Photoroom_20250705_222705_-_Rachel.jpg?v=1753986474" alt=""></p>
<p><span style="font-size: 0.875rem;">Making fabric from ribbon might be my new favorite thing. Especially with ribbons as pretty as these! The pattern is the <a href="https://banjoflannel.etsy.com/listing/1879305424" target="_blank">Art House Wallet Pattern</a>. <a href="https://www.instagram.com/banjoflannel/" target="_blank">@banjoflannel</a></span></p>
<p><span style="font-size: 0.875rem;"><img src="https://cdn.shopify.com/s/files/1/2355/9259/files/DFitzgerald_Adventale__Art_House_Wallet_6_-_Diana.jpg?v=1753986582" alt=""></span></p>
<p><span style="font-size: 0.875rem;"><img src="https://cdn.shopify.com/s/files/1/2355/9259/files/DFitzgerald_Adventale__Art_House_Wallet_4_-_Diana.jpg?v=1753986606" alt=""></span></p>
<p><span style="font-size: 0.875rem;"><img src="https://cdn.shopify.com/s/files/1/2355/9259/files/DFitzgerald_Adventale__Art_House_Wallet_2_-_Diana.jpg?v=1753986744" alt=""></span></p>
<p>I made a couple of my <a href="https://www.etsy.com/listing/1485871682/?ref=share_ios_native_control" target="_blank">#sprinklepouchpattern</a> with Ruby Star Society scraps and tied a little ribbon on the strap. These are going to be so cute to gift this year, I only need to decide what goodies to stuff inside them. <a href="https://www.instagram.com/sprinkleofsewing/" target="_blank">@sprinkleofsewing</a></p>
<p><img src="https://cdn.shopify.com/s/files/1/2355/9259/files/IMG_8918_-_Ali_Boriboun.jpg?v=1753990957" alt=""></p>
<p><img src="https://cdn.shopify.com/s/files/1/2355/9259/files/IMG_8925_-_Ali_Boriboun.jpg?v=1753990957" alt=""></p>
<p>A festive version of Dapper Dachshunds by Tilda. <a href="https://www.instagram.com/thevibrantpixel/" target="_blank">@thevibrantpixel</a></p>
<p><img src="https://cdn.shopify.com/s/files/1/2355/9259/files/DSC01500_-_Ama_Frimpong.jpg?v=1753992370" alt=""></p>
<p><img src="https://cdn.shopify.com/s/files/1/2355/9259/files/DSC01505_-_Ama_Frimpong.jpg?v=1753992370" alt=""></p>
<p><img src="https://cdn.shopify.com/s/files/1/2355/9259/files/DSC01501_-_Ama_Frimpong.jpg?v=1753992369" alt=""></p>
<p>I made a zip zip hooray (my bag pattern) with the lovely ribbons! <a href="https://www.instagram.com/tina1802/" target="_blank">@tina1802</a></p>
<p><img src="https://cdn.shopify.com/s/files/1/2355/9259/files/IMG_7194_-_Tina_Curtis.jpg?v=1753987906" alt=""></p>
<p><img alt="" src="https://cdn.shopify.com/s/files/1/2355/9259/files/IMG_7189_-_Tina_Curtis.jpg?v=1753993498"></p>
<p><img src="https://cdn.shopify.com/s/files/1/2355/9259/files/IMG_7191_-_Tina_Curtis.jpg?v=1753987925" alt=""></p>
<p>Bags made by <a rel="noopener" href="https://www.instagram.com/hillside.stitches/" target="_blank">@hillside.stitches</a>, pattern is the "hot cocoa bag" by Sew Can She. <br></p>
<p><img src="https://cdn.shopify.com/s/files/1/2355/9259/files/ribbon_-_Hillside_Stitches.jpg?v=1753992571" alt=""></p>
<p><img alt="" src="https://cdn.shopify.com/s/files/1/2355/9259/files/bag_-_Hillside_Stitches.jpg?v=1753993227"></p>
<p><img alt="" src="https://cdn.shopify.com/s/files/1/2355/9259/files/bag_2_-_Hillside_Stitches.jpg?v=1753993227"></p>
<p>The beautiful red and white Classic Christmas collection from @renaissanceribbons I received were perfect to make a small version of my clear vinyl #vivsprojectpouch that would be used to hold the rest of my scraps of ribbons! I created a quilted fabric using the Quilt-As-You-Go method with fusible fleece and paired it with a beautiful Tilda fabric for the lining. I also added a little strap for ease when wanting to transport this pouch wherever you go! I love the way it looks and the size is perfect. ❤️ <a href="https://www.instagram.com/sew.miss.viv/" target="_blank">@sew.miss.viv</a><a href="https://www.instagram.com/hillside.stitches/" target="_blank"></a></p>
<p><img src="https://cdn.shopify.com/s/files/1/2355/9259/files/VivianDoan_ProjectPouch_1_-_Vivian_Doan.jpg?v=1753988356" alt=""></p>
<p><img src="https://cdn.shopify.com/s/files/1/2355/9259/files/VivianDoan_ProjectPouch_2_-_Vivian_Doan.jpg?v=1753988356" alt=""></p>
<p><img src="https://cdn.shopify.com/s/files/1/2355/9259/files/VivianDoan_ProjectPouch_5_-_Vivian_Doan.jpg?v=1753988356" alt=""></p>]]>
    </content>
  </entry>
  <entry>
    <id>https://renaissanceribbons.com/blogs/ribbon-crafts/ribbon-embellished-jeans-tutorial-draft</id>
    <published>2025-07-18T07:34:56-06:00</published>
    <updated>2025-07-18T07:34:59-06:00</updated>
    <link rel="alternate" type="text/html" href="https://renaissanceribbons.com/blogs/ribbon-crafts/ribbon-embellished-jeans-tutorial-draft"/>
    <title>Ribbon Embellished Jeans Tutorial</title>
    <author>
      <name>Hilary Jordan</name>
    </author>
    <content type="html">
      <![CDATA[<p>We’re always looking for fun and creative ways to showcase our ribbons, and today’s tutorial is a perfect example. Bows and upcycling are having a moment—and we’re totally here for it! This technique combines the two and features our <a href="https://renaissanceribbons.com/search?q=reversible&amp;options%5Bprefix%5D=last" target="_blank">reversible ribbons</a> as both sides of them will show when stitched. </p>
<p><img alt="" src="https://cdn.shopify.com/s/files/1/2355/9259/files/Jeans_Bow_Tutorial-8.jpg?v=1752786820"></p>
<p>For this project you will need: <br></p>
<ul>
<li>1.5 - 2 yards of 3/8", 5/8", or 7/8" wide ribbon (we used<a href="https://renaissanceribbons.com/collections/designer-alexia-abegg/products/preorder-catnap-measure-twice-in-neon-pink-5-8-width-by-alexia-abegg-one-yard" target="_blank"> Measure Twice</a> in Neon Pink)</li>
<li>Pair of jeans - bootcut or wide leg work best </li>
<li>Fabric glue stick</li>
<li>Sewing machine</li>
<li>Coordinating Thread</li>
<li>Pins</li>
</ul>
<p>Instructions: </p>
<ol>
<li>Cut the hem off each leg of your jeans, and then cut up the outside leg seam approximately 5 - 6 inches. Be sure to cut out the seam allowance in that section to avoid bulk. Our jeans already had a raw edge so we skipped the cutting off the hem step. <br><br><img src="https://cdn.shopify.com/s/files/1/2355/9259/files/Jeans_Bow_Tutorial-7.jpg?v=1752785107" alt=""><br>
</li>
<li>Cut two equal lengths of ribbon from your yardage of ribbon and tie each into a loose bow. We used two 36" lengths from our 2 yard cut. This project can be done with a shorter 18" - 20" length of ribbon but we found it easier to get a great looking bow by having more ribbon length to work with. <br><br>
</li>
<li>Position the center of the bow over the side seam of your jeans right above the slit where you cut up the seam allowance. The tails of the bow should be positioned on the jeans with the edge of the ribbon right along the cut edge of the slit. <br><br><img src="https://cdn.shopify.com/s/files/1/2355/9259/files/Jeans_Bow_Tutorial-6.jpg?v=1752785139" alt=""><br>
</li>
<li>Adjust the bow as needed while glue basting and pinning in place to achieve your desired look. The tails of the bow should be longer than the hem of your jeans at this point in time and will be cut off in a later step.<br><br><img src="https://cdn.shopify.com/s/files/1/2355/9259/files/Jeans_Bow_Tutorial-5.jpg?v=1752785158" alt=""><br>
</li>
<li>With the walking foot fitted on your sewing machine and a matching thread color, carefully edge stitch around the ribbon to secure. Be sure to take your time and stitch slowly adjusting as needed to keep everything flat.<br><br><img src="https://cdn.shopify.com/s/files/1/2355/9259/files/Jeans_Bow_Tutorial-4.jpg?v=1752785024" alt="" style="display: block; margin-left: auto; margin-right: auto;"><br>
</li>
<li>Trim off excess ribbon at hem and use fray check to prevent the raw edge of the ribbon from fraying. We also used fray check along the edge of the denim in the slit to prevent fraying there as well.  <br><br><img alt="" src="https://cdn.shopify.com/s/files/1/2355/9259/files/Jeans_Bow_Tutorial-3.jpg?v=1752787100"><br>
</li>
<li>Rock your newly embellished jeans for the world to see.<br><br><img src="https://cdn.shopify.com/s/files/1/2355/9259/files/Jeans_Bow_Tutorial-1.jpg?v=1752785000" alt="">
</li>
</ol>
<p>Which ribbons will you choose for this fun tutorial? Be sure to tag us <a href="https://www.instagram.com/renaissanceribbons/" target="_blank" rel="noopener">@renaissanceribbons</a> and <a href="https://www.instagram.com/explore/search/keyword/?q=%23renaissanceribbons">#RenaissanceRibbons</a> so we can see your project!</p>]]>
    </content>
  </entry>
  <entry>
    <id>https://renaissanceribbons.com/blogs/ribbon-crafts/zip-it-up-2-0</id>
    <published>2025-02-06T11:32:52-07:00</published>
    <updated>2025-02-06T11:35:06-07:00</updated>
    <link rel="alternate" type="text/html" href="https://renaissanceribbons.com/blogs/ribbon-crafts/zip-it-up-2-0"/>
    <title>Zip It Up 2.0 | Mini Kit Club - February 2025</title>
    <author>
      <name>Sandra Rice</name>
    </author>
    <content type="html">
      <![CDATA[<p>For February's kit clubs, we're sending out the Zip It Up 2.0, from ByAnnie and we mixed and matched our favorite Tula and Kaffe fabrics to create this gorgeous kits!</p>
<p><img src="https://cdn.shopify.com/s/files/1/2355/9259/files/ZIp_It_Up_2.0_TP_Web_1.jpg?v=1738866636" alt=""></p>
<p><img src="https://cdn.shopify.com/s/files/1/2355/9259/files/ZIp_It_Up_2.0_TP_Web_5.jpg?v=1738866644" alt=""></p>
<p><img src="https://cdn.shopify.com/s/files/1/2355/9259/files/ZIp_It_Up_2.0_TP_Web_8.jpg?v=1738866651" alt=""></p>
<p> </p>
<p><img src="https://cdn.shopify.com/s/files/1/2355/9259/files/Zip_It_Up_2.0_KF_Web_9.jpg?v=1738866733" alt=""></p>
<p><img src="https://cdn.shopify.com/s/files/1/2355/9259/files/Zip_It_Up_2.0_KF_Web_1.jpg?v=1738866727" alt=""></p>
<p><img src="https://cdn.shopify.com/s/files/1/2355/9259/files/Zip_It_Up_2.0_KF_Web_2.jpg?v=1738866726" alt=""></p>
<p><img src="https://cdn.shopify.com/s/files/1/2355/9259/files/Zip_It_Up_2.0_KF_Web_12.jpg?v=1738866738" alt=""></p>
<p>Samples sewn by Nicole Wilkins <a href="https://www.instagram.com/nicolesstichnup_/" target="_blank" rel="noopener">@nicolesstichnup_</a></p>]]>
    </content>
  </entry>
  <entry>
    <id>https://renaissanceribbons.com/blogs/ribbon-crafts/measure-twice-ribbon-case-in-point-by-tula-pink</id>
    <published>2025-01-18T09:47:34-07:00</published>
    <updated>2025-01-18T10:00:26-07:00</updated>
    <link rel="alternate" type="text/html" href="https://renaissanceribbons.com/blogs/ribbon-crafts/measure-twice-ribbon-case-in-point-by-tula-pink"/>
    <title>Measure Twice Case in Point by Tula Pink</title>
    <author>
      <name>Sandra Rice</name>
    </author>
    <summary type="html">
      <![CDATA[<h3 style="text-align: left;">Case in Point - using Measure Twice ribbons by Tula Pink<br>
</h3>
<h3 style="text-align: left;"><br></h3>
<p style="text-align: left;"><meta charset="utf-8">Remember this bag at Tula's booth at Quilt Market last fall? It's the Case in Point from ByAnnie and it's STUNNING! Made entirely from the Measure Twice ribbons, Tula used the reversible nature of these ribbons to create a full rainbow of color! </p>
<p style="text-align: left;"><meta charset="utf-8">Using Tula's...</p><p><a class="read-more" href="https://renaissanceribbons.com/blogs/ribbon-crafts/measure-twice-ribbon-case-in-point-by-tula-pink">More</a></p>]]>
    </summary>
    <content type="html">
      <![CDATA[<h3 style="text-align: left;">Case in Point - using Measure Twice ribbons by Tula Pink<br>
</h3>
<h3 style="text-align: left;"><img style="display: block; margin-left: auto; margin-right: auto;" src="https://cdn.shopify.com/s/files/1/0838/5987/files/TP_Measure_Twice_Bag-web-5.jpg?v=1737218120" alt=""></h3>
<p style="text-align: left;"><meta charset="utf-8">Remember this bag at Tula's booth at Quilt Market last fall? It's the Case in Point from ByAnnie and it's STUNNING! Made entirely from the Measure Twice ribbons, Tula used the reversible nature of these ribbons to create a full rainbow of color! </p>
<p style="text-align: left;"><img alt="" src="https://cdn.shopify.com/s/files/1/0838/5987/files/TP_Measure_Twice_Bag-web-10.jpg?v=1737218238" style="display: block; margin-left: auto; margin-right: auto;"></p>
<p style="text-align: left;"><meta charset="utf-8">Using Tula's new hardware for Sallie Tomato, Tula created this amazing little keychain featuring an array of 3/8" ribbons and the Tassel Caps along with a small 1/2" D-ring. Brilliant!</p>
<p style="text-align: left;"><img alt="" src="https://cdn.shopify.com/s/files/1/0838/5987/files/TP_Measure_Twice_Bag-web-20.jpg?v=1737218293"></p>
<div style="text-align: left;">The inside of the Case in Point is no less stunning! Using Check Please in Cosmic for the lining along with Pom Poms in Cosmic, it's a match made in heaven! I love the ribbon detail below the zippers, too! </div>
<div style="text-align: left;">The inside dividers use mesh and elastic to create partitioned pockets, perfect for extra notions like small rulers, or even spools of thread!</div>
<div style="text-align: left;"><img src="https://cdn.shopify.com/s/files/1/0838/5987/files/TP_Measure_Twice_Bag-web-22.jpg?v=1737218329" alt=""></div>
<div style="text-align: left;">
<meta charset="utf-8">Though I think my favorite detail of all is the adorable hand-stitched heart on the inside! Did you see that before?! We didn't!</div>
<div>
<img style="float: left;"><img style="float: left;" src="https://cdn.shopify.com/s/files/1/0838/5987/files/TP_Measure_Twice_Bag-web-26.jpg?v=1737218367" alt="">
</div>
<div><br></div>
<div>Now that Measure Twice is out in the world, tell us what you'll make! What are the possibilities for this ribbon that we haven't thought of? How can you use this to take your project to the next level?</div>]]>
    </content>
  </entry>
  <entry>
    <id>https://renaissanceribbons.com/blogs/ribbon-crafts/quilt-market-2024</id>
    <published>2024-11-02T11:48:30-06:00</published>
    <updated>2024-11-02T11:55:29-06:00</updated>
    <link rel="alternate" type="text/html" href="https://renaissanceribbons.com/blogs/ribbon-crafts/quilt-market-2024"/>
    <title>Quilt Market 2024</title>
    <author>
      <name>Sandra Rice</name>
    </author>
    <summary type="html">
      <![CDATA[<meta charset="utf-8"><span data-mce-fragment="1">This year, Renaissance Ribbons had the incredible opportunity to attend the International Quilt Market in Houston, and it was truly a weekend to remember! Quilt Market always brings together some of the most talented and passionate individuals in the textile and quilting community, and being there in person was an unforgettable experience. As we reflect on our time at Quilt Market, we wanted to share a few highlights from our journey, including meeting potential new designers, reconnecting with old friends, and our special spot on the market floor—right between the fabulous booths of FreeSpirit and Tula Pink!</span><p><a class="read-more" href="https://renaissanceribbons.com/blogs/ribbon-crafts/quilt-market-2024">More</a></p>]]>
    </summary>
    <content type="html">
      <![CDATA[<meta charset="utf-8">
<div style="text-align: center;"><img style="margin-right: 101.45px; margin-left: 101.45px; float: none;" src="https://cdn.shopify.com/s/files/1/2355/9259/files/IMG_8365_1024x1024.jpg?v=1730569197"></div>
<p data-mce-fragment="1">This year, Renaissance Ribbons had the incredible opportunity to attend the International Quilt Market in Houston, and it was truly a weekend to remember! Quilt Market always brings together some of the most talented and passionate individuals in the textile and quilting community, and being there in person was an unforgettable experience. As we reflect on our time at Quilt Market, we wanted to share a few highlights from our journey, including meeting potential new designers, reconnecting with old friends, and our special spot on the market floor—right between the fabulous booths of FreeSpirit and <a title="Ribbons by designer Tula Pink" href="https://renaissanceribbons.com/collections/tula-pink-designer">Tula Pink</a>!</p>
<div style="text-align: center;"><img style="margin-right: 41.4497px; margin-left: 41.4497px; float: none;" alt="" src="https://cdn.shopify.com/s/files/1/2355/9259/files/QM_24-Tula_Booth_32_1024x1024.jpg?v=1730569245"></div>
<h3 data-mce-fragment="1">Prime Location, Perfect Inspiration</h3>
<p data-mce-fragment="1">When we learned we’d be situated between FreeSpirit and Tula Pink’s booths, we knew we were in for something special. Tula Pink’s designs bring such vibrant energy and imaginative flair, and FreeSpirit is renowned for supporting top-tier designers with bold, unique visions. This prime location allowed us to enjoy a constant stream of visitors—both new faces and familiar friends—who were eager to see what Renaissance Ribbons had to offer.</p>
<div style="text-align: center;"><img style="margin-right: 89.4531px; margin-left: 89.4445px; float: none;" src="https://cdn.shopify.com/s/files/1/2355/9259/files/QM_24-RR_Booth_1_1024x1024.jpg?v=1730569321"></div>
<p data-mce-fragment="1">Our own booth was brimming with the latest and greatest ribbon collections, each crafted to bring beauty and sophistication to quilting and crafting projects. From our recent collaborations with <a title="Ribbons designed by Ruby Star Society designer Melody Miller" href="https://renaissanceribbons.com/collections/designer-melody-miller">Melody Miller</a> and <a title="Ribbons designed by Ruby Star Society designer Kimberly Kight" href="https://renaissanceribbons.com/collections/designer-kimberly-kight">Kimberly Kight</a> to the new “<a title="Woodland Park by designer Rashida Coleman-Hale" href="https://renaissanceribbons.com/collections/designer-rashida-coleman-hale">Woodland Park</a>” collection by Rashida Coleman-Hale, our display showcased the diversity and creativity that Renaissance Ribbons is known for. It was thrilling to share these designs up close, where guests could feel the quality and appreciate the intricate details in each ribbon.</p>
<div style="text-align: center;"><img style="margin-right: 41.4497px; margin-left: 41.4497px; float: none;" alt="" src="https://cdn.shopify.com/s/files/1/2355/9259/files/QM_24-RR_Booth_8_1024x1024.jpg?v=1730569348"></div>
<h3 data-mce-fragment="1">Catching Up with Old Friends and Making New Ones</h3>
<p data-mce-fragment="1">One of the best parts of Quilt Market is reuniting with longtime friends in the industry. We were delighted to catch up with designers, retailers, and creators who have been part of our journey from the very beginning. Many of these connections go back years, and seeing each other face-to-face—sharing ideas, memories, and laughter—brought a true sense of community.</p>
<p data-mce-fragment="1">In addition to reconnecting with familiar faces, we also met many new friends and potential partners. Quilt Market offers a unique chance to connect with rising stars in the quilting and crafting world, and we were thrilled to meet several talented designers who might soon become part of the Renaissance Ribbons family. Their creativity and fresh perspectives are inspiring, and we can’t wait to see where these conversations might lead.</p>
<div style="text-align: center;"><img style="margin-right: 89.4531px; margin-left: 89.4445px; float: none;" alt="" src="https://cdn.shopify.com/s/files/1/2355/9259/files/QM_24-RR_Booth_23_1024x1024.jpg?v=1730569401"></div>
<p style="text-align: center;" data-mce-fragment="1"><em>Chelsea meeting with the team of Liberty London; wouldn't that be a dream come true?!</em></p>
<h3 data-mce-fragment="1">A Peek into the Future of Ribbon Design</h3>
<p data-mce-fragment="1">Throughout the weekend, we hosted a steady stream of visitors eager to see our newest collections and discuss the future of ribbon design. With each conversation, we gained new insights and ideas, making us even more excited for what’s to come. The feedback we received—from seasoned quilt shop owners to first-time Quilt Market attendees—reminded us of how valued and versatile ribbons are in the quilting community.</p>
<p data-mce-fragment="1">Seeing how quilters and crafters incorporate ribbons into their projects, whether it’s as an accent or a focal point, continues to inspire us to push creative boundaries and explore new techniques. We left Quilt Market with renewed energy, ready to continue our mission of creating ribbons that enhance and elevate every project.</p>
<h3 data-mce-fragment="1">A Heartfelt Thank You</h3>
<p data-mce-fragment="1">To everyone who visited us at Quilt Market, thank you for making our weekend so memorable. Each interaction, big and small, reminded us of why we’re so passionate about what we do. Renaissance Ribbons has always been about bringing beauty, craftsmanship, and creativity into the world, and it’s through connections with each of you that we’re able to keep that vision alive.</p>
<div style="text-align: center;"><img style="margin-right: 41.4497px; margin-left: 41.4497px; float: none;" alt="" src="https://cdn.shopify.com/s/files/1/2355/9259/files/RSS_at_booth_1024x1024.jpg?v=1730569625"></div>
<p data-mce-fragment="1">As we look ahead, we’re excited to build on the connections we made and the inspiration we gathered at Quilt Market. Stay tuned for exciting new releases, partnerships, and creative collaborations that we can’t wait to share with you!</p>
<p data-mce-fragment="1">Until next year, Houston!</p>]]>
    </content>
  </entry>
  <entry>
    <id>https://renaissanceribbons.com/blogs/ribbon-crafts/kaffe-classics-2024</id>
    <published>2024-07-28T10:18:48-06:00</published>
    <updated>2024-07-28T10:18:49-06:00</updated>
    <link rel="alternate" type="text/html" href="https://renaissanceribbons.com/blogs/ribbon-crafts/kaffe-classics-2024"/>
    <title>Kaffe Classics 2024</title>
    <author>
      <name>Sandra Rice</name>
    </author>
    <content type="html">
      <![CDATA[<meta charset="utf-8">
<p data-mce-fragment="1">Hey friends, </p>
<p data-mce-fragment="1">We've been hard at work with Kaffe Fassett and Brandon Mably designing new ribbons for 2024 that coordinate with all the current and upcoming fabric collections. This has been long overdue and we're excited to announce that this collection is now in stock!</p>
<p data-mce-fragment="1">Let's take a moment to go over each of the new designs!</p>
<p data-mce-fragment="1">Up first, we have Jumble, in 11 colors and in 5/8" width, these are the perfect accent to any project. Each design is fully reversible as well. </p>
<div style="text-align: center;" data-mce-fragment="1" data-mce-style="text-align: center;"><img style="float: none;" alt="" src="https://cdn.shopify.com/s/files/1/0838/5987/files/Jumble.jpg?v=1722182563" data-mce-fragment="1" data-mce-src="https://cdn.shopify.com/s/files/1/0838/5987/files/Jumble.jpg?v=1722182563" data-mce-style="float: none;"></div>
<div style="text-align: left;" data-mce-fragment="1" data-mce-style="text-align: left;">The second new design is Wobble, reminiscent of sandstone with it's multiple layers and beautiful colors! This design comes in 7/8" width.</div>
<div style="text-align: center;" data-mce-fragment="1" data-mce-style="text-align: center;"><img style="float: none;" src="https://cdn.shopify.com/s/files/1/0838/5987/files/Wobble.jpg?v=1722182638" data-mce-fragment="1" data-mce-src="https://cdn.shopify.com/s/files/1/0838/5987/files/Wobble.jpg?v=1722182638" data-mce-style="float: none;"></div>
<div style="text-align: center;" data-mce-fragment="1" data-mce-style="text-align: center;">Our third design is Stripe, which was originally a single stripe design featuring a multitude of colors, but we have split this into two colorways to allow better flexibility in use. This design is 7/8" wide.</div>
<div style="text-align: center;" data-mce-fragment="1" data-mce-style="text-align: center;"><img src="https://cdn.shopify.com/s/files/1/0838/5987/files/Stripe.jpg?v=1722182840" data-mce-fragment="1" data-mce-src="https://cdn.shopify.com/s/files/1/0838/5987/files/Stripe.jpg?v=1722182840"></div>
<div style="text-align: center;" data-mce-fragment="1" data-mce-style="text-align: center;"></div>
<div style="text-align: center;" data-mce-fragment="1" data-mce-style="text-align: center;">And, last but not least, we have Roman Glass, our personal favorite! This design is on 1-1/2" width, and comes in four colorways to accent a multitude of fabrics.</div>
<div style="text-align: center;" data-mce-fragment="1" data-mce-style="text-align: center;"><img src="https://cdn.shopify.com/s/files/1/0838/5987/files/Roman-Glass.jpg?v=1722182901" data-mce-fragment="1" data-mce-src="https://cdn.shopify.com/s/files/1/0838/5987/files/Roman-Glass.jpg?v=1722182901"></div>
<div style="text-align: left;" data-mce-fragment="1" data-mce-style="text-align: center;">We hope you love these ribbons as much as we do! Stay tuned for new additions throughout the year!</div>]]>
    </content>
  </entry>
  <entry>
    <id>https://renaissanceribbons.com/blogs/ribbon-crafts/tula-pinks-roar-collection</id>
    <published>2024-01-12T08:37:01-07:00</published>
    <updated>2024-01-12T08:49:40-07:00</updated>
    <link rel="alternate" type="text/html" href="https://renaissanceribbons.com/blogs/ribbon-crafts/tula-pinks-roar-collection"/>
    <title>Tula Pink&apos;s Roar Collection</title>
    <author>
      <name>Sandra Smith</name>
    </author>
    <content type="html">
      <![CDATA[<p><img style="display: block; margin-left: auto; margin-right: auto;" alt="" src="https://cdn.shopify.com/s/files/1/2355/9259/files/TP_Roar_Close_Up_4_IG.jpg?v=1705072535" data-mce-fragment="1" data-mce-src="https://cdn.shopify.com/s/files/1/2355/9259/files/TP_Roar_Close_Up_4_IG.jpg?v=1705072535"></p>
<p>Back in October when Tula Pink released her newest collection, Roar, we immediately knew it would make amazing ribbon! We reached out to Tula and got the process started, wasting no time! </p>
<p style="text-align: left;">We started with the Dinosaur Eggs in print in two sizes but ultimately nixed the larger; we needed a smaller print to help anchor the collection. As these designs are created with only two colors, they're completely reversible!</p>
<div style="text-align: center;"><img src="https://cdn.shopify.com/s/files/1/2355/9259/files/Dino-Eggs_480x480.jpg?v=1705073431" style="float: none;"></div>
<div style="text-align: center;"></div>
<p>Our second print in this collection was Stargazer. We initially only created the 7/8" version with but then tossed around the idea of metallic thread for this print and Tula fell in love! We tried the metallic thread with a larger scale of this design and we were SOLD. </p>
<div style="text-align: center;"><img src="https://cdn.shopify.com/s/files/1/2355/9259/files/Stargazer_600x600.jpg?v=1705073767" style="float: none;"></div>
<div style="text-align: left;">Finally, we played around with scale on the Meteor Shower print, too. Initially, we thought about this one as 1-1/2" size but after sampling, deemed it too simple to be that large, and we didn't originally plan on metallic thread for this one, either. However, we knew it had to be sparkly! I mean, how else could we make this print pop?!</div>
<div style="text-align: left;"></div>
<div style="text-align: center;"><img src="https://cdn.shopify.com/s/files/1/2355/9259/files/Meteor-Shower_480x480.jpg?v=1705074451" style="float: none;"></div>
<div style="text-align: left;">We hope you love the Roar collection as much as we do! We can't wait to see your projects and if you post them on social media, please tag us! We'd love to repost them for you!</div>]]>
    </content>
  </entry>
  <entry>
    <id>https://renaissanceribbons.com/blogs/ribbon-crafts/make-your-own-velvet-cushion-cover</id>
    <published>2023-09-04T18:28:20-06:00</published>
    <updated>2023-09-04T19:08:50-06:00</updated>
    <link rel="alternate" type="text/html" href="https://renaissanceribbons.com/blogs/ribbon-crafts/make-your-own-velvet-cushion-cover"/>
    <title>Make your own Velvet Cat Cushion Cover</title>
    <author>
      <name>Edith Minne</name>
    </author>
    <content type="html">
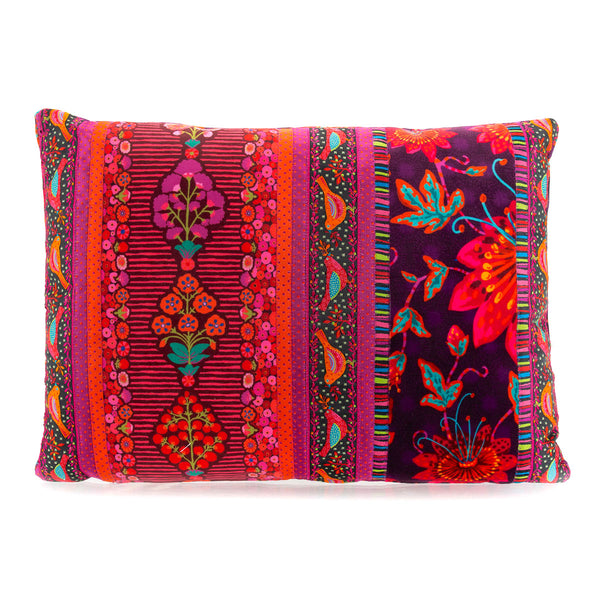
      <![CDATA[<p>Let's combine some fun and gorgeous material and make a plush and vibrant velvet Cushion Cover.</p>
<p>The kit we offer contains the velvet panel, the cotton fabrics and the 14" black zipper- Coming soon! </p>
<h2 style="text-align: center;"><a href="https://renaissanceribbons.com/products/kit-cushion-cover-cat-malabar-odile-b" title="Velvet Cushion Cover" target="_blank"><strong><span style="color: #ff2a00;">Get your Kit </span></strong></a></h2>
<p><img src="https://cdn.shopify.com/s/files/1/2355/9259/files/OB_Clu_cushion_cover-2-Edit_600x600.jpg?v=1693867590" alt="Make your own Velvet Cushion Cover Odile B"></p>
<h3 class="p1">Instructions:</h3>
<h3 class="p2"><strong>Cutting Fabric</strong></h3>
<ul>
<li>Cut the fabric Tula Pink Suited and Booted</li>
<li>Be aware it is directional and you want all 4 strips to read properly horizontally</li>
<li>Cut two 2.5"x9" strips and two 2.5"x14" strips of the<span class="Apple-converted-space">  </span>fabric for the log cabin frame.</li>
<li>Cut one 17"x17" square of Tula Pink Suited and Boote fabric for the back panel.</li>
</ul>
<p class="p2"> </p>
<h3 class="p1">
<span class="Apple-tab-span"> </span><span class="Apple-tab-span"> </span><strong>Make the log cabin frame</strong>:</h3>
<ul>
<li>Take one of the 2.5"x9" strips and sew it to the top edge of the French velvet panel using a 1/4" seam allowance.</li>
<li>Press the seam towards the fabric strip.</li>
<li>Sew the other 2.5"x9" strip to the bottom edge of the French velvet panel using a 1/4" seam allowance.</li>
<li>Press the seam towards the fabric strip.</li>
<li>Sew the 2.5"x14" strips to the left and right edges of the French velvet panel using a 1/4" seam allowance.</li>
<li>Press the seam towards the fabric strip.</li>
</ul>
<p class="p2"> </p>
<h3 class="p1">
<span class="Apple-tab-span"> </span><span class="Apple-tab-span"> </span><strong>Sew in the zipper:</strong>
</h3>
<p class="p1">Pay attention to place the zipper on the bottom of the cover to not have your kitty cat upside down !</p>
<p class="p1">Check some You Tube video if you need help on inserting a zipper in a cushion cover - Here is a<a href="https://youtu.be/teoK1ooITsM?si=RSW5-__TEZnmP5Ea" title="Add a zipper to a cushion cover" target="_blank"> simple and clear tutorial </a></p>
<p class="p1"> </p>
<h3 class="p1">Assemble the cushion cover:</h3>
<ul>
<li>Lay the piece attached to the zipper</li>
<li>Pin the three raw edges of the cushion cover together.</li>
<li>Using a 1/2" seam allowance, sew around the three sides of the cushion cover that are not sewn to the zipper.</li>
<li>Turn the cushion cover right side out and insert the cushion.</li>
</ul>
<p class="p2"> <img src="https://cdn.shopify.com/s/files/1/2355/9259/files/OB_Clu_cushion_cover-3-Edit_480x480.jpg?v=1693873683" alt="add zipper" data-mce-fragment="1" data-mce-src="https://cdn.shopify.com/s/files/1/2355/9259/files/OB_Clu_cushion_cover-3-Edit_480x480.jpg?v=1693873683"></p>
<p class="p1">Your Malabar Cat  Velvet cushion cover with a zipper closure is now complete!</p>
<p class="p1"><img alt="" src="https://cdn.shopify.com/s/files/1/2355/9259/files/Sophia_7-23-62-Edit_600x600.jpg?v=1693875802"></p>
<p> </p>]]>
    </content>
  </entry>
  <entry>
    <id>https://renaissanceribbons.com/blogs/ribbon-crafts/webbing</id>
    <published>2023-08-11T18:12:00-06:00</published>
    <updated>2023-10-20T15:08:09-06:00</updated>
    <link rel="alternate" type="text/html" href="https://renaissanceribbons.com/blogs/ribbon-crafts/webbing"/>
    <title>New Neon Webbing 1&quot; by Tula Pink!</title>
    <author>
      <name>Edith Minne</name>
    </author>
    <content type="html">
      <![CDATA[<h2 style="text-align: center;"></h2>
<h3 style="text-align: center;"><span style="color: #df2380;"></span></h3>
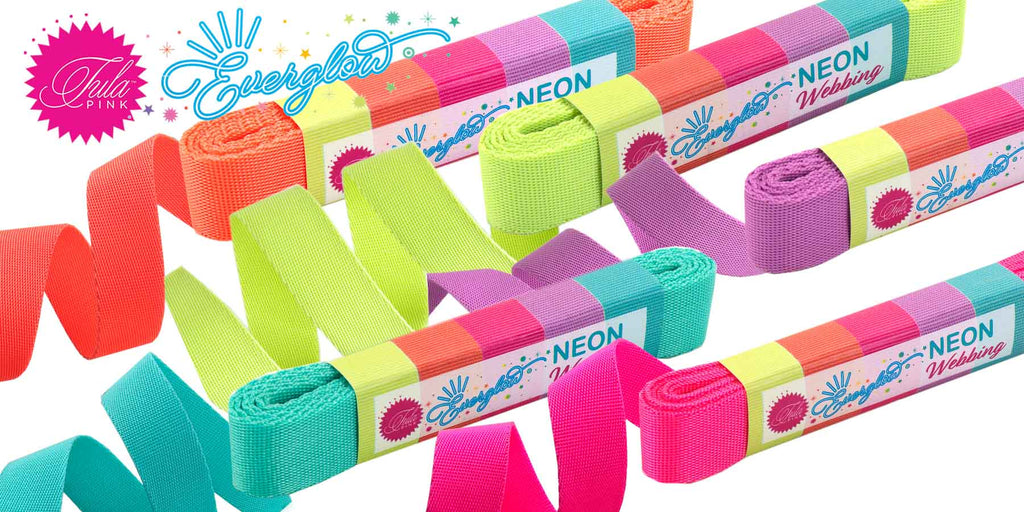
<p><span style="color: #df2380;"><img src="https://cdn.shopify.com/s/files/1/2355/9259/files/TKW_Neon_2x1_promo-22_1024x1024.jpg?v=1691799042" alt="Tula Pink EverGlow Webbing"></span></p>
<p> </p>
<p> </p>
<p> </p>
<p> </p>
<p><span style="color: #df2380;">May 3rd 2022, from Tula: </span>I’ve become quite the little bag maker in recent times and webbing is the best way to make something look cool and finished.</p>
<p><span style="color: #404040;"><img alt="" src="https://cdn.shopify.com/s/files/1/2355/9259/files/TK_Y_1_collecion_banner_1024x1024.jpg?v=1653615062"></span></p>
<meta charset="utf-8">
<p><span style="color: #404040;"><span>But it’s been hard to find good colors – they come in red, black, navy – they’re pretty basic, kind of boring, so launching our own webbing was crazy! A lot of people asked if we were going to do a 1” since the first round was 1-1/2” so we have finally finished sampling the 1” and voila!</span></span></p>
<div style="text-align: start;"></div>
<p><span style="color: #404040;"><span><img style="display: block; margin-left: auto; margin-right: auto;" alt="Tula Pink Webbing" src="https://cdn.shopify.com/s/files/1/2355/9259/files/TKW_1_-3-Edit_600x600.jpg?v=1653360746"></span></span></p>
<h3 style="text-align: center;"><span style="color: #df2380;"></span></h3>
<meta charset="utf-8">
<p style="text-align: center;"><span style="color: #404040;">These are releasing in <strong>early June</strong> from Renaissance Ribbons. They do a fantastic job – the quality is insane, the feel is insane! It’s nice when a product you help develop ends up being the product you like the best. I’m just really happy with how they’ve produced these </span> </p>
<p style="text-align: center;"><strong><span style="color: #ff00ff;">Thank you Tula!</span></strong></p>
<div style="text-align: start;"><img style="float: none; display: block; margin-left: auto; margin-right: auto;" alt="Tiny Beasts" src="https://cdn.shopify.com/s/files/1/2355/9259/files/TK_Tiny_Beasts-44_240x240.jpg?v=1653615234"></div>
<meta charset="utf-8">
<h1><span style="color: #ff00ff;">Total Game Changer for Bag Making! </span></h1>
<meta charset="utf-8">
<p style="text-align: center;"><span style="color: #404040;"><span>So, now along with our six original 1-1/2” webbings we’re launching our new 1” webbings and in addition we’re adding a black and white option in both widths – a pure black and pure white option. We had to go through a couple of versions of this because in a woven product any color will always affect the color next to it. We got it right by weaving on a white warp and adding the black – as the other way made the white a silvery color. For retailers, it will come on 16-yard spools, and they are also offered in 2-yard bundles which are really nice to have on hand, just like I keep a stash of zippers, then you have a full assortment and can always cut it down to any size you need.</span></span></p>
<p style="text-align: center;"> </p>
<p style="text-align: center;"><span style="color: #404040;"><img alt="Tula Pink New Webbing by Renaissance Ribbons" src="https://cdn.shopify.com/s/files/1/2355/9259/files/TKY_1_Slider_wholesale_6_colors_B_W_480x480.jpg?v=1653613729"></span></p>
<p style="text-align: center;"> </p>
<meta charset="utf-8">
<p>What I’ve done with the 1” webbings are to coordinate them back to the 1-1/2” webbings because often in a single bag you’ll have a wide webbing as a strap and additional webbing on the bag. I wanted them to coordinate without them being a total repeat of the 1-1/2”.  <strong>I spent a lot of time choosing the colors</strong> of the 1-1/2” to match my fabrics so those colors are still good but again I didn’t want them to be a repeat so what I did was to reverse the colors – the 1” has the reverse colors in the stripes. If the lavender is on the outside of the 1-1/2” then it’s on the inside of the 1” so they coordinate but they also give you a slightly different emphasis on color. <strong>While coordinating they give you kind of a different color</strong> – i.e., one can feel very blue and the other one very pink.</p>
<p><img style="float: left;" alt="Tula Pink webbing by Renaissance Ribbons" src="https://cdn.shopify.com/s/files/1/2355/9259/files/TKY-91-1_Col-05_Aqua-hot_Pink-C_240x240.jpg?v=1653613863"></p>
<div style="text-align: start;"><img style="float: none;" alt="" src="https://cdn.shopify.com/s/files/1/2355/9259/files/TK-90-38mm_col_5_aqua_pink-C_4e246dbb-eab6-4e7f-b6ef-a6d8f4c57700_240x240.jpg?v=1653613983"></div>
<p> </p>
<p>Why Nylon Webbing? Here is Tula's answer:</p>
<meta charset="utf-8">
<p>I chose to work with nylon vs. cotton for a couple of reasons: one is the finish and two is the durability. The nylon webbing won’t show oil from your hands as easily and since you’re often carrying it by the handle the lighter colors especially will show dirt and break down very quickly.</p>
<p>I spend a lot of time on these bags and the last thing I want is for them to look dirty and old!</p>
<p>The other reason I really like the nylon is because of how you can finish it.</p>
<p>Unraveling is very normal because it’s a woven product and with cotton you can’t really do anything about that but with nylon when you trim it clean, although it will start to unravel over time, you can melt it which creates a solid edge which will not unravel. What’s nice about that is when you have an open end on a bag such as when making a duffle bag and the two pieces come together and meet (rather than being sewn into the seam) then they will stay nice over time and not unravel once they are melted.﻿</p>
<p> </p>
<p><img style="display: block; margin-left: auto; margin-right: auto;" alt="Tula Pink Webbing" src="https://cdn.shopify.com/s/files/1/2355/9259/files/TK_Webbing_Fan_deck_480x480.jpg?v=1653614875"> </p>
<meta charset="utf-8">
<p><strong>How to use my webbing?</strong></p>
<p>What I also wanted to show you is <strong>how these webbings go with my fabrics</strong>. A lot of them are going to overlap. I’m always looking for webbing that’s going to pick up something in the fabric that isn’t obvious, so I very rarely match the webbing. I’m less interested in matching because I want the webbing to stand out.</p>
<p><strong>The webbing seems more special when it becomes a feature</strong>, and several combos can work.</p>
<p>Each one gives a different vibe so that’s fun to work with. I use the webbings to draw attention to the thing in the fabric I’m most in love with which is not always the main color in the fabric.</p>
<p><strong>Whatever you’re making the webbing highlights what you want to highlight in the fabric.</strong></p>
<p>These color combos speak to the fabric and create an additional language of color between the fabric and the webbing. So even though the colors seem sort of insane,<strong> there’s 100% a method to my madness!</strong></p>
<p>And you can use more than one combo on a bag which I often do.</p>
<p>You can use all these webbings with all the fabrics -</p>
<p>I’m inspired to make just a webbing bag!</p>
<p><strong>Having stuff like this on hand is super great if you often make bags</strong>. I think bags make the best gifts because quilts take forever and although they are special gifts, I personally have a really difficult time parting from a quilt after working on it months and months vs. a bag which I can make in a weekend.</p>
<p> </p>
<p>Please join our new Tula Pink Monthly Kit Club, where we offer complete sewing kits to make bags from Tula Pink gorgeous fabrics, ribbons and webbing!</p>
<meta charset="utf-8">
<h2 style="text-align: center;">
<a title="Tula Pink Monthly Kit Club!" href="https://renaissanceribbons.com/products/tula-pink-monthly-kit-club" target="_blank"><strong><span style="color: #ff00ff;">👉 Tula Pink Monthly Kit Club</span></strong></a>👈</h2>
<h2 style="text-align: center;"><strong style="font-size: 15px;"><span style="color: #ff00ff;"><img alt="" src="https://cdn.shopify.com/s/files/1/2355/9259/files/TK_Tiny_Beasts-44_160x160.jpg?v=1653615234"></span></strong></h2>
<p style="text-align: center;"><strong><span style="color: #ff00ff;">we include a Tula Pink bonus/surprise every Month! 💗</span></strong></p>
<p> </p>
<p> </p>
<meta charset="utf-8">
<p><strong>For retailers, it will come on 16-yard spools- see the wholesale link: 👇</strong></p>
<h3>               <a title="Wholesale Webbing Tula Pink" href="https://wholesale.renaissanceribbons.com/collections/tula-pink-webbing" target="_blank"><strong>I am a retailer interested in Tula Pink Webbing Wholesale</strong></a>
</h3>
<p><strong><img style="display: block; margin-left: auto; margin-right: auto;" alt="Tula Pink Webbing Spools for wholesale" src="https://cdn.shopify.com/s/files/1/2355/9259/files/TKY_1_fly_out_1x1_1_BW_Fans_480x480.jpg?v=1653617327"></strong></p>
<p> </p>
<p>They are also offered in 2-yard bundles which are really nice to have on hand, just like I keep a stash of zippers, then you have a full assortment and can always cut it down to any size you need.</p>
<h3><a title="Retail Tula Pin Webbing" href="https://renaissanceribbons.com/collections/new-tula-pink-webbing-1" target="_blank"><strong>2yd Bundles all colors Tula Pink Webbing 1"</strong></a></h3>
<p><strong><img style="display: block; margin-left: auto; margin-right: auto;" alt='Tula Pink Webbing 1" bundles all 6 colors' src="https://cdn.shopify.com/s/files/1/2355/9259/files/TKy_1_packs-4-Edit_600x600.jpg?v=1653617242"></strong></p>
<p><img style="display: block; margin-left: auto; margin-right: auto;" alt="Tula Pink" src="https://cdn.shopify.com/s/files/1/2355/9259/files/TK_Vintage_Dingbats-Magenta_Olive_geometric_160x160.png?v=1653616615"> And if one bag making subscription is not enough, you can still join the Tula Pink 4-Month Webbing Kit club- see below the 4 projects of the program:</p>
<h3 style="text-align: center;"><span style="color: #df2380;"></span></h3>
<h3 style="text-align: center;"><a href="https://renaissanceribbons.com/products/4-month-project-kit-club-webbing" target="_blank"><span style="color: #df2380;">Join the 4-Month Tula Pink Webbing Club</span></a></h3>
<p style="text-align: left;">Inspired by Tula's bags, we offer you full kits, delivered at your door, everything included ...</p>
<p style="text-align: left;">My friend Anjela came by yesterday and fell in love with one of our Kit Club prototype!</p>
<p style="text-align: left;">That is the perfect fashionable sling!</p>
<p style="text-align: left;"><img alt="" src="https://cdn.shopify.com/s/files/1/2355/9259/products/image_b9d0d948-cff8-4de8-bed5-015a33d26f9e_480x480.jpg?v=1633875346"></p>
<h3 style="text-align: center;"><strong><span style="color: #f14b9d;"><a style="color: #f14b9d;" title="Tula Pink Webbing" href="https://renaissanceribbons.com/collections/tula-pink-webbing" target="_blank">Click to see the whole collection of Webbing </a></span></strong></h3>
<p>"<em>Real close to be the best thing that just happened to be!</em></p>
<p><em>It just came out so right!</em></p>
<p><em>I do not think I will use any other webbing again! I just like it that much! This webbing makes a bag feeling elevated, gives it a more professional look.</em></p>
<p><em>Making bags is a great way to show well my fabric lines.</em>" ~ Tula Pink</p>
<p><img alt="Tula Pink Webbing Project Bags" src="https://cdn.shopify.com/s/files/1/2355/9259/files/KOB_90_In_Control_TK_DD-9_600x600.jpg?v=1643239563"></p>
<p><img alt="" src="https://cdn.shopify.com/s/files/1/2355/9259/products/kob_85_divided_basket-5090-edit_600x600.jpg?v=1642530228"><img alt="Tula Pink Webbing Project images" src="https://cdn.shopify.com/s/files/1/2355/9259/files/Sandhill_600x600.jpg?v=1641838610"></p>
<p><img alt="Tula Pink Webbing Project images" src="https://cdn.shopify.com/s/files/1/2355/9259/files/SK-FF-Contents-2_600x600.jpg?v=1641784305"> </p>
<p>Where did these colors come from?</p>
<p> </p>
<div style="text-align: center;"><span style="color: #404040;"></span></div>
<div style="text-align: center;"><span style="color: #404040;">★ Bright Soft Pink and Tangerine Orange</span></div>
<div style="text-align: center;"><span style="color: #404040;">★ Slushy Hot Watermelon and Plum </span></div>
<div style="text-align: center;"><span style="color: #404040;">★ Soft grey and neon yellow</span></div>
<div style="text-align: center;"><span style="color: #404040;">★ Classic Lime and Bright Aqua</span></div>
<div style="text-align: center;"><span style="color: #404040;">★ Tula Special: Blue Aqua with Hot Pink</span></div>
<div style="text-align: center;"><span style="color: #404040;">★ Lavender with Neon Peach</span></div>
<p> </p>
<p><span style="color: #f414aa;"><img style="float: none;" alt="Tula Pink My webbing" src="https://cdn.shopify.com/s/files/1/2355/9259/files/TK-Webbing-3508-Edit.jpg?v=1626914229"></span></p>
<p> </p>
<p style="text-align: center;"><span style="color: #404040;">All these colors are very crazy, out there, but they go with every thing I try to combine with! They all go together!</span></p>
<p> </p>
<meta charset="utf-8">
<ol class="learning-center-ol"></ol>
<ul>
<li>
<h2><strong>Tip on sealing the Webbing ends:</strong></h2>
</li>
</ul>
<p>Nylon, polypropylene, and polyester webbing can all be sealed using an open flame. Hold the end of your webbing close to but not directly in the fire. Sweep the material back and forth close to the flame to evenly seal the ends. Do not catch the webbing on fire as it will create a burnt look on the end of your webbing.</p>
<div style="text-align: center;"><span style="color: #404040;">1 1/2" wide</span></div>
<div style="text-align: center;"><span style="color: #404040;">Nylon webbing</span></div>
<div style="text-align: center;"><span style="color: #404040;">Will be available wholesale ( 16 yd spools and Bundle of 6 colors)</span></div>
<div style="text-align: center;"><span style="color: #404040;">and retail (2 yd mini Packs)</span></div>
<p> </p>
<div style="text-align: center;"><a title="Tula Pink Webbing" href="https://renaissanceribbons.com/collections/tula-pink-webbing"><img style="float: none;" alt="New Tula Pink Webbing" src="https://cdn.shopify.com/s/files/1/2355/9259/files/webbing_4.jpg?v=1632617957"></a></div>
<p> </p>
<div style="text-align: center;"><a title="Tula Pink Webbing" href="https://renaissanceribbons.com/collections/tula-pink-webbing"><img style="float: none;" alt="Tula Pink Webbing" src="https://cdn.shopify.com/s/files/1/2355/9259/files/webbing_5.jpg?v=1632618045"></a></div>
<p> </p>
<p><a title="Tula Pink Webbing" href="https://renaissanceribbons.com/collections/tula-pink-webbing"><img alt="Tula Pink Webbing" src="https://cdn.shopify.com/s/files/1/2355/9259/files/webbing_stacked_with_ribbons.jpg?v=1632618139"></a></p>
<p>Here are some behind the scenes images:</p>
<p>How do we weave this fabulous Tula Pink weaving? It all starts with very fine threads that have to be arranged perfectly right to form the warp, it is called warping.</p>
<p> </p>
<div align="center"><video style="max-width: 50%; height: auto;" controls="controls">
  <source type="video/mp4" src="https://cdn.shopify.com/s/files/1/2355/9259/files/VIDEO-2021-08-29-19-13-22.mp4?v=1631308862">
Your browser does not support our video.
</source></video></div>
<div style="text-align: center;"><img style="float: none;" height="480x480" width="480x480" alt="How to weave Tula Pink new striped webbing" src="https://cdn.shopify.com/s/files/1/2355/9259/files/241095109_396280971911037_1657589938824585854_n_480x480.jpg?v=1631308862"></div>
<p><span style="color: #df2380;">. </span></p>
<div style="text-align: center;"><img style="float: none;" alt="How to weave Tula Pink new striped webbing" src="https://cdn.shopify.com/s/files/1/2355/9259/files/241151601_1221228294955718_8730700713508527707_n_480x480.jpg?v=1631308862"></div>
<meta charset="utf-8">
<p><br><img style="display: block; margin-left: auto; margin-right: auto;" alt="How to weave Tula Pink new striped webbing" src="https://cdn.shopify.com/s/files/1/2355/9259/files/TK-90-38mm_col_5_aqua_pink-C_240x240.jpg?v=1631308907"></p>
<p><span style="color: #df2380;"> </span></p>
<p> </p>
<p>This video showcases a brand new product line that I'm so excited to show you all! We've been hard at work with our friends at Renaissance Ribbons dialing in the most PERFECT webbing to use for bag making and I think we came up with exactly that!</p>
<p>Eek! Just look at how those color combos POP against the fabric!</p>
<p>More information coming soon!</p>
<p>Announced by Tula Pink on July 2020- here is the <a title="Watch the video" href="https://fb.watch/v/1iQJ8YfHo/">link to the video</a>:</p>
<p> </p>
<div style="text-align: center;" dir="auto"><a title="Tula Pink announces new product - Webbing" href="https://fb.watch/v/1iQJ8YfHo/"><img style="float: none;" alt="Tula Pink announces new webbing - it's a game changer" src="https://cdn.shopify.com/s/files/1/2355/9259/files/Tula-Pink-webbing-video-cover.jpg?v=1627404272"></a></div>
<h2 style="text-align: center;" dir="auto"></h2>
<meta charset="utf-8">
<p> </p>
<div style="text-align: center;"><meta charset="utf-8"></div>
<div style="text-align: center;">  </div>
<div style="text-align: center;"><span style="color: #404040;">The video refers to </span></div>
<div style="text-align: center;">
<span style="color: #404040;">Buckhorn Pattern and </span>SandHill Sling  by Noodle Head Design</div>
<div style="text-align: center;">"Stash and Dash" ByAnnie</div>
<div style="text-align: center;">FreeSpirit Fabrics: Curiouser and Curiouser - DayDreamer</div>
<div style="text-align: center;"></div>
<h1 style="text-align: center;"><strong>Transcription of the video</strong></h1>
<p>Tula July 20, 2021 Facebook Post</p>
<p> </p>
<p>I’m not totally ready to show this yet because there’s a lot of information we don’t have but I want to show you what I’ve got so far. I want to keep this honest and not just full of hyperbole and not say that this is the best thing that’s ever happened to me because if I really had to go through and make a list, I don’t know that webbing is it but, it’s really close! I am crazy excited by how this turned out! Outside of a brand-new fabric line which is about the most excited I ever get, this is right up there.</p>
<div style="text-align: center;"><img style="float: none;" alt="" src="https://cdn.shopify.com/s/files/1/2355/9259/files/Screen_Shot_2021-07-20_at_4.24.48_PM_240x240.png?v=1626916211"></div>
<p>I haven’t been this excited about something new in a really long time. It just came out so right. Sometimes when I’m developing a new product it is difficult to get it right. We have to go through several stages and it takes a really long time but this stuff just came in right, right, right and that pretty much never happens. Developing a product is painstaking especially if it’s something new that I haven’t done before. The company I’m working with – we’re developing it together and that’s what this is.</p>
<p><strong>So, I’m talking about my webbing here.</strong></p>
<p>I’ve made quite a lot of bags at this point and it’s a great way to show off fabric which is why I started doing it. {I was going to say you can’t make quilts all the time but of course that’s ridiculous, of course you can totally make quilts all the time – I do it.} Sometimes I just want to make something different, something that I can finish quickly. I can start a bag in the morning and usually have a bag by the end of day which is really nice.</p>
<div style="text-align: center;"><img style="float: none;" alt="" src="https://cdn.shopify.com/s/files/1/2355/9259/files/Screen_Shot_2021-07-20_at_4.30.13_PM_240x240.png?v=1626916211"></div>
<p>I showed you this pattern a while ago, the Buckthorn from Noodlehead which I love. I loved making this pattern, it’s a great pattern and I really enjoyed it so I decided to try another one of her patterns called the <strong>Sandhill Sling</strong>.</p>
<p>I had to make a slight modification for my fabric but the pattern is beautifully written and incredibly easy to make. She calls for canvas which is a sturdier fabric than the quilting cotton I’m using so when I made the first one I made it without Soft and Stable and it felt a little too floppy. So I opened it up and sewed in some Soft and Stable, put the bag back together and it worked out beautifully. It’s super cool – it’s a one-armed bag and it even fits me and I didn’t alter it in any way. It’s a cool, throw-it-on bag with a front pocket.</p>
<p>Something I would like to point out is that I fussy-cut the flap to fit the pocket but if I tried to do it again I’m not sure that I could. So here finally is the green and blue webbing and I matched the interior to the webbing. This other bag is from the new Daydreamer fabric line and I used the accent colors from each fabric to choose the webbing. I used this iridescent hardware from Pink Door Fabrics and Emily Bags sells iridescent hardware too, I believe. Here’s another Sandhill Sling and on this one I used the slushy orange, hot watermelon combo.</p>
<p>I do have actual names for these colors but they’re new and I haven’t committed them to memory. I also wanted to make something little because even though this webbing is 1-1/2” wide, I always use 1-1/2” webbing even if a pattern calls for 1” webbing I just like a sturdy, heavy webbing.</p>
<div style="text-align: center;"><img style="float: none;" alt="" src="https://cdn.shopify.com/s/files/1/2355/9259/files/Screen_Shot_2021-07-20_at_4.33.42_PM_240x240.png?v=1626916211"></div>
<p>So this is little and I’ve had this pattern forever – it’s a By Annie pattern – it’s just a cute catch-all bag. I hate making ends for things but I thought it was cute to put a little ribbon end on this one that matched the fabric. On the back of this I put this vinyl pocket that I got from Sew Hungry Hippy. She has a lot of cool vinyls. I would call this Tula Classic color palette with the hot pink/aqua combo. I haven’t been able to make all ones I want to make yet – I haven’t had the time.</p>
<p> </p>
<div style="text-align: center;"><img style="float: none;" alt="" src="https://cdn.shopify.com/s/files/1/2355/9259/files/Screen_Shot_2021-07-20_at_4.29.57_PM_240x240.png?v=1626916211"></div>
<p><strong>So, let’s go through the colors</strong>. This one is bright soft pink – not so soft actually – a bright pink/tangerine orange. This one is a hot slushy watermelon and plum. Here is our soft dove gray with the neon yellow. Next the classic lime with a bright aqua. And the Tula Special, the blue aqua with the hot pink and lastly, the lavender with neon peach – amazing I know! I don’t remember picking them out.</p>
<p style="text-align: center;"> <img alt="Tula Pink My Webbing" src="https://cdn.shopify.com/s/files/1/2355/9259/files/TK-Webbing-3508-Edit_480x480.jpg?v=1626914229"></p>
<p>Since I haven’t been able to make the last two bags, I’ll just show you what I’m planning on making just to give you an idea of colors.</p>
<p>I want to try making another pattern from <strong>Noodlehead called the Range Backpack.</strong> This one is formatted a little differently because I downloaded it as a pdf from her website because I wanted to try it now, now, now! For that one I want to use this copper hardware from Sally Tomato, which I always love, using the Daydreamer Flamingos. This one has a top and bottom and you’ll only get a peak of this lavender on the webbing but I think it will be really cool.</p>
<p>The pattern uses quite a lot of webbing because obviously to show off the webbing I want to make things that have a lot of webbing in them. The other one I have left to make is with this combo which is really my favorite (pink &amp; orange) in terms of how it combines with all my fabrics (but I say that and I really don’t mean it, if I’m being honest).  I’m still trying to decide but I’m thinking I might make the <strong>By Annie duffel bag with the Ultimate Travel Bag</strong> that goes on top because that one is so great for taking fabric and sewing supplies to retreats, etc. I’m thinking of using this one (pink/orange) on the Flamingo fabric but here’s the cool thing – when I laid it on the Fairy Dust from True Colors it’s almost exactly the same colors.</p>
<p><strong>Here’s what I love about these webbing colors</strong> – I don’t know how this happened and I’m genuinely baffled by it myself – but all these colors are super crazy. These are not black and white, not pink and beige – <strong>these are pretty “out-there” color combinations and yet they all easily work with almost every fabric interchangeably.</strong></p>
<div style="text-align: center;"><img style="float: none;" alt="" src="https://cdn.shopify.com/s/files/1/2355/9259/files/Screen_Shot_2021-07-20_at_4.27.40_PM_240x240.png?v=1626916212"></div>
<p>I keep recombining the fabrics and webbing – they all totally work. Well, it’s not la huge mystery – I picked all the colors for the fabric and the webbing so I guess I shouldn’t be all that shocked by it.</p>
<p>Every time I try to match these up, every single one worked – each one was a valid option. I don’t feel like I will ever use any other webbing again – I just like it that much. <strong>I love the striped aspect of it and to me the webbing just makes a bag feel a bit elevated.</strong> I’ve never liked a fabric strap just “looks-wise” even though it’s totally comfortable. I always feel like the oils from your hands catch on a fabric strap and over time it breaks down really quickly and it starts to look dirty on the handle.</p>
<p><strong> When I started making bags I fell in love with webbing, particularly nylon webbing, because it doesn’t absorb the oil from your hands and they last longer, look cleaner and it gives a slightly more professional loo</strong>k which I like especially since I was always so insecure about my bag-making abilities so any little kick of confidence I could give myself when the bag was put together, I wanted.</p>
<p>So webbing, I’m super excited!</p>
<p> SUGGESTIONS ON PROJECTS TO MAKE:</p>
<p>1. Adjustable Yoga Mat Strap Wrap- Free Photo Tutorial on Sew4Home</p>
<p>https://sew4home.com/adjustable-yoga-mat-strap-wrap/</p>
<p> </p>]]>
    </content>
  </entry>
  <entry>
    <id>https://renaissanceribbons.com/blogs/ribbon-crafts/in-control-everglow-kit-addendum</id>
    <published>2023-08-02T11:30:00-06:00</published>
    <updated>2023-08-02T11:46:36-06:00</updated>
    <link rel="alternate" type="text/html" href="https://renaissanceribbons.com/blogs/ribbon-crafts/in-control-everglow-kit-addendum"/>
    <title>In Control EverGlow Kit Addendum</title>
    <author>
      <name>Edith Minne</name>
    </author>
    <content type="html">
      <![CDATA[<p> <img alt="In control kit by Annie Tula Pink EverGlow webbing" src="https://cdn.shopify.com/s/files/1/2355/9259/files/KOB_90_TK_All_Ears_-1-Edit_600x600.jpg?v=1686770406"></p>
<p> Fabulous edition of the In Control Pattern ByAnnie for this Months Special Tula Pink Kit Club!</p>
<h2 style="text-align: center;"><span style="color: #f334b0;"><a title="Get your Tula Pink All Ears Everglow elephants" href="https://renaissanceribbons.com/products/kit-in-control-everglow-aura-tula-pink" style="color: #f334b0;" target="_blank">Get your kit! </a></span></h2>
<h3 style="text-align: center;"><strong><span style="color: #f11ce0;">Additional information to help you sew your kit successfully! </span></strong></h3>
<p style="text-align: center;">To highlight <b>Tula Pink’s All Ears</b> fabric from her EverGlow  Collection, we fussy cut the elephants for front and back exterior pockets cutting them slightly larger than the pattern dimensions to accommodate for any shrinkage which may occur during quilting. We then quilt these pieces using either a light thread or an invisible thread, free-motion meandering around the outline of the elephants which makes the images pop. There is plenty of remaining fabric to quilt the other pieces of the caddy, and to complete the inner accordion-style dividers. </p>
<br>
<p><span style="font-weight: 400;">We made the stabilizer sleeve with the tent stripe fabric</span></p>
<p> </p>
<p><span style="font-weight: 400;">We opted to eliminate the zipper from Pocket D, and, instead, created two Pocket C’s, by simply binding the top long edge of each piece.</span></p>
<p><span style="font-weight: 400;"><img alt="In control kit by Annie Tula Pink EverGlow webbing" src="https://cdn.shopify.com/s/files/1/2355/9259/files/KOB_90_TK_All_Ears_-2-2-Edit_480x480.jpg?v=1686770447"></span></p>
<p><span style="font-weight: 400;">Our handles are made from Tula Pink webbing which makes fast work of a normally tedious process. When working with nylon webbing, I like to slightly singe each cut end with a lighter to eliminate fraying; you can also use a product like Fray Check.</span></p>
<p><span style="font-weight: 400;"><b>Webbing Cutting Instructions:</b></span></p>
<p><span style="font-weight: 400;">For the handle tabs, cut four 6 ½” strips</span></p>
<p><span style="font-weight: 400;">For the handles, cut two 16” strips</span></p>
<p><span style="font-weight: 400;"><b>To Make Handle Tabs:</b></span></p>
<p><span style="font-weight: 400;">Insert 1 ½” of webbing into 1” rectangle ring, fold over the webbing, and sew to secure. I like to make a ¾” box with an X inside. I stitch this twice for extra security. Make 4.</span></p>
<p><span style="font-weight: 400;"><b>To Make Handles:</b></span></p>
<p><span style="font-weight: 400;">Mark a line 4 ½” from each side. Fold the webbing in half and stitch between these marked lines. I stitched at 1/8” intervals to secure—your thread will show, so pay attention to both your top thread and your bobbin thread.</span></p>
<p><b>To Complete Handle Units:</b></p>
<p><b><span style="font-weight: 400;">Follow the instructions in Section IIC. Make Handle Units in the printed ByAnnie pattern.</span></b></p>
<p><strong><img alt="In control kit by Annie Tula Pink EverGlow" src="https://cdn.shopify.com/s/files/1/2355/9259/files/KOB_90_TK_All_Ears_-22-Edit_480x480.jpg?v=1686770266">. <img alt="In control kit by Annie Tula Pink EverGlow Webbing" src="https://cdn.shopify.com/s/files/1/2355/9259/files/KOB_90_TK_All_Ears_-23-10_480x480.jpg?v=1686770293"></strong></p>
<p style="text-align: center;"><meta charset="utf-8"><span style="color: #fd22d8;"><a href="https://cdn.shopify.com/s/files/1/2355/9259/files/KOB_90_SA_elephants_cover.jpg?v=1690997998" title="addendum to make the All ears Everglow In control Kit" style="color: #fd22d8;" data-mce-fragment="1" data-mce-href="https://cdn.shopify.com/s/files/1/2355/9259/files/KOB_90_SA_elephants_cover.jpg?v=1690997998" target="_blank">Download the addendum with the additional instructions</a> </span></p>
<p><strong>Sample made by the great LazySewist Kim Greenfeld ❤️</strong></p>
<p><b><span style="font-weight: 400;">Enjoy your beautiful creation and please, share your pictures by email at info@renaissanceribbons.com</span></b></p>
<p><img alt="All Ears Tula Pink EverGlow" src="https://cdn.shopify.com/s/files/1/2355/9259/files/KOB_90_SA_elephants_cover_480x480.jpg?v=1690997998"></p>
<h2 style="text-align: center;"><span style="color: #f91dd4;"><a href="https://renaissanceribbons.com/products/kit-in-control-everglow-aura-tula-pink" title="Get your Tula Pink All Ears Everglow elephants" style="color: #f91dd4;" target="_blank">Get your kit! </a></span></h2>
<p style="text-align: center;"><a href="https://cdn.shopify.com/s/files/1/2355/9259/files/KOB_90_SA_elephants_cover.jpg?v=1690997998" target="_blank" title="addendum to make the All ears Everglow In control Kit " rel="noopener noreferrer"><span style="color: #f91dd4;">Download the addendum with the additional instructions</span></a></p>]]>
    </content>
  </entry>
  <entry>
    <id>https://renaissanceribbons.com/blogs/ribbon-crafts/make-your-own-velvet-slippers</id>
    <published>2023-06-29T11:57:48-06:00</published>
    <updated>2023-08-23T18:09:37-06:00</updated>
    <link rel="alternate" type="text/html" href="https://renaissanceribbons.com/blogs/ribbon-crafts/make-your-own-velvet-slippers"/>
    <title>Velvet Slippers-Photo Tutorial</title>
    <author>
      <name>Edith Minne</name>
    </author>
    <content type="html">
      <![CDATA[<h2>Now available! </h2>
<p>Create something special for everyday use! <br>These easy-to-make slippers work up quickly and can be customized for gift-giving, lounging, post-shower, travel, and more.</p>
<p>Great project for additional, ribbon embellishment, embroidery designs, and beading- the sky's the limit regarding creativity.</p>
<h3 style="text-align: center;"><span style="color: #ff2a00;">Link to download the <a style="color: #ff2a00;" title="FREE PDF PATTERN VELVET SLIPPERS" href="https://cdn.shopify.com/s/files/1/2355/9259/files/Velvet_slipper_RS_85e2ed42-2f77-413f-b54d-cfea26008dec.pdf?v=1679586305" target="_blank">FREE PDF Pattern -Velvet Slippers</a></span></h3>
<div style="text-align: right;"><img style="margin: 10px 148.25px 10px 148.25px; float: none;" alt="French Velvet Slippers Kit DIY Odile B Kaffe Fassett" src="https://cdn.shopify.com/s/files/1/2355/9259/files/Velvet_slippers-Blossom-_Cover_240x240.jpg?v=1688061053"></div>
<div style="text-align: right;">
<meta charset="utf-8">
<h1 style="text-align: center;"><strong>Photo Tutorial - Step by Step-</strong></h1>
<p style="text-align: left;"><strong><img alt="Photo Tutorial Velvet Slippers" src="https://cdn.shopify.com/s/files/1/2355/9259/files/KVSL_0961_Velvet_Slipper_steps.3_240x240.jpg?v=1690306747">  <img src="https://cdn.shopify.com/s/files/1/2355/9259/files/KVSL_0959_Velvet_Slipper_steps.1_240x240.jpg?v=1690306747" alt="Photo Tutorial Velvet Slippers" data-mce-fragment="1" data-mce-src="https://cdn.shopify.com/s/files/1/2355/9259/files/KVSL_0959_Velvet_Slipper_steps.1_240x240.jpg?v=1690306747">. <img src="https://cdn.shopify.com/s/files/1/2355/9259/files/KVSL_0965_Velvet_Slipper_steps_55270ed1-93d0-45db-becb-271b76e62773_240x240.jpg?v=1690306746" alt="Photo Tutorial Velvet Slippers" data-mce-fragment="1" data-mce-src="https://cdn.shopify.com/s/files/1/2355/9259/files/KVSL_0965_Velvet_Slipper_steps_55270ed1-93d0-45db-becb-271b76e62773_240x240.jpg?v=1690306746">. <img src="https://cdn.shopify.com/s/files/1/2355/9259/files/KVSL_0966_Velvet_Slipper_steps.5_240x240.jpg?v=1690306743" alt="Photo Tutorial Velvet Slippers" data-mce-fragment="1" data-mce-src="https://cdn.shopify.com/s/files/1/2355/9259/files/KVSL_0966_Velvet_Slipper_steps.5_240x240.jpg?v=1690306743">  <img src="https://cdn.shopify.com/s/files/1/2355/9259/files/KVSL_0968_Velvet_Slipper_steps.7_240x240.jpg?v=1690306745" alt="Photo Tutorial Velvet Slippers" data-mce-fragment="1" data-mce-src="https://cdn.shopify.com/s/files/1/2355/9259/files/KVSL_0968_Velvet_Slipper_steps.7_240x240.jpg?v=1690306745">  <img src="https://cdn.shopify.com/s/files/1/2355/9259/files/KVSL_0969_Velvet_Slipper_steps.8_240x240.jpg?v=1690306744" alt="Photo Tutorial Velvet Slippers" data-mce-fragment="1" data-mce-src="https://cdn.shopify.com/s/files/1/2355/9259/files/KVSL_0969_Velvet_Slipper_steps.8_240x240.jpg?v=1690306744">. <img src="https://cdn.shopify.com/s/files/1/2355/9259/files/KVSL_0971_Velvet_Slipper_steps.10_240x240.jpg?v=1690306745" alt="Photo Tutorial Velvet Slippers" data-mce-fragment="1" data-mce-src="https://cdn.shopify.com/s/files/1/2355/9259/files/KVSL_0971_Velvet_Slipper_steps.10_240x240.jpg?v=1690306745">. <img src="https://cdn.shopify.com/s/files/1/2355/9259/files/KVSL_0970_Velvet_Slipper_steps.9_240x240.jpg?v=1690306746" alt="Photo Tutorial Velvet Slippers" data-mce-fragment="1" data-mce-src="https://cdn.shopify.com/s/files/1/2355/9259/files/KVSL_0970_Velvet_Slipper_steps.9_240x240.jpg?v=1690306746">  <img src="https://cdn.shopify.com/s/files/1/2355/9259/files/KVSL_0972_Velvet_Slipper_steps.11_240x240.jpg?v=1690306743" alt="Photo Tutorial Velvet Slippers" data-mce-fragment="1" data-mce-src="https://cdn.shopify.com/s/files/1/2355/9259/files/KVSL_0972_Velvet_Slipper_steps.11_240x240.jpg?v=1690306743">  <img src="https://cdn.shopify.com/s/files/1/2355/9259/files/KVSL_0962_Velvet_Slipper_steps.14_240x240.jpg?v=1690306743" alt="Photo Tutorial Velvet Slippers" data-mce-fragment="1" data-mce-src="https://cdn.shopify.com/s/files/1/2355/9259/files/KVSL_0962_Velvet_Slipper_steps.14_240x240.jpg?v=1690306743"></strong></p>
</div>
<div style="text-align: right;"></div>
<div style="text-align: center;"></div>
<p>We use the very soft French Velvet Border to make your slipper, some soft and Stable to add firmness, Designer quilting cotton as the binding and a good quality anti skid gripper fabric for the sole! Et Voila!</p>
<h2 style="text-align: center;"><span style="color: #ff2a00;"><a style="color: #ff2a00;" title="Velvet Slippers Kits - with PDF Pattern" href="https://renaissanceribbons.com/collections/velvet-slippers-kits" target="_blank">See the complete Collection  </a></span></h2>
<p style="text-align: center;">Adjust the size of the template and make any size you want! </p>
<div style="text-align: center;"><img style="float: none;" alt="French Velvet Slippers Kit DIY Odile B Kaffe Fassett" src="https://cdn.shopify.com/s/files/1/2355/9259/files/Velvet_Slippers_Kingfisher_480x480.jpg?v=1688061096"></div>
<p>  </p>
<div style="text-align: center;"><img style="float: none;" alt="French Velvet Slippers Kit DIY Odile B Kaffe Fassett" src="https://cdn.shopify.com/s/files/1/2355/9259/files/Kingfisher_Content_480x480.jpg?v=1688061528"></div>
<p class="p1">Experience a bit of luxury and comfort with our exquisite Velvet Slippers sewing kit. Make your own pair of colorful and oh-so-soft velvet slippers, adorned with the fabulous French Velvet borders designed and printed by the renowned artist Odile Bailloeul.</p>
<div style="text-align: center;"><img style="float: none;" alt="French Velvet Slippers  Free PDF Pattern Complete kits" src="https://cdn.shopify.com/s/files/1/2355/9259/files/Velvet_Slippers_Roses_on_green_480x480.jpg?v=1688061096"></div>
<p class="p2"> </p>
<div style="text-align: center;"><img style="float: none;" alt="French Velvet Slippers  Free PDF Pattern Complete kits" src="https://cdn.shopify.com/s/files/1/2355/9259/files/Roses_on_Green_Content_480x480.jpg?v=1688061528"></div>
<p class="p2"> </p>
<p class="p1">Step into a world of opulence and make every day special with these slippers, perfect for all occasions.Indulge in the pleasure of creating your own personalized pair of slippers effortlessly, as our kit guarantees a quick and seamless process.</p>
<p class="p1">Whether you're seeking a delightful gift, a cozy lounging accessory, a post-shower treat, or a travel companion, these versatile slippers will cater to your every need.</p>
<meta charset="utf-8">
<p class="p1"><span>How about house slippers for guests and family to put on at the front door! </span></p>
<p class="p2"> </p>
<p class="p1"> </p>
<div style="text-align: center;"><img style="float: none;" alt="French Velvet Slippers Kit DIY Odile B Kaffe Fassett" src="https://cdn.shopify.com/s/files/1/2355/9259/files/Velvet_Slippers_Busy_Lizzie_480x480.jpg?v=1688061095"></div>
<p> </p>
<div style="text-align: center;"><img style="float: none;" alt="French Velvet Slippers Kit DIY Odile B Kaffe Fassett" src="https://cdn.shopify.com/s/files/1/2355/9259/files/Busy_Lizzie_content_480x480.jpg?v=1688061528"></div>
<p> </p>
<meta charset="utf-8">
<p class="p1">Unlock your inner designer and embark on a journey of style and refinement. Our sewing kit provides everything you require to bring your vision to life, enabling you to customize your slippers to perfection. You can add bead and a bit of glitz, add  ribbons on the side, sew a button on top! </p>
<p class="p1">Elevate your everyday routine with a touch of elegance and grace, with our charming Velvet Slippers sewing kit.</p>
<p class="p1">With our sewing kit, the delightful allure of French Velvet borders meets the art of sewing, resulting in a fun and easy project, once you made one pair of slippers, you will want to make them all! </p>
<p> </p>
<meta charset="utf-8">
<h3><span style="color: #ff2a00;">Link to download the<a style="color: #ff2a00;" title="FREE PDF PATTERN VELVET SLIPPERS" href="https://cdn.shopify.com/s/files/1/2355/9259/files/Velvet_slipper_RS_85e2ed42-2f77-413f-b54d-cfea26008dec.pdf?v=1679586305" target="_blank"> FREE PDF Pattern -Velvet Slippers</a></span></h3>
<p style="text-align: center;"> <img alt="Make your own Velvet Slippers with our Kits" src="https://cdn.shopify.com/s/files/1/2355/9259/files/Velvet_Slippers_PIN-01.jpg?v=1689562162">     </p>
<p style="text-align: center;"> </p>
<h1 style="text-align: center;"><strong>Photo Tutorial - Step by Step-</strong></h1>
<p style="text-align: left;"><img alt="Photo tutorial Velvet Slippers Renaissance Ribbons-Free Pattern" src="https://cdn.shopify.com/s/files/1/2355/9259/files/KVSL_0960_Velvet_Slipper_steps.2_480x480.jpg?v=1690306747">. <img alt="Photo tutorial Velvet Slippers Renaissance Ribbons-Free Pattern" src="https://cdn.shopify.com/s/files/1/2355/9259/files/KVSL_0961_Velvet_Slipper_steps.3_480x480.jpg?v=1690306747"></p>
<p style="text-align: left;"><img alt="Photo tutorial Velvet Slippers Renaissance Ribbons-Free Pattern" src="https://cdn.shopify.com/s/files/1/2355/9259/files/KVSL_0959_Velvet_Slipper_steps.1_480x480.jpg?v=1690306747"></p>
<p style="text-align: left;"><img alt="Photo tutorial Velvet Slippers Renaissance Ribbons-Free Pattern" src="https://cdn.shopify.com/s/files/1/2355/9259/files/KVSL_0965_Velvet_Slipper_steps_55270ed1-93d0-45db-becb-271b76e62773_480x480.jpg?v=1690306746"></p>
<p style="text-align: left;"><img alt="Photo tutorial Velvet Slippers Renaissance Ribbons-Free Pattern" src="https://cdn.shopify.com/s/files/1/2355/9259/files/KVSL_0966_Velvet_Slipper_steps.5_480x480.jpg?v=1690306743"></p>
<p style="text-align: left;"><img alt="Photo tutorial Velvet Slippers Renaissance Ribbons-Free Pattern" src="https://cdn.shopify.com/s/files/1/2355/9259/files/KVSL_0967_Velvet_Slipper_steps.6_480x480.jpg?v=1690306742"></p>
<p style="text-align: left;"> </p>
<p style="text-align: left;"><img alt="Photo tutorial Velvet Slippers Renaissance Ribbons-Free Pattern" src="https://cdn.shopify.com/s/files/1/2355/9259/files/KVSL_0968_Velvet_Slipper_steps.7_480x480.jpg?v=1690306745"></p>
<p style="text-align: left;"><img alt="Photo tutorial Velvet Slippers Renaissance Ribbons-Free Pattern" src="https://cdn.shopify.com/s/files/1/2355/9259/files/KVSL_0969_Velvet_Slipper_steps.8_480x480.jpg?v=1690306744"></p>
<p style="text-align: left;"> </p>
<p style="text-align: left;"><img alt="Photo tutorial Velvet Slippers Renaissance Ribbons-Free Pattern" src="https://cdn.shopify.com/s/files/1/2355/9259/files/KVSL_0970_Velvet_Slipper_steps.9_480x480.jpg?v=1690306746"></p>
<p style="text-align: left;"><img alt="Photo tutorial Velvet Slippers Renaissance Ribbons-Free Pattern" src="https://cdn.shopify.com/s/files/1/2355/9259/files/KVSL_0971_Velvet_Slipper_steps.10_480x480.jpg?v=1690306745"></p>
<p style="text-align: left;"><img alt="Photo tutorial Velvet Slippers Renaissance Ribbons-Free Pattern" src="https://cdn.shopify.com/s/files/1/2355/9259/files/KVSL_0972_Velvet_Slipper_steps.11_480x480.jpg?v=1690306743"></p>
<p style="text-align: left;"><img alt="Photo tutorial Velvet Slippers Renaissance Ribbons-Free Pattern" src="https://cdn.shopify.com/s/files/1/2355/9259/files/KVSL_0962_Velvet_Slipper_steps.14_480x480.jpg?v=1690306743"></p>
<p style="text-align: left;"><img alt="Photo tutorial Velvet Slippers Renaissance Ribbons-Free Pattern" src="https://cdn.shopify.com/s/files/1/2355/9259/files/KVSL_0963_Velvet_Slipper_steps.13_480x480.jpg?v=1690306742"></p>
<p style="text-align: left;"><img alt="" src="https://cdn.shopify.com/s/files/1/2355/9259/files/velvetslippersblossom_480x480.jpg?v=1688077510"></p>
<p style="text-align: left;"> </p>
<meta charset="utf-8">
<h1 style="text-align: center;"><a title="All velvet Slippers Kits" href="https://renaissanceribbons.com/collections/velvet-slippers-kits" target="_blank"><span style="color: #ff2a00;">Collect and make them all!!</span></a></h1>
<p><span style="color: #ff2a00;"><img alt="https://renaissanceribbons.com/collections/velvet-slippers-kits" src="https://cdn.shopify.com/s/files/1/2355/9259/files/Velvet_slippers_PX-2x1_1024x1024.jpg?v=1689562797"></span></p>
<p> </p>]]>
    </content>
  </entry>
  <entry>
    <id>https://renaissanceribbons.com/blogs/ribbon-crafts/chevron-ribbon-pouch</id>
    <published>2023-06-16T19:25:08-06:00</published>
    <updated>2023-07-03T14:21:48-06:00</updated>
    <link rel="alternate" type="text/html" href="https://renaissanceribbons.com/blogs/ribbon-crafts/chevron-ribbon-pouch"/>
    <title>How to make a Ribbon Chevron Pouch</title>
    <author>
      <name>Edith Minne</name>
    </author>
    <content type="html">
      <![CDATA[<p><span style="font-weight: 400;">Chevron Ribbon Pouch   </span></p>
<p class="p1">The concept of <strong>Ribbon Art</strong> opens up a world of creative possibilities using the woven jacquard ribbons offered by Renaissance Ribbons. With this technique, you can create your own fabric by stitching ribbons together</p>
<p class="p1">This Ribbon Chevron Pouch is a small project to get started!</p>
<p style="text-align: center;"><b><i>  Cutting and sewing Instructions</i></b></p>
<p><b>1)</b> <b>Cut the fabric and interfacings as follow:</b></p>
<ul>
<li style="font-weight: 400;">
<span style="font-weight: 400;">Exterior back:  fabric A  </span><b>cut</b><span style="font-weight: 400;"> 1 piece 6 ¾” by 8 ¼” wide</span>
</li>
<li style="font-weight: 400;">
<span style="font-weight: 400;">Lining: fabric  A </span><b>cut</b><span style="font-weight: 400;"> 1 piece 7 ¾” by 15 ½” wide</span>
</li>
<li style="font-weight: 400;">
<span style="font-weight: 400;">Pellon fusible 808 ( craft Fuse)  for the exterior front </span><b>trim</b><span style="font-weight: 400;"> 1 piece 6 ¾” by 8 ¼” wide</span>
</li>
<li style="font-weight: 400;">
<span style="font-weight: 400;">Fusible Fleece for the exterior back </span><b>trim</b><span style="font-weight: 400;"> 1 piece  6” by 7 ½</span>
</li>
</ul>
<p><span style="font-weight: 400;">Note: if you use a non fusible foam or other interfacing cut it 6 ¾” by 8 ¼” wide</span></p>
<p><b> </b></p>
<p><b>2)</b> <b>Create the Ribbon front Exterior piece</b><span style="font-weight: 400;"> </span></p>
<p><span style="font-weight: 400;">This Pellon 808 ( Fusible craft weight interfacing) is used as a base to stitch the ribbons on.</span></p>
<p><span style="font-weight: 400;">Place shiny face up - do not iron until the end! Place the</span><b> Pellon piece horizontally</b><span style="font-weight: 400;"> (3 photos below)</span></p>
<p><span style="font-weight: 400;">Mark a horizontal line ½” from top ( that will be your seam line when you are assembling front and back, a vertical line marking the middle and a few 45 degree lines from your middle line - </span><b><i>see illustration A - </i></b><i><span style="font-weight: 400;">TIP: be sure to respect the 45 degree angle</span></i></p>
<p><i><span style="font-weight: 400;"><img src="https://cdn.shopify.com/s/files/1/2355/9259/files/KRR_11_JS_Project_-1_240x240.jpg?v=1686964741" alt="Ribbon Chevron Pouch FREE TUTORIAL"> <img src="https://cdn.shopify.com/s/files/1/2355/9259/files/KRR_11_JS_Project_-2_240x240.jpg?v=1686964783" alt="Ribbon Chevron Pouch FREE TUTORIAL"> </span></i></p>
<p><i><span style="font-weight: 400;">TIP: </span></i><b><i>Make sure the two ribbons overlap exactly on center line 2 and overlap the top of the base Pellon piece</i></b><i><span style="font-weight: 400;"> - this will determine the rest of the ribbon placement.- see illustration B</span></i></p>
<p><span style="font-weight: 400;">Continue building your chevron pattern making sure that the ends of the ribbons consistently overlap the line 1 and the center line 2. - see illustration C </span></p>
<p><span style="font-weight: 400;"><img src="https://cdn.shopify.com/s/files/1/2355/9259/files/KRR_11_JS_Project_-4_240x240.jpg?v=1686964830" alt="Ribbon Chevron Pouch FREE TUTORIAL"> <img src="https://cdn.shopify.com/s/files/1/2355/9259/files/KRR_11_JS_Project_-11_240x240.jpg?v=1686964864" alt="Ribbon Chevron Pouch FREE TUTORIAL"></span></p>
<p> </p>
<p><span style="font-weight: 400;">Trim the ribbon panel to 6 ¾” x 8 ¼” to match the back fabric. </span></p>
<p><span style="font-weight: 400;">Press the finished Ribbon Panel from the wrong side.</span></p>
<p><span style="font-weight: 400;"> </span></p>
<p><span style="font-weight: 400;">Cut a 3” piece from the ⅞” ribbon to make the tag, position it 1” from top of ribbon, baste in place on the Exterior - see illustration D.        </span></p>
<p><b>3) Assemble front and back:</b><span style="font-weight: 400;"> </span></p>
<p><i><span style="font-weight: 400;">TIP:To avoid bulky seams, precut the fleece panel ⅜”” smaller than the fabric.</span></i></p>
<p><span style="font-weight: 400;"> Center the fusible fleece panel  on top of the WS of the exterior back panel (fabric A) - Iron and fuse fleece and fabric.Square both panels at the same size, align and stitch RS together with a  ⅝” SA on sides and bottom, trim the corners, turn inside out, gently poking the corners out.</span></p>
<p><b>4)</b> <b>Prepare and assemble the lining and the bag</b></p>
<p><span style="font-weight: 400;">Fold in two. Stitch up the 7 ¾” vertical side  with ¼” seam allowance making a tube.</span></p>
<p><b><i>TIP: before stitching, check that the lining and the assembled bag fit exactly. </i></b></p>
<p><span style="font-weight: 400;">Assemble the lining following these steps:</span></p>
<ol>
<li style="font-weight: 400;"><span style="font-weight: 400;">Insert the exterior bag inside the lining tube, right sides together.</span></li>
<li style="font-weight: 400;"><span style="font-weight: 400;">Align/pin neatly both raw edges ( lining and bag), carefully matching both seams</span></li>
<li style="font-weight: 400;"><span style="font-weight: 400;">Stitch along the top edge</span></li>
<li style="font-weight: 400;"><span style="font-weight: 400;">Push inside the lining - fold the top to create a ½ “ border - press with fingers and for a better finish stitch  in the ditch on the outside along the seam</span></li>
</ol>
<p><i><span style="font-weight: 400;">TIP: stitch in the ditch for a better finish</span></i></p>
<p><span style="font-weight: 400;"></span><b>5) add a closure </b><span style="font-weight: 400;">by inserting a magnetic snap on both sides of the lining, approximately ¾" below the top of the bag. Alternatively, you can use colored plastic Kam Snaps on the outside  for a unique touch. </span></p>
<p><b><i>TIP:</i></b><i><span style="font-weight: 400;"> Search: <strong><span style="color: #ff2a00;">“How to install a magnetic snap”</span></strong> online, if you are new to this technique.</span></i><span style="font-weight: 400;"> Here is a <a href="https://youtu.be/sTt6iWt4NrQ" target="_blank" title="how to install a magnetic snap" rel="noopener noreferrer">full video Tutorial</a> and<a href="https://youtu.be/7Jq7n1l0suA" target="_blank" title="How To • Install Magnetic Snaps" rel="noopener noreferrer"> an other one too by Emmaline Bag</a></span></p>
<p><b><br>6) Complete the bottom seam. <span style="font-weight: 400;">Press the fabric inside and out to give it a clean finish. </span></b></p>
<p style="text-align: center;"><b> et Voila!</b></p>
<p style="text-align: center;"><img src="https://cdn.shopify.com/s/files/1/2355/9259/files/KRR11RBOIvPX_480x480.jpg?v=1686962497" alt=""> </p>
<p style="text-align: center;"> </p>]]>
    </content>
  </entry>
  <entry>
    <id>https://renaissanceribbons.com/blogs/ribbon-crafts/ribbon-keychains</id>
    <published>2023-06-14T13:24:00-06:00</published>
    <updated>2024-03-13T15:13:49-06:00</updated>
    <link rel="alternate" type="text/html" href="https://renaissanceribbons.com/blogs/ribbon-crafts/ribbon-keychains"/>
    <title>Handmade Ribbon Keychains: Crafting Personalized DIY Key Rings</title>
    <author>
      <name>Edith Minne</name>
    </author>
    <content type="html">
      <![CDATA[<meta charset="utf-8">
<h4><span></span></h4>
<p><span>DIY Ribbon Key Rings are a fun and easy way to add a pop of color and personality to your accessories. Crafting Ribbon Keychains is a great way to express your creativity and make something unique and they make great gifts! 🎁</span></p>
<h3 style="text-align: center;"><a href="https://renaissanceribbons.com/collections/key-fobs-supplies" title="key fob supplies" target="_blank"><span style="color: #ff2a00;">Get your Key Fob Supplies</span></a></h3>
<div style="text-align: start;"><img src="https://cdn.shopify.com/s/files/1/2355/9259/files/KK_OB_Fobs_2_600x600.jpg?v=1686770787" alt="KeyFob Kits Odile Bailloeul"></div>
<div style="text-align: start;"></div>
<div style="text-align: start;"><img src="https://cdn.shopify.com/s/files/1/2355/9259/files/HB_Keyfobs-12a_feef71ea-b968-4534-ab5a-ecbce105b3ba_600x600.jpg?v=1669689363" alt="Handmade Ribbon Keychains: Crafting Personalized DIY Key Rings | Renaissance Ribbons" style="float: none;"></div>
<meta charset="utf-8">
<p style="text-align: center;"><span><strong><span style="color: #ff2a00;">Love this image? Pin it to your sewing and DIY board</span></strong> and share the inspiration with your fellow creators</span></p>
<p> </p>
<p>In this<strong> Ribbon Keychain Tutorial</strong> - How to make a Key Fob - we quickly  guide you through the step-by-step process of creating your own Personalized Ribbon Keychains.</p>
<p><img src="https://cdn.shopify.com/s/files/1/2355/9259/files/2_4282e9b4-6030-49ce-ba56-16fc02442bcb_600x600.jpg?v=1684195296" alt="Learn how to make unique and personalized ribbon keychains with our step-by-step tutorial. Get creative with Renaissance Ribbons and make your own DIY key rings today!" style="display: block; margin-left: auto; margin-right: auto;"></p>
<meta charset="utf-8">
<p style="text-align: center;"><span style="color: #ff2a00;">Follow this <a href="https://pin.it/2yMN7sA" title="Pinterest board how to make a ribbon Key FOB" target="_blank"><strong>Pinterest board</strong></a> for all the project pins</span></p>
<p style="text-align: center;"> </p>
<p><span>So, let's get started and add some flair to your keys! DIY Ribbon Keychains: Personalized Accessories in a Snap! -</span></p>
<h4 style="padding-left: 30px; text-align: center;"><a href="https://renaissanceribbons.com/collections/key-fobs-supplies" title="Learn how to make unique and personalized ribbon keychains with our step-by-step tutorial. Get creative with Renaissance Ribbons and make your own DIY key rings today!" target="_blank"><strong><span style="color: #ff2a00;">Click and Shop Collection of supplies! </span></strong></a></h4>
<ul>
<li><span>Gather your materials -Hardware, webbing, ribbon, clamping tool</span></li>
<li><span>Choose your ribbon - 7/8" width is the recommended one</span></li>
<li><span>Cut the ribbon to size - 9" as an average or 12" if you want to use it as a wristlet</span></li>
<li><span>Position the  Ribbon on center of the webbing ( you can use a length  of double side basting tape to hold in place) - </span></li>
<li><span>Stitch on both sides of the ribbon using a color coordinated thread or an invisible thread-  Fold in half</span></li>
<li><span>Fix Hardware to raw ends and clam together using padded pliers-</span></li>
<li><span>Add ring and VOILA! </span></li>
</ul>
<p style="text-align: center;"> </p>
<div style="text-align: start;"><img src="https://cdn.shopify.com/s/files/1/2355/9259/files/TKV-projects_Keyfobs_480x480.jpg?v=1654280647" alt="Learn how to make unique and personalized ribbon keychains with our step-by-step tutorial. Get creative with Renaissance Ribbons and make your own DIY key rings today!" style="float: none;"></div>
<p><span> History of DIY Ribbon Keychains Ribbon keychains have been around for a long time, and they're a popular accessory for people of all ages. The first keychains were made of leather or metal and were used to hold keys together. However, as time passed, people started to look for more creative ways to personalize their keychains. This is where ribbon keychains came in. </span></p>
<p><span><strong>Ribbon keychains are a great way to add a pop of color and personality to your keys</strong>. They're easy to make and can be customized to suit your style. Whether you're looking for something simple or something more elaborate, ribbon keychains are a great way to express your creativity.</span></p>
<div style="text-align: start;"></div>
<p style="text-align: left;">What do you need to make Key Fobs? See all our listing here </p>
<p><span><strong>Assortment  of hardware</strong> ( Metal Fobs and Split Rings)  </span></p>
<h3 style="text-align: center;"><a href="https://renaissanceribbons.com/collections/key-fobs-supplies" title="Learn how to make unique and personalized ribbon keychains with our step-by-step tutorial. Get creative with Renaissance Ribbons and make your own DIY key rings today!"><span style="color: #ff2a00;">Show me!</span></a></h3>
<p><span>Great quality heavy weight<strong> Cotton Webbing</strong></span></p>
<meta charset="utf-8">
<h3 style="text-align: center;"><a href="https://renaissanceribbons.com/collections/key-fobs-supplies" title="Learn how to make unique and personalized ribbon keychains with our step-by-step tutorial. Get creative with Renaissance Ribbons and make your own DIY key rings today!" target="_blank"><span style="color: #ff2a00;">Show me!</span></a></h3>
<p><span>and of course tons of <strong>woven jacquard ribbons! </strong>7/8" width is the best to use with the 1.25"  webbing and hardware</span></p>
<meta charset="utf-8">
<h3 style="text-align: center;"><a href="https://renaissanceribbons.com/collections/medium-width-7-8" title="Learn how to make unique and personalized ribbon keychains with our step-by-step tutorial. Get creative with Renaissance Ribbons and make your own DIY key rings today!" target="_blank"><span style="color: #ff2a00;">Show me!</span></a></h3>
<p><span>Over the years, ribbon keychains have become more popular, and people have started to experiment with different materials and designs.</span></p>
<p><span> Today, you can find ribbon keychains made from a variety of materials, including webbing and  grosgrain, and we suggest to embellish the webbing with <strong>jacquard woven ribbons from Renaissance Ribbons</strong> . </span></p>
<p><span>Some people even add embellishments like beads, charms, and tassels to make their keychains even more unique. </span></p>
<p><span>In conclusion, ribbon keychains are a fun and easy way to add some flair to your keys. With just a few materials and a little bit of creativity, you can create your own personalized ribbon keychain that reflects your style and personality. So why not give it a try and see what you can come up with?</span></p>
<div style="text-align: start;"><img src="https://cdn.shopify.com/s/files/1/2355/9259/files/ME_bird_and_Keyfobs_on_black_480x480.jpg?v=1614288506" alt="Learn how to make unique and personalized ribbon keychains with our step-by-step tutorial. Get creative with Renaissance Ribbons and make your own DIY key rings today!" style="float: none;"></div>
<div style="text-align: start;"></div>
<div style="text-align: start;">This most adorable example is is from the <a href="https://renaissanceribbons.com/collections/mary-engelbreit-ribbons" title="Mary Engelbreit Ribbon designer" target="_blank">Mary Engelbreit ribbon Collection!</a>
</div>
<div style="text-align: start;"></div>
<p><span>Expert Tips for Creating Personalized Ribbon Keychains: - Experiment with different ribbon widths and textures to create unique designs. - Use a hot glue gun to secure the ribbon to the webbing, although we suggest to sew the ribbons on top of the webbing for added durability. -</span></p>
<p><span><img src="https://cdn.shopify.com/s/files/1/2355/9259/files/5_steps_to_make_your_own_Ribbon_Keyfobs.jpg?v=1684887249" alt="5 steps to make ribbon key fobs"></span></p>
<p><span>Add a personal touch by attaching a charm or small trinket to the keychain. - Don't be afraid to mix and match different ribbons to create a layered effect. - Use scissors with a sharp edge to ensure clean cuts when trimming the ribbon. - Consider using a ribbon with a pattern or print to add visual interest to your keychain. - Use a ruler or measuring tape to ensure your ribbon is cut to the correct length. -</span></p>
<div style="text-align: start;"><img src="https://cdn.shopify.com/s/files/1/2355/9259/files/C-1200_1x1_keyfob_ME_480x480.jpg?v=1629575066" alt="Learn how to make unique and personalized ribbon keychains with our step-by-step tutorial. Get creative with Renaissance Ribbons and make your own DIY key rings today!" style="float: none;"></div>
<p><span>Have fun and let your creativity run wild! In my opinion, DIY Ribbon Keychains are a fantastic way to express your creativity and add a personal touch to your accessories. With this step-by-step guide, you can easily create your own unique ribbon keychains that reflect your style and personality.</span></p>
<p><span><img src="https://cdn.shopify.com/s/files/1/2355/9259/files/Keyfob_Kaffe_480x480.jpg?v=1684176486" alt="Learn how to make unique and personalized ribbon keychains with our step-by-step tutorial. Get creative with Renaissance Ribbons and make your own DIY key rings today!"></span></p>
<p><span>Whether you're a beginner or an experienced crafter, these keychains are a fun and easy project that anyone can enjoy. So why not give it a try and see what you can come up with? I believe you'll be pleasantly surprised by the results. Happy crafting!</span></p>
<p> </p>
<meta charset="utf-8"><meta charset="utf-8">
<h4></h4>
<div style="text-align: start;"><a href="https://pin.it/2yMN7sA" title="Pinterest Board How to make a Ribbon KeyFob" target="_blank"><img src="https://cdn.shopify.com/s/files/1/2355/9259/files/1_aa08ca26-a547-4206-8e36-68fa73f4ce22_1024x1024.jpg?v=1684192780" alt="Learn how to make unique and personalized ribbon keychains with our step-by-step tutorial. Get creative with Renaissance Ribbons and make your own DIY key rings today!" style="float: none;"></a></div>
<div style="text-align: center;">
<meta charset="utf-8"> <strong>Follow <a href="https://pin.it/4DW0lmJ" title="Making your own Ribbon KeyFobs">this board </a>for all the project pins! </strong>
</div>
<div style="text-align: start;"></div>
<div style="text-align: start;"></div>]]>
    </content>
  </entry>
  <entry>
    <id>https://renaissanceribbons.com/blogs/ribbon-crafts/odileclub</id>
    <published>2023-05-27T14:25:00-06:00</published>
    <updated>2023-08-23T18:09:21-06:00</updated>
    <link rel="alternate" type="text/html" href="https://renaissanceribbons.com/blogs/ribbon-crafts/odileclub"/>
    <title>Join the Colorful and Creative World of Odile !</title>
    <author>
      <name>Edith Minne</name>
    </author>
    <content type="html">
      <![CDATA[<p> </p>
<p> </p>
<p><img alt="Odile Club" src="https://cdn.shopify.com/s/files/1/2355/9259/files/OB_Club_5x_7_Join_up_promo_Blog_1024x1024.jpg?v=1678139542"><strong>What is Renaissance Ribbons's  Odile Club:</strong></p>
<p>Our Velvet Club is a fun and engaging way for you to explore Odile's unique style and create your own beautiful and whimsical creations.</p>
<meta charset="utf-8">
<p><span>It is a </span><span>perfect bundle of French textile treasures:  velvet border, velvet fabric, quilting cotton fabric, woven jacquard ribbons and precut kit! Everything is designed by Odile Bailloeul and specially curated by Renaissance Ribbons.</span> </p>
<meta charset="utf-8"> <!--<p style="text-align: center;"><a href="https://renaissanceribbons.com/products/3-month-odile-club" title="Join the Club" class="action_button">JOIN THE CLUB</a></p>-->
<p> </p>
<div class="klaviyo-form-QYtTgx"></div>
<p><strong>Who is Odile B?</strong></p>
<p>Odile Bailloeul is a popular French designer. Her designs draw inspiration from various cultures and traditions nomadic and bohemian. </p>
<p>Her style is about creating a sense of wonder and delight. It is whimsical and colorful, with a strong focus on nature and animals<br>Odile's velvet fabrics have vibrant colors and luxurious textures with a soft and plush feel that is both beautiful and comfortable to the touch bold. Their bold and saturated colors add a pop of color to any project.</p>
<p><strong>What is inside the First Month Bundle?</strong><br><br>This Blue Balkan Bundle contains:<br><strong>1 velvet Border Bali Blue</strong><br><strong>2 half yards Quilting Cotton</strong> from Tropicalism collection for FreeSpirit Fabrics<br><strong>1 piece 18" by 27"</strong><span><strong> incredibly soft velvet fabric </strong> in bright colors </span>fabric from the Balkan Collection. Be daring with it! perfect for home decor (pillow, curtains ...) but also for dressmaking: dresses, kimono., scarves ...<br><strong>3 woven jacquard ribbons</strong> 1 yd each to embellish any project<br><strong>1 Complete Kit - included instructions -to make 2 velvet Baskets</strong><br><br><br></p>
<p><strong>What can I make with the supplies?</strong></p>
<p>Here are a few projects we made using some of the materials included, for some projects, you'll need to get additional supplies- as listed. These are not complete kits </p>
<p><img style="display: block; margin-left: auto; margin-right: auto;" alt="Odile Velvet Club" src="https://cdn.shopify.com/s/files/1/2355/9259/files/OB_CL-comp-Blog_600x600.jpg?v=1679526042"></p>
<p> </p>
<p><strong>1. The Renaissance Ribbon Bag- </strong>You'll need the <a title="Pattern Renaissance Ribbon Bag" href="https://renaissanceribbons.com/collections/sewing-patterns/products/renaissance-ribbons-bags-pattern-1" target="_blank">Pattern byAnnie</a> and 1 <a title="Zip ByAnnie Buttercup" href="https://renaissanceribbons.com/collections/zippers/products/30handbag-zipper-double-slide-buttercup" target="_blank">zip30 Buttercup</a> - click on the  link in the name</p>
<p>We used the quilting cotton provided or the lining, you can make 2 bags with 1 Velvet Border or make 1 bag and use the rest of the border for the Patchwork Cushion cover as shown below !</p>
<p><img alt="Renaissance Ribbons Bag Pattern By Annie Velvet Border" src="https://cdn.shopify.com/s/files/1/2355/9259/files/OB_CL-11_480x480.jpg?v=1679526242"></p>
<p> </p>
<p><strong><span style="text-decoration: underline;">2. Patchwork Cushion Cover</span> </strong>- 12 by 16 pillow form- Create your own fabric by stitching together  13" length of Fabric, Velvet Border, Ribbons Velvet fabric following your own inspiration. Make the back from the Cotton fabric and add a zipper as a closure! Voila! Unique and fantastic creation..</p>
<p>You'll need a 12" by 16" pillow form and one 14" zipper </p>
<p> </p>
<p><img style="float: left;" alt="Patchwork velvet cushion cover" src="https://cdn.shopify.com/s/files/1/2355/9259/files/OB_CL-01_480x480.jpg?v=1679526242">  </p>
<div style="text-align: left;"><img style="float: none;" alt="Patchwork velvet cushion cover" src="https://cdn.shopify.com/s/files/1/2355/9259/files/OB_CL-03_480x480.jpg?v=1679526242"></div>
<div style="text-align: left;">
<strong>3.Duo of Velvet baskets</strong>- Blue Birds on red -large and skunk on blue small</div>
<div style="text-align: left;">All included in this kit. Very simple and quick sewing project that makes a fun and whimsical gift or a very delightful container for your sewing room! </div>
<div style="text-align: left;">
<img alt="Velvet Basket Red" src="https://cdn.shopify.com/s/files/1/2355/9259/files/OB-Velvet_basket-pack-01_480x480.jpg?v=1679527011"><img alt="Velvet basket Blue Skunk design" src="https://cdn.shopify.com/s/files/1/2355/9259/files/OB-Velvet_basket-pack-04_480x480.jpg?v=1679527058">
</div>
<div style="text-align: left;"></div>
<div style="text-align: left;">4.<strong>Origami Drawstring Pouch</strong>- Fun and easy to make! Free and complete You Tube video  Tutorial by  Sew Easy </div>
<div style="text-align: left;"><img alt="Origami drawstring bag Free tutorial" src="https://cdn.shopify.com/s/files/1/2355/9259/files/OB_CL-10_480x480.jpg?v=1679526242"></div>
<p> </p>
<p>5. <strong>Velvet Pin Cushion or Lavender sachet</strong> embellished with Rhinestones </p>
<p>Just save a 5" square of the Velvet fabric and the cotton fabric + 8 to 10" narrow ribbon, stitch together and embellish with rhinestones ( I love that part)- simple tool called Hot Fix Applicator 💖<img alt="Velvet Pin Cushion" src="https://cdn.shopify.com/s/files/1/2355/9259/files/OB_CL-06_480x480.jpg?v=1679526241"><img alt="Velvet Pin Cushion" src="https://cdn.shopify.com/s/files/1/2355/9259/files/OB_CL-05_480x480.jpg?v=1679526240"></p>
<p><strong>6. Ribbon Keyfobs</strong> - check our<a title="Key Fobs supplies" href="https://renaissanceribbons.com/collections/key-fobs-supplies" target="_blank"> Keyfob making section</a> for all the supplies needed or check your craft room for some webbing and hardware (ring and clamp)... it must be somewhere!!</p>
<p><img alt="Ribbon Key Fobs" src="https://cdn.shopify.com/s/files/1/2355/9259/files/OB_CL-08_480x480.jpg?v=1679526239"></p>
<p> </p>
<meta charset="utf-8">
<p><strong>What is inside the Second Month Bundle?</strong><br><br><span>This Red Ibis Bundle contains:</span><br><strong>1 velvet Border </strong>Kaffe Fassett Red Spray<br><strong>2 half yards Quilting Cotton</strong><span> from Tropicalism collection for FreeSpirit Fabrics</span><br><strong>1 piece 18" by 27"</strong><span><strong> incredibly soft velvet fabric </strong> in red, burgundy and oranges  colors </span><span>from the Ibis Collection. Be daring with it! perfect for home decor (pillow, curtains ...) but also for dressmaking: dresses, kimono., scarves ...</span><br><strong>4 woven jacquard ribbons</strong><span> 1 yd each to embellish any project</span><br><strong>1 Complete Kit - included instructions - to make 1 Note Book cover </strong></p>
<p> </p>
<meta charset="utf-8">
<p><strong>What can I make with the supplies?</strong></p>
<p><strong><img alt="Odile Club #2" src="https://cdn.shopify.com/s/files/1/2355/9259/files/OB_CL-FB_Comp_2b_600x600.jpg?v=1681761714"></strong></p>
<p> <img alt="Odile B Content Club  velvet from France, velvet borders woven ribbons and kits" src="https://cdn.shopify.com/s/files/1/2355/9259/files/OB-Cushion_Cover-01_600x600.jpg?v=1681323812"></p>
<p> <img alt="Odile B Content Club  velvet from France, velvet borders woven ribbons and kits" src="https://cdn.shopify.com/s/files/1/2355/9259/files/OB-Cushion_Cover-05_240x240.jpg?v=1681323812">. <img alt="Odile B Content Club  velvet from France, velvet borders woven ribbons and kits" src="https://cdn.shopify.com/s/files/1/2355/9259/files/OB-Cushion_Cover-02_240x240.jpg?v=1681323812">. <img alt="Odile B Content Club  velvet from France, velvet borders woven ribbons and kits" src="https://cdn.shopify.com/s/files/1/2355/9259/files/OB-Cushion_Cover-06_240x240.jpg?v=1681323812"></p>
<div style="text-align: left;"><img style="float: none;" alt="Odile B Content Club  velvet from France, velvet borders woven ribbons and kits" src="https://cdn.shopify.com/s/files/1/2355/9259/files/OB_-Book_Cover-01_600x600.jpg?v=1681322711"></div>
<p><img alt="Odile B Content Club  velvet from France, velvet borders woven ribbons and kits" src="https://cdn.shopify.com/s/files/1/2355/9259/files/OB_-Book_Cover_240x240.jpg?v=1681322710">. <img alt="Odile B Content Club  velvet from France, velvet borders woven ribbons and kits" src="https://cdn.shopify.com/s/files/1/2355/9259/files/OB_-Book_Cover-04_240x240.jpg?v=1681322710">  <img alt="Odile B Content Club  velvet from France, velvet borders woven ribbons and kits" src="https://cdn.shopify.com/s/files/1/2355/9259/files/OB_-Book_Cover-05_240x240.jpg?v=1681322710"></p>
<meta charset="utf-8">
<p><strong>What is inside the Third and last  Bundle?</strong><br><br><span>This Savannah Bundle contains:</span><br><strong>1 velvet Border Savanna by Gwenaelle</strong><br><strong>2 half yards Quilting Cotton</strong><span> from Tropicalism collection for FreeSpirit Fabrics</span><br><strong>1 piece 18" by 27"</strong><span><strong> incredibly soft velvet fabric </strong> Big floral on black Background from the Balkan</span><span> Collection. Be daring with it! perfect for home decor (pillow, curtains ...) but also for dressmaking: dresses, kimono., scarves ...</span><br><strong> woven jacquard ribbons</strong><span> 1 yd each to embellish any project</span><br><strong>1 Complete Kit - included instructions - to make 1 I pad Cover Gecko</strong></p>
<meta charset="utf-8">
<p><strong>What can I make with the supplies?</strong></p>
<p>Here are a few projects we made using some of the materials included, for some projects, you'll need to get additional supplies- as listed. These are not complete kits </p>
<p><img alt="Colorful and Creative world of Odile  Velvet fabrics, ribbons and kit" src="https://cdn.shopify.com/s/files/1/2355/9259/files/OB_CL-3A_comp_600x600.jpg?v=1684288978"></p>
<p><strong>⍈ The iPad Cover kit</strong> - let's create a stylish and functional accessory for your iPad. Both exterior and interior are made with the printed polyester velvet, ensuring a soft and opulent feel</p>
<meta charset="utf-8">
<p class="p1">The kit includes user-friendly instructions that guide you through the assembly process effortlessly. Simply open the fabric, follow the marked lines for precise cutting, and stitch the pieces together seamlessly.</p>
<p class="p1">For a secure closure, the iPad Cover utilizes an elastic loop and a button, both of which are conveniently provided within the kit. However, if you prefer additional security, you have the option to incorporate a zipper as well.<span> </span></p>
<p> </p>
<p><img alt="Velvet iPad kit by Odile Bailloeul" src="https://cdn.shopify.com/s/files/1/2355/9259/files/OB_Tab_et_ouch-2-2-Edit_480x480.jpg?v=1684288978">  <img alt="Odile Club french velvet sewing kit and ribbons" src="https://cdn.shopify.com/s/files/1/2355/9259/files/OB_Tablet_pouch_-1-Edit_480x480.jpg?v=1684288978"></p>
<p> </p>
<p><img alt="Odile Club french velvet sewing kit and ribbons" src="https://cdn.shopify.com/s/files/1/2355/9259/files/OB_Club_3-5-Edit_480x480.jpg?v=1684288978"></p>
<p><img alt="Odile Club french velvet sewing kit and ribbons" src="https://cdn.shopify.com/s/files/1/2355/9259/files/OBV-GT06_Savanna-L_480x480.jpg?v=1684288978"> <img alt="Odile Club french velvet sewing kit and ribbons" src="https://cdn.shopify.com/s/files/1/2355/9259/files/OB_Club_3-15-Edit_480x480.jpg?v=1684288977"></p>
<p> </p>
<p><img alt="Odile Club french velvet sewing kit and ribbons" src="https://cdn.shopify.com/s/files/1/2355/9259/files/OB_Club_3_projects-7-2-Edit_480x480.jpg?v=1684288978"></p>
<p> </p>
<p><img alt="Odile Club french velvet sewing kit and ribbons" src="https://cdn.shopify.com/s/files/1/2355/9259/files/OB_Club_3_projects-10-Edit_480x480.jpg?v=1684288978"></p>
<p> </p>
<p><img alt="Odile Club french velvet sewing kit and ribbons" src="https://cdn.shopify.com/s/files/1/2355/9259/files/OB_club_3-11-2-Edit_480x480.jpg?v=1684288978"></p>
<p> </p>
<p> </p>
<p> <img alt="Odile Club french velvet sewing kit and ribbons" src="https://cdn.shopify.com/s/files/1/2355/9259/files/OB_Club_3-2-Edit_480x480.jpg?v=1684288978">  <img alt="Odile Club french velvet sewing kit and ribbons" src="https://cdn.shopify.com/s/files/1/2355/9259/files/OB_Club_3-5-2-Edit_480x480.jpg?v=1684288978">. <img alt="Odile Club french velvet sewing kit and ribbons" src="https://cdn.shopify.com/s/files/1/2355/9259/files/OB_Club_3_Projects-1-Edit_480x480.jpg?v=1684288977">  <img alt="Odile Club french velvet sewing kit and ribbons" src="https://cdn.shopify.com/s/files/1/2355/9259/files/OB_Club_3_Projects-6-Edit_480x480.jpg?v=1684288977"></p>
<p> </p>
<p><img alt="Odile Club french velvet sewing kit and ribbons" src="https://cdn.shopify.com/s/files/1/2355/9259/files/OB_club_3-16-2-Edit_480x480.jpg?v=1684288977"> <img alt="Odile Club french velvet sewing kit and ribbons" src="https://cdn.shopify.com/s/files/1/2355/9259/files/OBV-GT06_Savanna-C_480x480.jpg?v=1684288978"></p>
<p> </p>
<p> </p>
<p> </p>
<p> </p>
<p>Get ready to be swept away by our soft velvet fabrics, elegant velvet borders, beautiful woven ribbons, and delightful small project kits.</p>
<div style="text-align: center;" class="description woocommerce-product-details__short-description">
<p class="p1">Would you not love to be part of what's best in France as well, while staying home! Count on us to bring you the best </p>
<p class="p1">Don't miss out on this dream come true for all passionate sewists!"</p>
<meta charset="utf-8">
<h3 class="p1">
<span style="color: #ec1616;"><strong>Bonjour! Please, join me, says Odile!</strong></span> ❤️</h3>
<p class="p1">👇<img alt="Odile B and her ribbons" src="https://cdn.shopify.com/s/files/1/2355/9259/files/Odile_and_Ribbons_600x600.jpg?v=1676332446"></p>
</div>
<meta charset="utf-8">
<p> Whether you're a seasoned sewist or just starting, our subscription is perfect for you. Let's bring some color and joy to your sewing room with Odile's textile creations!</p>
<p class="p1">Get ready to be swept away by Odile’s soft velveteen fabrics, elegant velvet borders, beautiful woven ribbons, and delightful small project kits.</p>
<p class="p1">*Each month you will receive a gorgeous collection of sewing essentials from Odile, all newly released designs not yet available in stores.</p>
<p class="p1">*First shipment last week of March</p>
<p class="p1">*Limited Edition!</p>
<p class="p1">The 3-Month Subscription is open  -<a title="Join the Club" href="https://renaissanceribbons.com/products/3-month-odile-club" target="_blank"><strong><span style="color: #ff2a00;"> <span style="color: #ff2a00;" color="#ff2a00">H</span>ave a look</span></strong></a></p>
<p style="text-align: center;"><img alt="Join the Colorful and Creative World of Odile !" src="https://cdn.shopify.com/s/files/1/2355/9259/files/OB_promo-9-Edit_480x480.jpg?v=1675724020"></p>
<p style="text-align: center;"><strong>🖕Examples of what you'll receive!</strong></p>
<p class="p2">Odile’s designs are inspired by her traveling life.  Like a nomadic gypsy, Odile has traveled the world: starting in India; then crossing into the Slavic countries; briefly touching upon the Nordic lands, and finally settling in Camargue and Andalusia. All of these experiences have influenced the motifs and images that Odile references in her fantastically imaginative works.<span class="Apple-converted-space"> </span></p>
<meta charset="utf-8">
<p>Nomadic influences have been inspiring Odile’s designer work for a long time: the gypsy route, starting from India, crossing the Slavic countries, touching the Nordic lands, and settling in Camargue and Andalusia, sparks her imagination…</p>
<p> </p>
<meta charset="utf-8">
<p>Inspired by Odile's new book - Quiltmania Edition -</p>
<meta charset="utf-8">
<div class="product_title entry-title">NOMADIC SPIRIT – ODILE BAILLOEUL</div>
<p><img alt="Join the Colorful and Creative World of Odile !" src="https://cdn.shopify.com/s/files/1/2355/9259/files/OB_tropicalism-7-3_2x1_9e0fa55c-9d76-4bed-ae5b-0dd8d3119236_1024x1024.jpg?v=1675724163"></p>
<p style="text-align: center;">Meet Odile!</p>
<meta charset="utf-8">
<p class="p1">A celebrated student of Applied Arts, Odile lives in Western France with her husband, her cat, and a lovely caravan in their garden. A fiery flower print- festooned redhead, Odile loves tinkering, writing books, and painting. </p>
<p class="p1">She has created vibrant, wildly colorful textile creations for companies such as<span> </span><strong>FreeSpirit Fabrics,</strong>  Odile conjures up splendid designs for<span> </span><strong>Renaissance Ribbons,</strong><span> </span>and creates decorative objects and jewels in her distinctly original bohemian style.</p>
<p style="text-align: center;"> <img alt="Odile" src="https://cdn.shopify.com/s/files/1/2355/9259/files/Portrait-Odile-Bailloeul-600x800_600x600.jpg?v=1675733132"></p>
<p style="text-align: center;"><img alt="Join the Colourful world of Odile B" src="https://cdn.shopify.com/s/files/1/2355/9259/files/OB_tropicalism_Promo-3_1024x1024.jpg?v=1676334180"></p>
<p style="text-align: center;"><strong>What is in each Month's Kit?</strong></p>
<p style="text-align: center;">This is a bundle of French velvet border, velvet fabric, quilting cotton fabric, woven jacquard ribbons and precut kit! Everything is designed by Odile Bailloeul and specially curated by Renaissance Ribbons. <br>Odile Bailloeul is a popular French designer. Her designs draw inspiration from various cultures and traditions nomadic and bohemian. Her style is about creating a sense of wonder and delight. It is whimsical and colorful, with a strong focus on nature and animals<br>Odile's velvet fabrics have vibrant colors and luxurious textures with a soft and plush feel that is both beautiful and comfortable to the touch bold. Their bold and saturated colors add a pop of color to any project.<br>It includes a nice piece of supple incredibly soft velvet in bright colors and design. Be daring with it! , perfect for home decor (pillow, curtains ...) but also for dressmaking: dresses, kimono., scarves ...<br><br>Our Velvet Club is a fun and engaging way for you to explore Odile's unique style and create your own beautiful and whimsical creations.<br><br>This Bundle contains: <br>1 velvet Border Bali Blue<br>2 half yards Quilting Cotton from Tropicalism collection for FreeSpirit Fabrics<br>1 piece 18" by 27" soft velvet fabric from the Balkan Collection<br>3 woven jacquard ribbons 1 yd each to embellish any project <br>1 Complete Kit to make 2 velvet Baskets <br><br>A perfect bundle of textile treasures for you to explore Odile's unique style and create your own beautiful and whimsical creations</p>
<p style="text-align: center;"> </p>
<meta charset="utf-8">
<p style="text-align: center;"><span>Odile Bailloeul is a popular French designer. Her designs draw inspiration from various cultures and traditions nomadic and bohemian. Her style is about creating a sense of wonder and delight. It is whimsical and colorful, with a strong focus on nature and animals</span></p>]]>
    </content>
  </entry>
  <entry>
    <id>https://renaissanceribbons.com/blogs/ribbon-crafts/embellish-with-tula-pink-webbing</id>
    <published>2023-05-23T16:02:33-06:00</published>
    <updated>2023-05-23T17:28:57-06:00</updated>
    <link rel="alternate" type="text/html" href="https://renaissanceribbons.com/blogs/ribbon-crafts/embellish-with-tula-pink-webbing"/>
    <title>Embellish with Tula Pink Webbing</title>
    <author>
      <name>Edith Minne</name>
    </author>
    <content type="html">
      <![CDATA[<p style="text-align: center;"><img src="https://cdn.shopify.com/s/files/1/2355/9259/files/Tula_Pink_and_new_webbing_480x480.jpg?v=1684871157" alt="Tula Pink Webbing"> </p>
<p class="p1"><strong><span class="s1">Tula Pink</span> and Renaissance Ribbons</strong> have collaborated to create a great webbing mostly used for bag making. It comes in various colors and sizes, and it is designed to elevate your bag making projects to the next level</p>
<ul>
<li>Game changer: Tula Pink striped nylon webbing is a game changer for bag making, according to Tula Pink, it makes a bag feel elevated and gives it a more professional look</li>
<li>. It is available in two different sizes, 1" and 1.5", and a variety of colorways. Tula Pink webbing is also sold in multi-packs that include several different colors and sets of 2 yds</li>
<li>.The webbing is known for its high quality and brilliant colors, making it a great choice for bag making projects, can be used as handles, tags and straps - see this blog post for more information 👇<a href="https://renaissanceribbons.com/blogs/ribbon-crafts/tulapink-webbing-tips" target="_blank" title="Tips and techniques to use Tula Pink Webbing as straps and handles - as per By Annie " rel="noopener noreferrer" style="text-align: center;"><img src="https://cdn.shopify.com/s/files/1/2355/9259/files/TK-webbing-logo_d82167ac-d32b-45ca-984b-617443c554ea_240x240.jpg?v=1684871320" alt="Tula Pink Webbing" style="margin-bottom: 1px; float: none;"></a>
</li>
</ul>
<p class="p1"> <a href="https://renaissanceribbons.com/blogs/ribbon-crafts/tulapink-webbing-tips" target="_blank" title="Tips and techniques to use Tula Pink Webbing as straps and handles - as per By Annie " rel="noopener noreferrer">Tips and techniques to use Tula Pink Webbing as straps and handles - By Annie </a></p>
<meta charset="utf-8">
<h4 class="p1">In our new Everglow Clam up kit, we chose to use Tula Pink Webbing as an embellishment!  Stitching the webbing in a straight line in the middle of the pattern!</h4>
<div style="text-align: start;">
<span mce-data-marked="1">Here are a few tips to guide you:</span>  </div>
<div style="text-align: start;"></div>
<ol class="ol1">
<li class="li1">Before assembling the fabric pieces, lightly mark a middle line on<span class="Apple-converted-space">  </span>the main fabric where the webbing will be stitched. This line will help you align the webbing properly.</li>
<li class="li1">Apply a narrow basting tape on top of the marked middle line. The basting tape is used to temporarily hold the webbing in place before stitching.</li>
<li class="li1">Position the webbing on top of the basting tape, making sure to carefully keep it centered along the marked middle line. This ensures that the webbing is placed evenly on the fabric.</li>
<li class="li1">Stitch the webbing in place using either monopoly thread or matching thread. Monopoly thread is a transparent thread that won't be as visible on the lining side. If you use matching thread, keep in mind that the stitching will be visible on the lining side, so choose a thread color that blends well with the fabric.</li>
<li class="li1">Optionally, you can seal the cut edges of the webbing with fray check or briefly bring the end of the webbing close to a flame, allowing the heat to slightly melt and seal the fibers. Be cautious not to hold it too close or for too long to prevent scorching or damaging the webbing.</li>
</ol>
<p> </p>
<div style="text-align: center;"><img src="https://cdn.shopify.com/s/files/1/2355/9259/files/KOB-82_TK_Clam_up_everglow-Coverjpg_480x480.jpg?v=1684869198" alt="Tula Pink Webbing" style="float: none;"></div>
<p> <img src="https://cdn.shopify.com/s/files/1/2355/9259/files/KOB_82_Clam_up_TK_Everglow-07_480x480.jpg?v=1684877926" alt="Embellish with Tula Pink Webbing "> </p>
<p class="p1">Tula Pink striped nylon webbing is a great choice for bag makers who want to take their projects to the next level with high-quality, durable, and stylish webbing, we love using it in al our kits too, specially for  all the straps and handles, it is so much easier and really fun to make and to use! </p>
<p> </p>
<p> <img src="https://cdn.shopify.com/s/files/1/2355/9259/files/KOB_82_Clam_up_TK_Everglow-04_240x240.jpg?v=1684877991" alt="Embellish with Tula Pink Webbing " style="display: block; margin-left: auto; margin-right: auto;"></p>
<p> </p>
<p><strong>How to stop the new Tula Pink Webbing to fray:</strong></p>
<p class="p1">After cutting the desired length of webbing, prepare a heat source such as a lighter or a small flame.</p>
<p class="p1">Gently bring the end of the webbing close to the flame, allowing the heat to slightly melt and seal the fibers. Be cautious not to hold it too close or for too long to prevent scorching or damaging the webbing.This helps create a clean, sealed edge that prevents fraying.</p>
<p class="p1">Once you have singed the end of the webbing, let it cool down for a few moments before handling it.</p>
<p class="p1">By singeing the end of the webbing, you can further prevent fraying and enhance the durability of your finished sewing project.</p>
<p class="p1"><img src="https://cdn.shopify.com/s/files/1/2355/9259/files/TP_Webbing_Collection_240x240.jpg?v=1684871994" alt="Tula Pink webbing" style="display: block; margin-left: auto; margin-right: auto;"> </p>
<p class="p2"><span class="s1">Tula Pink</span> striped nylon webbing is not just any ordinary webbing! It's <strong>a game changer for bag maker</strong>s who want to take their projects to the next level with high-quality, durable, and stylish webbing. We love using it in all our kits because it's so much fun and easy to make and use, especially for all the straps and handles. Here are some reasons why Tula Pink webbing is a must-have for your bag-making projects:</p>
<meta charset="utf-8">
<ul class="ul1">
<li class="li2">
<p class="p1"><span class="s1">Quality: Tula Pink webbing is known for its high quality because it is yarn-</span>dyed prior to being woven, Most webbing is pieced dyed. This means that the yarns used in Tula Pink's webbing are dyed before they are woven into webbing, whereas in pieced dyed webbing, the webbing is first woven and then dyed.</p>
<p class="p1">This process of dyeing the yarns prior to weaving gives Tula Pink's webbing a more vibrant and even color throughout the webbing</p>
<p class="p2">Additionally, the dyeing process used in Tula Pink's webbing ensures that the color won't bleed onto the base fabric<br><a href="https://www.tulapink.com/ribbons"></a></p>
<span class="s2"></span>Vibrant colors: The vibrant colors are perfect for elevating your projects and giving them a more professional look</li>
<li class="li2">
<span class="s2"></span>Coordination: The webbing coordinates with Tula Pink's amazing fabrics<a href="https://quitchesgetstitches.com/products/new-tula-pink-1-nylon-webbing-bag-94975"><span class="s3"><b>1</b><br> </span></a>
</li>
<li class="li2">
<span class="s2"></span>Design: Tula Pink webbing is designed to elevate bag-making projects to the next level, with six beautiful color combinations<a href="https://www.stitchfabriccompany.com/collections/tula-pink-webbing"><span class="s3"><br> </span></a>
</li>
</ul>
<p class="p2">So, if you want to add some fun and style to your bag-making projects, Tula Pink webbing is the way to go!</p>
<p class="p2"><img src="https://cdn.shopify.com/s/files/1/2355/9259/files/TK_webbing-4419-Edit_1024x1024.jpg?v=1684882795" alt="tula Pink Webbing"> </p>]]>
    </content>
  </entry>
  <entry>
    <id>https://renaissanceribbons.com/blogs/ribbon-crafts/41967681-tips-on-sewing-with-ribbons</id>
    <published>2023-05-18T12:37:00-06:00</published>
    <updated>2023-05-18T13:08:09-06:00</updated>
    <link rel="alternate" type="text/html" href="https://renaissanceribbons.com/blogs/ribbon-crafts/41967681-tips-on-sewing-with-ribbons"/>
    <title>Tips on Sewing with Ribbons</title>
    <author>
      <name>Edith Minne</name>
    </author>
    <summary type="html">
      <![CDATA[<meta charset="utf-8">
<div style="text-align: left;">Tips for Sewing with Woven Ribbons By Elaine Schmidt<strong><strong><br></strong></strong>
</div>
<div style="text-align: left;"><span style="line-height: 1.4;"> </span></div>
<p> </p><p><a class="read-more" href="https://renaissanceribbons.com/blogs/ribbon-crafts/41967681-tips-on-sewing-with-ribbons">More</a></p>]]>
    </summary>
    <content type="html">
      <![CDATA[<div style="text-align: left;"><img src="https://cdn.shopify.com/s/files/1/2355/9259/files/RR_Spring_23-Blog-03_1024x1024.jpg?v=1684435287" alt="Mastering Ribbon Sewing: Essential Tips and Techniques for Perfecting Your Craft" style="float: none;"></div>
<meta charset="utf-8">
<p style="text-align: left;"> </p>
<meta charset="utf-8">
<p style="text-align: left;"><strong>Mastering Ribbon Sewing: Essential Tips and Techniques for Perfecting Your Craft</strong></p>
<meta charset="utf-8">
<p class="p1">A touch of ribbon can elevate any DIY project, adding vibrant colors and captivating visual appeal. While gluing ribbons is a quick fix, sewing them offers better durability and a professional finish. In this blog post, we will explore essential tips and techniques for sewing with ribbons. With a focus on Renaissance Ribbons, known for their exquisite woven designs, you'll discover how to create stunning fashion accessories, embellishments, and home decor pieces. Let's dive in!</p>
<p style="text-align: left;">Most of Renaissance Ribbons are <strong>woven ribbons, also called embroidered, brocade or tapestry ribbons</strong>, in that these are ribbons with designs woven into it. They have a front and back  and the intricate designs on the ribbon makes it very suitable for elaborate projects such as fashion accessories, home decor and embellishment in general.</p>
<p style="text-align: left;">  <img alt="" src="//cdn.shopify.com/s/files/1/2355/9259/files/JO-64-PC--2_grande.jpg?v=1544143471" style="float: none;"> </p>
<p> </p>
<p><span style="font-weight: 400;">This post includes <strong>tips for sewing with woven ribbons.</strong></span></p>
<ul>
<li>If you are making a project that will be laundered, such as a skirt or placemats, make sure to pre-wash and dry the base fabric as you would the finished project before you begin sewing. Fabrics can shrink quite a bit when laundered, especially cottons and linens, and that can cause the ribbons to not lie flat after the project is washed.</li>
</ul>
<ul>
<li>Since Renaissance Ribbons are woven of polyester that will not shrink, it is not necessary to pre-shrink them, although you could certainly pre-wash and dry them with the fabric. Just make sure to machine zigzag stitch across the cut edges so they do not unravel. I find that lightly pressing them with a steam iron and pressing cloth also works to smooth them and prepare them for sewing.</li>
</ul>
<p style="text-align: left;"><img alt="" src="//cdn.shopify.com/s/files/1/0838/5987/files/Hints_and_tips_for_sewing_with_ribbons_large.jpg?4317223674630300792" style="float: none;"></p>
<ul>
<li>Take care when ironing polyester ribbons as they require a lower ironing temperature than cotton and linen fabric. When sewn to the fabric, I like to press the ribbons from the wrong side of the fabric or use a pressing cloth to protect them from the heat.</li>
</ul>
<ul>
<li>Use a see-through quilting ruler to position ribbons onto your project equal distance from an edge. Dressmaker’s chalk or an air or water soluble marker are helpful for marking placement lines.</li>
</ul>
<ul>
<li>To eliminate the need for pins and to keep ribbons from shifting as you are sewing them in place, apply a little basting glue or strips of lightweight fusible web, such as Steam-a-Seam, to the wrong side of the ribbon. Follow the manufacturer’s instructions and test to make sure the ribbon can be easily stitched without the adhesive gumming up the needle. Some adhesives are not meant to be sewn through.</li>
<li>
<span style="color: #ff0000;">NEW TIP</span>: we love the new ByAnnie Double Basting tape in 3mm perfect for positioning the ribbons and will soon make it available in our store!</li>
</ul>
<p style="text-align: left;"><img alt="" src="//cdn.shopify.com/s/files/1/0838/5987/files/Hints_and_tips_for_sewing_with_ribbons2_large.jpg?8613427470875406930" style="float: none;"></p>
<p> </p>
<ul>
<li>Use a sharp hand or machine needle that will not snag the ribbon when it is stitched. The needle should be fine enough so that holes it creates in the ribbon are just large enough for the sewing thread.</li>
<li>Stitching ribbons to the flat fabric before the project is constructed allows for the raw edges of the ribbons to be caught in the seam allowance. If trimming a ready-made article, open up the seams a little to allow the ribbon joins to be hidden inside. Or, add a seam allowance to the ends of the ribbon and turn the cut edges under before stitching in place.</li>
</ul>
<h3> Machine Stitching Ribbons:</h3>
<p><img src="https://cdn.shopify.com/s/files/1/2355/9259/files/RR-Machine_Cover_480x480.jpg?v=1684436579" alt="Mastering Ribbon Sewing: Essential Tips and Techniques for Perfecting Your Craft" style="display: block; margin-left: auto; margin-right: auto;"></p>
<ul>
<li>I use a size 75 or 80 needle in my sewing machine when stitching ribbons.</li>
</ul>
<ul>
<li>Use polyester sewing thread. Machine embroidery thread may also be used for more densely sewn decorative stitches. Coordinate the thread color with the ribbon. Match the ribbon color for a less visible attachment or select a contrasting color for added interest.</li>
</ul>
<ul>
<li>Always sew in the same direction on both sides of the ribbon. This will prevent any shifting and puckering. </li>
</ul>
<ul>
<li>Make a sample to test the stitch length and machine tension. You can use straight stitches, narrow zigzags or overcast stitches that will just catch the edges of the ribbon. Check out some of your machine’s decorative stitches when making your sample. You might find one that really enhances the design of your selected ribbon. Experiment with the width and length of the stitches and different types and colors of thread. If decorative stitches cause puckering when sewn, add one or two layers of stabilizer under the fabric.</li>
</ul>
<p style="text-align: left;"><img alt="" src="//cdn.shopify.com/s/files/1/0838/5987/files/IMG_8569_large.JPG?3702087814307012472" style="float: none;">  </p>
<h3> Hand Sewing Ribbons:</h3>
<p> </p>
<ul>
<li>Hand sewing is best when sewing velvet or intricate jacquard ribbons or when machine stitching may show and interfere with the design of the ribbon.</li>
</ul>
<ul>
<li>Use a fine needle and select a thread color that matches the edge of the ribbon.</li>
</ul>
<ul>
<li>Sew hand slipstitches close to the edge of the ribbon to provide an almost invisible finish.</li>
</ul>
<ul>
<li>To form slipstitches, bring a threaded needle to the front of the background fabric. Take a tiny stitch just into the edge of the ribbon. Bring the thread back into the fabric, making stitches every ¼” and spacing them evenly along the length of the ribbon.</li>
<li>A small bead can be sewn in place with each slip stitch to add additional detail to the ribbon.</li>
<li>Add a tiny ric-rac along the edges and embellish with contrasting color thread and a slip stitch!</li>
</ul>
<p style="text-align: left;"><img alt="" src="//cdn.shopify.com/s/files/1/0838/5987/files/IMG_7784_large.JPG?4298524321417321161" style="float: none;"></p>
<p> </p>
<p>Have fun sewing with ribbons! </p>
<meta charset="utf-8">
<p>I Hope these hints &amp; tips will encourage you to start sewing with the  ribbons you might have in your stash.  Next time you are tempted at the store, go ahead and pick up a yard or two of your favorites.  I am sure you will find just the perfect way to use them to add that touch of “wow” to your projects.</p>
<p>and of course on our site we have them all!</p>
<p>Explore the versatility of ribbons and get inspired by more project ideas:</p>
<ul class="ul1">
<li class="li1">
<span class="s1"></span>Fashion accessories: Embellish headbands, hair clips, or handbags with ribbons to add a pop of color and style.</li>
<li class="li1">
<span class="s1"></span>Home decor: Sew ribbons onto pillow covers, curtains, or lampshades to create unique and personalized accents. </li>
</ul>
<p style="text-align: center;"><strong>Ribbon Art! Create your own Ribbon Art</strong></p>
<meta charset="utf-8">
<p class="p1">Embark on a creative journey and delve into the captivating world of Ribbon Art!</p>
<p class="p1">Discover the joy of creating your own unique pieces by stitching ribbons together to craft stunning works of art. With the simple technique of using a zigzag stitch to seamlessly connect ribbons of various widths and colors, you can bring your artistic vision to life, resulting in mesmerizing and textured fabric compositions. Unleash your creativity as you experiment with different ribbon placements, allowing you to design captivating patterns and intricate designs that truly stand out.</p>
<p class="p1">Once completed, your <strong>Ribbon Art creations</strong> can be showcased as exquisite mini quilts, perfect for framing and adorning your walls with a touch of artistic flair. Additionally, you can use your fabric as the exterior material for various crafts, such as pouches or decorative accents, adding a unique touch to your handmade creations.</p>
<p class="p1">Start your Ribbon Art journey today and unlock the endless possibilities of this captivating art form that allows you to express your individual style and imagination.<br>Here is my Ribbon Art creation this week end! <strong>A Ribbon Chevron Pouch!</strong></p>
<p class="p1" style="text-align: center;"><strong>Get the<a href="https://renaissanceribbons.com/products/chevron-ribbon-pouch-pdf-pattern" target="_blank" title="Ribbon Chevron Pouch Free Pattern" rel="noopener noreferrer"> <span style="color: #ef1717;">Free PDF pattern</span></a> if you want to give it a try!</strong></p>
<p class="p1"><img src="https://cdn.shopify.com/s/files/1/2355/9259/files/OB_Club_3-2-Edit_480x480.jpg?v=1684288978" alt="Mastering Ribbon Sewing: Essential Tips and Techniques for Perfecting Your Craft" style="display: block; margin-left: auto; margin-right: auto;"></p>
<p><img src="https://cdn.shopify.com/s/files/1/2355/9259/files/OB_Club_3-5-2-Edit_480x480.jpg?v=1684288978" alt="Mastering Ribbon Sewing: Essential Tips and Techniques for Perfecting Your Craft" style="display: block; margin-left: auto; margin-right: auto;"> </p>
<p> </p>
<p>Thanks for being a Ribbon Lover!</p>
<p> </p>
<p> </p>]]>
    </content>
  </entry>
  <entry>
    <id>https://renaissanceribbons.com/blogs/ribbon-crafts/what-to-make-with-our-french-velvet-borders</id>
    <published>2023-05-16T18:00:00-06:00</published>
    <updated>2023-05-23T17:48:29-06:00</updated>
    <link rel="alternate" type="text/html" href="https://renaissanceribbons.com/blogs/ribbon-crafts/what-to-make-with-our-french-velvet-borders"/>
    <title>What to make with our French Velvet Borders?</title>
    <author>
      <name>Edith Minne</name>
    </author>
    <content type="html">
      <![CDATA[<h2><a href="https://renaissanceribbons.com/collections/velvet-borders" title="French Velvet Ribbon Borders"><img src="https://cdn.shopify.com/s/files/1/2355/9259/files/COLL-BAN-OB_velvet_Borders_2048x2048_7b933f9a-9dc3-4992-91ea-ecfb11c45ad8.jpg?v=1618161267" alt="French Velvet Ribbon Borders" style="display: block; margin-left: auto; margin-right: auto;"></a></h2>
<h2>
<span>The </span>original artwork is hand painted by French artist Odile Bailloeul. Then they are printed digitally on a very soft velvet substrate, creating those  scrumptious velvet borders. They have a v<span class="s1">ery soft and supple texture which also  sews beautifully adding sensuality to all your projects!</span>
</h2>
<h4><span class="s1"></span></h4>
<meta charset="utf-8"><br>
<h1 style="text-align: center;"><a href="https://renaissanceribbons.com/pages/free-pattern-for-velvet-slippers" target="_blank" rel="noopener noreferrer"><span style="color: #ff2a00;">Velvet Borders Slippers</span></a></h1>
<p style="text-align: center;"><strong>👉 Sign up for<a href="https://renaissanceribbons.com/pages/free-pattern-for-velvet-slippers" target="_blank" title="Free pattern acess" rel="noopener noreferrer"> FREE PATTERN</a> 👈</strong> </p>
<p style="text-align: center;"><a href="https://cdn.shopify.com/s/files/1/2355/9259/files/Velvet_slipper_RS_887a76f7-58e9-43fb-b870-5021a9c7bb76.pdf?v=1647393042" target="_blank" title="Velvet Slippers Free PAttern" rel="noopener noreferrer"><img src="https://cdn.shopify.com/s/files/1/2355/9259/files/OBV_slipper_Cover_480x480.jpg?v=1645661101" alt=""></a></p>
<p> </p>
<div class="page" title="Page 1">
<div class="layoutArea">
<div class="column" style="text-align: start;">
<p><span>These easy-to-make slippers work up quickly and can be customized for gift giving, lounging, post-shower, travel, and more. Great use for focal fabrics, ribbon embellishment, embroidery designs, and bead- ing—the sky’s the limit in terms of creativity.</span></p>
<p><span><img src="https://cdn.shopify.com/s/files/1/2355/9259/files/OVB_Slippers-2-Edit_240x240.jpg?v=1647393499" style="float: none; display: block; margin-left: auto; margin-right: auto;"></span></p>
<p> </p>
<p> </p>
<p><span><img src="https://cdn.shopify.com/s/files/1/2355/9259/files/OVB_Slippers_comp_1024x1024.jpg?v=1663714319" alt="Velvet borders slippers"> <img src="https://cdn.shopify.com/s/files/1/2355/9259/files/OVB_Slippers-10-Edit_240x240.jpg?v=1647393543" style="float: none; display: block; margin-left: auto; margin-right: auto;"></span></p>
</div>
</div>
</div>
<p> </p>
<meta charset="utf-8">
<p><em><b class="jdgm-rev__title">Customer Review DM - Soft velvet border</b></em></p>
<div class="jdgm-rev__body">
<p><em>These borders are the most beautiful I've seen. They are so unique and special. I cannot wait to make something with them. I highly recommend these borders and the gorgeous ribbons. You cannot find such a special product anywhere else.</em></p>
</div>
<h2 style="text-align: center;"><span style="color: #ff2a00;"> The Renaissance Ribbons Bag by Annie Pattern</span></h2>
<p>We love these French Borders so much that my sister Veronique and I  designed a fabulous set of Zipper bag, it was inspired by a vintage French bag with a special construction of only one side seam- which was a wonderful way to not cut in the great velvet fabric and split the design with a seam!</p>
<p>We needed the expert  Annie Unrein to write this pattern! This was such a wonderful opportunity to work closely with Annie. She is a master at explaining new techniques and getting us to try new things...</p>
<meta charset="utf-8">
<p>Voila! The <a href="https://renaissanceribbons.com/collections/sewing-patterns/products/renaissance-ribbons-bags-pattern-1" title="Shop for pattern">Renaissance Ribbon bag pattern</a> allows you to make 2 bags with </p>
<ol>
<li>1 Pack  French  Velvet Border ( 1 meter=1.1 yd)</li>
<li> 2 pieces of ribbons : wide and narrow)</li>
<li>1/4 yd lining fabric,</li>
<li>1 wide tape double zipper 30",</li>
<li>a piece of Soft and Stable.</li>
</ol>
<p>Once you purchase the pattern, you get access to the free add on video on ByAnnie's website. The code is a unique code printed on a flyer inside the Pattern</p>
<div style="text-align: center;"><a href="https://renaissanceribbons.com/collections/sewing-patterns/products/renaissance-ribbons-bags-pattern-1" title="Shop patterns"><img src="https://cdn.shopify.com/s/files/1/2355/9259/files/renaissance_ribbons_bags_front_single_81ccd15d-5965-49d1-a67e-64813a33d2e5_480x480.jpg?v=1613253302" alt="" style="float: none;"></a></div>
<div style="text-align: center;"></div>
<div style="text-align: center;"><img src="https://cdn.shopify.com/s/files/1/2355/9259/products/kob46pjbluebirds1x1cover_06d17a93-728e-4801-8ac6-5fd74d7d04d8_480x480.jpg?v=1662162597" alt=""></div>
<div style="text-align: center;"></div>
<div style="text-align: center;">
<meta charset="utf-8">
<h4><span class="s1"></span></h4>
<h4><img src="https://cdn.shopify.com/s/files/1/2355/9259/files/OVB-04_11x_8.5_half_fold-01_600x600.jpg?v=1663714655" alt="what to make with the French Velvet Borders"></h4>
<h4><span class="s1"></span></h4>
<h4><span class="s1">One way we love using them is to create textile panels, stitching together length of velvet borders to ribbons of different width and colors. </span></h4>
<p><span class="s1">The borders have a 1/4 inch white edge, that can easily be covered by the finished edge of a ribbon</span></p>
<p> </p>
<p><span class="s1">1) For example, you can make <span><strong>a unique and glamorous cushion cover</strong></span>, like the one I just made in a couple of hours today!</span></p>
<div><a href="https://renaissanceribbons.com/collections/velvet-borders" title="Shop for French Velvet Ribbon borders"><img src="https://cdn.shopify.com/s/files/1/2355/9259/files/OB_French_Velvet_Borders_Renaissance_Ribbons-9627_480x480.jpg?v=1613337834" alt="Renaissance Ribbons French Velvet Borders easy Projects"></a></div>
<p> </p>
<div class="klaviyo-form-UbPJXv"></div>
<p> </p>
<p>Choose a pillow insert for of your choice, measure the height and width, mine is a 15" square, cut a piece of stabilizer fusible (or not). Arrange your selection of material, cut everything 1" longer than the insert ( I cut all my pieces at 16"), position and play with the arrangement to your satisfaction. Then start stitching the main piece, in the middle, then at the sewing machine continue assembling your panel one ribbon or border at a time.</p>
<p><span class="s1">I prefer not to pin, to not distort the ribbon, I use a zig zag stitch and an invisible thread to connect 2 ribbons together</span></p>
<div><a href="https://renaissanceribbons.com/collections/velvet-borders" title="Shop for French Velvet Ribbon borders"><img src="https://cdn.shopify.com/s/files/1/2355/9259/files/IMG_9820_480x480.jpg?v=1613337816" alt="FRENCH VELVET BORDER diy renaissance Ribbons"></a></div>
<p>When you are done, you can press from the back and prepare the backing of the pillow.</p>
<div><a href="https://renaissanceribbons.com/collections/velvet-borders" title="Shop for French Velvet Ribbon borders"><img src="https://cdn.shopify.com/s/files/1/2355/9259/files/IMG_9823_480x480.jpg?v=1613338012" alt="FRENCH VELVET BORDER diy renaissance Ribbons"></a></div>
<p>I usually prefer to make the envelope type of backing, because t gives me one more chance to add a ribbon on the open edge of the insert!</p>
<p>2) An other simple project is to make a <strong><span>small shoulder bag to carry your phone</span></strong> during the days and not always have it in your hands!</p>
<div><a href="https://renaissanceribbons.com/collections/velvet-borders" title="Shop for French Velvet Ribbon borders"><img src="https://cdn.shopify.com/s/files/1/2355/9259/files/OB_velvet_borders-9687-Edit_480x480.jpg?v=1613341783" alt="Shoulder bag velvet border"></a></div>
<p> </p>
<p>The width of the border id 5.5" so you can simply fold a piece on the length ( 18" folded in 2) , I stitched it on top of some  Soft and Stable for extra protection, then stitch right sides together 1/4" both sides.</p>
<p><em>Tip</em>: Make sure you take in the white border, otherwise it will show in the front</p>
<p>An option is to add lining : create a similar piece out a cotton fabric, leave a 4" open on the side to turn the bag</p>
<p>Time to add a long strap, or a thin cord, or leather handle, or a length of soft webbing covered with a ribbon! I chose 2 small tabs and a D ring and a leather cord with a metal closure.</p>
<p>For a handle of any king: Stitch both ends of the handle on one side of your velvet bag, making sure they do not get twisted and pull down  on the right side of the bag.</p>
<p>Insert it all inside the lining- right sides together, aligning seams at the top, making sure the handles are loose inside to bag</p>
<p> Align top of lining and velvet carefully, pin or clip, I prefer to hand baste at this stage as it gets tight to get the piece under the needle</p>
</div>
<div style="text-align: center;"></div>
<div style="text-align: center;">More wonderful projects to use the French Velvet Borders! </div>
<div style="text-align: center;"></div>
<div style="text-align: center;"><img src="https://cdn.shopify.com/s/files/1/2355/9259/files/OVB-wordless_9a9ecdd3-ef1c-4841-8a43-7c85994ccb2f_1024x1024.jpg?v=1647393636" alt=""></div>
<div style="text-align: center;"></div>
<p> </p>
<div style="text-align: center;"><a class="action_button" href="https://renaissanceribbons.com/collections/sewing-patterns" title="Shop Sewing Patterns">SHOP Sewing Patterns</a></div>
<div style="text-align: center;"></div>
<p> </p>
<div style="text-align: center;"><a href="https://renaissanceribbons.com/search?type=product&amp;q=Sewing%20Kit%20Velvet%20I-case*" target="_blank" title="Shop French Velvet Border Kits" rel="noopener noreferrer">SHOP Renaissance Ribbons French Velvet Kits</a></div>
<p> <a href="https://renaissanceribbons.com/collections/velvet-borders" title="Shop for French Velvet Ribbon borders"><img src="https://cdn.shopify.com/s/files/1/2355/9259/files/OB_French_Velvet_Borders_Renaissance_Ribbons--9648-2_480x480.jpg?v=1613615354" alt="French Velvet Borders" style="display: block; margin-left: auto; margin-right: auto;"></a></p>
<div style="text-align: center;"></div>
<p> </p>
<div style="text-align: center;"><a href="https://renaissanceribbons.com/collections/velvet-borders/products/sewing-kit-velvet-i-case-peonies" title="Shop for kits"><img src="https://cdn.shopify.com/s/files/1/2355/9259/files/DSC4878-Edit-2_480x480.jpg?v=1615571199" alt="velvet kits" style="float: none;"></a></div>
<p> </p>
<div style="text-align: center;"><a href="https://renaissanceribbons.com/collections/velvet-borders/products/sewing-kit-velvet-i-case-owls" title="Shop for kit"><img src="https://cdn.shopify.com/s/files/1/2355/9259/files/OB-Pochette_480x480.jpg?v=1615571170" alt="velvet kits" style="float: none;"></a></div>
<p> </p>
<div style="text-align: center;"><a href="https://renaissanceribbons.com/collections/velvet-borders/products/sewing-kit-velvet-i-case-ginger-cat" title="Shop for Kit"><img src="https://cdn.shopify.com/s/files/1/2355/9259/files/DSC4852-Edit_480x480.jpg?v=1615571135" alt="" style="float: none;"></a></div>
<p> </p>]]>
    </content>
  </entry>
  <entry>
    <id>https://renaissanceribbons.com/blogs/ribbon-crafts/tulapink-webbing-tips</id>
    <published>2023-05-10T11:54:01-06:00</published>
    <updated>2023-05-10T11:54:01-06:00</updated>
    <link rel="alternate" type="text/html" href="https://renaissanceribbons.com/blogs/ribbon-crafts/tulapink-webbing-tips"/>
    <title>Tips and Techniques Tula Pink Webbing</title>
    <author>
      <name>Edith Minne</name>
    </author>
    <content type="html">
      <![CDATA[<p> </p>
<meta charset="utf-8">
<p><span>Most ByAnnie patterns are designed for you to make fabric tubes into which you pull strapping for strength and stability. </span></p>
<p><span>The strapping is usually cut shorter than the fabric to avoid bulk in seams. </span></p>
<p><strong>If you'd like to use webbing instead of fabric-covered strapping for your handles in ByAnnie patterns, here are some tips: </strong></p>
<p><span>1. Do NOT cut the fabrics for the pieces that you'll replace with webbing. In most cases, this will include handles, carrying strap, and carrying strap tabs. </span></p>
<p><span>2. In most cases, you will need to cut the webbing longer than what the pattern calls for so that you can extend the pieces into the seams. So, <strong>cut the webbing to the length that the pattern directs for cutting the FABRIC handles and straps.</strong></span></p>
<p><span> 3. Keep in mind that the webbing tends to fray easily along the ends, so be sure to burn the ends or cover them with something to prevent fraying. Ends may be covered with fabric by folding the fabric so that there are no raw edges showing. Then use the fabric to enclose the ends of the webbing. Alternatively, you can cut a small piece of clear vinyl and fold it over the ends. Stitch about 1/8" to 1/4" from the edge of the webbing and then trim the vinyl even with the stitching and webbing.</span>--</p>
<p><span>Happy stitching, Annie Unrein</span></p>
<p><span>-------------------------------------------------------------------------------------------</span></p>
<p><strong>Tula Pink Project of the Month March 2023 Take a Stand ByAnnie Pattern</strong></p>
<p><span><img src="https://cdn.shopify.com/s/files/1/2355/9259/files/KBA_TK_TB-03_480x480.jpg?v=1683740503" alt="Tips and Techniques to use Tula Pink Webbing as straps"> <img src="https://cdn.shopify.com/s/files/1/2355/9259/files/KBA_TK_TB-2-3-Edit_480x480.jpg?v=1683740565" alt="Tips and Techniques to use Tula Pink Webbing as straps"></span></p>
<p><span><img src="https://cdn.shopify.com/s/files/1/2355/9259/files/KBA_TK_TB-05_480x480.jpg?v=1683740609" alt="Tips and Techniques to use Tula Pink Webbing as straps"></span></p>
<p> </p>
<p> </p>
<meta charset="utf-8">
<p><strong>Tula Pink Project of the Month January 2023 Travel Essential  ByAnnie </strong></p>
<p><strong><img src="https://cdn.shopify.com/s/files/1/2355/9259/files/Sk_Travel_essentials-4-3-Edit_480x480.jpg?v=1683740852" alt="Tula Pink Sewing kit Tips and Techniques"></strong></p>
<p><strong><img src="https://cdn.shopify.com/s/files/1/2355/9259/files/SK_Travel_Essentials-10-Edit_480x480.jpg?v=1683740915" alt="Tula Pink Sewing kit Tips and Techniques"> <img src="https://cdn.shopify.com/s/files/1/2355/9259/files/SK_TE_detail-02_480x480.jpg?v=1683741025" alt="Tula Pink Sewing kit Tips and Techniques"></strong></p>
<p> </p>
<p><img src="https://cdn.shopify.com/s/files/1/2355/9259/files/SK_546_Hillside-F-Edit_480x480.jpg?v=1672779088" alt="Using Tula Pink webbing for straps" style="display: block; margin-left: auto; margin-right: auto;"></p>
<p style="text-align: center;"><strong>Tula Pink Project of the Month January 2023 Hillside Tote by Noodlehead</strong> features making the adjustable strap with 1" striped webbing </p>
<p style="text-align: center;"> </p>
<p>Fabulous video byAnnie on How to use the webbing to make your straps and handles</p>
<p style="text-align: center;"><span style="color: #ff2a00;"><a href="https://www.facebook.com/patternsbyannie/videos/497551465511478" target="_blank" title="How to use Tula Pink Webbing to make straps on byAnnie Bags" style="color: #ff2a00;" rel="noopener noreferrer">access video link</a></span></p>
<p style="text-align: center;"><span style="color: #ff2a00;">start at 20:00 and later at 32.00</span></p>
<p style="text-align: center;"><span style="color: #ff2a00;">   <img src="https://cdn.shopify.com/s/files/1/2355/9259/files/KOB_90_In_Control_TK_DD-6_480x480.jpg?v=1671835297" alt="In Control By Annie Tula Pink Webbing"></span></p>
<h2 style="text-align: center;">Example on the Zip it up Pattern </h2>
<meta charset="utf-8">
<p><span>We opted to make the handle using Tula Pink webbing  which makes super fast work of a normally tedious process.</span></p>
<p><span>We used the 1" webbing</span></p>
<p><img src="https://cdn.shopify.com/s/files/1/2355/9259/files/Zip_it_up_Projects-3-2-Edit_600x600.jpg?v=1669852573" alt="Webbing handles"></p>
<h2 style="text-align: center;"><span style="color: #ff2a00;"></span></h2>
<h2 style="text-align: center;"></h2>
<h2 style="text-align: center;"><span style="color: #ff2a00;"><img src="https://cdn.shopify.com/s/files/1/2355/9259/files/KBA-252_Zip_it_up_Insert_600x600.jpg?v=1669852719" alt="Webbing handles  Zip it up by Annie"></span></h2>
<h2 style="text-align: center;"><span style="color: #ff2a00;"></span></h2>
<h2 style="text-align: center;"></h2>
<h2 style="text-align: center;"><span style="color: #ff2a00;"></span></h2>
<h2 style="text-align: center;">
<span style="color: #ff2a00;">Example on the Catch All Caddy Pattern</span> </h2>
<meta charset="utf-8">
<div style="text-align: center;">
<span>ByAnnie</span><span> </span><span>“Catch All Caddy” Webbing Kit Addendum</span>
</div>
<div style="text-align: center;">
<span>​</span><span>By Kim </span><span>Greenfeld</span>
</div>
<p><span> </span></p>
<p><span>We opted to make our handles using Tula Pink webbing which makes </span><span>super fast</span><span> work of a normally tedious process.</span></p>
<p><span> </span><span>  When working with nylon webbing, I like to slightly singe each cut end with a lighter to eliminate </span><span>fraying</span><span>;  you</span><span> can also use a product like Fray Check.</span></p>
<p><strong>Webbing Cutting Instructions:</strong></p>
<div class="s3">
<span class="s2">• </span><span>For the handle tabs, cut four 12” strips</span>
</div>
<div class="s3">
<span class="s2">• </span><span>For the handles, cut two 19” strips</span>
</div>
<p><span> </span></p>
<p><strong>To Make Handle Tabs:</strong></p>
<p><span>Insert 1 ½” of webbing into rectangle ring, fold over the webbing and sew to secure.  I like to make a ¾” box with an X inside.  I stitch this twice for extra security.  Make 4.  </span></p>
<p><span>The other end of the webbing piece gets inserted in the bottom seam - see illustration below</span></p>
<p><span> </span></p>
<p><strong>To Make Handles:</strong></p>
<p><span>Mark a line 4 ½” from each side.  Fold the webbing in half lengthwise</span><span> and stitch between these marked lines.  I stitched at 1/8” intervals to secure—your thread will show, so pay attention to both your top and bottom thread.</span></p>
<p><span> </span></p>
<p><strong>To Complete Handle Units:</strong></p>
<p><span>Follow the instructions in Section</span><span> IIC of the pattern.</span></p>
<p> </p>
<p><span><img src="https://cdn.shopify.com/s/files/1/2355/9259/files/KOB_94_Catch_All_Caddy-14-Edit_480x480.jpg?v=1660169799" alt="Webbing handles" style="display: block; margin-left: auto; margin-right: auto;"></span></p>
<p><span><img src="https://cdn.shopify.com/s/files/1/2355/9259/files/KOB_94_Catch_All_Caddy-5-Edit_600x600.jpg?v=1660148155" alt="How to make handles using Tula Pink webbing" style="display: block; margin-left: auto; margin-right: auto;">  </span></p>
<p> </p>
<div style="text-align: left;"><img src="https://cdn.shopify.com/s/files/1/2355/9259/files/KOB_90_Parisville_-2-Edit_480x480.jpg?v=1671747911" alt="Parisville Tula Pink Catch All Caddy" style="display: block; margin-left: auto; margin-right: auto;"></div>
<p style="text-align: left;"><span>   </span></p>
<div style="text-align: center;"><img src="https://cdn.shopify.com/s/files/1/2355/9259/files/Sandhill_15d07887-fa48-4342-a578-f82eb9ddbfbb_480x480.jpg?v=1671835542" alt="Sandhill Sling by Noodelhead" style="float: none;"></div>
<p style="text-align: left;"><span> </span></p>
<div style="text-align: center;"><img src="https://cdn.shopify.com/s/files/1/2355/9259/files/Sandhill-24_405b8759-7611-4392-ba6a-647e5364f395_480x480.jpg?v=1671835616" style="float: none;"></div>
<div style="text-align: center;">Be inspired by what our customers are saying too: </div>
<div style="text-align: center;">
<p class="p1"><b>TULA PINK WEBBING Reviews:</b></p>
<p class="p3">A game Changer in Bag Making! Tula Pink</p>
<p class="p3"><b>Nicole L.</b></p>
<p class="p3">Very vibrant colors! Smooth texture. Great for my bags!</p>
<p class="p3"><b>Carrie T</b></p>
<p class="p3">I love it!! It is perfect for bag making!! No longer do you have to make the straps for your bags. Great time saver.</p>
<p class="p2"><b>Wendy</b></p>
<p class="p3">I love the pop of color they<span class="Apple-converted-space">  </span>add to my bags.</p>
<p class="p3"><b>Linnea J.</b></p>
<p class="p2"><b>Great Quality</b></p>
<p class="p3">Beautiful finish, feels very strong and durable.</p>
<p class="p3"><b>Christina G.</b></p>
<p class="p3">Head-over-heels in love with the colors of the new Tula Pink Webbing. I am thrilled with its quality too. Thank you Renaissance Ribbons for providing such great products.</p>
<p class="p2"> </p>
<p class="p4"><b>Tula Pink Webbing</b></p>
<p class="p3">Best designed webbing. Using on different ByAnnie patterns, love it.</p>
<p class="p3"><b>Carrie T.</b></p>
<p class="p4"><b>New webbing!</b></p>
<p class="p3">It is amazing! Never making straps for bags again!!</p>
<p class="p3"><b>Sherry S.</b></p>
<p class="p2"> </p>
<p class="p4"><b>Love the colors and Quality</b></p>
<p class="p3">I can’t say enough good. I made a dog collar, straps and handles on bags and planning to make a short leash. Colors are so vibrant and beautiful. Quality is superb.</p>
<p class="p3"><b>Sheena D.</b></p>
<p class="p2"> </p>
<p class="p3">This webbing is amazing just like Tula!</p>
<p class="p3"><b>Pamela R.</b></p>
<p class="p1"><b>Love the New  Webbing</b></p>
<p class="p3">I love customizing the bags I make and the new webbing does exactly that and more. The colors are vibrant and pair perfectly with many fabric collections. Tula Pink is my favorite designer and I thank her and Renaissance Ribbons for providing such great webbing.</p>
<p class="p3"><b>Sammy</b></p>
<p class="p4"><b>Tula Pink webbing</b></p>
<p class="p3">The colors are great and the webbing goes with all Tula fabric. The order process was painless and delivered timely. I purchased this for my grown daughter who buys every Tula Pink fabric she can and is a huge fan. I know she will make good use of it in her projects.</p>
</div>]]>
    </content>
  </entry>
  <entry>
    <id>https://renaissanceribbons.com/blogs/ribbon-crafts/sandhill-tulapink-parisville</id>
    <published>2023-05-09T19:16:10-06:00</published>
    <updated>2023-05-10T10:29:53-06:00</updated>
    <link rel="alternate" type="text/html" href="https://renaissanceribbons.com/blogs/ribbon-crafts/sandhill-tulapink-parisville"/>
    <title>New Kit ! Sandhill by Noodlehead Tula Pink Parisville</title>
    <author>
      <name>Edith Minne</name>
    </author>
    <content type="html">
      <![CDATA[<p style="text-align: center;"><b>Sandhill Sling Tula Pink Parisville- limited edition May 2023</b></p>
<h4 style="text-align: center;"><span style="color: #ff2a00;"><a href="https://renaissanceribbons.com/products/kit-sandhill-cc-parisville-tula-pink" target="_blank" title="Parisville Tula Pink sewing kit" style="color: #ff2a00;" rel="noopener noreferrer"><b>Reserve yours now</b></a></span></h4>
<p style="text-align: center;"><span style="color: #000000;">Shipping out 3rd week of May</span></p>
<div style="text-align: left;"><img src="https://cdn.shopify.com/s/files/1/2355/9259/files/TK_Parisville-cover_logo_240x240.jpg?v=1683674703" alt="" style="display: block; margin-left: auto; margin-right: auto;"></div>
<br>
<p><span style="font-weight: 400;">This complete sewing kit is an original and limited edition featuring Tula Pink - Parisville fabric collection paired with 2 lovely ribbons Tiny dots and Hypnotizer </span></p>
<p><span style="font-weight: 400;"><img src="https://cdn.shopify.com/s/files/1/2355/9259/files/SK_SH-TK_Parisville-03_480x480.jpg?v=1683673976" alt="sewing kits Tula Pink Dela vu Parisville and Noodlehead Pattern Sandhill"></span></p>
<p><span style="font-weight: 400;">Sew this sling-style bag to carry your daily necessities or to take for travel. Its convenient sling design allows for easy access and being out of the way when you’re not using it.</span></p>
<p><span style="font-weight: 400;">Following the Sandhill Sling Pattern by Noodlehead, we made the following minor adjustments:</span></p>
<br>
<ol>
<li style="font-weight: 400;">
<span style="font-weight: 400;">We added</span><b> ByAnnie Soft &amp; Stable</b><span style="font-weight: 400;"> to the front and back panels, and top and bottom gussets (instead of plain interfacing). It gives more structure to the bag since we use quilting cotton as the exterior fabric</span>
</li>
<li style="font-weight: 400;">
<span style="font-weight: 400;">We strategically sewed</span><b> ribbons</b><span style="font-weight: 400;">: 2 rows on the front pocket and one row on either side of the top zipper.</span>
</li>
<li style="font-weight: 400;">
<span style="font-weight: 400;">We opted to use </span><b>Tula Pink’s 1 ½” Webbing</b><span style="font-weight: 400;"> as the shoulder sling and 1” as a handle</span>
</li>
<li style="font-weight: 400;"><span style="font-weight: 400;">We also added a second triangle ring, so that the Sling could be easily worn over either shoulder</span></li>
</ol>
<p><span style="font-weight: 400;"><img src="https://cdn.shopify.com/s/files/1/2355/9259/files/SK_SH-TK_Parisville-05_240x240.jpg?v=1683673977" alt="sewing kits Tula Pink Dela vu Parisville and Noodlehead Pattern Sandhill"> </span></p>
<div style="text-align: left;">
<img src="https://cdn.shopify.com/s/files/1/2355/9259/files/SK_SH-TK_Parisville-06_240x240.jpg?v=1683673977" alt="sewing kits Tula Pink Dela vu Parisville and Noodlehead Pattern Sandhill" style="float: none;">. <img src="https://cdn.shopify.com/s/files/1/2355/9259/files/SK_SH-TK_Parisville-01_480x480.jpg?v=1683673976" alt="sewing kits Tula Pink Dela vu Parisville and Noodlehead Pattern Sandhill">
</div>
<p><span style="font-weight: 400;">As a great help, there are also many video tutorials on YouTube, and Anna Graham from Noodlehead has a  </span><b>Sandhill Sling Sew-Along</b><b>. </b><span style="font-weight: 400;">This can be helpful if you are new to the pattern or need additional guidance during the sewing process.</span></p>
<p> </p>
<p><span style="font-weight: 400;"><img src="https://cdn.shopify.com/s/files/1/2355/9259/files/SK_SH-TK_Parisville-pattern_480x480.jpg?v=1683673974" alt="sewing kits Tula Pink Dela vu Parisville and Noodlehead Pattern Sandhill"></span></p>
<p><span style="font-weight: 400;">Let's find out more about Tula Pink Deja Vu Collection Prisvilee:</span></p>
 <img src="https://cdn.shopify.com/s/files/1/2355/9259/files/TK_Parisville-cover_logo_240x240.jpg?v=1683674703" alt="Tula Pink Parisville                                                                                    " style="display: block; margin-left: auto; margin-right: auto;">
<ol>
<li><span style="font-weight: 400;"><span>Parisville/Deja Vu Parisville was Tula's first collection for FreeSpirit Fabrics which was originally released in 2010. This collection marked the start of a new partnership that has gone on to last more than a decade! </span></span></li>
</ol>
<meta charset="utf-8">
<p><span style="font-weight: 400;"><span>Tula has left the designs largely intact in an effort to preserve the original qualities of the prints that made them popular in recent years. She made one notable change to the main print.</span></span></p>
<p> </p>
<p><span style="font-weight: 400;"><span>We carry the Fat Quarters Bundles - - they are discontinued now, last chance!</span></span></p>
<h2 style="text-align: center;"><a href="https://renaissanceribbons.com/products/parisville-dejavu-fat-stack" target="_blank" title="Parisville by Tula Pink for FreeSpirit Fabrics" rel="noopener noreferrer"><strong><span style="color: #a11ae7;">Get yours now!</span></strong></a></h2>
<p><span style="font-weight: 400;"><span><img src="https://cdn.shopify.com/s/files/1/2355/9259/files/TK_Parisville_FQ-4-Edit_480x480.jpg?v=1683674703" alt="Parisville Fabrics by Tula Pink for Free spirit"></span></span></p>
<p><span style="font-weight: 400;"><span>The Cameo print had 3 different hair styles when it was first released and the new print focuses on only the most coveted and classic sailing ship hair style that best represents the narrative. New from Tula Pink and Free Spirit, Parisville (Deja Vu) returns to her iconic collection, originally released in 2001. </span></span></p>
<p> </p>
<p><span style="font-weight: 400;"><span><strong><img src="https://cdn.shopify.com/s/files/1/2355/9259/files/Parisville_Fabrics_480x480.jpg?v=1683674704" alt="Parisville Fabrics by Tula Pink for Free spirit"></strong></span></span></p>
<meta charset="utf-8">
<p><span style="font-weight: 400;"><span><strong>The design of Parisville was based on the story of Marie Antoinette, </strong>in all of its unnecessary decadence, as seen through the lens of what a young girl might think is “fancy”. It was only natural to pull the new color palette from a buffet of ice cream colors and dessert treats. This collection is like frosting, its sweet, decadent and entirely indulgent.</span></span></p>]]>
    </content>
  </entry>
  <entry>
    <id>https://renaissanceribbons.com/blogs/ribbon-crafts/5-best-choices-for-mothers-day-gifts</id>
    <published>2023-05-03T20:32:31-06:00</published>
    <updated>2023-05-03T20:41:04-06:00</updated>
    <link rel="alternate" type="text/html" href="https://renaissanceribbons.com/blogs/ribbon-crafts/5-best-choices-for-mothers-day-gifts"/>
    <title>5 best choices for Mother&apos;s Day Gifts</title>
    <author>
      <name>Edith Minne</name>
    </author>
    <content type="html">
      <![CDATA[<meta charset="utf-8"><meta charset="utf-8">
<p><span><strong><span class="entity-link underline underline-offset-2 decoration-1 transition-all duration-300 cursor-pointer decoration-super md:hover:text-super">Mother's Day</span></strong> is just around the corner, and what better way to show your love and appreciation than with a handmade gift?</span></p>
<meta charset="utf-8">
<p><span>If you or your mother figure are fans of Tula Pink fabric and ribbons and enjoy sewing, then you have a great opportunity to make a gift that is both beautiful and meaningful.</span></p>
<h3 style="text-align: center;"><a href="https://renaissanceribbons.com/collections/kits-homemade-tula-pink" target="_blank" title="Tula Pink Sewing Kits " rel="noopener noreferrer"><strong><span style="color: #f2118a;">Tula Pink Sewing Kits Collection</span></strong></a></h3>
<p><span>Here are five creative Mother's Day gift ideas that you can make using Tula Pink ribbons and fabrics.  These kits include everything you need offer a fantastic range of ribbon and fabric combinations that can be used to create stunning, personalized gifts that any mother will cherish.</span></p>
<p> </p>
<div style="text-align: left;"><img src="https://cdn.shopify.com/s/files/1/2355/9259/files/27_480x480.jpg?v=1683166961" alt="Tula Pink Sewing kit as a Mother's Day Gifts" style="float: none;"></div>
<p>  </p>
<div style="text-align: right;"><img src="https://cdn.shopify.com/s/files/1/2355/9259/files/26_480x480.jpg?v=1683166961" alt="Tula Pink Sewing kit as a Mother's Day Gifts" style="float: none;"></div>
<p> </p>
<meta charset="utf-8">
<p><span>And if  your mother or mother figure is the one who loves to sew, then gifting her with Tula Pink fabrics and ribbons could be a real treat. It could inspire her to create something beautiful and add to her fabric collection, which is a gift that keeps on giving.</span></p>
<meta charset="utf-8">
<p><span>Tula Pink Sewing Kits offered by Renaissance Ribbons provide a wealth of creative options for Mother's Day gifts. Whether you're looking for bold and bright designs, striking Peacock, running zebras or cute woodland creatures, owls or foxes,  these kits offer something for every taste. </span></p>
<p><span>So, why not pick up a few kits and get sewing? </span></p>
<p><span>Your mother will love the thoughtful and personalized gifts you create for her.</span></p>
<p> </p>
<div style="text-align: left;"><img src="https://cdn.shopify.com/s/files/1/2355/9259/files/2_bddedd7e-e1bf-4b26-b299-f03d1c63ea2c_480x480.jpg?v=1683166960" alt="Tula Pink Sewing kit as a Mother's Day Gifts" style="float: none;"></div>
<p><span>. </span></p>
<div style="text-align: right;"><img src="https://cdn.shopify.com/s/files/1/2355/9259/files/28_480x480.jpg?v=1683166960" alt="Tula Pink Sewing kit as a Mother's Day Gifts" style="float: none;"></div>
<meta charset="utf-8">
<p><span>The Tula Pink Zipper Pouch Sewing Kit is a great choice for moms who love to stay organized. The kit includes all the fabric and hardware you need to create a stylish and functional zipper pouch. The kit features a variety of Tula Pink fabrics in a range of colors and patterns</span></p>
<div style="text-align: left;"><img src="https://cdn.shopify.com/s/files/1/2355/9259/files/115_480x480.jpg?v=1683166961" alt="Tula Pink Sewing kit as a Mother's Day Gifts" style="float: none;"></div>
<p><span>. </span></p>
<div style="text-align: right;"><img src="https://cdn.shopify.com/s/files/1/2355/9259/files/107_480x480.jpg?v=1683166961" alt="Tula Pink Sewing kit as a Mother's Day Gifts" style="float: none;"></div>]]>
    </content>
  </entry>
  <entry>
    <id>https://renaissanceribbons.com/blogs/ribbon-crafts/monkey-wrench-by-tula-pink</id>
    <published>2023-05-02T16:25:14-06:00</published>
    <updated>2023-05-23T17:40:00-06:00</updated>
    <link rel="alternate" type="text/html" href="https://renaissanceribbons.com/blogs/ribbon-crafts/monkey-wrench-by-tula-pink"/>
    <title>Monkey Wrench by Tula Pink</title>
    <author>
      <name>Edith Minne</name>
    </author>
    <content type="html">
      <![CDATA[<p>With the arrival of EverGlow, the new Fabric collection by Tula Pink, we could not resist revisiting the fabulous Monkey Wrench Woven Ribbon Collection from a few years back.</p>
<p style="text-align: center;"><a href="https://renaissanceribbons.com/collections/monkey-wrench-by-tula-pink" target="_blank" title="Tula Pink Monkey Wrench Ribbons" rel="noopener noreferrer">See Tula Pink Monkey Wrench woven Jacquard Ribbons collection </a></p>
<p><img src="https://cdn.shopify.com/s/files/1/2355/9259/files/TK-50_38mm_Col_1_l_480x480.jpg?v=1683064893" alt="Tula Pink Monkey Wrench Ribbons"><img src="https://cdn.shopify.com/s/files/1/2355/9259/files/TK-52_23mm_Col_1_L_480x480.jpg?v=1683064958" alt="Tula Pink Monkey Wrench Ribbons"> <img src="https://cdn.shopify.com/s/files/1/2355/9259/files/TK-51_13mm_Col_1_L_480x480.jpg?v=1683064984" alt="Tula Pink Monkey Wrench Ribbons"></p>
<p style="text-align: center;"><img src="https://cdn.shopify.com/s/files/1/2355/9259/files/DP-56-Mango-front-2_cacbaf4d-ce2b-4814-af2d-a7e68f7e71f3_480x480.jpg?v=1684364102" alt=""></p>
<p>Let me remind you of the story:</p>
<meta charset="utf-8">
<p><em>Monkey Wrench tells the story of a mischievous monkey named Bananas. Just when everything is going smoothly and life is sailing right along Bananas will show up to turn everything upside down. Bananas has a simple mission and that is to distract you from the mundane and introduce a little spontaneity into your life whether you like it or not. What you do with his interference is completely up to you. What? You are late for a boring budget meeting? Oh Look Bananas is leading a parade down the middle of the street complete with giant Banana Floats and a marching band! This is where you have a choice, go around the parade and arrive 10 minutes late to a meeting you didn’t even want to attend or skip it, put on your most elaborate hat and join in on the fun. In Monkey Wrench you will meet Bananas and his two best friends Hiccup and Buttercup, a pair of gossiping parrots. You will often find Hiccup and Buttercup perched on your shoulder poised to divide your attentions and guide you deeper into Banana’s shenanigans. Lady bugs, disappearing into a sea of spots and the frogs camouflaged in the foliage also make an appearance. The moral of the story is choose fun, give in to happiness, keep your eyes peeled and DON’T SLIP on the bananas.</em></p>]]>
    </content>
  </entry>
</feed>