<?xml version="1.0" encoding="UTF-8"?>
<feed xml:lang="en" xmlns="http://www.w3.org/2005/Atom" xmlns:opensearch="http://a9.com/-/spec/opensearch/1.1/" xmlns:s="http://jadedpixel.com/-/spec/shopify">
  <id>https://www.customled.com/blogs/custom-led-product-information.atom</id>
  <link rel="alternate" type="text/html" href="https://www.customled.com/blogs/custom-led-product-information"/>
  <link rel="self" type="application/atom+xml" href="https://www.customled.com/blogs/custom-led-product-information.atom"/>
  <title>Custom LED - Motorcycle LED Technical Blog by Custom LED</title>
  <updated>2026-06-04T21:49:01-04:00</updated>
  <author>
    <name>Custom LED</name>
  </author>
  <entry>
    <id>https://www.customled.com/blogs/custom-led-product-information/blinker-genie-run-and-turn-from-a-single-bulb</id>
    <published>2026-06-04T21:49:01-04:00</published>
    <updated>2026-06-12T09:22:08-04:00</updated>
    <link rel="alternate" type="text/html" href="https://www.customled.com/blogs/custom-led-product-information/blinker-genie-run-and-turn-from-a-single-bulb"/>
    <title>Blinker Genie and Blinker Genie 2: Run and Turn From a Single Bulb</title>
    <author>
      <name>Custom LED</name>
    </author>
    <summary type="html">
      <![CDATA[<p>The Blinker Genie lets a single-intensity bulb work as both a running light and a turn signal by powering the lamp through the running-light circuit and blinking it off during the signal pulse. Motorcycles use the Blinker Genie; cars and trucks with switchable running-light circuits use the Blinker Genie 2. Covers the two-product split, the universal versus pre-wired R1/R6/Diavel kits, the expected post-install hyperflash and its relay or load-equalizer cure, mounting, and brand-specific wiring notes.</p><p><a class="read-more" href="https://www.customled.com/blogs/custom-led-product-information/blinker-genie-run-and-turn-from-a-single-bulb">More</a></p>]]>
    </summary>
    <content type="html">
      <![CDATA[<p>Most factory turn signal setups use three wires: a running-light circuit, a turn-signal circuit, and a ground. That is how one front lamp can glow steadily as a running light and also blink when you signal. The problem surfaces when you switch to aftermarket LED turn signals, because most of them are two-wire, single-intensity lamps. A two-wire lamp can do one job or the other, not both, so a straight swap forces you to give up the running light to keep the blinker, or give up the blinker to keep the running light.</p>
<p>The <a href="/products/blinker-genie">Blinker Genie</a> is how you keep both. It is a small solid-state controller that switches a single two-wire (single-intensity) lamp between running-light and turn-signal duties, reproducing what your three-wire OEM setup did. On a motorcycle you use the <a href="/products/blinker-genie">Blinker Genie</a>; on a car or truck with a switchable running-light circuit you use the <a href="/products/blinker-genie-2">Blinker Genie 2</a>. The rest of this guide covers how it works, when you need it, and which version fits.</p>
<div class="customled-fitment-cta">
<strong>In a hurry?</strong> <span>Single-intensity bulb that needs to run and turn from one lamp. Motorcycle owners want the Blinker Genie. Car and truck owners want the Blinker Genie 2.</span> <a class="button customled-fitment-cta__button" href="/products/blinker-genie">Shop the Blinker Genie</a>
</div>
<h2>What problem does the Blinker Genie actually solve?</h2>
<p>A single-intensity lamp has one brightness level. It cannot get brighter to signal a turn the way a dual-filament bulb does, so on its own it can only be one thing at a time: a running light or a blinker. The Blinker Genie gets around that by powering the lamp through the running-light circuit instead of the turn-signal circuit. The lamp stays on as a steady running light, and when you signal, the indicator turns off for the duration of the blinker pulse. That off-pulse is how the blinking is achieved. What you see is a steady light that pulses off in rhythm, rather than a dark lamp that flashes on, and to anyone watching from the side it reads as a normal blinking signal.</p>
<h2>The Blinker Genie for Motorcycles lineup</h2>
<p>The core part is the motorcycle Blinker Genie, sold as a pair. Most installs need a pair because you use one unit per side, or roughly one per 25 Watts of indicator load. It runs a single-intensity two-wire lamp as a combined running light and blinker using an Advanced Power MOSFET switch with very low internal resistance, and it is compatible with all of our flasher relay patterns. It is made in the USA.</p>
<div style="display: flex; gap: 16px; align-items: center; margin: 0 0 16px;">
<a href="/products/blinker-genie" style="flex: 0 0 auto; line-height: 0;"><img src="https://cdn.shopify.com/s/files/1/0190/4226/products/MBLINK_REV2.jpg?v=1554824979" width="96" height="96" loading="lazy" style="display: block; width: 96px; height: 96px; object-fit: contain; background-color: var(--card-media-contain-bg,#fff); padding: 8px; border-radius: var(--border-radius-base,8px); box-sizing: border-box;"></a>
<p style="margin: 0; flex: 1 1 auto;"><a href="/products/blinker-genie">Blinker Genie for Motorcycles (pair)</a> is the universal splice-in unit. It runs a single-intensity lamp as both a running light and a blinker, handles a recommended indicator load up to 2A (25W) with a maximum switching capacity of 12A (180W - thermally de-rated to 25W), and works only on a negative common ground system. It includes a built-in 2-watt load equalizer that helps prevent no-blink or four-way-blink behavior on some bikes.</p>
</div>
<div style="display: flex; gap: 16px; align-items: center; margin: 0 0 16px;">
<a href="/products/blinker-genie-prewired-yamaha-3wire" style="flex: 0 0 auto; line-height: 0;"><img src="https://cdn.shopify.com/s/files/1/0190/4226/products/MBLINK_YT3W1-4_bea9dd26-4e92-4a58-a269-5cec88d8406b.jpg?v=1558405688" width="96" height="96" loading="lazy" style="display: block; width: 96px; height: 96px; object-fit: contain; background-color: var(--card-media-contain-bg,#fff); padding: 8px; border-radius: var(--border-radius-base,8px); box-sizing: border-box;"></a>
<p style="margin: 0; flex: 1 1 auto;"><a href="/products/blinker-genie-prewired-yamaha-3wire">
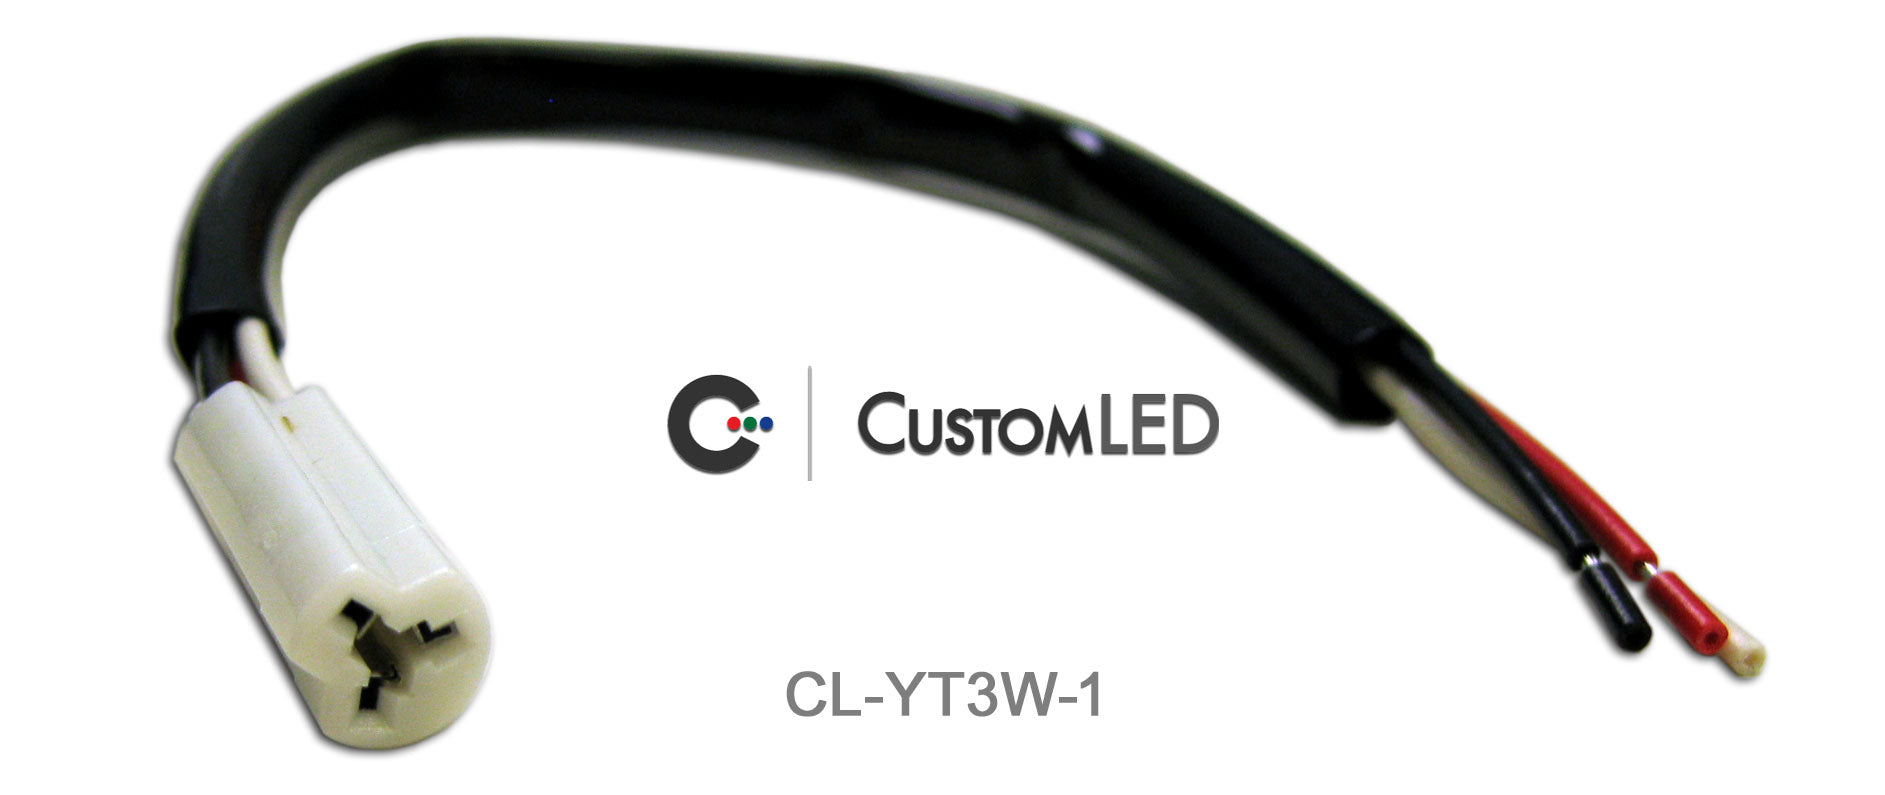
Blinker Genie Pre-Wired for Yamaha Motorcycles (pair)</a> is the standard Blinker Genie for Motorcycles with Yamaha 3-wire OEM connectors already attached. The electronics and specs are identical to the universal unit. It is a good middle ground, easier to install than the universal splice-in and less make-specific than the dedicated kits below. Before ordering, confirm your front connector matches and that your OEM signals ran as run-and-turn from the factory, since some late-model bikes are excluded.</p>
</div>
<div style="display: flex; gap: 16px; align-items: center; margin: 0 0 16px;">
<a href="/products/blinker-genie-pre-wired-for-2015-yamaha-yzf-r1-r1m" style="flex: 0 0 auto; line-height: 0;"><img src="https://cdn.shopify.com/s/files/1/0190/4226/products/MBLINK_15R1-3.gif?v=1614309229" width="96" height="96" loading="lazy" style="display: block; width: 96px; height: 96px; object-fit: contain; background-color: var(--card-media-contain-bg,#fff); padding: 8px; border-radius: var(--border-radius-base,8px); box-sizing: border-box;"></a>
<p style="margin: 0; flex: 1 1 auto;"><a href="/products/blinker-genie-pre-wired-for-2015-yamaha-yzf-r1-r1m">Blinker Genie Pre-Wired for 2015+ Yamaha YZF-R1 and R1M</a> is a plug-and-play harness that uses the OEM connectors with no cutting or splicing and is fully reversible. It makes the OEM pilot lights on this motorcycle function as run and turn. Because it is built for the R1 and R1M electronics, it is the version that installs with no fast-blink rates or error messages. It works with or without the OEM mirror lamps, and you can add Yamaha 3-wire Y-splitters to keep the mirror lamps.</p>
</div>
<div style="display: flex; gap: 16px; align-items: center; margin: 0 0 16px;">
<a href="/products/blinker-genie-pre-wired-for-2017-yamaha-yzf-r6" style="flex: 0 0 auto; line-height: 0;"><img src="https://cdn.shopify.com/s/files/1/0190/4226/products/ezgif.com-gif-maker3.gif?v=1614262158" width="96" height="96" loading="lazy" style="display: block; width: 96px; height: 96px; object-fit: contain; background-color: var(--card-media-contain-bg,#fff); padding: 8px; border-radius: var(--border-radius-base,8px); box-sizing: border-box;"></a>
<p style="margin: 0; flex: 1 1 auto;"><a href="/products/blinker-genie-pre-wired-for-2017-yamaha-yzf-r6">Blinker Genie Pre-Wired for 2017+ Yamaha YZF-R6</a> covers the 2017 to 2020 YZF-R6. It is the same plug-and-play, OEM-connector, fully reversible run-and-turn kit as the R1 version, with no fast-blink rates or error messages on the R6 electronics. It also works with or without the OEM mirror lamps, and the Yamaha 3-wire Y-splitters keep them in the circuit.</p>
</div>
<div style="display: flex; gap: 16px; align-items: center; margin: 0 0 16px;">
<a href="/products/blinker-genie-pre-wired-ducati-diavel" style="flex: 0 0 auto; line-height: 0;"><img src="https://cdn.shopify.com/s/files/1/0190/4226/products/BGDIAVEL2_446c648a-62d3-474e-9407-9ddf90d9d20b.jpg?v=1560726079" width="96" height="96" loading="lazy" style="display: block; width: 96px; height: 96px; object-fit: contain; background-color: var(--card-media-contain-bg,#fff); padding: 8px; border-radius: var(--border-radius-base,8px); box-sizing: border-box;"></a>
<p style="margin: 0; flex: 1 1 auto;"><a href="/products/blinker-genie-pre-wired-ducati-diavel">Blinker Genie Pre-Wired for 2011-2013 Ducati Diavel</a> is the most advanced of the pre-wired kits. Instead of a simple MOSFET intercept, it uses an intelligent microprocessor that drives the OEM front blinker lamps at about 50 percent brightness through PWM as a constant running light, then takes them to full bright and off when you signal. The PWM dimming protects the OEM lamps, which were not designed to dissipate the heat of a constant duty cycle. It is fully compatible with the Ducati Diavel electronics and CAN-bus system, with no fast-blink rates or error messages. It covers 2011 to 2013 only; 2014 to 2018 compatibility is unknown, so contact us if that is your bike.</p>
</div>
<h2>Blinker Genie for Automobiles lineup</h2>
<div style="display: flex; gap: 16px; align-items: center; margin: 0 0 16px;">
<a href="/products/blinker-genie-2" style="flex: 0 0 auto; line-height: 0;"><img src="https://cdn.shopify.com/s/files/1/0190/4226/files/BGA_REV2-1.jpg?v=1764960094" width="96" height="96" loading="lazy" style="display: block; width: 96px; height: 96px; object-fit: contain; background-color: var(--card-media-contain-bg,#fff); padding: 8px; border-radius: var(--border-radius-base,8px); box-sizing: border-box;"></a>
<p style="margin: 0; flex: 1 1 auto;"><a href="/products/blinker-genie-2">Blinker Genie 2 for Automobiles (pair)</a> is the automotive counterpart, built for switchable running light circuits. With the running lights off, it passes the turn-signal input straight through so the lamps blink on and stay off when you are not signaling. With the running lights on, it powers the lamps as running lights and blinks them off when there is voltage on the turn-signal input. Same core specs as the bike unit: a recommended load up to 2A (25W), internal resistance under 0.18 ohms, an Advanced Power MOSFET switch, and negative common ground only.</p>
</div>
<h2>Blinker Genie or Blinker Genie 2?</h2>
<p>This is the single most common point of confusion, and the answer comes down to one wiring difference between bikes and cars. On a motorcycle, the running-light circuit is live whenever the bike is running, so the original <a href="/products/blinker-genie">Blinker Genie</a> assumes and requires that the running light is always on when you expect to use the blinkers. Cars and trucks are different. They usually have a switchable running-light or parking-light circuit that you can turn on and off, and the original Blinker Genie was not designed for a switchable circuit. That is exactly why the <a href="/products/blinker-genie-2">Blinker Genie 2</a> exists.</p>
<p>A good real-world example of where the Blinker Genie 2 belongs is an owner who wanted the park and signal lamps on an '85 Pontiac Grand Prix to work as a combined running light and turn signal. The first attempt used four relays, capacitors, resistors, and diodes before the owner discovered there was a single part for the job. Because that is a car with a switchable running-light circuit, the right answer is the Blinker Genie 2, not the motorcycle unit. For any motorcycle, use the original Blinker Genie.</p>
<h2>Why does my signal blink fast after I install it?</h2>
<p>Here is the part most people miss when they plan a Blinker Genie install. Because the Genie moves the lamp onto the running-light circuit, the turn-signal circuit no longer sees the bulb it expects. The bike reads that as a burned-out bulb and speeds the flash up. That is hyperflash, and on the universal Blinker Genie it is expected behavior, not a defect. The dedicated R1, R6 and Diavel pre-wired kits are tuned to their bike's electronics and avoid this, but the universal unit and the Yamaha 3-wire pre-wired version will usually trigger it.</p>
<p>
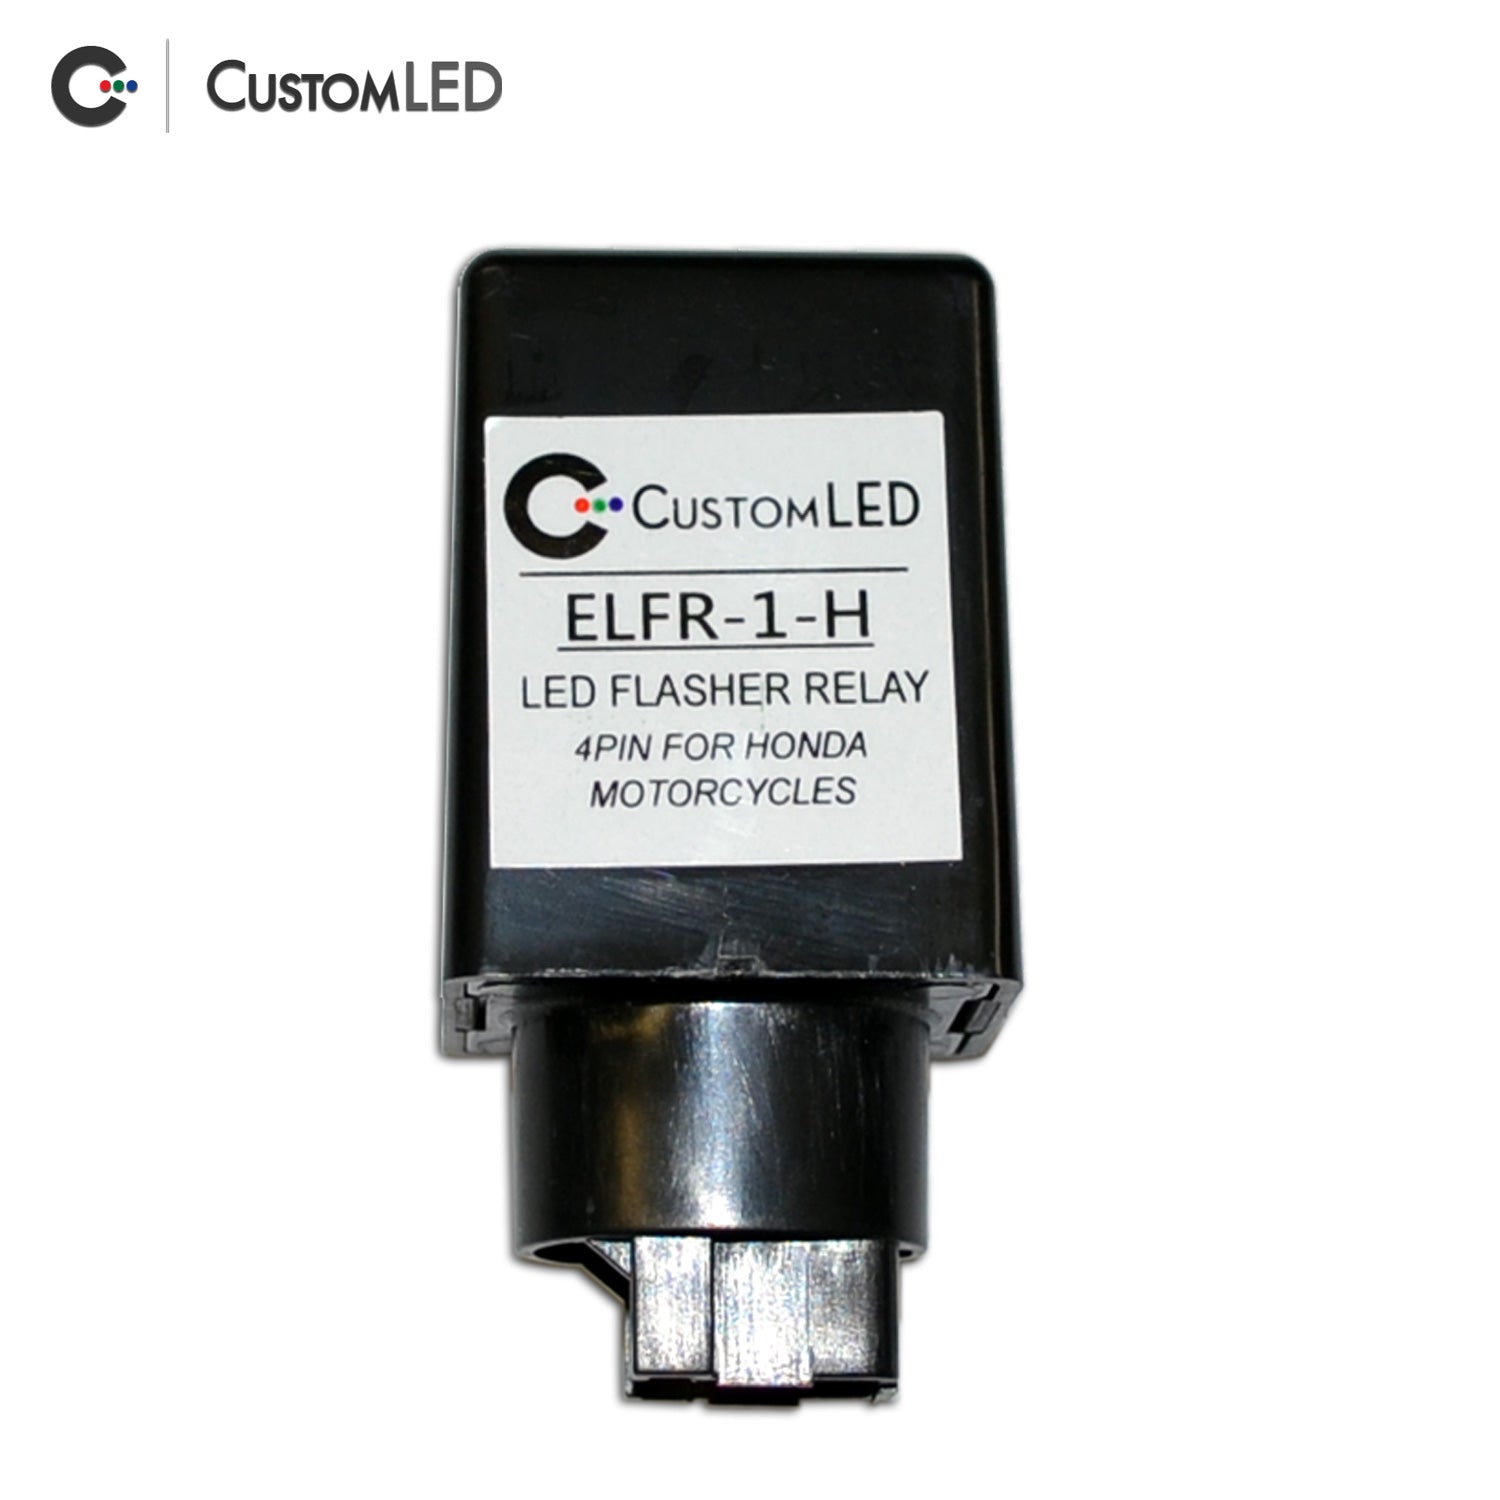
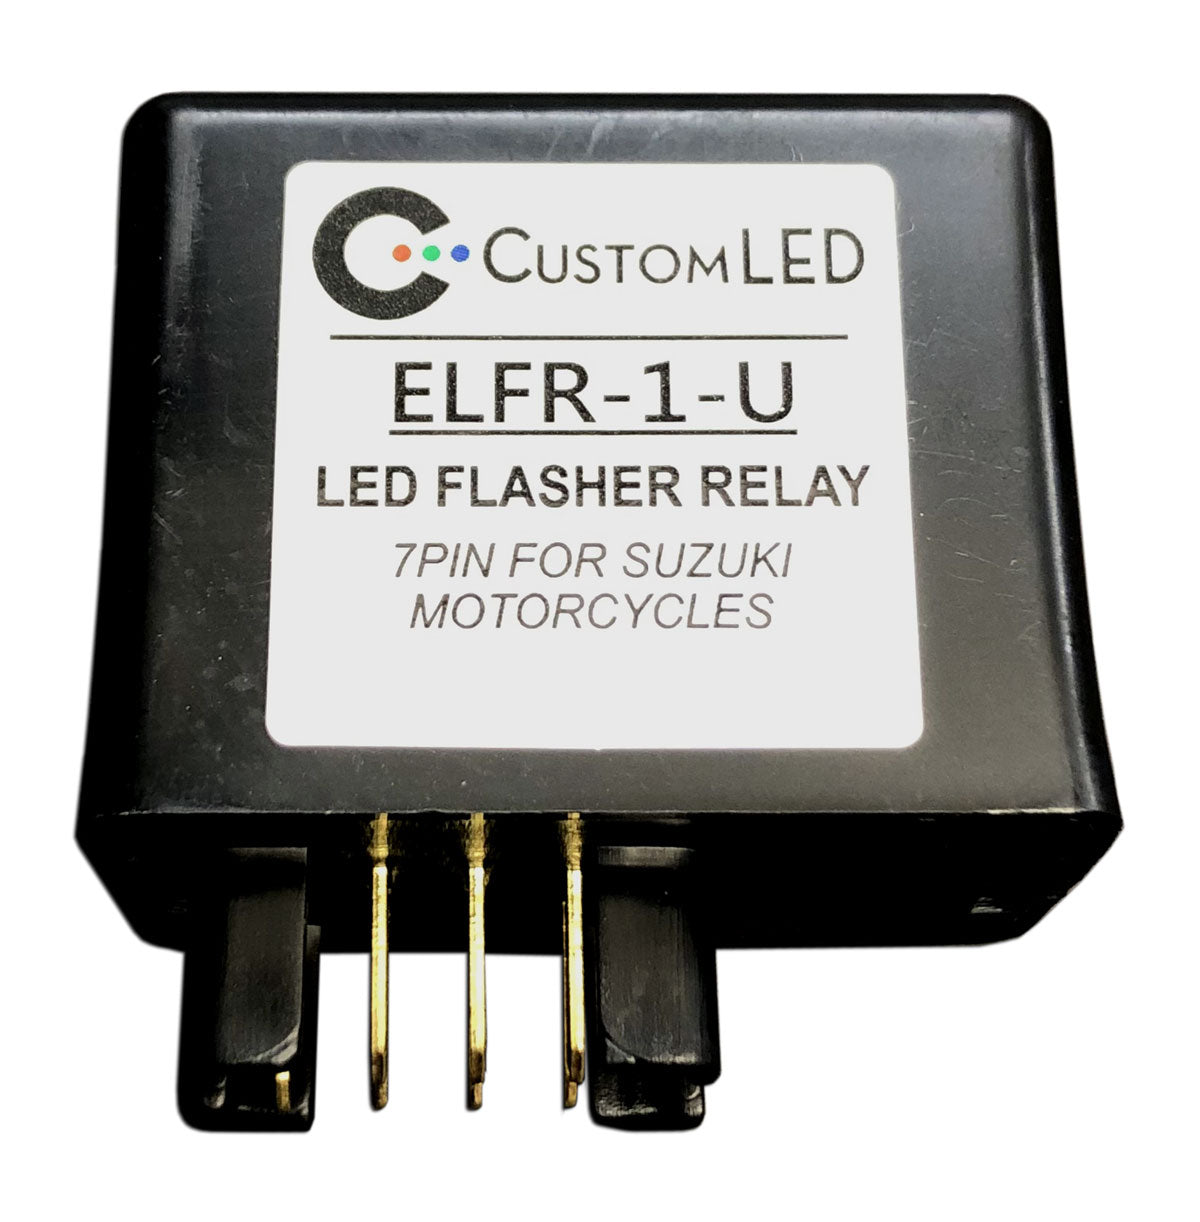
The cure is the same one we recommend for any LED hyperflash. Add an Electronic LED Flasher Relay, which is the preferred fix, or a Load Equalizer as the alternative. The flasher relay maintains the normal DOT blink rate of 60 to 120 flashes per minute, which is the speed you are after. We will not go through why LEDs cause fast blink here, because our FAQ already covers it well. Read <a href="/pages/custom-led-frequently-asked-questions">our blinker FAQ</a> for the fast-blink and no-blink mechanics and the relay-versus-equalizer decision, and <a href="/blogs/custom-led-product-information/led-flasher-relays-for-motorcycles">our full flasher relay guide</a> for the deep dive. Keep the counts straight while you plan: you use a pair of Blinker Genies (one per corner), but only one flasher relay per motorcycle.</p>
<p>One more symptom looks like a Blinker Genie problem but is not. The built-in 2-watt load equalizer only helps on some bikes, so do not count on it to clear hyperflash by itself. If the signals will not blink at all, that is a too-little-load no-blink situation, again covered in the FAQ, and the same relay or equalizer fix applies.</p>
<h2>Do they get hot, and can I zip-tie them to a wiring bundle?</h2>
<p>
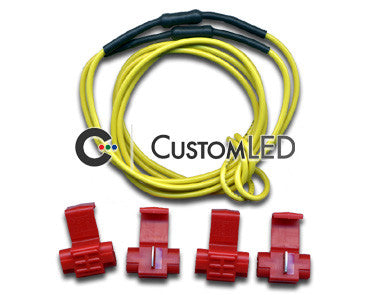
The Blinker Genie is a small solid-state unit built around a low-resistance MOSFET switch, with internal resistance around 0.18 ohms, and it is water resistant. A low-resistance solid-state switch like this runs cool by design, and we do not publish an operating-temperature figure for it. If you need a hard number for a specific mounting situation, contact us and we will get you the real answer. As for mounting, the unit is small (roughly 0.7 by 1.25 by 0.25 inches for the motorcycle version) and water resistant, so tucking it into a wiring bundle is a normal way to mount it. Use the included 7-inch wires and butt connectors to reach your splice points.</p>
<h2>How to install it</h2>
<p>For the universal Blinker Genie, the wiring follows directly from how the part works. You move each single-intensity lamp onto the running-light circuit through the Genie, then handle the resulting hyperflash with a flasher relay (preferred) or a load equalizer as described above. Use one Genie per corner, and remember the 2A recommended load per unit.</p>
<p>Two brand-specific wiring notes will save you a lot of troubleshooting. On bikes with no front running light, such as some newer Kawasaki sportbikes, the red wire needs to be tied to an ignition-switched source so the Genie has power when the bike is on. On Hondas, the left and right running-light wires (blue/white and orange/white) must be jumpered together to both red inputs, because Honda cuts the running-light circuit on the turning side, which would otherwise leave one Genie without power mid-signal.</p>
<p>If you would rather skip the splicing entirely and you ride an R1, R1M, R6 or a 2011 to 2013 Diavel, the pre-wired kits plug into the OEM connectors, are fully reversible, and are tuned so you do not have to chase a flasher relay afterward. The Yamaha 3-wire pre-wired version is the in-between option for other Yamahas whose front connector matches and whose signals ran as run-and-turn from the factory.</p>
<div class="customled-fitment-cta">
<strong>Ready to run and turn from one bulb?</strong> <span>Grab the motorcycle Blinker Genie, or the Blinker Genie 2 for a car or truck with switchable running lights.</span> <a class="button customled-fitment-cta__button" href="/products/blinker-genie">Shop the Blinker Genie</a>
</div>
<p>Still not sure which version fits your setup, or whether your bike will hyperflash? Tell us your make, model, year and what your front signals do now, and we will point you to the right part. <a href="/pages/contact-custom-led">Contact Custom LED</a> and we will help you sort it out.</p>]]>
    </content>
  </entry>
  <entry>
    <id>https://www.customled.com/blogs/custom-led-product-information/will-this-custom-led-part-fit-my-motorcycle-compatibility-finder</id>
    <published>2026-06-04T21:49:00-04:00</published>
    <updated>2026-06-04T22:45:34-04:00</updated>
    <link rel="alternate" type="text/html" href="https://www.customled.com/blogs/custom-led-product-information/will-this-custom-led-part-fit-my-motorcycle-compatibility-finder"/>
    <title>Will This Custom LED Part Fit My Motorcycle? Using the Compatibility Finder</title>
    <author>
      <name>Custom LED</name>
    </author>
    <summary type="html">
      <![CDATA[<p>Use the Compatibility Finder for flasher relays (make/model/year or OEM relay part number), per-product fitment lists for tail lights, and send us a photo when you are unsure.</p><p><a class="read-more" href="https://www.customled.com/blogs/custom-led-product-information/will-this-custom-led-part-fit-my-motorcycle-compatibility-finder">More</a></p>]]>
    </summary>
    <content type="html">
      <![CDATA[<p>The fastest way to find out if a Custom LED flasher relay fits your bike is the Compatibility Finder. Enter your make, model, and year, or type in your OEM flasher-relay part number, and it routes you to the exact relay that plugs into your motorcycle. Tail lights work a little differently: each one is its own product with its own fitment list, so you confirm those on the product page. If you are not sure about either one, send us a photo and we will confirm before you order.</p>
<p>This guide explains which tool to use for which part, how the finder decides, and what to do when your exact model and year is not listed.</p>
<div class="customled-fitment-cta">
<strong>Looking for a flasher relay?</strong> <span>Enter your make, model, and year, or your OEM relay part number, and we will point you to the right one.</span> <a class="button customled-fitment-cta__button" href="/pages/motorcycle-led-flasher-relay-compatibility">Find My Relay</a>
</div>
<h2>Which tool fits which part?</h2>
<p>Custom LED makes two kinds of parts that need fitment, and each has its own way to check.</p>
<p><strong>Flasher relays use the Compatibility Finder.</strong> Every motorcycle uses an OEM flasher relay (or a combination relay that includes the flasher function), and the connector that plugs into it is different from brand to brand. The finder exists because that connector is what matters. You give it your make, model, and year, or the OEM relay part number printed on your stock unit, and it matches you to the relay variant with the right plug. Browse the full family on the <a href="/collections/electronic-led-flasher-relays">Electronic LED Flasher Relays</a> collection.</p>
<p><strong>Tail lights use per-product fitment lists.</strong> Our integrated LED tail lights are built model by model, so fitment lives on each individual product page rather than in a single finder. Find your bike in the <a href="/collections/integrated-led-tail-lights-for-motorcycles">Integrated LED Tail Lights</a> collection and the product itself tells you the exact years and variants it covers.</p>
<h2>How does the relay finder decide?</h2>
<p>It comes down to the OEM connector. The electronics inside our relays do the same job on every bike: maintain the normal DOT blink rate of 60 to 120 flashes per minute so your LED turn signals do not hyperflash or fail to blink. What changes from one motorcycle to the next is the plug, and that is exactly what the finder resolves. It reads your make, model, and year and selects the variant whose connector matches your harness, so the relay drops in without any wiring work.</p>
<p>Here is the relay family the finder picks from. Differently shaped connectors mean a different part for the same job.</p>
<div style="display:flex;gap:16px;align-items:center;margin:0 0 16px;">
<a href="/products/elfr-1-electronic-led-flasher-relay" style="flex:0 0 auto;line-height:0;"><img src="https://cdn.shopify.com/s/files/1/0190/4226/products/ELFR-1-LED-Relay-1.jpg" width="96" height="96" loading="lazy" style="display:block;width:96px;height:96px;object-fit:contain;background-color:var(--card-media-contain-bg,#fff);padding:8px;border-radius:var(--border-radius-base,8px);box-sizing:border-box;"></a><p style="margin:0;flex:1 1 auto;"><strong>ELFR-1 Electronic LED Flasher Relay with OEM Connector.</strong> The most common variant the finder routes to. It maintains the OEM blinker flash rate for a wide range of LED and non-LED blinkers and offers plug and play connectivity with compatible 2-wire and 3-wire OEM flasher-relay connectors.</p>
</div>
<div style="display:flex;gap:16px;align-items:center;margin:0 0 16px;">
<a href="/products/elfr-1-qd-electronic-led-flasher-relay" style="flex:0 0 auto;line-height:0;"><img src="https://cdn.shopify.com/s/files/1/0190/4226/products/ELFR-1_QD-MAX.jpeg" width="96" height="96" loading="lazy" style="display:block;width:96px;height:96px;object-fit:contain;background-color:var(--card-media-contain-bg,#fff);padding:8px;border-radius:var(--border-radius-base,8px);box-sizing:border-box;"></a><p style="margin:0;flex:1 1 auto;"><strong>ELFR-1-QD Electronic LED Flasher Relay with Quick Disconnects.</strong> The same electronics as the ELFR-1, but with male quick-disconnect terminals on the wires instead of an OEM plug. They plug directly into some compatible OEM flasher-relay connectors and are useful for custom and hard-wire applications.</p>
</div>
<div style="display:flex;gap:16px;align-items:center;margin:0 0 16px;">
<a href="/products/elfr-1-h-electronic-led-flasher-relay-4-pin-honda" style="flex:0 0 auto;line-height:0;"><img src="https://cdn.shopify.com/s/files/1/0190/4226/products/ELFR-1-H-4.jpg" width="96" height="96" loading="lazy" style="display:block;width:96px;height:96px;object-fit:contain;background-color:var(--card-media-contain-bg,#fff);padding:8px;border-radius:var(--border-radius-base,8px);box-sizing:border-box;"></a><p style="margin:0;flex:1 1 auto;"><strong>ELFR-1-H Electronic LED Flasher Relay, 4-Pin Honda.</strong> The variant for Honda's 4-pin OEM flasher-relay connector, found on bikes like the CB500F and CB500X, CB650F, CBR500R, CBR650F, CMX300 and CMX500 Rebel, NC700 and NC750, CTX700, and VFR1200F.</p>
</div>
<div style="display:flex;gap:16px;align-items:center;margin:0 0 16px;">
<a href="/products/elfr-1-u-electronic-led-flasher-relay-7-pin-suzuki" style="flex:0 0 auto;line-height:0;"><img src="https://cdn.shopify.com/s/files/1/0190/4226/products/ELFR-1-U-5.jpg" width="96" height="96" loading="lazy" style="display:block;width:96px;height:96px;object-fit:contain;background-color:var(--card-media-contain-bg,#fff);padding:8px;border-radius:var(--border-radius-base,8px);box-sizing:border-box;"></a><p style="margin:0;flex:1 1 auto;"><strong>ELFR-1-U Electronic LED Flasher Relay, 7-Pin Suzuki.</strong> The variant for Suzuki's 7-pin combination relay, used on models like the Bandit, GSX-R, Hayabusa, SV650, V-Strom, Boulevard, Burgman, DR-Z400, and Katana. It plugs into the compatible Suzuki OEM combination relay socket, and it is the clearest example of why the finder exists: same job, completely different connector.</p>
</div>
<div style="display:flex;gap:16px;align-items:center;margin:0 0 16px;">
<a href="/products/elfr-p-led-flasher-relay" style="flex:0 0 auto;line-height:0;"><img src="https://cdn.shopify.com/s/files/1/0190/4226/products/ELFR-P_3_max.jpg" width="96" height="96" loading="lazy" style="display:block;width:96px;height:96px;object-fit:contain;background-color:var(--card-media-contain-bg,#fff);padding:8px;border-radius:var(--border-radius-base,8px);box-sizing:border-box;"></a><p style="margin:0;flex:1 1 auto;"><strong>ELFR-P Programmable Electronic LED Flasher Relay with OEM Connector.</strong> The programmable specialty version for motorcycles that the finder routes to the ELFR-1. It offers 10 user-selectable blinker flash patterns ranging from a DOT-style flash to intense strobe modulations, and it maintains the pattern you select.</p>
</div>
<h2>How does tail-light fitment work?</h2>
<p>Tail lights are matched per product, and one product often covers many model years. Our integrated LED tail light is a direct replacement for the OEM housing, so every model and year that shares that housing is covered by one product.</p>
<p>The 2015 to 2026 Yamaha YZF-R1 is a clean example. One product, the Blaster-X Integrated LED Tail Light, fits 2015 to 2026 Yamaha YZF-R1, R1S, and R1M because they all share the same OEM tail-light housing.</p>
<div style="display:flex;gap:16px;align-items:center;margin:0 0 16px;">
<a href="/products/2015-2016-2017-2018-2019-2020-2021-2022-2023-2024-2025-2026-yamaha-yzf-r1-integrated-led-tail-light" style="flex:0 0 auto;line-height:0;"><img src="https://cdn.shopify.com/s/files/1/0190/4226/products/15R1_WL-1000px-1.jpg" width="96" height="96" loading="lazy" style="display:block;width:96px;height:96px;object-fit:contain;background-color:var(--card-media-contain-bg,#fff);padding:8px;border-radius:var(--border-radius-base,8px);box-sizing:border-box;"></a><p style="margin:0;flex:1 1 auto;"><strong>2015 to 2026 Yamaha YZF-R1 Blaster-X Integrated LED Tail Light.</strong> A Complete Plug and Play Ultra-Bright Integrated LED tail light with High Quality clear or smoked lens and OEM fitment. No cutting, splicing, or bodywork modifications are required, and it produces no bulb-out warnings, diagnostic errors, or fast blink rates. No external load equalizers or flasher relays are necessary for proper operation with the Blaster-X tail light.</p>
</div>
<p>Because fitment is grouped by housing, the way to confirm a tail light is to open the product page for your model and read its fitment line. If your bike is on the list, it fits.</p>
<h2>Things that look like a fitment problem but are not</h2>
<p>Two situations come up often, and neither one means the part will not work.</p>
<p><strong>Your bike is a brand-new model year.</strong> When a manufacturer carries the same OEM part forward into a new model year, the existing product fits. The R1 tail light extending to the 2026 model year on a carried-over housing is exactly that situation. If your year is the newest one and the OEM part did not change, it should fit, and our <a href="/pages/custom-led-policies">return and satisfaction policy</a> covers you if anything is off.</p>
<p><strong>Your exact model and year is not listed.</strong> If you search the finder or the tail-light collection and your specific model and year does not come up, we most likely do not make that part for your bike yet. The finder and the per-product fitment lists are the authoritative source, so if your bike is not listed, do not assume a near match will plug in. Check with us before ordering.</p>
<h2>How to check your bike, step by step</h2>
<p>For a flasher relay:</p>
<ol>
<li>Open the <a href="/pages/motorcycle-led-flasher-relay-compatibility">Compatibility Finder</a>.</li>
<li>Enter your make, model, and year, or type in the OEM flasher-relay part number from your stock unit.</li>
<li>The finder routes you to the matching relay variant. Add it to your cart.</li>
</ol>
<p>For a tail light:</p>
<ol>
<li>Open the <a href="/collections/integrated-led-tail-lights-for-motorcycles">Integrated LED Tail Lights</a> collection.</li>
<li>Find your model and open its product page.</li>
<li>Read the fitment line. If your year and variant are listed, it fits.</li>
</ol>
<p>If your make, model, and year does not return a result on either path, contact us before ordering rather than guessing at a near match.</p>
<div class="customled-fitment-cta">
<strong>Ready to check your relay?</strong> <span>The Compatibility Finder matches your make, model, and year to the exact flasher relay for your bike.</span> <a class="button customled-fitment-cta__button" href="/pages/motorcycle-led-flasher-relay-compatibility">Find My Relay</a>
</div>
<h2>Still not sure?</h2>
<p>If the finder or the product page does not give you a clear answer, <a href="/pages/contact-custom-led">contact Custom LED</a> and send us a photo of your OEM flasher-relay connector or your tail-light housing. We will confirm the right part before you order so you get a clean plug-and-play fit the first time.</p>]]>
    </content>
  </entry>
  <entry>
    <id>https://www.customled.com/blogs/custom-led-product-information/magic-strobes-brake-light-flasher-patterns</id>
    <published>2026-06-04T21:48:57-04:00</published>
    <updated>2026-06-04T22:45:33-04:00</updated>
    <link rel="alternate" type="text/html" href="https://www.customled.com/blogs/custom-led-product-information/magic-strobes-brake-light-flasher-patterns"/>
    <title>Magic Strobes Brake Light Flasher: The 10 Patterns Explained</title>
    <author>
      <name>Custom LED</name>
    </author>
    <summary type="html">
      <![CDATA[<p>The Magic Strobes Brake Light Flasher adds a programmable flash-then-solid pattern to the brake light you already have, no integrated tail light required. It has ten selectable patterns, works on cars and motorcycles, and runs on either LED or incandescent brake lights. This guide explains what each pattern does, how to pick one, and what you need on your bike or car for it to work. Intended for off-road use only.</p><p><a class="read-more" href="https://www.customled.com/blogs/custom-led-product-information/magic-strobes-brake-light-flasher-patterns">More</a></p>]]>
    </summary>
    <content type="html">
      <![CDATA[<p>The Magic Strobes Brake Light Flasher makes your existing brake light flash a short pattern and then hold solid every time you hit the brakes. No integrated tail light or special lamp required. It wires into the brake light your bike or car already has, works with LED or incandescent bulbs, and gives you ten selectable patterns ranging from a subtle four-flash to an aggressive max strobe.</p>
<p>This guide walks through all ten patterns, explains which kind of bike or car each one needs, and covers the one wiring requirement that trips most people up.</p>
<div class="customled-fitment-cta">
<strong>Want the short version?</strong> <span>The Magic Strobes Brake Light Flasher is a universal 3-wire brake modulator with ten patterns, for LED or incandescent brake lights. It ships the same business day.</span> <a class="button customled-fitment-cta__button" href="/products/magic-strobes-brake-light-flasher">Shop Magic Strobes</a>
</div>
<h2>What is the Magic Strobes Brake Light Flasher?</h2>
<p>Magic Strobes is a small inline brake modulator. It sits between your brake circuit and your brake light, watches for the brake signal, and plays a flash pattern before letting the light go solid. Because it works on the brake light you already have, you do not replace anything. It is designed by Custom LED and built by Custom Dynamics, and it carries a 5-year warranty.</p>
<p>The hardware is compact at 2.25 x 1.25 x 0.5 inches, sealed in a weather-tight case, and handles up to 84 watts at 12 volts DC. It includes over-current, thermal, short-circuit, and reverse-wiring protection, so a wiring mistake during install is far less likely to damage anything. This is the GEN2 version of the design, and the brake modulation it uses comes from the proven Brake Alert feature in the Blaster-X integrated tail light line.</p>
<div style="display: flex; gap: 16px; align-items: center; margin: 0 0 16px;">
<a href="/products/magic-strobes-brake-light-flasher" style="flex: 0 0 auto; line-height: 0;"><img src="https://cdn.shopify.com/s/files/1/0190/4226/products/Brake-Light-Flasher-1-MAX.jpg?v=1558406254" width="96" height="96" loading="lazy" style="display: block; width: 96px; height: 96px; object-fit: contain; background-color: var(--card-media-contain-bg,#fff); padding: 8px; border-radius: var(--border-radius-base,8px); box-sizing: border-box;"></a>
<p style="margin: 0; flex: 1 1 auto;"><a href="/products/magic-strobes-brake-light-flasher">Magic Strobes Brake Light Flasher</a> for standard tail light systems. The universal version, for any vehicle with a dedicated brake circuit. Works with LED or incandescent brake lights. Simple 3-wire install. This is the version most riders and drivers want.</p>
</div>
<h2>Does it work on cars and motorcycles?</h2>
<p>Yes. Magic Strobes is universal. On a motorcycle it taps into the brake light circuit. On a car the third or high-mount brake light is usually the right place to connect it, because that lamp is almost always a dedicated brake-only circuit. The patterns themselves behave the same on either type of vehicle.</p>
<p>Magic Strobes is also CANbus and cruise control compatible on most bikes. A few bikes throw a CANbus error or lose cruise control when you modify a tail light circuit, because the bike expects a certain amount of current to flow. On those bikes, add a small <a href="/products/canbus-load-equalizer">CANbus Load Equalizer</a> to restore normal behavior. Most installs do not need one. Think of it as the documented fix for the minority of bikes that complain, not a required part.</p>
<h2>The 10 brake-flash patterns</h2>
<p>Magic Strobes ships with ten patterns you can step through and select. The first four work on both incandescent and LED brake lights. The strobe patterns require an LED brake light, because incandescent filaments cannot turn on and off fast enough to strobe. The patterns below are the ones on the standard universal unit.</p>
<ul>
<li>
<strong>P0:</strong> Four brake flashes, then solid (incandescent or LED).</li>
<li>
<strong>P1:</strong> Four flashes, solid for 3 seconds, then repeat (incandescent or LED).</li>
<li>
<strong>P2:</strong> Seven flashes, then solid (incandescent or LED).</li>
<li>
<strong>P3:</strong> Seven flashes, solid for 3 seconds, then repeat (incandescent or LED).</li>
<li>
<strong>P4:</strong> Quad strobe, solid for 1 second, then quad strobe (LED only).</li>
<li>
<strong>P5:</strong> Quad strobe, solid for 1 second, quad strobe, solid for 3 seconds, then repeat (LED only).</li>
<li>
<strong>P6:</strong> Blaster-X cycle for 3 seconds, then solid (LED only).</li>
<li>
<strong>P7:</strong> Blaster-X cycle on repeat (LED only).</li>
<li>
<strong>P8:</strong> Max brake strobe for 4 seconds, then solid (LED only).</li>
<li>
<strong>P9:</strong> No strobe, disabled.</li>
</ul>
<h2>Which pattern should you pick?</h2>
<p>The easiest way to choose is by how much activity you want before the light settles. The four-flash patterns (P0 and P1) are the most restrained. They give a quick burst and then go solid, which is enough to draw attention without being busy. The seven-flash patterns (P2 and P3) extend that burst. The strobe patterns (P4 through P8) are progressively more aggressive, with P8 being the most intense before it returns to solid.</p>
<p>The patterns that end in a single burst and then hold solid (P0, P2, P6, P8) flash once per brake application. The repeating patterns (P1, P3, P5, P7) keep cycling the flash and solid as long as you hold the brake. For one clear announcement per brake press, pick a single-burst pattern. For continuous motion while you hold the brake, pick a repeating one. P9 simply leaves the light steady.</p>
<h2>What you need before you buy</h2>
<p>The one requirement that catches people out is the brake circuit. Magic Strobes needs a dedicated brake wire, meaning a wire that carries +12 volts only when you are braking. On a standard tail light system that is exactly how the brake wire works, so the standard universal unit is the right choice. On a car, the third brake light is usually the safe dedicated tap for the same reason.</p>
<p>Some newer bikes, including newer BMW models, use a 2-wire tail light system where a single wire carries both the running-light signal and the brake signal. Magic Strobes only works on a 3-wire system with a dedicated brake wire, so it is not compatible with these 2-wire shared run-and-brake tail lights. If you are not sure which your bike uses, contact us before ordering.</p>
<p>For some bikes there is also a fully plug-and-play kit that applies the same modulator through a microprocessor harness, with no cutting or splicing. The 2011 to 2018 Ducati Diavel kit is one example. These kits add per-bike logic, such as canceling the modulation while a turn signal is active. Plug-and-play kits exist for select models, but most people use the universal unit on a standard brake circuit.</p>
<h2>How is this different from an integrated tail light?</h2>
<p>Magic Strobes is a modulator. It adds a brake-flash pattern to the OEM brake light you already have, and that light keeps doing its normal job. An integrated tail light, like the Blaster-X line, is a full replacement that builds the run, brake, and turn functions into one bright LED unit, and the Brake Alert flash pattern is built into it.</p>
<p>If your tail light is fine and you only want the brake-flash behavior, Magic Strobes is the simpler and cheaper path. If you want a brighter, all-in-one LED tail light with integrated turn signals and the flash built in, look at the <a href="/collections/integrated-led-tail-lights-for-motorcycles">Blaster-X integrated tail lights</a> instead.</p>
<h2>How do you install it?</h2>
<p>The standard universal unit is a simple 3-wire install: power, ground, and brake output. You connect the unit to your dedicated brake circuit, ground it, and run the brake output to your brake light. The modulator reads that +12 volt signal to know exactly when to play the pattern. The built-in protection against over-current, short circuits, and reverse wiring gives you some margin if a connection is wrong, but double-check your taps before powering up.</p>
<p>After wiring, you step through the patterns to select the one you want, and you are done. The unit seals up in a weather-tight case, so once mounted it tolerates the elements.</p>
<div class="customled-fitment-cta">
<strong>Ready to add brake-flash patterns?</strong> <span>The Magic Strobes Brake Light Flasher works with your existing LED or incandescent brake light, installs with three wires, and gives you ten selectable patterns. Backed by a 5-year warranty and ships the same business day.</span> <a class="button customled-fitment-cta__button" href="/products/magic-strobes-brake-light-flasher">Shop Magic Strobes</a>
</div>
<p>Still not sure which version fits your bike or car, or whether you have a dedicated brake circuit? <a href="/pages/contact-custom-led">Contact Custom LED</a> with your make, model, and year and we will point you to the right part.</p>]]>
    </content>
  </entry>
  <entry>
    <id>https://www.customled.com/blogs/custom-led-product-information/universal-smart-triple-play-run-brake-turn</id>
    <published>2026-06-04T21:48:24-04:00</published>
    <updated>2026-06-04T22:46:13-04:00</updated>
    <link rel="alternate" type="text/html" href="https://www.customled.com/blogs/custom-led-product-information/universal-smart-triple-play-run-brake-turn"/>
    <title>Universal Smart Triple Play: Run, Brake, and Turn From Your OEM Tail Light</title>
    <author>
      <name>Custom LED</name>
    </author>
    <summary type="html">
      <![CDATA[<p>The Universal Smart Triple Play is a controller-only module that lets your two rear turn signals work as running light, brake light, and turn signal at the same time, without replacing your OEM tail light. It works with LED or incandescent lights, supports bikes with or without a center tail light, and has a built-in 10-pattern brake modulator. Off-road use only.</p><p><a class="read-more" href="https://www.customled.com/blogs/custom-led-product-information/universal-smart-triple-play-run-brake-turn">More</a></p>]]>
    </summary>
    <content type="html">
      <![CDATA[<p>If you want your two rear turn signals to also glow as running lights and flash brighter when you brake, the <a href="/products/smart-triple-play-run-brake-turn-module">Universal Smart Triple Play</a> is the module that does it. It is a small control unit that wires into your existing lights and gives each rear lamp three jobs: running light, brake light, and turn signal. You keep your OEM tail light and turn signals or upgrade.</p>
<p>It works with LED or incandescent bulbs, and it works whether your bike has a center tail light or just the two rear turn signals.</p>
<div class="customled-fitment-cta">
<strong>In a hurry?</strong> <span>The Universal Smart Triple Play works with most bikes that have two rear turn signals, with or without a center tail light.</span> <a class="button customled-fitment-cta__button" href="/products/smart-triple-play-run-brake-turn-module">View the Universal Smart Triple Play</a>
</div>
<h2>What does the Universal Smart Triple Play actually do?</h2>
<p>It takes your two rear turn signals and lets them serve three jobs at once. They glow steadily as running lights, get brighter when you pull the brake, and still flash as turn signals. On a bike that has a center tail light, the module supports that light too, so your whole rear cluster works together. On a bike with only two rear lamps and no center light, you still get full run, brake, and turn behavior out of those two lamps.</p>
<p>Two settings let you dial it in for your bike. You can adjust the running-light brightness so the outer turn signals match the center tail light, and the turn signal flashes at full contrast (off to full bright) so each blink reads clearly from behind. On bikes that already have an ignition-off hazard function, the module preserves it.</p>
<h2>How is this different from a Blaster-X tail light?</h2>
<p>A <a href="/products/2008-2009-2010-2011-2012-2013-2014-2015-2016-yamaha-yzf-r6-integrated-led-tail-light">Blaster-X</a> is a model-specific integrated tail light. It is a complete replacement housing built for one bike, with its own bright LEDs and clear lens. The Universal Smart Triple Play is the opposite approach. It is a universal controller-only module. It does not replace anything. It keeps your existing OEM tail light and turn signals and adds the run, brake, and turn behavior on top of them.</p>
<p>The way Custom LED positions the two products makes the choice straightforward. The brake modulation in the Smart Triple Play comes from the Brake Alert feature in the Blaster-X line. If your bike has a Blaster-X option and you want a full upgraded tail light, get the Blaster-X. If your bike does not have a Blaster-X option, or you want to keep your stock lighting and add run, brake, and turn behavior with a brighter brake flash, the Universal Smart Triple Play is the right fit.</p>
<div style="display: flex; gap: 16px; align-items: center; margin: 0 0 16px;">
<a href="/products/smart-triple-play-run-brake-turn-module" style="flex: 0 0 auto; line-height: 0;"><img src="https://cdn.shopify.com/s/files/1/0190/4226/products/run-brake-turn-MAX.jpg?v=1538234346" width="96" height="96" loading="lazy" style="display: block; width: 96px; height: 96px; object-fit: contain; background-color: var(--card-media-contain-bg,#fff); padding: 8px; border-radius: var(--border-radius-base,8px); box-sizing: border-box;"></a>
<p style="margin: 0; flex: 1 1 auto;"><strong><a href="/products/smart-triple-play-run-brake-turn-module">Universal Smart Triple Play</a></strong> is the controller-only module. It works with LED or incandescent lights, supports bikes with or without a center tail light, and has the 10-pattern brake modulator built in. The housing is slim and water-resistant at 4.2 x 1.4 x 0.6 in. Designed by Custom LED, built by Custom Dynamics.</p>
</div>
<div style="display: flex; gap: 16px; align-items: center; margin: 0 0 16px;">
<a href="/products/2008-2009-2010-2011-2012-2013-2014-2015-2016-yamaha-yzf-r6-integrated-led-tail-light" style="flex: 0 0 auto; line-height: 0;"><img src="https://cdn.shopify.com/s/files/1/0190/4226/products/r6-tail-light-blaster-x_fa1beb20-31b4-44c9-afcf-90268961a64a.jpg?v=1558403227" width="96" height="96" loading="lazy" style="display: block; width: 96px; height: 96px; object-fit: contain; background-color: var(--card-media-contain-bg,#fff); padding: 8px; border-radius: var(--border-radius-base,8px); box-sizing: border-box;"></a>
<p style="margin: 0; flex: 1 1 auto;"><strong><a href="/products/2008-2009-2010-2011-2012-2013-2014-2015-2016-yamaha-yzf-r6-integrated-led-tail-light">Blaster-X Integrated LED Tail Light</a></strong> (shown: 2008-2016 Yamaha YZF-R6) is a plug-and-play replacement housing for a specific model, with Brake Alert, Turn Alert, Strobe Mode, and Sure-Blink built into the light itself. Pick this when your bike has a Blaster-X option and you want a full tail light upgrade.</p>
</div>
<h2>The 10 brake patterns built into the module</h2>
<p>The Universal Smart Triple Play has a built-in brake modulator with 10 patterns. When you brake, it can flash the center tail light, the turn signals, or both, depending on how you set it up. Some patterns work with both incandescent and LED lights, and some are LED only. These are the patterns as listed on the product page:</p>
<ul>
<li>Pattern 0: Four Flashes then Solid (Incandescent or LED)</li>
<li>Pattern 1: Four Flashes, Solid for 3 Seconds, Repeat (Incandescent or LED)</li>
<li>Pattern 2: Seven Flashes then Solid (Incandescent or LED)</li>
<li>Pattern 3: Seven Flashes, Solid for 3 Seconds, Repeat (Incandescent or LED)</li>
<li>Pattern 4: Quad Strobe, then Solid for 1 Second, then Quad Strobe (LED Only)</li>
<li>Pattern 5: Quad Strobe, Solid for 1 Second, then Quad Strobe, Solid for 3 Seconds, Repeat (LED Only)</li>
<li>Pattern 6: Custom LED Blaster-X Cycle for 3 Seconds, then Solid (LED Only)</li>
<li>Pattern 7: Custom LED Blaster-X Cycle, Repeat (LED Only)</li>
<li>Pattern 8: Max Strobe 4 Seconds, Solid (LED Only)</li>
<li>Pattern 9: Constant Max Strobe (LED Only)</li>
</ul>
<h2>What about wiring and CAN-bus?</h2>
<p>The module is marked *CANbus and Cruise Control Compatible. The asterisk matters. Some motorcycles need additional accessories for full compatibility, so it is not a blanket guarantee on every bike. On bikes where modifying the OEM tail light affects the CAN-bus system or cruise control, the <a href="/products/canbus-load-equalizer">CANbus Load Equalizer</a> adds CAN-bus compatibility and restores cruise control function.</p>
<p>There is one wiring behavior worth understanding before you install. When you connect your rear turn signals to this module, the input draws very little current. That reduced load on the blinker circuit causes a fast blink on many bikes. This is the same low-current effect that causes fast-blink when riders switch to LED turn signals, and we explain that mechanism in detail in our <a href="/pages/custom-led-frequently-asked-questions">FAQ</a>.</p>
<p>The fix is simple. Replacing the stock flasher with an <a href="/collections/electronic-led-flasher-relays">Electronic LED Flasher Relay</a> is generally the best way to keep the stock blink rate. The relay maintains the normal DOT blink rate of 60 to 120 flashes per minute. Some motorcycles have a flasher that is not compatible with a replacement relay, and on those bikes the <a href="/products/load-equalizer-25-watt">25 Watt Load Equalizer</a> is used instead. You only need one flasher relay per motorcycle. For the full relay-versus-equalizer decision, read our <a href="/pages/custom-led-frequently-asked-questions">FAQ</a> rather than guessing.</p>
<h2>Do I also need a Magic Strobes brake flasher?</h2>
<p>No, not on the same tail light. The brake modulator is already built into the Universal Smart Triple Play, so adding a separate brake flasher to the same circuit would be redundant. The two products are for different riders.</p>
<p>Choose the <a href="/products/magic-strobes-brake-light-flasher">Magic Strobes Brake Light Flasher</a> when all you want is brake modulation and you are not converting your turn signals to run, brake, and turn. It is the standalone brake modulator and works with LED or incandescent lights. Choose the Universal Smart Triple Play when you want the full run, brake, and turn conversion. The brake modulator is already built in.</p>
<div style="display: flex; gap: 16px; align-items: center; margin: 0 0 16px;">
<a href="/products/magic-strobes-brake-light-flasher" style="flex: 0 0 auto; line-height: 0;"><img src="https://cdn.shopify.com/s/files/1/0190/4226/products/Brake-Light-Flasher-1-MAX.jpg?v=1558406254" width="96" height="96" loading="lazy" style="display: block; width: 96px; height: 96px; object-fit: contain; background-color: var(--card-media-contain-bg,#fff); padding: 8px; border-radius: var(--border-radius-base,8px); box-sizing: border-box;"></a>
<p style="margin: 0; flex: 1 1 auto;"><strong><a href="/products/magic-strobes-brake-light-flasher">Magic Strobes Brake Light Flasher</a></strong> is the standalone, universal brake modulator for riders who want brake modulation only, with no run or turn conversion. It works with LED or incandescent lights and is marked *CANbus and Cruise Control Compatible.</p>
</div>
<h2>How to install it</h2>
<p>The module uses simple connectors and runs off multiple power inputs, with built-in protection against short circuits, reverse wiring, and overload. You connect your rear turn signals to the module, connect the center tail light if your bike has one, and power the unit. Then you set the running-light brightness so the outer lights match the rest of your cluster, and pick the brake pattern you want from the list above.</p>
<p>Keep in mind the flasher behavior covered earlier. Connecting the turn signals to the module lowers the load on the blinker circuit, so most riders pair the install with an Electronic LED Flasher Relay to maintain a normal blink rate. On bikes where the relay is not compatible, a 25 Watt Load Equalizer is used instead. Install difficulty varies by bike, since this is a universal module and some bikes need a bit of splicing while others are simpler.</p>
<h2>What if there is a plug-and-play version for my bike?</h2>
<p>For some bikes, Custom LED builds a model-specific kit that pairs the Smart Triple Play module with a wiring harness made for that exact motorcycle. The clearest example is the <a href="/products/ducati-xdiavel-smart-turn-signal-integrator-kit">Ducati XDiavel Smart Turn Signal Integrator Kit</a> for the 2016-2023 XDiavel and XDiavel S. It converts the factory rear run and brake lights so they also work as turn signals, it is plug-and-play with full CAN-bus compatibility, and the install is fully reversible with no cutting or splicing. There is also a model-specific kit for the <a href="/products/ducati-diavel-1260-1260s-smart-turn-signal-integrator-kit">Ducati Diavel 1260 and 1260 S</a>, along with kits for other bikes such as the Triumph Bonneville Bobber. These model-specific kits are plug-and-play solutions built around the same Smart Triple Play module, which is designed by Custom LED and built by Custom Dynamics.</p>
<div class="customled-fitment-cta">
<strong>Ready to add run, brake, and turn?</strong> <span>The Universal Smart Triple Play keeps your OEM tail light and adds run, brake, and turn behavior plus a 10-pattern brake modulator.</span> <a class="button customled-fitment-cta__button" href="/products/smart-triple-play-run-brake-turn-module">View the Universal Smart Triple Play</a>
</div>
<p>Still not sure whether the universal module, a model-specific kit, or a standalone brake flasher is right for your setup? <a href="/pages/contact-custom-led">Contact Custom LED</a> and tell us your bike, your lighting, and what you want it to do.</p>]]>
    </content>
  </entry>
  <entry>
    <id>https://www.customled.com/blogs/custom-led-product-information/can-bus-motorcycles-and-led-conversions</id>
    <published>2026-06-04T21:48:19-04:00</published>
    <updated>2026-06-04T22:45:35-04:00</updated>
    <link rel="alternate" type="text/html" href="https://www.customled.com/blogs/custom-led-product-information/can-bus-motorcycles-and-led-conversions"/>
    <title>No Flasher Relay to Replace? LED Turn Signals on CAN-bus and Computer-Controlled Motorcycles</title>
    <author>
      <name>Custom LED</name>
    </author>
    <summary type="html">
      <![CDATA[<p>CAN-bus motorcycles monitor each lighting circuit by expected current draw, so LEDs can trigger a bulb-out or lamp-failure warning even when they work. This guide explains why CAN-bus flags LEDs, keeps the CAN-bus bulb-out problem distinct from flasher-relay hyperflash, names the bikes that fight back hardest (BMW, Ducati, late-model Honda sportbikes, Harley/Victory/Indian), and covers what works: CAN-bus compatible Blaster-X tail lights and kits with built-in load equalizers, plus standalone load equalizers. Products are off-road use only.</p><p><a class="read-more" href="https://www.customled.com/blogs/custom-led-product-information/can-bus-motorcycles-and-led-conversions">More</a></p>]]>
    </summary>
    <content type="html">
      <![CDATA[<p>On a lot of motorcycles, the part that makes your turn signals blink is a small plug-in flasher relay you can pull out and replace. On some of the newer bikes, that part is gone. The flasher relay function is built into the motorcycle's computer (the ECU or body control module) and controlled by software, so there is nothing to unplug and swap. This guide is for those bikes: what actually goes wrong when you install LED blinker lamps, why the fast blink and the dash warning light are the same problem and not two, and how to fix it.</p>
<div class="customled-fitment-cta">
<strong>Chasing a fast blink or a bulb-out warning?</strong> <span>On most bikes with no replaceable flasher relay, a wattage-matched load equalizer is the fix - unless your bike uses a constant-current system.</span> <a class="button customled-fitment-cta__button" href="/collections/universal-led-load-equalizers">Shop Load Equalizers</a>
</div>
<h2>One problem, not two: why the blink speeds up and the dash lights up together</h2>
<p>Here is the part the internet usually gets wrong. On a computer-controlled bike, the same circuit that flashes your turn signals is also watching that circuit to decide whether a lamp has burned out. It judges that by how much current the circuit draws. A stock incandescent blinker lamp pulls a known amount of current; an LED blinker lamp pulls a fraction of it.</p>
<p>When the computer sees that low draw, it concludes the lamp has failed, and it reacts in two visible ways at once: it speeds up the blink (the classic hyperflash) and it puts a bulb-out warning in the gauge cluster. These are not two separate faults with two separate fixes. They are one judgment by the computer, that the circuit looks wrong, shown to you two ways. Address the cause and both clear together.</p>
<p>This can also happen on newer motorcycles that come with LED blinker lamps from the factory, as most aftermarket LED blinker lamps consume less power than the OEM. The motorcycle's ECU/BCM is tuned specifically for the power consumption of the OEM blinker lamps, and even a small variance can trigger the lamp error.</p>
<h2>The fix: give the circuit back the load it expects</h2>
<p>Since the computer is reacting to low current, the fix is to add the current back. A load equalizer is a power resistor that wires in parallel with your LED blinker lamp and draws the same amount of current the original incandescent lamp did. With the stock load restored, the computer sees a normal circuit again, the blink rate returns to normal, and the bulb-out warning goes away, because you have addressed the one thing that was triggering both.</p>
<p>One caveat before you buy: load equalizers are the fix for the large majority of bikes with no replaceable flasher relay, but not all of them. If your bike uses a constant-current system, adding load will not work and no load equalizer will solve it, so it is worth ruling that out first. We explain how to spot it in the constant-current section below.</p>
<p>Two rules make this work:</p>
<ul>
<li>
<strong>Match the wattage</strong> of the original blinker lamp you removed. Too little load and the system still reads bulb-out, so the fast blink stays. We make them in 2 watt, 10 watt, 25 watt, and 25 watt heavy-duty sizes so you can match the bike.</li>
<li>
<strong>One load equalizer per converted blinker lamp</strong> - typically four for a full LED swap, front and rear on both sides. They are sold as pairs.</li>
</ul>
<div style="display: flex; gap: 16px; align-items: center; margin: 0 0 16px;">
<a href="/products/stage-i-load-equalizer" style="flex: 0 0 auto; line-height: 0;"><img src="https://cdn.shopify.com/s/files/1/0190/4226/products/LEQZ_I.jpg?v=1538234371" alt="Custom LED 2 Watt Load Equalizer pair" width="96" height="96" loading="lazy" style="display: block; width: 96px; height: 96px; object-fit: contain; background-color: var(--card-media-contain-bg,#fff); padding: 8px; border-radius: var(--border-radius-base,8px); box-sizing: border-box;"></a>
<p style="margin: 0; flex: 1 1 auto;"><strong><a href="/products/stage-i-load-equalizer">Load Equalizer - 2 Watt (pair)</a></strong> The smallest size. Right when the blinker lamp you removed drew very little, such as a factory low-wattage or already-LED circuit. Two watts on its own often still reads as bulb-out on an incandescent bike, so match your removed bulb wattage.</p>
</div>
<div style="display: flex; gap: 16px; align-items: center; margin: 0 0 16px;">
<a href="/products/load-equalizer-10-watt" style="flex: 0 0 auto; line-height: 0;"><img src="https://cdn.shopify.com/s/files/1/0190/4226/products/LEQZ_II_f44d2391-7667-4ca7-ae0f-304d67b28b57.jpg?v=1538234336" alt="Custom LED 10 Watt Load Equalizer pair" width="96" height="96" loading="lazy" style="display: block; width: 96px; height: 96px; object-fit: contain; background-color: var(--card-media-contain-bg,#fff); padding: 8px; border-radius: var(--border-radius-base,8px); box-sizing: border-box;"></a>
<p style="margin: 0; flex: 1 1 auto;"><strong><a href="/products/load-equalizer-10-watt">Load Equalizer - 10 Watt (pair)</a></strong> A middle size for lower-wattage OEM blinker lamps. Match it to the wattage of the lamp you removed.</p>
</div>
<div style="display: flex; gap: 16px; align-items: center; margin: 0 0 16px;">
<a href="/products/load-equalizer-25-watt" style="flex: 0 0 auto; line-height: 0;"><img src="https://cdn.shopify.com/s/files/1/0190/4226/products/LEQZ_II.jpg?v=1538234373" alt="Custom LED 25 Watt Load Equalizer pair" width="96" height="96" loading="lazy" style="display: block; width: 96px; height: 96px; object-fit: contain; background-color: var(--card-media-contain-bg,#fff); padding: 8px; border-radius: var(--border-radius-base,8px); box-sizing: border-box;"></a>
<p style="margin: 0; flex: 1 1 auto;"><strong><a href="/products/load-equalizer-25-watt">Load Equalizer - 25 Watt (pair)</a></strong> The common choice for restoring a normal blink on bikes that ran standard incandescent blinker lamps. It mimics a 20 to 30 watt bulb so the computer sees a normal circuit.</p>
</div>
<div style="display: flex; gap: 16px; align-items: center; margin: 0 0 16px;">
<a href="/products/load-equalizer-25-watt-heavy-duty" style="flex: 0 0 auto; line-height: 0;"><img src="https://cdn.shopify.com/s/files/1/0190/4226/products/LEQZ_HD_1-2_0b3c0512-6ac6-48bf-a9c5-d8cde144abe0.jpg?v=1538234335" alt="Custom LED 25 Watt Heavy Duty Load Equalizer pair" width="96" height="96" loading="lazy" style="display: block; width: 96px; height: 96px; object-fit: contain; background-color: var(--card-media-contain-bg,#fff); padding: 8px; border-radius: var(--border-radius-base,8px); box-sizing: border-box;"></a>
<p style="margin: 0; flex: 1 1 auto;"><strong><a href="/products/load-equalizer-25-watt-heavy-duty">Load Equalizer - 25 Watt Heavy Duty (pair)</a></strong> The same 25 watt load with extra thermal headroom for hotter installs or tight spaces. Use it when a standard 25 watt unit runs too hot.</p>
</div>
<p>For how to size them and the electrical background, see our <a href="/blogs/custom-led-product-information/13640005-all-about-led-load-equalizers-for-led-blinkers-on-motorcycles">guide to LED load equalizers</a>.</p>
<h2>How to tell whether your bike even has a replaceable relay</h2>
<p>Before you buy anything, confirm which kind of bike you have. The quick field test: locate the suspected flasher relay, often under the seat or near the fuse box, and unplug it. If your turn signals stop working entirely, it was the flasher relay, and on a relay bike swapping in an electronic LED flasher relay is the cleaner fix. If the signals still work with that part unplugged, it was a power relay, not the flasher, which means the flasher function is integrated into the computer, there is nothing to replace, and load equalizers are your path.</p>
<p>If your bike does have a replaceable relay, this is the wrong guide. Start with our <a href="/blogs/custom-led-product-information/led-flasher-relays-for-motorcycles">guide to LED flasher relays</a> instead, and browse the <a href="/collections/electronic-led-flasher-relays">Electronic LED Flasher Relays</a> that fit it.</p>
<h2>The exception: constant-current systems, where adding load will not work</h2>
<p>Some recent models drive their blinker lamps with a constant-current design rather than a standard 12 volt circuit. The voltage on these systems will float within a range, to achieve the specified current output to drive the OEM blinker lamps. Typically these systems will measure at a lower voltage, like 7-9V when operating. There is no way to connect an aftermarket blinker lamp designed for constant voltage (12V nominal) to this system and have it function properly. You will certainly be stuck in the fast-blink lamp warning mode, and your aftermarket lamps will never see the 12V they were designed for.</p>
<p>These systems are hard to detect without taking direct measurements of voltage. We have designed our Blaster-X Tail Lights to work properly on motorcycles equipped with these systems (like the 2015+ Yamaha Road Star Raider), but there is currently no blinker converter for the front.</p>
<h2>A note on what the CANbus Load Equalizer is, and is not</h2>
<p>We do sell a product called the <a href="/products/canbus-load-equalizer">CANbus Load Equalizer</a>, but it is a brake-circuit part that restores cruise-control function and clears bulb-out messages on certain late-model Harley and Victory tail-light installs. It is not the part for turn-signal fast blink. For blinker hyperflash, the fix is the standard wattage-matched Load Equalizers above. It is designed to pair with the Universal Magic Strobes Brake Light Flasher, and it works whether that modulator is wired inline on the brake circuit or as part of an OEM tail-light replacement; we have tested it on late-model Harley and Victory.</p>
<h2>Related reading</h2>
<ul>
<li>Sizing and electrical background: our <a href="/blogs/custom-led-product-information/13640005-all-about-led-load-equalizers-for-led-blinkers-on-motorcycles">guide to LED load equalizers</a>.</li>
<li>For bikes that do have a replaceable relay: our <a href="/blogs/custom-led-product-information/led-flasher-relays-for-motorcycles">guide to LED flasher relays</a>.</li>
<li>If all four signals flash together: our <a href="/blogs/custom-led-product-information/4-way-hazard-blink-problem-on-motorcycles-with-led-turn-signals">4-way blink guide</a>.</li>
</ul>
<div class="customled-fitment-cta">
<strong>Not sure which category your bike is in?</strong> <span>Tell us your year, make, and model and what your signals are doing, and we will point you to the right fix.</span> <a class="button customled-fitment-cta__button" href="/pages/contact-custom-led">Contact Custom LED</a>
</div>]]>
    </content>
  </entry>
  <entry>
    <id>https://www.customled.com/blogs/custom-led-product-information/led-turn-signal-install-troubleshooting</id>
    <published>2026-06-04T21:47:33-04:00</published>
    <updated>2026-06-04T22:46:02-04:00</updated>
    <link rel="alternate" type="text/html" href="https://www.customled.com/blogs/custom-led-product-information/led-turn-signal-install-troubleshooting"/>
    <title>LED Turn Signal Install Troubleshooting: Solid Fronts, No-Blink, Dead Side, Blown Fuse</title>
    <author>
      <name>Custom LED</name>
    </author>
    <summary type="html">
      <![CDATA[<p>GAP-C install-troubleshooting post, fact-checked against the live Custom LED store on 2026-05-31. Six-symptom structure: solid fronts, no-blink/blown-fuse, dead side, 4-way blink, brake-switch, erratic flash. All six product handles re-verified ACTIVE with featuredMedia images matching, both pages and the connector collection resolve, all three cross-link articles confirmed (4-way and load-equalizer PUBLISHED, Blinker Genie still UNPUBLISHED). Every product spec re-checked against live product bodyHtml; FMVSS 108 / SAE J588 60-120 fpm blink rate confirmed via web. CTA-box and 96px thumbnail-row markup verified verbatim against the live TB-1 article body (Article 564671479906). No off-road/legal hedges. No content changes were required; the draft passed verification as-is.</p><p><a class="read-more" href="https://www.customled.com/blogs/custom-led-product-information/led-turn-signal-install-troubleshooting">More</a></p>]]>
    </summary>
    <content type="html">
      <![CDATA[<p>Most LED turn signal install problems come down to one of six things: the blinker lamps operate as they should but blink fast, the front and rear blinker lamps stay on solid as running lights, the blinker lamps will not blink at all, one side is non-functional, all four blink together, or the blinker lamps work fine and then start flashing erratically. Almost every one has a simple cause and a specific fix. Most are wiring or load issues, not a bad part.</p>
<p>This guide walks through each symptom in plain terms: what it looks like, what is actually causing it, and the exact part or step that fixes it. Start by matching your problem to the list below.</p>
<h2>The six symptoms, at a glance</h2>
<p>Find the one that matches what your bike is doing, then jump to that section below.</p>
<ul>
<li>
<strong>Fast blink rate.</strong> Most common, install one of our Electronic LED Flasher Relays.</li>
<li>
<strong>Front and rear blinker lamps stay on solid as running lights at ignition-on, and will not blink.</strong> The run circuit is back-feeding the turn circuit.</li>
<li>
<strong>Blinker lamps don't light up at all.</strong> Usually a blown fuse, a relay not cycling because of too little load, a bad turn signal switch or wiring, or blinker lamps wired with the wrong polarity.</li>
<li>
<strong>One side is non-functional.</strong> A bad blinker lamp, bad turn signal selector switch, a bad ground, or a side-specific connection.</li>
<li>
<strong>All four blinker lamps blink together.</strong> The 4-way blink, caused by crossover voltage at the dash indicator.</li>
<li>
<strong>Blinker lamps flash erratically after working fine.</strong> Water in the flasher relay body, or electrical noise.</li>
</ul>
<div style="height: 32px;" aria-hidden="true"><br></div>
<h2>Symptom 1: the blinker lamps blink fast when engaged.</h2>
<p>This is the classic example of when you would install an Electronic LED Flasher Relay. The OEM Flasher Relay is designed to blink fast when it detects a burned out blinker lamp. This is to alert the rider that there is a blown bulb. It makes this determination by measuring current/power draw through the flasher relay. So, when switching to highly efficient LEDs, it's determined as a bulb-out condition by the flasher relay.</p>
<p>Our Electronic LED Flasher Relays are designed to blink at the correct DOT blink rate, regardless of the type of blinker lamps installed.</p>
<div class="customled-fitment-cta">
<strong>Not sure which relay fits your motorcycle?</strong> <span>Search by motorcycle make, model, year, or OEM flasher relay part number.</span> <a class="button customled-fitment-cta__button" href="/pages/motorcycle-led-flasher-relay-compatibility">Find My Relay</a>
</div>
<h2>Symptom 2: the front and rear blinker lamps stay on solid and will not blink</h2>
<p>If your front and rear blinker lamps come on and stay on like running lights as soon as the ignition is switched on (as well as the turn signal indicator light(s) in the gauge cluster), and they do not blink when you engage the turn signals, then the run circuit is back feeding power into the turn circuit. The turn signal circuit is getting constant power from the running-light circuit, so the flasher relay cannot possibly switch off and on the blinker lamps. The fix is to separate the run and turn functions so the turn circuit can do its job. This is usually the result of miswiring front aftermarket 2-wire blinker lamps to the motorcycle harness, in an attempt to achieve run and turn on the 2-wire blinker lamp. It also happens on some 3-wire aftermarket lamps when they are not properly designed to isolate the inputs - which can be solved by installing a diode (1N4001) inline to prevent the back feed.</p>
<p>With a 2-wire single-intensity lamp, if you want to keep that running-light look and still get a blink out of a single two-wire blinker lamp, the Blinker Genie is built for exactly that. It lets a single-intensity two-wire LED blinker lamp run as a steady running light and then blink on the turn pulse. It creates the blink by switching the blinker lamp off on the turn pulse, so what you see as a flash is the steady light cutting out.</p>
<div style="display: flex; gap: 16px; align-items: center; margin: 0 0 16px;">
<a href="/products/blinker-genie" style="flex: 0 0 auto; line-height: 0;"><img src="https://cdn.shopify.com/s/files/1/0190/4226/products/MBLINK_REV2.jpg" alt="Custom LED Blinker Genie for Motorcycles" width="96" height="96" loading="lazy" style="display: block; width: 96px; height: 96px; object-fit: contain; background-color: var(--card-media-contain-bg,#fff); padding: 8px; border-radius: var(--border-radius-base,8px); box-sizing: border-box;"></a>
<p style="margin: 0; flex: 1 1 auto;"><strong><a href="/products/blinker-genie">Blinker Genie</a></strong> drives run and turn operation from a single two-wire LED blinker lamp on a motorcycle. It works on a negative common-ground system, is waterproof, and connects with butt connectors on its seven-inch wires. One thing to plan for: pulling the blinker lamp off the turn circuit reads to the flasher like a burned-out bulb, so the Blinker Genie on its own usually causes a fast blink. Pair it with an electronic flasher relay (the better fix) or a load equalizer so the rate stays normal. For the full walkthrough, see our <a href="/blogs/custom-led-product-information/blinker-genie-run-and-turn-from-a-single-bulb">guide to running run and turn from a single bulb</a>.</p>
</div>
<h2>Symptom 3: nothing blinks at all</h2>
<p>If the blinker lamps do nothing when you hit the switch, check the fuse first. A blown turn-signal fuse is the most common cause and the easiest thing to overlook, and no relay or load fix will help until the circuit has power. Find the turn-signal or signal fuse in your bike's fuse box, pull it, and confirm the metal strip inside is intact. Replace any blown fuse with one of the same rating before going further. If a new fuse blows again right away, you have a short to track down rather than a flasher problem.</p>
<p>If the fuse is good and the blinker lamps still will not blink, the relay is not cycling, usually because the LED load is too low for the factory flasher to see OR you have damaged the flasher relay with the short circuit (if the fuse was blown).</p>
<p>If the fuse was not blown, the fix is to give the circuit a flasher relay that does not care about load, or to add load back to the circuit. An electronic LED flasher relay flashes on a fixed internal timer at the normal DOT blink rate of 60 to 120 flashes per minute no matter how little current your LEDs draw, so it solves the no-blink and fast-blink problems outright.</p>
<div style="display: flex; gap: 16px; align-items: center; margin: 0 0 16px;">
<a href="/products/elfr-1-electronic-led-flasher-relay" style="flex: 0 0 auto; line-height: 0;"><img src="https://cdn.shopify.com/s/files/1/0190/4226/products/ELFR-1-LED-Relay-1.jpg" alt="Custom LED ELFR-1 Electronic LED Flasher Relay" width="96" height="96" loading="lazy" style="display: block; width: 96px; height: 96px; object-fit: contain; background-color: var(--card-media-contain-bg,#fff); padding: 8px; border-radius: var(--border-radius-base,8px); box-sizing: border-box;"></a>
<p style="margin: 0; flex: 1 1 auto;"><strong><a href="/products/elfr-1-electronic-led-flasher-relay">ELFR-1</a></strong> is the standard plug-and-play relay and the one most riders need. It holds the normal blink rate across a wide load range of 0.05A to 10A (about 0.6 to 120 watts), so a low-draw LED setup that will not trigger the stock flasher blinks normally on it. It plugs into compatible two-wire and three-wire OEM flasher relay connectors. On three-wire sockets, the third wire is a ground the ELFR-1 does not need. For a hard-wire install, the red wire goes to switched +12V and the black wire goes to the load (the blinker circuit); leave the factory ground wire unconnected. One note: swapping the relay can drop a factory self-canceling feature if your bike has one, in which case 25 Watt Load Equalizers are the better way to keep self-cancel.</p>
</div>
<p>The other fix is to add electrical load so the factory flasher detects enough current to start cycling. A load equalizer is a resistor that mimics the power draw of the original bulb. This is the right path when no plug-in relay fits your bike, or when you need to keep a factory self-canceling feature that a relay swap would disable.</p>
<div style="display: flex; gap: 16px; align-items: center; margin: 0 0 16px;">
<a href="/products/load-equalizer-25-watt" style="flex: 0 0 auto; line-height: 0;"><img src="https://cdn.shopify.com/s/files/1/0190/4226/products/LEQZ_II.jpg" alt="Custom LED 25 Watt Load Equalizer pair" width="96" height="96" loading="lazy" style="display: block; width: 96px; height: 96px; object-fit: contain; background-color: var(--card-media-contain-bg,#fff); padding: 8px; border-radius: var(--border-radius-base,8px); box-sizing: border-box;"></a>
<p style="margin: 0; flex: 1 1 auto;"><strong><a href="/products/load-equalizer-25-watt">25 Watt Load Equalizer</a></strong> provides load equal to a 20 to 30 watt incandescent, so the OEM flasher behaves as if the stock bulbs are still there and the blink returns to normal. It fixes the fast-blink, no-blink and 4-way blink problems, installs with quick-tap connectors and no cutting, and uses one per replaced stock bulb (one per side). Because it leaves the factory flasher in place, it keeps a self-canceling feature that swapping the relay would lose.</p>
</div>
<div style="display: flex; gap: 16px; align-items: center; margin: 0 0 16px;">
<a href="/products/stage-i-load-equalizer" style="flex: 0 0 auto; line-height: 0;"><img src="https://cdn.shopify.com/s/files/1/0190/4226/products/LEQZ_I.jpg" alt="Custom LED 2 Watt Load Equalizer pair" width="96" height="96" loading="lazy" style="display: block; width: 96px; height: 96px; object-fit: contain; background-color: var(--card-media-contain-bg,#fff); padding: 8px; border-radius: var(--border-radius-base,8px); box-sizing: border-box;"></a>
<p style="margin: 0; flex: 1 1 auto;"><strong><a href="/products/stage-i-load-equalizer">2 Watt Load Equalizer</a></strong> is usually enough to correct the blink speed on motorcycles that come equipped with LED blinker lamps from the factory.</p>
</div>
<p>See our <strong><a href="/blogs/custom-led-product-information/13640005-all-about-led-load-equalizers-for-led-blinkers-on-motorcycles">guide to LED Load Equalizers</a></strong> for how to size them for your application.</p>
<p>Two other things can leave the blinker lamps completely dark. A failed turn-signal switch can stop the circuit from ever sending power to the blinker lamps, so if the fuse is good and a known-good relay still produces nothing, test or bypass the switch. And because LEDs are polarity-sensitive in a way incandescent bulbs are not, a blinker lamp wired with its positive and negative leads reversed simply will not light. If only the LEDs you just installed are dark, reverse the two wires on that blinker lamp and check again.</p>
<h2>Symptom 4: one side is non-functional</h2>
<p>A flasher relay affects both sides equally, so if only one side has stopped working, the cause is on that side, not the relay. Work through four things in order. First, check the blinker lamp itself: confirm the blinker lamp or integrated tail light on the non-functional side actually lights up, and try a known-good unit if you have one. Second, isolate the part by swapping it side to side. If you move the suspect module or bulb to the working side and the problem moves with it, the part is the issue; if the problem stays on the same side of the bike, the wiring or connection on that side is the issue. Third, check the ground on the non-functional side, since a poor or missing ground is one of the most common reasons a single blinker lamp goes dark. A clean, tight ground connection fixes more one-side problems than anything else. Fourth, check the turn-signal selector switch: a worn contact on one side of the switch can feed only that side, so if the blinker lamp, ground, and wiring on the non-functional side all check out, the switch is the next suspect.</p>
<h2>Symptom 5: all four blinker lamps blink together</h2>
<p>When every blinker lamp flashes at once like a hazard light no matter which way you signal, that is the 4-way blink problem, and a flasher relay cannot cause or cure it. It happens because LEDs draw so little current that the small current that feeds through the dashboard turn signal indicator lamp is enough to illuminate the opposite side circuit. The proper fix is to diode-isolate the indicator circuits so current can no longer cross from one side to the other.</p>
<div style="display: flex; gap: 16px; align-items: center; margin: 0 0 16px;">
<a href="/products/1n4001-diode-for-4-way-blink-fix" style="flex: 0 0 auto; line-height: 0;"><img src="https://cdn.shopify.com/s/files/1/0190/4226/products/1.jpeg" alt="Custom LED Diode for 4-Way Blink Fix" width="96" height="96" loading="lazy" style="display: block; width: 96px; height: 96px; object-fit: contain; background-color: var(--card-media-contain-bg,#fff); padding: 8px; border-radius: var(--border-radius-base,8px); box-sizing: border-box;"></a>
<p style="margin: 0; flex: 1 1 auto;"><strong><a href="/products/1n4001-diode-for-4-way-blink-fix">Diode for 4-Way Blink Fix</a></strong> is the diode-isolation part for this exact problem. It blocks the back-feed at the indicator so the left and right circuits stay separate and each side blinks on its own again. Adding load equalizers also resolves the 4-way blink on many bikes. For the complete walkthrough of why this happens and how to wire the fix, read our <strong><a href="/blogs/custom-led-product-information/4-way-hazard-blink-problem-on-motorcycles-with-led-turn-signals">4-way blink guide</a>.</strong></p>
</div>
<h2>Symptom 6: the blinker lamps flash erratically after working fine</h2>
<p>If everything worked at install and the blinker lamps later start flashing erratically or intermittently, two field causes account for most of it, and neither is a bad relay.</p>
<p>The first is water. Moisture can wick down the inside of a wire sheath and reach the connector or relay, which throws off the signal. Dry the wiring out, and route the open end of any wire tube or sheath downward so water drains away instead of collecting at the connection.</p>
<p>The second is electrical noise. If the relay sits close to a source of ignition noise, that interference can make the blinker lamps flash unevenly. Move the relay an inch or two away from the noisy spot and strap it down so it stays put. A small relocation is often enough to settle an erratic flash. Both are things we see in the field, so confirm the behavior on your own bike before drawing conclusions.</p>
<h2>How to work through any LED turn signal problem</h2>
<p>When a symptom does not obviously match the list, work in this order and you will land on the cause without guessing.</p>
<ul>
<li>
<strong>Check the fuse.</strong> A blown turn-signal fuse mimics a dead relay. Confirm power before anything else.</li>
<li>
<strong>Check the grounds.</strong> A bad ground causes one-side failures, erratic behavior and blinker lamps that won't light. Make every ground clean and tight.</li>
<li>
<strong>Isolate the side.</strong> Swap the suspect part side to side. If the fault follows the part, the part is the issue; if it stays put, the wiring on that side is.</li>
<li>
<strong>Match the load.</strong> If the blinker lamps blink too fast or not at all, fit an electronic flasher relay or match the removed bulb wattage with a load equalizer.</li>
<li>
<strong>Separate the circuits.</strong> Solid fronts mean run and turn are tied together; all-four-blink means the indicator is back-feeding. Separate them, or diode-isolate the indicator.</li>
</ul>
<p>For the no-blink and fast-blink symptoms, the fastest fix is to find a relay that fits your bike and plug it in.</p>
<div class="customled-fitment-cta">
<strong>Not sure which relay fits your motorcycle?</strong> <span>Search by motorcycle make, model, year, or OEM flasher relay part number.</span> <a class="button customled-fitment-cta__button" href="/pages/motorcycle-led-flasher-relay-compatibility">Find My Relay</a>
</div>
<div style="height: 32px;" aria-hidden="true"><br></div>
<h2>Still not sure?</h2>
<p>If you have worked through the list and the problem is still there, or you are not sure which symptom you have, <a href="/pages/contact-custom-led">send us a message</a> with your make, model and year, a description of what the blinker lamps are doing, and a photo of your wiring or OEM connector. We will point you to the right fix.</p>]]>
    </content>
  </entry>
  <entry>
    <id>https://www.customled.com/blogs/custom-led-product-information/stealth-plate-mount-vs-fender-eliminator</id>
    <published>2026-06-04T21:47:33-04:00</published>
    <updated>2026-06-04T22:46:18-04:00</updated>
    <link rel="alternate" type="text/html" href="https://www.customled.com/blogs/custom-led-product-information/stealth-plate-mount-vs-fender-eliminator"/>
    <title>Stealth Plate Mount vs. Traditional Fender Eliminator: Trade-offs</title>
    <author>
      <name>Custom LED</name>
    </author>
    <summary type="html">
      <![CDATA[<p>Two ways to ditch the bulky OEM rear fender, compared: a traditional fender-eliminator look that keeps the plate visible on a tail tidy, versus a stealth plate mount that relocates the plate under the seat for the cleanest tail. Covers what the Custom LED Ultimate Stealth bracket includes (per bike), why it pairs with a Blaster-X tail light, and how the CanBus plate light avoids dash error codes. For off-road use only.</p><p><a class="read-more" href="https://www.customled.com/blogs/custom-led-product-information/stealth-plate-mount-vs-fender-eliminator">More</a></p>]]>
    </summary>
    <content type="html">
      <![CDATA[<p>If you want to ditch the bulky OEM rear fender on your motorcycle, you have two basic directions to go. One is the traditional fender eliminator look, where the license plate and lighting sit out behind the tail in plain view on a slim tail tidy. The other is a stealth plate mount, which relocates the plate out of sight under the seat so the back of the bike reads as clean as possible. Custom LED builds both ideas into a single part for a few bikes: the Ultimate Stealth License Plate Bracket relocates your plate using the OEM fender mounting position, so it doubles as a fender eliminator while supporting the license plate in a way that doesn't upset the aesthetics of the motorcycle. This guide walks through the trade-offs so you can pick the look you want.</p>
<div class="customled-fitment-cta">
<strong>In a hurry?</strong> <span>The Ultimate Stealth License Plate Bracket relocates your plate under the seat using the OEM fender mounting position, with no cutting or permanent modifications. See if it fits your bike.</span> <a class="button customled-fitment-cta__button" href="/products/ultimate-stealth-license-plate-bracket-for-2015-2026-yamaha-yzf-r1">View the Ultimate Stealth Bracket</a>
</div>
<div class="customled-fitment-cta"><br></div>
<h2>What is the difference between a stealth plate mount and a traditional fender eliminator?</h2>
<p>Both approaches start with the same job: remove the long OEM rear fender (the mudguard and plate holder that hangs off the back) and replace it with something far smaller. The difference is where the plate ends up.</p>
<p>A traditional fender eliminator, sometimes called a tail tidy, keeps the plate visible behind the tail on a short bracket, usually with the plate and any lighting tucked up close to the seat. It cleans up the back of the bike, but the plate is still part of the view.</p>
<p>A stealth plate mount goes further. It relocates the plate to a visible yet discreet location under the rider's seat without interfering with suspension travel, so the rear of the bike reads as clean as possible from behind. Custom LED markets its Ultimate Stealth License Plate Bracket as the ultimate fender eliminator precisely because it does both jobs at once: it eliminates the OEM fender and optimally positions the plate.</p>
<h2>License plate angle, illumination, and where it ends up</h2>
<p>This is the part to think through before you choose. Moving a plate under the seat changes its angle and how visible it is from behind. Rules covering plate position, viewing angle, and illumination vary by location and change over time, so check what applies where you ride.</p>
<p>For choosing a look, the key difference is this: a traditional tail tidy keeps the plate upright and out in the open, while a stealth mount tucks it lower and out of sight under the tail. Decide which matters more to you for how you actually ride, and check the rules for wherever you intend to use the bike.</p>
<h2>The Custom LED stealth bracket lineup</h2>
<p>The Ultimate Stealth bracket is built per bike, so the exact provisions differ from one fitment to the next. Here are two examples that show how the line works.</p>
<div style="display: flex; gap: 16px; align-items: center; margin: 0 0 16px;">
<a href="/products/ultimate-stealth-license-plate-bracket-for-2015-2026-yamaha-yzf-r1" style="flex: 0 0 auto; line-height: 0;"><img src="https://cdn.shopify.com/s/files/1/0190/4226/products/CL-15R1PB-1.jpg?v=1680550591" width="96" height="96" loading="lazy" style="display: block; width: 96px; height: 96px; object-fit: contain; background-color: var(--card-media-contain-bg,#fff); padding: 8px; border-radius: var(--border-radius-base,8px); box-sizing: border-box;"></a>
<p style="margin: 0; flex: 1 1 auto;"><a href="/products/ultimate-stealth-license-plate-bracket-for-2015-2026-yamaha-yzf-r1"><strong>Ultimate Stealth License Plate Bracket Mount for 2015-2026 Yamaha YZF-R1</strong></a><br>Relocates the plate using the OEM fender mounting position. Includes 3/8" (9.5mm) diameter mounting holes for optional blinker lamps, a cover plate to hide the unused OEM fender mounting holes, and a CanBus compatible license plate light with a plug-and-play OEM connector. Rugged steel construction, made in the USA.</p>
</div>
<div style="display: flex; gap: 16px; align-items: center; margin: 0 0 16px;">
<a href="/products/ultimate-stealth-license-plate-bracket-for-2020-2021-2022-2023-ktm-1290-super-duke-r" style="flex: 0 0 auto; line-height: 0;"><img src="https://cdn.shopify.com/s/files/1/0190/4226/files/2020-1290PB-V2-1_fa83418d-a852-47b9-b354-247a4a8c5e22.jpg?v=1718122003" alt="Custom LED Ultimate Stealth License Plate Bracket for 2020-2023 KTM 1290 Super Duke R" width="96" height="96" loading="lazy" style="display: block; width: 96px; height: 96px; object-fit: contain; background-color: var(--card-media-contain-bg,#fff); padding: 8px; border-radius: var(--border-radius-base,8px); box-sizing: border-box;"></a>
<p style="margin: 0; flex: 1 1 auto;"><a href="/products/ultimate-stealth-license-plate-bracket-for-2020-2021-2022-2023-ktm-1290-super-duke-r"><strong>Ultimate Stealth License Plate Bracket for 2020-2023 KTM 1290 Super Duke R</strong></a><br>This bracket relocates the plate using the OEM fender mounting position and hardware (OEM fender mounting hardware required). It accommodates optional OEM or aftermarket blinker lamps and includes the same CanBus compatible license plate light with a plug-and-play OEM connector.</p>
</div>
<p>Most of our Stealth Plate Mounts accommodate optional OEM or aftermarket blinker lamps. Check the product page for your specific bike to see exactly what is included.</p>
<h2>Pairing the stealth mount with a tail light</h2>
<p>Eliminating the fender also removes the OEM plate and reflector area, so pair the stealth bracket with a Blaster-X integrated tail light for a complete rear end. On the R1, that is the matching unit below.</p>
<div style="display: flex; gap: 16px; align-items: center; margin: 0 0 16px;">
<a href="/products/2015-2016-2017-2018-2019-2020-2021-2022-2023-2024-2025-2026-yamaha-yzf-r1-integrated-led-tail-light" style="flex: 0 0 auto; line-height: 0;"><img src="https://cdn.shopify.com/s/files/1/0190/4226/products/15R1_WL-1000px-1.jpg?v=1738431362" width="96" height="96" loading="lazy" style="display: block; width: 96px; height: 96px; object-fit: contain; background-color: var(--card-media-contain-bg,#fff); padding: 8px; border-radius: var(--border-radius-base,8px); box-sizing: border-box;"></a>
<p style="margin: 0; flex: 1 1 auto;"><a href="/products/2015-2016-2017-2018-2019-2020-2021-2022-2023-2024-2025-2026-yamaha-yzf-r1-integrated-led-tail-light"><strong>2015-2026 Yamaha YZF-R1 Blaster-X Integrated LED Tail Light</strong></a><br>A complete plug and play ultra-bright integrated LED tail light with a high quality clear or smoked lens. Together with the stealth bracket it gives you a clean, complete OEM fender elimination on the R1.</p>
</div>
<h2>Problems that look like the bracket but are not</h2>
<p>One thing riders sometimes blame on the bracket is a plate-light warning on the dash after the swap. That is not a fault in the mount. Many modern bikes use a CAN-bus system that watches the current each lighting circuit draws. An LED plate light pulls far less current than the original incandescent bulb, so the system can read the lower draw as a burned-out bulb and post a warning.</p>
<p>This is why the included license plate light is CanBus compatible with a plug-and-play OEM connector, which means no plate light error codes. It mimics the normal current draw so the bike does not flag the LED as a failed bulb. If you add your own optional blinker lamps in the bracket's mounting holes, switching both the front and rear turn signals to LED can cause them to flash too fast for the same low-current reason. That is a separate topic covered in our guide on <a href="/blogs/custom-led-product-information/led-flasher-relays-for-motorcycles">LED flasher relays for motorcycles</a>.</p>
<h2>How the stealth bracket installs</h2>
<p>The stealth bracket installs in place of the OEM rear fender assembly using the provided hardware, relocating the plate to its under-seat position. It requires no cutting or permanent modifications, so the swap is fully reversible. The included CanBus compatible plate light connects through a plug-and-play OEM connector, and on the R1 bracket the cover plate closes off the unused OEM fender mounting holes for a finished look. Each bike has its own instruction sheet, so follow the steps for your specific fitment.</p>
<p>The Ultimate Stealth bracket ships same business day and carries a 1-year Warranty &amp; Satisfaction Guarantee. For the full terms, see our <a href="/pages/custom-led-policies">policies page</a>.</p>
<div class="customled-fitment-cta">
<strong>Ready to clean up the back of your bike?</strong> <span>The Ultimate Stealth License Plate Bracket eliminates the OEM fender and hides your plate under the seat, with a CanBus compatible plate light included and no cutting required.</span> <a class="button customled-fitment-cta__button" href="/products/ultimate-stealth-license-plate-bracket-for-2015-2026-yamaha-yzf-r1">View the Ultimate Stealth Bracket</a>
</div>
<p>Not sure whether a stealth mount or a traditional fender eliminator is right for your bike, or what your specific fitment includes? <a href="/pages/contact-custom-led">Contact Custom LED</a> and we will help you sort it out.</p>]]>
    </content>
  </entry>
  <entry>
    <id>https://www.customled.com/blogs/custom-led-product-information/clear-vs-smoked-lenses-brightness-trade-off</id>
    <published>2026-06-04T21:47:32-04:00</published>
    <updated>2026-06-04T22:46:19-04:00</updated>
    <link rel="alternate" type="text/html" href="https://www.customled.com/blogs/custom-led-product-information/clear-vs-smoked-lenses-brightness-trade-off"/>
    <title>Clear vs. Smoked Lenses: The Brightness Trade-off</title>
    <author>
      <name>Custom LED</name>
    </author>
    <summary type="html">
      <![CDATA[<p>Clear lenses are always the brightest, because any tint absorbs some of the light passing through it. We started offering a lightly smoked lens on select Blaster-X tail lights only after they got bright enough to spare a little output for the look, and we never make dark tints. Here is how to decide between clear and smoke on your bike.</p><p><a class="read-more" href="https://www.customled.com/blogs/custom-led-product-information/clear-vs-smoked-lenses-brightness-trade-off">More</a></p>]]>
    </summary>
    <content type="html">
      <![CDATA[<p>Clear lenses are always the brightest. A smoked lens looks great when the light is off, but any tint absorbs some of the light passing through it, so a smoked tail light puts out less light than the same light with a clear lens. That is the whole trade-off in one sentence. The question is not whether smoke costs you some brightness, because it always does. The question is whether the look is worth it on your bike, and how much tint you can run before you give up more than you want to.</p>
<p>Custom LED only started offering a smoked-lens option in 2020, and only on select Blaster-X Tail Lights, because we finally reached a level of brightness where we felt comfortable giving up a little of it for the look. We still do not make dark, heavily smoked tail lights. A light tint on an already very bright light is a fair compromise. A dark tint that swallows your brake light is not something we build.</p>
<div class="customled-fitment-cta">
<strong>Want the smoked look?</strong> <span>See which Blaster-X Integrated LED Tail Lights are offered with a lightly smoked lens option.</span> <a class="button customled-fitment-cta__button" href="/collections/smoked-blaster-x-tail-lights">Shop Smoked Blaster-X Tail Lights</a>
</div>
<h2>Why is a smoked lens dimmer than a clear lens?</h2>
<p>It comes down to simple physics. The tint literally absorbs some of the light passing through it, and the darker the tint, the more light is absorbed. The LEDs inside the tail light generate a fixed amount of light. A clear lens lets almost all of it through to the riders and drivers behind you. A tinted lens catches a portion of that light before it ever leaves the housing, and that is exactly the light the riders and drivers behind you are supposed to see.</p>
<p>This is true of every tinted lens on every vehicle, not just ours. It is why we resisted offering a smoked option for so long. For most of the company's history our position was that the loss in performance, visibility, and safety from reduced light throughput was not worth the slightly cleaner look. That position has not changed for dark tints. What changed is how bright our lights got.</p>
<h2>How smoke finally became an option on Blaster-X</h2>
<p>Our Blaster-X Integrated LED Tail Lights got bright enough to have headroom to spare. A representative example, the ZX-6R unit, runs 32 ultra-bright red LEDs for the running and brake lights and 32 ultra-bright yellow LEDs for the turn signals, all running under 4 MHz microprocessor control. When a light generates that much output, a light tint takes a slice off the top instead of cutting into the brightness you actually need to be seen.</p>
<p>That headroom is what made the smoked option possible. In 2020 we started offering a lightly smoked (tinted) lens on select models. We describe it as the perfect compromise for safety and aesthetics: you get the darker, more finished look while keeping the brightness up where it needs to be. The key word is lightly. We do not produce dangerously dark smoked tail lights, because that goes against what this company is built on. If you have seen aftermarket lights so dark you can barely tell the brake light came on, that is the opposite of what we make.</p>
<h2>How much brightness does a smoked lens actually cost?</h2>
<p>If you are worried a smoked lens will leave you dimmer than your old bulb, here is the full picture. Our Blaster-X tail lights are many times brighter than the stock incandescent tail light they replace. The smoked lens gives up roughly 30% of its brightness compared to our clear lens. Even so, a smoked Blaster-X is still much brighter than the original OEM tail light, because it starts from such a high baseline. Take that 30% as a practical rule of thumb, not a lab measurement.</p>
<p>That context still matters. Because the clear light starts so far ahead of the bulb most bikes ship with, a lightly smoked version still has real brightness to give. You are trading away a portion of a large surplus, not dipping below where you started. If absolute maximum visibility is your priority, clear is the answer. If you want the look and you accept that roughly 30% reduction from a very high baseline, a light smoke is a reasonable choice.</p>
<h2>The "Stealth" look you already get on a clear lens</h2>
<p>A lot of riders want the smoked look mostly to kill the bright red plastic appearance when the light is off. You may not need a tinted lens for that. Every one of our Blaster-X Integrated LED Tail Lights already features black Stealth electronics and dark components inside the housing, which gives the look of a lightly smoked lens without giving up any performance or safety. From a few feet away, a clear-lens Blaster-X with its black internals already reads as a darkened, finished tail light when it is off, and then lights up at full clear brightness when it is on.</p>
<p>That is worth knowing before you decide. If the Stealth black internals get you 90% of the look you wanted, the clear lens may be all you need. You keep every bit of the brightness.</p>
<h2>See the difference side by side</h2>
<p>The honest way to choose is to look at both. Here is a clear-versus-smoked comparison on the same Blaster-X model so you can see how subtle our smoke really is.</p>
<p style="margin: 0 0 16px;"><img src="https://cdn.shopify.com/s/files/1/0190/4226/products/13ZX6R_WL_SL-1000px_bd7706ae-8ce6-40e7-9393-917dfe743fd3.jpg?v=1581972347" loading="lazy" alt="Clear lens versus smoked lens comparison on a Custom LED Blaster-X Integrated LED Tail Light" style="display: block; max-width: 100%; height: auto; border-radius: var(--border-radius-base,8px);"></p>
<p>The clear lens is the brighter, more open look. The smoked lens reads darker when off and slightly muted when on. Notice that even our smoked option is light. We tune the tint so the brake and turn output still come through clearly, which is the entire reason we were willing to offer it.</p>
<h2>When smoke makes sense, and when clear is the right call</h2>
<p>Smoke is the right choice when the look matters most to you. If your bike is dark or blacked out, if your OEM bodywork already has smoke-styled lighting, or if you simply want visual continuity with a murdered-out theme, the lightly smoked lens finishes the bike the way you picture it. On those builds the small brightness trade is usually worth it to the owner.</p>
<p>Clear is the right call when visibility is the priority. If you do a lot of low-light or night riding, if you ride in groups where you want to be unmistakable to the rider behind you, or if you just want the maximum margin of being seen, run the clear lens. You already get the dark, finished appearance from the Stealth black internals, so going clear costs you nothing in looks and gives you the most light out the back.</p>
<h2>Can I tint a clear lens myself if there's no smoked option for my bike?</h2>
<p>Not every model is offered with a factory smoked lens. If yours is clear only and you still want the look, you can spray-tint the clear lens yourself. Doing it yourself gives you full control over the depth and color of the tint, and it will not void your Custom LED warranty. Start light. Remember that the darker you go, the more light you absorb, and once it is dark enough to dim the brake light you have given up the safety margin the light was built to provide.</p>
<p>One important note before you reach for the spray can. You take full responsibility for the changes you make to the tail light, and once tinted or modified in any way, our tail lights cannot be returned for any reason. If there is any chance you will want to return the light, decide on clear versus smoke before you modify it.</p>
<h2>A few of the models offered with a smoked lens</h2>
<p>These are examples of Blaster-X Integrated LED Tail Lights available with both a clear and a lightly smoked lens option, drawn from across sportbikes and cruisers. The full set lives in the Smoked Blaster-X collection.</p>
<div style="display: flex; gap: 16px; align-items: center; margin: 0 0 16px;">
<a href="/products/2013-2014-2015-2016-2017-2018-kawasaki-ninja-zx-6r-integrated-led-tail-light" style="flex: 0 0 auto; line-height: 0;"><img src="https://cdn.shopify.com/s/files/1/0190/4226/products/13ZX6R_WL-1000px-1_63b74f2c-6c5f-4818-b155-40d10272bb2f.jpg?v=1581972330" width="96" height="96" loading="lazy" style="display: block; width: 96px; height: 96px; object-fit: contain; background-color: var(--card-media-contain-bg,#fff); padding: 8px; border-radius: var(--border-radius-base,8px); box-sizing: border-box;"></a>
<p style="margin: 0; flex: 1 1 auto;"><a href="/products/2013-2014-2015-2016-2017-2018-kawasaki-ninja-zx-6r-integrated-led-tail-light">2013-2018 Kawasaki Ninja ZX-6R (636) Blaster-X Integrated LED Tail Light.</a> A complete Plug and Play Ultra-Bright Integrated LED tail light with High Quality clear or smoked lens and OEM fitment. Both lens options run the same price, so the choice is purely about look versus maximum brightness.</p>
</div>
<div style="display: flex; gap: 16px; align-items: center; margin: 0 0 16px;">
<a href="/products/2008-2009-2010-2011-2012-2013-2014-2015-2016-honda-cbr-1000rr-integrated-led-tail-light" style="flex: 0 0 auto; line-height: 0;"><img src="https://cdn.shopify.com/s/files/1/0190/4226/products/08_1000RR_WL-1000px-1.jpg?v=1581016748" width="96" height="96" loading="lazy" style="display: block; width: 96px; height: 96px; object-fit: contain; background-color: var(--card-media-contain-bg,#fff); padding: 8px; border-radius: var(--border-radius-base,8px); box-sizing: border-box;"></a>
<p style="margin: 0; flex: 1 1 auto;"><a href="/products/2008-2009-2010-2011-2012-2013-2014-2015-2016-honda-cbr-1000rr-integrated-led-tail-light">2008-2016 Honda CBR1000RR Blaster-X Integrated LED Tail Light.</a> High Quality clear or smoked lens with OEM fitment for the CBR1000RR, another sportbike platform offered both ways.</p>
</div>
<div style="display: flex; gap: 16px; align-items: center; margin: 0 0 16px;">
<a href="/products/2002-2003-2004-2005-2006-2007-2008-2009-yamaha-warrior-integrated-led-tail-light" style="flex: 0 0 auto; line-height: 0;"><img src="https://cdn.shopify.com/s/files/1/0190/4226/products/02WARRIOR_WL-1000px-1.jpg?v=1579036438" width="96" height="96" loading="lazy" style="display: block; width: 96px; height: 96px; object-fit: contain; background-color: var(--card-media-contain-bg,#fff); padding: 8px; border-radius: var(--border-radius-base,8px); box-sizing: border-box;"></a>
<p style="margin: 0; flex: 1 1 auto;"><a href="/products/2002-2003-2004-2005-2006-2007-2008-2009-yamaha-warrior-integrated-led-tail-light">2002-2009 Yamaha Warrior Blaster-X Integrated LED Tail Light.</a> A cruiser example with both clear and smoked lens options, a good fit for a darker bike where the smoked look ties the rear end together.</p>
</div>
<p>For the deeper background on tint, color, and why we take the position we do, see our full write-up on <a href="/pages/smoked-tail-lights-for-motorcycles">smoke, colored, and tinted tail lights for motorcycles</a>.</p>
<div class="customled-fitment-cta">
<strong>Ready to choose your lens?</strong> <span>Browse the Blaster-X Integrated LED Tail Lights offered with a lightly smoked lens option, then pick clear or smoke at checkout.</span> <a class="button customled-fitment-cta__button" href="/collections/smoked-blaster-x-tail-lights">Shop Smoked Blaster-X Tail Lights</a>
</div>
<p>Still not sure which way to go on your bike? Tell us your model and how you ride, and we will tell you honestly whether the smoke is worth it on your build. <a href="/pages/contact-custom-led">Contact Custom LED</a> and we will help you choose.</p>]]>
    </content>
  </entry>
  <entry>
    <id>https://www.customled.com/blogs/custom-led-product-information/led-headlight-bulbs-bases-bezels-and-bikes</id>
    <published>2026-06-04T21:47:31-04:00</published>
    <updated>2026-06-04T22:46:08-04:00</updated>
    <link rel="alternate" type="text/html" href="https://www.customled.com/blogs/custom-led-product-information/led-headlight-bulbs-bases-bezels-and-bikes"/>
    <title>LED Headlight Bulbs: Bases, Bezels, and Bikes</title>
    <author>
      <name>Custom LED</name>
    </author>
    <summary type="html">
      <![CDATA[<p>Choosing an LED headlight bulb is about two things: matching your stock bulb's base code, and confirming the corded fan and driver will clear the back of your housing. This guide decodes the base names (9005/HB3/H10, H11/H8/H9/H16JP, H7, H4 and more), explains why the right base does not always mean a clean fit, breaks down the fan-cooled design and real-output lumen specs, and covers the headlight bulb-out warning fix. Sold for off-road use.</p><p><a class="read-more" href="https://www.customled.com/blogs/custom-led-product-information/led-headlight-bulbs-bases-bezels-and-bikes">More</a></p>]]>
    </summary>
    <content type="html">
      <![CDATA[<p>Picking the right LED headlight bulb comes down to two things: the bulb type of your stock bulb and whether the new bulb's fan and driver will clear the back of your headlight housing. Match the bulb type and you have the right electrical plug. Confirm there is room behind the housing for the corded fan and driver, and you have a bulb that actually fits. Most fit problems people run into are the second part, not the first.</p>
<p>Below is how to read the bulb type codes, why the right type does not always guarantee a clean install, and what the specs on our bulbs actually mean.</p>
<div class="customled-fitment-cta">
<strong>Looking for the right bulb?</strong> <span>Browse the full LED Headlight Bulb lineup and match your bulb type.</span> <a class="button customled-fitment-cta__button" href="/collections/led-headlight-bulbs-high-performance">Shop LED Headlight Bulbs</a>
</div>
<h2>How do I know which bulb type my bike uses?</h2>
<p>Your headlight bulb type is a letter-and-number code stamped on the bulb or printed in the housing. The catch is that one bulb type often has several names, because the U.S. trade name and the European (ECE) name differ for the same bulb. If you know the name on your stock bulb, find it in the group below and order the matching bulb type.</p>
<p>The <a href="/products/9005-led-headlight-bulb">9005</a> bulb type is the same bulb as HB3 and shares its fitting with H10, so a bulb listed as any of those three uses the 9005 fitting. The <a href="/products/9006-led-headlight-bulb">9006</a> bulb type is also called HB4. The <a href="/products/h11-led-headlight-bulb">H11</a> bulb type belongs to a family that also covers H8, H9, and H16JP, which share the same fitting and differ mainly in wattage. The 9005 family and the H11 family look similar at a glance but are not interchangeable with each other, so read the code rather than eyeballing it.</p>
<p>The <a href="/products/h7-led-headlight-bulb">H7</a> bulb type stands on its own and is one of the most common single-beam types on motorcycles. The <a href="/products/h4-led-headlight-bulb">H4</a> bulb type, also called 9003 or HB2, is a dual-beam bulb: one bulb produces both your high and low beam. We also stock <a href="/products/9007-led-headlight-bulb">9007</a> (HB5), <a href="/products/h13-led-headlight-bulb">H13</a> (9008), and <a href="/products/9004-led-headlight-bulb">9004</a> (HB1), which are dual-beam bulbs that handle both beams in a single unit.</p>
<p>Each bulb is sold individually. Most motorcycles run one headlight, so one is usually all you need. If your bike or car has two headlights, order a pair.</p>
<h2>Why does the right bulb type not always mean it will fit?</h2>
<p>This is the part that surprises people. The mounting base on our bulbs is identical to the halogen bulb you are replacing, so the plug and the locking tabs are correct. What is different is the back of the bulb. To make room for the active cooling fan and the driver electronics, the electrical connection is on a cord rather than built straight into the base. The fan takes up roughly the same room behind the housing that your old bulb connection did, but the housing, the dust cap, or the area right behind the headlight needs enough clearance for the cord and the fan.</p>
<p>That is why a bulb of the correct type can still be a tight fit. The fan or heat sink may be too large for the bezel or the pocket behind the lens, the dust cap may not seat, or an OEM running-light setup can use adapters that complicate the swap. These are clearance problems, not wrong-type problems, and you only catch them by checking the actual space behind your headlight before you commit.</p>
<p>In practice: match the bulb type first, then confirm there is room behind your headlight for the cord and fan before you button everything up.</p>
<h2>Fan-cooled vs passive cooling, and what the wattage means</h2>
<p>Our bulbs use an active cooling fan rather than a passive heat sink with fins. The fan pulls heat off the LED chips so the bulb can run at full brightness without throttling down. We use a ball-bearing fan specifically because it outlasts a sleeve-bearing fan and handles heat and any mounting orientation better, which matters in a headlight that can sit at any angle and runs hot. The bulb itself is rated for a 50,000 hour lifespan and carries a 1 year warranty.</p>
<p>The wattage numbers are worth a look. The <a href="/products/9005-led-headlight-bulb">9005</a> and <a href="/products/9006-led-headlight-bulb">9006</a> draw 35 watts, down from the roughly 55 to 65 watts a halogen in those sizes pulls, while producing 4800 lumens. The <a href="/products/h11-led-headlight-bulb">H11</a> and <a href="/products/h7-led-headlight-bulb">H7</a> draw 25 watts and produce 2000 lumens, and the dual-beam <a href="/products/h4-led-headlight-bulb">H4</a> draws under 25 watts. All run a 6000K color and are IP67 waterproof on an 11 to 30 volt input.</p>
<h2>Real output vs peak marketing numbers</h2>
<p>Lumen numbers on aftermarket bulbs are not all measured the same way, which is why two bulbs claiming similar brightness can look very different on the road. On our H7, H11, and H4 pages we state the lumen figure as real output, not peak. The difference matters because peak numbers describe the most light a chip can briefly produce in a lab, not the steady, usable light coming out of the bulb. Chip placement matters just as much. If the chips are placed off the focal point, most of the light scatters instead of forming a clean beam, so a high lumen number on paper turns into a poorly focused beam in practice. We place the chips to match the focal point of the halogen bulb they replace so the light goes where the reflector aims it.</p>
<h2>The dash says a bulb is out after the swap</h2>
<p>On some vehicles, the dash throws a bulb-out warning after an LED conversion even though the new bulb is working fine. This is a headlight monitoring issue, and it is a different circuit from the turn-signal hyperflash problem that flasher relays and load equalizers solve. Do not mix the two up. The headlight monitor expects to see a halogen-level power draw, roughly 55 to 65 watts. Our LED bulbs draw far less (25 to 35 watts), so the monitor reads that lower draw as a burned-out bulb.</p>
<p>Most motorcycles have no headlamp bulb monitoring, so this never comes up. It is mainly automobiles that watch the headlight circuit, and even then it is fairly rare. If your vehicle does flag it, there are two fixes, one per bulb. The cleaner option is the <a href="/products/led-headlight-decoder-canbus-module">LED Headlight Decoder/CanBus Module</a>. Instead of wasting power as heat the way a resistor does, it signals the monitoring system to read a higher power draw than the bulb actually uses, without generating heat. The other option is the <a href="/products/led-headlight-resistor-kit">LED Headlight Resistor Kit</a>, which is the resistor-based approach that dissipates the extra power as heat. The Decoder is what we recommend first because it does the same job without the added heat.</p>
<h2>Installing the bulb</h2>
<p>Installation is close to a stock bulb swap with one extra step. Remove the dust cap or cover behind the headlight and unplug your halogen bulb. There will be a retaining clip holding the bulb to the headlight housing.  Unfasten the clip and remove the bulb.  The LED bulb's base collar drops into the same socket and locks the same way, so seating it is familiar. However, it is important to note that the base collar should be removed from the LED bulb first, and fastened to the headlight housing with the retaining clip.  This is because the fan on the back of the bulb would interfere otherwise.  To remove the collar, simply twist the collar approximately 1/8 of a turn and then pull the collar straight off the tip of the LED bulb.  Then once fastened, the LED bulb can be re-installed into the collar.</p>
<p>Before you reinstall the dust cap, route the cord that connects to the driver and confirm the fan and cord have clearance behind the housing. This is exactly the clearance check described above. If the dust cap will not seat over the cord, you may need an extended cap or a small grommet so the cap closes around the cord. Plug it in, check your beam, and close everything up.</p>
<p>And very importantly, you must not restrict air flow around the fan in any way.  The fan must be able to exchange heat from the LED lamp with the environment.  If the air is trapped by a dust cover, there is no way for the fan to dissipate that heat properly and this WILL cause a premature failure of an LED headlight bulb.  Free airflow is critical.  If you can modify the dust cover to fit over the fan, so the fan is exposed, that is a good solution.  If it's a rigid dust cover, you may need to leave it off entirely.</p>
<div class="customled-fitment-cta">
<strong>Ready to upgrade your headlight?</strong> <span>Match your bulb type and pick your bulb from the full lineup.</span> <a class="button customled-fitment-cta__button" href="/collections/led-headlight-bulbs-high-performance">Shop LED Headlight Bulbs</a>
</div>
<h2>The lineup</h2>
<div style="display: flex; gap: 16px; align-items: center; margin: 0 0 16px;">
<a href="/products/9005-led-headlight-bulb" style="flex: 0 0 auto; line-height: 0;"><img src="https://cdn.shopify.com/s/files/1/0190/4226/products/9005.jpg?v=1578712829" width="96" height="96" loading="lazy" style="display: block; width: 96px; height: 96px; object-fit: contain; background-color: var(--card-media-contain-bg,#fff); padding: 8px; border-radius: var(--border-radius-base,8px); box-sizing: border-box;"></a>
<p style="margin: 0; flex: 1 1 auto;"><a href="/products/9005-led-headlight-bulb">9005 LED Headlight Bulb</a> (also HB3/H10). Single-beam, 4800 lumens at 35 watts, 6000K, with an active ball-bearing cooling fan and a 50,000 hour rating.</p>
</div>
<div style="display: flex; gap: 16px; align-items: center; margin: 0 0 16px;">
<a href="/products/9006-led-headlight-bulb" style="flex: 0 0 auto; line-height: 0;"><img src="https://cdn.shopify.com/s/files/1/0190/4226/products/9006.jpg?v=1578712887" width="96" height="96" loading="lazy" style="display: block; width: 96px; height: 96px; object-fit: contain; background-color: var(--card-media-contain-bg,#fff); padding: 8px; border-radius: var(--border-radius-base,8px); box-sizing: border-box;"></a>
<p style="margin: 0; flex: 1 1 auto;"><a href="/products/9006-led-headlight-bulb">9006 LED Headlight Bulb</a> (also HB4). Single-beam, 4800 lumens at 35 watts, 6000K, ball-bearing fan, 50,000 hour rating.</p>
</div>
<div style="display: flex; gap: 16px; align-items: center; margin: 0 0 16px;">
<a href="/products/h11-led-headlight-bulb" style="flex: 0 0 auto; line-height: 0;"><img src="https://cdn.shopify.com/s/files/1/0190/4226/products/CL-HV1-H11-0.jpg?v=1629754607" width="96" height="96" loading="lazy" style="display: block; width: 96px; height: 96px; object-fit: contain; background-color: var(--card-media-contain-bg,#fff); padding: 8px; border-radius: var(--border-radius-base,8px); box-sizing: border-box;"></a>
<p style="margin: 0; flex: 1 1 auto;"><a href="/products/h11-led-headlight-bulb">H11 LED Headlight Bulb</a> (also H8/H9/H16JP). 2000 lumens of real output at 25 watts, 6000K, ball-bearing fan, 50,000 hour rating.</p>
</div>
<div style="display: flex; gap: 16px; align-items: center; margin: 0 0 16px;">
<a href="/products/h7-led-headlight-bulb" style="flex: 0 0 auto; line-height: 0;"><img src="https://cdn.shopify.com/s/files/1/0190/4226/products/0.jpg?v=1614266928" width="96" height="96" loading="lazy" style="display: block; width: 96px; height: 96px; object-fit: contain; background-color: var(--card-media-contain-bg,#fff); padding: 8px; border-radius: var(--border-radius-base,8px); box-sizing: border-box;"></a>
<p style="margin: 0; flex: 1 1 auto;"><a href="/products/h7-led-headlight-bulb">H7 LED Headlight Bulb</a>. One of the most common single-beam types on motorcycles. 2000 lumens of real output at 25 watts, 6000K, ball-bearing fan, 50,000 hour rating.</p>
</div>
<div style="display: flex; gap: 16px; align-items: center; margin: 0 0 16px;">
<a href="/products/h4-led-headlight-bulb" style="flex: 0 0 auto; line-height: 0;"><img src="https://cdn.shopify.com/s/files/1/0190/4226/products/CL-HV1-H4-1.jpg?v=1610657062" width="96" height="96" loading="lazy" style="display: block; width: 96px; height: 96px; object-fit: contain; background-color: var(--card-media-contain-bg,#fff); padding: 8px; border-radius: var(--border-radius-base,8px); box-sizing: border-box;"></a>
<p style="margin: 0; flex: 1 1 auto;"><a href="/products/h4-led-headlight-bulb">H4 LED Headlight Bulb</a> (also 9003/HB2). Dual-beam, so one bulb runs both high and low beam, rated at 1250/2000 lumens of real output per high/low beam, under 25 watts, 6000K, ball-bearing fan.</p>
</div>
<p>Not sure which bulb type your bike uses, or whether a bulb will clear your housing? Tell us your bike and what you are working with on our <a href="/pages/contact-custom-led">contact page</a> and we will help you sort it out.</p>]]>
    </content>
  </entry>
  <entry>
    <id>https://www.customled.com/blogs/custom-led-product-information/oem-turn-signal-connectors-and-y-splitters</id>
    <published>2026-06-04T21:47:31-04:00</published>
    <updated>2026-06-04T22:46:19-04:00</updated>
    <link rel="alternate" type="text/html" href="https://www.customled.com/blogs/custom-led-product-information/oem-turn-signal-connectors-and-y-splitters"/>
    <title>OEM Turn Signal Connectors and Y-Splitters: Picking the Right One</title>
    <author>
      <name>Custom LED</name>
    </author>
    <summary type="html">
      <![CDATA[<p>How to choose between OEM turn signal connectors and Y-splitters: match by the physical plug shape and wire count, not just the brand. Covers the 2-wire vs 3-wire distinction, why Type numbers matter, when a Y-splitter adds a second set of signals, and how to install them. For off-road use only.</p><p><a class="read-more" href="https://www.customled.com/blogs/custom-led-product-information/oem-turn-signal-connectors-and-y-splitters">More</a></p>]]>
    </summary>
    <content type="html">
      <![CDATA[<p>Pick your connector by the physical plug shape, not just the brand and wire count. Two connectors can both be "Honda 2-wire" or both be "Ducati 2-wire" and still not plug into each other, because manufacturers use several different housing shapes across models and years. The fastest way to get the right part is to match the photo to the plug already on your bike, then decide whether you need a single connector or a Y-splitter.</p>
<p>A single connector allows you to connect aftermarket blinker lamps to your motorcycle harness without having to cut any wires on the harness itself. A Y-splitter takes one turn signal circuit and feeds two different blinker lamps from it, so you can run a second set of blinker lamps on the same circuit all while keeping it plug-and-play with factory connectors. Both come pre-wired and sheathed, and both are sold as pairs so you can do the left and right sides in one go.</p>
<div class="customled-fitment-cta">
<strong>In a hurry?</strong> <span>Browse the full set of direct-fitment OEM turn signal connectors and Y-Splitters for Honda, Yamaha, Kawasaki, KTM and Ducati.</span> <a href="/collections/oem-connectors-for-motorcycles" class="button customled-fitment-cta__button">Shop Connectors &amp; Y-Splitters</a>
</div>
<h2>Keep your factory blinker lamps and add an integrated tail light</h2>
<p>The most common reason riders reach for a Y-splitter is to keep their stock blinker lamps while adding an integrated LED tail light, and you can do it without cutting a single wire. A Blaster-X integrated tail light has its own built-in rear blinker lamps that plug into the OEM connectors. By default, our Blaster-X Tail Lights are equipped with OEM turn signal connectors that will occupy the turn signal connectors on the motorcycle harness. Most of the time, the OEM rear blinker lamps are being removed so this is not an issue. However, if you want to run both the integrated tail light and OEM or aftermarket blinker lamps together, a Y-splitter is what makes that possible. It plugs into your motorcycle's existing turn signal harness and gives you two lamp connectors where the bike only had one, so the integrated blinker lamp and your original OEM blinker lamp both run off the same factory circuit. Keeping the OEM connectors instead of cutting the harness also protects the reliability, serviceability, and resale value of your motorcycle.</p>
<div style="display: flex; gap: 16px; align-items: center; margin: 0 0 16px;">
<a style="flex: 0 0 auto; line-height: 0;" href="/products/2008-2009-2010-2011-2012-2013-2014-2015-2016-yamaha-yzf-r6-integrated-led-tail-light"><img style="display: block; width: 96px; height: 96px; object-fit: contain; background-color: var(--card-media-contain-bg,#fff); padding: 8px; border-radius: var(--border-radius-base,8px); box-sizing: border-box;" alt="Yamaha YZF-R6 Blaster-X Integrated LED Tail Light" loading="lazy" height="96" width="96" src="https://cdn.shopify.com/s/files/1/0190/4226/products/r6-tail-light-blaster-x_fa1beb20-31b4-44c9-afcf-90268961a64a.jpg?v=1558403227"></a>
<p style="margin: 0; flex: 1 1 auto;">A Blaster-X integrated tail light, like the <a href="/products/2008-2009-2010-2011-2012-2013-2014-2015-2016-yamaha-yzf-r6-integrated-led-tail-light">2008-2016 Yamaha YZF-R6 Blaster-X Integrated LED Tail Light</a>, is a complete plug-and-play unit with a high quality clear lens. It installs with OEM connectors for both the tail light and the turn signals, and it carries 42 ultra bright yellow LEDs for the rear blinker lamps built right in.</p>
</div>
<p>If you do decide to remove your OEM blinker lamps, you may need additional accessories to correct blinker behavior, sold separately. The recommended accessories section on the tail light product pages will recommend the correct flasher relay or load equalizers. The Y-splitter is the accessory that solves the other half of that equation. Instead of removing your stock blinker lamps, you split the rear circuit so the integrated blinker lamps and the OEM blinker lamps both run together. Plugging in a splitter keeps everything reversible and keeps your factory wiring intact.</p>
<h2>Connector or Y-splitter: which one do I need?</h2>
<p>A connector is a one-to-one part. It gives you the correct factory plug with wire already attached, so you can splice in a new blinker lamp, extend a lead, or repair a harness without cutting the original plug off your bike. If you are swapping one blinker lamp for one blinker lamp, a connector is all you need.</p>
<p>A Y-splitter is a one-to-two part. It plugs into the factory turn signal connector and splits that single circuit into two outputs, so two blinker lamps blink together on the same side. The product pages describe the use case as increasing turn signal visibility with two sets of blinker lamps, such as integrated blinker lamps plus auxiliary or OEM blinker lamps. If you want to keep your stock blinker lamps and add a second pair, the splitter is the part that does it without re-wiring the harness.</p>
<p>There is a physical tell, too. The single connectors ship with about 8 inches of 22AWG wire already installed, while the Y-splitters use about 6 inches of 22AWG wire between the connectors. Both come with protective sheathing and both are sold as pairs, one for each side of the bike.</p>
<p>The splitter does not change your flasher relay. Adding a second blinker lamp per side increases the total load on that circuit, which can affect blink behavior, but you still run one flasher relay per motorcycle. If adding blinker lamps changes your blink speed, that is a relay or load question covered in our flasher relay guide and the <a href="/pages/custom-led-frequently-asked-questions">FAQ</a>, not a connector problem.</p>
<h2>2-wire vs 3-wire: what the extra wire is for</h2>
<p>Connectors and splitters come in 2-wire and 3-wire versions, and they are not interchangeable. The wire count has to match the plug on your bike. As a general pattern across the catalog, rear blinker lamps tend to use the 2-wire connector and front blinker lamps tend to use the 3-wire connector. On many bikes the front blinker lamp also doubles as a running or position lamp, which is why that plug carries an extra wire. Confirm the count by looking at your own plug rather than assuming it from the model.</p>
<p>You can see the split clearly in the Honda line. The Honda 2-wire connector is described as typically used for rear turn signal connectors, while the Honda 3-wire connector is described as typically used for front turn signal connectors. Yamaha follows the same idea, with a 2-wire part for some rear blinker lamps and a 3-wire part described as used for front and rear blinker lamps on some Yamaha models. Count the wires on your factory plug first, then match the part to that count.</p>
<h2>Why "same brand, same wire count" still is not enough</h2>
<p>This is the part that trips people up. Within a single brand and a single wire count, there can be several physically different plug shapes, and they will not mate with each other. Custom LED labels these with Type numbers, and the differences are real, not cosmetic.</p>
<p>The Ducati and KTM 2-wire line is the clearest example. There are three types, and the product descriptions spell out which ones go together. The Type 1 connector mates with the Type 3 connector but does not mate with the Type 2 connector. The Type 2 connector is the odd one out and does not mate with Type 1. So even though all three are "2-wire," picking by brand and wire count alone can still leave you with a plug that physically will not connect. Kawasaki is the same story on the connector side, with three separate 2-wire types that are all the same wire count but different shapes.</p>
<p>Match the photo of the plug, not just the words "brand" and "wire count." If two plugs in the same family do not look identical, treat them as different parts.</p>
<h2>How to identify the connector on your bike</h2>
<p>Look at the factory turn signal plug and check three things in order. First, count the wires going into it, two or three. Second, note the brand. Third, compare the physical shape of the plug to the product photos, because that shape is what decides the Type. If your bike is a Ducati, KTM or Kawasaki, the Type comparison matters most, since those families have multiple 2-wire shapes. If you are between two types and cannot tell from the photos, the safest move is to email a clear photo of your plug before ordering. If we do not stock a part that matches your plug, that does not mean you are stuck. Send us a photo of your factory connector and we can often build a custom pigtail for it.</p>
<h2>The lineup</h2>
<p>Every part below comes pre-wired with protective sheathing to prevent chafing and is sold as pairs, two per order. Single connectors come with 8 inches of 22AWG wire installed. Y-splitters use 6 inches of 22AWG wire between the connectors.</p>
<h3>Single connectors</h3>
<div style="display: flex; gap: 16px; align-items: center; margin: 0 0 16px;">
<a style="flex: 0 0 auto; line-height: 0;" href="/products/honda-oem-turn-signal-connectors-2-wire"><img style="display: block; width: 96px; height: 96px; object-fit: contain; background-color: var(--card-media-contain-bg,#fff); padding: 8px; border-radius: var(--border-radius-base,8px); box-sizing: border-box;" loading="lazy" height="96" width="96" src="https://cdn.shopify.com/s/files/1/0190/4226/products/CL-HT2W-1.jpg?v=1547223260"></a>
<p style="margin: 0; flex: 1 1 auto;"><a href="/products/honda-oem-turn-signal-connectors-2-wire">Honda OEM Turn Signal Connectors, 2-Wire</a>. Typically used for rear turn signal connectors on Honda motorcycles. Pairs with the 3-wire Honda part below when your front and rear plugs differ.</p>
</div>
<div style="display: flex; gap: 16px; align-items: center; margin: 0 0 16px;">
<a style="flex: 0 0 auto; line-height: 0;" href="/products/honda-oem-turn-signal-connectors-3-wire"><img style="display: block; width: 96px; height: 96px; object-fit: contain; background-color: var(--card-media-contain-bg,#fff); padding: 8px; border-radius: var(--border-radius-base,8px); box-sizing: border-box;" loading="lazy" height="96" width="96" src="https://cdn.shopify.com/s/files/1/0190/4226/products/CL-HT3W-1.jpg?v=1547236062"></a>
<p style="margin: 0; flex: 1 1 auto;"><a href="/products/honda-oem-turn-signal-connectors-3-wire">Honda OEM Turn Signal Connectors, 3-Wire</a>. Typically used for front turn signal connectors on Honda motorcycles, where the front blinker lamp also runs as a position lamp.</p>
</div>
<div style="display: flex; gap: 16px; align-items: center; margin: 0 0 16px;">
<a style="flex: 0 0 auto; line-height: 0;" href="/products/yamaha-oem-turn-signal-connectors-2-wire-pair"><img style="display: block; width: 96px; height: 96px; object-fit: contain; background-color: var(--card-media-contain-bg,#fff); padding: 8px; border-radius: var(--border-radius-base,8px); box-sizing: border-box;" loading="lazy" height="96" width="96" src="https://cdn.shopify.com/s/files/1/0190/4226/products/CL-YT2W-1.jpg?v=1546532168"></a>
<p style="margin: 0; flex: 1 1 auto;"><a href="/products/yamaha-oem-turn-signal-connectors-2-wire-pair">Yamaha OEM Turn Signal Connectors, 2-Wire</a>. Typically used for rear turn signal connectors on some Yamaha motorcycles.</p>
</div>
<div style="display: flex; gap: 16px; align-items: center; margin: 0 0 16px;">
<a style="flex: 0 0 auto; line-height: 0;" href="/products/yamaha-oem-turn-signal-connectors-3-wire"><img style="display: block; width: 96px; height: 96px; object-fit: contain; background-color: var(--card-media-contain-bg,#fff); padding: 8px; border-radius: var(--border-radius-base,8px); box-sizing: border-box;" loading="lazy" height="96" width="96" src="https://cdn.shopify.com/s/files/1/0190/4226/products/CL-YT3W-1.jpg?v=1547233584"></a>
<p style="margin: 0; flex: 1 1 auto;"><a href="/products/yamaha-oem-turn-signal-connectors-3-wire">Yamaha OEM Turn Signal Connectors, 3-Wire</a>. Typically used for front and rear turn signal connectors on some Yamaha motorcycles.</p>
</div>
<div style="display: flex; gap: 16px; align-items: center; margin: 0 0 16px;">
<a style="flex: 0 0 auto; line-height: 0;" href="/products/kawasaki-oem-turn-signal-connectors-2-wire"><img style="display: block; width: 96px; height: 96px; object-fit: contain; background-color: var(--card-media-contain-bg,#fff); padding: 8px; border-radius: var(--border-radius-base,8px); box-sizing: border-box;" loading="lazy" height="96" width="96" src="https://cdn.shopify.com/s/files/1/0190/4226/products/CL-KT2W-1.jpg?v=1547222362"></a>
<p style="margin: 0; flex: 1 1 auto;"><a href="/products/kawasaki-oem-turn-signal-connectors-2-wire">Kawasaki OEM Turn Signal Connectors, 2-Wire, Type 1</a>. Typically used for rear turn signal connectors on Kawasaki motorcycles. Kawasaki uses three different 2-wire shapes, so compare the plug to the <a href="/products/kawasaki-oem-turn-signal-connectors-2-wire-type-2">Type 2</a> and <a href="/products/kawasaki-oem-turn-signal-connectors-2-wire-type-3">Type 3</a> before ordering.</p>
</div>
<div style="display: flex; gap: 16px; align-items: center; margin: 0 0 16px;">
<a style="flex: 0 0 auto; line-height: 0;" href="/products/ducati-oem-turn-signal-connectors-2-wire"><img style="display: block; width: 96px; height: 96px; object-fit: contain; background-color: var(--card-media-contain-bg,#fff); padding: 8px; border-radius: var(--border-radius-base,8px); box-sizing: border-box;" loading="lazy" height="96" width="96" src="https://cdn.shopify.com/s/files/1/0190/4226/products/CL-DT2W-1.jpg?v=1547222330"></a>
<p style="margin: 0; flex: 1 1 auto;"><a href="/products/ducati-oem-turn-signal-connectors-2-wire">Ducati and KTM OEM Turn Signal Connectors, 2-Wire, Type 1</a>. Shared across Ducati, KTM and Yamaha. Mates with the Type 3 part but not the Type 2.</p>
</div>
<div style="display: flex; gap: 16px; align-items: center; margin: 0 0 16px;">
<a style="flex: 0 0 auto; line-height: 0;" href="/products/ducati-oem-turn-signal-connectors-2-wire-2"><img style="display: block; width: 96px; height: 96px; object-fit: contain; background-color: var(--card-media-contain-bg,#fff); padding: 8px; border-radius: var(--border-radius-base,8px); box-sizing: border-box;" loading="lazy" height="96" width="96" src="https://cdn.shopify.com/s/files/1/0190/4226/products/CL-DT2W-2-MAX.jpg?v=1547220802"></a>
<p style="margin: 0; flex: 1 1 auto;"><a href="/products/ducati-oem-turn-signal-connectors-2-wire-2">Ducati OEM Turn Signal Connectors, 2-Wire, Type 2</a>. The odd one out. It does not mate with the Type 1 plug, so confirm your shape before choosing.</p>
</div>
<div style="display: flex; gap: 16px; align-items: center; margin: 0 0 16px;">
<a style="flex: 0 0 auto; line-height: 0;" href="/products/ducati-oem-turn-signal-connectors-2-wire-3"><img style="display: block; width: 96px; height: 96px; object-fit: contain; background-color: var(--card-media-contain-bg,#fff); padding: 8px; border-radius: var(--border-radius-base,8px); box-sizing: border-box;" loading="lazy" height="96" width="96" src="https://cdn.shopify.com/s/files/1/0190/4226/products/CL-DT2W-3.jpg?v=1547234351"></a>
<p style="margin: 0; flex: 1 1 auto;"><a href="/products/ducati-oem-turn-signal-connectors-2-wire-3">Ducati and KTM OEM Turn Signal Connectors, 2-Wire, Type 3</a>. Ducati, KTM and Yamaha. Mates with the Type 1 part but not the Type 2.</p>
</div>
<h3>Y-splitters</h3>
<div style="display: flex; gap: 16px; align-items: center; margin: 0 0 16px;">
<a style="flex: 0 0 auto; line-height: 0;" href="/products/honda-oem-turn-signal-y-splitter-connectors-2-wire-pair"><img style="display: block; width: 96px; height: 96px; object-fit: contain; background-color: var(--card-media-contain-bg,#fff); padding: 8px; border-radius: var(--border-radius-base,8px); box-sizing: border-box;" loading="lazy" height="96" width="96" src="https://cdn.shopify.com/s/files/1/0190/4226/products/CL-HT2W-1-SPLIT.jpg?v=1546534951"></a>
<p style="margin: 0; flex: 1 1 auto;"><a href="/products/honda-oem-turn-signal-y-splitter-connectors-2-wire-pair">Honda OEM Turn Signal Y-Splitter Connectors, 2-Wire</a>. Splits a rear Honda turn signal circuit so two blinker lamps blink together.</p>
</div>
<div style="display: flex; gap: 16px; align-items: center; margin: 0 0 16px;">
<a style="flex: 0 0 auto; line-height: 0;" href="/products/yamaha-oem-turn-signal-y-splitter-connectors-2-wire-pair"><img style="display: block; width: 96px; height: 96px; object-fit: contain; background-color: var(--card-media-contain-bg,#fff); padding: 8px; border-radius: var(--border-radius-base,8px); box-sizing: border-box;" loading="lazy" height="96" width="96" src="https://cdn.shopify.com/s/files/1/0190/4226/products/CL-YT2W-1-SPLIT.jpg?v=1546531377"></a>
<p style="margin: 0; flex: 1 1 auto;"><a href="/products/yamaha-oem-turn-signal-y-splitter-connectors-2-wire-pair">Yamaha OEM Turn Signal Y-Splitter Connectors, 2-Wire</a>. Connects two blinker lamps to each turn signal circuit, so you can run two sets of blinker lamps together, such as integrated blinker lamps alongside auxiliary or OEM blinker lamps.</p>
</div>
<div style="display: flex; gap: 16px; align-items: center; margin: 0 0 16px;">
<a style="flex: 0 0 auto; line-height: 0;" href="/products/yamaha-oem-turn-signal-y-splitter-connectors-3-wire-pair"><img style="display: block; width: 96px; height: 96px; object-fit: contain; background-color: var(--card-media-contain-bg,#fff); padding: 8px; border-radius: var(--border-radius-base,8px); box-sizing: border-box;" loading="lazy" height="96" width="96" src="https://cdn.shopify.com/s/files/1/0190/4226/products/CL-YT3W-1-SPLIT.jpg?v=1546571972"></a>
<p style="margin: 0; flex: 1 1 auto;"><a href="/products/yamaha-oem-turn-signal-y-splitter-connectors-3-wire-pair">Yamaha OEM Turn Signal Y-Splitter Connectors, 3-Wire, Type 1</a>. The 3-wire splitter for front and rear blinker lamps on some Yamaha models. This is the splitter to look at when you want to add a second set of blinker lamps to a 3-wire circuit.</p>
</div>
<div style="display: flex; gap: 16px; align-items: center; margin: 0 0 16px;">
<a style="flex: 0 0 auto; line-height: 0;" href="/products/kawasaki-oem-turn-signal-y-splitter-connectors-2-wire-pair"><img style="display: block; width: 96px; height: 96px; object-fit: contain; background-color: var(--card-media-contain-bg,#fff); padding: 8px; border-radius: var(--border-radius-base,8px); box-sizing: border-box;" loading="lazy" height="96" width="96" src="https://cdn.shopify.com/s/files/1/0190/4226/products/CL-KT2W-1-SPLIT.jpg?v=1546533900"></a>
<p style="margin: 0; flex: 1 1 auto;"><a href="/products/kawasaki-oem-turn-signal-y-splitter-connectors-2-wire-pair">Kawasaki OEM Turn Signal Y-Splitter Connectors, 2-Wire</a>. The Type 1 Kawasaki splitter for a 2-wire circuit.</p>
</div>
<div style="display: flex; gap: 16px; align-items: center; margin: 0 0 16px;">
<a style="flex: 0 0 auto; line-height: 0;" href="/products/ducati-oem-turn-signal-y-splitter-connectors-2-wire-pair"><img style="display: block; width: 96px; height: 96px; object-fit: contain; background-color: var(--card-media-contain-bg,#fff); padding: 8px; border-radius: var(--border-radius-base,8px); box-sizing: border-box;" loading="lazy" height="96" width="96" src="https://cdn.shopify.com/s/files/1/0190/4226/products/CL-DT2W-1-SPLIT.jpg?v=1550006136"></a>
<p style="margin: 0; flex: 1 1 auto;"><a href="/products/ducati-oem-turn-signal-y-splitter-connectors-2-wire-pair">Ducati and KTM OEM Turn Signal Y-Splitter Connectors, 2-Wire, Type 1</a>. Splitter built on the Type 1 Ducati and KTM plug. There are matching <a href="/products/ducati-oem-turn-signal-y-splitter-connectors-2-wire-pair-2">Type 2</a> and <a href="/products/ducati-oem-turn-signal-y-splitter-connectors-2-wire-pair-3">Type 3</a> splitters, so match the Type the same way you would for a single connector.</p>
</div>
<h2>Installing them</h2>
<p>Installation is plug-in, not splice-the-harness. That is the whole point of using the exact factory plug. For a single connector, unplug the factory blinker lamp, plug the matching connector into the bike side, and wire your new blinker lamp to the 8 inches of installed lead. For a Y-splitter, unplug the factory blinker lamp, plug the splitter's input into the bike's connector, and connect a blinker lamp to each of the two outputs, which sit on 6 inches of wire between connectors.</p>
<p>Here is the order of operations for a keep-both-blinker-lamps Y-splitter install:</p>
<ol>
<li>Identify your factory plug and order the matching splitter. Count the wires and compare the plug shape to the product photos using the steps above.</li>
<li>Unplug the OEM turn signal connector on the bike and plug the Y-splitter into it. No cutting and no splicing into the factory harness.</li>
<li>Connect your two blinker lamps to the two connectors the splitter now provides, one for the integrated blinker lamp and one for your OEM blinker lamp. To join your lamp wires to the splitter's leads, solder the connections and seal them with heat shrink for a clean, durable joint.</li>
<li>Repeat on the other side. Both connectors and splitters are sold as pairs, so you have one for each side.</li>
<li>Test both turn signals. If the blink speed looks off after adding blinker lamps, that is the load question below, not the connector.</li>
</ol>
<p>Route the wire so the sheathing stays clear of moving and hot parts, and leave a little slack at the steering stops on front blinker lamps so the lead is not pulled tight at full lock. Because every part is sold in pairs, do the left and right sides together so both sides match.</p>
<h2>Will splitting the circuit change my blink speed?</h2>
<p>Adding a second blinker lamp per side does change how much current that circuit draws. That is a separate problem from anything the connector or splitter does. If your blink speed shifts after you add blinker lamps, that is a load question, not a faulty connector. The fix lives at the flasher relay or the load equalizer, not at the plug. One thing that does not change: you still have only one flasher relay per motorcycle. Adding blinker lamps does not add a relay. If you need to rebalance the circuit after your blinker modifications, you should look to replacing your flasher relay as the first option. A load equalizer for blink speed issues is always the last resort.</p>
<div style="display: flex; gap: 16px; align-items: center; margin: 0 0 16px;">
<a style="flex: 0 0 auto; line-height: 0;" href="/collections/electronic-led-flasher-relays"><img style="display: block; width: 96px; height: 96px; object-fit: contain; background-color: var(--card-media-contain-bg,#fff); padding: 8px; border-radius: var(--border-radius-base,8px); box-sizing: border-box;" alt="Custom LED Electronic LED Flasher Relay" loading="lazy" height="96" width="96" src="https://cdn.shopify.com/s/files/1/0190/4226/products/ELFR-1-LED-Relay-1.jpg"></a>
<p style="margin: 0; flex: 1 1 auto;">An <a href="/collections/electronic-led-flasher-relays">Electronic LED Flasher Relay</a> is the first thing to reach for when your blink speed shifts after adding blinker lamps. It holds the correct DOT blink rate no matter how much load the circuit draws, so it fixes the blink rate outright. Find the one for your bike with the <a href="/pages/motorcycle-led-flasher-relay-compatibility">flasher relay compatibility guide</a>.</p>
</div>
<div class="customled-fitment-cta">
<strong>Ready to order?</strong> <span>Match your plug, then grab the right part. Single connectors and Y-Splitters for Honda, Yamaha, Kawasaki, KTM and Ducati are all in one place.</span> <a href="/collections/oem-connectors-for-motorcycles" class="button customled-fitment-cta__button">Shop Connectors &amp; Y-Splitters</a>
</div>
<p>Still not sure which plug you have? Send us a clear photo of the factory connector and we will tell you which part matches. If we do not stock your exact plug, we can often build a custom pigtail for it. <a href="/pages/contact-custom-led">Contact Custom LED</a> and we will help you pick the right one.</p>]]>
    </content>
  </entry>
  <entry>
    <id>https://www.customled.com/blogs/custom-led-product-information/led-flasher-relays-for-motorcycles</id>
    <published>2026-06-04T21:47:31-04:00</published>
    <updated>2026-06-04T22:46:37-04:00</updated>
    <link rel="alternate" type="text/html" href="https://www.customled.com/blogs/custom-led-product-information/led-flasher-relays-for-motorcycles"/>
    <title>Everything You Need to Know About LED Flasher Relays for Motorcycles</title>
    <author>
      <name>Custom LED</name>
    </author>
    <summary type="html">
      <![CDATA[When you switch to LED turn signals, your blinkers usually flash too fast. Here is what an electronic LED flasher relay does, why LEDs cause hyperflash, how to choose between a relay and a load equalizer, and which Custom LED relay fits your motorcycle.<p><a class="read-more" href="https://www.customled.com/blogs/custom-led-product-information/led-flasher-relays-for-motorcycles">More</a></p>]]>
    </summary>
    <content type="html">
      <![CDATA[<p>When you swap your motorcycle's incandescent turn signals for LEDs, the blinkers almost always start flashing too fast. That rapid flicker, usually called hyperflash, is the most common side effect of an LED signal conversion. In most cases the fix is one plug-in part: an electronic LED flasher relay.</p>
<p>This guide covers what the relay does, why LEDs cause the problem, how to tell whether you need a relay or a load equalizer, and which Custom LED relay is right for your bike.</p>
<div class="customled-fitment-cta">
<strong>In a hurry? Find your relay now.</strong> <span>Search by motorcycle make, model, year, or OEM flasher relay part number.</span> <a class="button customled-fitment-cta__button" href="/pages/motorcycle-led-flasher-relay-compatibility">Find My Relay</a>
</div>
<h2>What an electronic flasher relay does</h2>
<p>The flasher relay is the small module that makes your turn signals switch on and off. On most bikes its core job is timing: it sets how fast the signals blink. When people say their relay went "bad" after an LED swap, what they almost always mean is that the blink rate is wrong, not that the relay failed.</p>
<p>One thing worth knowing up front: the part your bike calls a flasher relay is not always a simple flasher. Some motorcycles use a combination relay or signal control unit, with several wires and data circuits, that also manages functions like self-canceling turn signals, hazard flashing, and bulb monitoring. A basic two-wire electronic relay only handles the flashing, so replacing a combination unit with one can drop those extra functions. That is why we make connector-specific models such as the <a href="/products/elfr-1-u-electronic-led-flasher-relay-7-pin-suzuki">ELFR-1-U</a> for bikes that use a multi-pin combination relay, and why a load equalizer is sometimes the better choice when you want to keep a factory self-canceling feature (more on that below).</p>
<p>An electronic LED flasher relay holds the blink rate at the normal, legal speed no matter how little power your LED signals draw. Federal law (FMVSS 108) requires turn signals to flash between 60 and 120 times per minute, and a properly matched relay keeps you in that window whether you are running LED bulbs, stock bulbs, or any combination of the two.</p>
<h2>Why your stock relay cannot handle LEDs</h2>
<p>Your factory flasher decides how fast to blink by watching how much current the turn signal circuit draws. Older bikes use a thermal flasher, where current heats a small metal element that opens and closes the circuit. Newer bikes use an electronic flasher that measures the load directly. Either way, the flasher is built around the assumption that a working bulb draws a certain amount of power.</p>
<p>LEDs are far more efficient, so they draw a tiny fraction of what an incandescent bulb does. The flasher reads that low current as a burned-out bulb and responds the way it was designed to: it doubles the blink rate to warn you (hyperflash), or in some cases it stops blinking entirely (the no-blink problem). Nothing is broken. The relay is doing its job with a load it was never built to see.</p>
<p>This is why a Custom LED electronic relay is specified for a very wide load range. Ours hold the normal rate across anything from 0.05A to 10A (roughly 0.6 to 120 watts), which covers nearly any mix of LED and stock bulbs you are likely to run.</p>
<h2>What if my bike already came with LED turn signals?</h2>
<p>It is easy to assume that a motorcycle that rolled off the line with LED turn signals is immune to all of this. Often it is not. The factory flasher on an LED-equipped bike is tuned for the exact OEM signals it shipped with, and it expects that specific electrical load. The moment you change the signals, that assumption breaks.</p>
<p>So if you replace the OEM LED signals with a different aftermarket set, add an integrated LED tail light, or run fewer or lower-draw LEDs than the bike came with, the factory relay can hyperflash, refuse to blink, or trip a bulb-out warning, just as it would on a bike converting from incandescent. The bike was already LED, but the relay was matched to the original load, not the new one.</p>
<p>The fix is the same as any other conversion: match the system to the new load. On most bikes that means one of our compatible electronic LED flasher relays, which holds the correct rate no matter how much current the signals draw. Where a plug-in relay is not available, a load equalizer sized to the OEM blinker lamps restores normal behavior.</p>
<h2>How an electronic LED flasher relay fixes it</h2>
<p>A timing-based electronic relay ignores current draw altogether. Instead of guessing at bulb health from how much power flows through it, it flashes on a fixed internal timer at the correct DOT rate. Run two LEDs, four LEDs, or a mix of LED and incandescent, and the rate stays normal.</p>
<p>Because the Custom LED relays plug into the factory connector, installation on a supported bike is genuinely plug-and-play: unplug the OEM relay, plug ours in, done. They also turn on with near zero delay, so your first blink fires the instant you hit the switch rather than after the lag some other LED relays have.</p>
<h2>Flasher relay or load equalizer: which do you need?</h2>
<p>There are two ways to fix a fast blink. You can replace the flasher relay, or you can add a load equalizer, which is a resistor that mimics the electrical power draw of the original bulb so the stock relay behaves normally. Replacing the relay is almost always the better and cheaper solution, but a load equalizer is the right answer in a few specific cases.</p>
<p><strong>Choose a flasher relay when:</strong></p>
<ul>
<li>A compatible plug-in relay exists for your motorcycle (check the finder below).</li>
<li>You want the cleanest, lowest-cost fix with no splicing.</li>
<li>You want to keep the power-saving benefit of running LEDs.</li>
</ul>
<p><strong>Choose a load equalizer when:</strong></p>
<ul>
<li>Your bike's flasher function is built into another module or a combination unit that cannot be swapped on its own, and no plug-in relay fits.</li>
<li>You need to preserve a factory self-canceling turn signal feature. Replacing the relay can disable self-cancel, so our Load Equalizers are the better choice if you want to keep it.</li>
<li>You are working on a vehicle that shares one circuit for brake and turn signals.</li>
</ul>
<p>Custom LED <a href="/collections/universal-led-load-equalizers">Load Equalizers</a> fix the fast-blink, no-blink and 4-way blink problems, and they come in 2 Watt, 10 Watt and 25 Watt sizes so you can match the wattage of the bulb you removed. For the full breakdown of how equalizers work and how to size them, see our <a href="/blogs/custom-led-product-information/13640005-all-about-led-load-equalizers-for-led-blinkers-on-motorcycles">guide to LED Load Equalizers</a>.</p>
<h2>The Custom LED flasher relay lineup</h2>
<p>We make several versions of our <a href="/collections/electronic-led-flasher-relays">Electronic LED Flasher Relay</a> so you can plug directly into your bike's factory connector. They share the same core electronics. The difference is the connector and a few features.</p>
<div style="display: flex; gap: 16px; align-items: flex-start; margin: 0 0 16px;">
<a href="/products/elfr-1-electronic-led-flasher-relay" style="flex: 0 0 auto; line-height: 0;"><img src="https://cdn.shopify.com/s/files/1/0190/4226/products/ELFR-1-LED-Relay-1.jpg" alt="Custom LED ELFR-1 Electronic LED Flasher Relay" width="96" height="96" loading="lazy" style="display: block; width: 96px; height: 96px; object-fit: contain; background-color: var(--card-media-contain-bg,#fff); padding: 8px; border-radius: var(--border-radius-base,8px); box-sizing: border-box;"></a>
<p style="margin: 0; flex: 1 1 auto;"><strong><a href="/products/elfr-1-electronic-led-flasher-relay">ELFR-1</a></strong> is the standard plug-and-play relay and the one most riders need. It plugs into compatible 2-wire and 3-wire OEM flasher relay connectors, where the third wire is simply a ground that our relay does not require. It is the recommended relay for every Custom LED Integrated LED Tail Light.</p>
</div>
<div style="display: flex; gap: 16px; align-items: flex-start; margin: 0 0 16px;">
<a href="/products/elfr-1-qd-electronic-led-flasher-relay" style="flex: 0 0 auto; line-height: 0;"><img src="https://cdn.shopify.com/s/files/1/0190/4226/products/ELFR-1_QD-MAX.jpeg" alt="Custom LED ELFR-1-QD Electronic LED Flasher Relay with Quick Disconnects" width="96" height="96" loading="lazy" style="display: block; width: 96px; height: 96px; object-fit: contain; background-color: var(--card-media-contain-bg,#fff); padding: 8px; border-radius: var(--border-radius-base,8px); box-sizing: border-box;"></a>
<p style="margin: 0; flex: 1 1 auto;"><strong><a href="/products/elfr-1-qd-electronic-led-flasher-relay">ELFR-1-QD</a></strong> uses the same electronics as the ELFR-1 but ships with male quick-disconnect terminals instead of a molded connector. It is the right pick for certain OEM connectors and for custom or hard-wire installs where you want to attach your own terminals.</p>
</div>
<div style="display: flex; gap: 16px; align-items: flex-start; margin: 0 0 16px;">
<a href="/products/elfr-1-h-electronic-led-flasher-relay-4-pin-honda" style="flex: 0 0 auto; line-height: 0;"><img src="https://cdn.shopify.com/s/files/1/0190/4226/products/ELFR-1-H-4.jpg" alt="Custom LED ELFR-1-H Electronic LED Flasher Relay for 4-pin Honda" width="96" height="96" loading="lazy" style="display: block; width: 96px; height: 96px; object-fit: contain; background-color: var(--card-media-contain-bg,#fff); padding: 8px; border-radius: var(--border-radius-base,8px); box-sizing: border-box;"></a>
<p style="margin: 0; flex: 1 1 auto;"><strong><a href="/products/elfr-1-h-electronic-led-flasher-relay-4-pin-honda">ELFR-1-H</a></strong> is built for compatible Honda motorcycles that use a 4-pin OEM flasher relay connector. It plugs straight into that Honda connector with no adapting.</p>
</div>
<div style="display: flex; gap: 16px; align-items: flex-start; margin: 0 0 16px;">
<a href="/products/elfr-1-u-electronic-led-flasher-relay-7-pin-suzuki" style="flex: 0 0 auto; line-height: 0;"><img src="https://cdn.shopify.com/s/files/1/0190/4226/products/ELFR-1-U-5.jpg" alt="Custom LED ELFR-1-U Electronic LED Flasher Relay for 7-pin Suzuki" width="96" height="96" loading="lazy" style="display: block; width: 96px; height: 96px; object-fit: contain; background-color: var(--card-media-contain-bg,#fff); padding: 8px; border-radius: var(--border-radius-base,8px); box-sizing: border-box;"></a>
<p style="margin: 0; flex: 1 1 auto;"><strong><a href="/products/elfr-1-u-electronic-led-flasher-relay-7-pin-suzuki">ELFR-1-U</a></strong> is built for compatible Suzuki motorcycles that use a 7-pin OEM combination relay. It maintains all of the functions of that combination relay while restoring a normal blink rate.</p>
</div>
<div style="display: flex; gap: 16px; align-items: flex-start; margin: 0 0 16px;">
<a href="/products/elfr-p-led-flasher-relay" style="flex: 0 0 auto; line-height: 0;"><img src="https://cdn.shopify.com/s/files/1/0190/4226/products/ELFR-P_3_max.jpg" alt="Custom LED ELFR-P Programmable Electronic LED Flasher Relay" width="96" height="96" loading="lazy" style="display: block; width: 96px; height: 96px; object-fit: contain; background-color: var(--card-media-contain-bg,#fff); padding: 8px; border-radius: var(--border-radius-base,8px); box-sizing: border-box;"></a>
<p style="margin: 0; flex: 1 1 auto;"><strong><a href="/products/elfr-p-led-flasher-relay">ELFR-P</a></strong> is our programmable relay, covered in the next section.</p>
</div>
<h2>ELFR-P: when you want to choose the flash pattern</h2>
<p>The <a href="/products/elfr-p-led-flasher-relay">ELFR-P</a> is for riders who want more than a standard hyperflash fix. It is a microcontroller-based relay with 10 user-selectable flash patterns, set with a 10-position rotary switch on the unit. The patterns range from a normal, DOT-style steady flash to attention-grabbing strobe modulations, so you can dial in the look you want and change it later without rewiring.</p>
<p>The easiest way to choose a pattern is to watch them in action. The demonstration below runs through all 10 settings on the rotary switch, from the standard DOT-style flash to the most aggressive strobe, so you can decide which one you want before you install.</p>
<div style="position: relative; padding-bottom: 56.25%; height: 0; overflow: hidden; margin: 18px 0 22px;"><iframe src="https://www.youtube.com/embed/BfEn7LA-C2Y?rel=0" title="Custom LED ELFR-P 10-pattern flash demonstration" loading="lazy" style="position: absolute; top: 0; left: 0; width: 100%; height: 100%; border: 0;"></iframe></div>
<p>The ELFR-P shares the same motorcycle compatibility as the ELFR-1, so if the finder shows that an ELFR-1 fits your bike, you can use the ELFR-P as the programmable alternative. It comes with a longer fused harness and needs one extra connection: a separate ground wire to the frame or battery negative. If all you need is to correct a fast blink and you do not care about selectable patterns, the standard ELFR-1 is the simpler choice.</p>
<h2>Problems that look like a relay issue but are not</h2>
<p>A flasher relay sets the blink rate, so a few common LED conversion problems get blamed on it by mistake even though it cannot cause or cure them. Knowing the difference saves you from buying the wrong part.</p>
<p><strong>Hyperflash on one side only.</strong> A relay affects both sides equally. If just one side flashes fast or behaves oddly, the cause is usually a dead or incompatible bulb, or a bad connection on that side, not the relay.</p>
<p><strong>All signals blinking at once (the 4-way blink).</strong> When every signal flashes together like a hazard light regardless of which way you signal, that is the 4-way blink problem, and a flasher relay cannot cause or cure it. It comes from the loss of resistive load and a crossover at the dashboard indicator lamp. The proper fix is to diode-isolate the indicator circuit, or to add load equalizers. Our full walkthrough is in the <a href="/blogs/custom-led-product-information/4-way-hazard-blink-problem-on-motorcycles-with-led-turn-signals">4-way blink guide</a>.</p>
<p><strong>A bulb-out or warning light on the dash.</strong> Some newer bikes actively monitor the signal circuit and will flag a fault even when the signals work correctly. That is a separate system from the blink rate, and a flasher relay does not address it.</p>
<h2>Installing your relay</h2>
<p>On a supported bike, installation takes minutes. The factory flasher relay is a small module plugged into the wiring harness. It commonly lives under the seat, behind a side panel or fairing, or near the steering head, but the location varies quite a bit from bike to bike. Your motorcycle's factory repair or service manual is the definitive source for where the flasher relay sits and how to reach it, so check it first if you are not sure. Once you find it, unplug the OEM relay, plug in the matching Custom LED relay, and you are done.</p>
<p>For a hard-wire install, the wiring is straightforward. The red wire goes to switched +12V power (hot with the ignition on), and the black wire goes to the load, meaning the blinker circuit. Leave any factory ground wire unconnected, since our standard relay does not use one. The ELFR-P is the exception: it has a white load wire and needs its own ground wire run to the frame or battery negative.</p>
<p>Mount the relay away from direct engine heat and secure it so it cannot rattle loose from vibration. Your bike needs a standard rectified 12VDC electrical system, which covers almost every modern motorcycle.</p>
<h2>Find the right relay for your bike</h2>
<div class="customled-fitment-cta">
<strong>Not sure which relay fits your motorcycle?</strong> <span>Search by motorcycle make, model, year, or OEM flasher relay part number.</span> <a class="button customled-fitment-cta__button" href="/pages/motorcycle-led-flasher-relay-compatibility">Find My Relay</a>
</div>
<p>The finder matches your motorcycle to the correct Custom LED relay and shows OEM relay part numbers and fitment notes where we have them. It is the fastest way to be sure you are ordering the right model before you buy.</p>
<h2>Still not sure?</h2>
<p>If the finder does not list your motorcycle, or you are not sure which part you need, <a href="/pages/contact-custom-led">send us a message</a> with your make, model and year, along with a photo of your OEM flasher relay connector. We will point you to the right solution.</p>]]>
    </content>
  </entry>
  <entry>
    <id>https://www.customled.com/blogs/custom-led-product-information/4-way-hazard-blink-problem-on-motorcycles-with-led-turn-signals</id>
    <published>2018-05-14T13:38:00-04:00</published>
    <updated>2026-06-04T22:45:28-04:00</updated>
    <link rel="alternate" type="text/html" href="https://www.customled.com/blogs/custom-led-product-information/4-way-hazard-blink-problem-on-motorcycles-with-led-turn-signals"/>
    <title>4-Way / Hazard Blink Problem on Motorcycles with LED Turn Signals</title>
    <author>
      <name>Custom LED</name>
    </author>
    <content type="html">
      <![CDATA[<h2><span>What the Heck is the 4-Way Blink Problem?</span></h2>
<p>Some motorcycles exhibit strange behavior on the blinkers when switching out from Incandescent to LED blinker lamps.  You may experience what we call the <strong><span style="text-decoration: underline;">4-Way Blink Problem</span></strong>, where all turn signals on the motorcycle blink simultaneously - regardless of the direction you choose on the handlebar turn signal selector switch!  Basically, the <strong>blinkers behave like hazards</strong> anytime you try to use them.</p>
<h2>What Causes the 4-Way Blink Problem?</h2>
<p>This problem actually has <strong>nothing </strong>to do with the flasher relay on the motorcycle.  A flasher relay can not cause, or fix this particular issue.</p>
<p>The problem stems from a lack of restive load (incandescent bulbs) on a blinker system that was designed for incandescent bulbs - however the best solution is actually NOT to add resistors.  It is actually best to solve the problem at the source, which is the turn signal indicator lamp in the gauge cluster.  The turn signal indicator lamp is the little light that blinks next to the speedometer when you are turning. </p>
<p>It is at the turn signal indicator lamp where both the left and right turn signal circuits are brought together.  Left turn circuit on one side of the indicator lamp "filament" and right turn circuit on the other side.  With the incandescent turn signal bulbs installed, the system behaves as designed where voltage on either the left or right turn signal circuits illuminates the turn signal indicator lamp.  This is achieved simply by allowing the opposite side turn signal circuit from the one activated, to function as a ground path for the indicator lamp.  The small amount of current that passes through the indicator lamp in the gauge cluster is not enough to illuminate the power-hungry incandescent bulbs, and they simply function as a ground path without lighting up at all.  When removing these incandescent bulbs and installing LEDs, you have removed this ground path - which usually leaves the turn signal indicator lamp inoperative - AND you have introduced voltage to the opposite side turn signal circuit which is enough to illuminate the super efficient LEDs.</p>
<h2>OK, So How Do I Fix the 4-Way Blink Problem?</h2>
<p>The pure solution to the 4-Way Blink Problem (not the simple one, but the correct solution) is to <strong>diode isolate the two turn signal circuits leading to the gauge cluster, and provide a dedicated ground for the indicator lamp</strong>.</p>
<p style="float: left;">This is done by finding these two turn signal circuit wires leading into the gauge cluster (typically the same wire colors as found at the blinker lamps themselves).  Once you properly identify them in the harness leading to the gauge cluster, you cut them and install a Diode (<a href="https://www.customled.com/products/1n4001-diode-for-4-way-blink-fix">1N4001</a>) in each circuit (with the gray band towards the gauge cluster) on the two wires feeding power from the turn signal circuit. You will then combine the outputs of the diodes into one of the two wires leading into the gauge cluster, and ground the other wire going into the gauge cluster.</p>
<p>The diodes will keep electricity from being able to cross over from one turn signal circuit to the other, but it will allow the two circuits to be combined to power the indicator lamp properly.<br><br>The following crude sketch illustrates the concept.</p>
<p><img src="//cdn.shopify.com/s/files/1/0190/4226/files/4-way-Blink-Fix_grande.jpg?v=1526319111" alt="" style="display: block; margin-left: auto; margin-right: auto;"></p>
<p><strong>The <a href="/products/1n4001-diode-for-4-way-blink-fix">1N4001 diodes</a> can be purchased from our website <a href="/products/1n4001-diode-for-4-way-blink-fix">here</a>. You will need 2 diodes for a proper install.</strong></p>
<p>For some bikes we also offer a plug-and-play No-Cut Diode Kit — the same diode fix pre-built into a model-specific harness, so you do not have to splice in loose 1N4001 diodes. For example, the <a href="/products/2008-2009-2010-2011-2012-kawasaki-ninja-250r-no-cut-diode-kit">2008-2012 Kawasaki Ninja 250R No-Cut Diode Kit</a> plugs straight in with no cutting.</p>
<h2>Dude, You Lost Me!</h2>
<p>If installing the diodes seems too involved for you, don't despair, there is another solution. The simplest way to fix this problem is to add some resistive load to your blinker system to damp out these crossover voltages and restore the ground path for the indicator lamp. One pair of our 2 Watt <a href="https://www.customled.com/collections/universal-led-load-equalizers">Load Equalizers</a> may sufficient to solve this problem on <strong><em>some</em></strong> modern sportbikes, however most bikes do require more than one pair, or larger Load Equalizers altogether. Older bikes require as much as 25 Watts to be dissipated through a resistor to eliminate this problem! </p>
<p>I'm afraid it will take a little experimentation to get the right amount of load.  But, if installing one pair of the OEM blinkers back on the motorcycle eliminates the 4-way blink problem, then you can be sure that an equally sized <a href="https://www.customled.com/collections/universal-led-load-equalizers">Load Equalizer</a> will do the same (match the wattage of the original incandescent bulb, to that of our Load Equalizer).</p>]]>
    </content>
  </entry>
  <entry>
    <id>https://www.customled.com/blogs/custom-led-product-information/13640005-all-about-led-load-equalizers-for-led-blinkers-on-motorcycles</id>
    <published>2014-04-14T15:48:00-04:00</published>
    <updated>2026-06-04T22:45:28-04:00</updated>
    <link rel="alternate" type="text/html" href="https://www.customled.com/blogs/custom-led-product-information/13640005-all-about-led-load-equalizers-for-led-blinkers-on-motorcycles"/>
    <title>All about LED Load Equalizers for LED Blinkers on Motorcycles</title>
    <author>
      <name>Custom LED</name>
    </author>
    <content type="html">
      <![CDATA[<p style="text-align: center;"><span style="line-height: 1.2; font-size: 14px;"><a href="/collections/universal-led-load-equalizers"><img alt="" src="//cdn.shopify.com/s/files/1/0190/4226/products/LEQZ_HD_1-1_f370d735-ca24-4b54-ade4-eef3c5453a35_compact.jpg?v=1538234335" style="float: none;"><img alt="" src="//cdn.shopify.com/s/files/1/0190/4226/products/LEQZ_II_f44d2391-7667-4ca7-ae0f-304d67b28b57_compact.jpg?v=1538234336" style="float: none;"><img alt="" src="//cdn.shopify.com/s/files/1/0190/4226/products/LEQZ_I_compact.jpg?v=1538234371" style="float: none;"><img alt="" src="//cdn.shopify.com/s/files/1/0190/4226/products/CANbus_LEQZ_MAX_compact.jpg?v=1538234371" style="float: none;"></a></span></p>
<p><span style="line-height: 1.2; font-size: 14px;">You may have heard the term "Load Equalizer" or "Load Resistor" being thrown around when looking for a solution to your fast-blink or no-blink issues on your motorcycle.  The fast blink issue occurs when you remove the OEM incandescent blinker lamps and replace them with LEDs.  </span></p>
<p><span style="line-height: 1.2; font-size: 14px;">Well, understanding what a Load Equalizer is, starts by understanding why you need one in the first place.</span></p>
<h2>Why do I need a Load Equalizer?</h2>
<p><span style="line-height: 1.2;">If you remove any of the OEM blinker lamps on a car, truck or motorcycle, you may find that your blinkers now blink faster than they did originally - or they stop blinking entirely!  </span><strong style="line-height: 1.2;">The Fast-Blink rate is actually the designed response of the OEM flasher relay</strong><span style="line-height: 1.2;">.  It's designed to blink fast when the Flasher Relay detects that a light bulb is burned out.  This way, the operator knows he has a light bulb that needs to be replaced.  </span></p>
<p><span style="line-height: 1.2;"></span>The Flasher Relay makes this burned-out-bulb determination by checking the amount of current being drawn through the Flasher Relay to power the blinker lamps.  When using LEDs blinker lamps, there is FAR less current being drawn on the blinker circuits compared to the OEM incandescent bulbs.  It is because the LEDs are so efficient that they draw such little power.</p>
<h2>What the heck is a Load Equalizer? </h2>
<p><strong>A Load Equalizer is used as a power-sink, to dissipate the same amount of power as the OEM turn signal lamps did.</strong>  </p>
<p>This means, if you had 25 Watt light bulbs originally on your turn signal circuit, you need to add 25 Watts worth of Load Equalization to create the same power draw on the blinker circuit as with the OEM lamps installed.</p>
<p>If you match the power draw properly, your Flasher Relay is tricked into thinking the bulbs are still there!  And like magic, it starts blinking normally again!</p>
<h2>Where do I get the Correct Load Equalizer for my application?</h2>
<p>What you need to do is find out the wattage of the OEM blinker lamps that you have removed or replaced with LEDs.  You will need to add this amount Wattage with Load Equalizers.</p>
<p>Custom LED makes the finest <a href="/collections/universal-led-load-equalizers" target="_blank" title="Custom LED Load Equalizers for Motorcycles with LED Blinkers" rel="noopener noreferrer">Load Equalizers</a> for motorcycle applications.  They do not get dangerously hot like some other cheaper alternatives out there, and we have been making them since 2001!  Tried and true is the way to go.</p>
<ul>
<li>Use our <a href="/products/stage-i-load-equalizer" target="_blank" title="Custom LED 2 Watt Load Equalizers for Motorcycles" style="line-height: 1.2;" rel="noopener noreferrer">2 Watt Load Equalizers</a><span style="line-height: 1.2;"> to replace 2 Watt light bulbs.</span>
</li>
<li><span style="line-height: 1.2;">Use our <a href="https://www.customled.com/products/load-equalizer-10-watt">10 Watt Load Equalizers</a> to replace 10 Watt light bulbs.</span></li>
<li>Use our <a href="/products/stage-ii-load-equalizer" target="_blank" title="Custom LED 25 Watt Load Equalizers for Motorcycles" style="line-height: 1.2;" rel="noopener noreferrer">25 Watt Load Equalizers</a><span style="line-height: 1.2;"> to replace 25 Watt light bulbs.</span>
</li>
<li><span style="line-height: 1.2;">Use our <a href="https://www.customled.com/products/load-equalizer-25-watt-heavy-duty">25 Watt Heavy-Duty Load Equalizers</a> to replace 25 Watt light bulbs on automobiles that use the same circuit for brake and turn.</span></li>
</ul>
<h2>What about replacing my Flasher Relay instead?</h2>
<p><strong>YES!  </strong>Replacing your Flasher is the best way to fix fast-blink or no-blink issues.  If we have an LED Flasher Relay that will work for your application, then forget about Load Equalizers.</p>
<p><strong>By changing the OEM Flasher Relay to one that does not have a bulb-out notification, and is designed to work with very low current draw, you are taking advantage of the power-saving aspects of LED blinkers!</strong>  </p>
<p>Why put the large electrical load of the incandescent lamps back on your blinker system just to trick the OEM Flasher Relay, when you can just replace the OEM Flasher Relay with an Electronic LED Flasher Relay that blinks normal regardless of what blinker lamps you are using?</p>
<p>Custom LED makes a few different types of <a href="/collections/electronic-led-flasher-relays" title="Electronic LED Flasher Relay for LED Blinkers">Electronic LED Flasher Relays</a> for Motorcycles.  See which one is compatible with your bike on the respective product pages.</p>
<p style="text-align: center;"> <a href="/collections/electronic-led-flasher-relays"><img src="//cdn.shopify.com/s/files/1/0190/4226/products/ELFR-1-U-5_compact.jpg?v=1552679975" alt=""></a><a href="/collections/electronic-led-flasher-relays"><img alt="" src="//cdn.shopify.com/s/files/1/0190/4226/products/ELFR-1-LED-Relay-1_compact.jpg?v=1543616085" style="float: none;"></a><a href="/collections/electronic-led-flasher-relays"><img src="//cdn.shopify.com/s/files/1/0190/4226/products/ELFR-1-H-1_compact.jpg?v=1478013205" alt=""></a><a href="/collections/electronic-led-flasher-relays"><img src="//cdn.shopify.com/s/files/1/0190/4226/products/ELFR-P_2_max_56233805-ea2f-4e2e-b0ba-eeb83986fb4b_compact.jpg?v=1538234370" alt=""></a></p>
<p>One mounting note for the 25 Watt Heavy Duty Load Equalizer: it uses an aluminum heat sink with integrated mounting tabs. On a shared turn-and-brake circuit, or any install that sees prolonged voltage, it can run warm, so mount it to the frame using those tabs rather than burying it in a wiring bundle. The standard 2, 10, and 25 Watt units are oversized for good heat capacity and stay cool, so they do not need special mounting.</p>
<p><strong>If you have any technical questions about your particular application, please don't hesitate to contact us!</strong></p>]]>
    </content>
  </entry>
  <entry>
    <id>https://www.customled.com/blogs/custom-led-product-information/12610269-cbr-600rr-flasher-relay-replacement-for-led-years-2003-2004-2005-2006</id>
    <published>2012-04-12T00:00:00-04:00</published>
    <updated>2026-06-04T22:46:51-04:00</updated>
    <link rel="alternate" type="text/html" href="https://www.customled.com/blogs/custom-led-product-information/12610269-cbr-600rr-flasher-relay-replacement-for-led-years-2003-2004-2005-2006"/>
    <title>CBR 600RR Flasher Relay Replacement for LED, Years 2003, 2004, 2005, 2006</title>
    <author>
      <name>Custom LED</name>
    </author>
    <content type="html">
      <![CDATA[<p>So, you may be wondering where the flasher relay is on your 2003-2006 Honda CBR 600RR.  You have changed your OEM blinker lamps to LEDs and/or installed our <a href="/products/2003-2004-2005-2006-honda-cbr-600rr-integrated-led-tail-light" title="2003-2006 Honda CBR-600RR Blaster-X Integrated LED Tail Light | Custom LED">2003-2006 CBR 600RR Blaster-X Tail Light</a> on the rear, and now the blinkers blink fast, or don’t blink at all.  You know you need to replace the flasher relay, but nobody seems to have one compatible with your bike!</p>
<p>Worry not, <a href="https://www.customled.com/" target="_blank" rel="noopener noreferrer">Custom LED</a> has the answer, and the solution!</p>
<p style="float: left;"><a href="https://www.customled.com/products/elfr-1-electronic-led-flasher-relay"><img alt="" src="//cdn.shopify.com/s/files/1/0190/4226/products/ELFR-1-LED-Relay-1_compact.jpg?v=1543616085" style="float: left;"></a>The flasher relay on your bike is physically built into the gauge cluster.  “Replacing” it requires disconnecting two particular wires leading to the gauge cluster, and connecting the Custom LED <a href="https://www.customled.com/products/elfr-1-electronic-led-flasher-relay">ELFR-1 LED Flasher Relay</a> to these wires.  A very useful and informative <a href="https://youtu.be/q6AxdaICrek">2003-2006 CBR 600RR ELFR-1 Flasher Relay Install YouTube video</a> clearly shows an approach that does not require any wires to be cut!</p>
<p>There are two specific wires leading to the gauge cluster (the gauge cluster is the device that shows speed, engine RPM and other indications) that you will need to identify for a proper installation of our ELFR-1.</p>
<ul>
<li>
<strong>Gray</strong> wire = "blinks" +12V with the blinkers on, this is your Load wire coming from the stock relay</li>
<li>
<strong>White/Green stripe</strong> = ignition switched +12V power</li>
</ul>
<p>You should check these wire functions with a volt-meter or test light before proceeding to make sure they match the functions listed above.  The motorcycle manufacturers can change wire colors slightly from year to year, and region to region.</p>
<p><em><strong>If</strong></em> the wire functions match those listed above, then proceed as follows.  You will need to effectively disconnect both wires from the gauge cluster, and connect them to the ELFR-1 as follows:</p>
<ul>
<li>Gray wire gets attached to the BLACK wire on the ELFR-1 (attach to the wire going away from the gauge cluster, not to the gauge cluster)</li>
<li>White/Green stripe connects to the RED wire on the ELFR-1 (attach to the wire going away from the gauge cluster, not to the gauge cluster)</li>
</ul>
<p><span><strong>NOTE</strong></span><strong>:</strong> It is critical that you effectively disconnect these wires from the gauge cluster, otherwise the OEM relay will still control the blinkers and cause the malfunction you are experiencing to continue.</p>
<p>This Hard-Wire installation is somewhat tricky if you are not familiar with electronics, and for this reason we generally recommend <a href="/products/stage-ii-load-equalizer" title="Universal Motorcycle 25 Watt Load Equalizer for LED Blinkers | Custom LED">load equalizers</a> for the 2003-2006 CBR 600RR instead.</p>]]>
    </content>
  </entry>
</feed>
