<?xml version="1.0" encoding="utf-8"?>
<feed xmlns="http://www.w3.org/2005/Atom">

  <title><![CDATA[Esa-Matti Suuronen]]></title>
  <link href="http://esa-matti.suuronen.org/atom.xml" rel="self"/>
  <link href="http://esa-matti.suuronen.org/"/>
  <updated>2013-06-18T13:41:44+03:00</updated>
  <id>http://esa-matti.suuronen.org/</id>
  <author>
    <name><![CDATA[Esa-Matti Suuronen]]></name>
    <email><![CDATA[esa-matti@suuronen.org]]></email>
  </author>
  <generator uri="http://octopress.org/">Octopress</generator>

  
  <entry>
    <title type="html"><![CDATA[Asynchronous module loading with Browserify]]></title>
    <link href="http://esa-matti.suuronen.org/blog/2013/04/15/asynchronous-module-loading-with-browserify/"/>
    <updated>2013-04-15T10:00:00+03:00</updated>
    <id>http://esa-matti.suuronen.org/blog/2013/04/15/asynchronous-module-loading-with-browserify</id>
    <content type="html"><![CDATA[<p>This is a sequel for the <a href="http://esa-matti.suuronen.org/blog/2013/03/22/journey-from-requirejs-to-browserify/">Journey From RequireJS to Browserify</a> post.</p>

<p>After publishing the previous post I got a lot of feedback saying that
Browserify can&#8217;t do asynchronous module loading. Since that&#8217;s something I&#8217;d
like to have with Browserify too I started looking on how to do it and after
couple of <a href="https://github.com/substack/node-browserify/pull/360">pull</a> <a href="https://github.com/substack/browser-pack/pull/9">requests</a> and one published npm
<a href="https://github.com/epeli/browserify-externalize">module</a> later I&#8217;m happy to say it&#8217;s very much possible now!</p>

<!-- more -->


<h2>Background</h2>

<p>Basically asynchronous module loading can be done just by creating multiple
bundles with Browserify and loading them with a script loader of your choosing.
There is one in <a href="http://api.jquery.com/jQuery.getScript/">jQuery</a> or if you don&#8217;t like jQuery there
<a href="https://npmjs.org/package/scriptjs">are</a> <a href="http://yepnopejs.com/">quite</a> <a href="http://headjs.com/">a</a> <a href="http://labjs.com/">few</a>
<a href="https://github.com/rgrove/lazyload/">standalone</a> <a href="http://addyosmani.github.io/basket.js/">ones</a> <a href="https://gist.github.com/epeli/5384178">out</a> there.</p>

<h2>Loading shims for old browsers</h2>

<p>This is a simple use case and it has almost nothing to do with Browserify. For
example if we are using <code>Function.prototype.bind</code> in our app and we want to
load <a href="https://github.com/kriskowal/es5-shim">es5-shim</a> if the browser is missing the implementation:</p>

<figure class='code'><figcaption><span>index.js</span></figcaption><div class="highlight"><table><tr><td class="gutter"><pre class="line-numbers"><span class='line-number'>1</span>
<span class='line-number'>2</span>
<span class='line-number'>3</span>
<span class='line-number'>4</span>
<span class='line-number'>5</span>
<span class='line-number'>6</span>
<span class='line-number'>7</span>
<span class='line-number'>8</span>
<span class='line-number'>9</span>
<span class='line-number'>10</span>
<span class='line-number'>11</span>
<span class='line-number'>12</span>
</pre></td><td class='code'><pre><code class='javascript'><span class='line'><span class="k">if</span> <span class="p">(</span><span class="nb">Function</span><span class="p">.</span><span class="nx">prototype</span><span class="p">.</span><span class="nx">bind</span><span class="p">)</span> <span class="p">{</span>
</span><span class='line'>  <span class="c1">// Just require the main module if the browser</span>
</span><span class='line'>  <span class="c1">// has Function.prototype.bind implementation</span>
</span><span class='line'>  <span class="nx">require</span><span class="p">(</span><span class="s2">&quot;./main&quot;</span><span class="p">);</span>
</span><span class='line'><span class="p">}</span>
</span><span class='line'><span class="k">else</span> <span class="p">{</span>
</span><span class='line'>  <span class="c1">// If not load the es5-shim with a script loader and</span>
</span><span class='line'>  <span class="c1">// require main after it has loaded</span>
</span><span class='line'>  <span class="nx">jQuery</span><span class="p">.</span><span class="nx">getScript</span><span class="p">(</span><span class="s2">&quot;./vendor/es5-shim.js&quot;</span><span class="p">,</span> <span class="kd">function</span><span class="p">(){</span>
</span><span class='line'>    <span class="nx">require</span><span class="p">(</span><span class="s2">&quot;./main&quot;</span><span class="p">);</span>
</span><span class='line'>  <span class="p">});</span>
</span><span class='line'><span class="p">}</span>
</span></code></pre></td></tr></table></div></figure>


<h2>Conditional bundle loading</h2>

<p>We might have different bundles for different browsers. Often on modern
browsers we can rely on the native implementations and skip the Javascript
shims or polyphills that are required for the older ones. We could for example
inlude a custom lightweight <a href="http://net.tutsplus.com/tutorials/javascript-ajax/how-to-build-your-own-custom-jquery/">jQuery build</a> to our &#8220;modern browser&#8221; bundle or
go little extreme and use Zepto in place of jQuery for modern browsers like we
do here.</p>

<p>To detect modern enough browsers for Zepto we check for
<code>document.querySelector</code> implementation.</p>

<p>To do this we need to build simple lightweight entry point with a script loader
and two versions of the main bundle. One with Zepto and one with jQuery.</p>

<figure class='code'><figcaption><span>build.js</span></figcaption><div class="highlight"><table><tr><td class="gutter"><pre class="line-numbers"><span class='line-number'>1</span>
<span class='line-number'>2</span>
<span class='line-number'>3</span>
<span class='line-number'>4</span>
<span class='line-number'>5</span>
<span class='line-number'>6</span>
<span class='line-number'>7</span>
<span class='line-number'>8</span>
<span class='line-number'>9</span>
<span class='line-number'>10</span>
<span class='line-number'>11</span>
<span class='line-number'>12</span>
<span class='line-number'>13</span>
<span class='line-number'>14</span>
<span class='line-number'>15</span>
</pre></td><td class='code'><pre><code class='javascript'><span class='line'><span class="kd">var</span> <span class="nx">browserify</span> <span class="o">=</span> <span class="nx">require</span><span class="p">(</span><span class="s2">&quot;browserify&quot;</span><span class="p">);</span>
</span><span class='line'>
</span><span class='line'><span class="kd">var</span> <span class="nx">index</span> <span class="o">=</span> <span class="nx">browserify</span><span class="p">(</span><span class="s2">&quot;./index&quot;</span><span class="p">);</span>
</span><span class='line'><span class="kd">var</span> <span class="nx">jquery</span> <span class="o">=</span> <span class="nx">browserify</span><span class="p">(</span><span class="s2">&quot;./main&quot;</span><span class="p">);</span>
</span><span class='line'><span class="kd">var</span> <span class="nx">zepto</span> <span class="o">=</span> <span class="nx">browserify</span><span class="p">(</span><span class="s2">&quot;./main&quot;</span><span class="p">);</span>
</span><span class='line'>
</span><span class='line'><span class="c1">// The main bundle has require calls to both jQuery and Zepto.</span>
</span><span class='line'><span class="c1">// So remove Zepto from the jQuery bundle:</span>
</span><span class='line'><span class="nx">jquery</span><span class="p">.</span><span class="nx">external</span><span class="p">(</span><span class="s2">&quot;./vendor/zepto&quot;</span><span class="p">);</span>
</span><span class='line'><span class="c1">// and jQuery from the Zepto bundle:</span>
</span><span class='line'><span class="nx">zepto</span><span class="p">.</span><span class="nx">external</span><span class="p">(</span><span class="s2">&quot;./vendor/jquery&quot;</span><span class="p">);</span>
</span><span class='line'>
</span><span class='line'><span class="nx">index</span><span class="p">.</span><span class="nx">bundle</span><span class="p">().</span><span class="nx">pipe</span><span class="p">(</span><span class="nx">fs</span><span class="p">.</span><span class="nx">createWriteStream</span><span class="p">(</span><span class="s2">&quot;./bundle/index.js&quot;</span><span class="p">));</span>
</span><span class='line'><span class="nx">zepto</span><span class="p">.</span><span class="nx">bundle</span><span class="p">().</span><span class="nx">pipe</span><span class="p">(</span><span class="nx">fs</span><span class="p">.</span><span class="nx">createWriteStream</span><span class="p">(</span><span class="s2">&quot;./bundle/main-zepto.js&quot;</span><span class="p">));</span>
</span><span class='line'><span class="nx">jquery</span><span class="p">.</span><span class="nx">bundle</span><span class="p">().</span><span class="nx">pipe</span><span class="p">(</span><span class="nx">fs</span><span class="p">.</span><span class="nx">createWriteStream</span><span class="p">(</span><span class="s2">&quot;./bundle/main-jquery.js&quot;</span><span class="p">));</span>
</span></code></pre></td></tr></table></div></figure>


<p>In index.js we just detect which one we want to use and load it:</p>

<figure class='code'><figcaption><span>index.js</span></figcaption><div class="highlight"><table><tr><td class="gutter"><pre class="line-numbers"><span class='line-number'>1</span>
<span class='line-number'>2</span>
<span class='line-number'>3</span>
<span class='line-number'>4</span>
<span class='line-number'>5</span>
<span class='line-number'>6</span>
<span class='line-number'>7</span>
<span class='line-number'>8</span>
<span class='line-number'>9</span>
<span class='line-number'>10</span>
<span class='line-number'>11</span>
<span class='line-number'>12</span>
<span class='line-number'>13</span>
</pre></td><td class='code'><pre><code class='javascript'><span class='line'><span class="c1">// Since we don&#39;t have jQuery.getScript here we use an</span>
</span><span class='line'><span class="c1">// lightweight alternative called $script.js. npm: scriptjs</span>
</span><span class='line'><span class="kd">var</span> <span class="nx">$script</span> <span class="o">=</span> <span class="nx">require</span><span class="p">(</span><span class="s2">&quot;scriptjs&quot;</span><span class="p">).</span><span class="nx">$script</span><span class="p">;</span>
</span><span class='line'>
</span><span class='line'><span class="c1">// We set a global flag indicating which one we are using.</span>
</span><span class='line'><span class="c1">// We use this later to detect which one we can require.</span>
</span><span class='line'><span class="nb">window</span><span class="p">.</span><span class="nx">USE_ZEPTO</span> <span class="o">=</span> <span class="o">!!</span><span class="nb">document</span><span class="p">.</span><span class="nx">querySelectorAll</span><span class="p">;</span>
</span><span class='line'>
</span><span class='line'><span class="c1">// The both main bundles have an entry points (main.js) so we</span>
</span><span class='line'><span class="c1">// only need to load them and the code will be executed soon</span>
</span><span class='line'><span class="c1">// as it is added to the DOM</span>
</span><span class='line'><span class="k">if</span> <span class="p">(</span><span class="nb">window</span><span class="p">.</span><span class="nx">USE_ZEPTO</span><span class="p">)</span> <span class="nx">$script</span><span class="p">(</span><span class="s2">&quot;bundle/main-zepto.js&quot;</span><span class="p">);</span>
</span><span class='line'><span class="k">else</span> <span class="nx">$script</span><span class="p">(</span><span class="s2">&quot;bundle/main-jquery.js&quot;</span><span class="p">);</span>
</span></code></pre></td></tr></table></div></figure>


<p>In our app code we need to abstract the require calls to jQuery and Zepto to
make  it smooth:</p>

<figure class='code'><figcaption><span>jquery-or-zepto.js</span></figcaption><div class="highlight"><table><tr><td class="gutter"><pre class="line-numbers"><span class='line-number'>1</span>
<span class='line-number'>2</span>
<span class='line-number'>3</span>
<span class='line-number'>4</span>
<span class='line-number'>5</span>
<span class='line-number'>6</span>
<span class='line-number'>7</span>
<span class='line-number'>8</span>
<span class='line-number'>9</span>
<span class='line-number'>10</span>
</pre></td><td class='code'><pre><code class='javascript'><span class='line'><span class="c1">// Neither one, jQuery or Zepto, does CommonJS exports</span>
</span><span class='line'><span class="c1">// so grab them from the globals after requiring</span>
</span><span class='line'><span class="k">if</span> <span class="p">(</span><span class="nb">window</span><span class="p">.</span><span class="nx">USE_ZEPTO</span><span class="p">)</span> <span class="p">{</span>
</span><span class='line'>  <span class="nx">require</span><span class="p">(</span><span class="s2">&quot;./vendor/zepto&quot;</span><span class="p">);</span>
</span><span class='line'>  <span class="nx">module</span><span class="p">.</span><span class="nx">exports</span> <span class="o">=</span> <span class="nb">window</span><span class="p">.</span><span class="nx">Zepto</span><span class="p">;</span>
</span><span class='line'><span class="p">}</span>
</span><span class='line'><span class="k">else</span> <span class="p">{</span>
</span><span class='line'>  <span class="nx">require</span><span class="p">(</span><span class="s2">&quot;./vendor/jquery&quot;</span><span class="p">);</span>
</span><span class='line'>  <span class="nx">module</span><span class="p">.</span><span class="nx">exports</span> <span class="o">=</span> <span class="nb">window</span><span class="p">.</span><span class="nx">jQuery</span><span class="p">;</span>
</span><span class='line'><span class="p">}</span>
</span></code></pre></td></tr></table></div></figure>


<p>And in app code just use <code>var $ = require("./jquery-or-zepto");</code> to get the
correct one depending on the bundle we loaded.</p>

<h2>Lazy loading rarely used parts</h2>

<p>Now this is where things get really interesting.</p>

<p>Lets say our app has some graph view which requires a large graphing library
and we want to load that library and related code lazily only when the user
actually uses the feature like this:</p>

<figure class='code'><figcaption><span>main.js</span></figcaption><div class="highlight"><table><tr><td class="gutter"><pre class="line-numbers"><span class='line-number'>1</span>
<span class='line-number'>2</span>
<span class='line-number'>3</span>
<span class='line-number'>4</span>
<span class='line-number'>5</span>
<span class='line-number'>6</span>
<span class='line-number'>7</span>
<span class='line-number'>8</span>
</pre></td><td class='code'><pre><code class='javascript'><span class='line'><span class="nx">$</span><span class="p">(</span><span class="s2">&quot;button.display-graph&quot;</span><span class="p">).</span><span class="nx">on</span><span class="p">(</span><span class="s2">&quot;click&quot;</span><span class="p">,</span> <span class="kd">function</span><span class="p">(){</span>
</span><span class='line'>  <span class="nx">jQuery</span><span class="p">.</span><span class="nx">getScript</span><span class="p">(</span><span class="s2">&quot;bundle/graph.js&quot;</span><span class="p">,</span> <span class="kd">function</span><span class="p">(){</span>
</span><span class='line'>    <span class="kd">var</span> <span class="nx">GraphView</span> <span class="o">=</span> <span class="nx">require</span><span class="p">(</span><span class="s2">&quot;./graph-view&quot;</span><span class="p">);</span>
</span><span class='line'>    <span class="kd">var</span> <span class="nx">view</span> <span class="o">=</span> <span class="k">new</span> <span class="nx">GraphView</span><span class="p">();</span>
</span><span class='line'>    <span class="nx">view</span><span class="p">.</span><span class="nx">render</span><span class="p">();</span>
</span><span class='line'>    <span class="nx">$</span><span class="p">(</span><span class="s2">&quot;.graph-container&quot;</span><span class="p">).</span><span class="nx">html</span><span class="p">(</span><span class="nx">view</span><span class="p">.</span><span class="nx">el</span><span class="p">);</span>
</span><span class='line'>  <span class="p">});</span>
</span><span class='line'><span class="p">});</span>
</span></code></pre></td></tr></table></div></figure>


<p>To do this we have to remove the <code>./graph-view</code> and its dependencies from the
main bundle. Here&#8217;s where my module, <a href="https://github.com/epeli/browserify-externalize">externalize</a>, comes to help.
We create a second Browserify bundle which is a subset of the main bundle and
use the <code>externalize</code> function to remove code from the main:</p>

<figure class='code'><figcaption><span>build.js</span></figcaption><div class="highlight"><table><tr><td class="gutter"><pre class="line-numbers"><span class='line-number'>1</span>
<span class='line-number'>2</span>
<span class='line-number'>3</span>
<span class='line-number'>4</span>
<span class='line-number'>5</span>
<span class='line-number'>6</span>
<span class='line-number'>7</span>
<span class='line-number'>8</span>
<span class='line-number'>9</span>
<span class='line-number'>10</span>
<span class='line-number'>11</span>
<span class='line-number'>12</span>
<span class='line-number'>13</span>
<span class='line-number'>14</span>
<span class='line-number'>15</span>
<span class='line-number'>16</span>
<span class='line-number'>17</span>
<span class='line-number'>18</span>
</pre></td><td class='code'><pre><code class='javascript'><span class='line'><span class="kd">var</span> <span class="nx">fs</span> <span class="o">=</span> <span class="nx">require</span><span class="p">(</span><span class="s2">&quot;fs&quot;</span><span class="p">);</span>
</span><span class='line'><span class="kd">var</span> <span class="nx">browserify</span> <span class="o">=</span> <span class="nx">require</span><span class="p">(</span><span class="s2">&quot;browserify&quot;</span><span class="p">);</span>
</span><span class='line'><span class="kd">var</span> <span class="nx">externalize</span> <span class="o">=</span> <span class="nx">require</span><span class="p">(</span><span class="s2">&quot;externalize&quot;</span><span class="p">);</span>
</span><span class='line'>
</span><span class='line'><span class="c1">// Main bundle has main.js as the entry point</span>
</span><span class='line'><span class="kd">var</span> <span class="nx">main</span> <span class="o">=</span> <span class="nx">browserify</span><span class="p">(</span><span class="s2">&quot;./main&quot;</span><span class="p">);</span>
</span><span class='line'>
</span><span class='line'><span class="c1">// Graph bundle does not have an entry point, but it has</span>
</span><span class='line'><span class="c1">// `./graph-view` as requireable module</span>
</span><span class='line'><span class="kd">var</span> <span class="nx">graph</span> <span class="o">=</span> <span class="nx">browserify</span><span class="p">().</span><span class="nx">require</span><span class="p">(</span><span class="s2">&quot;./graph-view&quot;</span><span class="p">);</span>
</span><span class='line'>
</span><span class='line'><span class="c1">// Use externalize to remove graph bundle code from the main</span>
</span><span class='line'><span class="nx">externalize</span><span class="p">(</span><span class="nx">main</span><span class="p">,</span> <span class="nx">graph</span><span class="p">,</span> <span class="kd">function</span><span class="p">(</span><span class="nx">err</span><span class="p">){</span>
</span><span class='line'>  <span class="k">if</span> <span class="p">(</span><span class="nx">err</span><span class="p">)</span> <span class="k">throw</span> <span class="nx">err</span><span class="p">;</span>
</span><span class='line'>  <span class="c1">// After externalizing the bundles can be written to files</span>
</span><span class='line'>  <span class="nx">main</span><span class="p">.</span><span class="nx">bundle</span><span class="p">().</span><span class="nx">pipe</span><span class="p">(</span><span class="nx">fs</span><span class="p">.</span><span class="nx">createWriteStream</span><span class="p">(</span><span class="s2">&quot;./bundle/main.js&quot;</span><span class="p">));</span>
</span><span class='line'>  <span class="nx">graph</span><span class="p">.</span><span class="nx">bundle</span><span class="p">().</span><span class="nx">pipe</span><span class="p">(</span><span class="nx">fs</span><span class="p">.</span><span class="nx">createWriteStream</span><span class="p">(</span><span class="s2">&quot;./bundle/graph.js&quot;</span><span class="p">));</span>
</span><span class='line'><span class="p">});</span>
</span></code></pre></td></tr></table></div></figure>


<p>Now just include <code>./bundle/main.js</code> to the page and <code>./bundle/graph.js</code> will
be loaded lazily when needed.</p>

<p>Checkout the externalize <a href="https://github.com/epeli/browserify-externalize#readme">readme</a> file for more information.</p>

<h2>Putting it all together</h2>

<p>I&#8217;ve uploaded a more real worldish example on <a href="http://epeli.github.io/carcounter/">github pages</a> using
the techniques presented here. It will also serve as a decent Backbone.js and
Handlebars example with Browserify.  It&#8217;s heavily commented so it should be
easy to follow even if you don&#8217;t know/care anything about Backbone or
Handlebars.</p>

<p><a href="http://epeli.github.io/carcounter/"><img src="http://esa-matti.suuronen.org/images/carcounter.png"></a></p>

<p>Open up devtools from your browser and look at the network tab to see what
happens when you hit to &#8220;Toggle graph&#8221; button for the first time.</p>

<p>I encourage you to read the source code of the example in following order:</p>

<ol>
<li><a href="https://github.com/epeli/carcounter/blob/master/build.js">build.js</a>

<ul>
<li>Build script for the bundles</li>
</ul>
</li>
<li><a href="https://github.com/epeli/carcounter/blob/master/client/index.js">index.js</a>

<ul>
<li>This is the first thing executed on the page</li>
<li>It determines whether to load jQuery or the Zepto version of the main bundle
and whether to load the shims</li>
</ul>
</li>
<li><a href="https://github.com/epeli/carcounter/blob/master/client/main.js">main.js</a>

<ul>
<li>The actual application code starts here</li>
<li>It lazy loads the graph code on first time it is used</li>
</ul>
</li>
<li><a href="https://github.com/epeli/carcounter/tree/master/bundle">Compiled bundles</a>

<ul>
<li>Take a look at their sizes and skim through what they contain</li>
</ul>
</li>
</ol>


<h2>Before going crazy with it</h2>

<p>Before slicing up your Browserify bundles you should really sit down and think
through whether this is really required for your app. For example if you add a
largish image to your app it might easily dissolve all the benefits you gained
by slicing the bundles. Even a single 100kb image will translate to a quite big
chunk of minified and gzipped Javascript code. And because this can get very
complex if you go crazy with it you should make sure it is worth it.</p>

<p>Happy hacking!</p>
]]></content>
  </entry>
  
  <entry>
    <title type="html"><![CDATA[Journey from RequireJS to Browserify]]></title>
    <link href="http://esa-matti.suuronen.org/blog/2013/03/22/journey-from-requirejs-to-browserify/"/>
    <updated>2013-03-22T13:37:00+02:00</updated>
    <id>http://esa-matti.suuronen.org/blog/2013/03/22/journey-from-requirejs-to-browserify</id>
    <content type="html"><![CDATA[<p>Lately I have been very frustrated with <a href="http://requirejs.org/">RequireJS</a>. I have a feeling that I
have to fork almost every third party library I&#8217;m using in my projects. So I
started investigating <a href="https://github.com/substack/node-browserify">Browserify</a> as an alternative. Here&#8217;s what I found.</p>

<!-- more -->


<h2>RequireJS</h2>

<p><img class="right" src="http://esa-matti.suuronen.org/images/browserify/requirejs-logo.png"></p>

<p>First I want to little bit explain why RequireJS bugs me. The main reason is
the mess with the <a href="https://github.com/amdjs/amdjs-api/wiki/AMD">AMD</a> define functions calls in various libraries. Some do
them and some don&#8217;t. That&#8217;s usually ok because you can easily shim the
libraries but when you have dependencies between the third party libraries the
shit starts hitting the fan.</p>

<h3>Disappearing globals</h3>

<p>My latest frustration was with the Flotr2 graphing library. I decided to use
the regular build with the intention of shimming the <code>Flotr</code> global because the
AMD build was so much older. But there was a nasty surprise waiting for the
RequireJS users. Flotr2 depends on a library called Bean which is bundled into
Flotr2 and it just expects to find the Bean library from the global namespace.
Ok, but the Bean library itself has an <a href="https://github.com/umdjs/umd">UMD</a> style AMD definition which means
that when it detects an AMD define function it uses it and skips the creation
of the global which results in broken Flotr2. It really bums me out to fork
libraries and remove AMD defines to make them work with AMD!
<sup><a href="#update2">update!</a></sup></p>

<h3>Handlebars plugin and the build step</h3>

<p>Another pain point has been the <a href="https://github.com/SlexAxton/require-handlebars-plugin">require-handlebars-plugin</a>. It&#8217;s really
complex to configure to work properly with the r.js builds. It requires forked
versions of Handlebars, Underscore and json2 libraries. It also forces you to
include some i18n solution which collided with ours. Not fun.  I just wanted to
use Handlebars with precompilation (In the end I ended up writing my own
Handlebars <a href="https://github.com/epeli/requirejs-hbs">loader plugin</a>).</p>

<p>These are just few of the issues I&#8217;ve had with RequireJS. Not really anything
blocking but there is just always some annoyances especially with build the
step and it doesn&#8217;t help that it doesn&#8217;t give proper error messages when
something goes wrong.</p>

<h2>Enter Browserify V2</h2>

<p><img class="right" src="http://esa-matti.suuronen.org/images/browserify/browserify-logo.png" width="300"></p>

<p>I&#8217;ve always preferred the node.js style module syntax (<code>module.exports</code>) over
the AMD style. It&#8217;s just simpler and easier to deal with. Also I haven&#8217;t gotten
any real benefits from the asynchronous part of AMD. So I&#8217;m very open to
replace it with simpler synchronous requires. And now with the new version 2 of
Browserify by substack it seems to more simpler than ever to use them in the
browsers too.</p>

<p>So I made a list of few features I need to consider before jumping into it:</p>

<ul>
<li>Debugging: I don&#8217;t want to see just one big bundle in the browser</li>
<li>Using libraries with globals</li>
<li>CoffeeScript precompiling</li>
<li>Handlebars precompiling</li>
<li>Multiple versions of the same dependency</li>
</ul>


<h3>Debugging</h3>

<p>Well this one was easy. Just build the bundle with <code>--debug</code> flag</p>

<pre><code>$ browserify --debug main.js &gt; bundle.js
</code></pre>

<p>and Browserify will inline source maps into the bundle and then just fire up
Chrome with source maps enabled from developer tools and it will display the
original files as they where separate files.</p>

<p>But currently this seems to work only with Chrome. In others you get just a
huge bundle of Javascript. Source maps are coming to Firefox but I wouldn&#8217;t put
my hopes up for IE&#8230;</p>

<h3>Using libraries with globals</h3>

<p>Lets face it. The browser world is just not going to adopt any module system
unanimously any time soon. We just have to work with libraries exposing them as
globals on the window object. I just want be able to use them without forking
them.</p>

<p>Browserify does somewhat decent job about this. If you require a random
Javascript file exposing globals the <code>require</code> call will return <code>undefined</code> but
after that you can just access the globals. Only requirement seems to be that
the library exposes itself explicitly to the <code>window</code> object. If it uses a
<code>var</code> statement to declare the global then you get into trouble. In Browserify
that global will be hidden inside the module closure. Also <code>this</code> seems to be
bound to some internal dependency array of Browserify so libraries exposing
global to it need some special handling too.  <sup><a href="#update3">update!</a></sup></p>

<h4>Shims</h4>

<p>In RequireJS you can configure shims for the globals. With shims you can use
the globals just they had the AMD define without touching the library code. It
appears that you can do the same in Browserify just by writing simple wrapper
modules.</p>

<p>Example with jQuery:</p>

<figure class='code'><figcaption><span>jquery.shim.js</span></figcaption><div class="highlight"><table><tr><td class="gutter"><pre class="line-numbers"><span class='line-number'>1</span>
<span class='line-number'>2</span>
<span class='line-number'>3</span>
<span class='line-number'>4</span>
<span class='line-number'>5</span>
</pre></td><td class='code'><pre><code class='javascript'><span class='line'><span class="c1">// jQuery does not export itself as node.js/CommonJS module</span>
</span><span class='line'><span class="nx">require</span><span class="p">(</span><span class="s2">&quot;./jquery.js&quot;</span><span class="p">);</span>
</span><span class='line'><span class="c1">// but after the require we can just export the jQuery</span>
</span><span class='line'><span class="c1">// global from this module</span>
</span><span class='line'><span class="nx">module</span><span class="p">.</span><span class="nx">exports</span> <span class="o">=</span> <span class="nb">window</span><span class="p">.</span><span class="nx">jQuery</span><span class="p">;</span>
</span></code></pre></td></tr></table></div></figure>


<p>And then for example in jQuery plugin module you can just do:</p>

<figure class='code'><figcaption><span>myplugin.jquery.js</span></figcaption><div class="highlight"><table><tr><td class="gutter"><pre class="line-numbers"><span class='line-number'>1</span>
<span class='line-number'>2</span>
</pre></td><td class='code'><pre><code class='javascript'><span class='line'><span class="kd">var</span> <span class="nx">$</span> <span class="o">=</span> <span class="nx">require</span><span class="p">(</span><span class="s2">&quot;./jquery.shim&quot;</span><span class="p">);</span>
</span><span class='line'><span class="nx">$</span><span class="p">.</span><span class="nx">fn</span><span class="p">.</span><span class="nx">myplugin</span> <span class="o">=</span> <span class="kd">function</span><span class="p">()</span> <span class="p">{</span> <span class="p">...</span> <span class="p">};</span>
</span></code></pre></td></tr></table></div></figure>


<p>Also in a Flotr like cases <sup><a href="#note1">note</a></sup> where you have a library
expecting a global but you only have it as a non global module you can just put
the global back in the shim:</p>

<figure class='code'><figcaption><span>flotr2.shim.js</span></figcaption><div class="highlight"><table><tr><td class="gutter"><pre class="line-numbers"><span class='line-number'>1</span>
<span class='line-number'>2</span>
<span class='line-number'>3</span>
<span class='line-number'>4</span>
</pre></td><td class='code'><pre><code class='javascript'><span class='line'><span class="kd">var</span> <span class="nx">bean</span> <span class="o">=</span> <span class="nx">require</span><span class="p">(</span><span class="s2">&quot;bean&quot;</span><span class="p">);</span>
</span><span class='line'><span class="nb">window</span><span class="p">.</span><span class="nx">bean</span> <span class="o">=</span> <span class="nx">bean</span><span class="p">;</span>
</span><span class='line'><span class="nx">require</span><span class="p">(</span><span class="s2">&quot;flotr2&quot;</span><span class="p">);</span>
</span><span class='line'><span class="nx">module</span><span class="p">.</span><span class="kr">export</span> <span class="o">=</span> <span class="nb">window</span><span class="p">.</span><span class="nx">Flotr</span><span class="p">;</span>
</span></code></pre></td></tr></table></div></figure>


<h3>CoffeeScript precompiling</h3>

<p>Substack himself has written a CoffeeScript plugin for Browserify called
<a href="https://github.com/substack/coffeeify">coffeeify</a>. Since he isn&#8217;t a CoffeeScript user he is looking for maintainers
for the plugin. Nevertheless the plugin works surprisingly well.</p>

<p>It is used by installing it locally to a project and calling <code>browserify</code> with
a <code>--transfrom</code> flag:</p>

<pre><code>$ npm install coffeeify
$ browserify --transform coffeeify --debug main.js &gt; bundle.js
</code></pre>

<p>By working surprisingly well I mean this fun little feature:</p>

<p><img src="http://esa-matti.suuronen.org/images/browserify/sourcemaps.png"></p>

<p>Source maps!</p>

<h3>Handlebars precompiling</h3>

<p>Well, here Browserify had nothing to offer out of the box but I took it as an
opportunity to get my self familiar the Browserify transform plugin API and
about an hour later had it working:</p>

<p><a href="https://github.com/epeli/node-hbsfy">https://github.com/epeli/node-hbsfy</a></p>

<p>When compared to RequireJS plugin API this was a really nice experience. A lot
less confusing: No need to figure out how to do ajax in development, file
system reading during build build or how to work with custom APIs. Just the
familiar node.js transform streams here. I like it a lot.</p>

<h3>Multiple versions of the same dependency</h3>

<p>As Browserify uses <a href="https://npmjs.org/">npm</a> as its package manager you should be aware how npm
pulls in dependencies. If two modules have a same dependency but on a
different versions it will download two copies of this dependency and those
will be put into the Browserify bundle too! Luckily npm is smart enough to
combine those dependencies if their <a href="https://npmjs.org/package/semver">semver</a> version strings are compatible.</p>

<p>This means that if you use for example Underscore in your project root it must
be compatible with every subdependency of your dependencies to get only one
copy of Underscore to your Browserify bundle. But I do think this is a nice
feature because then you don&#8217;t get into any trouble using libraries with
conflicting dependencies. You only get few more bytes. It&#8217;s just something to
be aware.</p>

<h2>Conclusion</h2>

<p>This journey is still on going but I think will try using Browserify in my next
project or convert some old one from RequireJS.</p>

<p>To conclude here&#8217;s a list of pros and cons when moving from  RequireJS to
Browserify.</p>

<h3>Pros</h3>

<ul>
<li>Always bundling. No running into build problems later on.</li>
<li>Can use cool things from node.js.</li>
<li>Simpler syntax: <code>module.exports = ...</code> FTW!</li>
<li>npm at your disposal.</li>
<li>Sharing modules with node.js is no brainer</li>
<li>Source maps for CoffeeScript. Thou RequireJS will probably get those
<a href="https://github.com/jrburke/require-cs/issues/42">soon</a> too.</li>
<li>The plugin API is awesome.</li>
</ul>


<h3>Cons</h3>

<ul>
<li>Always bundling. Debugging old browsers can be a pain.</li>
<li>Must use a watcher tool for the builds. RequireJS can work purely in the
browser</li>
<li>Some people might not want browser only libraries to npm. I&#8217;m not sure
what&#8217;s the node.js/npm authors&#8217; stand on this
<sup><a href="#update1">update!</a></sup>, but nevertheless with browserify you are
not bound to npm. Nothing should prevent you from using CommonJS modules
from <a href="http://twitter.github.com/bower/">Bower</a> for example.</li>
<li>Documentation could be better. Lots of things are assumed that you know
already from node.js. I hope this blog post helps a little bit.</li>
<li>No community other than the node.js community. I&#8217;d like to see a mailing
list and an IRC channel.</li>
</ul>


<h2>Next</h2>

<p>There are still few thing I want to investigate. If browser only modules are
ok in npm: How can I use images and CSS from a npm module? CSS could done
with a transform plugin and some runtime code which appends it to DOM, but how
to get images from it especially if I&#8217;m not using node.js as my backend?</p>

<p>Another interesting area to investigate would be <a href="https://github.com/component/component">component</a> modules. They
use the CommonJS syntax but I have no idea whether they can be used from
Browserify.</p>

<p>Drop a comment if you know anything about these. Thanks!</p>

<p><span id="note1">
<strong>Note</strong>: In reality the Flotr2 distribution is unusable in Browserify too
because it contains multiple CommonJS exports in a single file which is
inherently incompatible with the CommonJS specification to start with.
</span></p>

<p><span id="update1">
<strong>Update 1</strong>: Browser only modules are ok in npm. See the comments.
</span></p>

<p><span id="update2">
<strong>Update 2</strong>: It
<a href="https://twitter.com/lmjabreu/status/315009976064155648">appears</a> you can
restore the global from RequireJS too.
</span></p>

<p><span id="update3">
<strong>Update 3</strong>: <code>this</code> works like you would expect in node <a href="https://github.com/substack/browser-pack/pull/11">now</a>.
</span></p>
]]></content>
  </entry>
  
  <entry>
    <title type="html"><![CDATA[Mastering nested views in Backbone.js]]></title>
    <link href="http://esa-matti.suuronen.org/blog/2012/12/10/mastering-nested-views-in-backbone-dot-js/"/>
    <updated>2012-12-10T22:25:00+02:00</updated>
    <id>http://esa-matti.suuronen.org/blog/2012/12/10/mastering-nested-views-in-backbone-dot-js</id>
    <content type="html"><![CDATA[<p>During the last year or so I have been building quite a few apps on top of
Backbone.js. The reason for choosing Backbone.js was the fact it&#8217;s fairly low
level. It does not get in my way when I want to integrate some random crappy
jQuery plugings or swap Ajax backend to Websockets in to my apps etc. Also it
doesn&#8217;t isolate me to inside some framework wonderland jail. I really had to
learn how to work with the DOM and how to arrange my code. This is good in the
since it has given me good foundations how things generally work if I ever want
to venture into some other frameworks.</p>

<p>But there is a downside to all this low levelness. With certain aspects you are
really left alone by the framework. For me the hardest part was how to handle
nested views.</p>

<!-- more -->


<h2>Backbone.ViewMaster</h2>

<p>I think I&#8217;ve found some good patterns on how to handle them. Originally I
wanted to just write a blog post about them, but more I looked my code I
realized it would be better as a library, because they were not that trivial in
the end.</p>

<p>This not by any means unique. There are several libraries that can help you
with nested views. I would guess the most notable ones are
backbone.layoutmanager and Marionette.js. But I wanted something simpler. So
here&#8217;s Backbone.ViewMaster:</p>

<p><a href="http://epeli.github.com/backbone.viewmaster/">http://epeli.github.com/backbone.viewmaster/</a></p>

<p>It is just a single Backbone.js View which can be used as the base view when
building Backbone.js apps. It tries to be more than just a library as it
encourages on writing decoupled and reusable views. Read the tutorial to get
gist of it.</p>
]]></content>
  </entry>
  
  <entry>
    <title type="html"><![CDATA[How to Use Guard::LiveReload With Octopress]]></title>
    <link href="http://esa-matti.suuronen.org/blog/2012/11/04/how-to-use-guard-livereload-with-octopress/"/>
    <updated>2012-11-04T13:30:00+02:00</updated>
    <id>http://esa-matti.suuronen.org/blog/2012/11/04/how-to-use-guard-livereload-with-octopress</id>
    <content type="html"><![CDATA[<p>During the development of Opinsys Labs site I had to bit hack on
Octopress/Jekyll to make Guard::LiveReload to reliably.</p>

<p><footer>
  <a rel="full-article" href="http://labs.opinsys.com/blog/2012/11/02/hello-labs-and-how-to-use-livereload-with-octopress/">Read at Opinsys Labs →</a>
</footer></p>
]]></content>
  </entry>
  
  <entry>
    <title type="html"><![CDATA[Bringing HTML5 to the Desktop With AppJS]]></title>
    <link href="http://esa-matti.suuronen.org/blog/2012/11/04/bringing-html5-to-the-desktop-with-appjs/"/>
    <updated>2012-11-04T13:29:00+02:00</updated>
    <id>http://esa-matti.suuronen.org/blog/2012/11/04/bringing-html5-to-the-desktop-with-appjs</id>
    <content type="html"><![CDATA[<p><footer>
  <a rel="full-article" href="http://labs.opinsys.com/blog/2012/11/01/bringing-html5-to-the-desktop-with-appjs/">Read at Opinsys Labs →</a>
</footer></p>
]]></content>
  </entry>
  
  <entry>
    <title type="html"><![CDATA[Blogging at Opinsys Labs]]></title>
    <link href="http://esa-matti.suuronen.org/blog/2012/11/04/blogging-at-opinsys-labs/"/>
    <updated>2012-11-04T13:16:00+02:00</updated>
    <id>http://esa-matti.suuronen.org/blog/2012/11/04/blogging-at-opinsys-labs</id>
    <content type="html"><![CDATA[<p>Since I also blog actively to our company blog <a href="http://labs.opinsys.com/">Opinsys Labs</a> and the
content is highly similar to what I usually blog here. I will link some of
those post to here from now on.</p>

<p>If you&#8217;re more interested on what we do at Opinsys follow our Twitter accounts
<a href="https://twitter.com/opinsyslabs">@OpinsysLabs</a> and <a href="http://twitter.com/opinsys">@Opinsys</a> (mostly finnish) too.</p>
]]></content>
  </entry>
  
  <entry>
    <title type="html"><![CDATA[Improving console.log for Node.js]]></title>
    <link href="http://esa-matti.suuronen.org/blog/2012/09/30/improving-console-dot-log-for-node-dot-js/"/>
    <updated>2012-09-30T22:33:00+03:00</updated>
    <id>http://esa-matti.suuronen.org/blog/2012/09/30/improving-console-dot-log-for-node-dot-js</id>
    <content type="html"><![CDATA[<p>Node.js gives you four methods for logging stuff <code>console.log()</code>,
<code>console.info()</code>, <code>console.warn()</code>, and <code>console.error()</code>. These could go
pretty far, but unfortunately they fall bit short since their output does not
give any indication which method was used for logging except for the output
stream.  Which in my opinion is bit confusing. But I do like their <a href="http://nodejs.org/api/stdio.html">API</a>.
They can do <code>printf</code> like formating, pretty printing objects and they can even
handle objects with circular references.</p>

<p>So I&#8217;ve written a little module called <em>clim</em> (<strong>C</strong>onsole.<strong>L</strong>og <strong>IM</strong>proved) which
gives some superpowers to console.log and friends.</p>

<!--more-->


<h2>Usage</h2>

<p>You can shadow the original <code>console</code> or monkeypatch it once and for all</p>

<figure class='code'><figcaption><span></span></figcaption><div class="highlight"><table><tr><td class="gutter"><pre class="line-numbers"><span class='line-number'>1</span>
<span class='line-number'>2</span>
<span class='line-number'>3</span>
<span class='line-number'>4</span>
<span class='line-number'>5</span>
<span class='line-number'>6</span>
<span class='line-number'>7</span>
</pre></td><td class='code'><pre><code class='javascript'><span class='line'><span class="kd">var</span> <span class="nx">clim</span> <span class="o">=</span> <span class="nx">require</span><span class="p">(</span><span class="s2">&quot;clim&quot;</span><span class="p">);</span>
</span><span class='line'>
</span><span class='line'><span class="c1">// Just shadow it</span>
</span><span class='line'><span class="kd">var</span> <span class="nx">console</span> <span class="o">=</span> <span class="nx">clim</span><span class="p">();</span>
</span><span class='line'>
</span><span class='line'><span class="c1">// or monkeypatch it!</span>
</span><span class='line'><span class="nx">clim</span><span class="p">(</span><span class="nx">console</span><span class="p">,</span> <span class="kc">true</span><span class="p">);</span>
</span></code></pre></td></tr></table></div></figure>


<p>Now you can use <code>console.log</code> just like before, but the output is more detailed:</p>

<figure class='code'><figcaption><span></span></figcaption><div class="highlight"><table><tr><td class="gutter"><pre class="line-numbers"><span class='line-number'>1</span>
<span class='line-number'>2</span>
<span class='line-number'>3</span>
<span class='line-number'>4</span>
</pre></td><td class='code'><pre><code class='javascript'><span class='line'><span class="nx">console</span><span class="p">.</span><span class="nx">log</span><span class="p">(</span><span class="s2">&quot;message with log&quot;</span><span class="p">);</span>
</span><span class='line'><span class="nx">console</span><span class="p">.</span><span class="nx">info</span><span class="p">(</span><span class="s2">&quot;message with info&quot;</span><span class="p">);</span>
</span><span class='line'><span class="nx">console</span><span class="p">.</span><span class="nx">warn</span><span class="p">(</span><span class="s2">&quot;message with warn&quot;</span><span class="p">);</span>
</span><span class='line'><span class="nx">console</span><span class="p">.</span><span class="nx">error</span><span class="p">(</span><span class="s2">&quot;message with error&quot;</span><span class="p">);</span>
</span></code></pre></td></tr></table></div></figure>


<figure class='code'><figcaption><span></span></figcaption><div class="highlight"><table><tr><td class="gutter"><pre class="line-numbers"><span class='line-number'>1</span>
<span class='line-number'>2</span>
<span class='line-number'>3</span>
<span class='line-number'>4</span>
</pre></td><td class='code'><pre><code class='text'><span class='line'>Sun Sep 30 2012 23:06:24 GMT+0300 (EEST) LOG message with log
</span><span class='line'>Sun Sep 30 2012 23:06:24 GMT+0300 (EEST) INFO message with info
</span><span class='line'>Sun Sep 30 2012 23:06:24 GMT+0300 (EEST) WARN message with warn
</span><span class='line'>Sun Sep 30 2012 23:06:24 GMT+0300 (EEST) ERROR message with error
</span></code></pre></td></tr></table></div></figure>


<p>Also now all the methods write to stderr for the sake of consistency. By
default <code>log</code> and <code>info</code> writes to stdout and <code>warn</code> and <code>error</code> to stderr, but
this causes some pains when redirecting logs to a single file. Log order might
be messed up depending on IO buffering etc.</p>

<p>Of course keep in mind that this might break your unix style app which uses
stdout to communicate outside if you depend on <code>console.log()</code> being the print
statement of Node.js. Rather use <code>process.stdout.write()</code>. It is more explicit
and gives you more control.</p>

<h2>Background</h2>

<p>The main idea behind this module is to keep the original API of
<code>console.log()</code>, because then it is possible to just drop it in a project
without any refactoring. If you encouter any inconsistencies with with it
please file a <a href="https://github.com/epeli/node-clim/issues">bug</a>.</p>

<p><em>clim</em> also exposes few hooks that can be used to customize its behaviour. You
can modify the date string, change log target from stderr to back stdout or
even to a database, add default prefixes to console objects and inherit from
them. For more details view the project page on Github:</p>

<p><a href="https://github.com/epeli/node-clim">https://github.com/epeli/node-clim</a></p>
]]></content>
  </entry>
  
  <entry>
    <title type="html"><![CDATA[Creating KISS daemons in Linux]]></title>
    <link href="http://esa-matti.suuronen.org/blog/2012/07/22/creating-kiss-daemons-in-linux/"/>
    <updated>2012-07-22T13:53:00+03:00</updated>
    <id>http://esa-matti.suuronen.org/blog/2012/07/22/creating-kiss-daemons-in-linux</id>
    <content type="html"><![CDATA[<p>Daemonizing processes in Linux and running them on boot is a very easy task in
theory, but the variety of different Linux distributions tend to make it
incredible hard sometimes. So here&#8217;s my take on Daemonizing processes without a
headache.</p>

<!--more-->


<h2>Background</h2>

<p>When starting a process on boot there are usually few requirements I need</p>

<ol>
<li>Drop privileges from root</li>
<li>Ensure safe umask</li>
<li>Redirect stdout/stderr to a log file</li>
<li>Set current working directory</li>
<li>Set environment variables</li>
<li>Write a pid file</li>
<li>And finally daemonize the process</li>
</ol>


<p>These all are fairly trivial tasks to implement in the actual application, but
also these are the same for every app. I like to keep things DRY. When I&#8217;m
creating for example some simple prototype application in Node.js I really
don&#8217;t care to think about which logging framework to use or how to do a double
fork in a environment which don&#8217;t even have a fork call to begin with.</p>

<p>I&#8217;m usually working with Debian and Ubuntu based distros. They both have
a init system which can be used to accomplish these requirements.</p>

<p>Debian uses <code>/etc/init.d/</code> style scripts and Ubuntu uses Upstart which is
actually somewhat usable. Here&#8217;s my Upstart <a href="https://gist.github.com/3159365">config</a> for Redis for
example, but that&#8217;s not usable in Debian of course. Debian gives you a skeleton
script in <code>/etc/init.d/skeleton</code> which can be used to create a daemon on boot
up. That&#8217;s 159 lines long! Pretty complex for such a simple task I&#8217;d say.</p>

<h2>Alternative</h2>

<p>Luckily there are alternative tools for daemonizing processes. One of the
simplest ones I&#8217;ve encountered is called <em><a href="http://libslack.org/daemon/">daemon</a></em>. This tool has been
around for a while, but I&#8217;ve just found out about it. I think the name makes it
kinda hard to stumble upon&#8230;</p>

<p>It&#8217;s easily installable via apt-get</p>

<pre><code># apt-get install daemon
</code></pre>

<p>Then it is just matter of running the command on boot up. I don&#8217;t usually care
about the run levels so I just put it in <code>/etc/rc.local</code> which is the last
script executed during Debian and Ubuntu boot process.</p>

<p>My <em>daemon</em> setup for Node.js servers is usually something like this:</p>

<pre><code>daemon \
    --name myapp \
    --user user \
    --chdir /home/user/myapp/ \
    --output /home/user/myapp/myapp.log \
    --pidfile /home/user/myapp/myapp.pid \
    --inherit \
    --env="NODE_ENV=production" \
    /usr/local/bin/node /home/user/myapp/server.js
</code></pre>

<p>It&#8217;s Fairly straightforward. Just make sure that the pid and log directories
are writable by the user. The <code>--inherit</code> switch is only required when defining
custom environment variables with <code>--env</code> so that you don&#8217;t loose previously
defined environment variables such as <code>PATH</code>. There is no mention of umask in
this command, because <em>daemon</em> sets it to 022 by default to prevent creation of
group or world readable files. Checkout the <a href="http://libslack.org/daemon/manpages/daemon.1.html">man page</a> for details.</p>
]]></content>
  </entry>
  
  <entry>
    <title type="html"><![CDATA[Grocery Store Analogy for Evented Web Servers]]></title>
    <link href="http://esa-matti.suuronen.org/blog/2012/06/03/grocery-store-analogy-for-evented-web-servers/"/>
    <updated>2012-06-03T18:33:00+03:00</updated>
    <id>http://esa-matti.suuronen.org/blog/2012/06/03/grocery-store-analogy-for-evented-web-servers</id>
    <content type="html"><![CDATA[<p>Today I was trying to explain the differences between threaded and evented web
servers to a friend on a high level. Usually the threaded model is explained
with a grocery store analogy and I started to wonder how that analogy could be
extended to explain the evented model too.</p>

<!--more-->


<h2>Threaded model</h2>

<p>Lets revise the grocery store analogy for the threaded web servers first.
Grocery store is the web server, cashiers are the threads and customers are the
incoming requests.</p>

<p>During a late afternoon when everybody is leaving work and going for grocery
shopping the store will be filled with customers. For the store to work
properly the store owner has to hire multiple cashiers to cash the customers
concurrently in order to keep them from waiting in long lines. Web servers
spawn multiple threads to serve requests concurrently to keep users from
waiting pages to load. Hiring cashiers cost money as spawning threads cost
memory and CPU cycles.</p>

<h2>Evented model</h2>

<p>In the evented model the web server has only a single thread. How a store with
single cashier could function in a rush hour?</p>

<p>The cashiers use most of the their time scanning bar codes as threads use most
of the their time waiting for I/O in threaded web servers. In some modern
stores the customers scan the products themselves while picking them to their
baskets. This means that there is no limit how many products can be scanned
concurrently. Same goes for evented web servers. The thread is not waiting for
any I/O. It just does the real computing work as the cashier does only cashing
of the customers. This is very efficient.</p>

<p>This is of course has some drawbacks. A single troublesome customer can block
the entire checkout line for all the customers. This is true for evented web
servers too. It will go to bankruptcy if <a href="http://teddziuba.com/2011/10/node-js-is-cancer.html">Mr. Fibonacci</a> is let in to the store
to occupy the only cashier with long computations. The single thread cannot
respond to any other requests if it is busy computing something.</p>

<p>Luckily this is not usually the case with web servers and if the web
application really needs to do some intensive computations the work must be
handed to some other worker process. This way the thread can keep responding to
the requests in a timely fashion. Like in the store, the cashier cannot go of
doing something else for long periods of time without creating long lines. He
will need someone to help on those tasks.</p>

<p>Evented systems can be more efficient, but you have to take greater care of
what you let run in it.</p>

<h3>Conlusion</h3>

<p>While this is not a perfect analogy, but I do like how this explains some of
the drawbacks too. Some evented systems (read Node.js) get way too much hype
for just being fast without considering the gotchas and the real benefits
they bring in, but that&#8217;s a whole another blog post.</p>

<p>I hope this helps some others to grasp the evented model too.</p>
]]></content>
  </entry>
  
  <entry>
    <title type="html"><![CDATA[Rendering Javascript Templates Without Rendering]]></title>
    <link href="http://esa-matti.suuronen.org/blog/2012/05/28/rendering-javascript-templates-without-rendering/"/>
    <updated>2012-05-28T22:56:00+03:00</updated>
    <id>http://esa-matti.suuronen.org/blog/2012/05/28/rendering-javascript-templates-without-rendering</id>
    <content type="html"><![CDATA[<p>For a long time client-side templating languages has somewhat bothered me.
Since they all take strings as input and re-renders those to DOM elements on
every small change you want to make. That has always sounded bit silly to me.
Why not just create the DOM tree once and then just manipulate the bits you
want to be changed?</p>

<!--more-->


<p>Well in practice that&#8217;s lots of work even with help of jQuery. Surprisingly it
appears that templating languages are not invented without a reason. Although
there are several templating languages that are made for DOM only manipulation,
but for reason or another I haven&#8217;t liked any of them until I was told to try
<a href="http://leonidas.github.com/transparency/">Transparency</a> made by <a href="https://github.com/pyykkis">Jarno Keskikangas</a> on the Finnish Javascript
channel <code>#javascript.fi</code> on IRCnet.</p>

<p>It gives a simple semantic data binding API which makes it easy to do similar
transformations to DOM as you would do with regular templating languages like
collection rendering, but without actually rendering any strings to DOM
elements or cluttering them with some micro programming language. Transparency
templates are just DOM elements filled with data and nothing more. The logic
stays in the Javascript code.</p>

<h2>Using with Backbone.js</h2>

<p>Since it not directly obvious how use it with Backbone and similar client-side
frameworks efficiently I&#8217;ll give a simple example here.</p>

<p>First you must have some base DOM elements which can be used as templates:</p>

<figure class='code'><figcaption><span></span></figcaption><div class="highlight"><table><tr><td class="gutter"><pre class="line-numbers"><span class='line-number'>1</span>
<span class='line-number'>2</span>
<span class='line-number'>3</span>
<span class='line-number'>4</span>
<span class='line-number'>5</span>
<span class='line-number'>6</span>
<span class='line-number'>7</span>
<span class='line-number'>8</span>
<span class='line-number'>9</span>
<span class='line-number'>10</span>
<span class='line-number'>11</span>
<span class='line-number'>12</span>
</pre></td><td class='code'><pre><code class='html'><span class='line'><span class="nt">&lt;div</span> <span class="na">id=</span><span class="s">&quot;templates&quot;</span><span class="nt">&gt;</span>
</span><span class='line'>
</span><span class='line'><span class="nt">&lt;div</span> <span class="na">class=</span><span class="s">&quot;data&quot;</span><span class="nt">&gt;</span>
</span><span class='line'>
</span><span class='line'>    <span class="nt">&lt;h2&gt;</span>Data View<span class="nt">&lt;/h2&gt;</span>
</span><span class='line'>    <span class="nt">&lt;span</span> <span class="na">class=</span><span class="s">&quot;name&quot;</span><span class="nt">&gt;&lt;/span&gt;</span>:
</span><span class='line'>    <span class="nt">&lt;span</span> <span class="na">class=</span><span class="s">&quot;x&quot;</span><span class="nt">&gt;&lt;/span&gt;</span>,
</span><span class='line'>    <span class="nt">&lt;span</span> <span class="na">class=</span><span class="s">&quot;y&quot;</span><span class="nt">&gt;&lt;/span&gt;</span>
</span><span class='line'>
</span><span class='line'><span class="nt">&lt;/div&gt;</span>
</span><span class='line'>
</span><span class='line'><span class="nt">&lt;/div&gt;</span>
</span></code></pre></td></tr></table></div></figure>


<p>These can be anywhere in the DOM. Just add some CSS to hide it:</p>

<figure class='code'><figcaption><span></span></figcaption><div class="highlight"><table><tr><td class="gutter"><pre class="line-numbers"><span class='line-number'>1</span>
<span class='line-number'>2</span>
<span class='line-number'>3</span>
</pre></td><td class='code'><pre><code class='css'><span class='line'><span class="nf">#templates</span> <span class="p">{</span>
</span><span class='line'>  <span class="k">display</span><span class="o">:</span> <span class="k">none</span><span class="p">;</span>
</span><span class='line'><span class="p">}</span>
</span></code></pre></td></tr></table></div></figure>


<p>Next we will create a simple Backbone View which will demonstrate Transparency
usage with Backbone. It just displays a name and some random values.</p>

<figure class='code'><figcaption><span></span></figcaption><div class="highlight"><table><tr><td class="gutter"><pre class="line-numbers"><span class='line-number'>1</span>
<span class='line-number'>2</span>
<span class='line-number'>3</span>
<span class='line-number'>4</span>
<span class='line-number'>5</span>
<span class='line-number'>6</span>
<span class='line-number'>7</span>
<span class='line-number'>8</span>
<span class='line-number'>9</span>
<span class='line-number'>10</span>
<span class='line-number'>11</span>
<span class='line-number'>12</span>
<span class='line-number'>13</span>
<span class='line-number'>14</span>
<span class='line-number'>15</span>
<span class='line-number'>16</span>
<span class='line-number'>17</span>
<span class='line-number'>18</span>
<span class='line-number'>19</span>
<span class='line-number'>20</span>
<span class='line-number'>21</span>
<span class='line-number'>22</span>
<span class='line-number'>23</span>
<span class='line-number'>24</span>
<span class='line-number'>25</span>
</pre></td><td class='code'><pre><code class='javascript'><span class='line'><span class="kd">var</span> <span class="nx">DataViewer</span> <span class="o">=</span> <span class="nx">Backbone</span><span class="p">.</span><span class="nx">View</span><span class="p">.</span><span class="nx">extend</span><span class="p">({</span>
</span><span class='line'>
</span><span class='line'>  <span class="c1">// Cache the template selector for all DataViewer Views.</span>
</span><span class='line'>  <span class="nx">baseEl</span><span class="o">:</span> <span class="nx">$</span><span class="p">(</span><span class="s2">&quot;#templates .data&quot;</span><span class="p">),</span>
</span><span class='line'>
</span><span class='line'>  <span class="nx">constructor</span><span class="o">:</span> <span class="kd">function</span><span class="p">()</span> <span class="p">{</span>
</span><span class='line'>    <span class="nx">Backbone</span><span class="p">.</span><span class="nx">View</span><span class="p">.</span><span class="nx">prototype</span><span class="p">.</span><span class="nx">constructor</span><span class="p">.</span><span class="nx">apply</span><span class="p">(</span><span class="k">this</span><span class="p">,</span> <span class="nx">arguments</span><span class="p">);</span>
</span><span class='line'>
</span><span class='line'>    <span class="c1">// Get View element for this view instance just by cloning</span>
</span><span class='line'>    <span class="c1">// the object from the DOM.</span>
</span><span class='line'>    <span class="k">this</span><span class="p">.</span><span class="nx">setElement</span><span class="p">(</span><span class="k">this</span><span class="p">.</span><span class="nx">baseEl</span><span class="p">.</span><span class="nx">clone</span><span class="p">());</span>
</span><span class='line'>
</span><span class='line'>    <span class="c1">// Render on every model change.</span>
</span><span class='line'>    <span class="k">this</span><span class="p">.</span><span class="nx">model</span><span class="p">.</span><span class="nx">on</span><span class="p">(</span><span class="s2">&quot;change&quot;</span><span class="p">,</span> <span class="k">this</span><span class="p">.</span><span class="nx">render</span><span class="p">,</span> <span class="k">this</span><span class="p">);</span>
</span><span class='line'>  <span class="p">},</span>
</span><span class='line'>
</span><span class='line'>  <span class="nx">render</span><span class="o">:</span> <span class="kd">function</span><span class="p">()</span> <span class="p">{</span>
</span><span class='line'>    <span class="c1">// Let Transparency to render the model data. This is very</span>
</span><span class='line'>    <span class="c1">// efficient since it does not create new elements (except when</span>
</span><span class='line'>    <span class="c1">// looping collections), but just fills the existing DOM with</span>
</span><span class='line'>    <span class="c1">// given data.</span>
</span><span class='line'>    <span class="nx">Transparency</span><span class="p">.</span><span class="nx">render</span><span class="p">(</span><span class="k">this</span><span class="p">.</span><span class="nx">el</span><span class="p">,</span> <span class="k">this</span><span class="p">.</span><span class="nx">model</span><span class="p">.</span><span class="nx">toJSON</span><span class="p">());</span>
</span><span class='line'>  <span class="p">}</span>
</span><span class='line'>
</span><span class='line'><span class="p">});</span>
</span></code></pre></td></tr></table></div></figure>


<p>Note how Javascripty this is. The view element is got just by copying the
existing DOM objects like you would do with normal Javascript objects. You
copy an object and then extend it. You could do even some template inheritance
with this.</p>

<p>The view is used like any other Backbone View:</p>

<figure class='code'><figcaption><span></span></figcaption><div class="highlight"><table><tr><td class="gutter"><pre class="line-numbers"><span class='line-number'>1</span>
<span class='line-number'>2</span>
<span class='line-number'>3</span>
<span class='line-number'>4</span>
<span class='line-number'>5</span>
<span class='line-number'>6</span>
<span class='line-number'>7</span>
<span class='line-number'>8</span>
<span class='line-number'>9</span>
<span class='line-number'>10</span>
<span class='line-number'>11</span>
</pre></td><td class='code'><pre><code class='javascript'><span class='line'><span class="kd">var</span> <span class="nx">model</span> <span class="o">=</span> <span class="k">new</span> <span class="nx">Backbone</span><span class="p">.</span><span class="nx">Model</span><span class="p">({</span> <span class="nx">name</span><span class="o">:</span> <span class="s2">&quot;Mouse Position&quot;</span> <span class="p">});</span>
</span><span class='line'><span class="kd">var</span> <span class="nx">mousePosition</span> <span class="o">=</span> <span class="k">new</span> <span class="nx">DataViewer</span><span class="p">({</span> <span class="nx">model</span><span class="o">:</span> <span class="nx">model</span> <span class="p">});</span>
</span><span class='line'>
</span><span class='line'><span class="c1">// Put it to the DOM</span>
</span><span class='line'><span class="nx">mousePosition</span><span class="p">.</span><span class="nx">render</span><span class="p">();</span>
</span><span class='line'><span class="nx">$</span><span class="p">(</span><span class="s2">&quot;#content&quot;</span><span class="p">).</span><span class="nx">append</span><span class="p">(</span><span class="nx">mousePosition</span><span class="p">.</span><span class="nx">el</span><span class="p">);</span>
</span><span class='line'>
</span><span class='line'><span class="c1">// Put some random data to our model</span>
</span><span class='line'><span class="nx">$</span><span class="p">(</span><span class="nb">document</span><span class="p">).</span><span class="nx">mousemove</span><span class="p">(</span><span class="kd">function</span><span class="p">(</span><span class="nx">e</span><span class="p">){</span>
</span><span class='line'>    <span class="nx">model</span><span class="p">.</span><span class="nx">set</span><span class="p">({</span> <span class="nx">x</span><span class="o">:</span> <span class="nx">e</span><span class="p">.</span><span class="nx">pageX</span><span class="p">,</span> <span class="nx">y</span><span class="o">:</span> <span class="nx">e</span><span class="p">.</span><span class="nx">pageY</span> <span class="p">});</span>
</span><span class='line'><span class="p">});</span>
</span></code></pre></td></tr></table></div></figure>


<p>With Transparency there is one feature or gotcha you must be aware of. The
state of the <code>view.el</code> element is not completely reset between render calls.
This can be an advantage in some situations. For example you could do some
additional manipulation with jQuery to it which is not lost between render
calls. But if you need to reset it you can just reclone the base element again.</p>

<p>Here&#8217;s a fully working <a href="http://jsfiddle.net/DBq9v/3/">fiddle</a> of this example
for you to play with.</p>

<p>This sounds very promising to me and I&#8217;m going to try it in some project when I
get the chance.</p>
]]></content>
  </entry>
  
  <entry>
    <title type="html"><![CDATA[Slimux - tmux Plugin for Vim]]></title>
    <link href="http://esa-matti.suuronen.org/blog/2012/04/19/slimux-tmux-plugin-for-vim/"/>
    <updated>2012-04-19T19:21:00+03:00</updated>
    <id>http://esa-matti.suuronen.org/blog/2012/04/19/slimux-tmux-plugin-for-vim</id>
    <content type="html"><![CDATA[<p>Lately I&#8217;ve gotten really in to <a href="http://tmux.sourceforge.net/">tmux</a> and I&#8217;ve been looking for ways to
integrate it to my Vim workflow. As result I ended up creating this Vim
plugin.</p>

<!--more-->


<p>If you are unfamiliar with tmux, it&#8217;s best described as alternative to GNU
screen or Tiling Window Manger for console application. For fast start I can
recommend a book from The Pragmatic Bookshelf - <a href="http://pragprog.com/book/bhtmux/tmux">tmux: Productive Mouse-Free
Development</a>.</p>

<p>The plugin takes its inspiration from Emacs Slime as well as from other similar
Vim plugins.</p>

<p>The idea behind it is to make interaction with Read Eval Print Loops (REPL)
easier. You can select for example portion of Ruby code execute it in
Interactive Ruby (irb) with just one command. Also another goal is to make
running of build and test commands a breeze.</p>

<p>
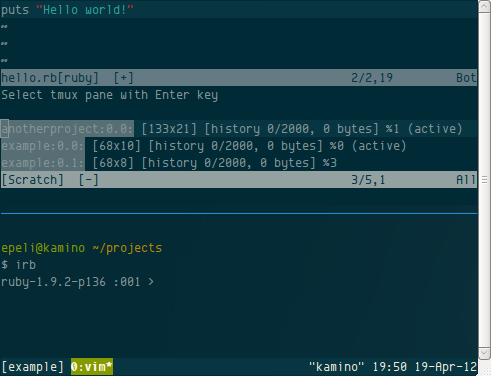
Usage goes like this :</p>

<ol>
<li>Create a tmux pane and start your REPL in it</li>
<li>Select some code and hit the keyboard shortcut (you must configure this)</li>
</ol>


<p>Slimux now prompts the pane from you:</p>

<p><img src="http://esa-matti.suuronen.org/images/slimux/configure.png" alt="Configuring Slimux" /></p>

<p>Here you list of all your tmux panes. The syntax is read like this</p>

<figure class='code'><div class="highlight"><table><tr><td class="gutter"><pre class="line-numbers"><span class='line-number'>1</span>
</pre></td><td class='code'><pre><code class=''><span class='line'>[session name].[window index].[pane index]</span></code></pre></td></tr></table></div></figure>


<p>Slimux will then remember that selection and won&#8217;t ask it again unless you
explicitly want to reconfigure it. After that Slimux sends the code to the REPL
and executes it.</p>

<p>Here&#8217;s an ascii.io screencast of <a href="http://ascii.io/a/409">Slimux in use</a>.</p>

<p>For detailed command and install instructions refer to project README on
Github:</p>

<p><a href="https://github.com/epeli/slimux">https://github.com/epeli/slimux</a></p>

<h2>Wait, yet another tmux plugin?</h2>

<p>Yes, there are quite a few tmux plugins for Vim already and this plugin got
started pretty much by accident. I started by fixing
<a href="https://github.com/jpalardy/vim-slime/pull/14">some</a>
<a href="https://github.com/jpalardy/vim-slime/pull/13">bugs</a> from
<a href="https://github.com/jpalardy/vim-slime">vim-slime</a>. One thing I wanted
for it was an interactive prompt for tmux pane selection. Typing the target
pane manually is kinda pain. I started working on that feature on a empty
plugin and soon I realized that it was actually easier to grab features from
vim-slime to my plugin than to merge my work back to upstream. That was mainly
because vim-slime supports GNU screen which I don&#8217;t care at all. Every this
heavy GNU screen user should just upgrade to tmux anyway.</p>

<p>Then there is <a href="https://github.com/benmills/vimux">Vimux</a> which on the surface seems to do every thing as Slimux,
but there where few annoyances for me. It takes too much control of tmux. It
creates the tmux pane for you where you must run your commands/REPLs. I want to
manually configure my tmux. Slimux allows you to manually select the tmux pane.
Very often I want to run the REPL or commands in whole another tmux
session so that I can put it to my second monitor. This also means that Slimux
works just fine with GVim.</p>

<p>Another issue is that Vimux doesn&#8217;t have hooks to preprocess code by its type
before sending it to REPL. For example you have to the remove extra line breaks
from Python code to make it work with its REPL.</p>

<p>But do read their <a href="https://www.braintreepayments.com/braintrust/vimux-simple-vim-and-tmux-integration">introductory blog post</a>. Good stuff anyways.</p>

<p>Also I just kinda wanted learn some Vim Scripting and this is my first proper
Vim plugin I&#8217;ve written. Feedback is really appreciated.</p>
]]></content>
  </entry>
  
  <entry>
    <title type="html"><![CDATA[How to Write CoffeeScript Efficiently]]></title>
    <link href="http://esa-matti.suuronen.org/blog/2011/11/28/how-to-write-coffeescript-efficiently/"/>
    <updated>2011-11-28T20:07:00+02:00</updated>
    <id>http://esa-matti.suuronen.org/blog/2011/11/28/how-to-write-coffeescript-efficiently</id>
    <content type="html"><![CDATA[<p>I have found few tricks that makes writing CoffeeScript more efficient and fun,
especially when learning it and I&#8217;d like to share it with you.</p>

<p>These tricks are for Vim, but the ideas can be carried out to other editors as
well. I know that at least the TextMate CoffeeScript Bundle can do some of
these.</p>

<!--more-->


<h2>Basics</h2>

<p>Let&#8217;s get the basics out of way. Get syntax hilighting from
<a href="https://github.com/kchmck/vim-coffee-script">vim-coffee-script</a> plugin
and automatic syntax checking from
<a href="http://www.vim.org/scripts/script.php?script_id=2736">Syntastic</a>. These will
take you a long way, but with CoffeeScript we can do more.</p>

<h2>Reading compiled code</h2>

<p>Especially when starting out with CoffeeScript you are not always sure what the
snippet you are reading or even the code you just wrote does.  Chances are that
you already know Javascript so we can use that to our advantage.
<code>vim-coffee-script</code> makes that incredibly easy.</p>

<p>Lets take following snippet that might be confusing to CoffeeScript newbies:</p>

<figure class='code'><figcaption><span></span></figcaption><div class="highlight"><table><tr><td class="gutter"><pre class="line-numbers"><span class='line-number'>1</span>
</pre></td><td class='code'><pre><code class='coffeescript'><span class='line'><span class="p">{</span><span class="nx">@foo</span><span class="p">}</span> <span class="o">=</span> <span class="nx">bar</span>
</span></code></pre></td></tr></table></div></figure>


<p>With <code>vim-coffee-script</code> you can just select the snippet in Visual Mode and type
<code>:CoffeeCompile</code> which will open up a new scratch buffer with a compiled
version of the snippet which will clearly tell what this syntax in CoffeeScript
means. You can use this to verify that you understood the CoffeeScript syntax
by using your Javascript knowledge!</p>

<p>I recommend creating a shortcut for this. It&#8217;s so useful. Put this to your
<code>.vimrc</code>:</p>

<figure class='code'><figcaption><span></span></figcaption><div class="highlight"><table><tr><td class="gutter"><pre class="line-numbers"><span class='line-number'>1</span>
<span class='line-number'>2</span>
</pre></td><td class='code'><pre><code class='coffeescript'><span class='line'><span class="nx">vmap</span> <span class="o">&lt;</span><span class="nx">leader</span><span class="o">&gt;</span><span class="nx">c</span> <span class="o">&lt;</span><span class="nx">esc</span><span class="o">&gt;:</span><span class="s">&#39;&lt;,&#39;</span><span class="o">&gt;:</span><span class="nx">CoffeeCompile</span><span class="o">&lt;</span><span class="nx">CR</span><span class="o">&gt;</span>
</span><span class='line'><span class="nx">map</span> <span class="o">&lt;</span><span class="nx">leader</span><span class="o">&gt;</span><span class="nx">c</span> <span class="o">:</span><span class="nx">CoffeeCompile</span><span class="o">&lt;</span><span class="nx">CR</span><span class="o">&gt;</span>
</span></code></pre></td></tr></table></div></figure>


<p>This allows you to invoke the compiler with <code>Leader-key + c</code>. The leader key is
backslash by default, but usually it is redefined to comma.</p>

<h2>Stack Traces</h2>

<p>I don&#8217;t like manually compiling CoffeeScript files for my Node.js apps. Instead
I use the <code>coffee</code> command directly or use plain js wrapper app that starts my
CoffeeScript apps. This is clean and simple, but can be painful when you get an
exception. There is a stack trace, but it refers to the compiled Javacript file
which does not exist!  You could look up the original CoffeeScript file and try
to guess what line the stack trace means by looking variable names or manually
compile the file when exception occurs. Not so fun.</p>

<p><code>vim-coffee-script</code> to the rescue!</p>

<p>When you execute the <code>CoffeeCompile</code> Vim command in Command Mode you will get
the whole file compiled into the scratch buffer. In that you can scroll the
line referred by the stack trace and see what code exactly rose it.  This is
bit clumsy since normally you can jump to a certain line by typing <code>:&lt;number&gt;</code>.
We can do better! Put this to <code>.vimrc</code>:</p>

<figure class='code'><figcaption><span></span></figcaption><div class="highlight"><table><tr><td class="gutter"><pre class="line-numbers"><span class='line-number'>1</span>
</pre></td><td class='code'><pre><code class='coffeescript'><span class='line'><span class="nx">command</span> <span class="o">-</span><span class="nx">nargs</span><span class="o">=</span><span class="mi">1</span> <span class="nx">C</span> <span class="nx">CoffeeCompile</span> <span class="o">|</span> <span class="o">:&lt;</span><span class="nx">args</span><span class="o">&gt;</span>
</span></code></pre></td></tr></table></div></figure>


<p>And then try typing <code>:C&lt;number&gt;</code>. Whoah! This takes you to the given line
number in the compiled Javascript of the CoffeeScript file you are editing.
Using it is just one character longer than normally jumping lines!</p>
]]></content>
  </entry>
  
  <entry>
    <title type="html"><![CDATA[Python-like Decorators in CoffeeScript]]></title>
    <link href="http://esa-matti.suuronen.org/blog/2011/10/06/python-like-decorators-in-coffeescript/"/>
    <updated>2011-10-06T21:10:00+03:00</updated>
    <id>http://esa-matti.suuronen.org/blog/2011/10/06/python-like-decorators-in-coffeescript</id>
    <content type="html"><![CDATA[<p>I really like decorators in Python and I sometimes miss them when working in
other languages. Today at work it hit me when I was working on a CoffeeScript
project. It is really easy to implement Python-like decorators cleanly in
CoffeeScript.</p>

<!--more-->


<p>If you are not familar what decorators are in Python you should skim through
<a href="http://docs.python.org/glossary.html#term-decorator">this</a> and
<a href="http://www.ibm.com/developerworks/linux/library/l-cpdecor/index.html">this</a>.
In short they are a nice syntax for wrapping functions/methods with other
functions in Python.</p>

<h2>Decorators in Python</h2>

<p>Here&#8217;s an example usage of Python decorator. Let&#8217;s pretend that this is a
class for reading values from some device. It will give us values between 0 and
100, but in this app we want put a roof for the values it gives. We can create
a decorator that limits the values given by the getter.</p>

<figure class='code'><figcaption><span>Decorator in Python  (decorator_example.py)</span> <a href='http://esa-matti.suuronen.org/downloads/code/decorator_example.py'>download</a></figcaption>
 <div class="highlight"><table><tr><td class="gutter"><pre class="line-numbers"><span class='line-number'>1</span>
<span class='line-number'>2</span>
<span class='line-number'>3</span>
<span class='line-number'>4</span>
<span class='line-number'>5</span>
<span class='line-number'>6</span>
<span class='line-number'>7</span>
<span class='line-number'>8</span>
<span class='line-number'>9</span>
<span class='line-number'>10</span>
<span class='line-number'>11</span>
<span class='line-number'>12</span>
<span class='line-number'>13</span>
<span class='line-number'>14</span>
<span class='line-number'>15</span>
<span class='line-number'>16</span>
<span class='line-number'>17</span>
<span class='line-number'>18</span>
<span class='line-number'>19</span>
<span class='line-number'>20</span>
<span class='line-number'>21</span>
<span class='line-number'>22</span>
<span class='line-number'>23</span>
<span class='line-number'>24</span>
<span class='line-number'>25</span>
<span class='line-number'>26</span>
<span class='line-number'>27</span>
<span class='line-number'>28</span>
<span class='line-number'>29</span>
<span class='line-number'>30</span>
<span class='line-number'>31</span>
</pre></td><td class='code'><pre><code class='py'><span class='line'><span class="c">#!/usr/bin/env python</span>
</span><span class='line'>
</span><span class='line'><span class="c"># Our magic device</span>
</span><span class='line'><span class="kn">import</span> <span class="nn">random</span>
</span><span class='line'>
</span><span class='line'><span class="k">def</span> <span class="nf">roof</span><span class="p">(</span><span class="n">amount</span><span class="p">):</span>
</span><span class='line'>    <span class="k">def</span> <span class="nf">decorator</span><span class="p">(</span><span class="n">method</span><span class="p">):</span>
</span><span class='line'>        <span class="k">def</span> <span class="nf">wrapper</span><span class="p">(</span><span class="o">*</span><span class="n">args</span><span class="p">):</span>
</span><span class='line'>
</span><span class='line'>            <span class="n">value</span> <span class="o">=</span> <span class="n">method</span><span class="p">(</span><span class="o">*</span><span class="n">args</span><span class="p">)</span>
</span><span class='line'>            <span class="k">if</span> <span class="n">value</span> <span class="o">&gt;</span> <span class="n">amount</span><span class="p">:</span>
</span><span class='line'>                <span class="k">return</span> <span class="n">amount</span>
</span><span class='line'>            <span class="k">else</span><span class="p">:</span>
</span><span class='line'>                <span class="k">return</span> <span class="n">value</span>
</span><span class='line'>
</span><span class='line'>        <span class="k">return</span> <span class="n">wrapper</span>
</span><span class='line'>    <span class="k">return</span> <span class="n">decorator</span>
</span><span class='line'>
</span><span class='line'><span class="k">class</span> <span class="nc">Device</span><span class="p">(</span><span class="nb">object</span><span class="p">):</span>
</span><span class='line'>
</span><span class='line'>    <span class="nd">@roof</span><span class="p">(</span><span class="mi">50</span><span class="p">)</span>
</span><span class='line'>    <span class="k">def</span> <span class="nf">get_value</span><span class="p">(</span><span class="bp">self</span><span class="p">):</span>
</span><span class='line'>        <span class="c"># Read value from the device</span>
</span><span class='line'>        <span class="k">return</span> <span class="n">random</span><span class="o">.</span><span class="n">randint</span><span class="p">(</span><span class="mi">0</span><span class="p">,</span> <span class="mi">100</span><span class="p">)</span>
</span><span class='line'>
</span><span class='line'><span class="k">if</span> <span class="n">__name__</span> <span class="o">==</span> <span class="s">&#39;__main__&#39;</span><span class="p">:</span>
</span><span class='line'>    <span class="n">reader</span> <span class="o">=</span> <span class="n">Device</span><span class="p">()</span>
</span><span class='line'>    <span class="k">for</span> <span class="n">i</span> <span class="ow">in</span> <span class="nb">range</span><span class="p">(</span><span class="mi">10</span><span class="p">):</span>
</span><span class='line'>        <span class="k">print</span> <span class="n">reader</span><span class="o">.</span><span class="n">get_value</span><span class="p">()</span>
</span></code></pre></td></tr></table></div></figure>


<h2>Decorators in CoffeeScript</h2>

<p>So that was an advanced configurable decorator for Python. Lets see how
CoffeeScript handles the same situation.</p>

<figure class='code'><figcaption><span>Decorator in CoffeeScript [] (decorator_example.coffee)</span> <a href='http://esa-matti.suuronen.org/downloads/code/decorator_example.coffee'>download</a></figcaption>
 <div class="highlight"><table><tr><td class="gutter"><pre class="line-numbers"><span class='line-number'>1</span>
<span class='line-number'>2</span>
<span class='line-number'>3</span>
<span class='line-number'>4</span>
<span class='line-number'>5</span>
<span class='line-number'>6</span>
<span class='line-number'>7</span>
<span class='line-number'>8</span>
<span class='line-number'>9</span>
<span class='line-number'>10</span>
<span class='line-number'>11</span>
<span class='line-number'>12</span>
<span class='line-number'>13</span>
<span class='line-number'>14</span>
<span class='line-number'>15</span>
<span class='line-number'>16</span>
<span class='line-number'>17</span>
<span class='line-number'>18</span>
<span class='line-number'>19</span>
<span class='line-number'>20</span>
<span class='line-number'>21</span>
</pre></td><td class='code'><pre><code class='coffeescript'><span class='line'><span class="c1">#!/usr/bin/env coffee</span>
</span><span class='line'>
</span><span class='line'><span class="nv">roof = </span><span class="nf">(amount) -&gt;</span> <span class="nf">(method) -&gt;</span> <span class="o">-&gt;</span>
</span><span class='line'>
</span><span class='line'>  <span class="nv">value = </span><span class="nx">method</span><span class="p">.</span><span class="nx">apply</span> <span class="nx">@</span><span class="p">,</span> <span class="nx">arguments</span>
</span><span class='line'>
</span><span class='line'>  <span class="k">if</span> <span class="nx">value</span> <span class="o">&gt;</span> <span class="nx">amount</span>
</span><span class='line'>    <span class="nx">amount</span>
</span><span class='line'>  <span class="k">else</span>
</span><span class='line'>    <span class="nx">value</span>
</span><span class='line'>
</span><span class='line'><span class="k">class</span> <span class="nx">Device</span>
</span><span class='line'>
</span><span class='line'>    <span class="nv">getValue: </span><span class="nx">roof</span><span class="nf">(50) -&gt;</span>
</span><span class='line'>      <span class="nb">parseInt</span> <span class="nb">Math</span><span class="p">.</span><span class="nx">random</span><span class="p">()</span> <span class="o">*</span> <span class="mi">100</span>
</span><span class='line'>
</span><span class='line'><span class="k">if</span> <span class="nx">require</span><span class="p">.</span><span class="nx">main</span> <span class="o">is</span> <span class="nx">module</span>
</span><span class='line'>  <span class="nv">device = </span><span class="k">new</span> <span class="nx">Device</span>
</span><span class='line'>  <span class="k">for</span> <span class="nx">i</span> <span class="k">in</span> <span class="p">[</span><span class="mi">0</span><span class="p">..</span><span class="mi">10</span><span class="p">]</span>
</span><span class='line'>    <span class="nx">console</span><span class="p">.</span><span class="nx">log</span> <span class="nx">device</span><span class="p">.</span><span class="nx">getValue</span><span class="p">()</span>
</span></code></pre></td></tr></table></div></figure>


<p>Wow! That is a lot less syntax and no extra nesting!</p>

<p>This really shows how powerful anonymous functions and implicit returns are in
CoffeeScript.  Also the usage syntax would not be so clean if CoffeeScript
didn&#8217;t have ability to call functions without the parenthesis.</p>

<p>The usage syntax is though better in Python, because you can stack decorators
cleanly with it.</p>

<figure class='code'><figcaption><span>Stacking decorators in Python</span></figcaption><div class="highlight"><table><tr><td class="gutter"><pre class="line-numbers"><span class='line-number'>1</span>
<span class='line-number'>2</span>
<span class='line-number'>3</span>
<span class='line-number'>4</span>
<span class='line-number'>5</span>
</pre></td><td class='code'><pre><code class='python'><span class='line'><span class="k">class</span> <span class="nc">Device</span><span class="p">(</span><span class="nb">object</span><span class="p">):</span>
</span><span class='line'>    <span class="nd">@roof</span><span class="p">(</span><span class="mi">50</span><span class="p">)</span>
</span><span class='line'>    <span class="nd">@floor</span><span class="p">(</span><span class="mi">10</span><span class="p">)</span> <span class="c"># Checks the bottom of the value</span>
</span><span class='line'>    <span class="k">def</span> <span class="nf">get_value</span><span class="p">(</span><span class="bp">self</span><span class="p">):</span>
</span><span class='line'>        <span class="k">return</span> <span class="n">random</span><span class="o">.</span><span class="n">randint</span><span class="p">(</span><span class="mi">0</span><span class="p">,</span> <span class="mi">100</span><span class="p">)</span>
</span></code></pre></td></tr></table></div></figure>


<p>In CoffeeScript must put them after each others which can get nasty if you have
many decorators.</p>

<figure class='code'><figcaption><span>Piping decorators in CoffeeScript</span></figcaption><div class="highlight"><table><tr><td class="gutter"><pre class="line-numbers"><span class='line-number'>1</span>
<span class='line-number'>2</span>
<span class='line-number'>3</span>
</pre></td><td class='code'><pre><code class='coffeescript'><span class='line'><span class="k">class</span> <span class="nx">Device</span>
</span><span class='line'>    <span class="nv">getValue: </span><span class="nx">roof</span><span class="p">(</span><span class="mi">50</span><span class="p">)</span> <span class="nx">floor</span><span class="nf">(10) -&gt;</span>
</span><span class='line'>      <span class="nb">parseInt</span> <span class="nb">Math</span><span class="p">.</span><span class="nx">random</span><span class="p">()</span> <span class="o">*</span> <span class="mi">100</span>
</span></code></pre></td></tr></table></div></figure>


<p>But wait! There were no specific decorator syntax in Python in the old days.
One could apply decorators just by calling it to the target and replacing the
original method.</p>

<figure class='code'><figcaption><span>Oldschool decorator usage</span></figcaption><div class="highlight"><table><tr><td class="gutter"><pre class="line-numbers"><span class='line-number'>1</span>
<span class='line-number'>2</span>
<span class='line-number'>3</span>
<span class='line-number'>4</span>
<span class='line-number'>5</span>
<span class='line-number'>6</span>
</pre></td><td class='code'><pre><code class='python'><span class='line'><span class="k">class</span> <span class="nc">Device</span><span class="p">(</span><span class="nb">object</span><span class="p">):</span>
</span><span class='line'>    <span class="k">def</span> <span class="nf">get_value</span><span class="p">(</span><span class="bp">self</span><span class="p">):</span>
</span><span class='line'>        <span class="k">return</span> <span class="n">random</span><span class="o">.</span><span class="n">randint</span><span class="p">(</span><span class="mi">0</span><span class="p">,</span> <span class="mi">100</span><span class="p">)</span>
</span><span class='line'>
</span><span class='line'>    <span class="n">get_value</span> <span class="o">=</span> <span class="n">roof</span><span class="p">(</span><span class="mi">50</span><span class="p">)(</span><span class="n">get_value</span><span class="p">)</span>
</span><span class='line'>    <span class="n">get_value</span> <span class="o">=</span> <span class="n">floor</span><span class="p">(</span><span class="mi">10</span><span class="p">)(</span><span class="n">get_value</span><span class="p">)</span>
</span></code></pre></td></tr></table></div></figure>


<p>So you can do this in CoffeeScript</p>

<figure class='code'><figcaption><span>Piping decorators in CoffeeScript</span></figcaption><div class="highlight"><table><tr><td class="gutter"><pre class="line-numbers"><span class='line-number'>1</span>
<span class='line-number'>2</span>
<span class='line-number'>3</span>
<span class='line-number'>4</span>
<span class='line-number'>5</span>
<span class='line-number'>6</span>
</pre></td><td class='code'><pre><code class='coffeescript'><span class='line'><span class="k">class</span> <span class="nx">Device</span>
</span><span class='line'>  <span class="nv">getValue: </span><span class="nx">roof</span><span class="nf">(50) -&gt;</span>
</span><span class='line'>    <span class="nb">parseInt</span> <span class="nb">Math</span><span class="p">.</span><span class="nx">random</span><span class="p">()</span> <span class="o">*</span> <span class="mi">100</span>
</span><span class='line'>
</span><span class='line'>  <span class="nv">getValue: </span><span class="nx">roof</span><span class="p">(</span><span class="mi">50</span><span class="p">)</span> <span class="nx">Device</span><span class="o">::</span><span class="nx">getValue</span>
</span><span class='line'>  <span class="nv">getValue: </span><span class="nx">floor</span><span class="p">(</span><span class="mi">10</span><span class="p">)</span> <span class="nx">Device</span><span class="o">::</span><span class="nx">getValue</span>
</span></code></pre></td></tr></table></div></figure>


<p>Pretty ugly, yeah, but might be better if you have tons of decorators.</p>
]]></content>
  </entry>
  
</feed>
