Your Name: Claudia
Type of Appliance: Washer
Brand: Amana
Model Number: NFW7200TW
Your Precious Words:
My Amana NFW7200TW washer will not power on. I had loaded a small load, heard it start to fill, then walked away for an hour. When I returned NO power.
I have power at the receptical, but unpluged it overnight. Checked water lines, one filter was plugged, so I cleaned it. Still no power.
If you confirmed that you have power at the receptacle (by using a meter or plugging in a lamp or something else) then it’s time to crawl into the belly of the beast. Actually, we’ll just be going into the control panel so it’s probably more accurate to say the “brain of the beast” but that just didn’t have the same rhythm and imagery that I was going for.
This is pretty easy to do. Just unplug the washer, remove the top panel, dispenser drawer, and a couple of screws in the front of the control panel, then tilt the control panel forward. These steps are demonstrated in this video.
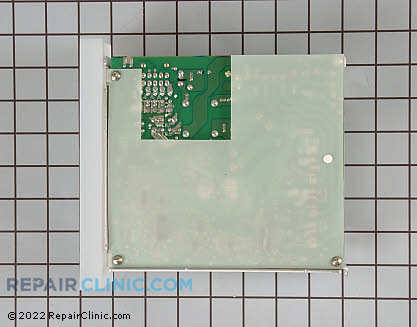
Next, plug the washer back in and use your meter to check for 120vac at the control board in the locations listed in the image below in the “AC Power Check” section. Click the image for a larger view that opens in a new window.

If you’re getting 120vac up to the board and lights or anything on the control console, then you need to replace the control board. You can buy the replacement board here with a one year return guarantee.

If you’re not getting voltage to the control board, then you may have a bad connection somewhere and you’ll need to use your meter and the wiring diagram on the tech sheet (located in a pouch under the top cabinet panel that you removed to access the control board) to troubleshoot and find where you’re missing the voltage. I show you how to do this using real-world examples, including a front loading washer, in my seminal tome, “Using the Tech Sheet Schematic to Root Out Appliance Gremlins.”
If you need more help, come to the Samurai Appliance Repair Forums, become an Apprentice, and start a new topic for interactive repair help from Master Appliantologists. We’re here to help!
To learn more about your washing machine, or to order parts, click here.
]]>


 , Samurai Appliance Repair Man goes undercover as The Appliance Guru and kicks some major appliance boot-ay on a GE refrigerator that’s lost its cool.