Pullers are used to remove parts such as gears, bearings, pulleys, and other components from shafts, axles, and other machinery parts without damaging the equipment.
]]>Pullers are used to remove parts such as gears, bearings, pulleys, and other components from shafts, axles, and other machinery parts without damaging the equipment.
Pullers fall into two major categories:
- Mechanical Pullers: this most common type of puller features a threaded rod or spindle attached to a set of arms or jaws. These arms or jaws are designed to grip the part to be removed securely. As the threaded rod is turned, it exerts a pulling force on the part, gradually dislodging it from its place.
- Hydraulic Pullers: Hydraulic pullers use hydraulic pressure to exert force on the part being removed. They are capable of generating high levels of force and are often used for heavy-duty applications where mechanical pullers may not be sufficient.
Within these categories there are several types of pullers available, each designed for specific applications and requirements:
Jaw Pullers: Jaw pullers are the most common and versatile tools, featuring two or three jaws that grip around the part to be removed. They come in various sizes and configurations, including mechanical and hydraulic versions. Jaw pullers are suitable for a wide range of applications and can be used to apply a significant force to remove stubborn parts.
Slide Hammer Pullers: Slide hammer pullers consist of a heavy slide hammer attached to a threaded shaft or other adapter. The slide hammer is repeatedly struck or hammered to apply force to the part being removed. This type of puller is often used for removing gears, bearings, and other parts that require a sharp, sudden force.
Bearing Separators: Bearing separators are designed specifically for removing bearings from shafts or housings. They typically feature a set of jaws or hooks that grip behind the bearing while a central screw or hydraulic mechanism applies force to pull the bearing off its seat.
Pilot Bearing Pullers: Pilot bearing pullers are specialized tools used to remove pilot bearings or bushings from the crankshaft of an engine or other machinery. They often feature a collet or expanding mechanism that grips the inside diameter of the bearing while a central screw or hydraulic mechanism applies force to pull it out.
Gear Pullers: Gear pullers are designed specifically for removing gears from shafts. They typically feature two or three jaws that grip behind the gear while a central screw or hydraulic mechanism applies force to pull it off the shaft.
Puller Components:

How To Select the Right Puller
When choosing a puller for a particular application, it's essential to understand its key technical specifications to ensure it is appropriate for the task at hand.
Capacity: is the amount of pulling force that can be safely exerted by the puller without damage to the tool or the part being worked on. In real-life applications it is very difficult to predict the amount of force needed for a pulling operation. One rule of thumb in choosing a puller is the center bolt diameter must be at least ½ the diameter of the shaft from which the object is being removed. It is impossible to predict the exact force needed for every pulling situation.
Spread: is the maximum distance between the jaws. A proper puller has a large enough spread to attach to the object being removed.
Reach: is the distance between the pulling surface of the jaw and the jaw head of the puller. This distance increases or decreases as the jaws are opened and closed. When choosing a puller, make certain the reach is sufficient to attach the puller.
Number of jaws: most pullers feature 2 or 3 jaws. The 3 jaw versions are usually preferable as the additional jaw helps distribute the force more evenly. However, in some applications where space is limited, only 2 jaws are necessary. Thus, some models feature one jaw that can be removed and reattached as needed, making the puller more versatile.
Internal/External: many models are reversible, meaning the jaws can be adjusted for internal or external pulling.
Manual versus Self-Adjusting Puller
Users can further narrow the search for pullers, by deciding to choose a model that can be manually adjusted, or a self-adjusting option.
In manual-adjusting pullers, the user manually adjusts the arms or legs of the puller to accommodate the size and shape of the object being pulled. This may involve loosening bolts or screws and physically repositioning the arms to fit around the object.
Versatility: Manual-adjusting pullers offer versatility in that they can be adjusted to fit various sizes and shapes of objects.
Control: Users have direct control over the adjustment process, allowing them to make fine adjustments as needed during the extraction process.
Complexity: Manual-adjusting pullers may require more effort and time to set up and adjust compared to self-adjusting pullers.
Self-adjusting pullers feature mechanisms that automatically adjust to the size and shape of the object being pulled. These mechanisms may include springs, gears, or other devices that expand or contract the arms of the puller to fit around the object.
Ease of Use: Self-adjusting pullers are generally easier and quicker to set up since they automatically adapt to the object being pulled without requiring manual adjustments.
Speed: Self-adjusting pullers can speed up the extraction process since there's no need for manual adjustments during the operation.
Limitations: Self-adjusting pullers may have limitations in terms of the range of sizes and shapes they can accommodate compared to manual-adjusting pullers.
How Pullers Work
Pullers work by applying mechanical force to extract or remove objects such as bearings, gears, pulleys, and other press-fit components from shafts, holes, or other mounting surfaces. The process involves several key steps:
Preparation: Before using a puller, it's essential to prepare the equipment and the object being pulled. This may involve cleaning the surfaces, ensuring proper alignment, and selecting the appropriate type and size of the puller for the task.
Attachment: The puller is positioned around the object to be extracted, with the jaws or hooks of the puller securely gripping onto the object. The arms or legs of the puller may be adjusted manually or automatically to ensure a snug fit around the object.
Application of Force: Once the puller is properly positioned, force is applied to the puller to loosen the object from its mounting surface. This force is typically applied by turning a center bolt or screw mechanism using a wrench, ratchet, or other tools.
Even Distribution of Force: Pullers are designed to distribute the force evenly across the object being pulled to avoid damage or distortion. This helps ensure that the object is extracted smoothly without causing any additional problems.
Gradual Extraction: In most cases, force is applied gradually to the puller to slowly and steadily extract the object from its mounting surface. This helps prevent sudden movements or damage to the object or surrounding equipment.
Monitoring and Adjustment: Throughout the extraction process, it's important to monitor the progress and make any necessary adjustments to the puller or the application of force. This may involve repositioning the puller, tightening or loosening the center bolt, or making other adjustments to ensure that the extraction proceeds smoothly.
Completion and Removal: Once the object has been successfully extracted, the puller is removed, and the object can be inspected, cleaned, and prepared for further use or replacement.
Overall, pullers work by leveraging mechanical force and proper alignment to safely and effectively extract objects from their mounting surfaces. By following the appropriate procedures and using the right equipment, pullers can be invaluable tools for a wide range of maintenance, repair, and manufacturing applications.
Puller Maintenance 101
Maintaining a puller ensures its longevity and reliable performance over time. Here are some general tips for maintaining a puller:
Clean Regularly: After each use, clean the puller to remove dirt, debris, and any residues that may have accumulated during the operation. Use a brush, compressed air, or a solvent appropriate for the materials of the puller to clean its components thoroughly.
Inspect for Damage: Periodically inspect the puller for signs of wear, damage, or corrosion. Pay attention to the jaws, arms, center bolt, and other moving parts. Replace any damaged or worn-out components to prevent further deterioration and ensure safe operation.
Lubrication: Apply lubricant to the moving parts of the puller, such as the center bolt threads and pivot points, to reduce friction and prevent rust and corrosion. Use lubricants recommended by the manufacturer and avoid over-lubrication, which can attract dirt and debris.
Store Properly: Store the puller in a clean, dry, and well-ventilated area away from moisture, humidity, and extreme temperatures. Avoid storing the puller in direct sunlight or in areas where it may be exposed to corrosive substances.
Protective Coatings: Consider applying protective coatings or rust inhibitors to the metal surfaces of the puller to prevent corrosion and extend its lifespan. Follow the manufacturer's recommendations for specific coating products and application methods.
Follow Manufacturer's Guidelines: Always follow the manufacturer's guidelines and recommendations for maintaining the puller. This includes proper assembly, usage, and maintenance procedures specified in the user manual or documentation provided by the manufacturer.
Inspect Accessories: If your puller comes with accessories such as jaws, hooks, or bolts, inspect them regularly for signs of wear or damage. Replace worn-out accessories to maintain the effectiveness and safety of the puller.
Training and Education: Ensure that operators are properly trained in the use and maintenance of the puller. Provide training sessions on proper handling, storage, and maintenance procedures to prevent accidents and prolong the life of the equipment.
By following these maintenance tips, you can help ensure that your puller remains in good working condition, prolong its lifespan, and minimize the risk of breakdowns or accidents during operation.
]]>


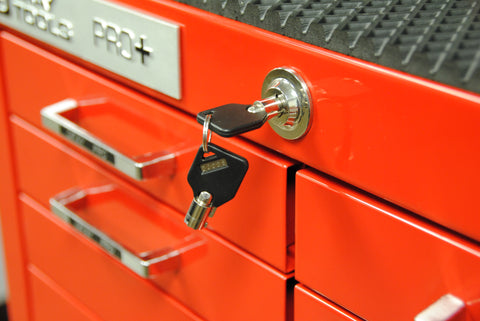


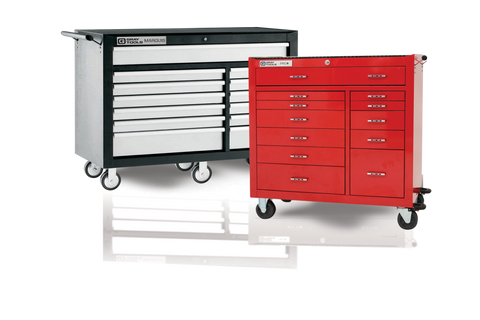 If you waste a lot of time searching through worktables, closets, boxes, tool holders, or pouches trying to locate a tool, it is time to consider purchasing a tool chest.