Hey there, campers and outdoor cooks! This post is for you if you're looking for a delicious gluten-free dough recipe.
Gluten sensitivities can be a hassle, and can sometimes stop people from enjoying good food that is offered to them or that they want to make themselves. Fortunately, there’s a treasure trove of resources available to make awesome recipes without gluten, and pizza is no exception! Read on to learn about how to make pizza dough, gluten-free.
What is gluten free dough and why you should care
Gluten free dough is something of an innovation for bakers who have been looking for a way to suit the needs of clients with gluten-based intolerances or allergies. This type of dough has no traces of gluten, making it safe and accessible to everyone.
Not only that, but it can be just as flavorful and delicious as traditional recipes – meaning anyone can enjoy baking and eating delightful treats regardless of dietary limitations. Even if you don't suffer from gluten-sensitivity, experimenting with different types of dough is part of the fun. A loaf made with gluten free dough might just be your new favorite!
What makes a recipe gluten-free?
Before attempting to cook gluten free pizza, it helps to be familiar with what gluten is and how to avoid it. Gluten is a mix of proteins found in grains like wheat, barley, and rye, according to the Celiac Foundation. It’s gluten that gives grain-based foods their shape and texture, but gluten can also cause illness to people with gluten sensitivities.
Gluten-free cooking involves the use of grains free of gluten, and the incorporation of a non-allergenic binding agent to restore the food’s shape and texture without the risk of a negative reaction. Taste of Home has some information on gluten-free cooking centered around the use of gluten-free or rice-based flours, and binding agents like xanthan gum or arrowroot powder.
How to make gluten free dough?
Gluten-free baking doesn’t have to be intimidating. The key to making a delicious gluten-free dough starts with having the right ingredients or a premade mix.
Utilizing naturally gluten free grains, like oats, sorghum, and quinoa flour are great alternatives for wheat and other grain based flours. If you're using a packaged mix, it's as simple as following instructions on the box. After mixing your ingredients together and forming your dough, consider letting it sit for a few minutes before rolling out for pizza or pie crusts, or shape into balls for cookies.
Don't forget to lightly grease cooking pans or sheets if desired with non stick spray or oil of your choice before placing raw dough on them - this will help prevent sticking and keep your finished product from sticking too! Have fun experimenting in the kitchen and finding new ways of creating delicious gluten-free dough recipes!
Making gluten free dough is actually a lot easier than it looks. First, get a good blend of gluten free flours including almond flour and breadcrumb substitutes. You'll also want to make sure you have xantham gum and baking powder on hand before you get started.
When the time comes to combine the ingredients, mix them together thoroughly until the whole mixture has an even consistency. The next step is to roll out the dough, making sure it's not too thick or thin - if you're planning to achieve something like pizza crust this will be particularly important!
Finally, bake according to whatever recipe you are using and enjoy scrumptious gluten free fare that won't leave your stomach feeling heavy afterwards!
How to use gluten free dough
Gluten free dough is a great way to enjoy delicious meals without worrying about the side effects of wheat or other gluten products. Whether you're looking for something sweet or savory, there are tons of recipes available to explore with gluten-free dough.
Pizza, cinnamon rolls, calzones and quiche can all be created using this type of dough, as can pot pie casseroles, pierogis and even Chinese Dumplings. For a healthier twist, you can make gluten-free flatbreads from dough that has been made with almond meal or nut butters and spices.
And for a true treat, check out the recipes for delicious gluten-free pastry shells that are perfect for desserts like strawberry rhubarb pie!
Recipes for gluten free dough
Are you looking for some delicious, gluten free dough recipes? You’re in luck! There’s no need to stick to plain old gluten free bread anymore; now you have access to so many amazing recipes and ideas.
From pizza dough and focaccia to cinnamon rolls and even gnocchi, there’s a recipe out there that’s suitable for every taste bud. Not only are these recipes delicious and satisfying, but they are also easy to make with ingredients that can most likely be found in your pantry.
Experimenting with different flavors and toppings can make your meals more exciting while still sticking to a gluten-free diet. So why not try something new today?
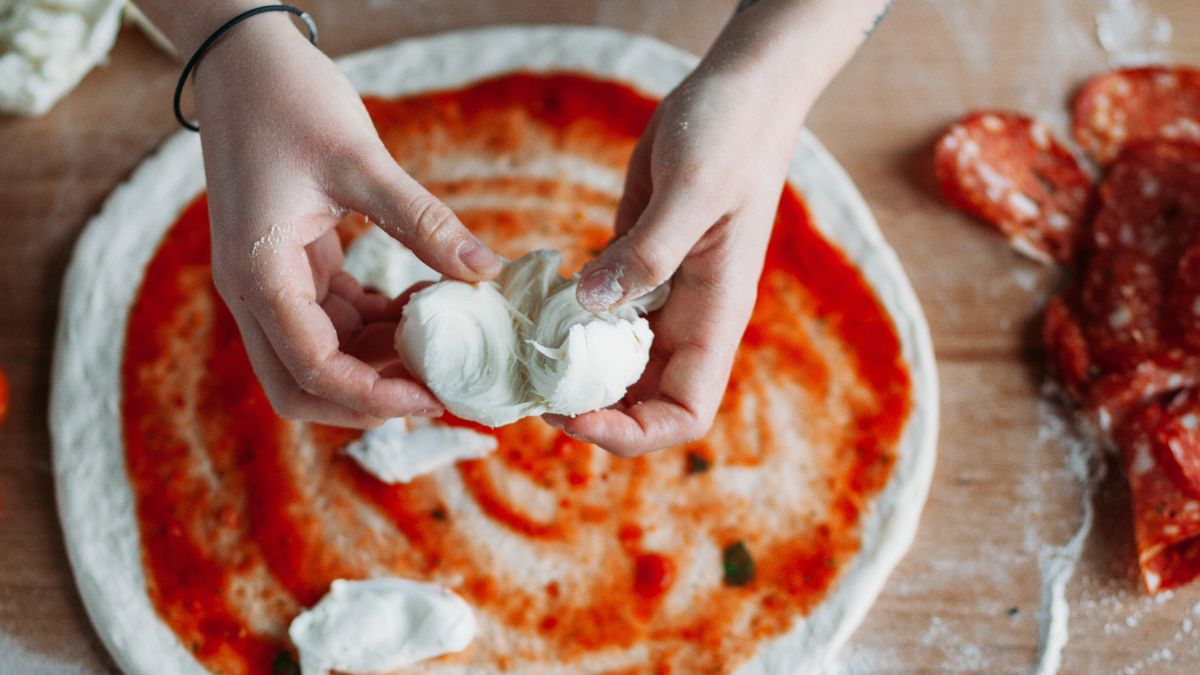
Gluten free neapolitan pizza dough
Making a gluten free Neapolitan pizza dough is surprisingly easy! All you need is a few simple ingredients and some patience to let the dough rise.
This dough is perfect for campsite pizzas, flatbreads, or even just for snacking on (it's that good). So whether you're avoiding gluten or just looking for a new cooking adventure, read on for this easy and tasty recipe.
Ingredients
- 2 cups of warm water
- 1 teaspoon of active dry yeast
- 4 cups of gluten free flour (any variety)
- 1 teaspoon of salt
- 2 tablespoons of olive oil
Instructions
- To make the dough, start by combining the warm water and yeast in a large bowl.
- Stir until the yeast has dissolved, then let it sit for 5 minutes or until frothy.
- Next, add in the flour and salt, stirring to combine everything together.
- Finally, drizzle in the olive oil and knead the dough for 8-10 minutes, or until it's elastic and smooth.
- Once you're done kneading, transfer the dough to a lightly greased bowl and cover with plastic wrap or a damp towel.
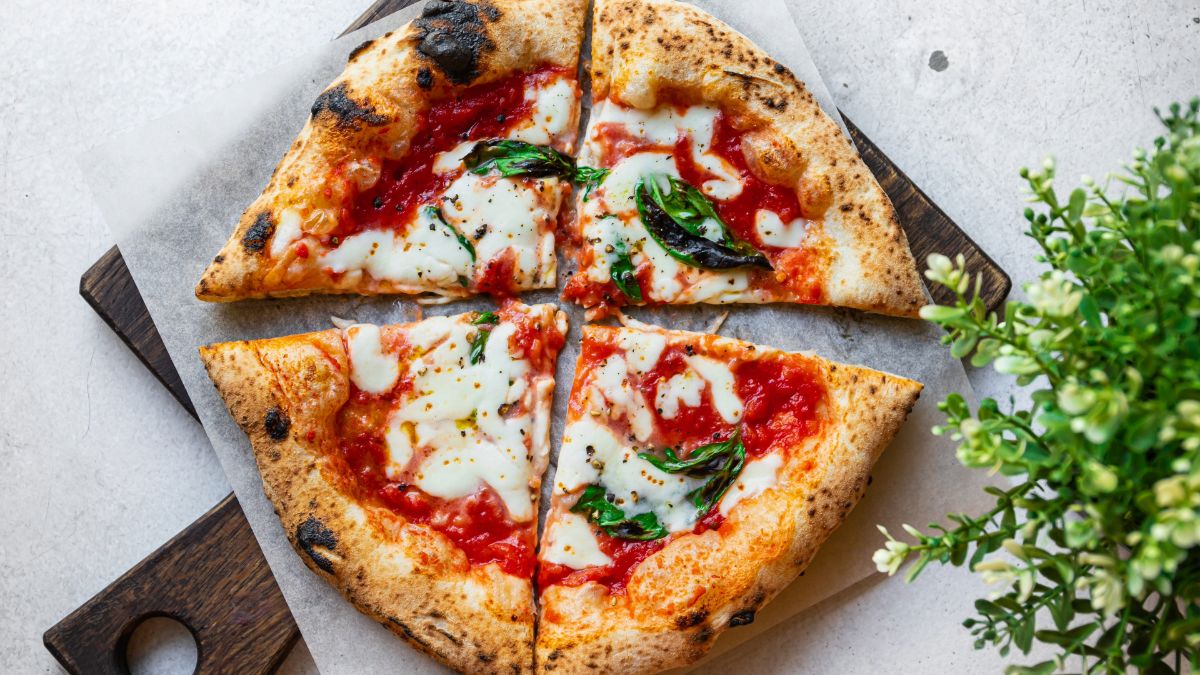
- Allow the dough to rise at room temperature for 1-2 hours, or until it's doubled in size. Now your dough is ready to use!
Go ahead and make your favorite Neapolitan pizza with this delicious gluten free pizza dough recipe - you won't regret it! Enjoy!
Gluten free pizza dough for bread machine
If you’re looking to make a delicious gluten free pizza dough in your bread machine, here are the ingredients and steps to do so!
Ingredients:
- 1/2 teaspoon baking powder
- 2 teaspoons xantham gum
- 3 cups gluten free flour blend (look for one without rice flour for the best texture)
- 1/4 cup sugar
- 2 teaspoons salt
- 3 tablespoons olive oil
- 2 teaspoons active dry yeast
- 11/2 cups warm water (110 degrees)
Instructions:
1. Start by adding all the dry ingredients to your bread machine pan: gluten free flour blend, baking powder, xantham gum, sugar, salt and yeast.
2. Add the olive oil and warm water to the mix.
3. Select your bread machine’s dough cycle (or pizza crust cycle if you have one) and let it run until it’s completed.
4. When the cycle is done, your dough should be soft and pliable. Take it out of the machine, form it into whatever shape you’d like for your pizza crust and add your favorite toppings!
5. Preheat the oven to 425 degrees Fahrenheit, then bake the pizza for about 15-20 minutes until golden and bubbly. Enjoy your gluten free pizza dough!
Note: If you have any leftovers, the bakery dough can be stored in an airtight container in the refrigerator for up to three days. Just make sure to bring it back up to room temperature before using it again.
Caputo gluten free pizza dough recipe
Preheat your oven to 500°F before you get started making the Caputo Gluten Free Pizza Dough.
Ingredients:
Instructions:
- Start by combining the yeast, sugar and warm water in a bowl and stir until the yeast is dissolved. Let the mixture sit for about 10 minutes so it can activate.
- In a separate bowl, mix together the Caputo gluten free pizza flour and 1 tablespoon of salt until everything is evenly combined. Slowly pour in the yeast mixture to the dry ingredients while stirring continuously. Keep stirring until all of the ingredients are completely combined, forming a dough ball.
- Transfer the dough to a lightly floured surface and knead for 10 minutes until it’s smooth, elastic and non-sticky.
- Place the dough in a lightly oiled bowl (to prevent sticking) and let it rise at room temperature for about 1 hour or until doubled in size.
- Once the dough has risen, cut it into 8 equal sized pieces and roll each piece into a ball.
- Place the balls of dough on a lightly floured surface and press them down slightly with your fingertips to flatten.
- Sprinkle some cornmeal onto a pizza peel or baking sheet before you place your pizza dough onto it.
- Shape the dough into a thin round then brush with olive oil and add your favorite toppings.
- Bake in the preheated oven for 15-20 minutes, or until the crust is golden brown.
Note: Don’t spoil your perfect gluten-free dough with the wrong ingredients, though; instead, follow some advice from Deiorios and use their recommendations for gluten free toppings, including:
- Gluten-free cheeses (mozzarella, gorgonzola, cheddar, feta, and many more)
- Gluten-free meats (Pork products, chicken, sausage, even shrimp!)
- Almost all vegetables
Gluten-free pizza recipe that uses instant yeast
There's no need to worry if you're looking for a gluten-free pizza recipe that uses instant yeast. We've got you covered with this easy and delicious recipe.
Ingredients:
- 1 cup gluten-free all-purpose flour
- 1 teaspoon instant yeast
- 1/2 teaspoon salt
- 1/2 cup warm milk
- 2 tablespoons olive oil
Instructions:
1. In a large bowl, mix together the gluten-free flour, instant yeast, and salt.
2. Slowly pour in the warm milk and olive oil while whisking until combined into a dough-like consistency. If the batter is too dry, add some more warm milk.
3. Knead the dough for about 8 minutes or until it's soft and pliable. If you have a stand mixer with a dough hook, you can use that instead of kneading by hand.
4. Place the dough in an oiled bowl, cover with plastic wrap, and let rise for one hour.
5. After the dough has doubled in size, punch it down and place on a floured surface. Use a rolling pin to form a large circle and transfer it to a parchment-lined baking sheet.
6. Top with your favorite sauce, cheese, and toppings before baking at 350F for 25 minutes or until the edges are golden brown.
Enjoy!
Gluten free pizza dough without xanthan gum
You don't need xanthan gum to make gluten free pizza dough. Instead, you can use a combination of other ingredients such as psyllium husk, almond flour, tapioca starch, and potato starch.
It's important that the ratio of these ingredients is correct in order to create a dough-like consistency. You can also use other ingredients such as baking powder, arrowroot, and ground flax seeds to improve the texture of the pizza dough. With the right combination, you can make a delicious gluten free pizza crust without xanthan gum!
Here is a great recipe for "gluten free pizza dough without xanthan gum".
Ingredients:
- 1/2 cup Psyllium Husk Powder
- 2 cups Almond Flour
- 2/3 cup Tapioca Starch
- 2/3 cup Potato Starch
- 1 teaspoon Baking Powder
- 1 tablespoon Arrowroot Starch (optional)
- 2 tablespoons Ground Flax Seeds (optional)
- 1 teaspoon Salt
- 1/2 cup Lukewarm Water
- 2 tablespoons Olive Oil
Instructions:
1. In a large bowl, mix together the psyllium husk powder, almond flour, tapioca starch, potato starch, baking powder, arrowroot starch (optional), ground flax seeds (optional) and salt.
2. Add the lukewarm water and olive oil to the dry ingredients and mix until you get a thick dough.
3. Knead the dough on a lightly floured surface for 3-5 minutes until it is smooth and elastic.
4. Place the dough in a lightly greased bowl, cover it with plastic wrap and let it rest for 30 minutes before using.
5. Preheat oven to 375F and roll out the dough on a lightly floured surface to desired thickness. Transfer to a baking sheet lined with parchment paper or greased pizza stone.
6. Bake for 18-25 minutes or until the crust is golden brown and cooked through. Enjoy!
With this recipe, you can easily make gluten free pizza dough without xanthan gum!

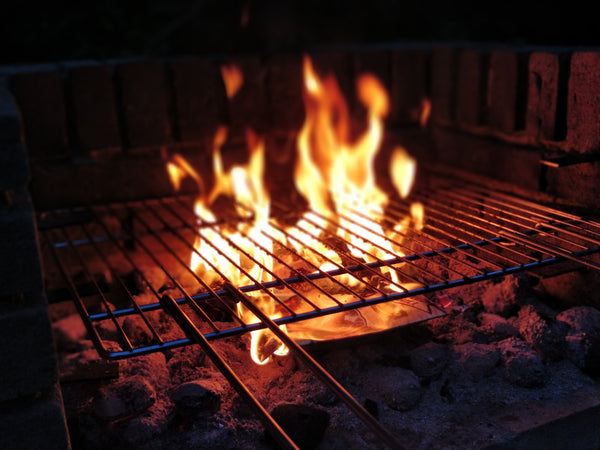
Gluten free pizza dough for wood fired oven
Learning how to make gluten free pizza dough for a wood-fired oven is a great way to make sure everyone can enjoy your homemade pizzas. Before you start, there are a few things you need to know about gluten free dough.
First, it is important to use a special gluten-free flour blend when making the dough. You want to make sure that the combination of flours provides an optimal texture and flavor for your pizza. Rice flour, potato starch, and tapioca starch are all good options for making a gluten-free crust.
Another tip is to make sure that your oven is preheated to the proper temperature before you start baking. Gluten-free dough won’t rise as much as regular dough, so it needs to be cooked at a slightly higher heat. This will ensure that the crust is crispy and golden-brown when it’s done cooking.
Start off by gathering the necessary ingredients.
Ingredients:
- 1 cup of gluten free all-purpose flour
- 1 teaspoon of active dry yeast
- 3 tablespoons of extra virgin olive oil
- 1/2 cup of warm water
Make sure you purchase gluten free ingredients to prevent cross contamination.
Instructions:
- In a large bowl, mix together the flour and yeast until everything is well combined.
- Slowly add in the oil and warm water, stirring everything together. The dough should start to form and become slightly sticky as you mix.
- Using your hands, knead the dough for a few minutes until it's soft and pliable.
- If the dough is too dry, add a bit more warm water until it reaches the desired consistency.
- Cover the bowl with a damp dish towel and let the dough rest for around 30 minutes.
- The dough is now ready to use! Shape it into a ball or flatten it out with your hands and place it on a pizza paddle.
- Top it with your favorite sauce, toppings, and cheese before transferring the pizza to the wood-fired oven.
- Bake for 15-20 minutes or until the crust is golden brown and crispy. Enjoy!
Making gluten free pizza dough for a wood-fired oven doesn't have to be difficult. With the right ingredients and a bit of patience, you can make delicious pizzas in no time. So why not give it a try? You won't regret it!
Gluten free focaccia recipe
This gluten free focaccia bread is not only delicious but it's also super easy to make. All you need is a few simple ingredients and some extra virgin olive oil to get started.
Start by preheating your oven to 375°F (190°C). In a bowl, mix together 2 cups of gluten-free all-purpose flour, 1 teaspoon of baking powder, and ½ teaspoon of sea salt. Then add in ½ cup of warm water and 2 tablespoons of extra virgin olive oil until the dough forms a soft ball.
On a lightly floured piece of parchment paper, roll out the dough until it forms a circle about 8 inches (20 cm) in diameter. Place the dough onto a lightly greased baking sheet and use your fingers to press dimples into the surface of the focaccia.
Once you’ve done that, brush the top with extra virgin olive oil and sprinkle with sea salt. Bake in preheated oven for 25 minutes or until golden brown. Let cool before serving. Enjoy!
FAQS About Gluten Free Dough
Is gluten bad for you?
The short answer is it depends. Generally speaking, gluten-free diets are recommended for those who are celiac, or have a wheat allergy or intolerance. For the majority of people though, there’s no clear health benefit to following a gluten-free diet and there’s some concern that avoiding whole grains might be detrimental to health.
It’s important to remember that not all gluten-containing foods are unhealthy, and many contain beneficial nutrients like fiber, iron and B vitamins. If you don't need a gluten-free diet for medical reasons but still want to cut down on your gluten intake, it's a good idea to focus on eating more whole grains that are naturally gluten-free like quinoa, buckwheat and millet. Plus, a balanced diet that includes plenty of fresh fruit and veg is always the best way to make sure you’re getting all the nutrients you need.
Ultimately, it’s up to you how much or little gluten you choose to include in your diet. Just make sure it fits with your nutritional goals so that you can feel and look your best.
Is gluten free pizza crust better for you?
It depends. If you are avoiding gluten for medical reasons, like celiac disease, then a gluten free pizza crust is definitely the best choice for your health. But if you're not avoiding gluten and just looking to eat healthier, it may or may not be better depending on what type of crust you choose.
Gluten-free pizza crusts can range from being made with nutrient-dense ingredients, such as whole grains, to being made with refined starches that offer little nutritional value. So it really comes down to what type of gluten free crust you choose and how it fits in with your overall diet and nutrition goals.
If you're looking for a healthier pizza option, look for one with a whole grain gluten-free crust and plenty of vegetables. That way you'll get more nutrients while still enjoying your favorite treat!
Is gluten free pizza healthy?
Gluten free pizza can be a healthier option than regular pizzas, depending on what other ingredients are used. Gluten free pizza usually contains fewer calories and carbohydrates, as well as more fiber and protein.
In addition, gluten free dough tends to use less processed grains like oats or quinoa in the recipe, which adds even more nutritional value. All of these things can help make gluten free pizza a healthier option than regular pizza, but it depends on what toppings and ingredients you choose.
Adding lots of cheese and processed meats on top can still result in an unhealthy meal. In general, it's best to choose leaner proteins and vegetables for your toppings if you want a truly healthy pizza. And of course, don't forget to enjoy your pizza in moderation!
How long does gluten free pizza dough last in the fridge
The short answer is usually 3-4 days. To store your gluten-free pizza dough properly, wrap it tightly in plastic wrap and place it in an airtight container before putting it in the fridge. If you’re not planning on using the dough within a few days, you can also freeze it for up to three months.
Can you eat gluten free pizza crust on keto?
Yes, you can eat gluten-free pizza crust on a keto diet. While regular pizza is typically high in carbs and not suitable for the low-carb lifestyle of the keto diet, there are some great options available for gluten-free and keto-friendly pizza dough recipes.
These include using almond flour or coconut flour as replacements for regular wheat flour. Alternatively, you can try a pizza crust made with cheese and egg as the main ingredients.
Whichever way you go, these gluten-free and keto-friendly options make it possible to enjoy pizza while still staying within the guidelines of your diet! Bon appetit!
Is gluten free pizza crust keto?
Yes, gluten free pizza crust can be keto friendly. However, it is important to check the label and make sure that the ingredients are low in carbs. Many store-bought options contain high amounts of sugar, so it's best to make your own using almond flour or coconut flour instead. Be sure to top your pizza with plenty of veggies, proteins, and healthy fats to make it a complete keto meal.
Is gluten free pizza crust low carb?
The answer to this depends on the ingredients used when making the pizza crust. Generally, gluten free pizza crusts are made with a combination of gluten-free flours such as rice or almond flour, arrowroot starch, psyllium husk powder and xanthan gum for binding. The carb count of these ingredients varies, so it's hard to say definitively whether or not a gluten free pizza crust is low carb.
However, if you're looking for a lower carbohydrate option, you may want to opt for a crust made with almond flour and arrowroot starch as these tend to be lower in carbs than the other ingredients. Also, be sure to check labels carefully as some gluten free pizza crusts may use additional ingredients that could increase the carb count.
Ultimately, it's best to consult your doctor or nutritionist to make sure a gluten free pizza crust is right for you and fits within your dietary needs.
Does gluten free pizza dough taste different?
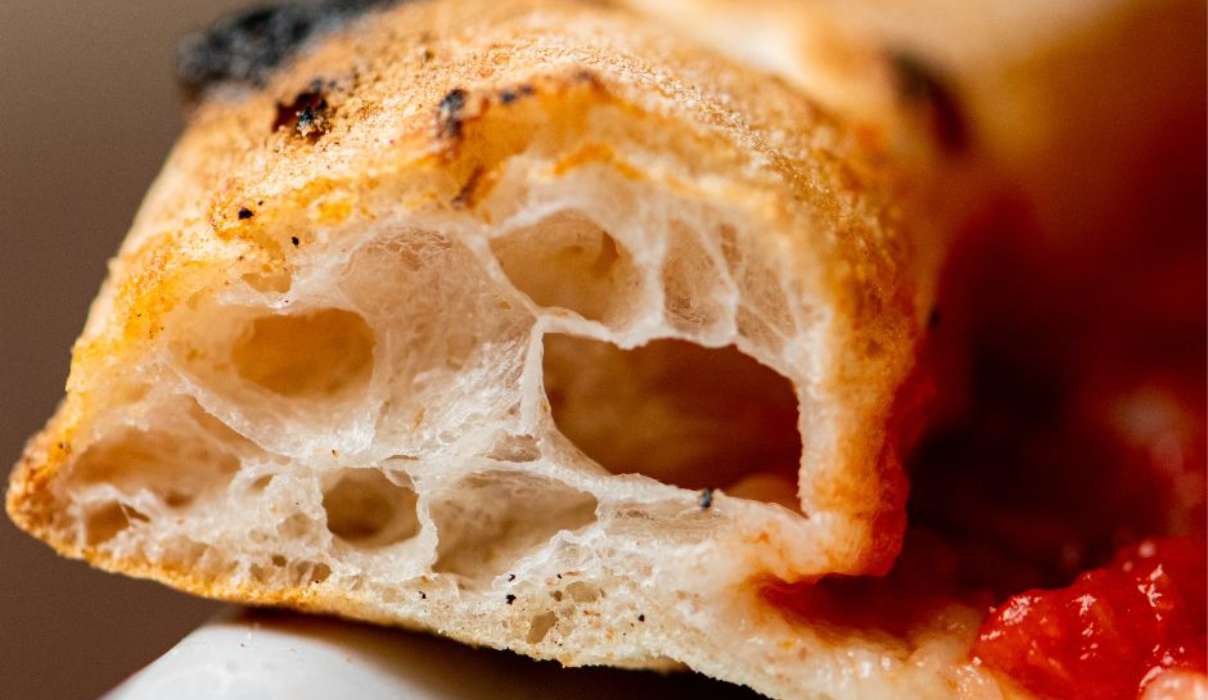
The short answer is yes, gluten free pizza dough does taste different than regular pizza dough. Because it doesn't have gluten, the texture of the dough can be slightly denser and chewier.
Additionally, depending on the type of ingredients used in the recipe for gluten free pizza dough, you may find that there's a slight difference in flavor. However, most people find that the differences between regular and gluten free pizza dough are subtle. With a few simple tweaks to your pizza-making techniques, you can easily create a delicious gluten free pizza!
Can you make pizza dough with gluten free flour?
Yes, you can definitely make pizza dough with gluten free flour! All you need to do is substitute the all-purpose flour in your favorite pizza dough recipe for a gluten-free alternative.
Common gluten-free flours that are great for making pizza dough include almond flour, buckwheat flour, and coconut flour. Depending on the type of flour you use, you may need to adjust the amount of liquid in the recipe. If your dough feels too dry, simply add a few more tablespoons of water or oil until it comes together.
Where to buy gluten free pizza dough
If you're looking for gluten free pizza dough, your best bet is to look online. There are several stores that specialize in gluten free ingredients and products, including dough. Your grocery store may also carry gluten free dough if you don't want to order online. Additionally, many local bakeries will provide custom orders of gluten free dough — so it's worth giving them a call or visiting their website to see what they can do for you.
5 Grocery stores that usually carry gluten free pizza dough
1. Whole Foods Market
2. Sprouts Farmers Market
3. Trader Joe's
4. Walmart
5. Kroger
Of course, it's always important to read the ingredient labels carefully and make sure that there are no traces of gluten before purchasing any product labeled as "gluten free."
20 Popular brands of gluten free dough
- Glutino - This is a favorite among gluten-free bakers, offering a range of flours and mixes for breads, cakes, and more.
- Bob's Red Mill - The vast majority of Bob's products are certified gluten free, so you can be sure whatever you get isn't contaminated with even trace amounts of gluten. Bob's red mill gluten free pizza crust is a popular pizza dough choice.
- King Arthur Gluten-Free - This brand has a great selection of flours and baking mixes, including the popular King Arthur Gluten-Free Pizza Crust Mix. Lots of home chefs make King Arthur gluten free pizza dough
- Enjoy Life Foods - Enjoy Life offers a variety of allergen-free and gluten-free products, from baking mixes to cookies, cakes and brownies.
- Pillsbury - This well-known baking brand offers a range of gluten-free mixes, including brownie mixes and ready-to-bake cookie doughs. Pillsbury gluten free pizza dough and crescent roll dough are also available. They have a special gluten-free section on their website that details all of their products and provides helpful information.
- Namaste Foods - Their products are 100% gluten free, as well as vegan and organic, making them ideal for those with dietary restrictions.
- Cup4Cup - They offer an impressive selection of baking mixes, from breads to cakes and pizza crusts. Plus, their products are certified gluten free by a third-party organization.
- Udi's Gluten Free - This company carries an array of gluten-free products, from pizza crusts to bagels and muffins.
- Jules Gluten Free - This brand is considered one of the leading experts in gluten-free baking, offering a variety of flours and mixes for breads, cakes and more.
- Schär - This company has an extensive line of gluten-free products, including breads, pastries and pizza crust. Plus, their products are certified gluten free.
- Wholly Gluten Free - This company specializes in gluten-free pizza dough and frozen crusts, along with other baking mixes like bread and cake. Wholly gluten free pizza dough and crusts are made with whole-grain ancient grains and other high-quality ingredients, so you can feel good about eating them. Plus, they're GMO-free and packed with nutrients.
- Aleia's Gluten Free Foods - This brand offers a wide range of gluten-free goodies, from breads and cakes to cookies and pizza crusts.
- Miss Roben's Gluten Free Bakery - Their products are certified gluten free, making them ideal for those on restricted diets. They offer a variety of baking mixes, from breads to pies and pizza dough.
- Canyon Bakehouse - This all-natural bakery offers a variety of gluten-free products, including rolls, flatbreads and pizza crusts.
- Bakery on Main - This company has an array of specialty baking mixes and products, such as granola and breads, as well as gluten-free pizza dough. Bakery on main gluten free pizza crust mix.
- Annie's Homegrown - The well-known brand offers a variety of gluten-free products, from mac 'n cheese to crescent rolls and pizza dough.
- BFree Foods - This company specialises in making gluten-free and vegan products, such as wraps, bagels, breads and pizza bases.
- Against the Grain Gourmet - They offer a range of frozen pizzas and baking mixes that are certified gluten free.
- Caputo Fioreglut - This Italian company offers a variety of gluten-free flours and baking mixes, from pizza doughs to cakes and breads. Caputo fioreglut gluten free flour is perfect for making your own gluten-free dough!
- Gluten Free Mama - This brand has a great selection of baking mixes, from pancakes and waffles to pizza crusts and bread. Plus, they use natural sweeteners like coconut sugar.
- Maninis - This dough is certified gluten-free, and it's also made without common allergens like dairy and soy. Their pre-made dough comes in a convenient resealable bag, making meal prep a breeze! With Manini's gluten free pizza dough, you can make restaurant-quality pizza without all the hassle.
No matter which brand you choose, there are plenty of options out there for gluten-free bakers! So if you're looking to bake something special without gluten, give some of these a try. You won't be disappointed!
What is gluten free pizza crust made of?
Gluten free pizza crust is usually made with a blend of gluten-free flours, such as rice flour, tapioca starch, and potato starch. It can also contain xanthan gum or guar gum to help hold it together and provide a chewy texture similar to traditional pizza crust.
Some recipes even include ground flaxseed or chia seeds for added nutrition and flavor. The type of flour and other ingredients used will vary depending on the recipe, so be sure to check the label for any potential allergens. Most gluten-free pizza crusts are vegan and dairy free as well.
A gluten-free crust doesn’t have to mean sacrificing an easy pizza dough recipe. Rather, you can try what the ladies at The Minimalist Baker did and simply substitute the wheat flour used in the dough for a gluten-free alternative. The end result might be a little more delicate than a traditional pizza crust, but this is made up for by the dough’s tendency to become perfectly crisp on the outside and tender, yet firm, in the middle.
The Gluten Free Palate advises something similar, recommending either a 1-to-1 gluten free flour mix, like the one offered by Bob’s Red Mill, or your own experimentation with rice-based flours and other alternatives. This recipe can even be made vegan with the replacement of the egg with flax egg, and cheese with dairy-free cheese or butter alternatives.
Try these options in your home pizza oven for either you or someone you love who’s on bad terms with gluten. After all, there’s no better way to feel better than with pizza; especially the kind you can eat!
]]>


 ]]>
]]>