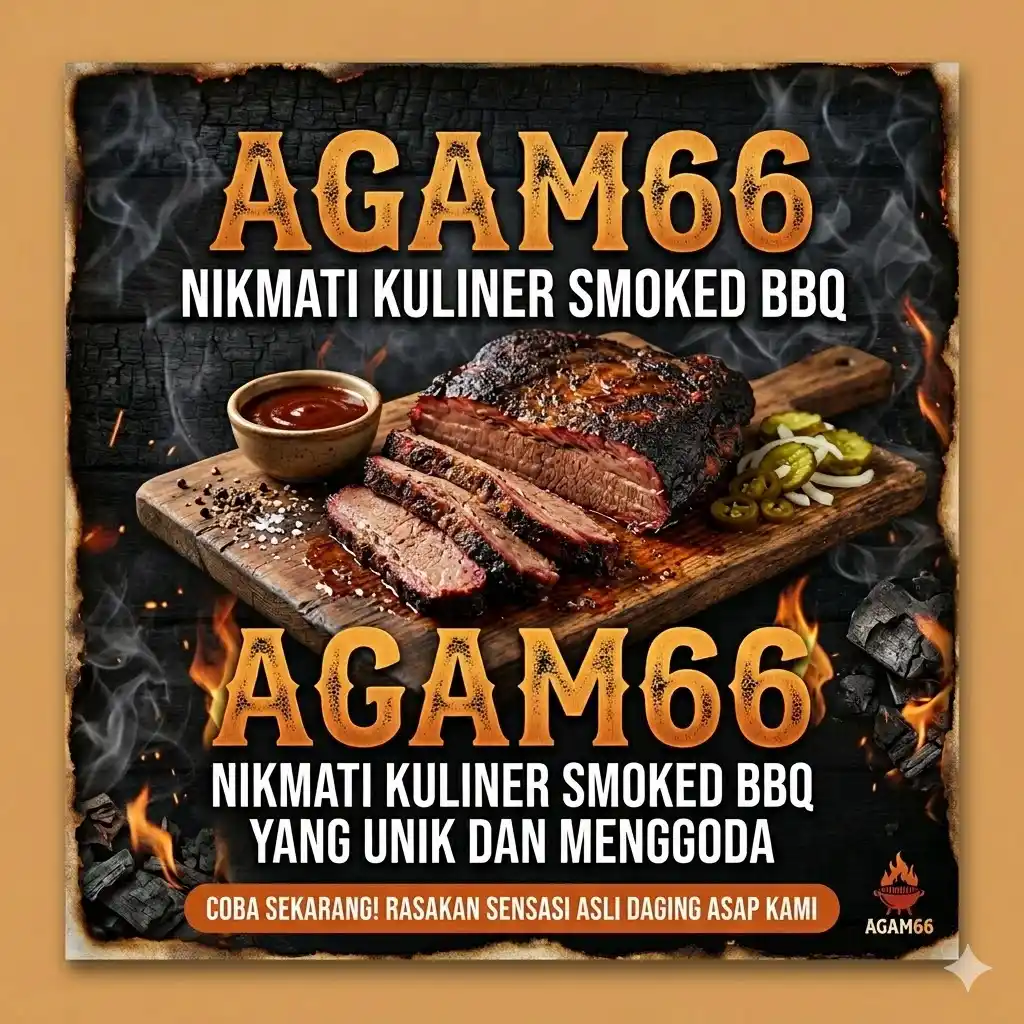
<?xml version="1.0" encoding="UTF-8"?>
<?xml-stylesheet type="text/xsl" media="screen" href="/~d/styles/rss2full.xsl"?><?xml-stylesheet type="text/css" media="screen" href="http://feeds.feedburner.com/~d/styles/itemcontent.css"?><rss xmlns:content="http://purl.org/rss/1.0/modules/content/" xmlns:wfw="http://wellformedweb.org/CommentAPI/" xmlns:dc="http://purl.org/dc/elements/1.1/" xmlns:atom="http://www.w3.org/2005/Atom" xmlns:sy="http://purl.org/rss/1.0/modules/syndication/" xmlns:slash="http://purl.org/rss/1.0/modules/slash/" version="2.0">

<channel>
	<title>Rags to Couture</title>
	
	<link>http://ragstocouture.com</link>
	<description>Ragstocouture.com - Fashion DIY Tutorials</description>
	<lastBuildDate>Sat, 18 May 2013 08:05:38 +0000</lastBuildDate>
	<language>en-US</language>
	<sy:updatePeriod>hourly</sy:updatePeriod>
	<sy:updateFrequency>1</sy:updateFrequency>
	<generator>http://wordpress.org/?v=3.5.1</generator>
		<atom10:link xmlns:atom10="http://www.w3.org/2005/Atom" rel="self" type="application/rss+xml" href="http://feeds.feedburner.com/RagsToCouture" /><feedburner:info xmlns:feedburner="http://rssnamespace.org/feedburner/ext/1.0" uri="ragstocouture" /><atom10:link xmlns:atom10="http://www.w3.org/2005/Atom" rel="hub" href="http://pubsubhubbub.appspot.com/" /><item>
		<title>Making Two Boxes out of One – DIY Tutorial</title>
		<link>http://ragstocouture.com/making-two-boxes-out-of-one-diy-tutorial/</link>
		<comments>http://ragstocouture.com/making-two-boxes-out-of-one-diy-tutorial/#comments</comments>
		<pubDate>Sat, 18 May 2013 08:05:38 +0000</pubDate>
		<dc:creator>admin</dc:creator>
				<category><![CDATA[DIY]]></category>
		<category><![CDATA[DIY - Home Decor]]></category>
		<category><![CDATA[Tutorials]]></category>
		<category><![CDATA[box drawer]]></category>
		<category><![CDATA[box drawers]]></category>
		<category><![CDATA[fabric boxes]]></category>
		<category><![CDATA[interior ideas paper boxes]]></category>
		<category><![CDATA[junk storage]]></category>
		<category><![CDATA[organizing diys]]></category>
		<category><![CDATA[storage tutorial diy]]></category>

		<guid isPermaLink="false">http://ragstocouture.com/?p=2241</guid>
		<description><![CDATA[I needed somewhere to hide all the junk that has been cluttering my desk. I decided to put this old paper box to use. I cut both the box and the lid in two. The lid will become the front &#8230; <a class="more-link" href="http://ragstocouture.com/making-two-boxes-out-of-one-diy-tutorial/">Continue reading <span class="meta-nav">&#8594;</span></a>]]></description>
				<content:encoded><![CDATA[<p><img class="aligncenter" alt="making two boxes out of one paper diy fabric drawers drawer junk box storage organizing" src="http://ragstocouture.com/wp-content/uploads/2013/05/bow-drawers-diy-using-one-box-two.jpg" /></p>
<p>I needed somewhere to hide all the junk that has been cluttering my desk. I decided to put this old paper box to use.<br />
<img class="aligncenter" alt="paper box diy cut in two to make two boxes" src="http://ragstocouture.com/wp-content/uploads/2013/05/remaking-paper-box-into-two-boxes.jpg" /></p>
<p>I cut both the box and the lid in two.<br />
<img class="aligncenter" alt="cut boxes in two" src="http://ragstocouture.com/wp-content/uploads/2013/05/cut-up-boxes.jpg" /></p>
<p>The lid will become the front pieces for these boxes.<br />
<img class="aligncenter" alt="lid as front of box" src="http://ragstocouture.com/wp-content/uploads/2013/05/boxes-with-lid-as-front.jpg" /></p>
<p>I removed the paper that was on the box (I added that some years ago, so this is the second time I am re-inventing this box&#8230;lol) to make it easier to work with.<br />
<img class="aligncenter" alt="box drawer on shelf" src="http://ragstocouture.com/wp-content/uploads/2013/05/box-on-shelf-before.jpg" /></p>
<p>Some cute fabric and glue was used to hide the ugly surface.<br />
<img class="aligncenter" alt="fabric glue supplies for box" src="http://ragstocouture.com/wp-content/uploads/2013/05/fabric-glue-pencil-supplies.jpg" /></p>
<p>The lid was attached to the front with a glue gun.<br />
<img class="aligncenter" alt="glue gunning the lid front" src="http://ragstocouture.com/wp-content/uploads/2013/05/glue-gun-attaching-front.jpg" /></p>
<p>All the crap that was spread out around my working space was hidden away in the boxes.<br />
<img class="aligncenter" alt="box drawers" src="http://ragstocouture.com/wp-content/uploads/2013/05/box-drawers-with-junk.jpg" /></p>
<p>The boxes where put up on a shelf.<br />
<img class="aligncenter" alt="box drawers on shelf" src="http://ragstocouture.com/wp-content/uploads/2013/05/box-drawers-on-shelf.jpg" /></p>
<p>I also added a handle to them using a white suede leather cord. Very easy to do. Punch some holes in the front, use three starnds of cord, braid, and tie a knot at each end of the handles.<br />
<img class="aligncenter" alt="handle tie knots" src="http://ragstocouture.com/wp-content/uploads/2013/05/bow-drawers-diy-using-one-box-two.jpg" /></p>
<p><img class="aligncenter" alt="box drawers lid front knots back braid handle" src="http://ragstocouture.com/wp-content/uploads/2013/05/knots-boxes-drawres.jpg" /></p>
]]></content:encoded>
			<wfw:commentRss>http://ragstocouture.com/making-two-boxes-out-of-one-diy-tutorial/feed/</wfw:commentRss>
		<slash:comments>2</slash:comments>
		</item>
		<item>
		<title>19th Century Chair Restoration DIY – Part 3 – Finally DONE!</title>
		<link>http://ragstocouture.com/19th-century-chair-restoration-diy-part-3-finally-done/</link>
		<comments>http://ragstocouture.com/19th-century-chair-restoration-diy-part-3-finally-done/#comments</comments>
		<pubDate>Sun, 12 May 2013 20:49:07 +0000</pubDate>
		<dc:creator>admin</dc:creator>
				<category><![CDATA[Antiques]]></category>
		<category><![CDATA[DIY]]></category>
		<category><![CDATA[DIY - Home Decor]]></category>
		<category><![CDATA[Tutorials]]></category>
		<category><![CDATA[19th century rococo revival style]]></category>
		<category><![CDATA[antique chair renovation diy]]></category>
		<category><![CDATA[black chair roses seating]]></category>
		<category><![CDATA[seating upholstery]]></category>
		<category><![CDATA[upholstery old rococo chair]]></category>

		<guid isPermaLink="false">http://ragstocouture.com/?p=2208</guid>
		<description><![CDATA[Check out Part 1 and Part 2. If you saw my latest post on this chair you probably noticed that I changed my mind about the fabric. Instead of the velvet I decided to go with last time I found &#8230; <a class="more-link" href="http://ragstocouture.com/19th-century-chair-restoration-diy-part-3-finally-done/">Continue reading <span class="meta-nav">&#8594;</span></a>]]></description>
				<content:encoded><![CDATA[<p><img class="aligncenter" alt="19th cenury chair restoration upholstery renovation diy black rococo " src="http://ragstocouture.com/wp-content/uploads/2013/05/19th-century-rococo-chair-remake-upholstery-renovation-diy.jpg" /></p>
<p>Check out <a title="Chair Restoration Part 1" href="http://ragstocouture.com/19th-century-chair-restoration-diy-part-1/" target="_blank">Part 1</a> and <a title="Chair Restoration Part 2" href="http://ragstocouture.com/19th-century-chair-restoration-diy-part-2/" target="_blank">Part 2</a>.</p>
<p>If you saw my latest post on this chair you probably noticed that I changed my mind about the fabric. Instead of the velvet I decided to go with last time I found a much better fabric a few weeks ago. It is a upholstery fabric and it looks much better that the previous fabric!</p>
<p>I also found a great ribbon for the chair. This is how I attached it.</p>
<p><img class="aligncenter" alt="ribbon chair 19th century upholstery restoration" src="http://ragstocouture.com/wp-content/uploads/2013/05/ribbon-for-chair-upholstery-renovation-new-fabric.jpg" /></p>
<p>I knew using glue for this was out of the question. I am actually not sure, but I think most ribbons on chairs like this one are attached with small nails. The problem with that is that you do not want the nails to be visible.</p>
<p>I managed to make the nails invisible by sneaking them in from the sides and hide them within the ribbon.<br />
<img class="aligncenter" alt="nails from the sides " src="http://ragstocouture.com/wp-content/uploads/2013/05/ribbon-for-chair-nailing-nails.jpg" /></p>
<p>Do you see the little nail in there somewhere? I hope not.<br />
<img class="aligncenter" alt="nails hidden under ribbon invisible nails" src="http://ragstocouture.com/wp-content/uploads/2013/05/nails-hidden-under-ribbon.jpg" /></p>
<p>The hardest part to get the ribbon around is the base of the chair&#8217;s back. Again, I am not sure how this is done correctly, but I solved it by folding the ribbon and sewing a few stitches.<br />
<img class="aligncenter" alt="back part chair restoration" src="http://ragstocouture.com/wp-content/uploads/2013/05/back-part.jpg" /></p>
<p><img class="aligncenter" alt="back part 2" src="http://ragstocouture.com/wp-content/uploads/2013/05/back-part-1.jpg" /></p>
<p><img class="aligncenter" alt="back4" src="http://ragstocouture.com/wp-content/uploads/2013/05/back-part3.jpg" /></p>
<p><img class="aligncenter" alt="19th century rococo chair rhow to restore diy new seating" src="http://ragstocouture.com/wp-content/uploads/2013/05/sewing-chair.jpg" /></p>
<p><img class="aligncenter" alt="new upholstery restoration rococo vintage antique " src="http://ragstocouture.com/wp-content/uploads/2013/05/chair-back.jpg" /></p>
<p>Very happy with the result!<br />
<img class="aligncenter" alt="chair rococo upholstery renovation fabric diy antique" src="http://ragstocouture.com/wp-content/uploads/2013/05/chair-done.jpg" /></p>
<p><img class="aligncenter" alt="rococo antiques renovation tutorial" src="http://ragstocouture.com/wp-content/uploads/2013/05/chair-done-restoration-upholstery-stol-renovering.jpg" /></p>
<p><img class="aligncenter" alt="antique hair old renovation" src="http://ragstocouture.com/wp-content/uploads/2013/05/chair-upholstert-rococo-antique-renovation-diy.jpg" /></p>
<p><img class="aligncenter" alt="old chair new fabric seating cushion" src="http://ragstocouture.com/wp-content/uploads/2013/05/chair-done2.jpg" /></p>
<p>&nbsp;</p>
]]></content:encoded>
			<wfw:commentRss>http://ragstocouture.com/19th-century-chair-restoration-diy-part-3-finally-done/feed/</wfw:commentRss>
		<slash:comments>0</slash:comments>
		</item>
		<item>
		<title>How to Clean and Condition Old Leather – DIY Tutorial</title>
		<link>http://ragstocouture.com/how-to-clean-and-condition-old-leather-diy-tutorial/</link>
		<comments>http://ragstocouture.com/how-to-clean-and-condition-old-leather-diy-tutorial/#comments</comments>
		<pubDate>Sun, 05 May 2013 10:44:08 +0000</pubDate>
		<dc:creator>admin</dc:creator>
				<category><![CDATA[DIY]]></category>
		<category><![CDATA[DIY - Shoes & Accessories]]></category>
		<category><![CDATA[Tutorials]]></category>
		<category><![CDATA[cleaning leather at home]]></category>
		<category><![CDATA[cleaning leather diy tutorial how to guide pictures]]></category>
		<category><![CDATA[cleaning with pine oil soap]]></category>
		<category><![CDATA[conditioning leather with mink oil]]></category>
		<category><![CDATA[how to clean leather]]></category>
		<category><![CDATA[tvätta rengöra läder med såpa]]></category>
		<category><![CDATA[using soap on leather]]></category>

		<guid isPermaLink="false">http://ragstocouture.com/?p=2168</guid>
		<description><![CDATA[As if I didn&#8217;t have enough old leather jackets to repurpose already, my aunt donated hers a few weeks ago. It had a very heavy brown leather and it was not in a great condition. Before I could use it &#8230; <a class="more-link" href="http://ragstocouture.com/how-to-clean-and-condition-old-leather-diy-tutorial/">Continue reading <span class="meta-nav">&#8594;</span></a>]]></description>
				<content:encoded><![CDATA[<p><img class="aligncenter" alt="how to clean and condition leather" src="http://ragstocouture.com/wp-content/uploads/2013/05/how-to-clean-leather-diy-tips-tutorial-easy.jpg" /></p>
<p>As if I didn&#8217;t have enough old leather jackets to repurpose already, my aunt donated hers a few weeks ago. It had a very heavy brown leather and it was not in a great condition. Before I could use it to make something new, the leather had to be cleaned and conditioned.</p>
<p>I used soap, mink oil and neutral shoe shine/polish (colored shoe shine could get onto my clothes if some residue is left when the leather has been turned into a bag).</p>
<p><img class="aligncenter" alt="sponge swedisg grumme såpa läder rengöra clean leather with soap glycerin pine oil" src="http://ragstocouture.com/wp-content/uploads/2013/05/soap-and-sponge-cleaning-leather.jpg" /></p>
<p>To get the leather nice and clean I used a sponge and a few drops of <a title="Green Floor Soap" href="http://www.ocado.com/webshop/product/Grumme-Gron-Sapa--Liquid-Green-Floor-Soap/79232011" target="_blank">Swedish pine soap</a> diluted in water. If you are anywhere else but in Scandinavia you will probably not have access to this soap, but regular glycerine soap will work just as great! Try not to use a soap that will make the leather dry, go for soaps that are oil based.</p>
<p>Gently clean the surface with the sponge.<br />
<img class="aligncenter" alt="clean leather with sponge" src="http://ragstocouture.com/wp-content/uploads/2013/05/soap-to-clean-leather-with-sponge.jpg" /></p>
<p>After you are done cleaning, wipe off the surface with a cotton rag. I used an old worn out t-shirt, hah!<br />
<img class="aligncenter" alt="wipe off water with cotton rag" src="http://ragstocouture.com/wp-content/uploads/2013/05/wipe-off-water-soap.jpg" /></p>
<p>Let the leather dry. Then apply mink oil. I had to use quite a lot of it, mostly because the leather was SO dried up, but also because my mink oil is probably over 20 years old and kind of dried up too&#8230; It still works, even though it could be considered to be&#8230; uhm. Vintage.<br />
<img class="aligncenter" alt="mink oil on leather" src="http://ragstocouture.com/wp-content/uploads/2013/05/mink-oil.jpg" /></p>
<p>Let the leather soak up the mink oil. I left mine over night. In the morning the oil had dried up and there was almost nothing left to wipe off.<br />
<img class="aligncenter" alt="wipe off mink oil" src="http://ragstocouture.com/wp-content/uploads/2013/05/wipe-off-mink-oil.jpg" /></p>
<p>But I did anyway, and so should you. Get that cotton rag again and wipe off the leather until you have a surface that is non-sticky and smooth.</p>
<p>After the mink oil I like to use a polish to get some shine. This is not really necessary, but I think it makes the leather come alive again and brings out the color more. It makes the leather look new.</p>
<p>Apply the shoe shine and let it dry.<br />
<img class="aligncenter" alt="neutral shoe shine on leather" src="http://ragstocouture.com/wp-content/uploads/2013/05/shoe-polish-shine-how-to-clean-leather.jpg" /></p>
<p>Polish it up until you have a nice shine.<br />
<img class="aligncenter" alt="polish shine leather" src="http://ragstocouture.com/wp-content/uploads/2013/05/polishing-leather.jpg" /></p>
<p>&#8230; And be amazed at the result!</p>
<p>The end.</p>
]]></content:encoded>
			<wfw:commentRss>http://ragstocouture.com/how-to-clean-and-condition-old-leather-diy-tutorial/feed/</wfw:commentRss>
		<slash:comments>0</slash:comments>
		</item>
		<item>
		<title>I made another Drawstring Bag and it was Terrible – DIY</title>
		<link>http://ragstocouture.com/i-made-another-drawstring-bag-and-it-was-terrible-diy/</link>
		<comments>http://ragstocouture.com/i-made-another-drawstring-bag-and-it-was-terrible-diy/#comments</comments>
		<pubDate>Sun, 28 Apr 2013 15:46:20 +0000</pubDate>
		<dc:creator>admin</dc:creator>
				<category><![CDATA[DIY]]></category>
		<category><![CDATA[DIY - Shoes & Accessories]]></category>
		<category><![CDATA[Tutorials]]></category>
		<category><![CDATA[blue suede]]></category>
		<category><![CDATA[bohemian bag diy sholder bag bucket bag]]></category>
		<category><![CDATA[leather drawstring bag multicolored tassels fringe]]></category>
		<category><![CDATA[leather remake repurposed upcycle old jacket]]></category>
		<category><![CDATA[slouchy bag diy]]></category>

		<guid isPermaLink="false">http://ragstocouture.com/?p=2147</guid>
		<description><![CDATA[Terrible because my sewing machine decided to stop working on leather and I had to sew the entire thing by hand :C So, now you know why I did not update last week. The blue suede is from an old &#8230; <a class="more-link" href="http://ragstocouture.com/i-made-another-drawstring-bag-and-it-was-terrible-diy/">Continue reading <span class="meta-nav">&#8594;</span></a>]]></description>
				<content:encoded><![CDATA[<p><img class="aligncenter" alt="multi color fringe blue drawstring bag in suede leather" src="http://ragstocouture.com/wp-content/uploads/2013/04/blue-suede-drawstring-bag-multicolor-tassel-fringe-diy.jpg" /></p>
<p>Terrible because my sewing machine decided to stop working on leather and I had to sew the entire thing by hand :C So, now you know why I did not update last week.</p>
<p>The blue suede is from an old jacket (of course ;)) and the multi colored suede cords are from <a title="endlessleather.com" href="http://www.endlessleather.com/" target="_blank">endlesssleather.com</a>. I also used my hole punch.</p>
<p><img class="aligncenter" alt="supplies" src="http://ragstocouture.com/wp-content/uploads/2013/04/suede-cords-for-fringe-bag.jpg" /></p>
<p>As usual I used A4 paper as a pattern (I did add some extra cm for the fold at the top).</p>
<p><img class="aligncenter" alt="suede blue bag drawstrng diy tutorial" src="http://ragstocouture.com/wp-content/uploads/2013/04/blue-suede-drawstring-bag-multicolored-fringe.jpg" /></p>
<p>Like the<a title="Leather Drawstring Bag DIY" href="http://ragstocouture.com/leather-drawstring-bag-diy-tutorial/" target="_blank"> black drawstring bag</a> I did some weeks ago I had to use two smaller pieces for the bag&#8217;s front and back.</p>
<p>I used the same stitch as <a title="How to Hand-Sew Buttonholes" href="http://www.craftstylish.com/item/42556/how-to-hand-sew-a-buttonhole/page/all" target="_blank">this tutorial on hand sewn buttonsholes</a> use. The fringes I added made the bag sturdy enough even though I couldn&#8217;t use my machine to sew it.</p>
<p><img class="aligncenter" alt="hand sewn seam" src="http://ragstocouture.com/wp-content/uploads/2013/04/blue-suede-drawstring-bag-seam.jpg" /></p>
<p><img class="aligncenter" alt="hole punch" src="http://ragstocouture.com/wp-content/uploads/2013/04/suede-fringe-bag-holepuncher.jpg" /></p>
<p><img class="aligncenter" alt="adding fringe" src="http://ragstocouture.com/wp-content/uploads/2013/04/fringessuede.jpg" /></p>
<p><img class="aligncenter" alt="tassel fringe on bag suede leather draw string" src="http://ragstocouture.com/wp-content/uploads/2013/04/blue-drawstring-bag-with-tassels-diy-suede-leather.jpg" /></p>
<p>After folding down the top I cut out holes for the drawstring and stitched them.<br />
<img class="aligncenter" alt="holes fro drawstring" src="http://ragstocouture.com/wp-content/uploads/2013/04/drawstring-holes-bag.jpg" /></p>
<p><img class="aligncenter" alt="drawstring in action" src="http://ragstocouture.com/wp-content/uploads/2013/04/suede-drawstring-bag-fringe-strings-dr.jpg" /></p>
<p>Sewing the shoulder strap and attaching it to the bag was the hardest to do by hand. But it worked out fine in the end.</p>
<p><img class="aligncenter" alt="strap front" src="http://ragstocouture.com/wp-content/uploads/2013/04/sholder-strap-front.jpg" /></p>
<p><img class="aligncenter" alt="back" src="http://ragstocouture.com/wp-content/uploads/2013/04/sholder-strap-back.jpg" /></p>
<p><img class="aligncenter" alt="handle" src="http://ragstocouture.com/wp-content/uploads/2013/04/leatherstrapshandle.jpg" /></p>
<p>I have more leather bag projects planned, I bought a new leather needle for my machine yesterday. I hope that solves my problems&#8230;</p>
<p><img alt="tassel fringe leather cords" src="http://ragstocouture.com/wp-content/uploads/2013/04/suade-bag-tassel-fringe-trim-diy.jpg" /></p>
]]></content:encoded>
			<wfw:commentRss>http://ragstocouture.com/i-made-another-drawstring-bag-and-it-was-terrible-diy/feed/</wfw:commentRss>
		<slash:comments>2</slash:comments>
		</item>
		<item>
		<title>Hot Up a Top with Lace Trims – Remake DIY</title>
		<link>http://ragstocouture.com/hot-up-a-top-with-lace-trims-remake-diy/</link>
		<comments>http://ragstocouture.com/hot-up-a-top-with-lace-trims-remake-diy/#comments</comments>
		<pubDate>Sun, 14 Apr 2013 12:26:26 +0000</pubDate>
		<dc:creator>admin</dc:creator>
				<category><![CDATA[DIY]]></category>
		<category><![CDATA[DIY - Clothing]]></category>
		<category><![CDATA[Links]]></category>
		<category><![CDATA[Pop Culture]]></category>
		<category><![CDATA[blue denim and gold]]></category>
		<category><![CDATA[dress to top remake]]></category>
		<category><![CDATA[goldem trim sequined]]></category>
		<category><![CDATA[lace collar]]></category>
		<category><![CDATA[lace trim]]></category>
		<category><![CDATA[remakeing top upycle clothes]]></category>
		<category><![CDATA[top blouse diy]]></category>

		<guid isPermaLink="false">http://ragstocouture.com/?p=2124</guid>
		<description><![CDATA[I decided to cut off this miserable dress and make it into a top. I cut it off at the hem and cut off the sleeves to make them normal &#8211; I am SO tired of gathered/scrunched up sleeves! Ugh. &#8230; <a class="more-link" href="http://ragstocouture.com/hot-up-a-top-with-lace-trims-remake-diy/">Continue reading <span class="meta-nav">&#8594;</span></a>]]></description>
				<content:encoded><![CDATA[<p><img class="aligncenter" alt="remaking dress into top diy lace trim collar golden denim" src="http://ragstocouture.com/wp-content/uploads/2013/04/remake-upcycle-denim-dress-to-top-lace-ribbon-trim-golden-collar.jpg" /></p>
<p>I decided to cut off this miserable dress and make it into a top.</p>
<p><img class="aligncenter" alt="dress before remake" src="http://ragstocouture.com/wp-content/uploads/2013/04/before-remake-denim-drawstring-waist-dress.jpg" /></p>
<p>I cut it off at the hem and cut off the sleeves to make them normal &#8211; I am SO tired of gathered/scrunched up sleeves! Ugh. I also removed the drawstring waist and instead used a piece from the cut off as a sewn on belt. I added one of the left over buttons at the waist, that part easily opened up after I gathered the top at the waist.</p>
<p>To spice things up with I also added two gold trims from <a href="http://www.wholeport.com/" title="Wholeport.com" target="_blank">Wholeport.com</a>. The gold looks great with the blue denim!</p>
<p><img class="aligncenter" alt="whole port golden lace trim shop crafting supplies" src="http://ragstocouture.com/wp-content/uploads/2013/04/golden-trim-lace-wholeport-supplies-seller-shop.jpg" /></p>
<p><img class="aligncenter" alt="denim top with gold lace trim" src="http://ragstocouture.com/wp-content/uploads/2013/04/gold-lace-collar-on-denim-top-diy.jpg" /></p>
<p><img class="aligncenter" alt="golden lace trim top jean blue denim gold" src="http://ragstocouture.com/wp-content/uploads/2013/04/gold-lace-collar-sequins-on-denim-blouse-re-make-dress-upcycle.jpg" /></p>
<p><img class="aligncenter" alt="gathered waist jean denim top blouse" src="http://ragstocouture.com/wp-content/uploads/2013/04/top-remake-jean-denim-gold-lace-trim-sequins.jpg" /></p>
<p><img class="aligncenter" alt="gold sequin trim detail close up wholeport" src="http://ragstocouture.com/wp-content/uploads/2013/04/ho-tup-top-with-lace.jpg" /></p>
<p><img class="aligncenter" alt="denim blue top spring summer chic fashion blog rags to couture diy tutorials" src="http://ragstocouture.com/wp-content/uploads/2013/04/lace-golden-trim-sequins-top-collar-blouse-denim-blue-gold.jpg" /></p>
<p style="text-align: right;"><em>Please note: This post features sponsored material.</em></p>
]]></content:encoded>
			<wfw:commentRss>http://ragstocouture.com/hot-up-a-top-with-lace-trims-remake-diy/feed/</wfw:commentRss>
		<slash:comments>0</slash:comments>
		</item>
	</channel>
</rss>
