SVALT product design begins with an understanding of a laptop’s built-in cooling system, and then moves into researching and testing the best way to optimize the laptop’s cooling system while adding supplemental cooling to increase the laptop’s total cooling capacity, reduce heat degradation, and boost performance potential. Use this page to learn about your laptop’s built-in cooling system and to select a SVALT product optimized for your laptop from the following list:
MacBook Pro
MacBook Air
MacBook Neo
MacBook
PC Laptops
Cooling System Fundamentals
Heat Generation
Computers generate work through processors. The more work they do, the more power they pull, and the more power that goes through the system, then the more heat is generated. Processors generate so much heat that temperatures can rise to the point of causing errors, reducing hardware durability and can even lead to immediate hardware failure.
To avoid frying the computer, a built-in cooling system attempts to remove a portion of the heat that could cause hardware damage. However, when the cooling system is not sufficiently sized, as is often the case for laptops and compact desktops, then processing power is throttled. Throttling helps to protect hardware, but it also has the undesirable result of slowing performance. If not already familiar with throttling, then you can learn more on the Throttling page.
While processors (CPUs and GPUs) are the primary heat generating components within a laptop, essentially all electrical components generate some heat. The computer’s internal power supply and batteries can also generate significant heat when being charged or when being rapidly discharged.
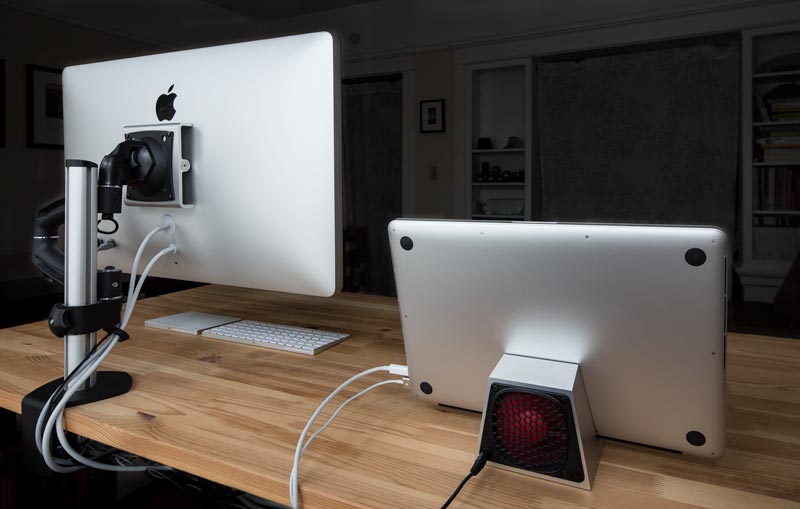
As with most laptops, Apple laptops use a built-in cooling system to remove internal heat. These cooling systems consists of the following components that will be reviewed in greater detail in subsequent sections: 1) an external aluminum enclosure heatsink, and 2) an air cooling system that includes one or more processor heatsink, heat pipe, heat radiator fan, cool air intake vent and hot air exhaust vent.
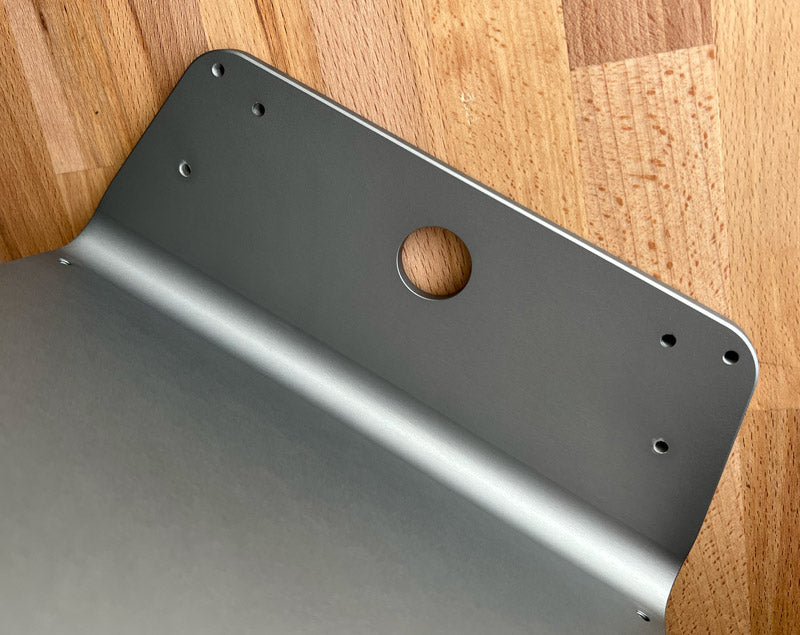
Aluminum Enclosure
The first production Mac laptop with a metal enclosure was released in 2001, and by 2006 all Mac laptops began to use an anodized aluminum metal enclosure. Using metal instead of plastic allows the enclosure to act as the device’s structure onto which mechanical and electronic components mount. This helps create a structure that is light, strong and rigid, as well as creating a durable and beautifully finished surface. Using aluminum for the enclosure also allows it to act as a heatsink, absorbing heat from internal heat generating components through direct physical contact (conduction), heat waves (radiation) and hot air (convection). This means that the aluminum enclosure is an important component in the laptop’s built-in cooling system, with it playing a more significant role as the laptop size increases.
For more effective cooling of the enclosure, it should be open and exposed to cooling airflow, or should be connected to an external heatsink to pull heat away from the laptop. Running the laptop with the screen closed in clamshell mode can trap heat, resulting in a greater need for supplemental cooling.
Using laptop covers, cases, skins or wraps can also negatively impact cooling performance as they are typically made of insulating materials that will prevent heat from escaping. So while laptop covers and cases may serve their purpose of decorating and protecting surfaces, it’s good to be aware of the disadvantages so that a user can determine what best serves their needs.
Air Cooling
Laptop built-in air cooling systems include one or more processor heatsink, heat pipe, heat radiator, fan, cool air intake vent and hot air exhaust vent. Heat is transferred from the processor to the heatsink, which then transfers heat to the heat pipe, which then transfers heat to the radiators through which the fan blows air that extracts heat from the radiator’s large surface area and finally expels it out of the laptop. The laptop’s internal fans pull cooling air through intake vents, and depending on that laptop, the cooling air path can help to directly cool components as the cool air is pulled into the fan. The processors, heatsink, pipe and radiator are typically the areas with a laptop that have the highest temperatures. All of these components are located towards the back edge of the laptop, and are approximately centered at the upper section of the keyboard.
Keeping the laptop intake vents open with access to fresh and cool air helps with cooling performance, while keeping the exhaust vents free of obstructions is essential for maintaining proper laptop function. Restricting hot air exhaust vents can quickly lead to higher temperatures, and sever restrictions of blocking the vents could result in hardware damage. Even placing an external fan that pulls heat from the laptop can cause damage if the fan is not pulling more exhaust air than would normally be discharged by the laptop’s internal fan.
SVALT = Cool By Design
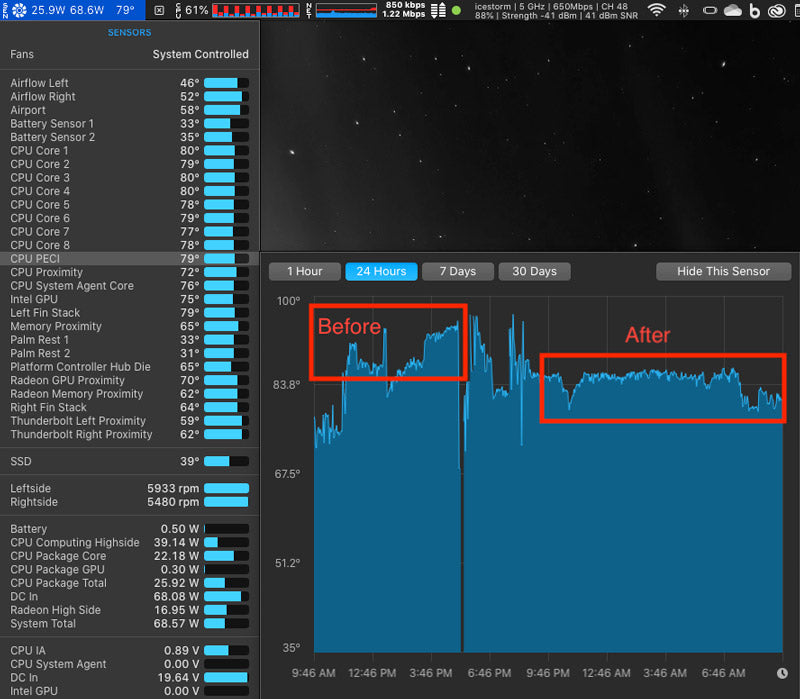
Performance is fundamentally limited by the computer’s ability to remove heat, and because laptops typically have less powerful cooling systems, then supplemental cooling is often required to help manage heat. This is why SVALT products use innovative designs in which every inch and every detail has been obsessively researched, tested, engineered and designed to the extreme to help quiet screaming fans, help increase the laptop’s cooling capacity, help reduce processor throttling, and help regain peak performance potential.
SVALT products are designed to work with passive airflows to naturally and silently cool the laptop’s enclosure and support the laptop’s built-in cooling system. SVALT products raise up the laptop and separate the laptop’s hot exhaust air from the center intake vent, which improves the laptop cooling even without supplemental cooling enabled. For the most effective cooling, SVALT products focus supplemental cooling where it is needed the most, at the processor location. SVALT supplement cooling is designed to be both powerful and quiet, and is provided through a variety of methods, such as a thermally conductive heatsink (heatsink models), passive and active airflow (all models), and direct internal processor cooling (multiple models when used with compatible laptops).
Back to top
MacBook Pro 16-inch M1, M2, M3, M4 and M5 Pro / Max (Apple Silicon) 2021-2026+

Laptop Description
The 2021+ MacBook Pro is Apple’s next generation Apple Silicon laptop. It includes two cool air intake vents located on each side, as well as the return of the pre-2016 model’s central cool air intake vent located along the back screen hinge for direct processor cooling. Vents located on both ends of the back screen hinge exhaust hot air from the two internal fans. With the screen open, duplicate vents on the top of the screen hinge allow for additional hot exhaust airflow. The vents on the 16-inch are longer than the 14-inch. The 16-inch has two large internal cooling fans that are larger than the 14-inch, as well as larger than the prior 16-inch Intel laptop. The M Max has a larger processor and a larger heatsink than the M Pro.
Laptop Analysis
The 16-inch laptops are effectively desktop replacement computers, and this is especially true with the M Max processor models. Apple increased the thickness of the 2021 MacBook Pros, which allowed for a larger cooling system, increased cooling capacity, and for the laptops to run cooler and quieter when handling most normal tasks. However, when tackling sustained heavy workloads, internal temperatures can climb and internal fans can spin up to higher speeds in an effort to remove heat and avoid performance throttling. This is especially so with High Power Mode, which depends on cooler laptop temperatures to more readily sustain the higher performance capabilities.
Laptop with Mx Modular Heatsink Cooling System

 2021+ 16-inch MacBook Pro w/ MxD

 2021+ 16-inch MacBook Pro w/ MxS-hi

 2021+ 16-inch MacBook Pro w/ MxS-lo

MxSW2-hi / MxSW-hi
Cooling Stand from $389
MxSW2-lo / MxSW-lo / MxS-lo
Cooling Stand from $379
MxDW2 / MxDW
Cooling Dock from $379
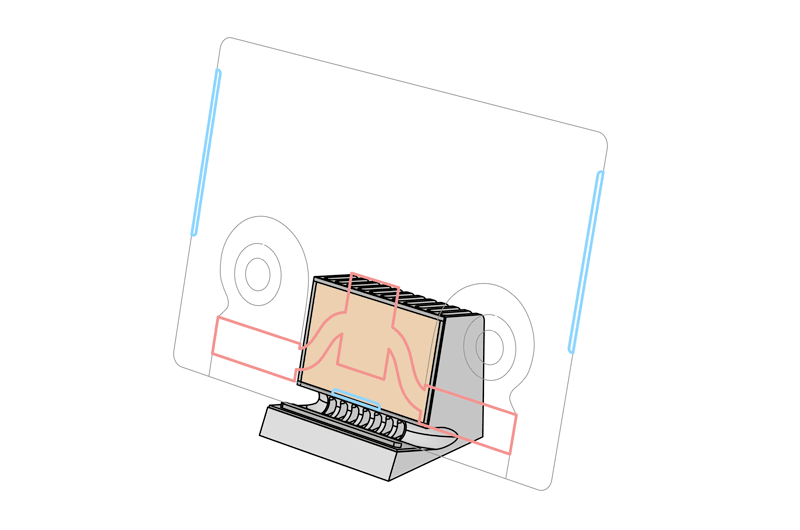
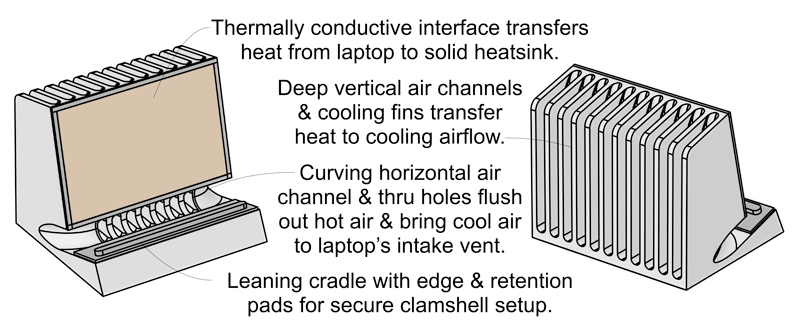
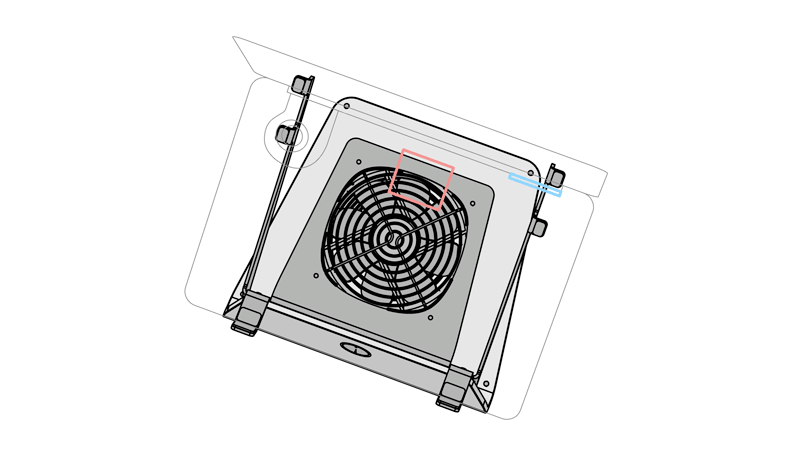
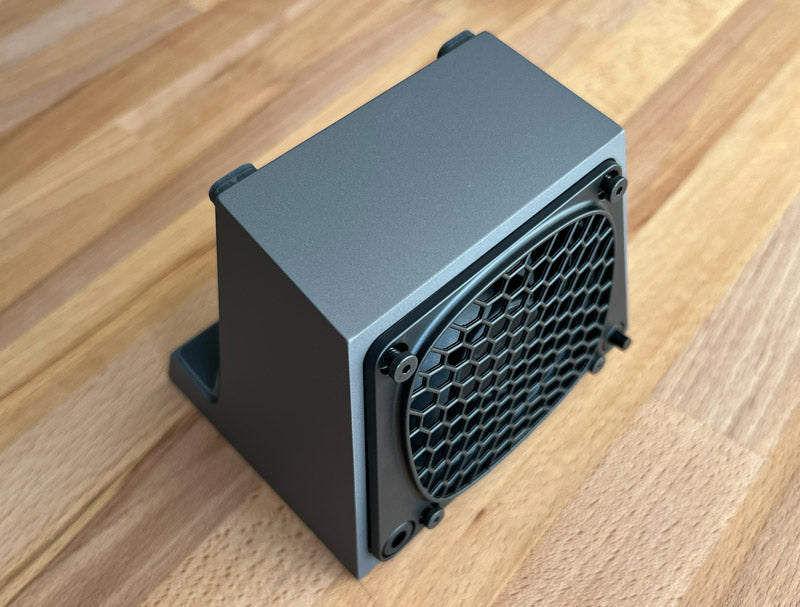
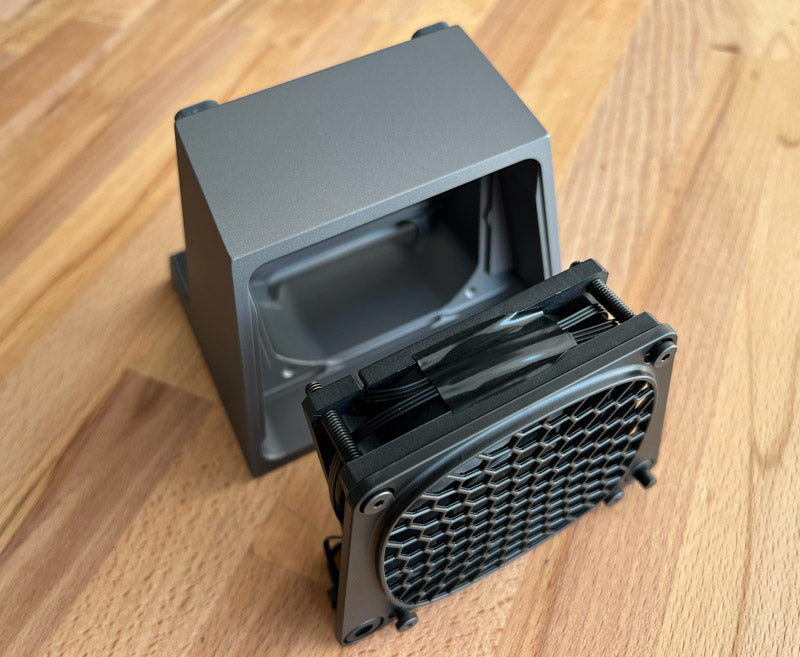
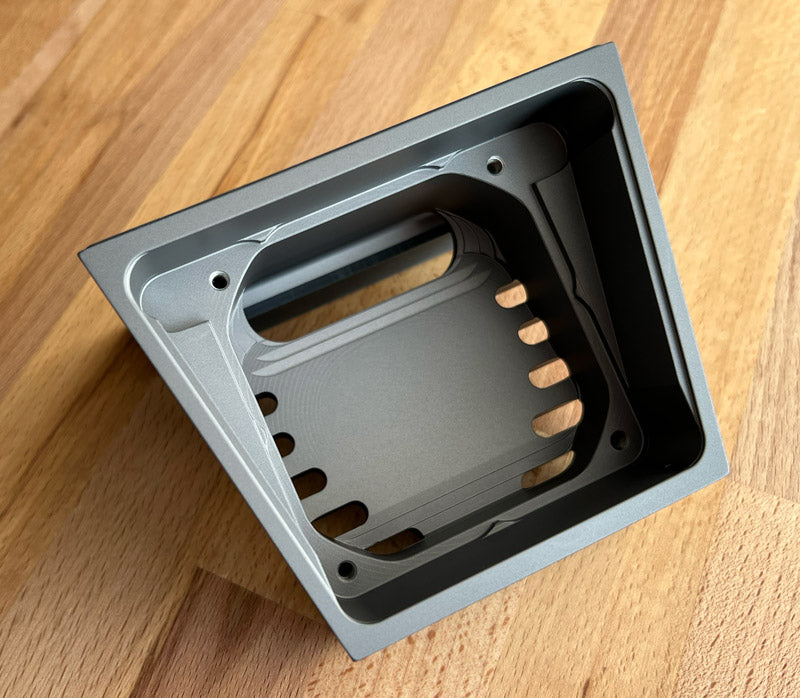
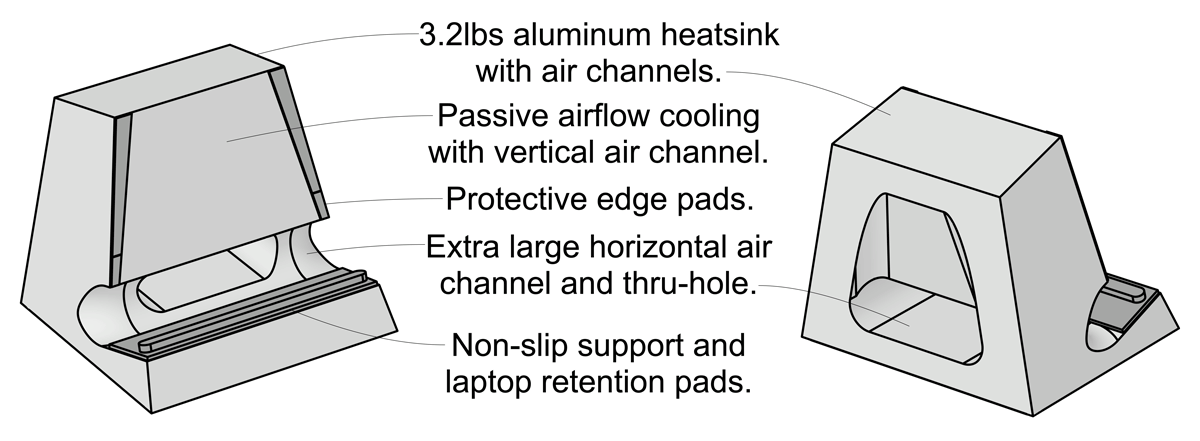
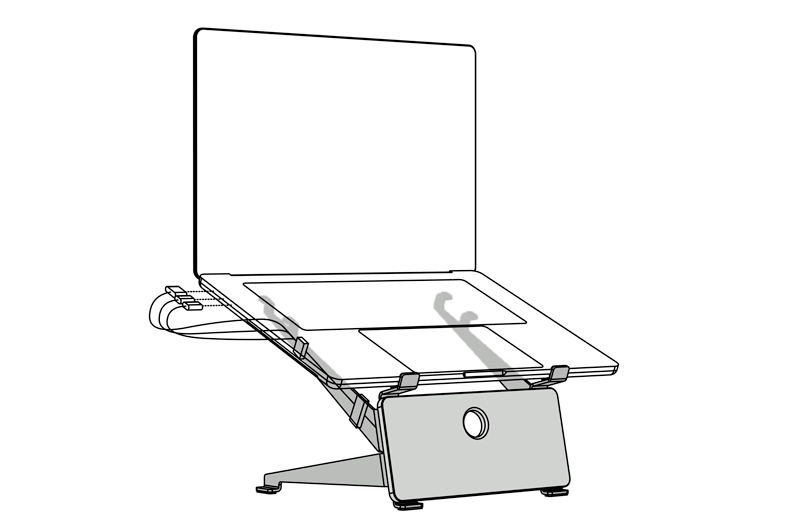
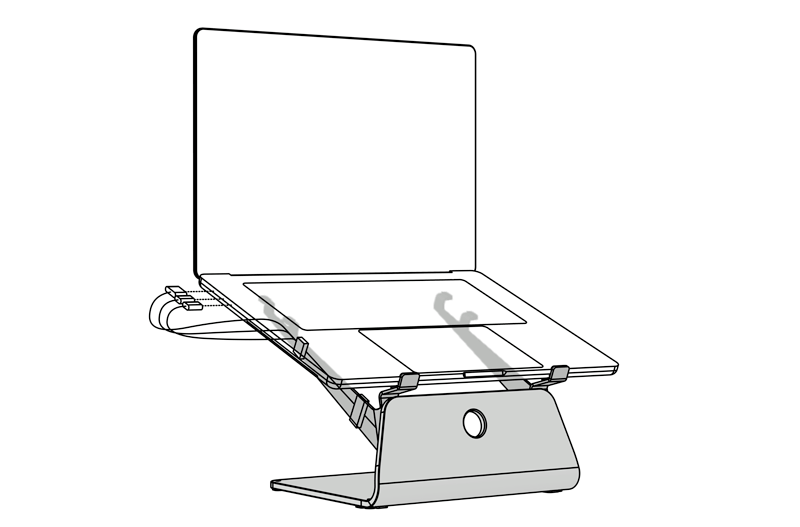
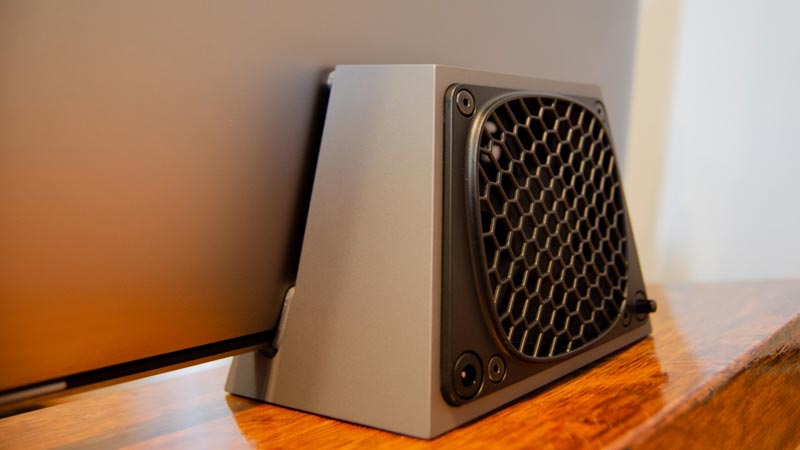
Silent Conductive Heatsink Cooling for Closed and Open-Screen Laptops
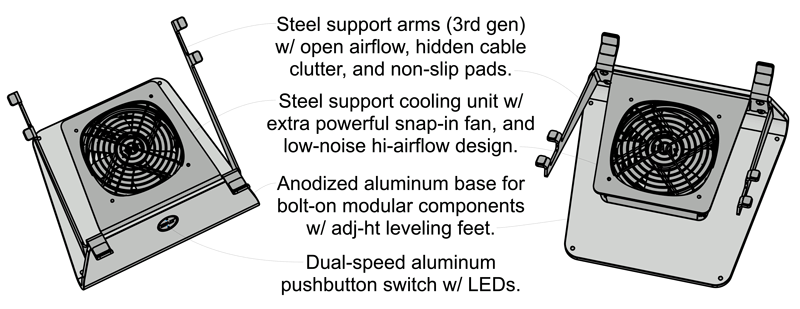
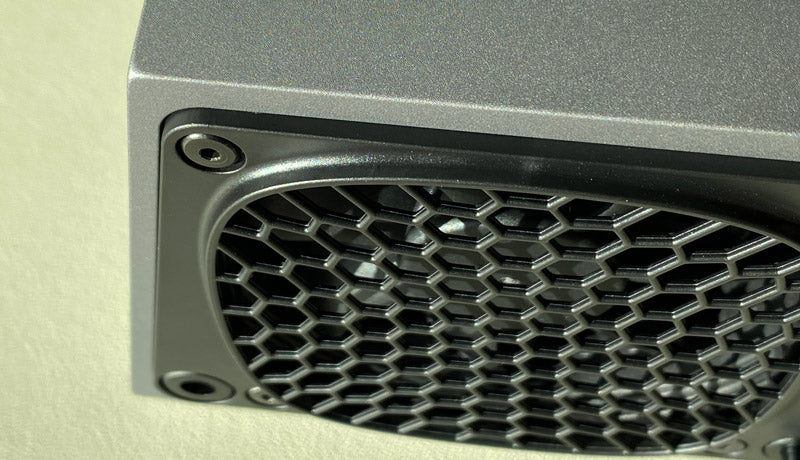
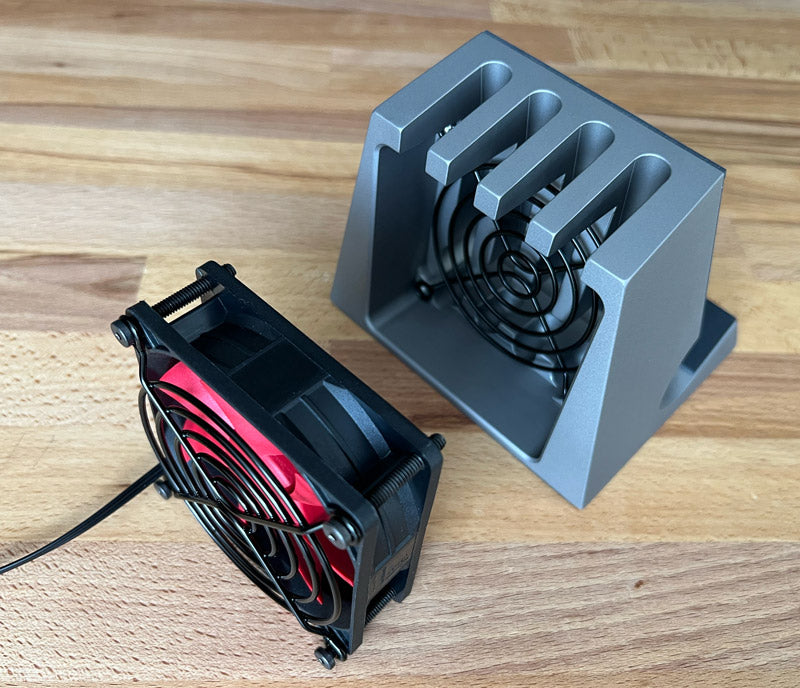
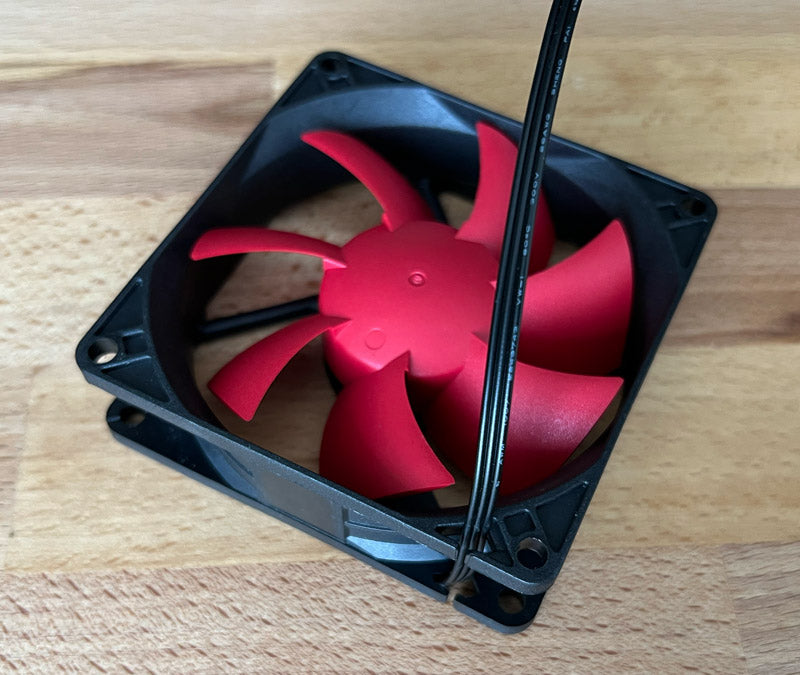
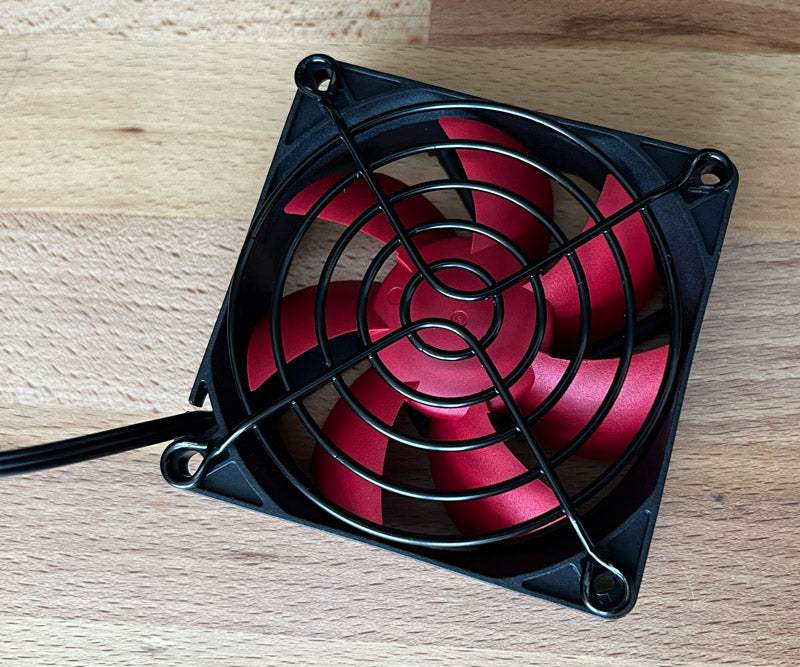
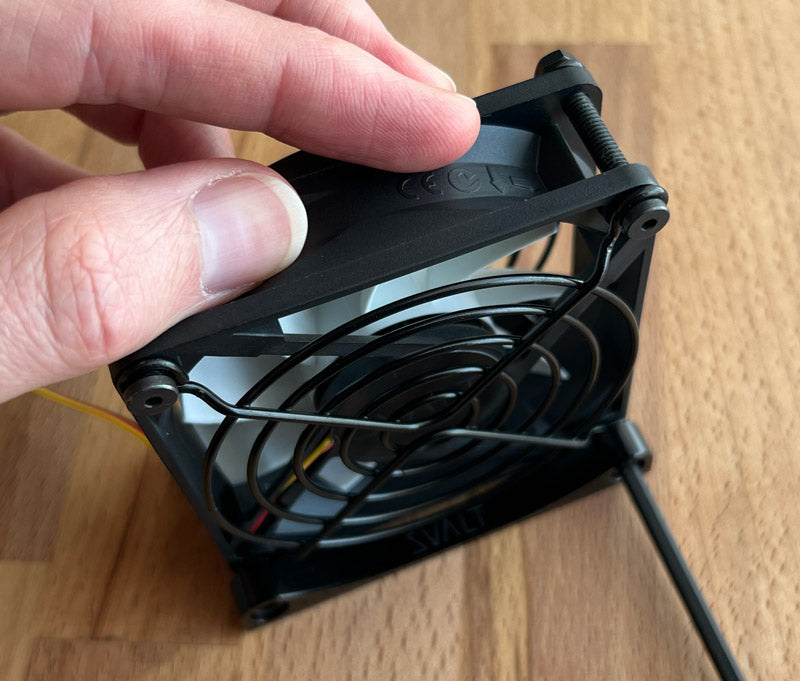
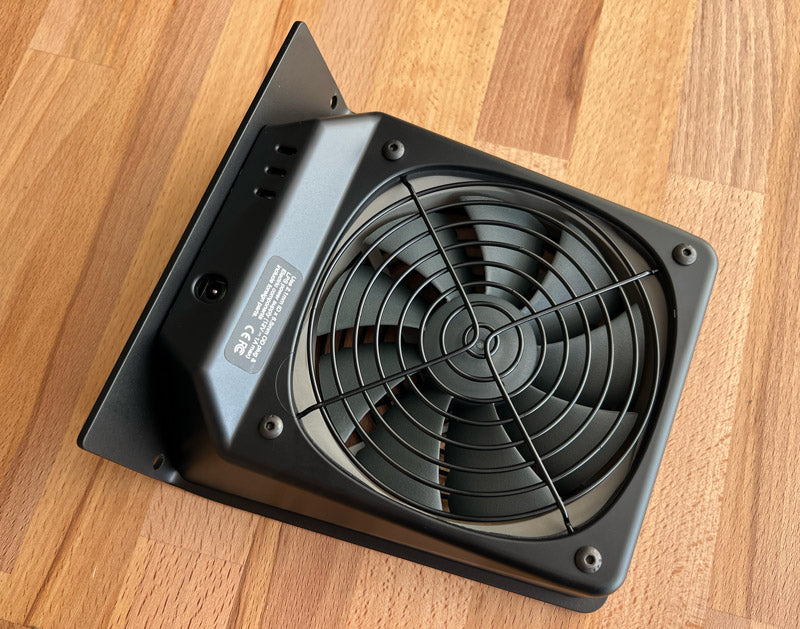
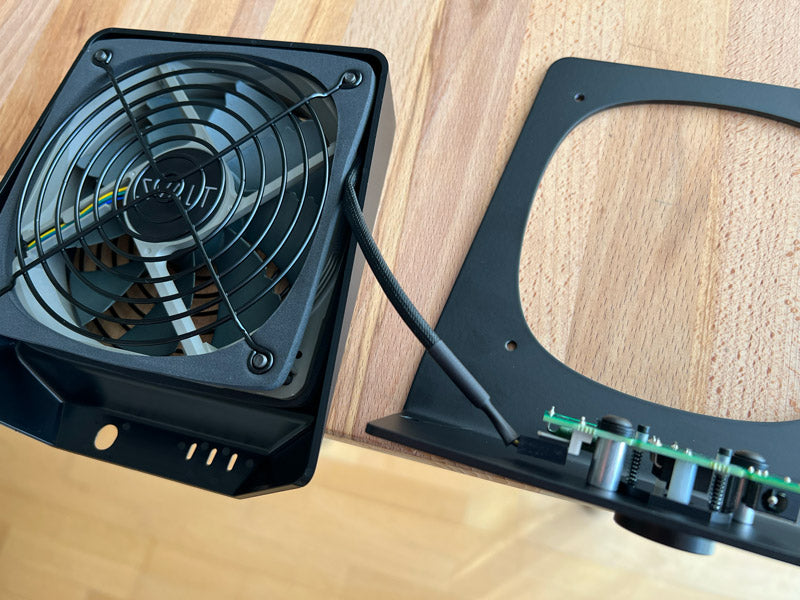
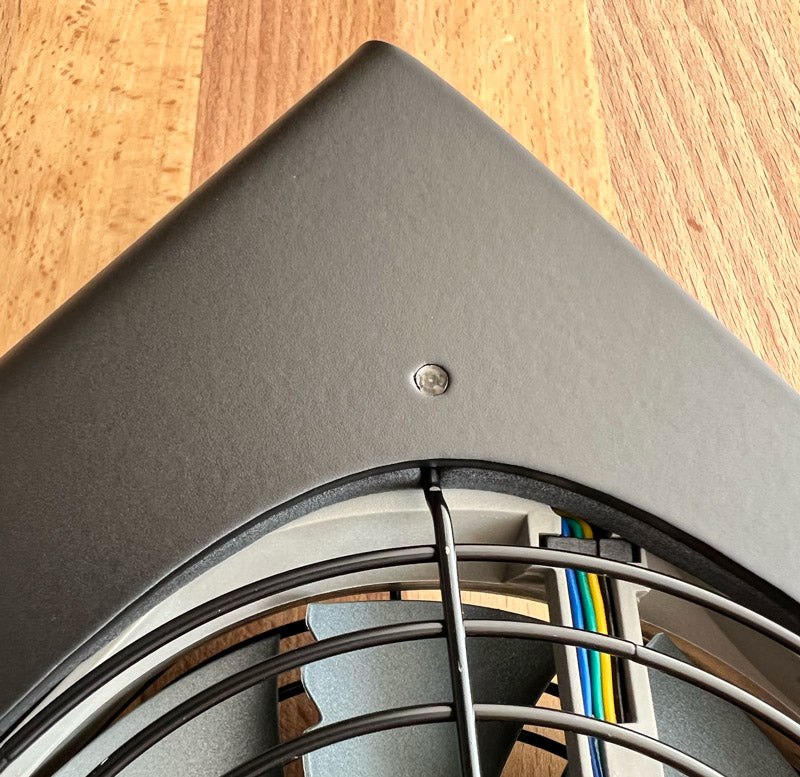
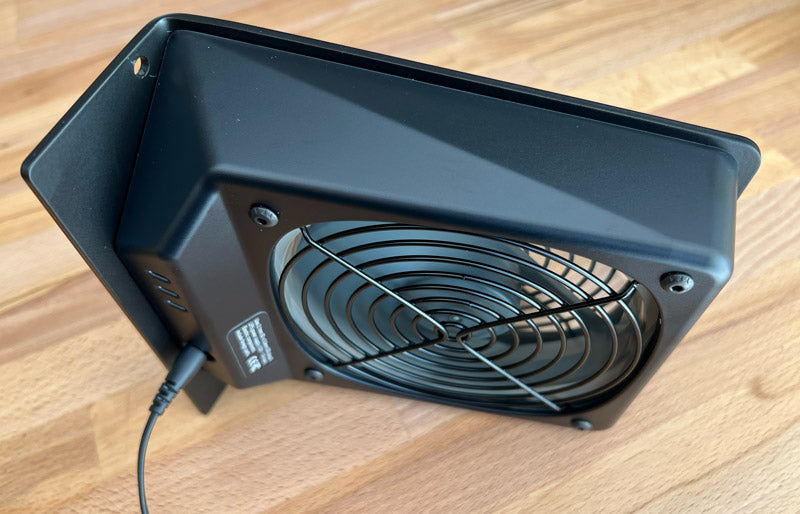
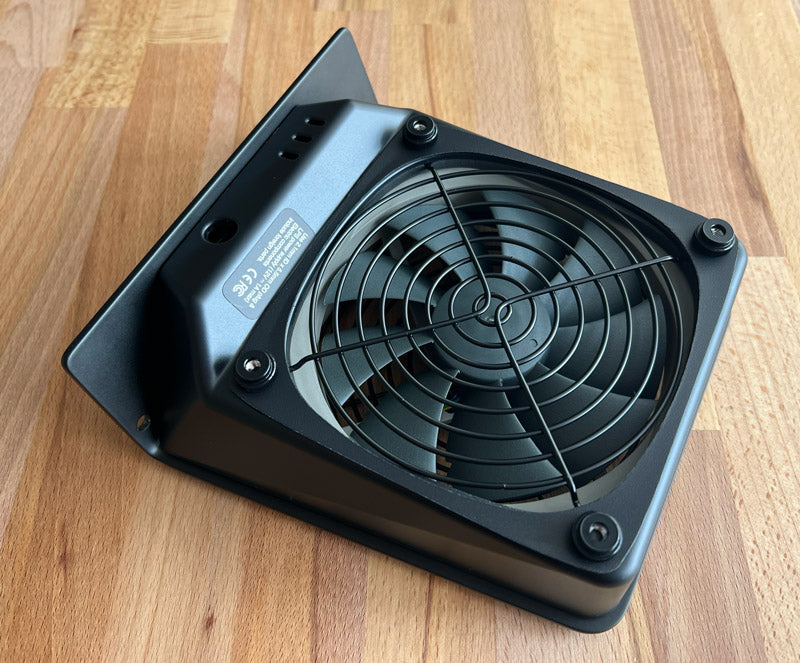
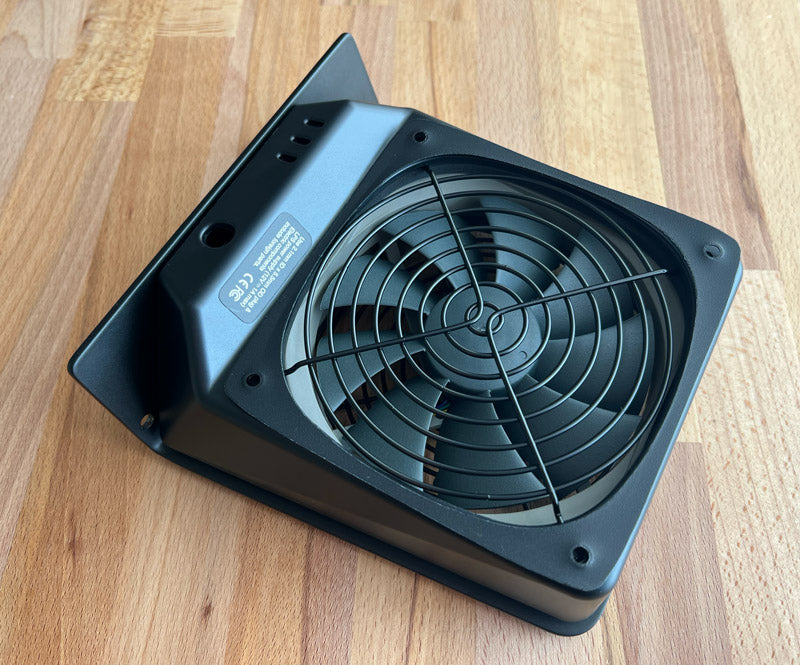
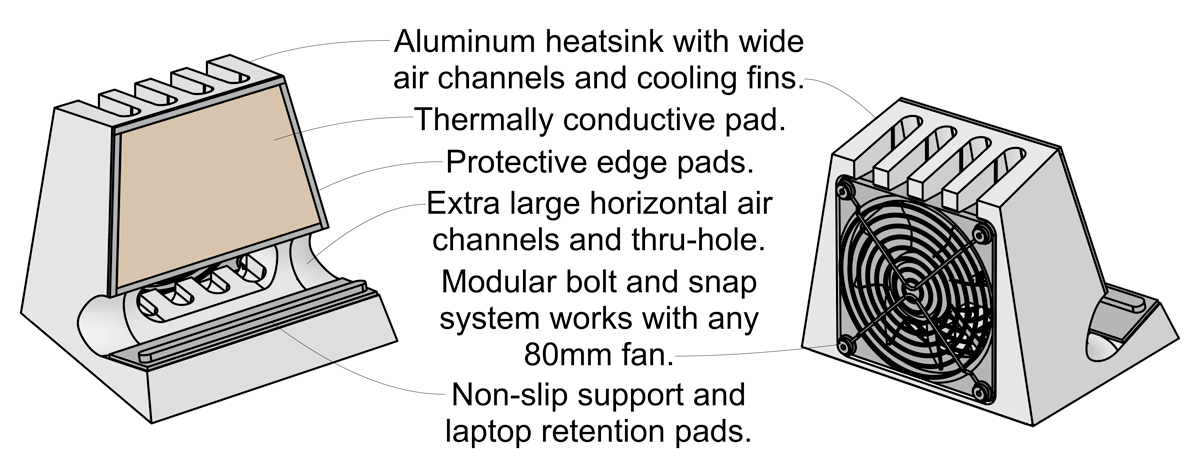
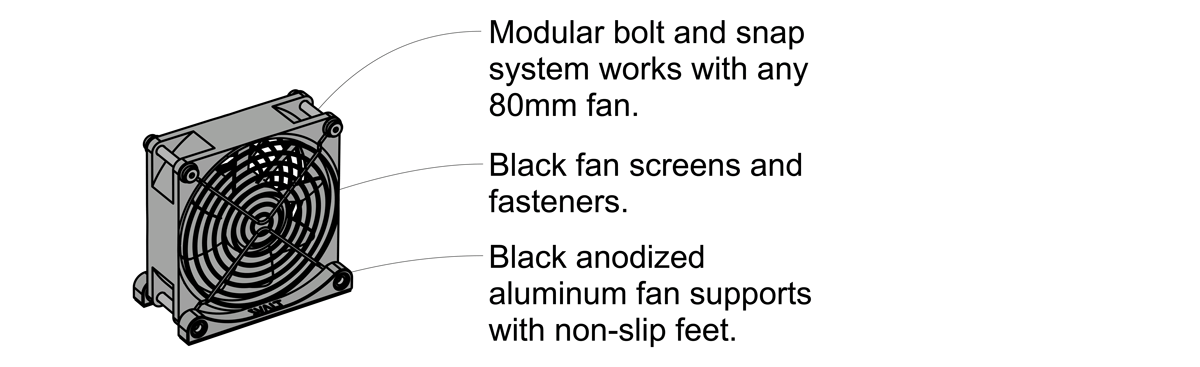
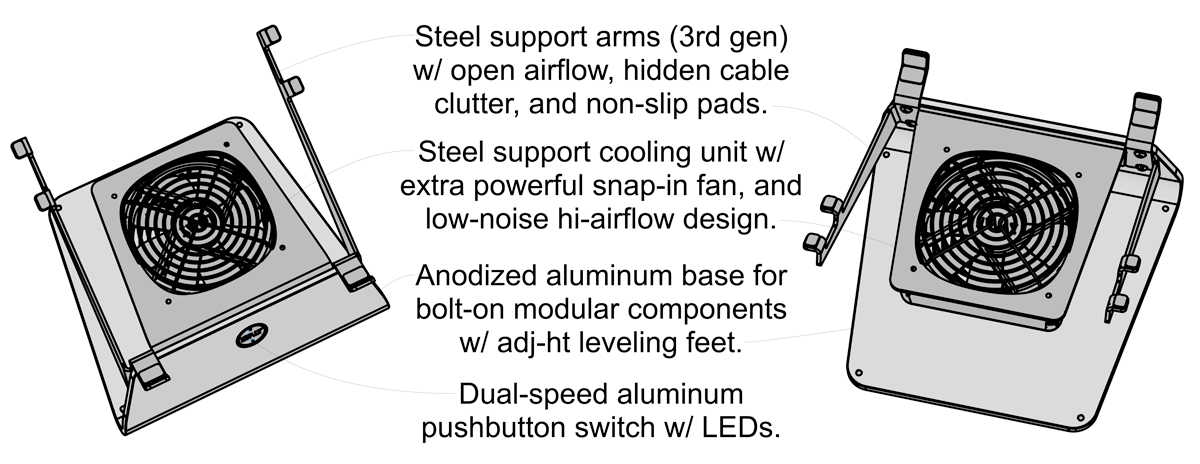
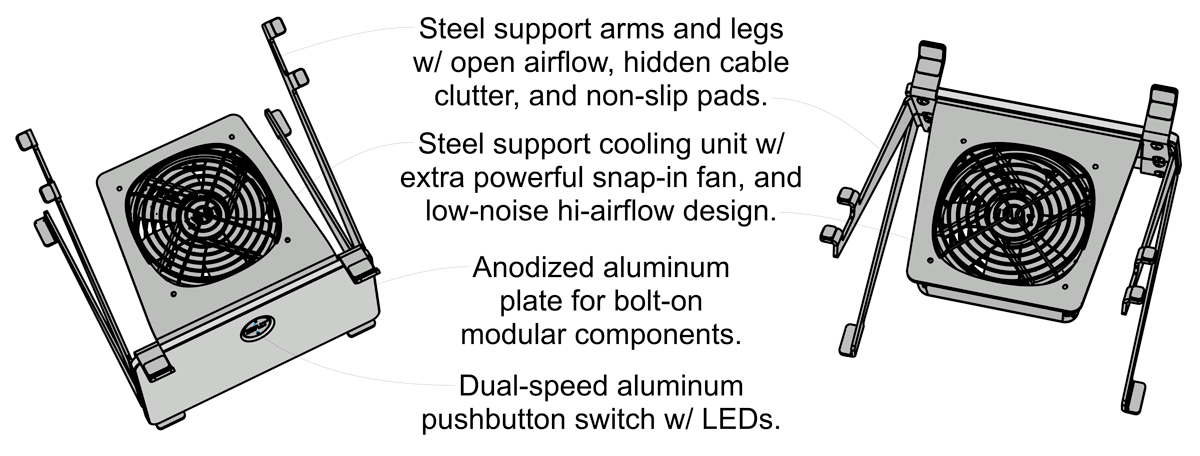
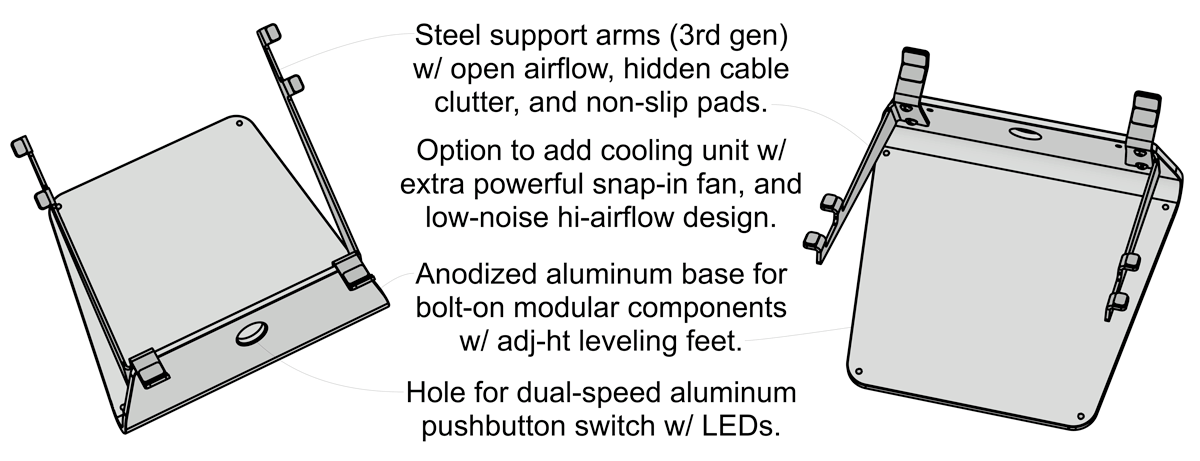
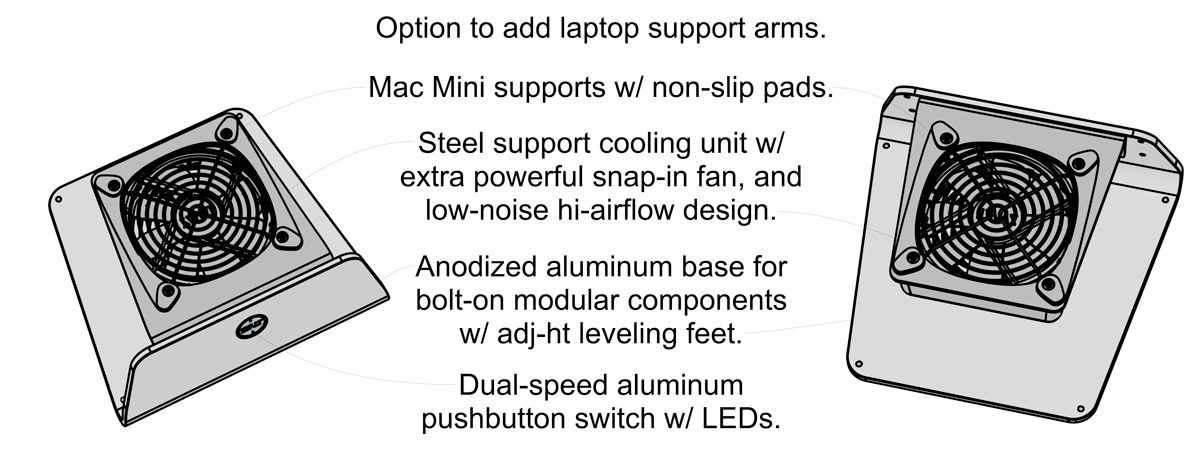
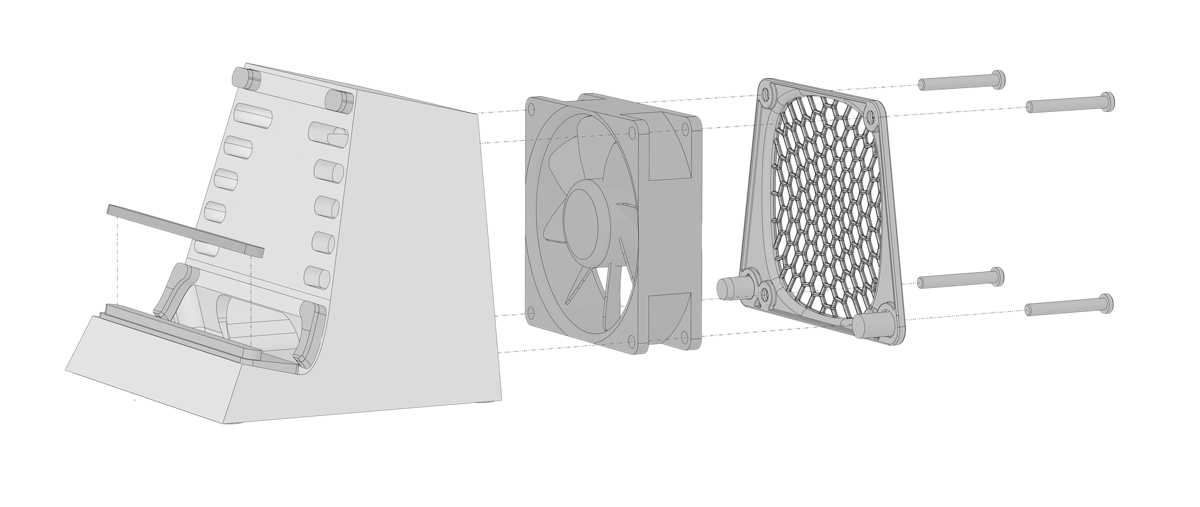
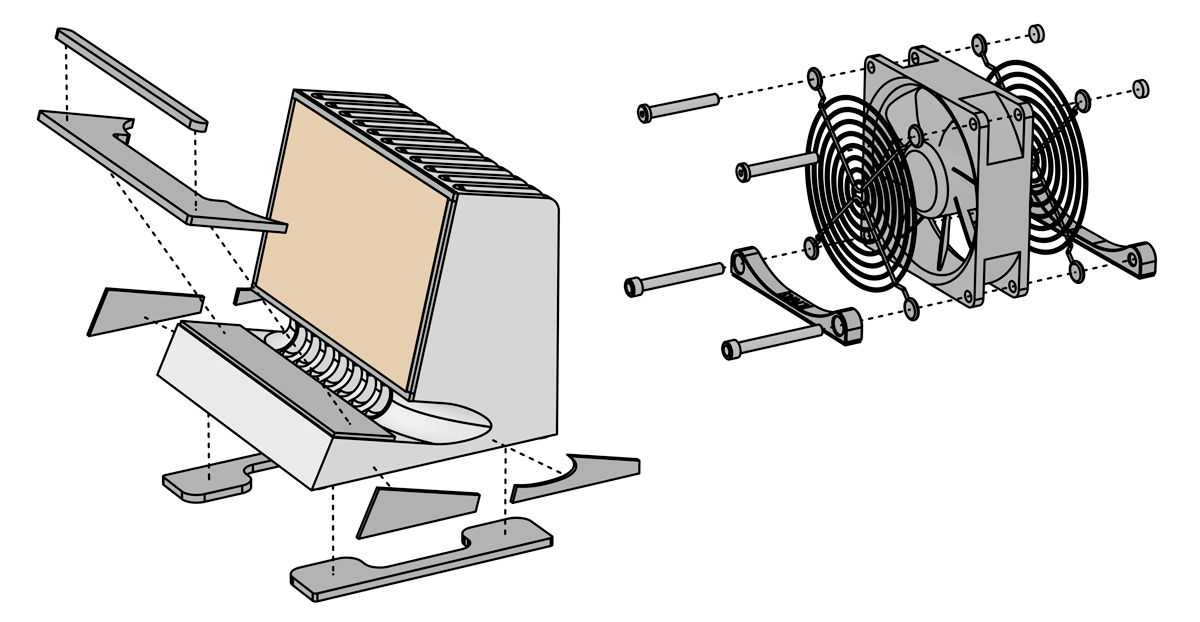
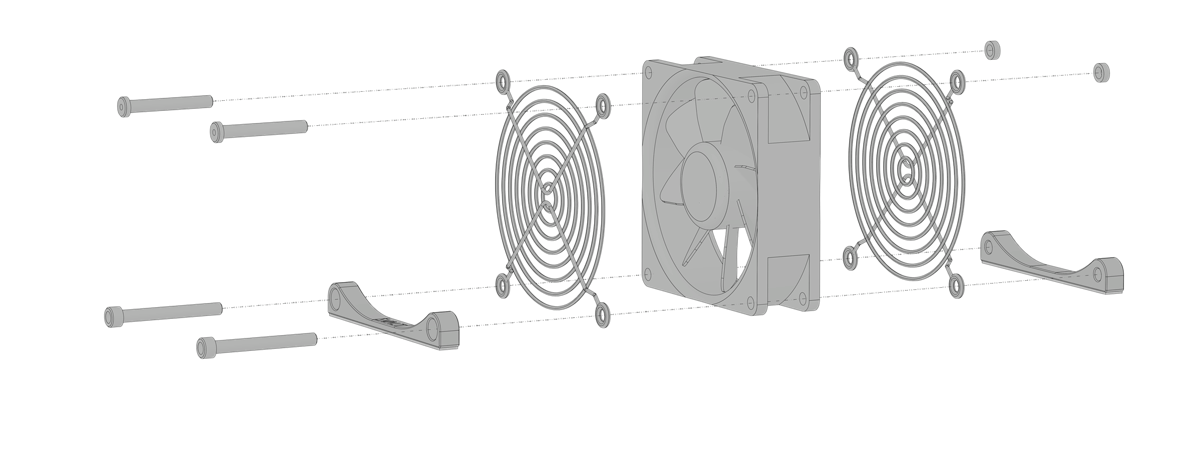
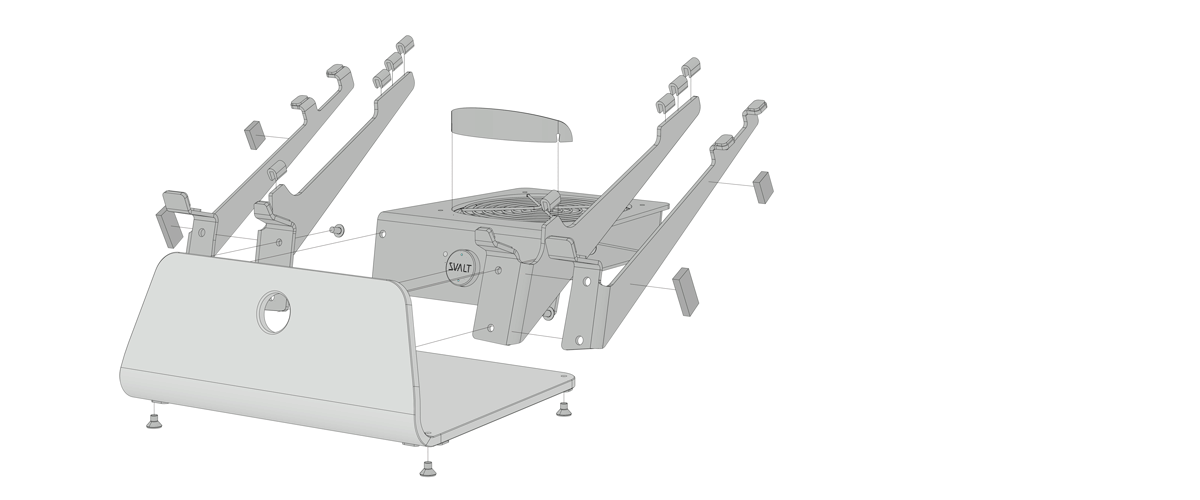
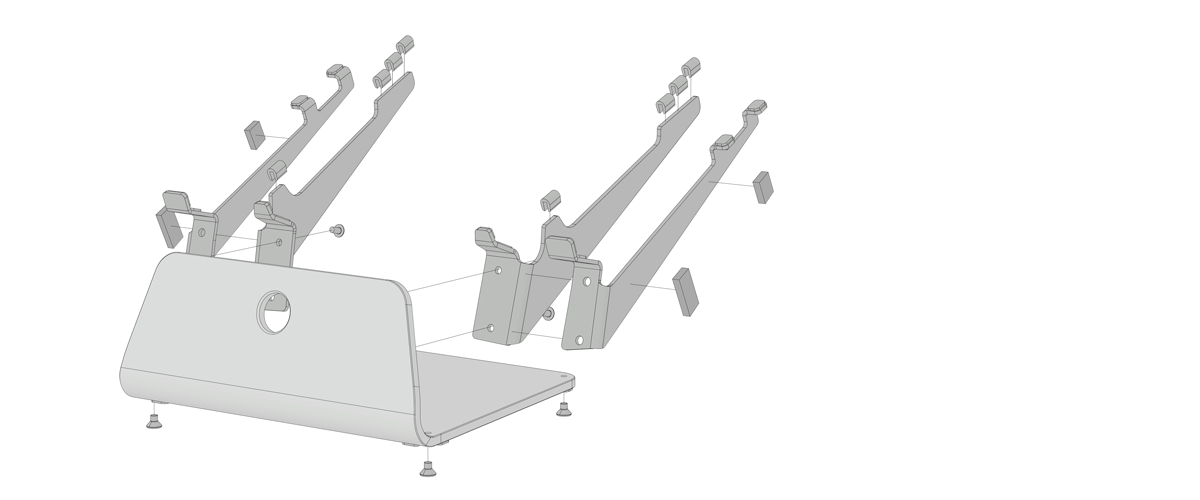
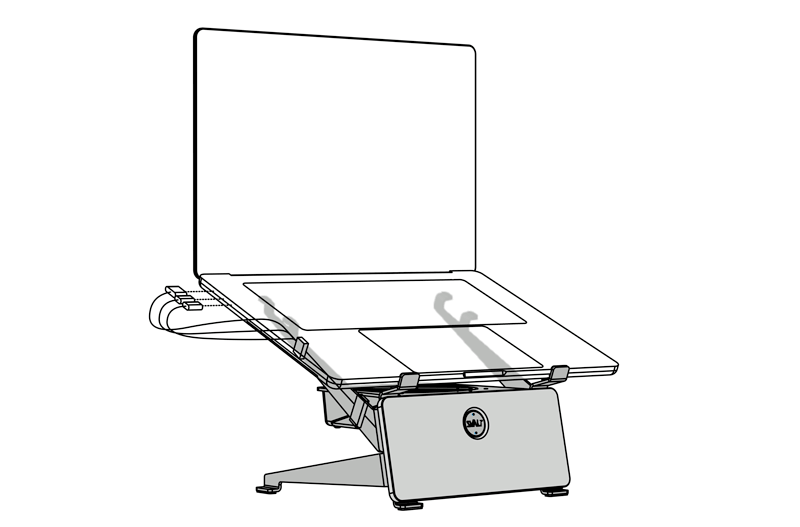
The Mx product line’s modular system is built around a massive thermally conductive heatsink for extreme cooling. The heatsink is available with a variety of different support types, materials and colors to help customers create their ultimate laptop workstation setup. The Mx features unmatched levels of both silent and fan cooling capabilities, high-quality Noctua fan systems, optimized compatibility with all modern Apple laptops, adjustable cable clutter management, uneven surface leveling, high-quality materials, heavy-duty construction with bolted connections, right-to-repair modularity, and locally made with a focus on sustainability.
Laptop with DHCR Cooling Dock
DHCR Cooling Dock from $289
Silent Conductive Heatsink Cooling for Closed-Screen Laptops
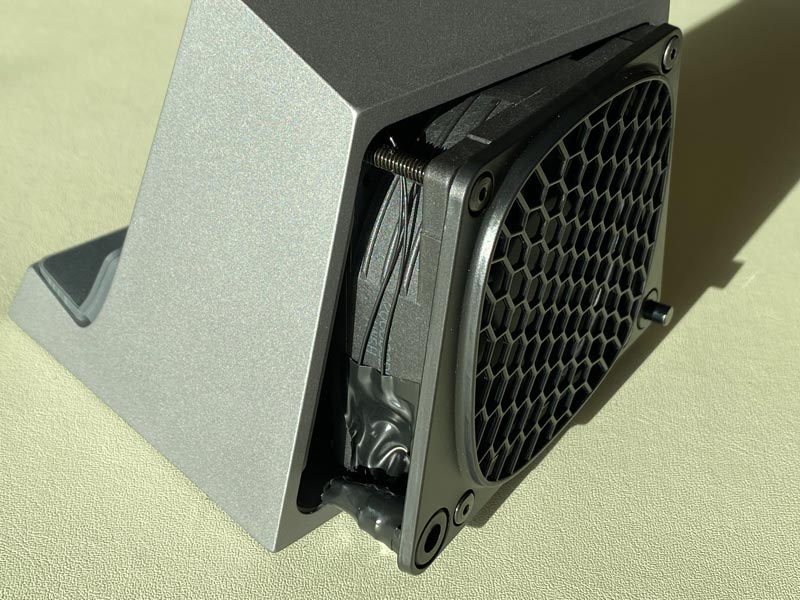
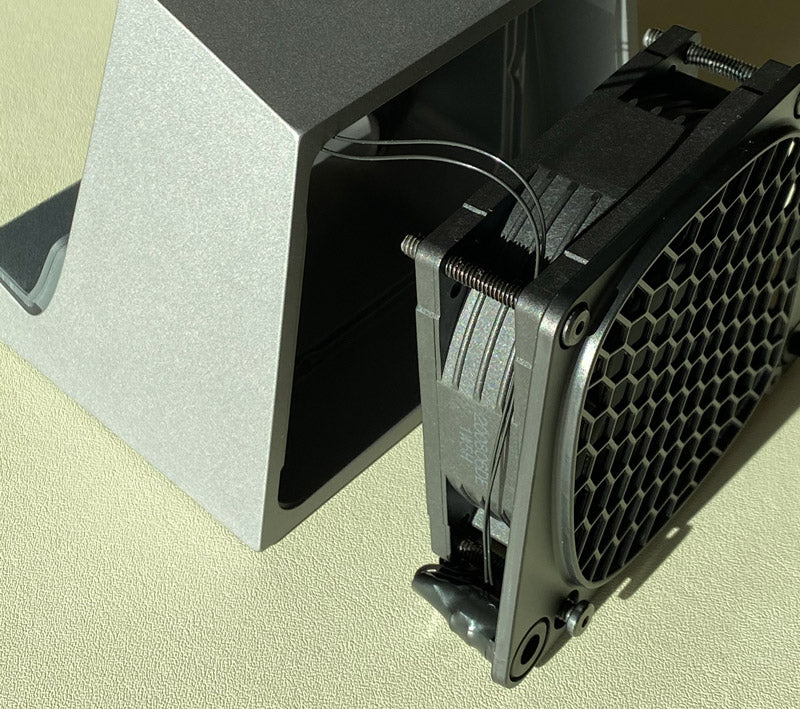
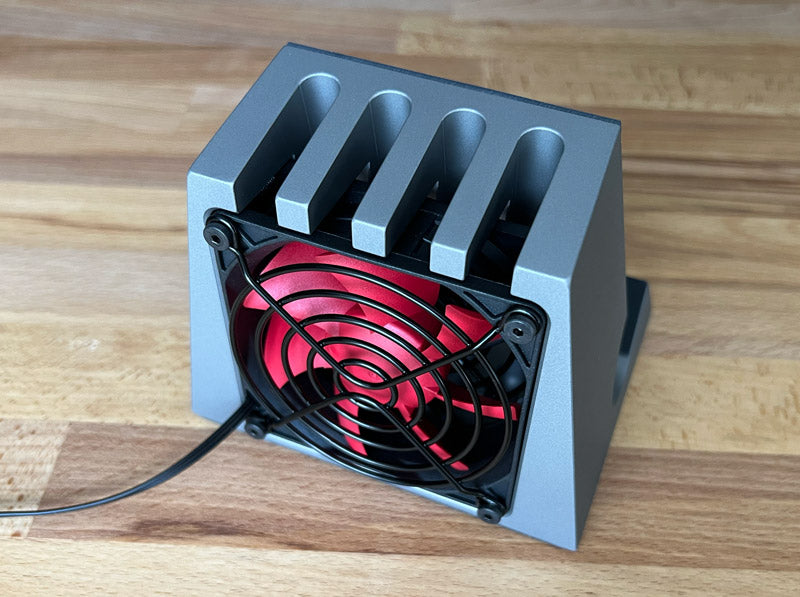
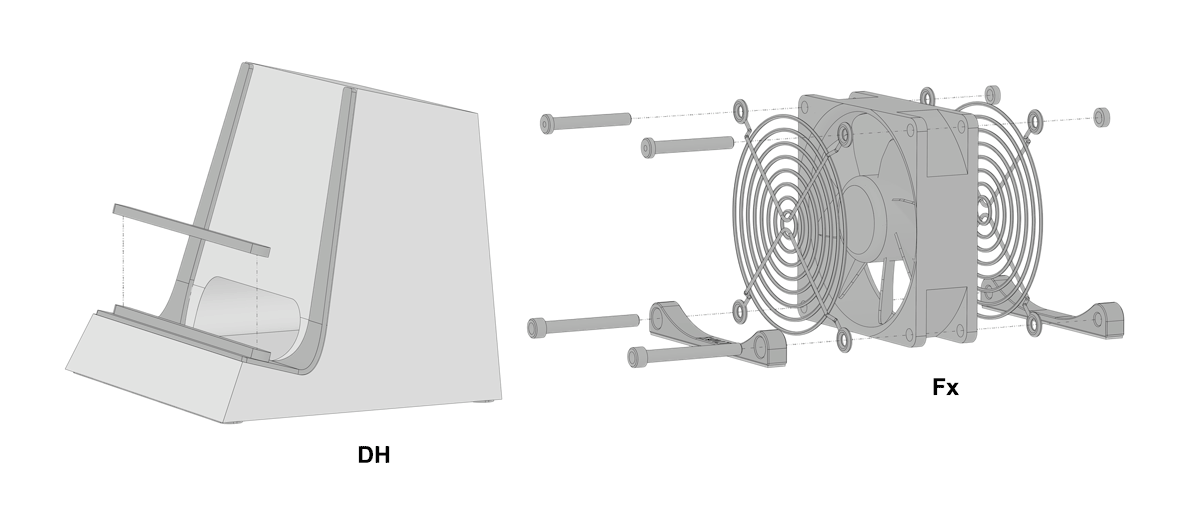
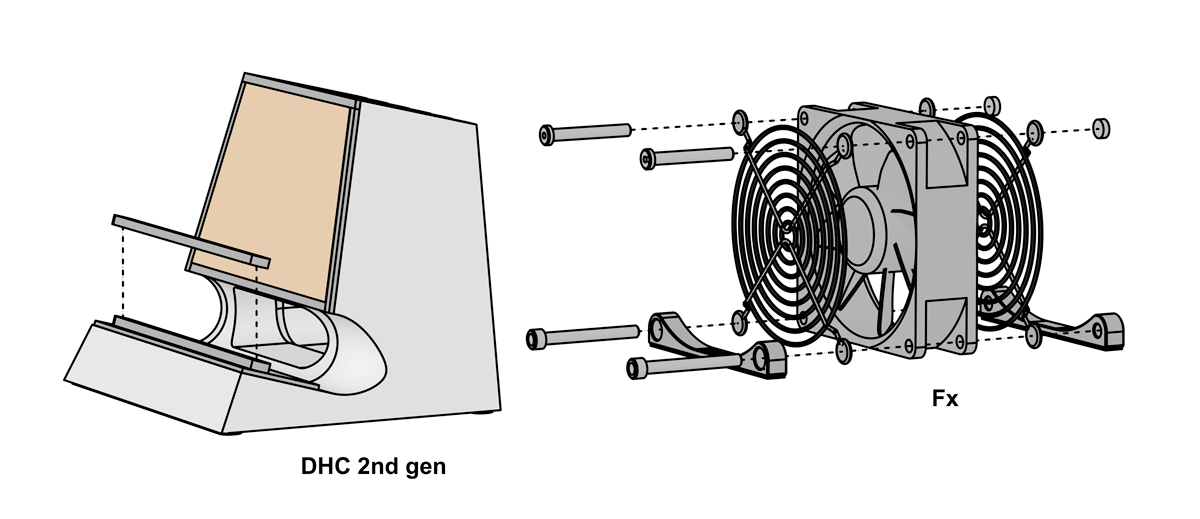
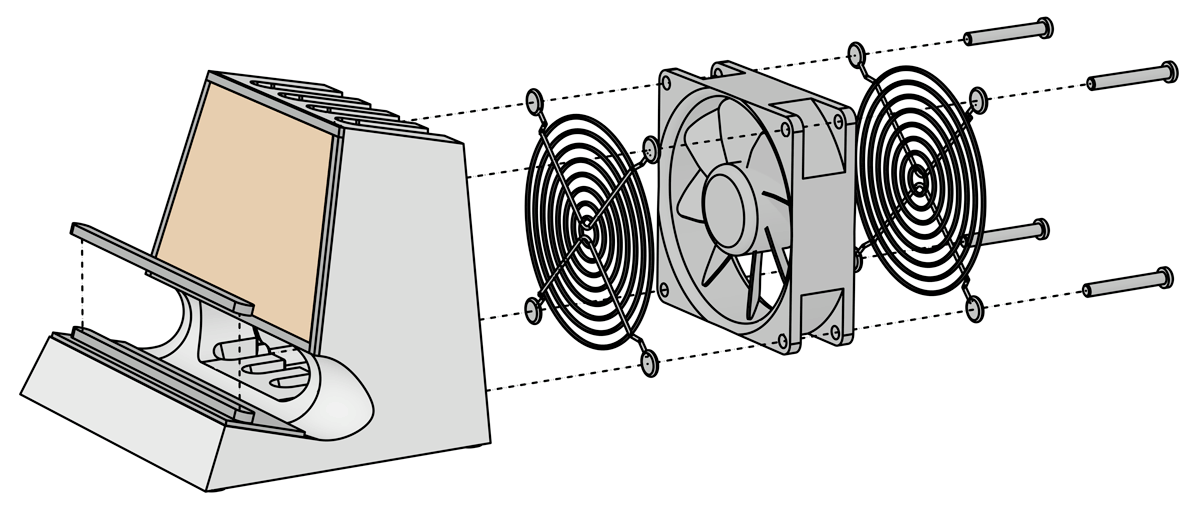
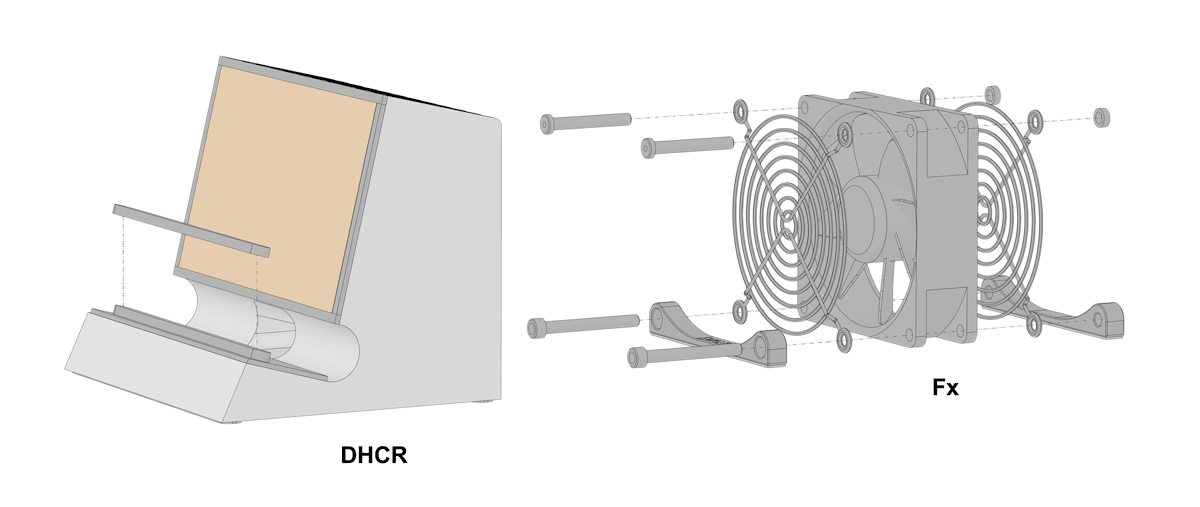
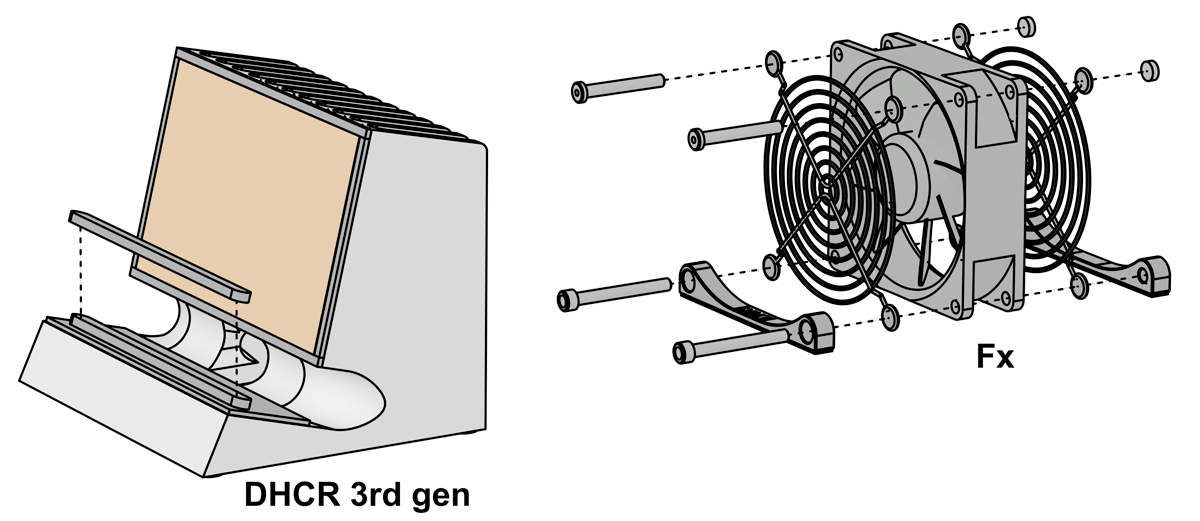
The 4th generation DHCR offers thermally conductive heatsink cooling carved from a solid and compact single piece of aluminum. Support and cooling compatibility is optimized for all modern Apple laptops. Optional active cooling with fully modular tight-to-repair Fx Cooling Fan.
Laptop with Sx Cooling Stand

Sx Cooling Stand from $279
Quiet Active Airflow Cooling for Open-Screen Laptops
The Sx offers an unmatched level of open airflow for lower noise and higher cooling efficiency optimized for a wide range of Apple and PC laptops, and features an extra large and powerful modular dual-speed fan cooling system with new ultra-quiet Noctua fans, hidden cord clutter, improved workstation ergonomics, extra rigid no-bounce device support, and a fully modular system with exchangeable components.
Back to top
MacBook Pro 14-inch M1, M2, M3, M4 and M5 Pro / Max (Apple Silicon) 2021-2026+

Laptop Description
The 2021+ MacBook Pro is Apple’s next generation Apple Silicon laptop. It includes two cool air intake vents located on each side, as well as the return of the pre-2016 model’s central cool air intake vent located along the back screen hinge for direct processor cooling. Vents located on both ends of the back screen hinge exhaust hot air from the two internal fans. With the screen open, duplicate vents on the top of the screen hinge allow for additional hot exhaust airflow. The 14-inch has smaller vents and fans than the 16-inch. The M Max has a larger processor and a larger heatsink than the M Pro.
Laptop Analysis
This is the first time that Apple has included the highest spec CPU and GPU processors from the larger 16-inch model within the smaller 14-inch model, which effectively creates a 14-inch that offers the potential for desktop class performance within a compact and travel friendly platform. Apple increased the thickness of the 2021 MacBook Pros, which allows for a larger cooling system, increased cooling capacity, and for the laptops to run cooler and quieter when handling most normal tasks. However, when compared to the 16-inch model, the 14-inch’s smaller and thinner chassis, shorter venting and smaller cooling fans means that the significant amount of heat generated under heavy sustained workloads can result in processor temperatures rising, internal fans running at higher speeds and processor throttling. This is especially true for the smaller 14-inch with more powerful M Max processor, and still even more of an issue with more recent models that allow for High Power Mode that had previously been limited to the 16-inch Max models as the 16-inch includes a more substantial cooling system to help with the increased heat generation.
Laptop with Mx Modular Heatsink Cooling System

 2021+ 14-inch MacBook Pro w/ MxD

 2021+ 14-inch MacBook Pro w/ MxS-hi

 2021+ 14-inch MacBook Pro w/ MxS-lo
MxSW2-hi / MxSW-hi
Cooling Stand from $389
MxSW2-lo / MxSW-lo / MxS-lo
Cooling Stand from $379
MxDW2 / MxDW
Cooling Dock from $379
Silent Conductive Heatsink Cooling for Closed and Open-Screen Laptops
The Mx product line’s modular system is built around a massive thermally conductive heatsink for extreme cooling. The heatsink is available with a variety of different support types, materials and colors to help customers create their ultimate laptop workstation setup. The Mx features unmatched levels of both silent and fan cooling capabilities, high-quality Noctua fan systems, optimized compatibility with all modern Apple laptops, adjustable cable clutter management, uneven surface leveling, high-quality materials, heavy-duty construction with bolted connections, right-to-repair modularity, and locally made with a focus on sustainability.
Laptop with DHCR Cooling Dock

DHCR Cooling Dock from $289
Silent Conductive Heatsink Cooling for Closed-Screen Laptops
The 4th generation DHCR offers thermally conductive heatsink cooling carved from a solid and compact single piece of aluminum. Support and cooling compatibility is optimized for all modern Apple laptops. Optional active cooling with fully modular tight-to-repair Fx Cooling Fan.
Laptop with Sx Cooling Stand

Sx Cooling Stand from $279
Quiet Active Airflow Cooling for Open-Screen Laptops
The Sx offers an unmatched level of open airflow for lower noise and higher cooling efficiency optimized for a wide range of Apple and PC laptops, and features an extra large and powerful modular dual-speed fan cooling system with new ultra-quiet Noctua fans, hidden cord clutter, improved workstation ergonomics, extra rigid no-bounce device support, and a fully modular system with exchangeable components.
Back to top
MacBook Pro 14-inch M3, M4, and M5 (Apple Silicon) 2023-2026+

Laptop Description
The 2021+ MacBook Pro is Apple’s next generation Apple Silicon laptop. The 2023+ M3-M5 14-inch model is the new entry-level MacBook Pro that replaces the prior Touch Bar generation design 13-inch TouchBar MacBook Pro with M1 and M2 chips. The M3-M5 14-inch includes two cool air intake vents located on each side, as well as the return of the pre-2016 model’s central cool air intake vent located along the back screen hinge for direct processor cooling. A vent located on the left end of the back screen hinge exhaust hot air from a single internal fan. The M3-M5 only has a single fan that is the same size as the 14-inch M Pro/Max fans, which are smaller the 16-inch model. With the screen open, duplicate vents on the top of the screen hinge allow for additional hot exhaust airflow. The entry-level M3-M5 14-inch has a processor and heatsink that is approximately have the size of the M Pro/Max 14-inch models.
Laptop Analysis
Apple has increased the thickness of this new 14-inch entry-level MacBook Pro compared to the prior Touch Bar generation design 13-inch TouchBar MacBook Pro, which allows for a larger cooling system, increased cooling capacity, and for the laptops to run cooler and quieter when handling most normal tasks. However, the M3-M5 14-inch model only has a single fan and heatsink that is half the size of the M Pro/Max models, so there’s less cooling capacity to avoid processor throttling under heavy workloads. The 14-inch is among a small group of laptops that doesn’t see a large reduction in temperatures when the screen is open, or conversely, is particularly capable when running in clamshell mode with the screen closed.
Laptop with Mx Modular Heatsink Cooling System


MxSW2-hi / MxSW-hi
Cooling Stand from $389
MxSW2-lo / MxSW-lo / MxS-lo
Cooling Stand from $379
MxDW2 / MxDW
Cooling Dock from $379
Silent Conductive Heatsink Cooling for Closed and Open-Screen Laptops
The Mx product line’s modular system is built around a massive thermally conductive heatsink for extreme cooling. The heatsink is available with a variety of different support types, materials and colors to help customers create their ultimate laptop workstation setup. The Mx features unmatched levels of both silent and fan cooling capabilities, high-quality Noctua fan systems, optimized compatibility with all modern Apple laptops, adjustable cable clutter management, uneven surface leveling, high-quality materials, heavy-duty construction with bolted connections, right-to-repair modularity, and locally made with a focus on sustainability.
Laptop with DHCR Cooling Dock
DHCR Cooling Dock from $289
Silent Conductive Heatsink Cooling for Closed-Screen Laptops
The 4th generation DHCR offers thermally conductive heatsink cooling carved from a solid and compact single piece of aluminum. Support and cooling compatibility is optimized for all modern Apple laptops. Optional active cooling with fully modular tight-to-repair Fx Cooling Fan.
Laptop with Sx Cooling Stand

Sx Cooling Stand from $279
Quiet Active Airflow Cooling for Open-Screen Laptops
The Sx offers an unmatched level of open airflow for lower noise and higher cooling efficiency optimized for a wide range of Apple and PC laptops, and features an extra large and powerful modular dual-speed fan cooling system with new ultra-quiet Noctua fans, hidden cord clutter, improved workstation ergonomics, extra rigid no-bounce device support, and a fully modular system with exchangeable components.
Back to top
MacBook Pro 13-inch Touch Bar M1 and M2 (Apple Silicon) 2020-2023

Laptop Description
The M2/M1 MacBook Pro uses the same case design and cooling system layout as the former entry level Intel version that includes a single fan with exhaust vent and intake vent along the underside back screen hinge. While the cooling system is relatively small, the venting layout creates an efficient cooling airflow path that pulls the cool air from one side, drawing it over the processors for directly cooling, and then the fan pushes the air past the radiator and out the exhaust.
Laptop Analysis
The laptop has reduced cooling capacity compared to most other MacBook Pro models, but this reduced cooling system is well matched for the M2/M1 chip’s efficiency cores that generate less heat. Temperatures can increase and internal fans can spin up to higher speeds in an effort to remove heat and avoid performance throttling while under heavier sustained workloads that stress the M2/M1 chip’s performance cores.
Laptop with Mx Modular Heatsink Cooling System


MxSW2-hi / MxSW-hi
Cooling Stand from $389
MxSW2-lo / MxSW-lo / MxS-lo
Cooling Stand from $379
MxDW2 / MxDW
Cooling Dock from $379
Silent Conductive Heatsink Cooling for Closed and Open-Screen Laptops
The Mx product line’s modular system is built around a massive thermally conductive heatsink for extreme cooling. The heatsink is available with a variety of different support types, materials and colors to help customers create their ultimate laptop workstation setup. The Mx features unmatched levels of both silent and fan cooling capabilities, high-quality Noctua fan systems, optimized compatibility with all modern Apple laptops, adjustable cable clutter management, uneven surface leveling, high-quality materials, heavy-duty construction with bolted connections, right-to-repair modularity, and locally made with a focus on sustainability.
Laptop with DHCR Cooling Dock

DHCR Cooling Dock from $289
Silent Conductive Heatsink Cooling for Closed-Screen Laptops
The 4th generation DHCR offers thermally conductive heatsink cooling carved from a solid and compact single piece of aluminum. Support and cooling compatibility is optimized for all modern Apple laptops. Optional active cooling with fully modular tight-to-repair Fx Cooling Fan.
Laptop with Sx Cooling Stand

Sx Cooling Stand from $279
Quiet Active Airflow Cooling for Open-Screen Laptops
The Sx offers an unmatched level of open airflow for lower noise and higher cooling efficiency optimized for a wide range of Apple and PC laptops, and features an extra large and powerful modular dual-speed fan cooling system with new ultra-quiet Noctua fans, hidden cord clutter, improved workstation ergonomics, extra rigid no-bounce device support, and a fully modular system with exchangeable components.
Back to top
MacBook Pro 16-inch Touch Bar (Intel) 2019-2020

Laptop Description
The MacBook Pro Touch Bar generation includes two cool air intake vents located on each side, but lacks the center intake along the screen hinge as found on prior and 2021 MacBook Pros. The 16-inch version includes two fans connected to two hot air exhaust vents at either end of the back screen hinge. For Intel generation MacBook Pros, only the larger 16 and 15-inch models include a more powerful dedicated graphics processors (GPU) with second heatsink attached to the heat pipe shared with the Intel processor (CPU) heatsink.
Laptop Analysis
The 2016 redesign created the thinnest MacBook Pro generation while simultaneously adding more powerful Intel and graphics processors, including Apple’s first use of a 6-core processor. The upgraded cooling system helped with the added heat load, however, the thinner chassis and elimination of the prior generation’s center intake vent located next to the processors meant that the substantial processor heat output could build up and cause the laptop’s internal fans to spin at higher and louder speeds, as well as leading to performance throttling under a variety of workload scenarios. This was particularly the case with the 16-inch’s higher-end i9 processors and top-spec graphic processors.
Laptop with Mx Modular Heatsink Cooling System


MxSW2-hi / MxSW-hi
Cooling Stand from $389
MxSW2-lo / MxSW-lo / MxS-lo
Cooling Stand from $379
MxDW2 / MxDW
Cooling Dock from $379
Silent Conductive Heatsink Cooling for Closed and Open-Screen Laptops
The Mx product line’s modular system is built around a massive thermally conductive heatsink for extreme cooling. The heatsink is available with a variety of different support types, materials and colors to help customers create their ultimate laptop workstation setup. The Mx features unmatched levels of both silent and fan cooling capabilities, high-quality Noctua fan systems, optimized compatibility with all modern Apple laptops, adjustable cable clutter management, uneven surface leveling, high-quality materials, heavy-duty construction with bolted connections, right-to-repair modularity, and locally made with a focus on sustainability.
Laptop with DHCR Cooling Dock
DHCR Cooling Dock from $289
Silent Conductive Heatsink Cooling for Closed-Screen Laptops
The 4th generation DHCR offers thermally conductive heatsink cooling carved from a solid and compact single piece of aluminum. Support and cooling compatibility is optimized for all modern Apple laptops. Optional active cooling with fully modular tight-to-repair Fx Cooling Fan.
Laptop with Sx Cooling Stand
Sx Cooling Stand from $279
Quiet Active Airflow Cooling for Open-Screen Laptops
The Sx offers an unmatched level of open airflow for lower noise and higher cooling efficiency optimized for a wide range of Apple and PC laptops, and features an extra large and powerful modular dual-speed fan cooling system with new ultra-quiet Noctua fans, hidden cord clutter, improved workstation ergonomics, extra rigid no-bounce device support, and a fully modular system with exchangeable components.
Back to top
MacBook Pro 15-inch Touch Bar (Intel) 2016-2019

Laptop Description
The MacBook Pro Touch Bar generation includes two cool air intake vents located on each side, but lacks the center intake along the screen hinge as found on prior and 2021 MacBook Pros. The 15-inch version includes two fans connected to two hot air exhaust vents at either end of the back screen hinge. For Intel generation MacBook Pros, only the larger 16 and 15-inch models include a more powerful dedicated graphics processors (GPU) with second heatsink attached to the heat pipe shared with the Intel processor (CPU) heatsink.
Laptop Analysis
The 2016 redesign created the thinnest MacBook Pro generation while simultaneously adding more powerful Intel and graphics processors, including Apple’s first use of a 6-core processor and then an 8-core processor. The upgraded cooling system helped with the added heat load, however, the thinner chassis and elimination of the prior generation’s center intake vent located next to the processors meant that the substantial processor heat output could build up and cause the laptop’s internal fans to spin at higher and louder speeds, as well as leading to performance throttling under a variety of workload scenarios. This was particularly the case with higher-end processors and top-spec graphic processors.
Laptop with Mx Modular Heatsink Cooling System


MxSW2-hi / MxSW-hi
Cooling Stand from $389
MxSW2-lo / MxSW-lo / MxS-lo
Cooling Stand from $379
MxDW2 / MxDW
Cooling Dock from $379
Silent Conductive Heatsink Cooling for Closed and Open-Screen Laptops
The Mx product line’s modular system is built around a massive thermally conductive heatsink for extreme cooling. The heatsink is available with a variety of different support types, materials and colors to help customers create their ultimate laptop workstation setup. The Mx features unmatched levels of both silent and fan cooling capabilities, high-quality Noctua fan systems, optimized compatibility with all modern Apple laptops, adjustable cable clutter management, uneven surface leveling, high-quality materials, heavy-duty construction with bolted connections, right-to-repair modularity, and locally made with a focus on sustainability.
Laptop with DHCR Cooling Dock

DHCR Cooling Dock from $289
Silent Conductive Heatsink Cooling for Closed-Screen Laptops
The 4th generation DHCR offers thermally conductive heatsink cooling carved from a solid and compact single piece of aluminum. Support and cooling compatibility is optimized for all modern Apple laptops. Optional active cooling with fully modular tight-to-repair Fx Cooling Fan.
Laptop with Sx Cooling Stand

Sx Cooling Stand from $279
Quiet Active Airflow Cooling for Open-Screen Laptops
The Sx offers an unmatched level of open airflow for lower noise and higher cooling efficiency optimized for a wide range of Apple and PC laptops, and features an extra large and powerful modular dual-speed fan cooling system with new ultra-quiet Noctua fans, hidden cord clutter, improved workstation ergonomics, extra rigid no-bounce device support, and a fully modular system with exchangeable components.
Back to top
MacBook Pro 13-inch Touch Bar (Intel) 2016-2020

Laptop Description
The MacBook Pro Touch Bar generation includes two cool air intake vents located on each side, but lacks the center intake along the screen hinge as found on prior and 2021 MacBook Pros. The 13-inch version with Touch Bar includes two fans connected to two hot air exhaust vents at either end of the back screen hinge.
Laptop Analysis
The 2016 redesign created the thinnest MacBook Pro generation while simultaneously adding more powerful Intel and graphics processors, including Apple’s first use of a quad-core processor in the smaller 13-inch platform. The upgraded cooling system helped with the added heat load, however, the thinner and smaller chassis and elimination of the prior generation’s center intake vent located next to the processors meant that the substantial processor heat output could build up and cause the laptop’s internal fans to spin at higher and louder speeds, as well as leading to performance throttling under a variety of workload scenarios.
Laptop with Mx Modular Heatsink Cooling System


MxSW2-hi / MxSW-hi
Cooling Stand from $389
MxSW2-lo / MxSW-lo / MxS-lo
Cooling Stand from $379
MxDW2 / MxDW
Cooling Dock from $379
Silent Conductive Heatsink Cooling for Closed and Open-Screen Laptops
The Mx product line’s modular system is built around a massive thermally conductive heatsink for extreme cooling. The heatsink is available with a variety of different support types, materials and colors to help customers create their ultimate laptop workstation setup. The Mx features unmatched levels of both silent and fan cooling capabilities, high-quality Noctua fan systems, optimized compatibility with all modern Apple laptops, adjustable cable clutter management, uneven surface leveling, high-quality materials, heavy-duty construction with bolted connections, right-to-repair modularity, and locally made with a focus on sustainability.
Laptop with DHCR Cooling Dock
DHCR Cooling Dock from $289
Silent Conductive Heatsink Cooling for Closed-Screen Laptops
The 4th generation DHCR offers thermally conductive heatsink cooling carved from a solid and compact single piece of aluminum. Support and cooling compatibility is optimized for all modern Apple laptops. Optional active cooling with fully modular tight-to-repair Fx Cooling Fan.
Laptop with Sx Cooling Stand

Sx Cooling Stand from $279
Quiet Active Airflow Cooling for Open-Screen Laptops
The Sx offers an unmatched level of open airflow for lower noise and higher cooling efficiency optimized for a wide range of Apple and PC laptops, and features an extra large and powerful modular dual-speed fan cooling system with new ultra-quiet Noctua fans, hidden cord clutter, improved workstation ergonomics, extra rigid no-bounce device support, and a fully modular system with exchangeable components.
Back to top
MacBook Pro 13-inch non-Touch Bar (Intel) 2016-2019

Laptop Description
The MacBook Pro Touch Bar generation that does not have the Touch Bar includes a single fan connected to a single hot air exhaust vent at one end of the screen hinge, and then a cool air intake vent at the other end of the hinge.
Laptop Analysis
The 2016 redesign created the thinnest MacBook Pro generation and the non-Touch Bar model used less powerful processors with a less powerful cooling system. More sustained and heavier workloads can increase temperatures, leading to faster spinning and louder internal fans, as well as throttling processor performance.
Laptop with Mx Modular Heatsink Cooling System


MxSW2-hi / MxSW-hi
Cooling Stand from $389
MxSW2-lo / MxSW-lo / MxS-lo
Cooling Stand from $379
MxDW2 / MxDW
Cooling Dock from $379
Silent Conductive Heatsink Cooling for Closed and Open-Screen Laptops
The Mx product line’s modular system is built around a massive thermally conductive heatsink for extreme cooling. The heatsink is available with a variety of different support types, materials and colors to help customers create their ultimate laptop workstation setup. The Mx features unmatched levels of both silent and fan cooling capabilities, high-quality Noctua fan systems, optimized compatibility with all modern Apple laptops, adjustable cable clutter management, uneven surface leveling, high-quality materials, heavy-duty construction with bolted connections, right-to-repair modularity, and locally made with a focus on sustainability.
Laptop with DHCR Cooling Dock
DHCR Cooling Dock from $289
Silent Conductive Heatsink Cooling for Closed-Screen Laptops
The 4th generation DHCR offers thermally conductive heatsink cooling carved from a solid and compact single piece of aluminum. Support and cooling compatibility is optimized for all modern Apple laptops. Optional active cooling with fully modular tight-to-repair Fx Cooling Fan.
Laptop with Sx Cooling Stand
Sx Cooling Stand from $279
Quiet Active Airflow Cooling for Open-Screen Laptops
The Sx offers an unmatched level of open airflow for lower noise and higher cooling efficiency optimized for a wide range of Apple and PC laptops, and features an extra large and powerful modular dual-speed fan cooling system with new ultra-quiet Noctua fans, hidden cord clutter, improved workstation ergonomics, extra rigid no-bounce device support, and a fully modular system with exchangeable components.
Back to top
MacBook Air 15-inch M2, M3, M4 and M5 (Apple Silicon) 2023-2026+

Laptop Description
The 2023+ M MacBook Air uses a fanless design similar to Apple’s prior 12-inch MacBook model. Without an internal built-in air cooling system, the laptop’s cooling depends on the external aluminum enclosure to act as a heatsink for cooling.
Laptop Analysis
While the M chip’s efficiency cores stay cooler than Intel chips, the lack of a built-in fan means that heat can build up and performance can throttle while under heavier sustained workloads that stress the M chip’s performance cores.
Laptop with Mx Modular Heatsink Cooling System


MxSW2-hi / MxSW-hi
Cooling Stand from $389
MxSW2-lo / MxSW-lo / MxS-lo
Cooling Stand from $379
MxDW2 / MxDW
Cooling Dock from $379
Silent Conductive Heatsink Cooling for Closed and Open-Screen Laptops
The Mx product line’s modular system is built around a massive thermally conductive heatsink for extreme cooling. The heatsink is available with a variety of different support types, materials and colors to help customers create their ultimate laptop workstation setup. The Mx features unmatched levels of both silent and fan cooling capabilities, high-quality Noctua fan systems, optimized compatibility with all modern Apple laptops, adjustable cable clutter management, uneven surface leveling, high-quality materials, heavy-duty construction with bolted connections, right-to-repair modularity, and locally made with a focus on sustainability.
Laptop with DHCR Cooling Dock
DHCR Cooling Dock from $289
Silent Conductive Heatsink Cooling for Closed-Screen Laptops
The 4th generation DHCR offers thermally conductive heatsink cooling carved from a solid and compact single piece of aluminum. Support and cooling compatibility is optimized for all modern Apple laptops. Optional active cooling with fully modular tight-to-repair Fx Cooling Fan.
Laptop with Sx Cooling Stand
Sx Cooling Stand from $279
Quiet Active Airflow Cooling for Open-Screen Laptops
The Sx offers an unmatched level of open airflow for lower noise and higher cooling efficiency optimized for a wide range of Apple and PC laptops, and features an extra large and powerful modular dual-speed fan cooling system with new ultra-quiet Noctua fans, hidden cord clutter, improved workstation ergonomics, extra rigid no-bounce device support, and a fully modular system with exchangeable components.
Back to top
MacBook Air 13-inch M2, M3, M4 and M5 (Apple Silicon) 2022-2026+

Laptop Description
The 2022+ M MacBook Air uses a fanless design similar to Apple’s prior 12-inch MacBook model. Without an internal built-in air cooling system, the laptop’s cooling depends on the external aluminum enclosure to act as a heatsink for cooling.
Laptop Analysis
While the M chip’s efficiency cores stay cooler than Intel chips, the lack of a built-in fan means that heat can build up and performance can throttle while under heavier sustained workloads that stress the M chip’s performance cores.
Laptop with Mx Modular Heatsink Cooling System


MxSW2-hi / MxSW-hi
Cooling Stand from $389
MxSW2-lo / MxSW-lo / MxS-lo
Cooling Stand from $379
MxDW2 / MxDW
Cooling Dock from $379
Silent Conductive Heatsink Cooling for Closed and Open-Screen Laptops
The Mx product line’s modular system is built around a massive thermally conductive heatsink for extreme cooling. The heatsink is available with a variety of different support types, materials and colors to help customers create their ultimate laptop workstation setup. The Mx features unmatched levels of both silent and fan cooling capabilities, high-quality Noctua fan systems, optimized compatibility with all modern Apple laptops, adjustable cable clutter management, uneven surface leveling, high-quality materials, heavy-duty construction with bolted connections, right-to-repair modularity, and locally made with a focus on sustainability.
Laptop with DHCR Cooling Dock
DHCR Cooling Dock from $289
Silent Conductive Heatsink Cooling for Closed-Screen Laptops
The 4th generation DHCR offers thermally conductive heatsink cooling carved from a solid and compact single piece of aluminum. Support and cooling compatibility is optimized for all modern Apple laptops. Optional active cooling with fully modular tight-to-repair Fx Cooling Fan.
Laptop with Sx Cooling Stand
Sx Cooling Stand from $279
Quiet Active Airflow Cooling for Open-Screen Laptops
The Sx offers an unmatched level of open airflow for lower noise and higher cooling efficiency optimized for a wide range of Apple and PC laptops, and features an extra large and powerful modular dual-speed fan cooling system with new ultra-quiet Noctua fans, hidden cord clutter, improved workstation ergonomics, extra rigid no-bounce device support, and a fully modular system with exchangeable components.
Back to top
MacBook Air 13-inch M1 (Apple Silicon) 2020-2023

Laptop Description
The M1 MacBook Air is a first generation Apple Silicon laptop. It lacks an internal built-in air cooling system and as a results relies only on the external aluminum enclosure to act as a heatsink for cooling.
Laptop Analysis
While the M1 chip’s efficiency cores stay cooler than Intel chips, the lack of a built-in fan means that heat can build up and performance can throttle while under heavier sustained workloads that stress the M1 chip’s performance cores.
Laptop with Mx Modular Heatsink Cooling System


MxSW2-hi / MxSW-hi
Cooling Stand from $389
MxSW2-lo / MxSW-lo / MxS-lo
Cooling Stand from $379
MxDW2 / MxDW
Cooling Dock from $379
Silent Conductive Heatsink Cooling for Closed and Open-Screen Laptops
The Mx product line’s modular system is built around a massive thermally conductive heatsink for extreme cooling. The heatsink is available with a variety of different support types, materials and colors to help customers create their ultimate laptop workstation setup. The Mx features unmatched levels of both silent and fan cooling capabilities, high-quality Noctua fan systems, optimized compatibility with all modern Apple laptops, adjustable cable clutter management, uneven surface leveling, high-quality materials, heavy-duty construction with bolted connections, right-to-repair modularity, and locally made with a focus on sustainability.
Laptop with DHCR Cooling Dock
DHCR Cooling Dock from $289
Silent Conductive Heatsink Cooling for Closed-Screen Laptops
The 4th generation DHCR offers thermally conductive heatsink cooling carved from a solid and compact single piece of aluminum. Support and cooling compatibility is optimized for all modern Apple laptops. Optional active cooling with fully modular tight-to-repair Fx Cooling Fan.
Laptop with Sx Cooling Stand
Sx Cooling Stand from $279
Quiet Active Airflow Cooling for Open-Screen Laptops
The Sx offers an unmatched level of open airflow for lower noise and higher cooling efficiency optimized for a wide range of Apple and PC laptops, and features an extra large and powerful modular dual-speed fan cooling system with new ultra-quiet Noctua fans, hidden cord clutter, improved workstation ergonomics, extra rigid no-bounce device support, and a fully modular system with exchangeable components.
Back to top
MacBook Air 13-inch Retina (Intel) 2018-2020

Laptop Description
The MacBook Air Retina generation does not include intake vents along the side, and instead includes a single intake vent at one end of the back screen hinge and a single exhaust vent at the other end of the back screen hinge. Unlike other air cooling laptops, the processor’s heatsink is not connected to a heat pipe, radiator and cooling fan. Instead the processor heatsink has cooling fins that transfer heat to internal airflow generated by the built-in cooling fan.
Laptop Analysis
The cooling system used for this model is unusual, but also efficient in terms of size, weight and cost. For light tasks it does well, but more sustained and heavier workloads can increase temperatures, leading to faster spinning and louder internal fans, as well as throttling processor performance.
Laptop with Mx Modular Heatsink Cooling System


MxSW2-hi / MxSW-hi
Cooling Stand from $389
MxSW2-lo / MxSW-lo / MxS-lo
Cooling Stand from $379
MxDW2 / MxDW
Cooling Dock from $379
Silent Conductive Heatsink Cooling for Closed and Open-Screen Laptops
The Mx product line’s modular system is built around a massive thermally conductive heatsink for extreme cooling. The heatsink is available with a variety of different support types, materials and colors to help customers create their ultimate laptop workstation setup. The Mx features unmatched levels of both silent and fan cooling capabilities, high-quality Noctua fan systems, optimized compatibility with all modern Apple laptops, adjustable cable clutter management, uneven surface leveling, high-quality materials, heavy-duty construction with bolted connections, right-to-repair modularity, and locally made with a focus on sustainability.
Laptop with DHCR Cooling Dock

DHCR Cooling Dock from $289
Silent Conductive Heatsink Cooling for Closed-Screen Laptops
The 4th generation DHCR offers thermally conductive heatsink cooling carved from a solid and compact single piece of aluminum. Support and cooling compatibility is optimized for all modern Apple laptops. Optional active cooling with fully modular tight-to-repair Fx Cooling Fan.
Laptop with Sx Cooling Stand
Sx Cooling Stand from $279
Quiet Active Airflow Cooling for Open-Screen Laptops
The Sx offers an unmatched level of open airflow for lower noise and higher cooling efficiency optimized for a wide range of Apple and PC laptops, and features an extra large and powerful modular dual-speed fan cooling system with new ultra-quiet Noctua fans, hidden cord clutter, improved workstation ergonomics, extra rigid no-bounce device support, and a fully modular system with exchangeable components.
Back to top
MacBook Neo 13-inch A18 Pro (Apple Silicon) 2026+
Laptop Description
The MacBook Neo lacks an internal built-in air cooling system and as a result relies only on the external aluminum enclosure to act as a heatsink for cooling.
Laptop Analysis
The Neo lacks a dedicated cooling system so processor performance throttling is used to manage heat, which means that throttling is expected under heavy workloads.
Back to top
MacBook 12-inch Retina (Intel) 2015-2018

Laptop Description
The MacBook Retina generation lacks an internal built-in air cooling system and as a result relies only on the external aluminum enclosure to act as a heatsink for cooling.
Laptop Analysis
Apple’s thinnest and lightest Apple laptop lacks a dedicated cooling system so processor performance throttling is used to manage heat, which means that throttling can be constant and severe.
Laptop with Mx Modular Heatsink Cooling System


MxSW2-hi / MxSW-hi
Cooling Stand from $389
MxSW2-lo / MxSW-lo / MxS-lo
Cooling Stand from $379
MxDW2 / MxDW
Cooling Dock from $379
Silent Conductive Heatsink Cooling for Closed and Open-Screen Laptops
The Mx product line’s modular system is built around a massive thermally conductive heatsink for extreme cooling. The heatsink is available with a variety of different support types, materials and colors to help customers create their ultimate laptop workstation setup. The Mx features unmatched levels of both silent and fan cooling capabilities, high-quality Noctua fan systems, optimized compatibility with all modern Apple laptops, adjustable cable clutter management, uneven surface leveling, high-quality materials, heavy-duty construction with bolted connections, right-to-repair modularity, and locally made with a focus on sustainability.
Laptop with DHCR Cooling Dock

DHCR Cooling Dock from $289
Silent Conductive Heatsink Cooling for Closed-Screen Laptops
The 4th generation DHCR offers thermally conductive heatsink cooling carved from a solid and compact single piece of aluminum. Support and cooling compatibility is optimized for all modern Apple laptops. Optional active cooling with fully modular tight-to-repair Fx Cooling Fan.
Laptop with Sx Cooling Stand

Sx Cooling Stand from $279
Quiet Active Airflow Cooling for Open-Screen Laptops
The Sx offers an unmatched level of open airflow for lower noise and higher cooling efficiency optimized for a wide range of Apple and PC laptops, and features an extra large and powerful modular dual-speed fan cooling system with new ultra-quiet Noctua fans, hidden cord clutter, improved workstation ergonomics, extra rigid no-bounce device support, and a fully modular system with exchangeable components.
Back to top
PC Laptops
General Laptop Considerations
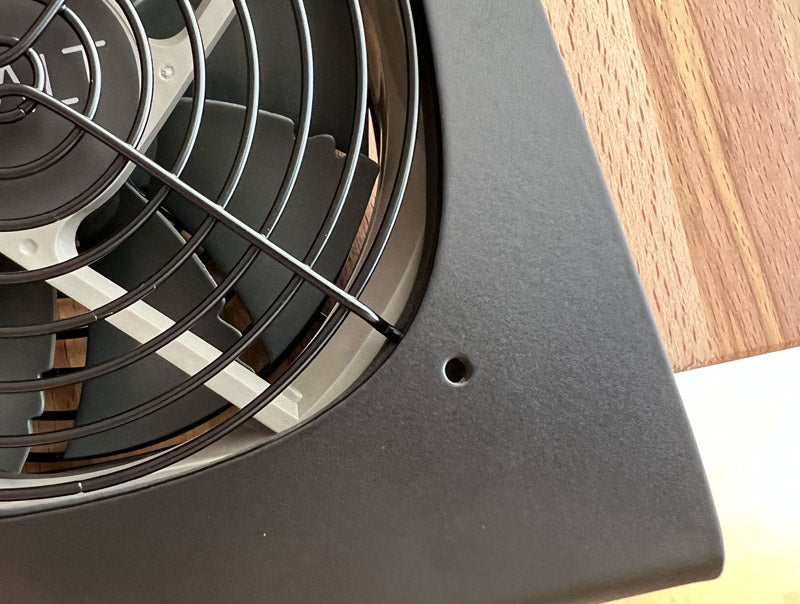
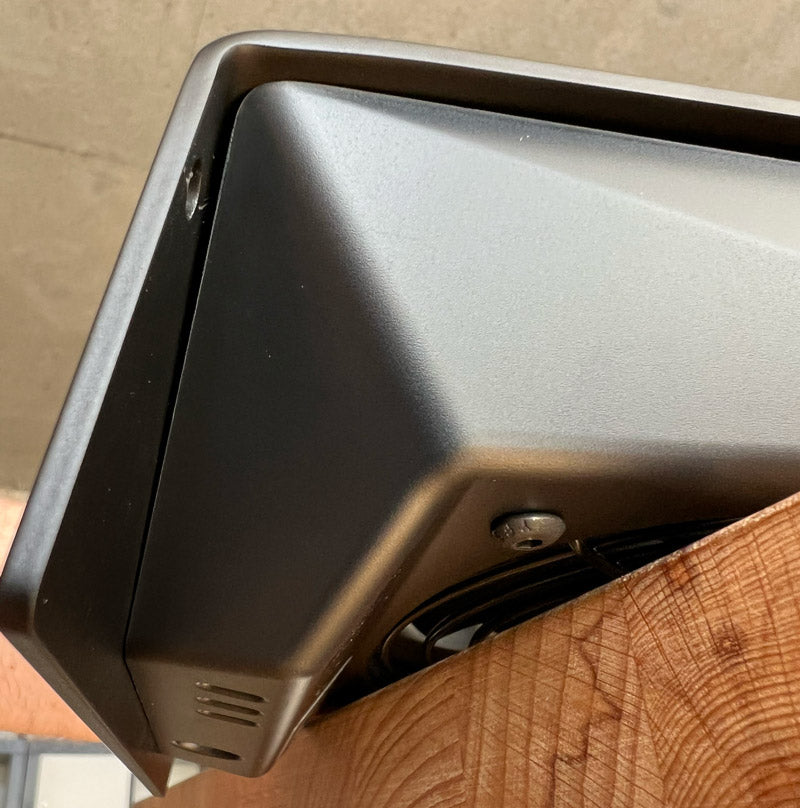
Cooling performance improves with laptops that have the following attributes: 1) Metal enclosures / chassis to absorb heat and then expel it to external supplemental cooling through airflow or thermal conduction to a heatsink. 2) Processor location centered and near bottom edge to align the highest temperature location with the external supplemental cooling fan or heatsink for the largest heat transfer potential.
Mx Modular Heatsink Cooling System
MxSW2-hi / MxSW-hi
Cooling Stand from $389
MxSW2-lo / MxSW-lo / MxS-lo
Cooling Stand from $379
MxDW2 / MxDW
Cooling Dock from $379
Silent Conductive Heatsink Cooling for Closed and Open-Screen Laptops
The Mx product line’s modular system is built around a massive thermally conductive heatsink for extreme cooling. The heatsink is available with a variety of different support types, materials and colors to help customers create their ultimate laptop workstation setup. The Mx features unmatched levels of both silent and fan cooling capabilities, high-quality Noctua fan systems, optimized compatibility with all modern Apple laptops, adjustable cable clutter management, uneven surface leveling, high-quality materials, heavy-duty construction with bolted connections, right-to-repair modularity, and locally made with a focus on sustainability.

Mx Compatibility Criteria
For device compatibility with the Mx modular heatsink cooling system, all of the following compatibility criteria must be met:
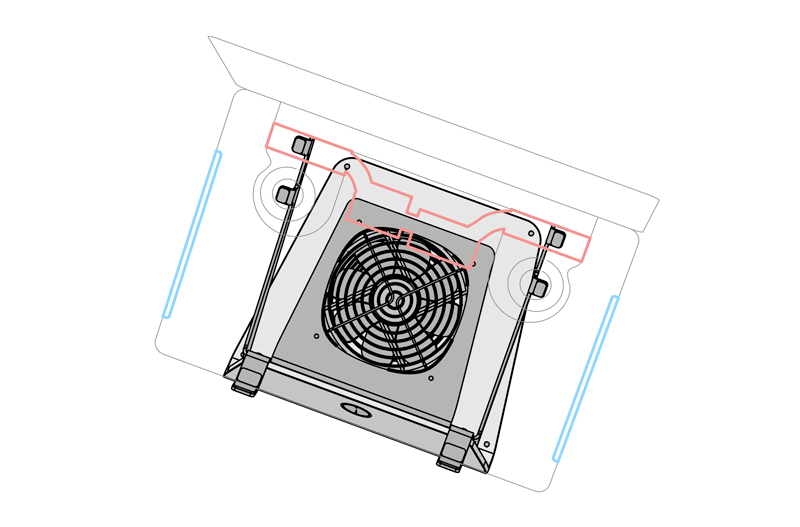
- Metal Coupling: For proper heatsink coupling and maximum thermally conductive heat transfer, the back/bottom of the device should have a metal enclosure/chassis and should not have a protective cover/case installed over or on top of the metal surface.
- Flat Coupling: For proper heatsink coupling and maximum thermally conductive heat transfer, the back/bottom of the device should have a flat metal surface free of pads, bumps and protrusions within the heatsink’s coupling area.
- Coupling Area: For proper heatsink coupling and maximum thermally conductive heat transfer, the back/bottom of the device should have flat metal surface that is at least 6.750 inches front-to-back and 5.950 inches side-to-side. A smaller area can work with a device that is smaller than the heatsink and meets other compatibility criteria.
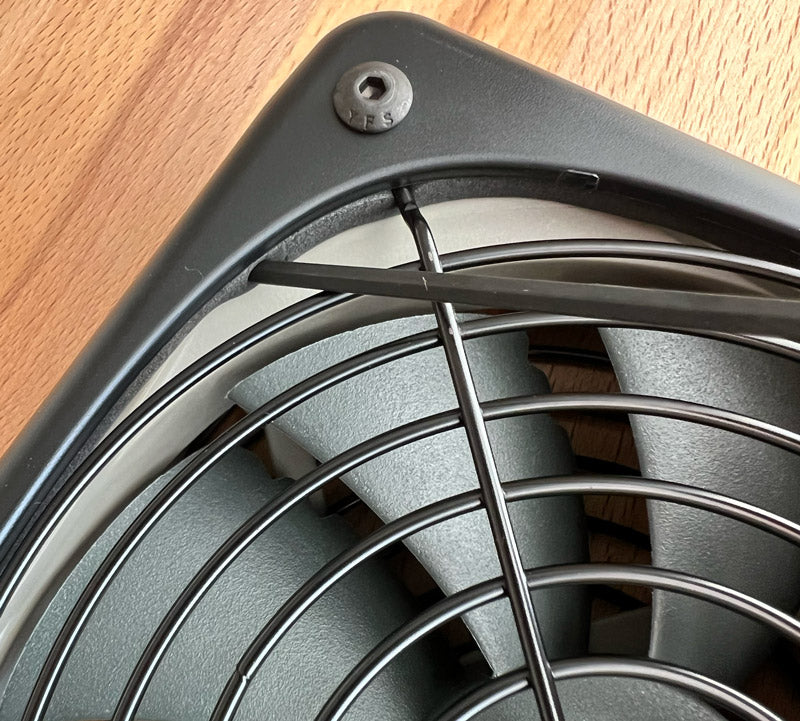
- Air Vents: If the device has a built-in air cooling system, then the device’s vent locations and their direction of airflow needs to be considered, such as the following: 1) The device’s vents should not be covered by the heatsink’s coupling area. 2) The device’s hot exhaust vents should not blow directly onto the heatsink.
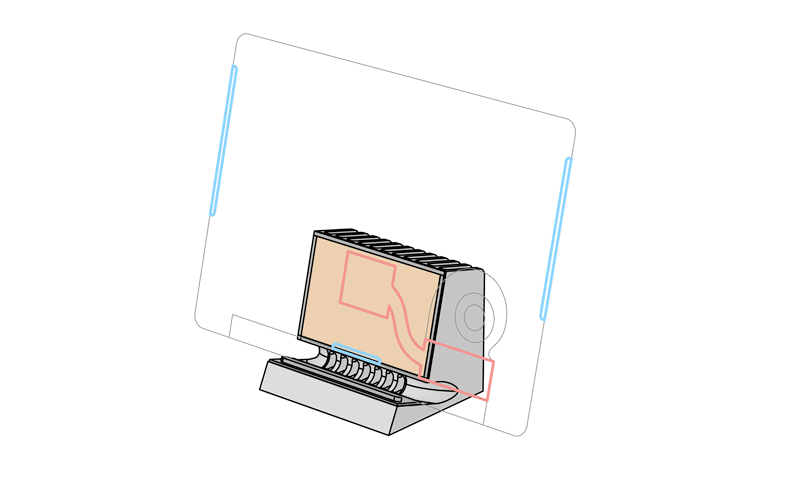
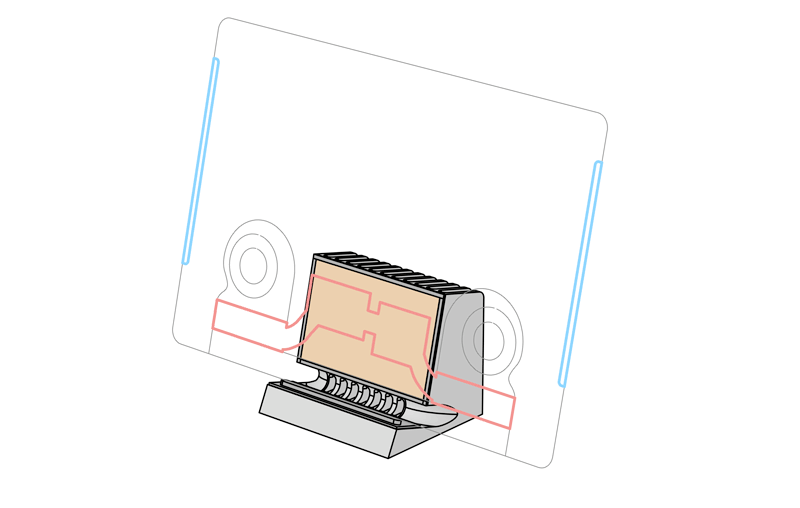
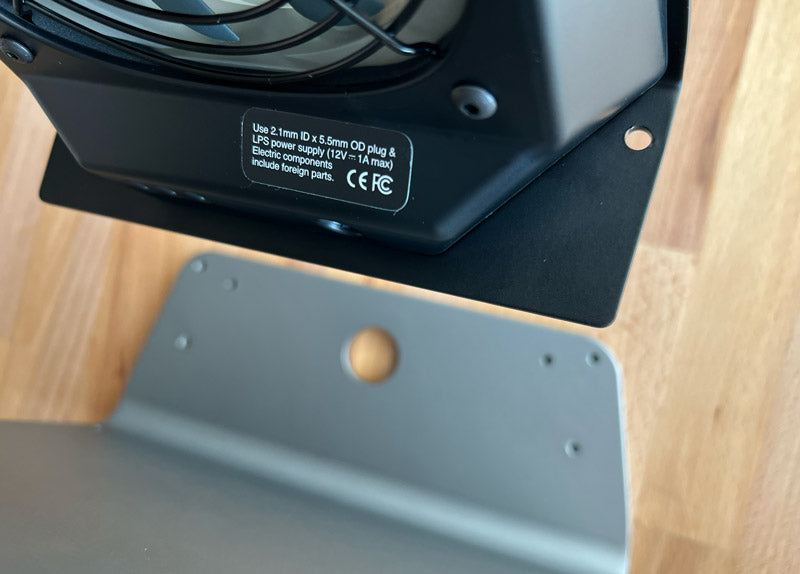
- Fit w/ Dock Supports: The Dock Supports position the heatsink above the device’s bottom edge by approximately 0.430 inches.
- Fit w/ Stand Supports: The High/Low Stand Supports have four heatsink mounting options, and position the heatsink from the device’s front edge by approximately 2.700 inches for position 1, 2.150 inches for position 2, 1.600 inches for position 3, and 1.050 inches for position 4.
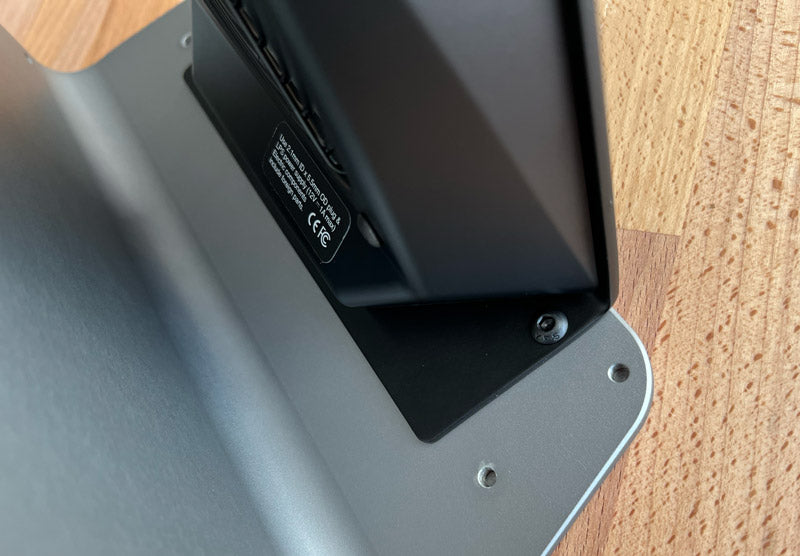
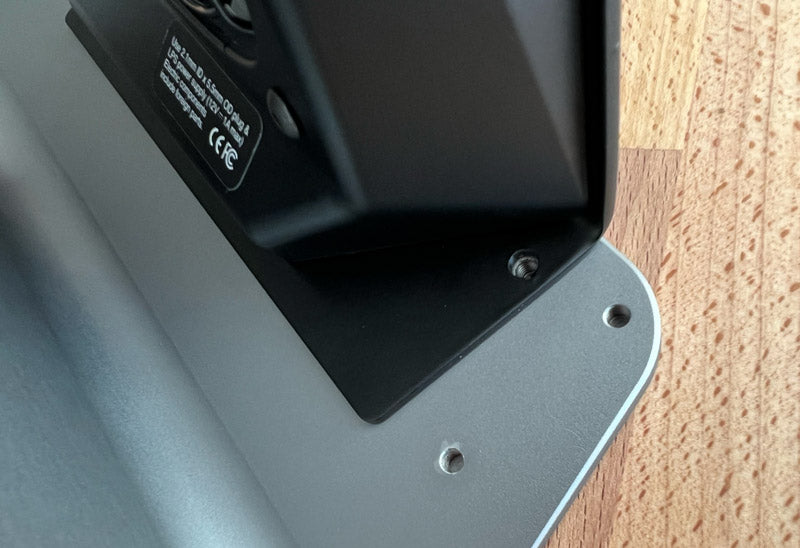
DHCR Cooling Dock
DHCR Cooling Dock from $289
Silent Conductive Heatsink Cooling for Closed-Screen Laptops
The 4th generation DHCR offers thermally conductive heatsink cooling carved from a solid and compact single piece of aluminum. Support and cooling compatibility is optimized for all modern Apple laptops with select PC laptop compatibility. Optional active cooling with fully modular tight-to-repair Fx Cooling Fan.
The DHCR4 thermally couple with flat backed / bottomed metal laptops and can accommodate laptops with thicknesses up to 1.100 inches. The laptop’s venting locations need to be considered, such as the hot air exhaust vents should NOT be located within the 4.800 inch center portion of the bottom edge (screen hinge edge on laptops), and ideally a cooling air intake vent occupies this central location for direct internal processor cooling.
Sx Cooling Stand
Sx Cooling Stand from $279
Quiet Active Airflow Cooling for Open-Screen Laptops
The Sx offers an unmatched level of open airflow for lower noise and higher cooling efficiency optimized for a wide range of Apple and PC laptops, and features an extra large and powerful modular dual-speed fan cooling system with new ultra-quiet Noctua fans, hidden cord clutter, improved workstation ergonomics, extra rigid no-bounce device support, and a fully modular system with exchangeable components.
The Sx works with laptops that are at least 9.5 inches wide (side-to-side) and 10.25 inches deep (front-to-back).
Back to top
]]>
 For 2026 I decided to lean into volunteering work and sustainability efforts through my business SVALT. An aspect of this will be going beyond my comfort zone of face-to-face and one-on-one interactions, to do more outreach like this posting.


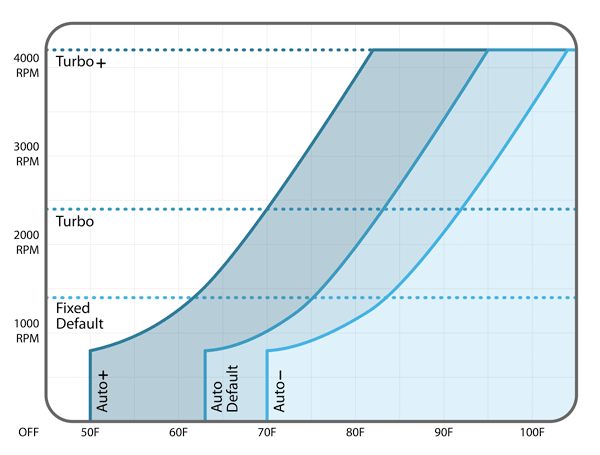
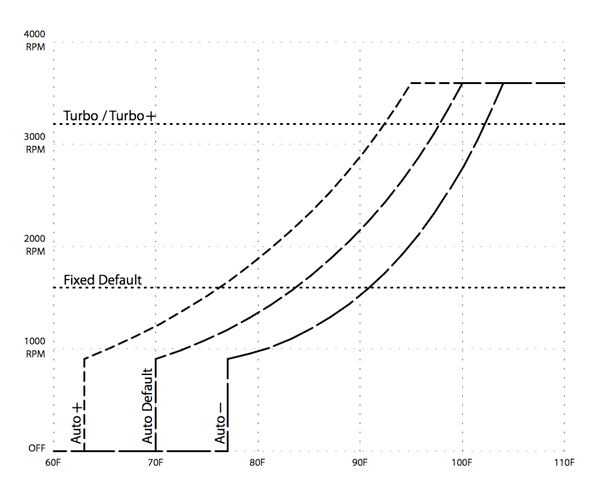
 #8 LAYOUT = AVOID
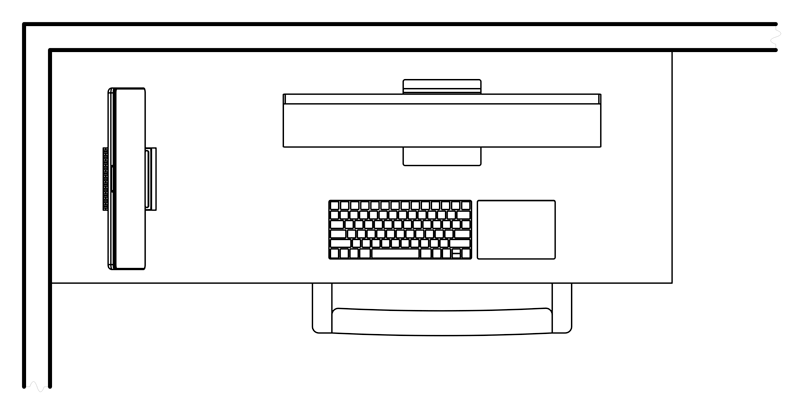 #7 LAYOUT = OKAY
 #6 LAYOUT = GOOD
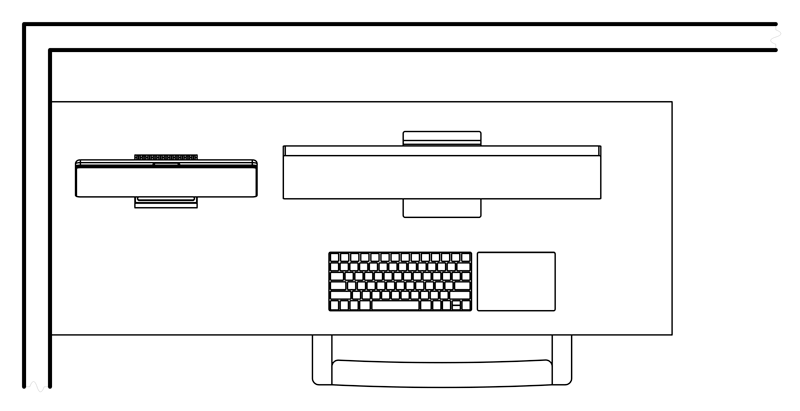 #5 LAYOUT = GOOD
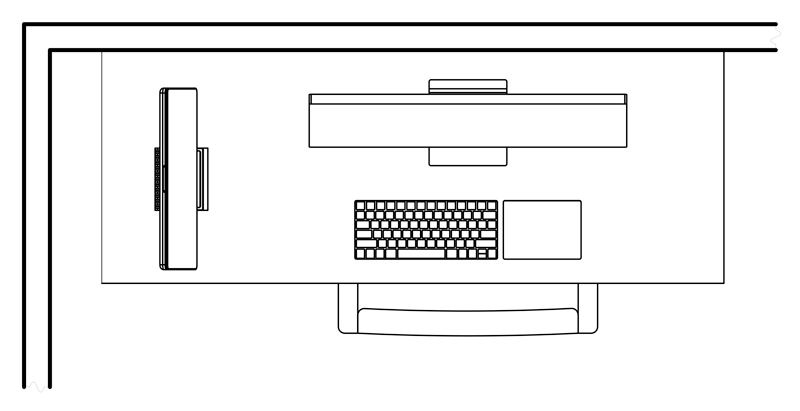 #4 LAYOUT = GOOD
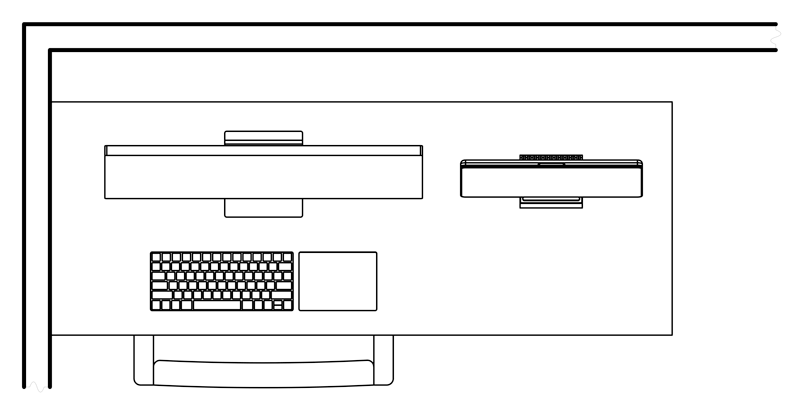 #3 LAYOUT = EXCELLENT
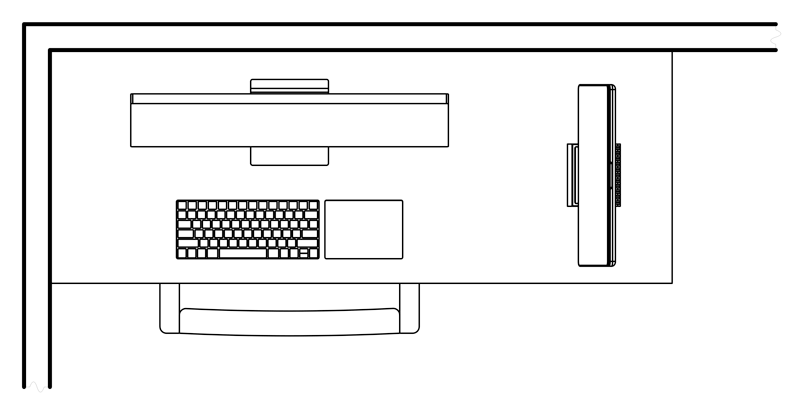 #2 LAYOUT = EXCELLENT
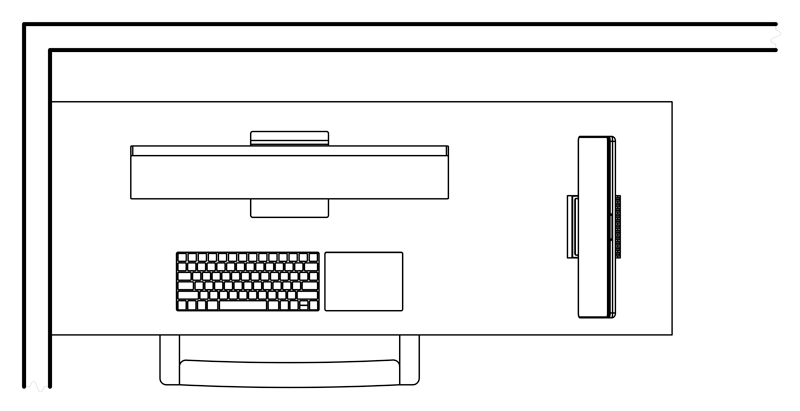 #1 LAYOUT = BEST
 #4 LAYOUT = AVOID
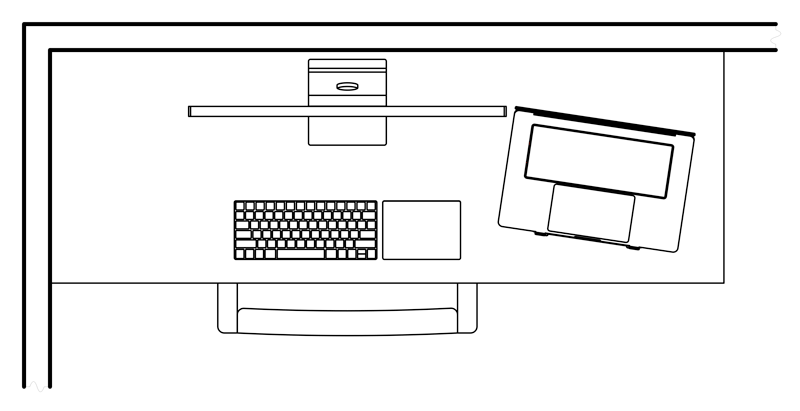 #3 LAYOUT = GOOD
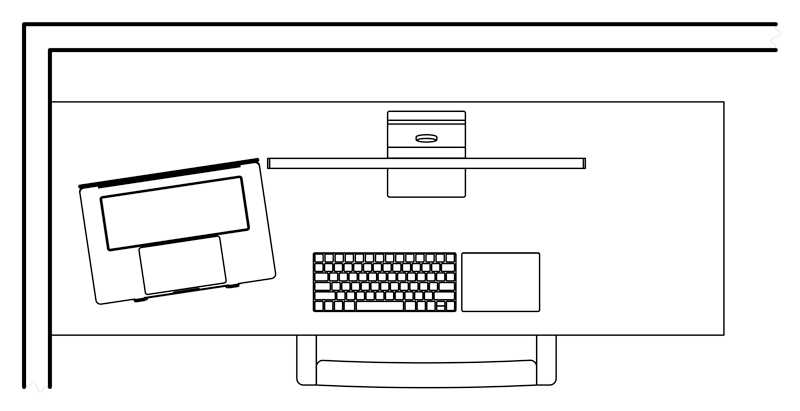 #2 LAYOUT = GOOD
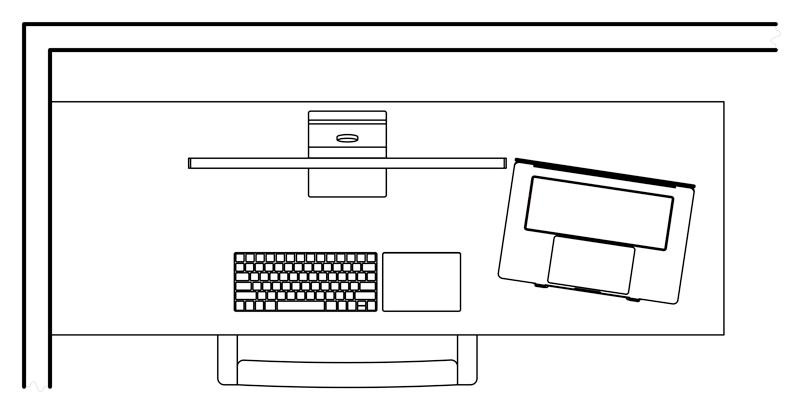 #1 LAYOUT = BEST
 Mx Modular Heatsink Cooling System models:
 Cooling Dock DLx models:
 Cooling Dock Dx models:
 Cooling Dock DH models:
 Cooling Dock DHC models:
 Cooling Dock DHCx models:
 Cooling Dock DHCR models:
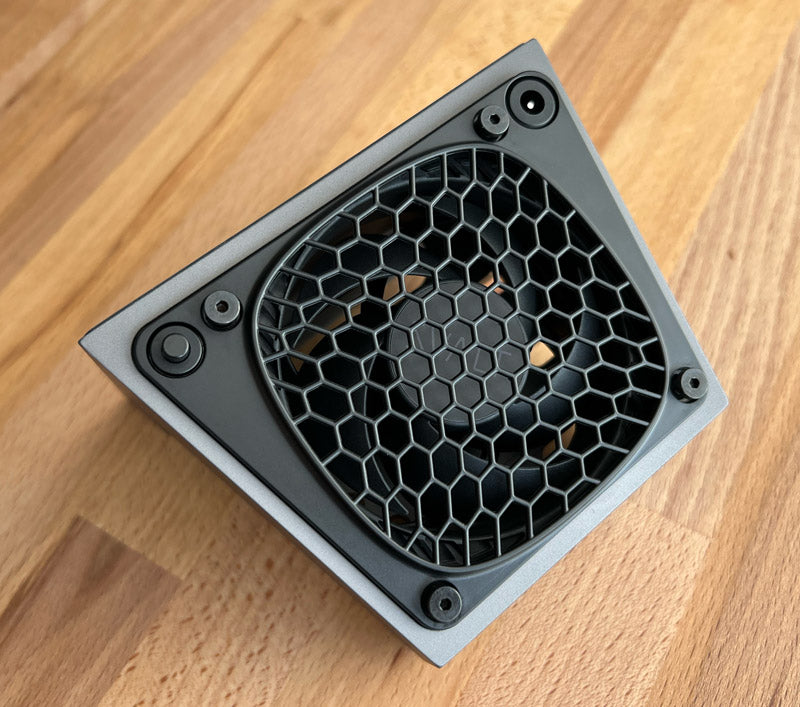
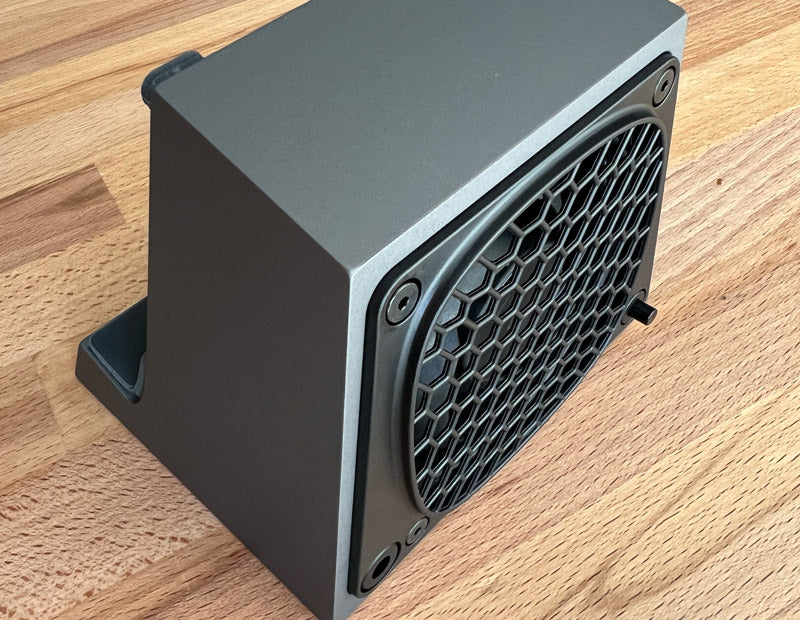
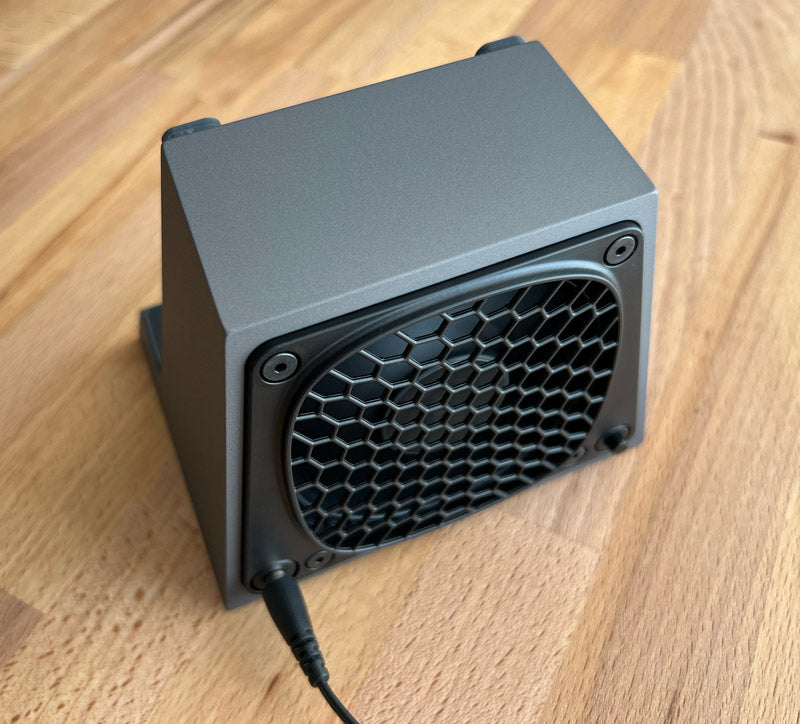
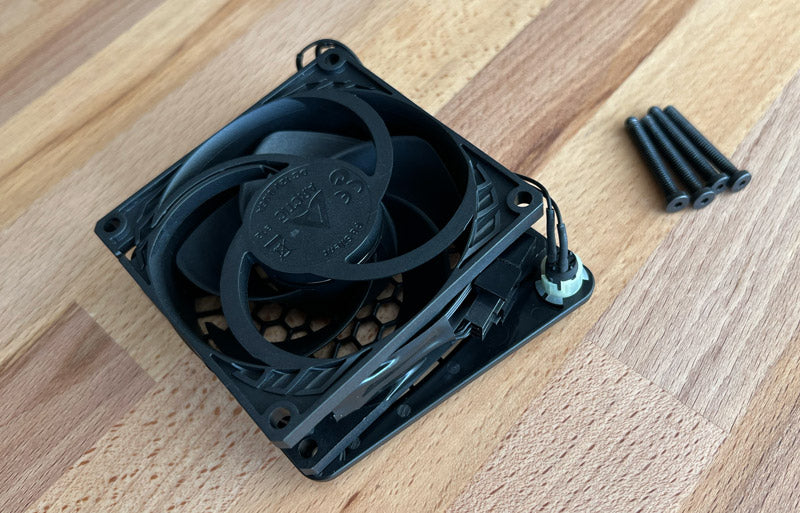
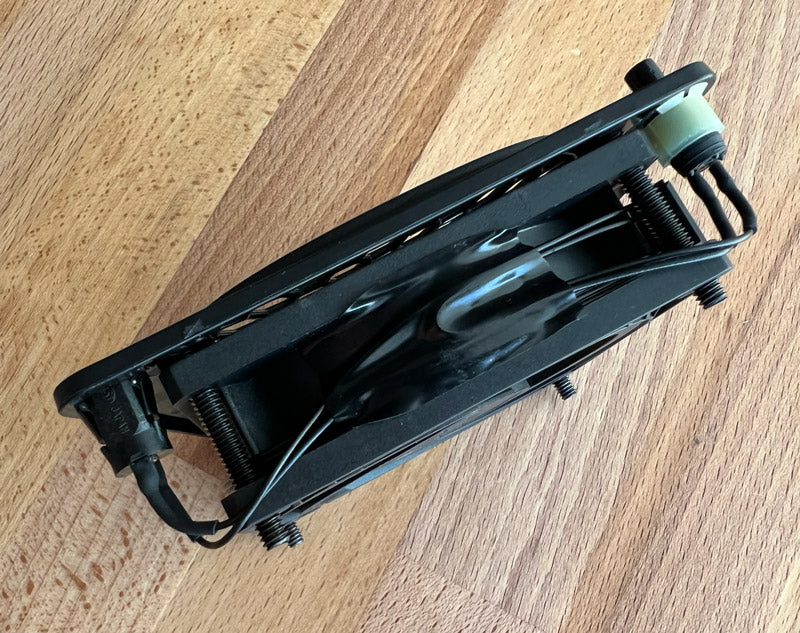
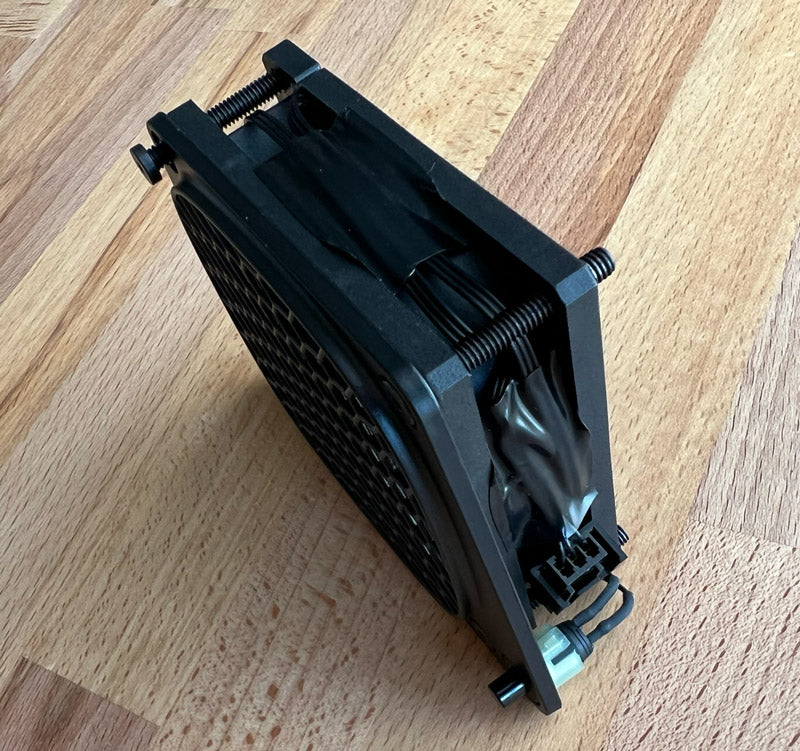
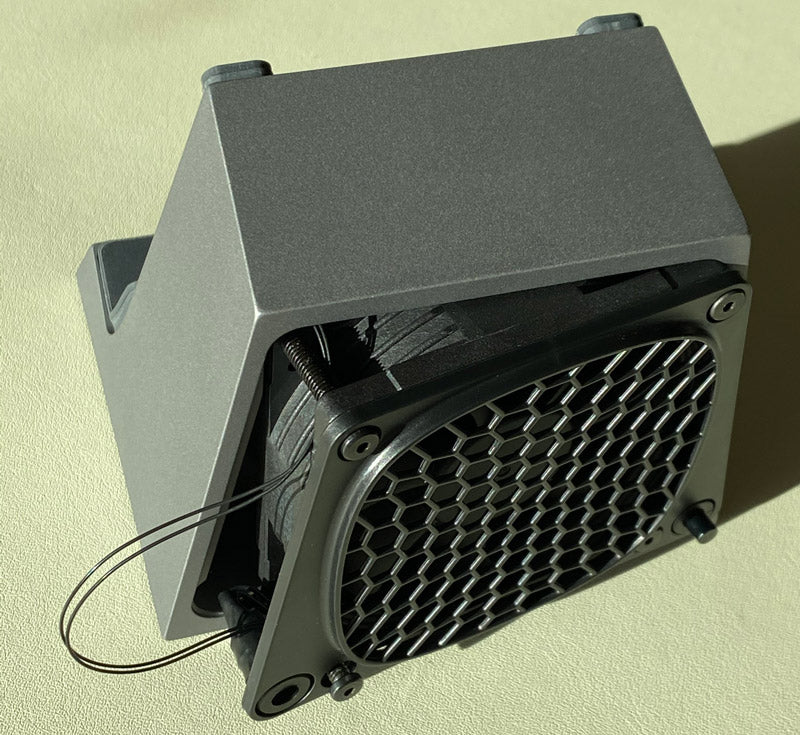
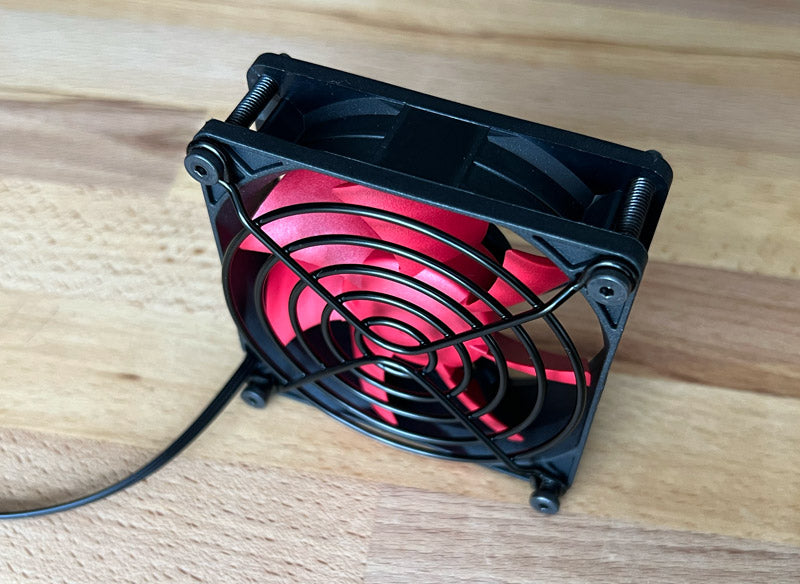
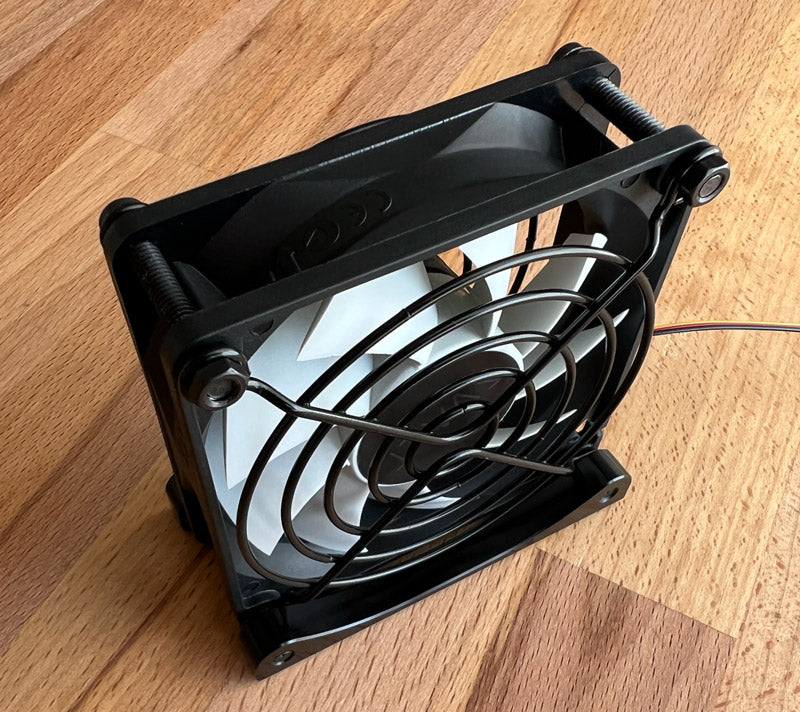
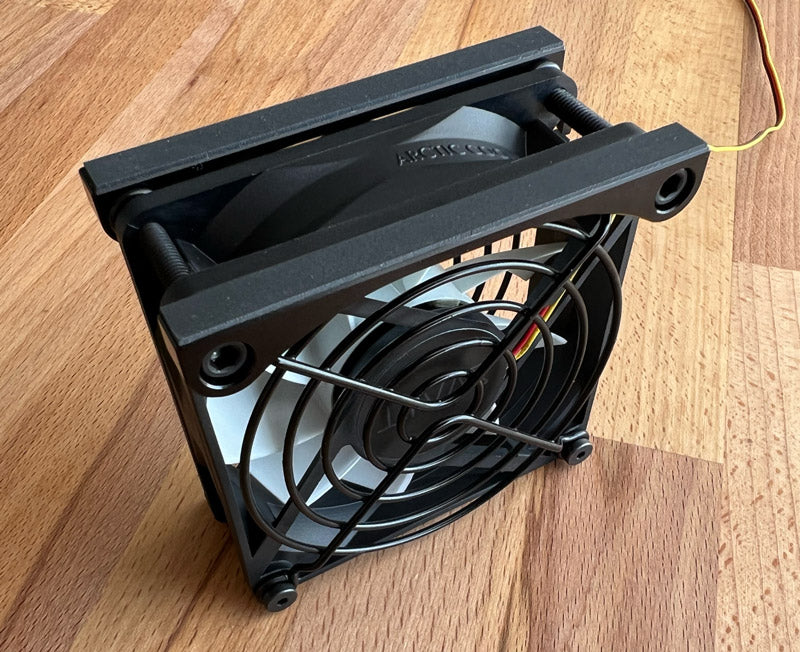
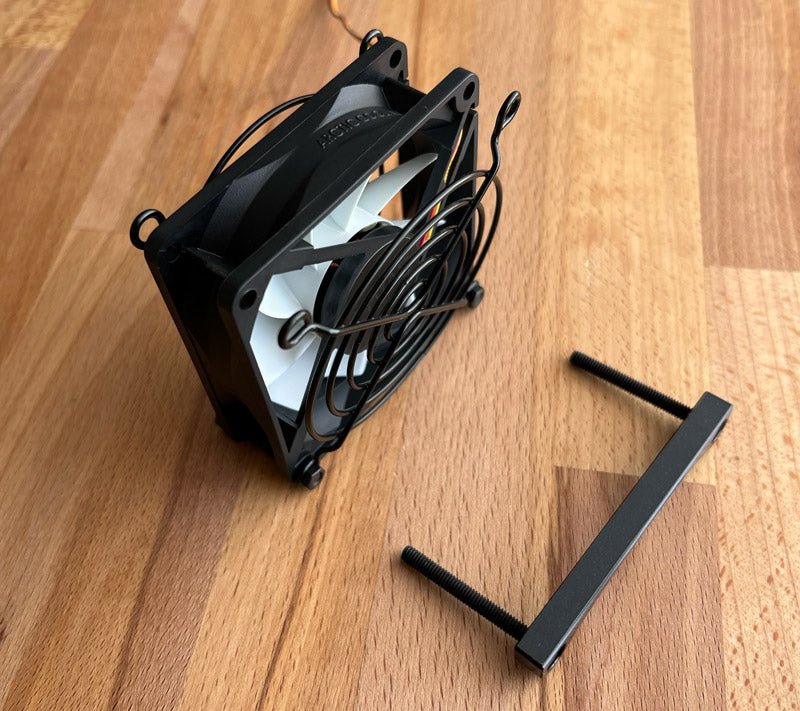
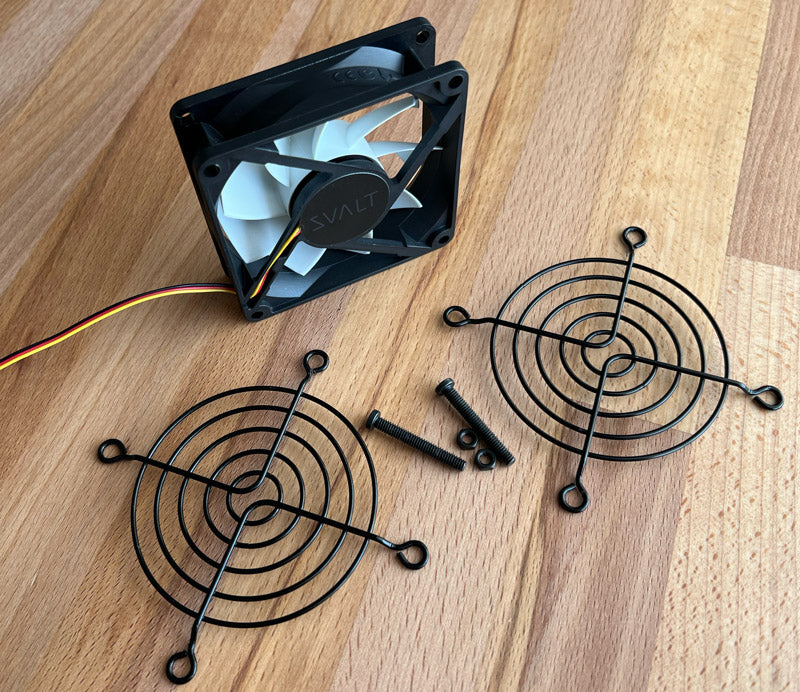
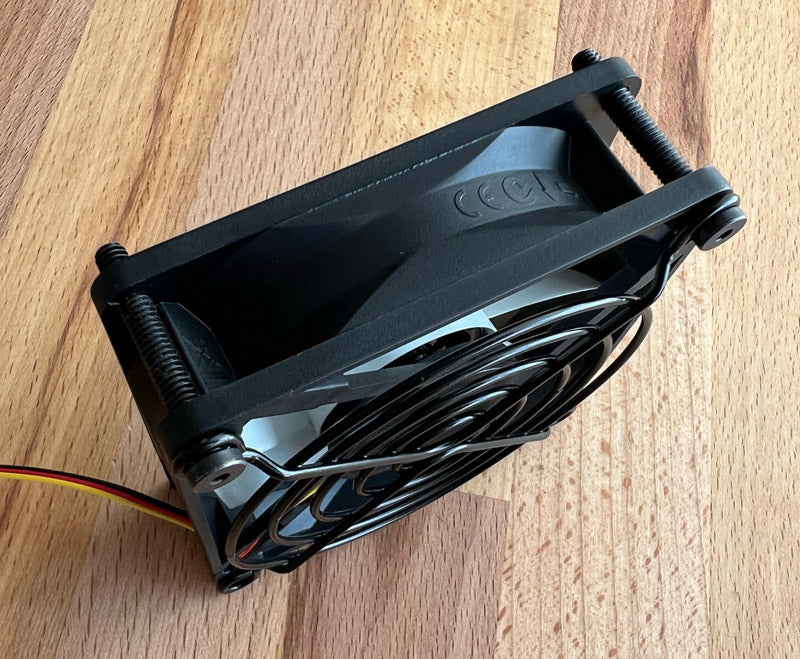
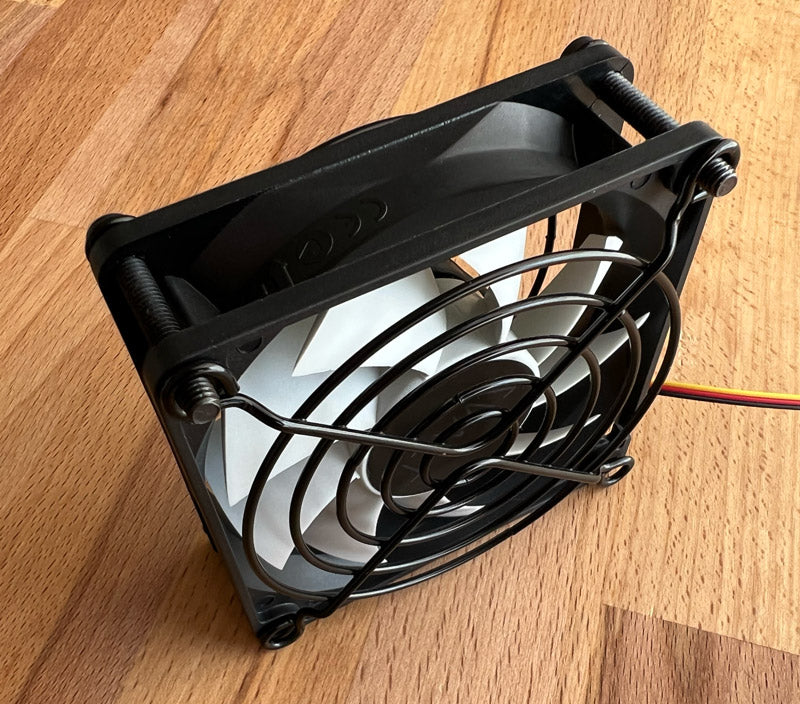
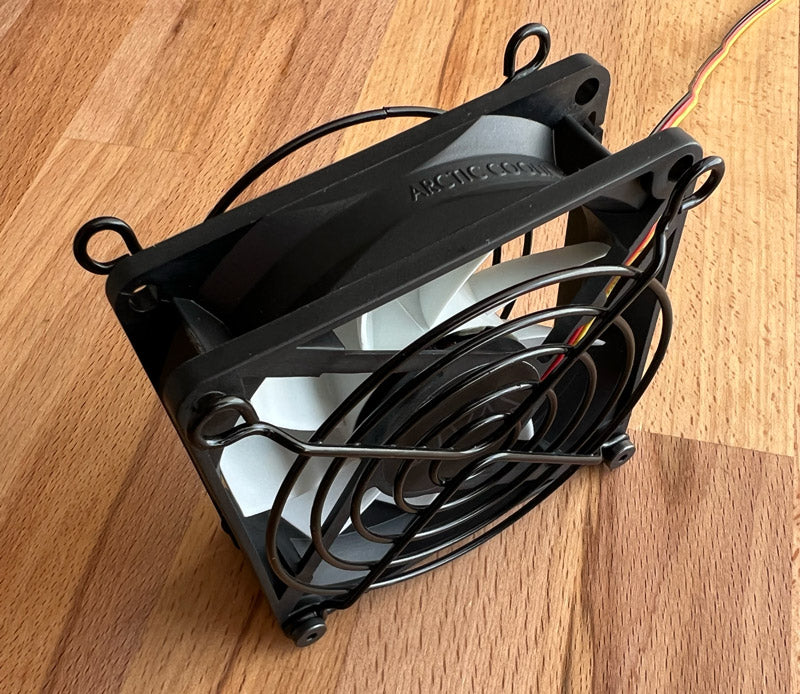
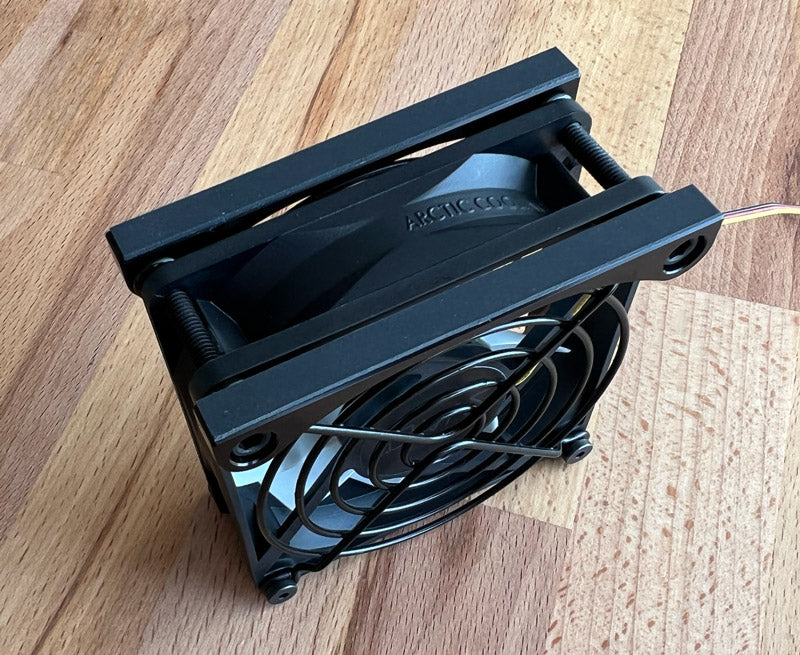
 Cooling Fan Fx models:
 Cooling Stand Sx models:
 Cooling Stand SRx models:
 Cooling Stand SxN models:
 Cooling Stand SRxN models:
 Cooling Stand SxM models:
 Cooling Stand SxM models:

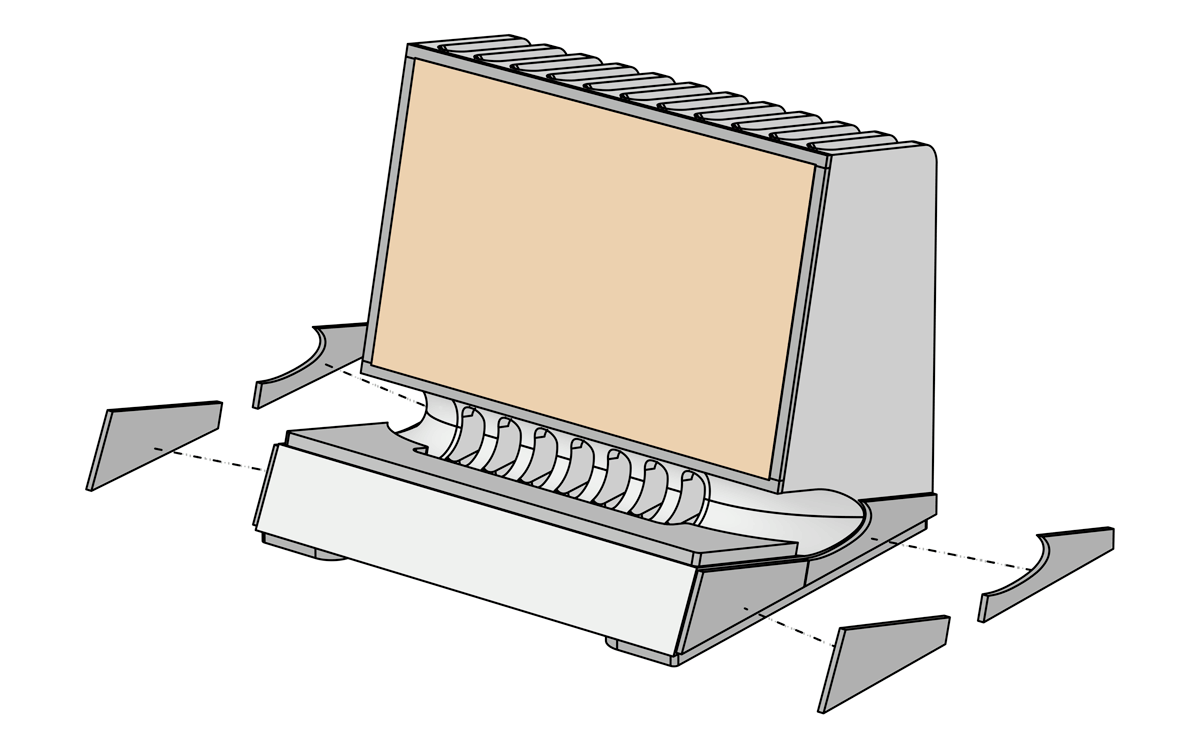
 Modular Laptop Side Support Upgrades
 Modular Fan Cooling System Upgrades
 Modular Replacement Parts and Accessories
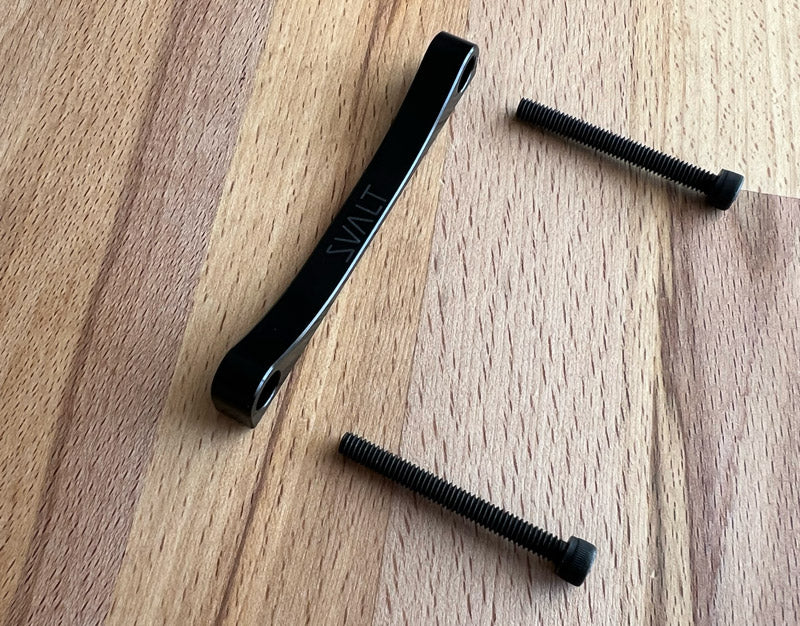
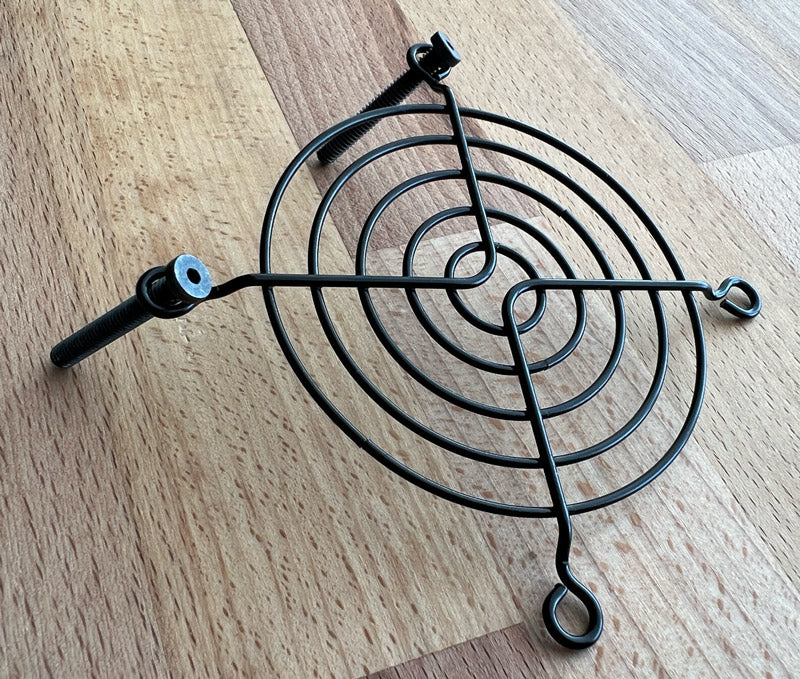
 Cleaning / Servicing / Right-to-Repair
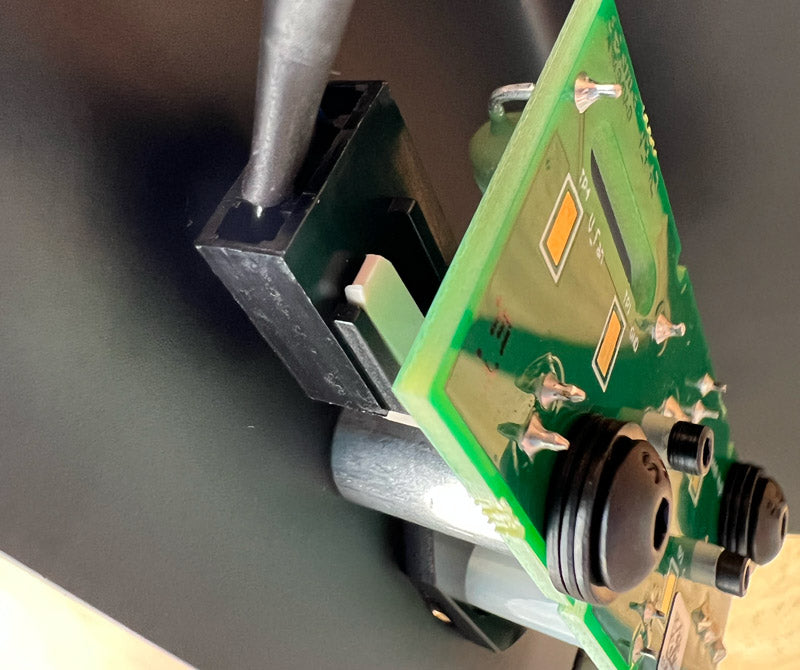
 Free Optimization Upgrades
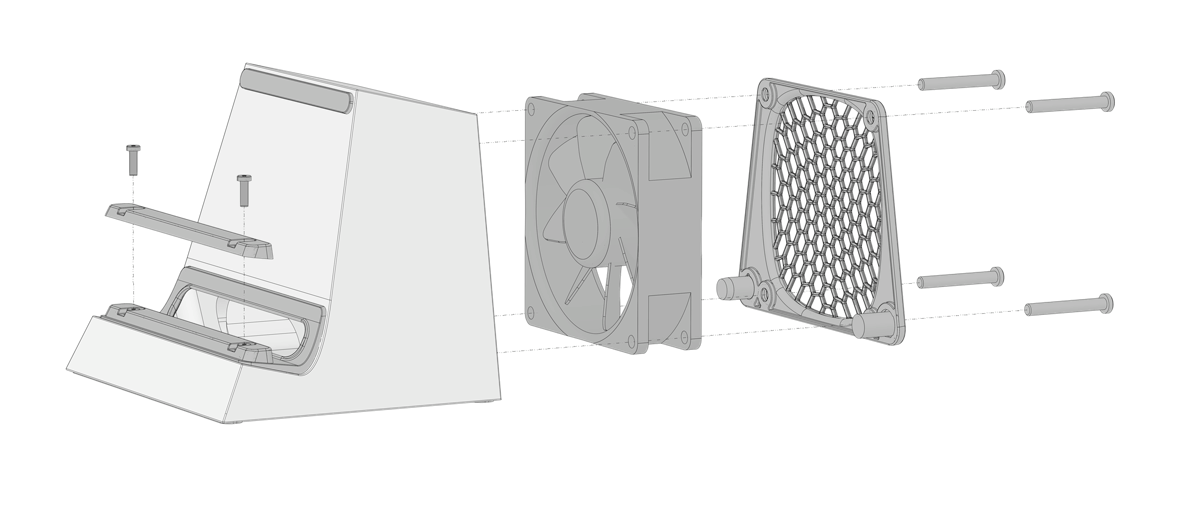


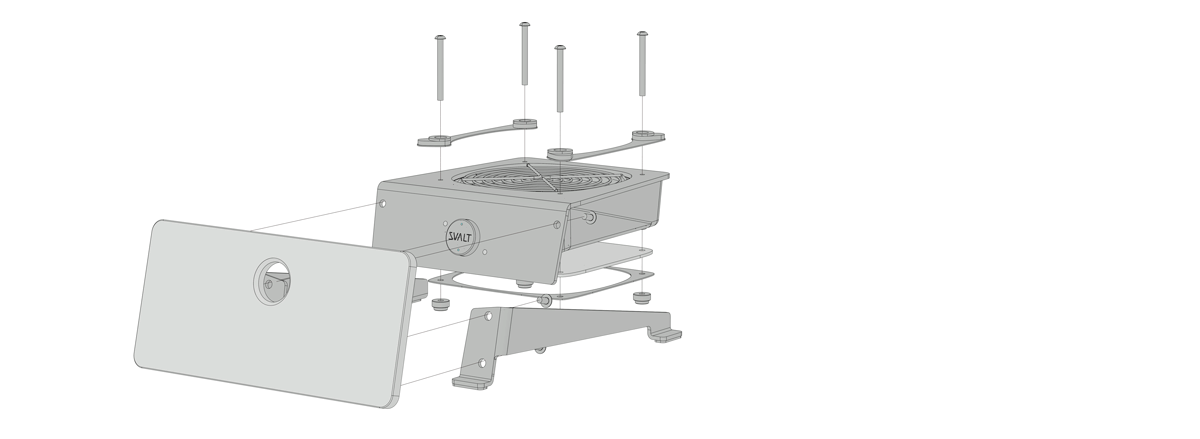
 Product Setup
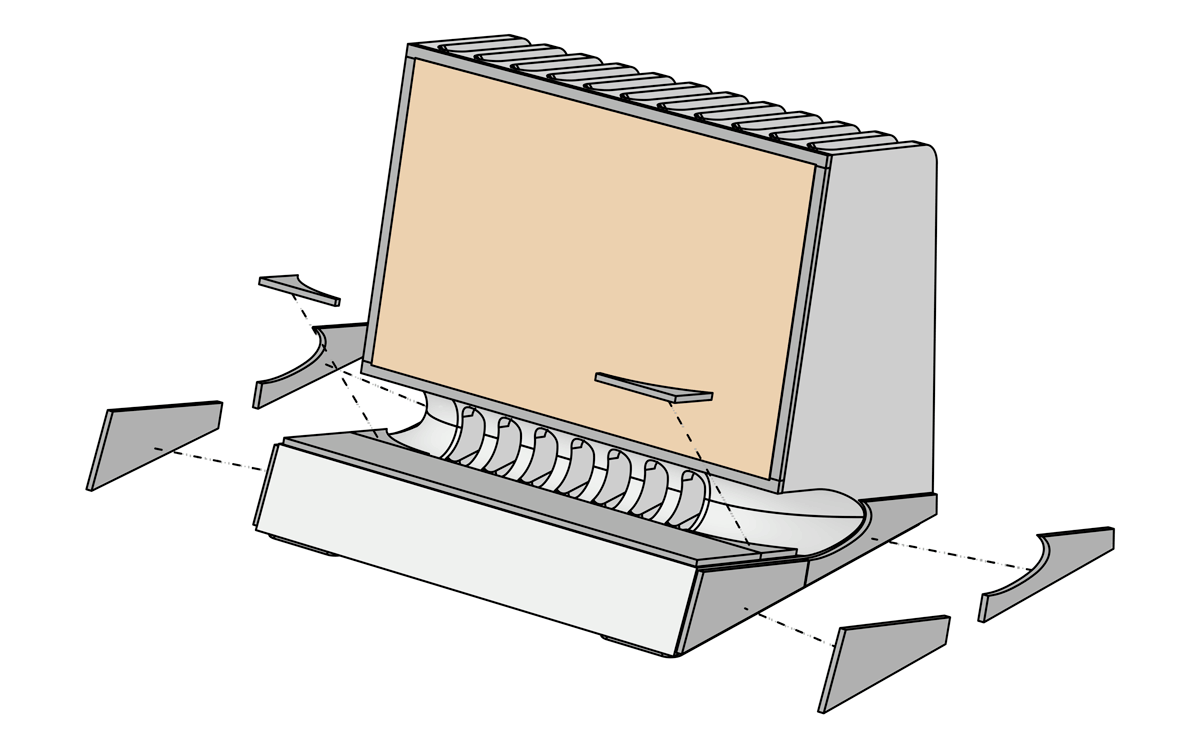
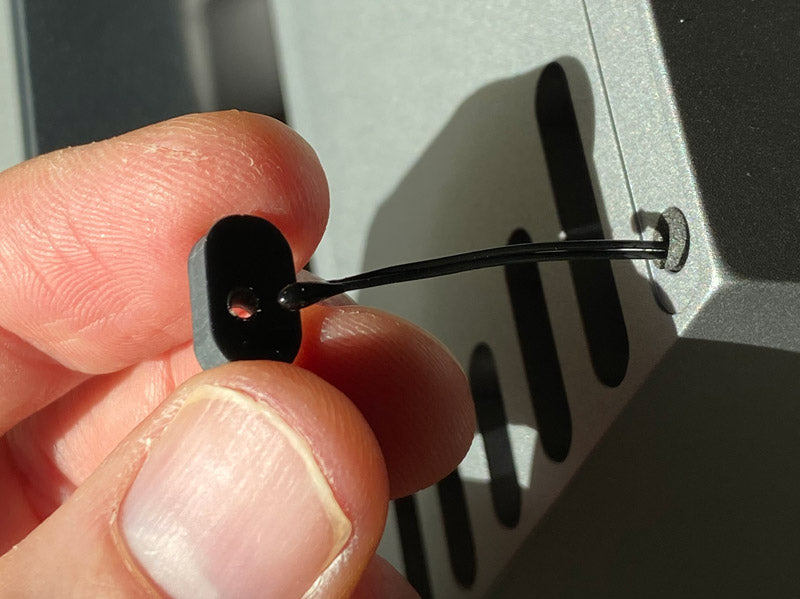
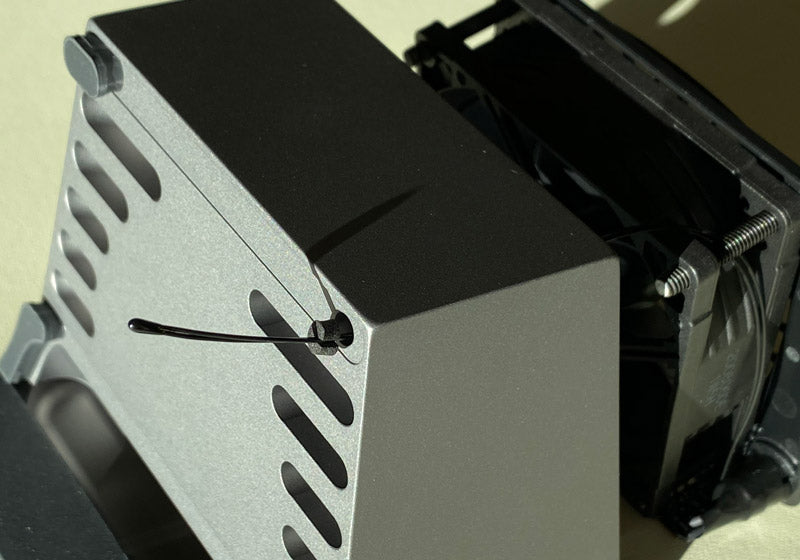
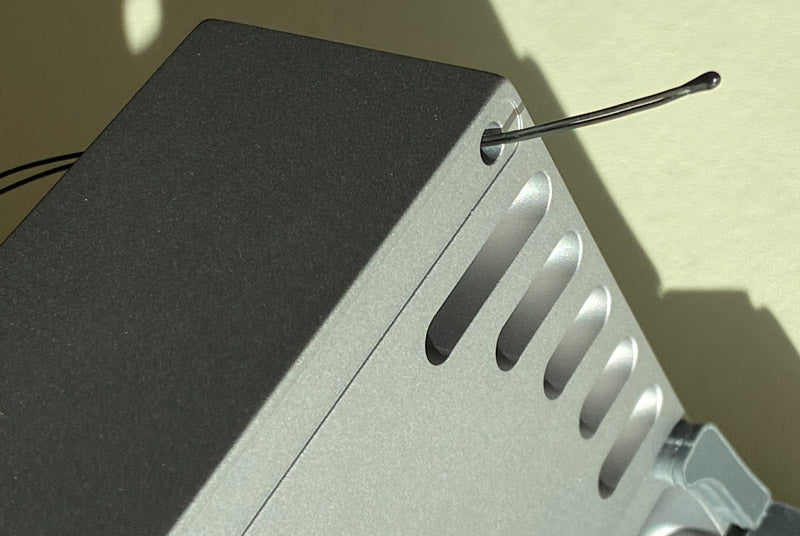
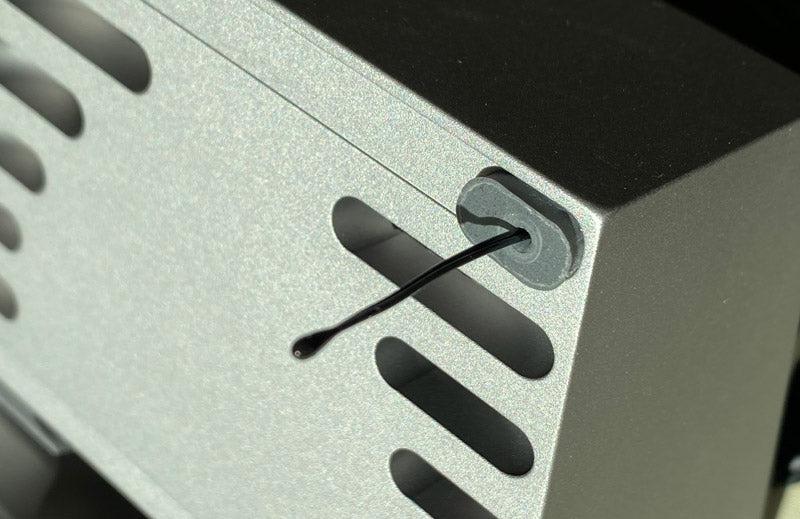
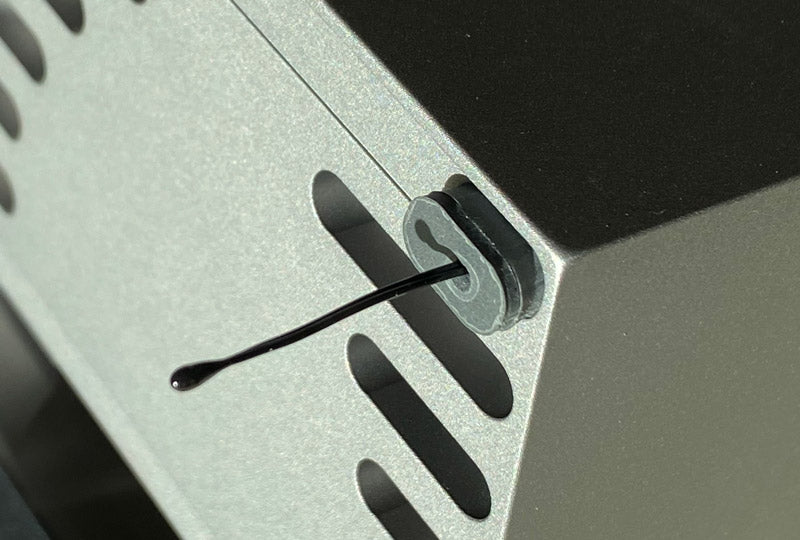
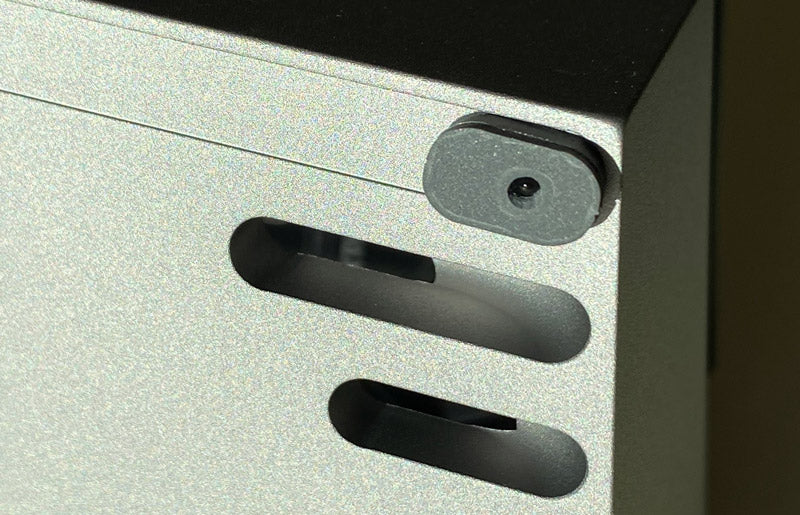
 Insulating Side Pads
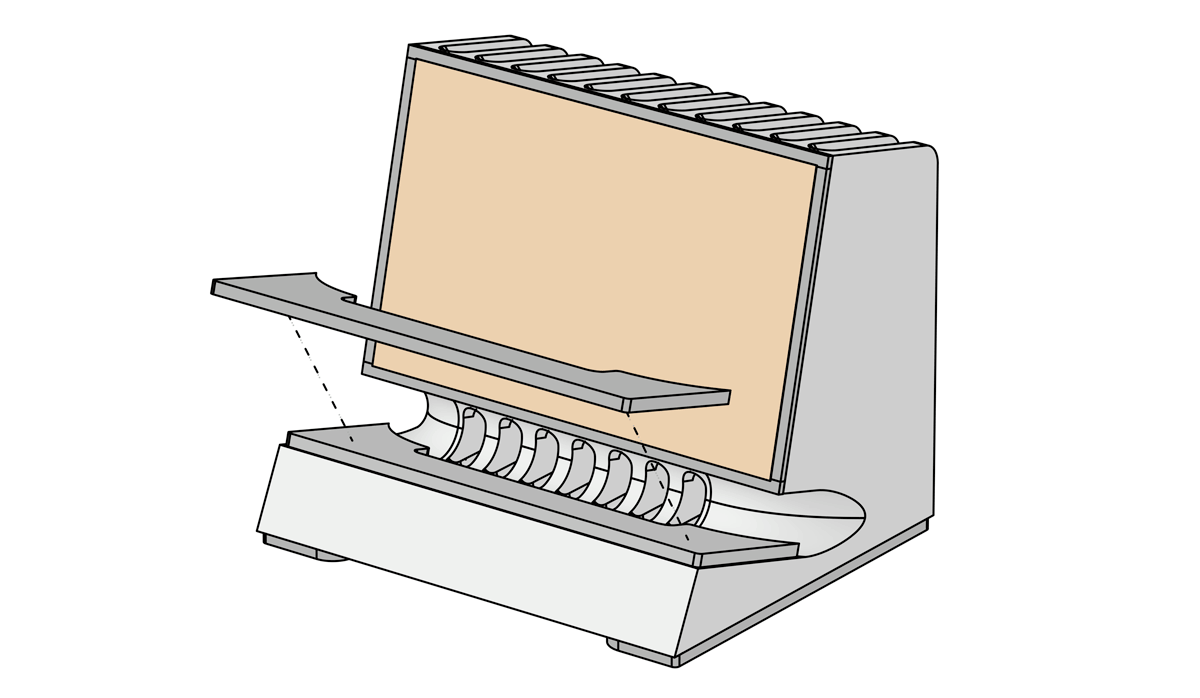 Performance Laptop Support Pad
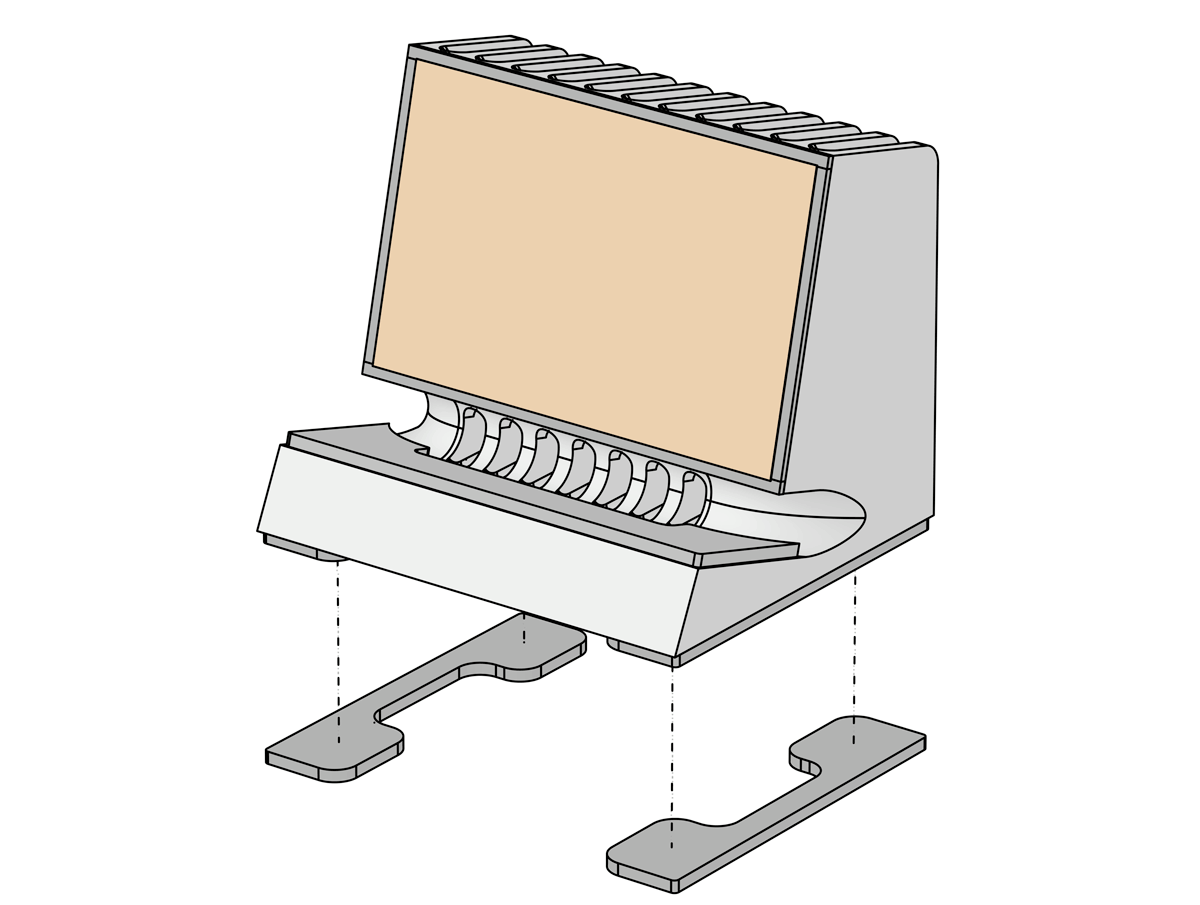 Performance Bottom Pads
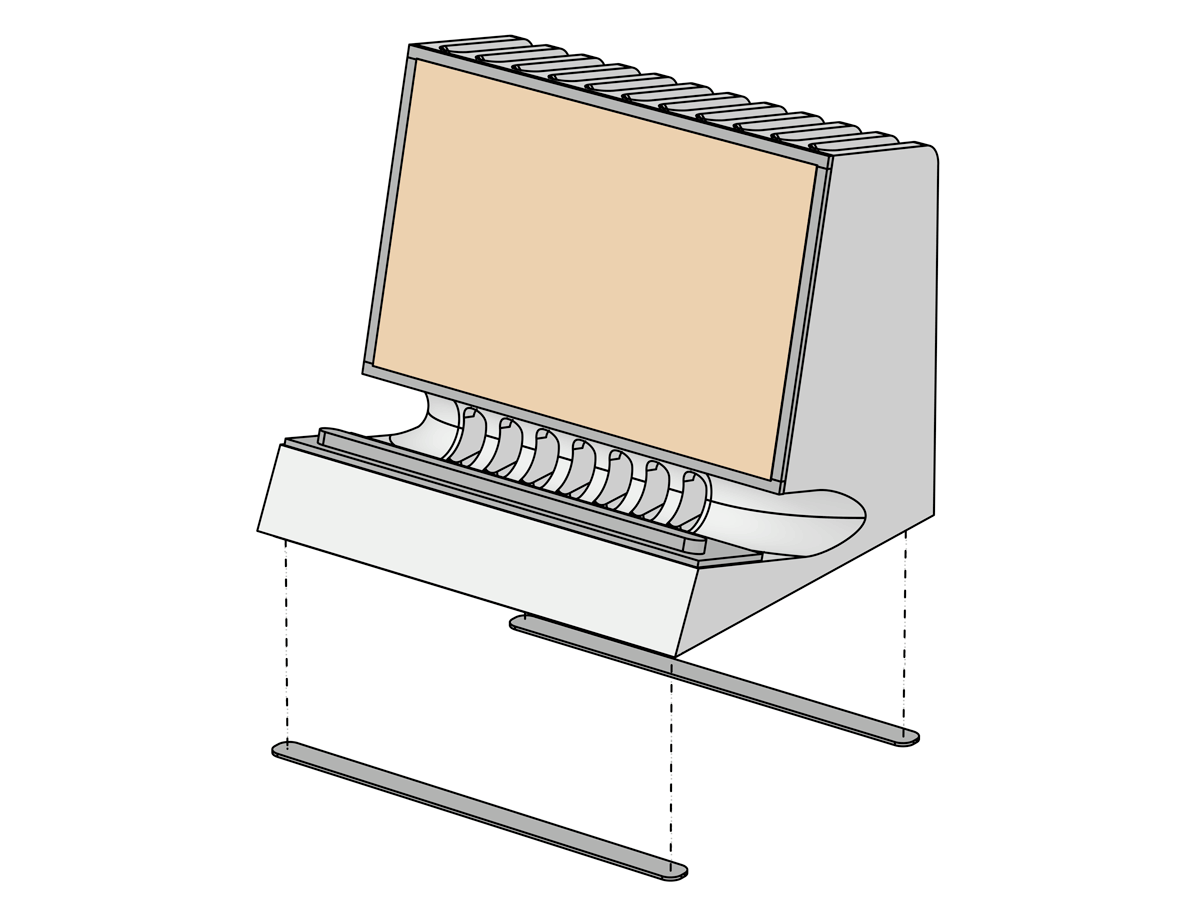 Standard Bottom Pads
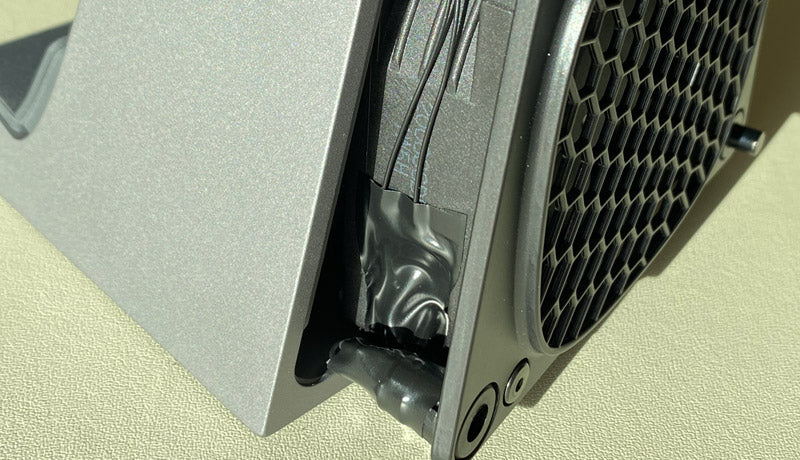
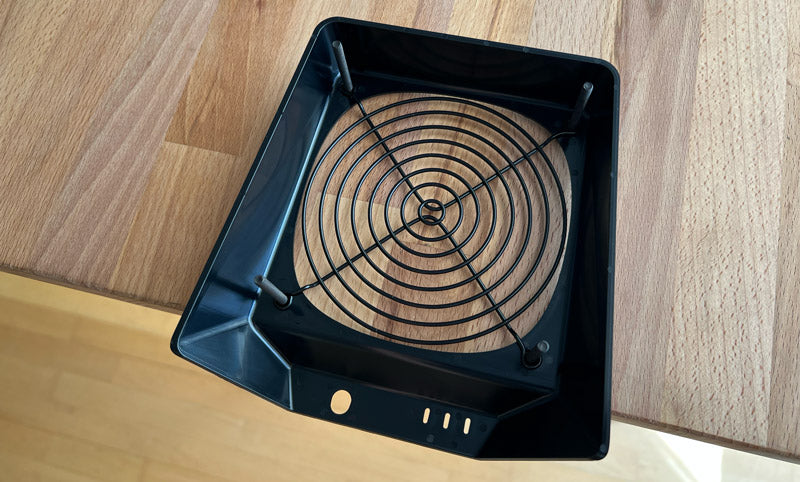
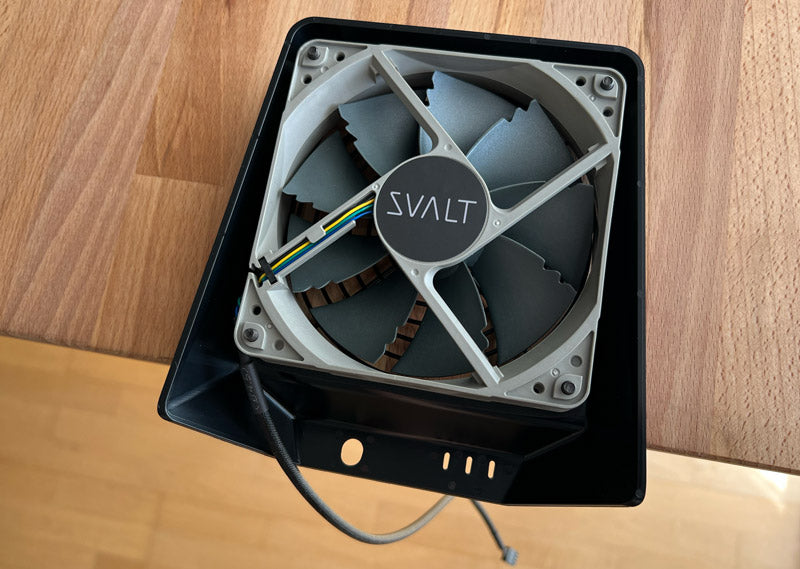
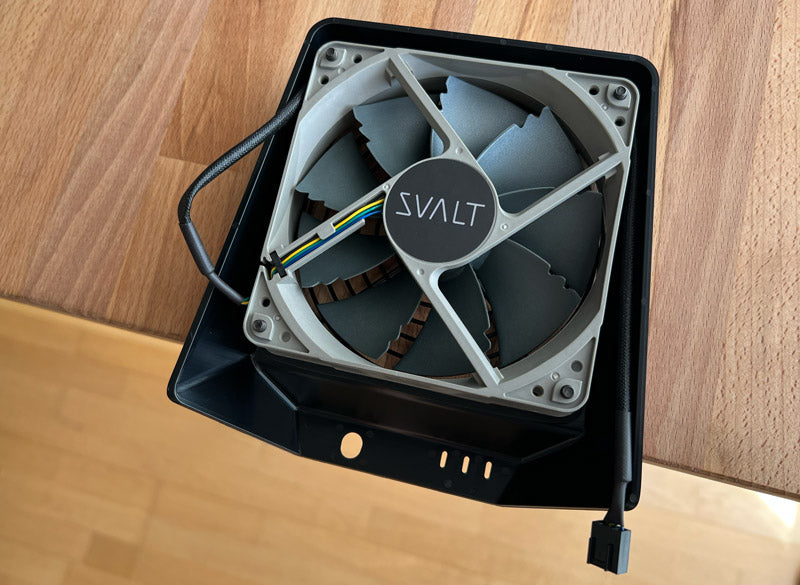
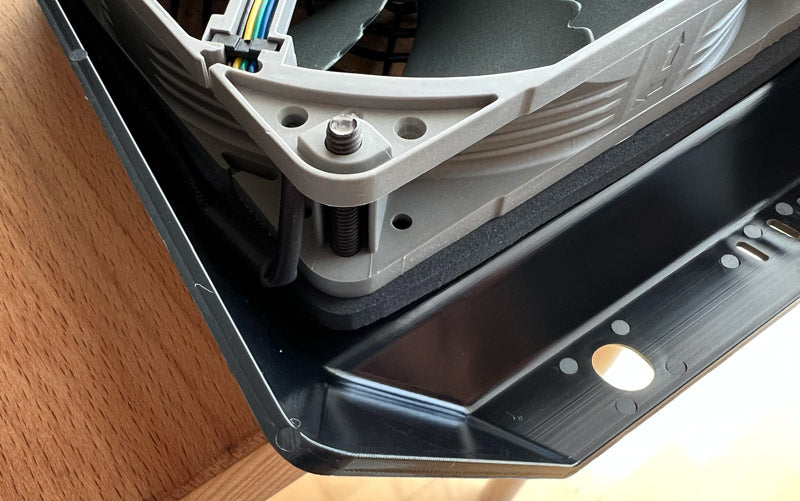
 Fx Cooling Fan
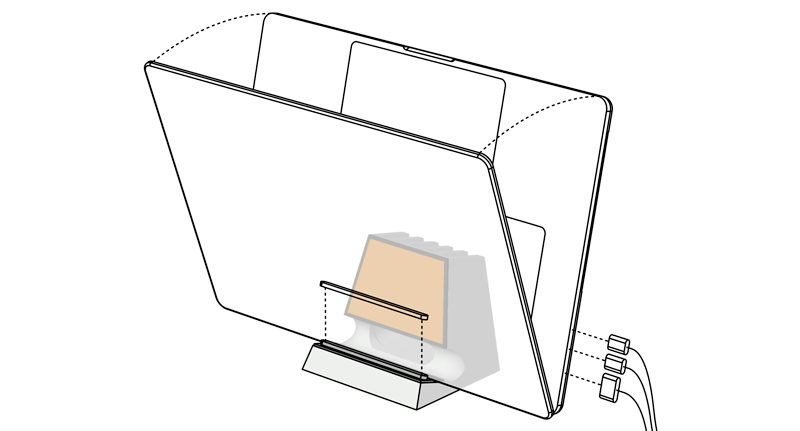 Product setup and operation has a significant impact on cooling performance, as does workstation setup. This page assists with product setup, and once complete, then please see the Workstation Setup page.
 Product setup and operation has a significant impact on cooling performance, as does workstation setup. This page assists with product setup, and once complete, then please see the Workstation Setup page.
 Product setup and operation has a significant impact on cooling performance, as does workstation setup. This page assists with product setup, and once complete, then please see the Workstation Setup page.
 Product setup and operation has a significant impact on cooling performance, as does workstation setup. This page assists with product setup, and once complete, then please see the Workstation Setup page.
 Product setup and operation has a significant impact on cooling performance, as does workstation setup. This page assists with product setup, and once complete, then please see the Workstation Setup page.
 Product setup and operation has a significant impact on cooling performance, as does workstation setup. This page assists with product setup, and once complete, then please see the Workstation Setup page.
 Product setup and operation has a significant impact on cooling performance, as does workstation setup. This page assists with product setup, and once complete, then please see the Workstation Setup page.
 Product setup and operation has a significant impact on cooling performance, as does workstation setup. This page assists with product setup, and once complete, then please see the Workstation Setup page.
 Product setup and operation has a significant impact on cooling performance, as does workstation setup. This page assists with product setup, and once complete, then please see the Workstation Setup page.
 Product setup and operation has a significant impact on cooling performance, as does workstation setup. This page assists with product setup, and once complete, then please see the Workstation Setup page.
 Product setup and operation has a significant impact on cooling performance, as does workstation setup. This page assists with product setup, and once complete, then please see the Workstation Setup page.

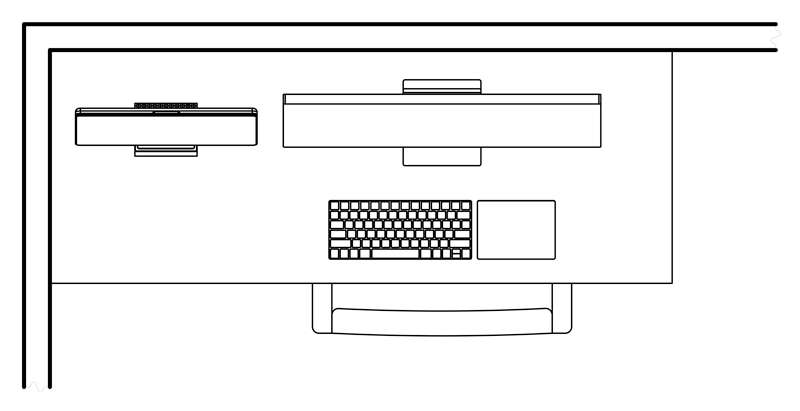
 2021+ 16-inch MacBook Pro w/ MxD

 2021+ 16-inch MacBook Pro w/ MxS-hi

 2021+ 16-inch MacBook Pro w/ MxS-lo


 2021+ 14-inch MacBook Pro w/ MxD

 2021+ 14-inch MacBook Pro w/ MxS-hi

 2021+ 14-inch MacBook Pro w/ MxS-lo


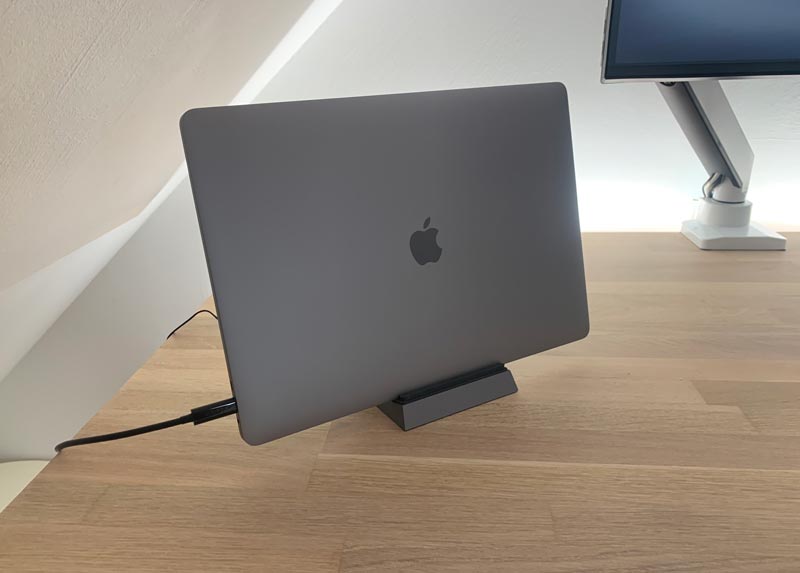
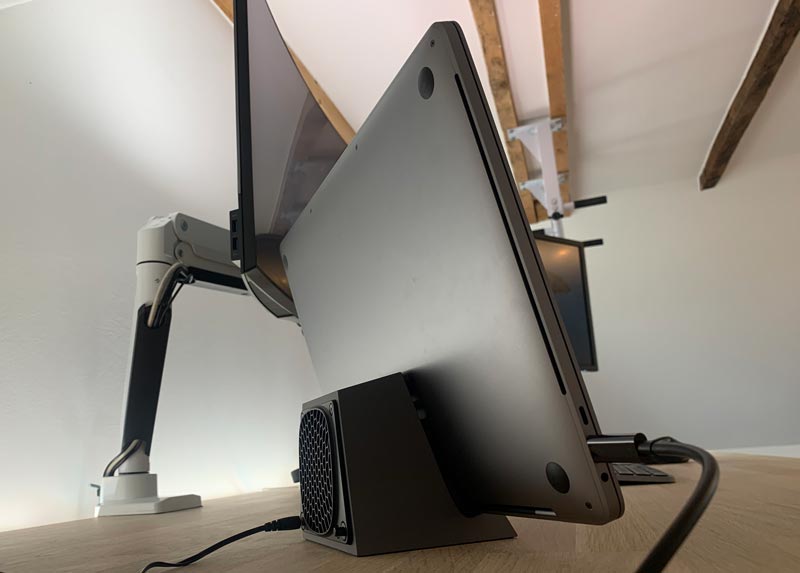
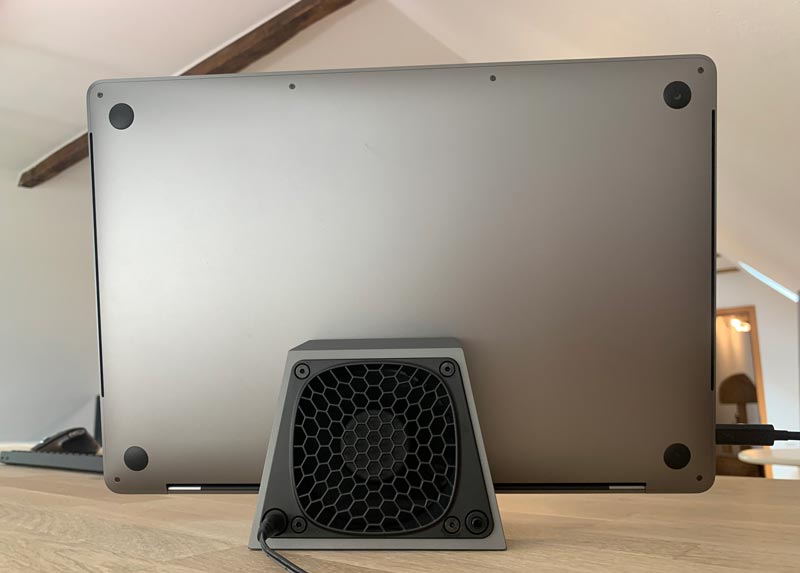
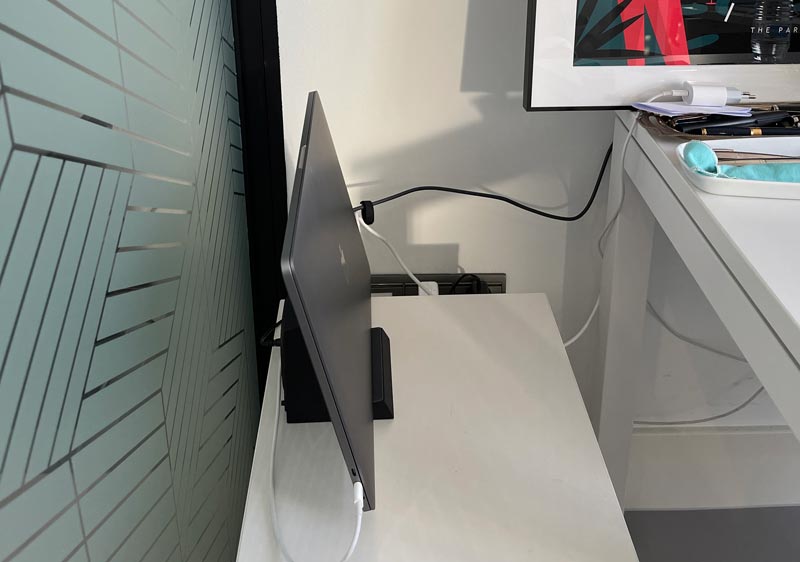


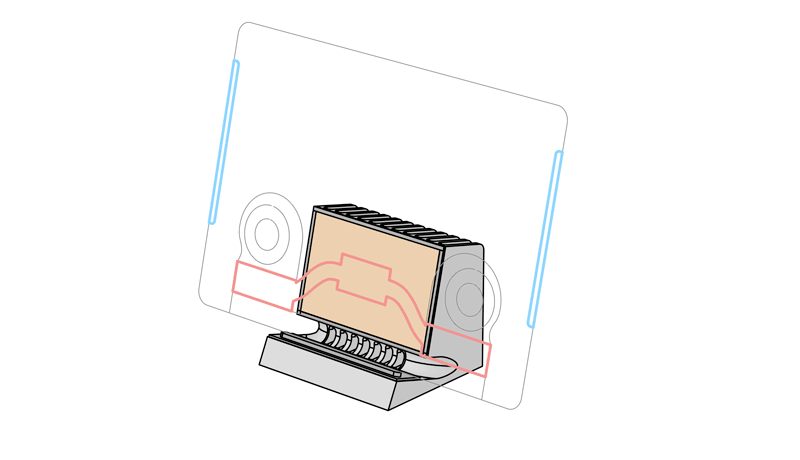
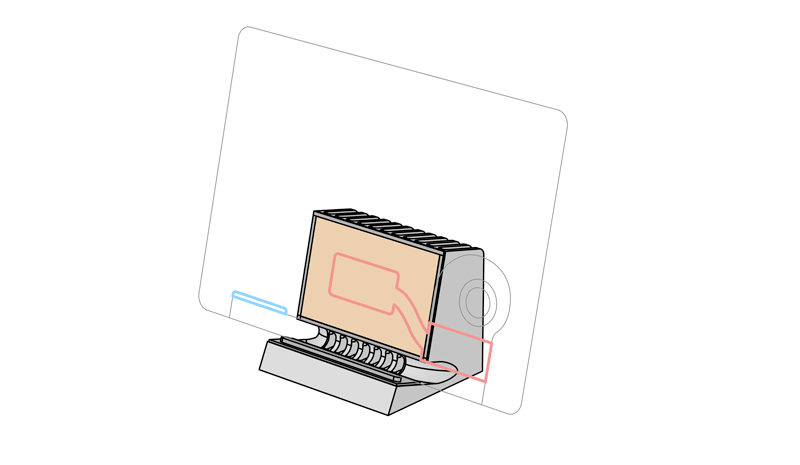
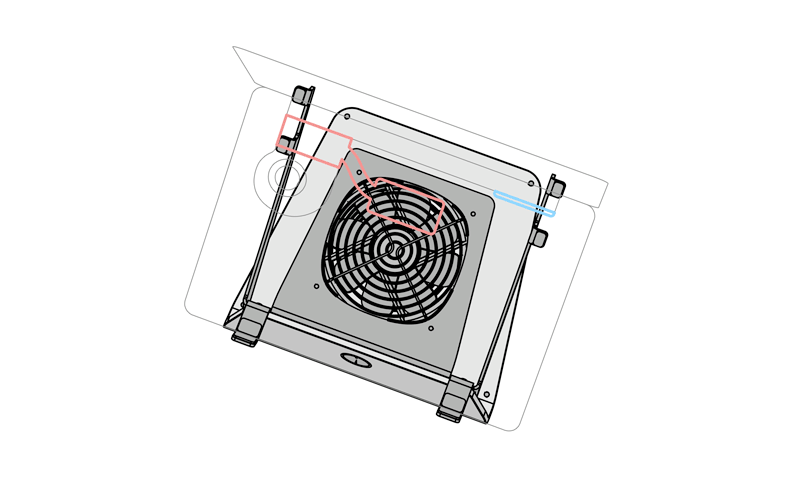
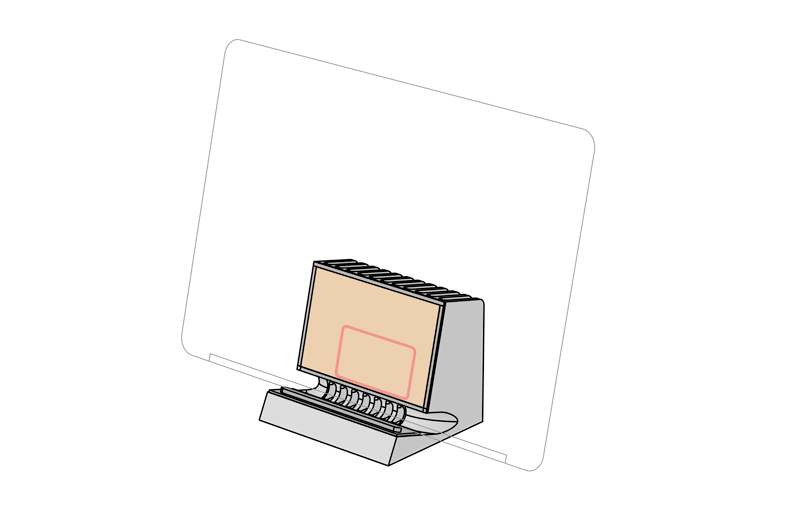
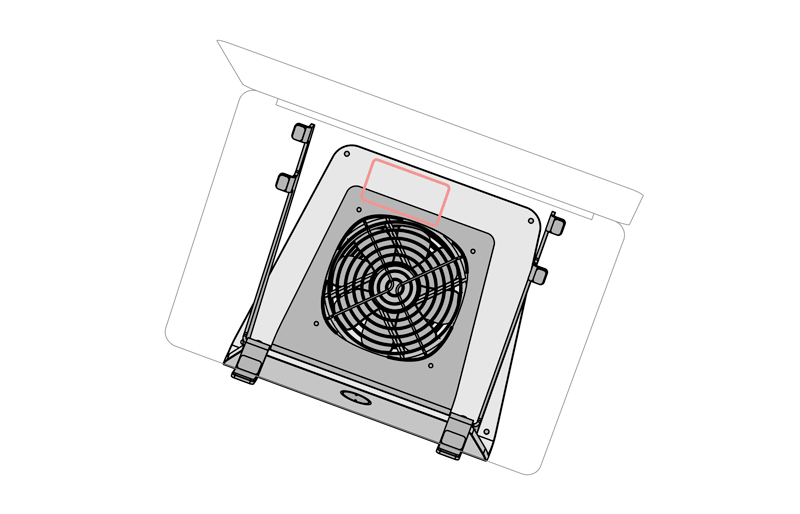
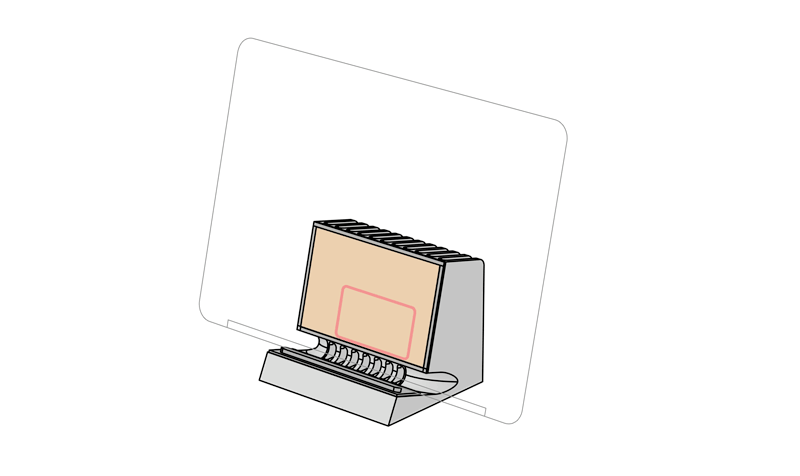
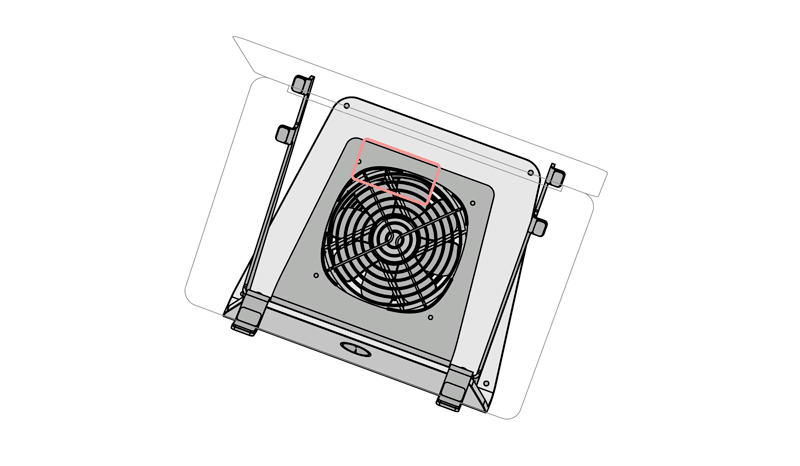
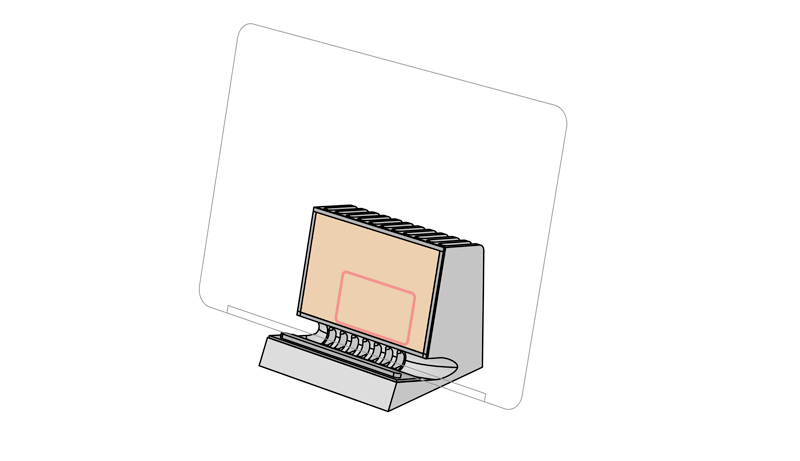
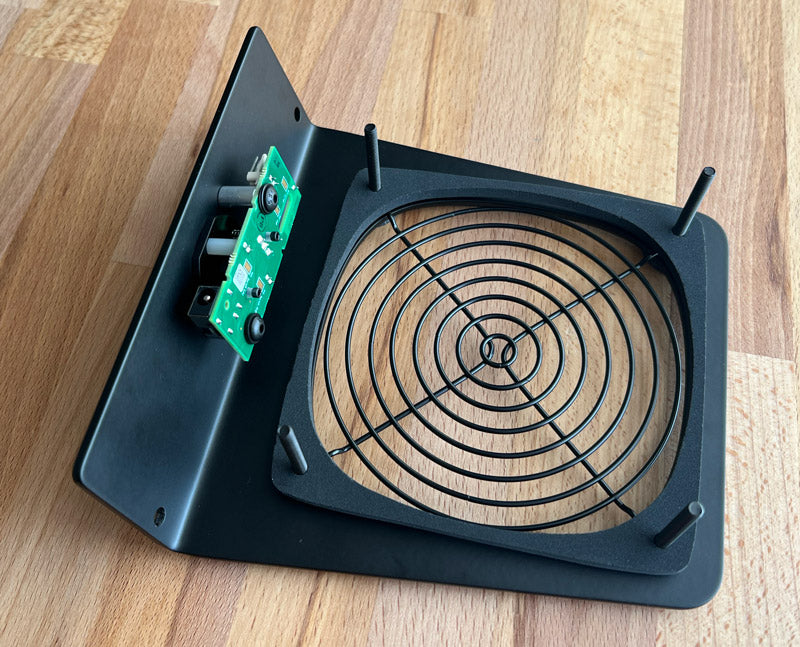
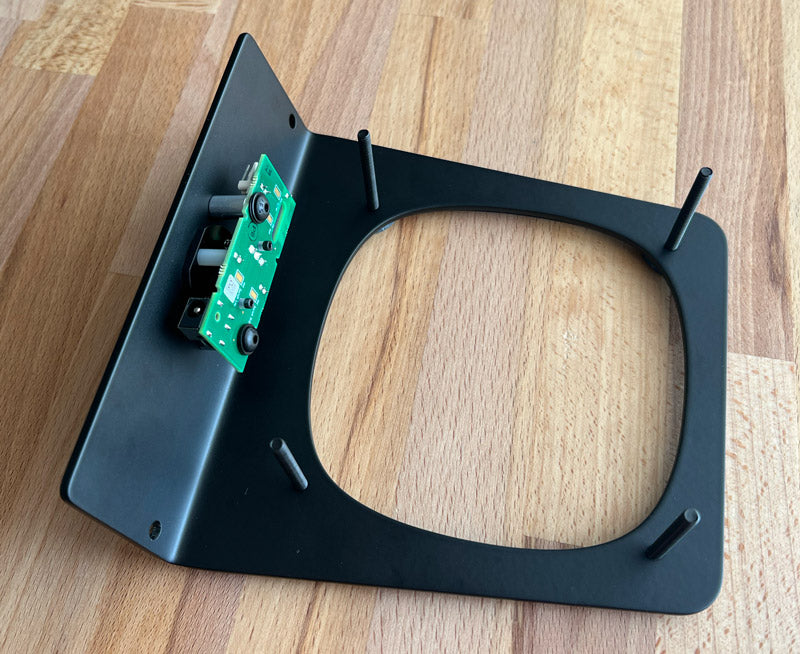
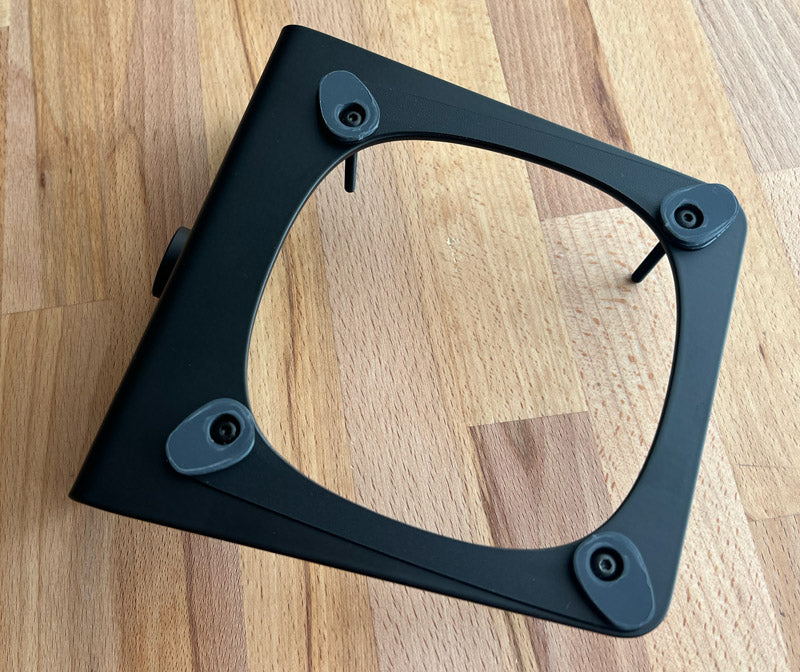
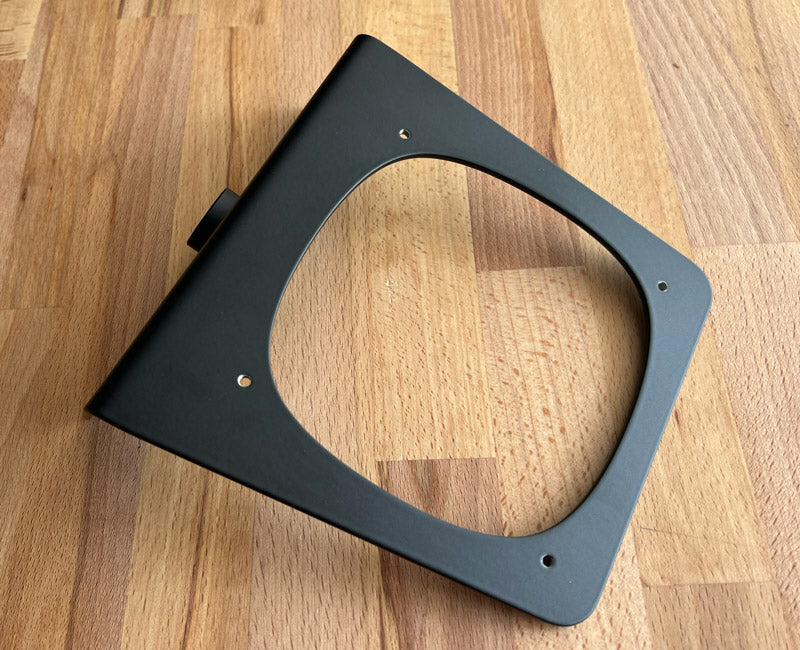
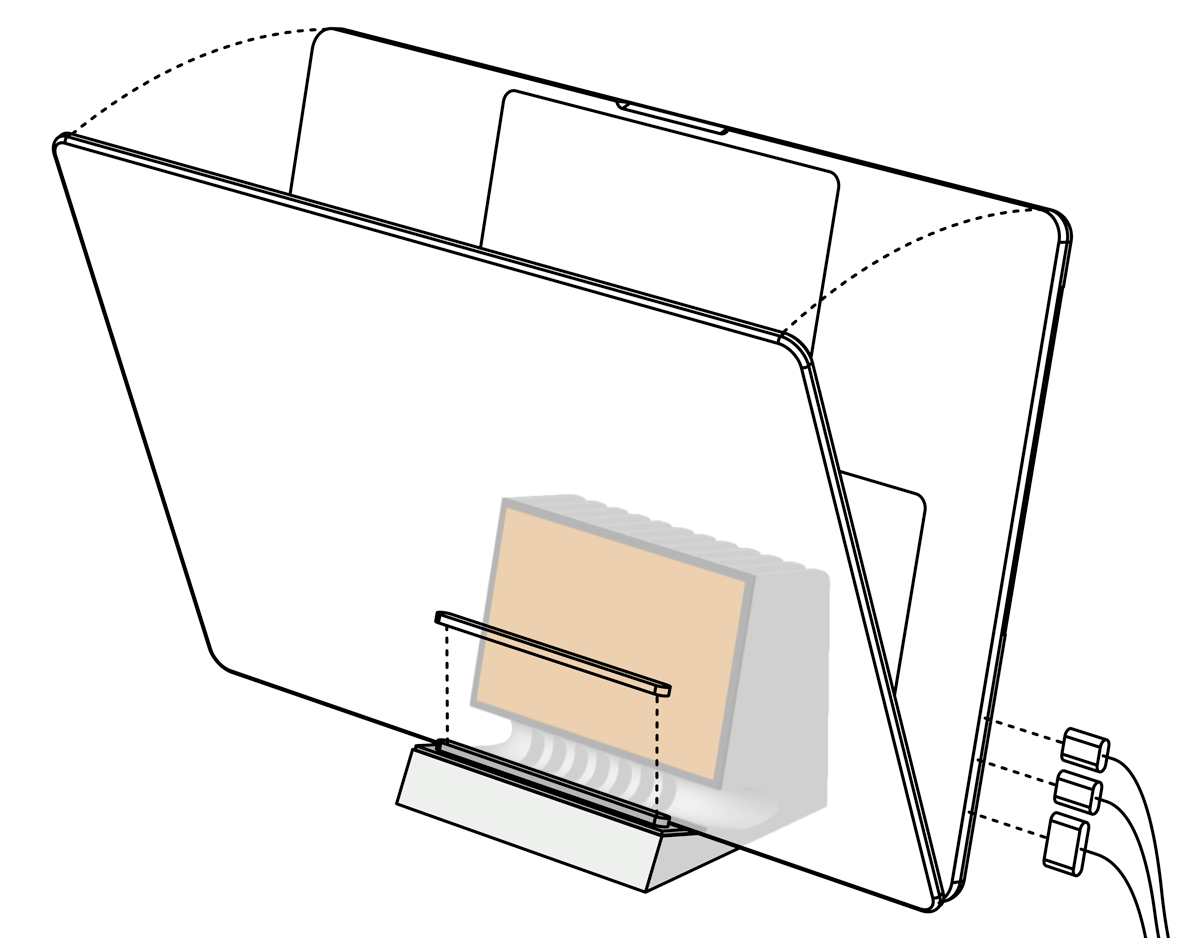
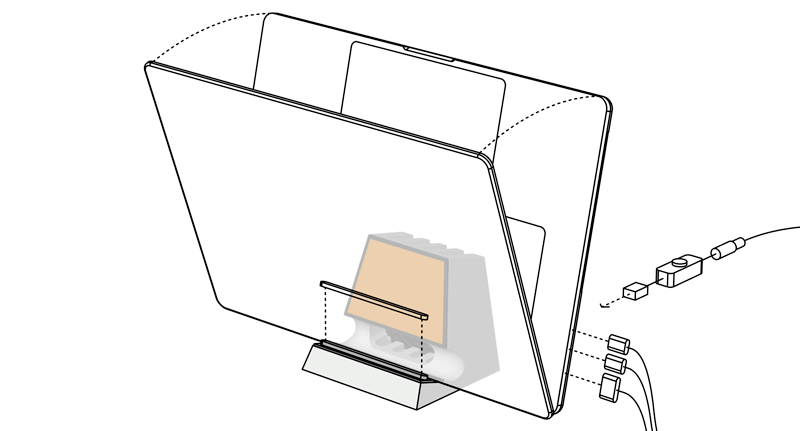
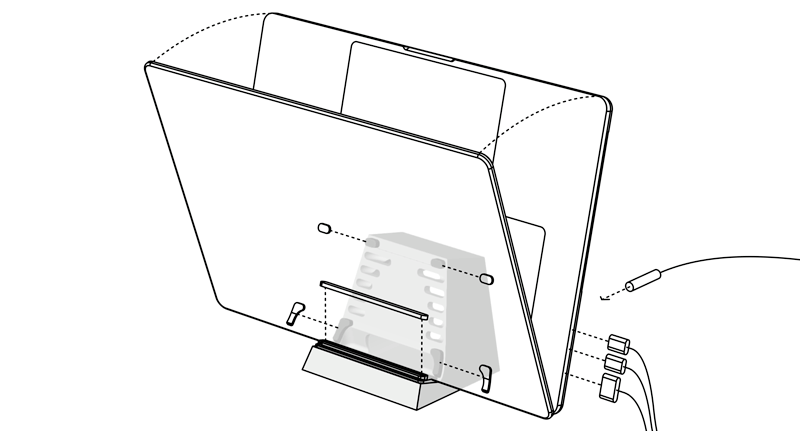
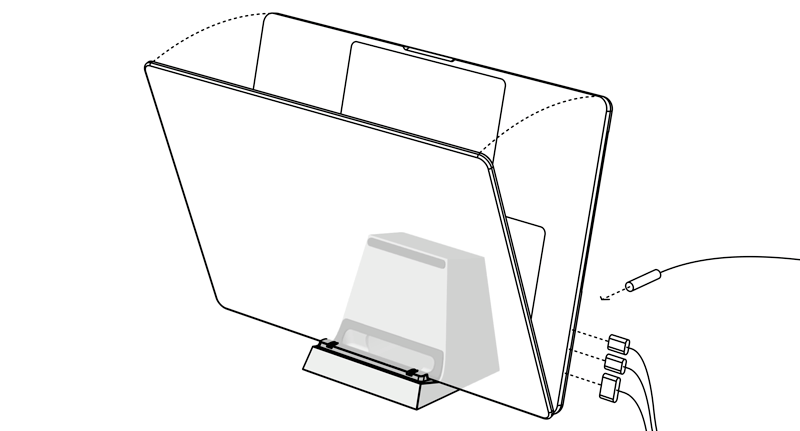
 In addition to cooling, the Cooling Dock product line uses an innovative leaning vertical configuration for increased support stability with a wide variety of laptop sizes. This configuration makes the process of enabling clamshell mode easier by allowing a user to open the screen and access the power button while the laptop is connected to cables and safely resting within a padded cradle. See Laptops to learn what SVALT models have been optimized to provide the best cooling performance for your laptop model.