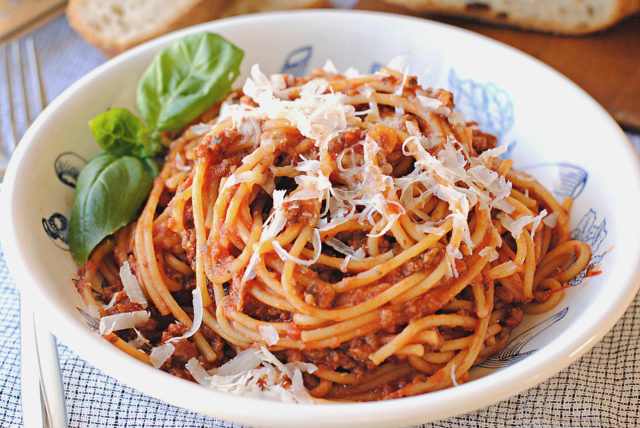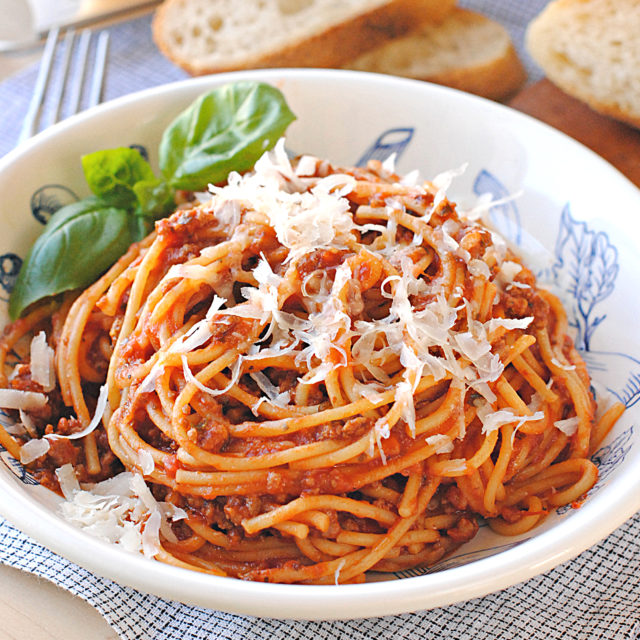
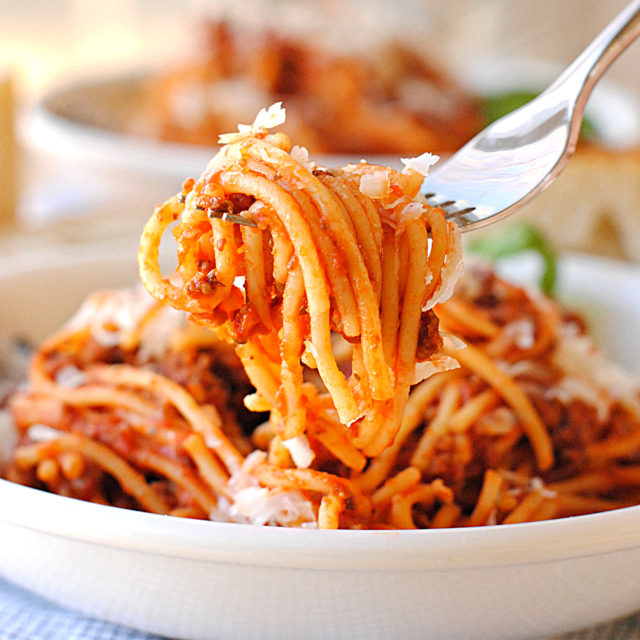
It’s a fact. This is truly the best homemade spaghetti I have ever tasted, and I have tasted a LOT of spaghetti. I am absolutely fascinated with the fact that the whole thing, noodles and all, can be made in an Instant Pot at the same time. Truthfully, this spaghetti is so easy, I feel as though I am somehow cheating.
My mom used to make her spaghetti sauce in a slow cooker. She would cook it all day long and it would taste great. Over the years, I have rarely cooked my sauce in a slow cooker, but I have simmered it on the stove-top for as short as 20 minutes or as along as two hours. Oh, and by the way, the 20 minute sauce tasted better than the 2-hour sauce. Just FYI.
The Instant Pot, however, has been a game changer for me. I just can’t get over the fact that I can put the sauce ingredients and the noodles together in the same pot, put the lid in place, and 20 minutes later everything is ready to serve. That 20 minutes includes 13 minutes for the pot to come to pressure and 7 minutes of cooking time. Fabulous!
If you are looking for some amazingly easy breadsticks to go along with this spaghetti, try these Quick and Easy Breadsticks. And this Tuscan Bean Salad would make a fun addition to the meal, as well.
About the Sauce
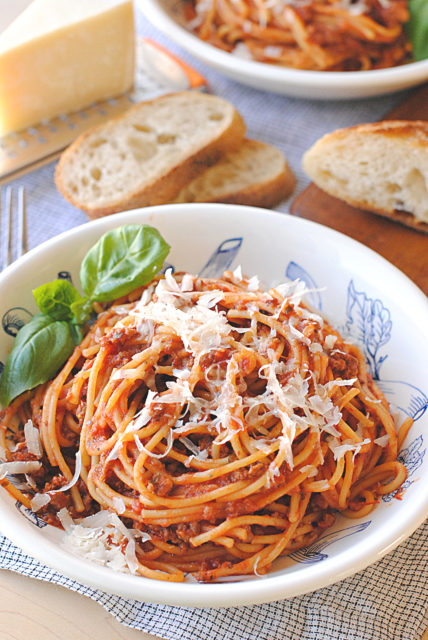
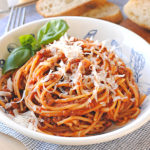
The homemade sauce in this spaghetti screams perfection, at least to me. It is rich and satisfying with layers of flavor from the Italian sausage, ground beef, beef broth, crushed tomatoes, garlic and the herbs and seasonings. The dish is finished with a scattering of Parmesan cheese. Actually, it is more like an avalanche of cheese.
I almost never use store-bought pasta sauce. It’s against my personal cooking rules. I know that lots of folks swear by store-bought pasta sauce and have their favorites, and that’s okay. I am happy for you.
As for me, I am just stubborn enough to want to make my own sauce. I absolutely do not want any ready-made item I pull off of a grocery shelf to be better than what I can make at home. The sauce in this spaghetti exceeded my expectations.
In reality, I find that making homemade spaghetti sauce is quite simple, particularly in an electric pressure cooker. It is worth the few extra minutes it takes to make the sauce from scratch, rather than using a jarred sauce. The longest part of the whole process is browning the ground beef and Italian sausage, which takes a total of about 10 minutes, which includes cooking the onions and garlic.
After the meat browns and the onions and garlic are cooked, the remainder of the ingredients get layered on top, including the noodles. I am amazed every single time that it all works so beautifully.
As far as this sauce goes, I wish that I could say that it is exactly like the sauce I always make, but it is not. In fact, it is better, which means that my tried and true favorite sauce needs revamping. (And I have just discovered that I have never posted my spaghetti sauce on this blog. How the heck did that happen?) I have been trying to figure out why the spaghetti in the IP tastes better and I believe there are two things at play.
- Food cooked in the Instant Pot has a more intense flavor. I don’t know why. Perhaps it is because cooking under pressure aids the flavors to infuse throughout the food.
- I added beef broth to the sauce in the Instant Pot. Because the IP requires liquid in order to pressurize, and there needs to be enough liquid to cook the noodles, I needed to add more liquid than I would with other cooking methods. I chose beef broth rather than water because I wanted a richer flavor. Very successful decision.
Ingredients for Instant Pot Spaghetti
Ground Beef and Italian Sausage. The two meats together offer a richer, more complex flavor in the sauce. An 85%-90% lean ground beef is the best way to go for a lean meat to fat ratio. Italian sausage can be mild or spicy. Choose the sausage that suits your palate.
Onion and garlic. This is the standard duo that goes into much of Italian cooking. They are power houses of flavor. For best flavor, use fresh garlic. It takes a minute or two more to prep the garlic by hand, but there is a big return on your investment.
Crushed tomatoes . I know that budgets are tight, so use the best quality of tomato products that you can afford. After many years of making spaghetti, I can tell you that the brand and type of tomatoes used, will make a definite difference in the outcome of the sauce.
The best tomatoes that I have found are labeled ‘San Marzano’. These meaty, sweet, plum tomatoes are grown in the volcanic soils around Mt. Vesuvias in Italy. The tomatoes are packed whole, so crush them using either a potato masher or even your hand. A stick blender can be used, also, but you will likely end up with tomato puree, which works just fine.
San Marzano tomatoes are more expensive than standard store-brand tomatoes; about twice as much. The brand that is most readily available where I live is Cento. I confess that I cringe a little bit at the price, but I only use these tomatoes for spaghetti because spaghetti is all about the sauce and the sauce is mostly all about the tomatoes. Your sauce is going to taste great with whatever brand or type of tomatoes you use, but maybe just once you could try San Marzano tomatoes.
Italian seasoning, parsley and basil. Although Italian seasoning contains basil, I like to give the sauce an extra boost of flavor using additional basil. Frequently I use freeze-dried basil by Lighthouse. It has a fresh taste that I have not found in other brands. However, basic dried basil that you can find in most any grocery store works just fine. I get the Lighthouse brand from my local Costco, but it may not be available at all Costco stores.
The parsley can be fresh or dried. Of course, with fresh, you are going to get more flavor. I use fresh parsley about 1/4 of the time because I don’t often have it on hand when the spaghetti mood hits. If using fresh, triple the amount that is listed for dried parsley in the recipe. In the case of this recipe, the amount of dried parsley is 2 tablespoons. Increase the amount to 6 tablespoons or 1/3 heaping cup if using fresh parsley.
Salt and Pepper. I have come to prefer seasoning salt in this spaghetti. It provides some extra flavor nuances that are not present in salt alone. My favorite brand is “Johnny’s” and I get it at Costco. For some reason, the grocery stores in my area have not been stocking Johnny’s for the past couple of years. Lawry’s seasoning salt also works just fine. If 2 teaspoons of seasoning salt seems excessive, remember that the noodles will be soaking up some of that salt. Pasta needs salt for best flavor. You may find that you prefer even more salt than what is listed in the recipe.
Freshly ground black pepper is my pepper preference, but the pre-ground stuff works, too. A pinch of red pepper flakes is also an option, if you like them. However, before adding them, be sure to consider the spiciness of the Italian sausage you are using.
Beef Broth. I cheat on the beef broth. For a very flavorful shortcut, I use a tablespoon of beef flavored Better Than Bouillon, dissolved in 3 1/2 cups of water. It is low sodium and comes in chicken, beef, and vegetable flavors. It has been my go-to sub for broth for years. Store in the refrigerator after opening.
Spaghetti Noodles. Everyone has their own favorite brand of pasta. I use Garofalo brand, again, sold at Costco. You’ll want to make sure to use a sturdy, good quality, spaghetti noodle in the Instant Pot or else it will be obliterated by the pressure. Sorry guys, don’t use cheap noodles. Also, fresh pasta will not hold up in the IP, so be sure to use the dried stuff.
How to make spaghetti in an Instant Pot
This is so ridiculously easy. One and done; one pot, that is. You will love that the spaghetti mess is contained to one pot. No more frying pan, no more simmering mess, no more boiling noodles, no more drips and splatters and boil overs. Cool.
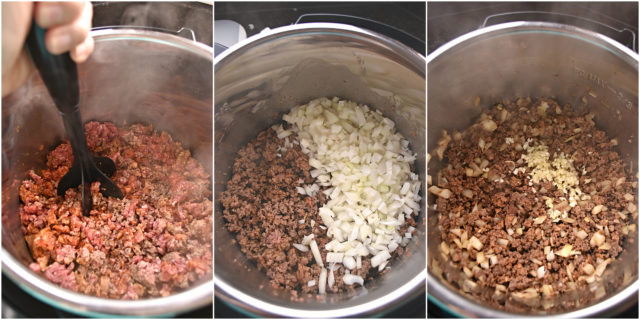
- Saute the ground beef and Italian sausage. With the liner in place, set the Instant Pot to “Saute”. When the display shows “Hot”, add the meat to the liner. Cook for 5 minutes, breaking up the meat well. I have found that a tool such as the “Chop and Stir” works very well for this.
- Add the diced onion to the meat mixture. Cook, stirring as needed for three minutes.
- Add the minced garlic. Stir the minced garlic in with the meat and onions. Cook for 2 minutes. Be careful not to let the garlic burn.
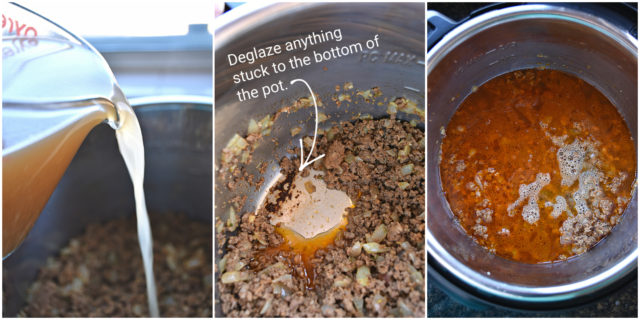
- Deglaze the bottom of the IP liner. Add about 1 cup of the broth to the meat mixture. Stir well, scraping the bottom of the liner to release the bits that may have stuck. This is important because anything that is stuck will cause the Instant Pot to post a “Burn” notice while you are trying to pressurize the pot.
- Add the remaining stock. After the pot has been deglazed, add the remaining stock. Press the “Cancel” button to turn off the IP.
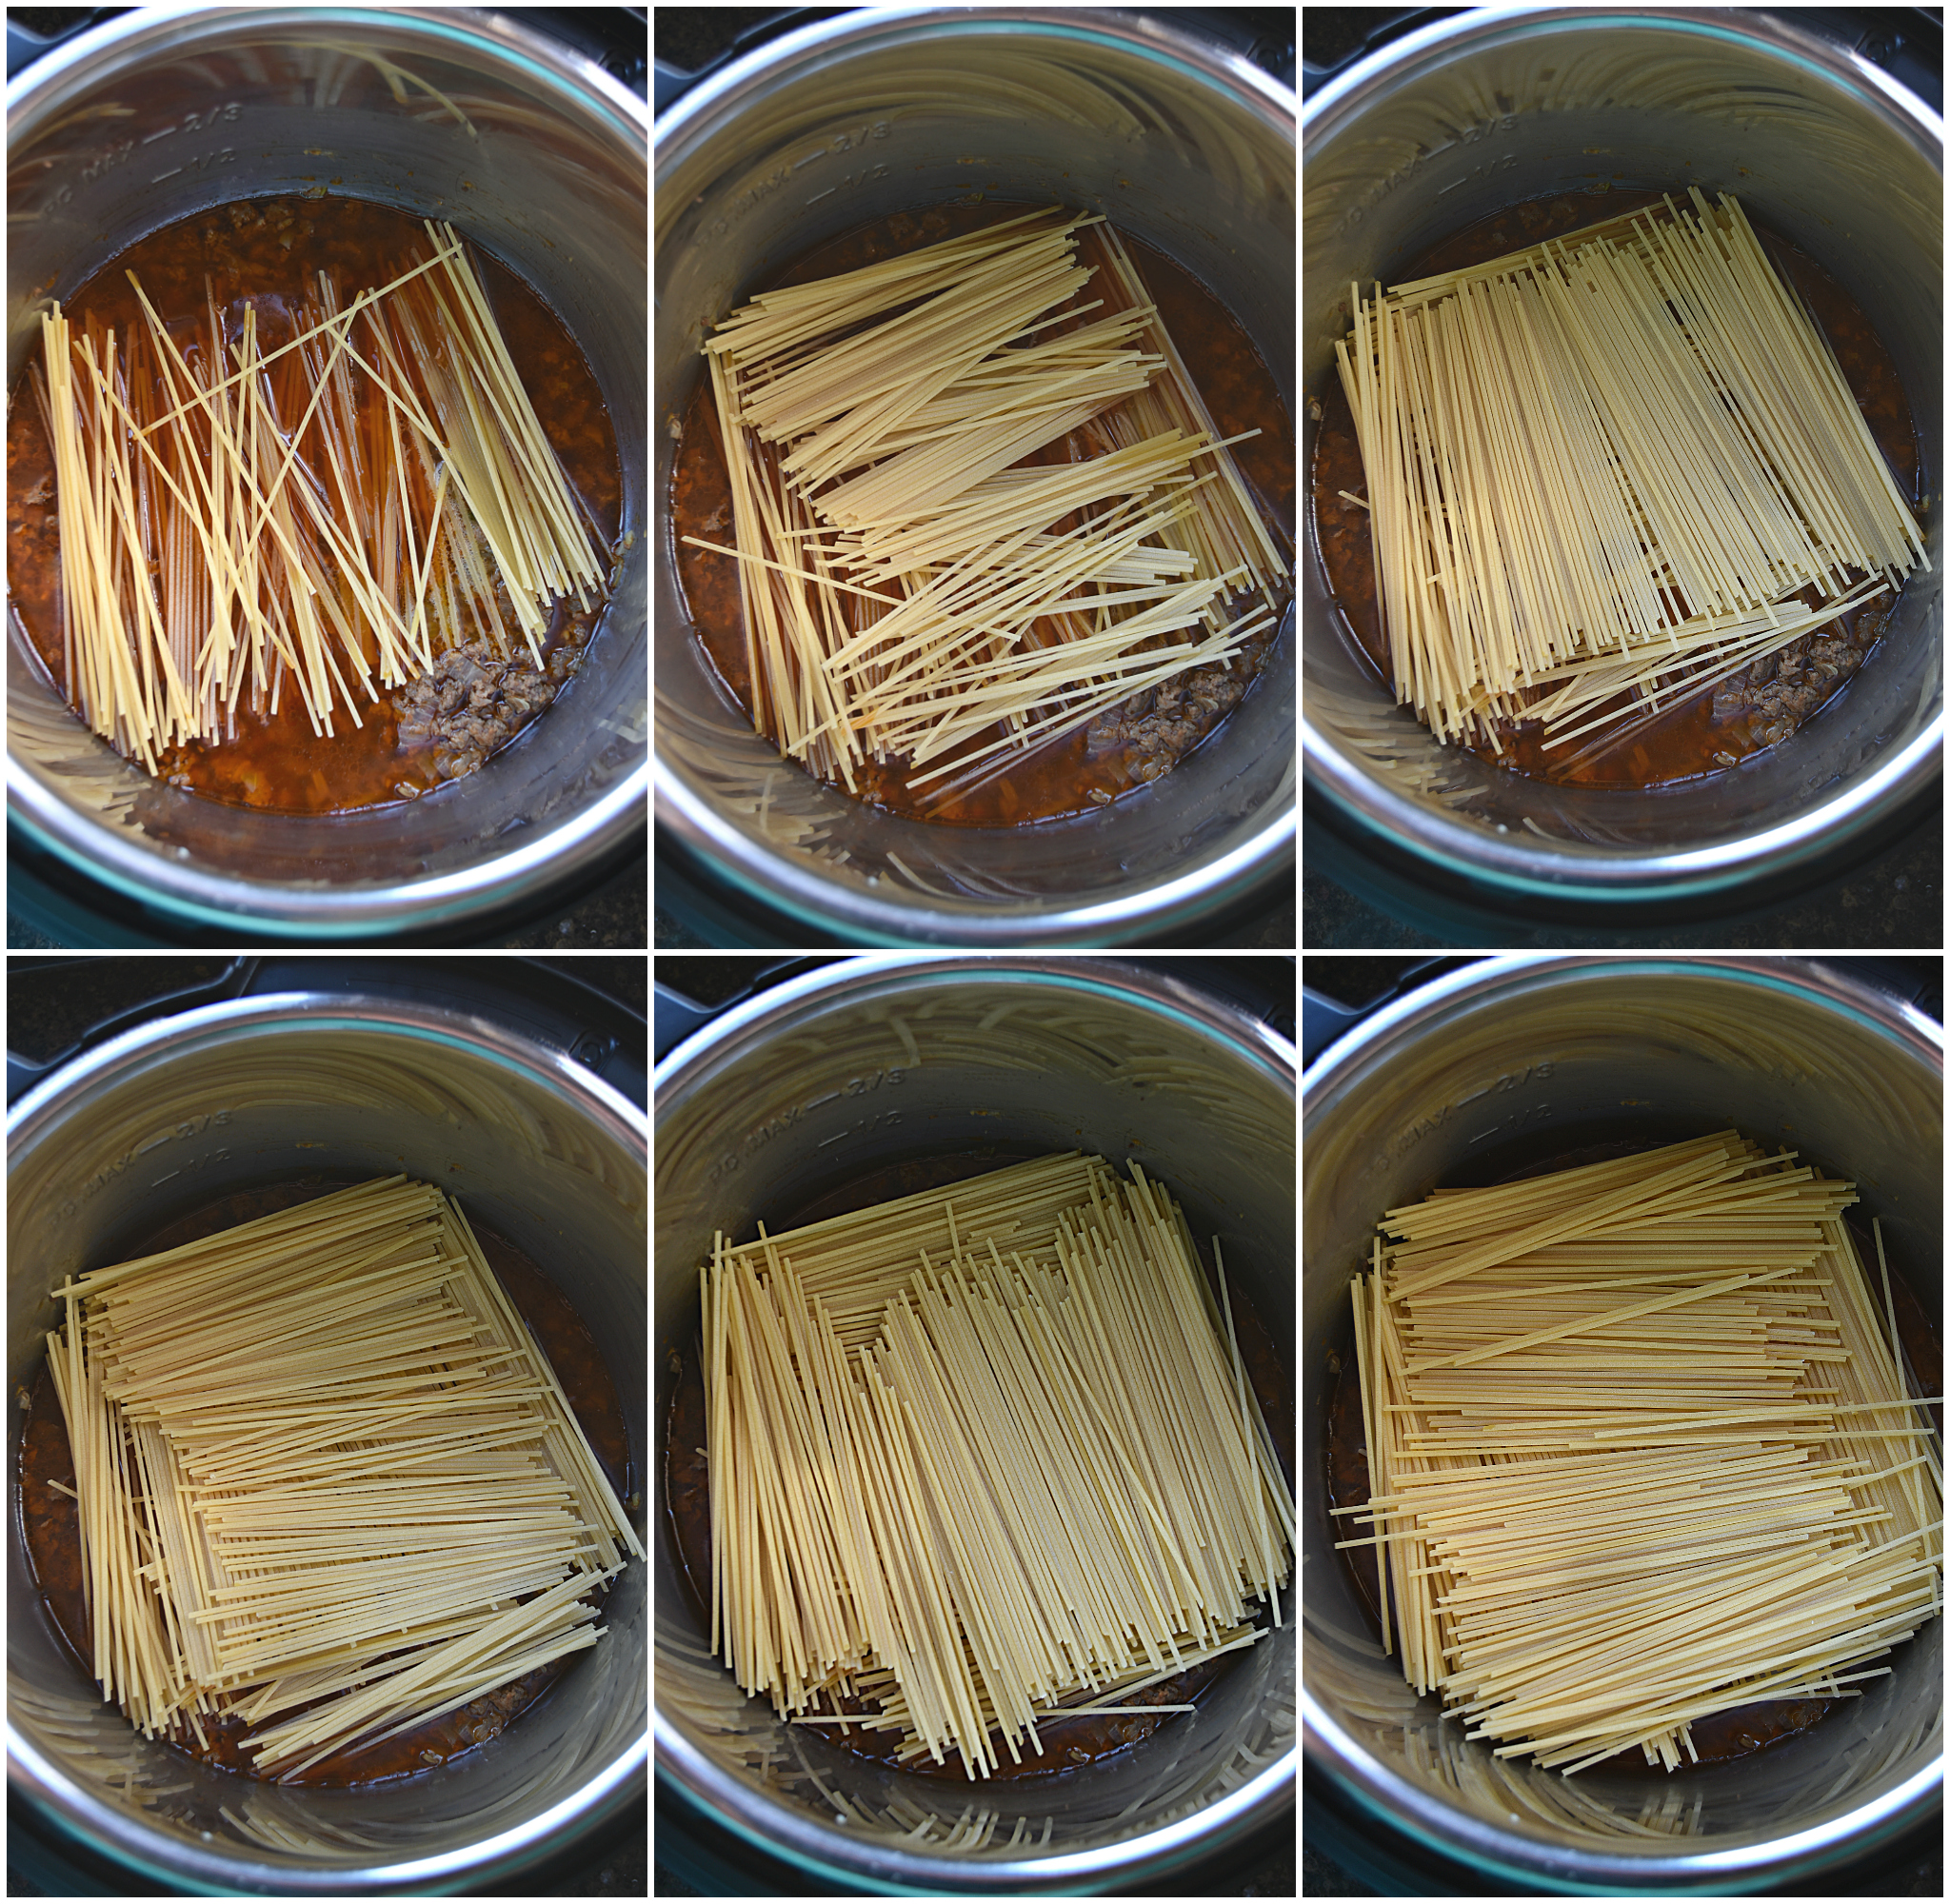
- Break the noodles in half and place them on top of the meat. Working in 3 batches, break the noodles in half and place them in a criss-cross pattern on top of the meat. There will be at least 6 layers. This pattern helps to keep the noodles from clumping as they cook. It works remarkably well. I have found the if some of the noodles do appear to have clumped during cooking, they will come apart quite easily when the spaghetti is stirred.
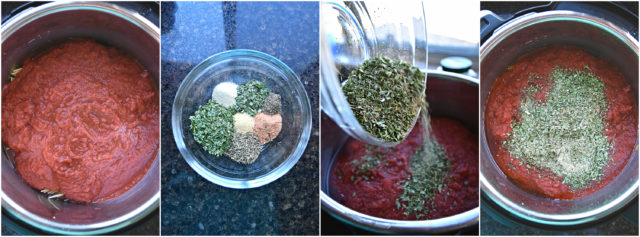
- Pour the crushed tomatoes over the noodles. Using both cans of crushed tomatoes, pour them over the spaghetti noodles.
- Sprinkle the seasoning salt, pepper, and herbs over the tomatoes. For photography purposes I mixed all of the seasonings together in a small bowl and then sprinkled them over the crushed tomatoes. This is not necessary. As each seasoning is measured out from its container, simply sprinkle it over the tomatoes.
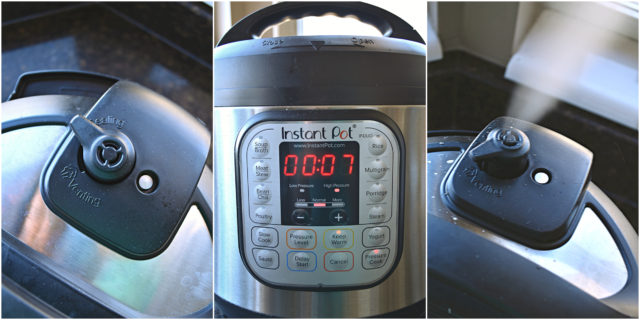
- Close pot and cook the spaghetti. Lock the lid in place. Put the pressure release knob into the “Sealing” position. Set the pot to cook for 7 minutes at high pressure. The pot take about 13 minutes to come to pressure and then the timer starts counting down for the 7 minutes.
- Perform a manual release. Carefully push the pressure release knob to “Venting”. Stay clear of the scalding steam from the vent. When all of the steam has vented, the pot will unlock and you can open the lid. Again, open the lid away from you to avoid burns from rising steam.
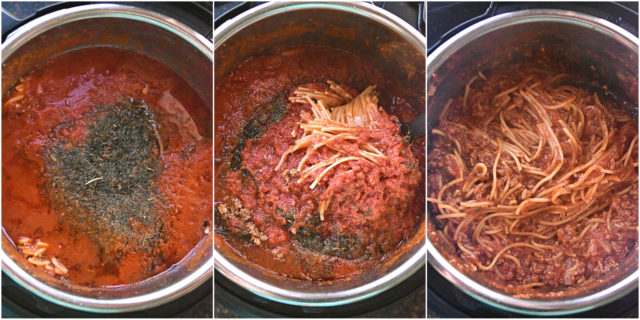
- Stir the spaghetti. Using a long-handled spoon, stir the spaghetti. If the spaghetti appears to be watery, this will resolve as you stir. Put the bowl of the spoon all the way to the bottom of the pot and lift upwards to bring the bottom contents to the surface. The meat is on the bottom and the tomatoes are on top. Be sure to mix gently, but thoroughly. Any noodles that may have clumped will likely easily separate during stirring.
- Serve. Serve this spaghetti right away for optimal texture. As with all pasta, the longer it sits in a moist environment, the more liquid it absorbs. The flavor remains wonderful, but the pasta will be softer.
Photo Tutorial for making Instant Pot Spaghetti
Q & A
Can spaghetti be frozen? Not recommended for Instant Pot spaghetti. The noodles will be too soft to hold up well to freezing. They will be mushy.
Can I use water instead of beef broth? Yes. Use the same amount of water as is noted for beef broth. The spaghetti will not be as flavorful.
Can fresh herbs be used instead of dried herbs in spaghetti? Yes. Use three times as much fresh herbs as is stated for dry herbs. Example: The recipe calls for 2 teaspoons dried basil. Use 6 teaspoons (=2 tablespoons) of fresh, chopped basil.
How can I get the pasta to be “al dente” in the Instant Pot? For this recipe, try cooking the spaghetti for 6 minutes. The noodles will be pliable, but firm. They may need to sit for a couple of minutes after stirring in order for them reach the ‘al dente’ stage.
Can I use angel hair pasta instead of regular spaghetti noodles? No, not in a pressure cooker. The thinner angel hair pasta will not hold up under pressure. It will disintegrate.
Can I use minced garlic from a jar instead of using fresh garlic? Yes, but it may be somewhat less flavorful. However, you may not notice the difference, especially if you use the jarred variety regularly.
What percentage of fat works best for the ground beef in spaghetti? My favorite is 85/15. Ninety percent is also okay. Don’t go lower than 85% because it will make the spaghetti too greasy. Also, meat that is above 90% lean will not provide enough fat content for browning without adding oil.
Can I halve this recipe? Yes. Use your math skills to halve everything except the crushed tomatoes. For the tomatoes, use 1 (28 ounce) can crushed tomatoes. The cooking time will remain the same, 7 minutes at high pressure. Note, however, that the time it takes the pot to come to pressure will likely decrease.
Homemade Spaghetti – Instant Pot
Ingredients
- 1 pound ground beef
- 1 pound Italian sausage
- 1 medium onion medium dice
- 4 cloves garlic minced
- 3 1/2 cups beef broth
- 1 pound spaghetti noodles (NOT angel hair)
- 1 (28 ounce) can crushed tomatoes
- 1 (15 ounce) can crushed tomatoes
- 2 tablespoons dried parsley or 6 tablespoons chopped fresh parsley
- 2 teaspoons Italian seasoning
- 2 teaspoons dried basil or 2 tablespoons chopped fresh basil
- 2 teaspoons seasoning salt
- 1 teaspoon granulated onion
- 1/2 teaspoon granulated garlic powder
- 1/2 teaspoon ground black pepper
Instructions
- With the Instant Pot set to "Saute" and the liner in place, brown the ground beef and Italian sausage for 5 minutes. Add the onion; cook, stirring as needed, for 3 minutes. Add the garlic; cook for an additional 2 minutes, stirring as needed.
- To deglaze the bottom of the liner, add about 1 cup of the beef broth to the meat mixture. With a non-metal spoon or spatula, scrape the bottom of the liner to loosen any bits that may have stuck while cooking. This will help to avoid a "burn" notice on the Instant Pot. Press "Cancel" to turn off the Instant Pot.
- Working in batches, break the spaghetti noodles in half. Arrange noodles in layers in a criss-cross fashion over the meet mixture. For best results, use 6 or more layers. This will help insure that the noodles are not too crowded and will allow the liquids to move freely to avoid clumped noodles.
- Pour the tomatoes and the remaining beef broth over the noodles. Sprinkle the spices over the tomatoes.
- Lock lid in place. Put the release valve in the "Sealing" position. Press the manual button and set pot for 7 minutes on high. After a few seconds the pot will switch to "ON" while it comes to pressure. This will take approximately 10-15 minutes. When the Instant Pot reaches the appropriate pressure, a single 'beep' will sound and the pot will begin its countdown. The minutes-to-cook will display in the panel.
- At the end of the cooking cycle, there will be several beeps and the pot will stop. The "Keep Warm" function will activate, unless you have canceled it. Perform a "Manual Release" by moving the pressure valve into the "Venting" position. The steam will release forcefully for a minute or two. Keep all body parts away from the steam.
- Once the steam has completely released, the locking mechanism will release. Carefully open the lid. With a large, long-handled spoon, stir the pot contents. Be sure to stir from the bottom of the pot, lifting the contents to the surface while stirring.
Notes
Nutrition