<?xml version="1.0" encoding="UTF-8"?>
<feed xml:lang="en" xmlns="http://www.w3.org/2005/Atom" xmlns:opensearch="http://a9.com/-/spec/opensearch/1.1/" xmlns:s="http://jadedpixel.com/-/spec/shopify">
  <id>https://utopiatoysandmodels.com/blogs/news.atom</id>
  <link rel="alternate" type="text/html" href="https://utopiatoysandmodels.com/blogs/news"/>
  <link rel="self" type="application/atom+xml" href="https://utopiatoysandmodels.com/blogs/news.atom"/>
  <title>Utopia Toys and Models - Videguy Collectibles News</title>
  <updated>2026-09-07T03:27:56-04:00</updated>
  <author>
    <name>Utopia Toys and Models</name>
  </author>
  <entry>
    <id>https://utopiatoysandmodels.com/blogs/news/gunpla-grades-comparison</id>
    <published>2026-09-07T03:27:56-04:00</published>
    <updated>2026-09-07T03:27:58-04:00</updated>
    <link rel="alternate" type="text/html" href="https://utopiatoysandmodels.com/blogs/news/gunpla-grades-comparison"/>
    <title>Gunpla Grades Comparison: Which Kit Fits You?</title>
    <author>
      <name>Admin</name>
    </author>
    <summary type="html">
      <![CDATA[Our Gunpla grades comparison breaks down HG, RG, MG, PG, SD, and more so you can choose the right Gundam model kit for your next build on display today.<p><a class="read-more" href="https://utopiatoysandmodels.com/blogs/news/gunpla-grades-comparison">More</a></p>]]>
    </summary>
    <content type="html">
      <![CDATA[<p>A shelf full of Gundam kits can look like a wall of acronyms: HG, RG, MG, PG, SD, FM. A good Gunpla grades comparison turns that alphabet soup into a shopping shortcut. Grades generally tell you a kit’s scale, engineering complexity, parts count, detail level, and intended building experience - but they do not simply rank from worst to best.</p>
<p>WELCOME TO UTOPIA, where the right kit is the one that matches your time, budget, favorite mobile suit, and display goals. Whether you want a fast build for a weekend or a centerpiece that takes over your workbench, each grade has a lane.</p>
<h2>Gunpla Grades Comparison at a Glance</h2>
<p>| Grade | Typical Scale | Best For | What to Expect |<br>| --- | --- | --- | --- |<br>| Entry Grade | Usually 1/144 | First-time builders | Very simple construction, low parts count |<br>| High Grade (HG) | 1/144 | New and returning builders | Affordable, broad character selection, solid detail |<br>| Real Grade (RG) | 1/144 | Builders who enjoy fine detail | Small parts, layered armor, advanced engineering |<br>| Master Grade (MG) | 1/100 | Dedicated hobby builders | Larger size, inner frames, display presence |<br>| Full Mechanics (FM) | Usually 1/100 | Big, detailed builds without MG complexity | Strong outer detail and satisfying scale |<br>| Perfect Grade (PG) | 1/60 | Experienced builders and collectors | Huge size, extensive mechanics, premium project |<br>| Super Deformed (SD) | Stylized | Casual builders and character fans | Compact, expressive proportions, quick builds |</p>
<p>A grade is a useful signal, not an absolute promise. A newer High Grade can have sharper color separation than an older Master Grade. An RG may have more surface detail than an MG while still being much smaller. Always look at the specific kit, especially when comparing releases from different eras.</p>
<h2>Entry Grade Is the Cleanest Starting Point</h2>
<p>Entry Grade kits are designed to remove friction. They typically use touch-gate parts that can often be separated by hand, simplified construction, and color-separated pieces that look good without paint. For someone opening their first Gundam model kit, that means less time worrying about tools and more time seeing a mobile suit take shape.</p>
<p>They are also great palette cleansers for longtime builders. After a complex build full of tiny decals and panel lines, an Entry Grade can be a genuinely fun reset. The trade-off is limited articulation, fewer accessories, and less mechanical depth. You are getting a clean representation of the character, not a miniature engineering project.</p>
<h2>High Grade Delivers the Best Value for Most Builders</h2>
<p>HG 1/144 is the workhorse of Gunpla. It is affordable, compact, widely available across Gundam series, and varied enough to support almost any collection. Want to build a classic RX-78-2, a witchy mobile suit from The Witch from Mercury, a rugged Zeon design, or an army of grunt suits? HG is usually where you start looking.</p>
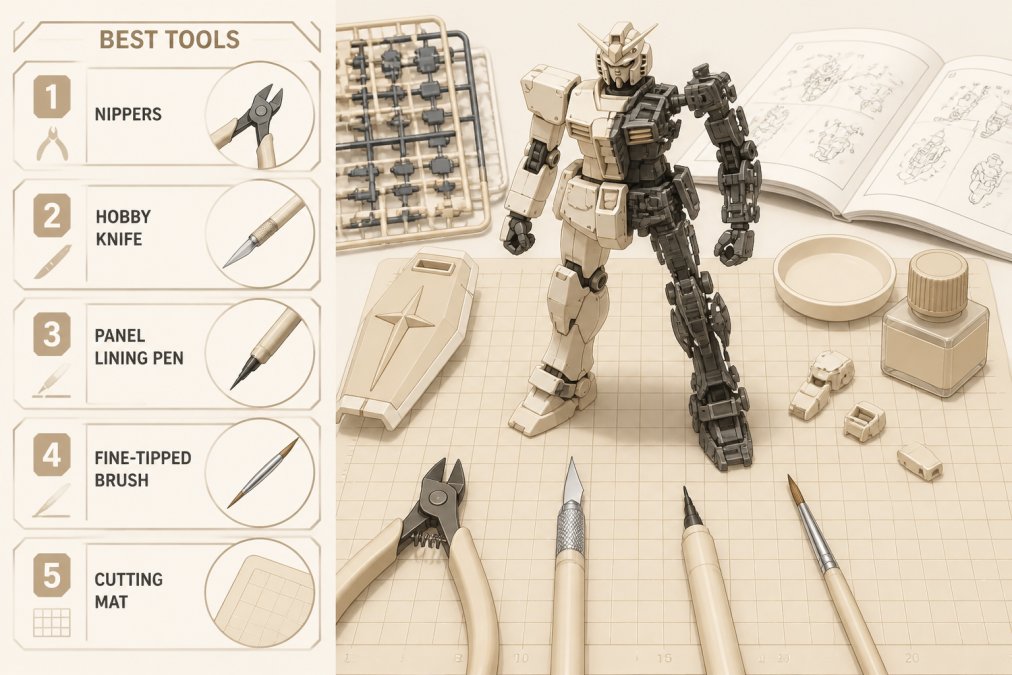
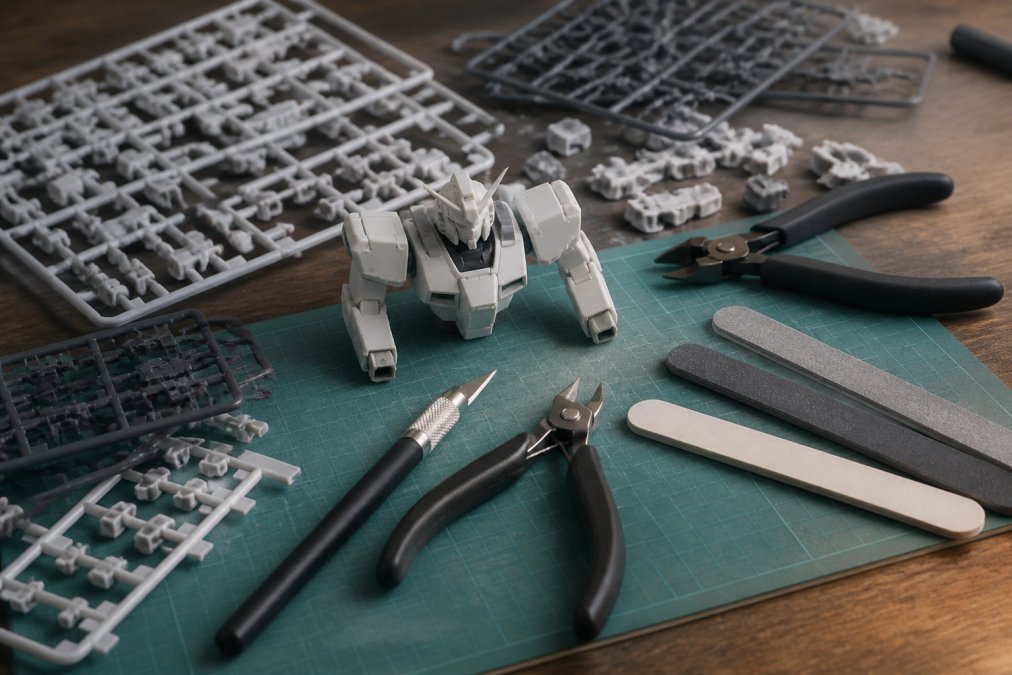
<p>Most HG kits can be completed in a few hours to a weekend, depending on your pace and how much finishing work you add. Modern HG releases often feature excellent color separation, smart articulation, and crisp proportions right out of the box. A basic nipper, sanding tools, and a panel-lining marker can take one from good to shelf-ready.</p>
<p>The compromise is that HG kits usually have fewer opening hatches, less elaborate inner construction, and simpler hands than larger grades. Some weapons may need more careful posing, and older HG kits can show their age through stickers or limited movement. None of that makes them bad kits. It just means HG rewards builders who value variety, price, and a growing display over maximum complexity.</p>
<h3>Pick HG if your collection is built around fandom</h3>
<p>For collectors who shop by series, HG makes it easier to build a complete visual lineup. You can put rival suits, team units, and deep-cut favorites together without needing a display case the size of a starship. If your goal is to represent your favorite Gundam universe rather than spend months on one build, HG is a strong home base.</p>
<h2>Real Grade Packs Big Detail Into a Small Scale</h2>
<p>RG takes the familiar 1/144 footprint and pushes it hard. These kits aim for a realistic, layered look with intricate color separation, moving armor sections, decals, and mechanical details that feel closer to a larger model. A finished RG can look spectacular beside an HG, especially from a few feet away.</p>
<p>That detail comes with a real trade-off: the parts are tiny. RG is less forgiving if you rush runner cleanup, force a joint, or treat a delicate antenna like a handle. Earlier releases are known for more complex pre-assembled inner-frame sections, while newer RG kits often use newer engineering approaches and can be remarkably sturdy when built carefully.</p>
<p>RG is best for builders who already enjoy HG and want a challenge without moving to a larger scale. Give yourself a clear workspace, good lighting, and patience. This is not the grade to build while half-watching a show and hunting for the next piece under your couch.</p>
<h2>Master Grade Makes One Kit the Main Event</h2>
<p>MG 1/100 kits are larger, more involved, and made for builders who want to spend meaningful time with a single mobile suit. Many include an inner frame, opening armor panels, cockpit details, stronger hands, and a level of mechanical presence that stands out immediately on a shelf.</p>
<p>The 1/100 scale also makes MG more comfortable for people who find RG parts too small. You still get a detailed build, but the pieces are easier to hold, clean, and pose. That said, MG boxes cost more, take up more storage space, and can demand more attention to assembly order. A backpack, transformation mechanism, or weapon loadout can turn a simple-looking suit into a serious project.</p>
<p>Not every MG is equally complex. Some are approachable first 1/100 builds, while others are famous for dense parts counts or challenging transformations. If you are stepping up from HG, choose an MG of a suit you genuinely love. A favorite character carries you through the longer sessions far better than chasing a grade label.</p>
<h2>Full Mechanics Is a Smart 1/100 Alternative</h2>
<p>Full Mechanics kits sit in a useful space between HG and MG. They are generally 1/100 scale and can offer dramatic proportions, strong surface detail, and a rewarding amount of build time without always using the full inner-frame approach associated with MG.</p>
<p>For builders who want a large, impressive anime design but do not need every hatch to open, FM can be the sweet spot. These kits often prioritize a sturdy finished look and bold shelf presence. Exact complexity varies by release, so compare the individual kit rather than assuming every Full Mechanics box follows the same formula.</p>
<h2>Perfect Grade Is a Build You Plan For</h2>
<p>PG 1/60 kits are not just larger Gunpla. They are long-form hobby projects. The scale allows for major mechanical detail, elaborate inner structures, large accessories, and, on many releases, LED lighting options. A completed PG becomes a display centerpiece almost by default.</p>
<p>The cost, build time, and display footprint are substantial. You will want room to organize runners, a protected place to display the finished kit, and enough patience to enjoy the process instead of racing through it. PG is ideal when one specific mobile suit means enough to you that you want the biggest, most involved version of it.</p>
<p>Do not treat PG as a required graduation. Plenty of highly skilled builders collect HG, RG, or MG because those grades fit their space and favorite designs better. The best collection is not the most expensive one. It is the one you keep wanting to look at.</p>
<h2>SD and Mega Size Follow Different Rules</h2>
<p>SD Gunpla uses exaggerated proportions: oversized heads, compact bodies, and tons of personality. They are excellent for quick builds, desk displays, younger hobbyists, and fans who want a stylized version of a favorite suit. Modern SD lines can include surprisingly clever part separation and articulation, but their charm is the look, not realism.</p>
<p>Mega Size goes in the opposite direction, making large-scale builds that emphasize presence and straightforward construction. They are not necessarily more complex than MG or PG. Think of Mega Size as a statement piece for builders with the shelf space to support it.</p>
<h2>Choose Your Grade by the Build You Want Tonight</h2>
<p>Start with the experience, then select the grade. If you want a fast, low-stress build, choose Entry Grade or SD. If you want the widest selection and the easiest way to collect by series, HG is hard to beat. If tiny mechanical detail sounds fun rather than frustrating, try RG. For a larger hands-on project, look to MG or Full Mechanics. Save PG for the suit you want to make the star of your collection.</p>
<p>One last collector rule: buy the kit that makes you excited to clip the first piece off the runner. A great Gunpla build is not about proving you picked the highest grade. It is about finding your fandom, building it your way, and giving it a place of honor on the shelf.</p>]]>
    </content>
  </entry>
  <entry>
    <id>https://utopiatoysandmodels.com/blogs/news/sticky-model-kits-why-do-model-kits-get-sticky</id>
    <published>2026-09-06T21:28:38-04:00</published>
    <updated>2026-09-06T21:28:39-04:00</updated>
    <link rel="alternate" type="text/html" href="https://utopiatoysandmodels.com/blogs/news/sticky-model-kits-why-do-model-kits-get-sticky"/>
    <title>Why Do Model Kits Get Sticky? Fixes &amp; Prevention</title>
    <author>
      <name>Editorial Team</name>
    </author>
    <summary type="html">
      <![CDATA[Sticky model kits come from plasticizer migration. Learn how to clean sticky rubberized plastic, fix tacky figures, and store Gundam models the right way.<p><a class="read-more" href="https://utopiatoysandmodels.com/blogs/news/sticky-model-kits-why-do-model-kits-get-sticky">More</a></p>]]>
    </summary>
    <content type="html">
      <![CDATA[<h2 id="table-of-contents">Table of Contents</h2>
<ul>
<li><a href="#the-real-reason-your-model-kits-get-sticky-over-time">The Real Reason Your Model Kits Get Sticky Over Time</a></li>
<li>
<a href="#plasticizer-migration-in-pvc-figures-the-science-explained">Plasticizer Migration in PVC Figures: The Science Explained</a><ul><li><a href="#why-heat-uv-exposure-and-humidity-accelerate-the-process">Why Heat, UV Exposure, and Humidity Accelerate the Process</a></li></ul>
</li>
<li>
<a href="#how-to-clean-sticky-rubberized-plastic-and-hard-plastic-parts">How to Clean Sticky Rubberized Plastic and Hard Plastic Parts</a><ul>
<li><a href="#solvent-safety-by-plastic-type-abs-styrene-ps-and-pvc">Solvent Safety by Plastic Type: ABS, Styrene (PS), and PVC</a></li>
<li><a href="#the-two-pass-cleaning-protocol">The Two-Pass Cleaning Protocol</a></li>
<li><a href="#what-to-do-when-cleaning-fails-the-saturation-point">What to Do When Cleaning Fails: The Saturation Point</a></li>
<li><a href="#the-ph-balance-factor">The pH Balance Factor</a></li>
</ul>
</li>
<li><a href="#the-soft-touch-coating-myth-why-some-kits-feel-tacky-by-design">The Soft-Touch Coating Myth: Why Some Kits Feel Tacky by Design</a></li>
<li>
<a href="#the-best-way-to-store-gundam-models-for-long-term-protection">The Best Way to Store Gundam Models for Long-Term Protection</a><ul>
<li><a href="#the-656565-rule-temperature-humidity-and-light">The 65/65/65 Rule: Temperature, Humidity, and Light</a></li>
<li><a href="#the-barrier-material-hierarchy">The Barrier Material Hierarchy</a></li>
<li><a href="#the-outgassing-containment-strategy">The Outgassing Containment Strategy</a></li>
<li><a href="#the-contact-rule-separating-reactive-plastics">The Contact Rule: Separating Reactive Plastics</a></li>
<li><a href="#the-annual-audit">The Annual Audit</a></li>
<li><a href="#material-specific-storage-solutions-for-abs-styrene-and-pvc">Material-Specific Storage Solutions for ABS, Styrene, and PVC</a></li>
</ul>
</li>
<li><a href="#common-mistakes-that-make-sticky-model-kits-worse">Common Mistakes That Make Sticky Model Kits Worse</a></li>
<li><a href="#conclusion-preserve-your-builds-for-years-to-come">Conclusion: Preserve Your Builds for Years to Come</a></li>
<li><a href="#frequently-asked-questions">Frequently Asked Questions</a></li>
</ul>
<p><em>Last Updated: September 7, 2026</em></p>
<h2 id="the-real-reason-your-model-kits-get-sticky-over-time">The Real Reason Your Model Kits Get Sticky Over Time</h2>
<p>Most sticky model kits suffer from plasticizer migration, not dirt or poor handling. Plasticizers added during manufacturing to make plastics flexible can slowly leach to the surface, leaving a tacky, greasy film that attracts dust (<a rel="noopener noreferrer" target="_blank" href="https://pubs.acs.org/aapmcd/article/8/16/14405/5254156/Low-Temperature-Performance-and-Migration-Behavior">pubs.acs.org</a>). This guide explains why do model kits get sticky over time, how to fix it safely, and how to prevent it.</p>
<p>The wrong cleaning method can permanently damage your build. Many collectors assume the residue is grime and reach for harsh solvents, which can strip paint, cloud clear plastic, or melt the part. The good news is that sticky model kits are usually recoverable with a gentle, informed approach.</p>
<h2 id="plasticizer-migration-in-pvc-figures-the-science-explained">Plasticizer Migration in PVC Figures: The Science Explained</h2>
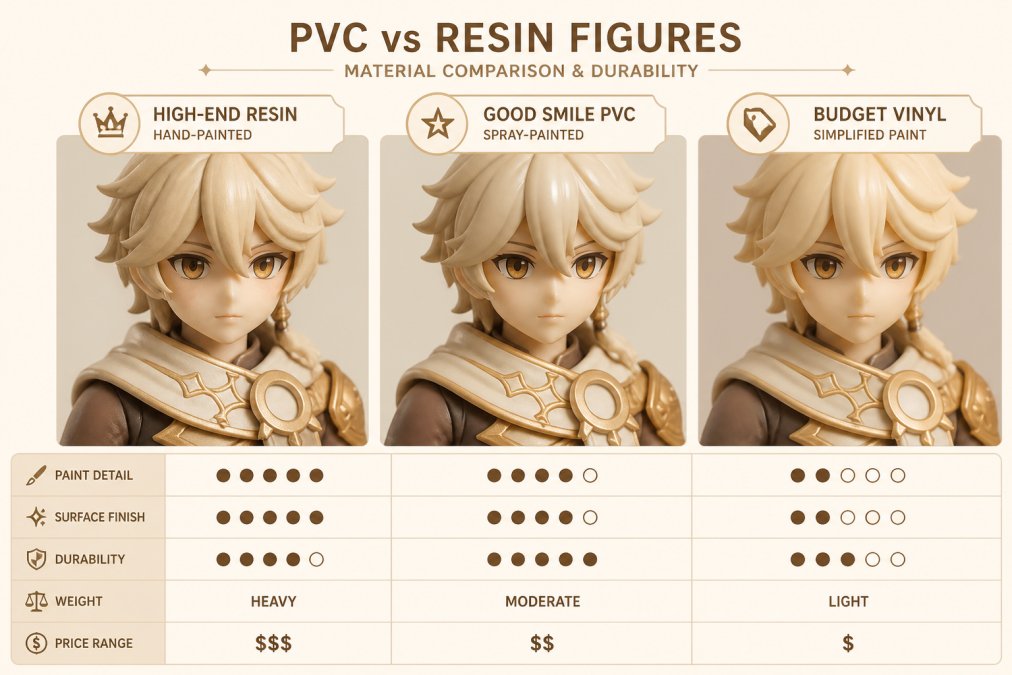
<p>Plasticizer migration is where softening agents added to polyvinyl chloride (PVC) and other flexible plastics travel from the interior to the surface. Unlike hard plastics such as ABS or styrene, PVC figures rely on these additives for bendable limbs and soft details. Over time, the plasticizer molecules break free from the polymer chain and form a visible surface film.</p>
<p>This is not a defect but an inherent property of the material. The migration rate depends on the quality of the original compound and the storage environment. When the surface film oxidizes upon contact with air, it becomes tackier and can bond with dust, making the problem appear worse.</p>
<p>Washing with soap and water removes the current residue but does not stop the plasticizer inside the part from continuing to leach out. This is why a figure can feel sticky again within weeks of a thorough wash.</p>
<h3 id="why-heat-uv-exposure-and-humidity-accelerate-the-process">Why Heat, UV Exposure, and Humidity Accelerate the Process</h3>
<p>Heat gives plasticizer molecules more energy to move, UV exposure can break down the polymer structure, and humidity can make the surface film feel wetter and stickier (<a rel="noopener noreferrer" target="_blank" href="https://www.nist.gov/publications/effects-ultraviolet-radiation-exposure-vinyl-ester-resins-characterization-chemical">nist.gov</a>). Storing your collection near a window, above a radiator, or inside a hot car is the fastest way to accelerate this degradation.</p>
<p>Climate control is your first line of defense. A cool, dark, and dry room will dramatically slow the chemical breakdown of your figures. In a humid climate, running a dehumidifier in your display room can extend the shelf life of softer PVC parts.</p>
<h2 id="how-to-clean-sticky-rubberized-plastic-and-hard-plastic-parts">How to Clean Sticky Rubberized Plastic and Hard Plastic Parts</h2>
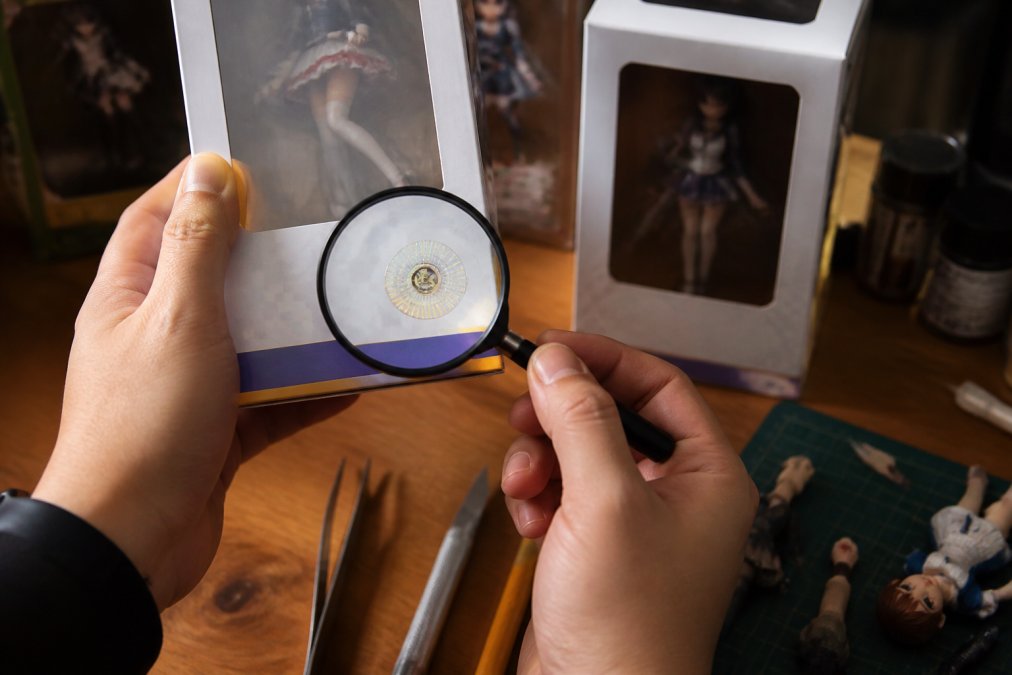
<figure class="article-content-image my-8" style="margin:2em 0;padding:0;background:transparent;border:0;"><img src="https://cdn.grandranker.com/articles/why-do-model-kits-get-sticky-fixes-prevention-content-1-1788744514.jpg" alt="Close-up of a hobbyist's hands in a well-lit workshop carefully wiping a white Gundam model kit part with a soft microfiber cloth and isopropyl alcohol, with tweezers and cotton swabs arranged on the desk nearby" class="w-full rounded-lg shadow-lg" loading="lazy" style="display:block;width:100%;max-width:100%;height:auto;border-radius:8px;margin:0 auto;"><figcaption class="text-sm text-gray-600 mt-2 text-center" style="font-size:0.875em;color:#6b7280;text-align:center;margin-top:0.6em;">Close-up of a hobbyist's hands in a well-lit workshop carefully wiping a white Gundam model kit part with a soft microfiber cloth and isopropyl alcohol, with tweezers and cotton swabs arranged on the desk nearby</figcaption></figure>
<p>Cleaning sticky model kits is not one-size-fits-all. The wrong solvent can turn a salvageable part into a melted, cloudy mess. Match your cleaning agent to the specific polymer chemistry of your kit.</p>
<h3 id="solvent-safety-by-plastic-type-abs-styrene-ps-and-pvc">Solvent Safety by Plastic Type: ABS, Styrene (PS), and PVC</h3>
<p><strong>ABS (Acrylonitrile Butadiene Styrene):</strong> This is the workhorse plastic for Gundam inner frames and many <a href="/products/neca-national-lampoons-christmas-vacation-8-clothed-action-figure-chainsaw-clark">action figure</a> joints. It is relatively resistant to short-term alcohol exposure. You can safely use <strong>70% isopropyl alcohol (IPA)</strong> on a cotton swab for surface cleaning, but avoid soaking the part. Prolonged immersion can cause the butadiene component to swell, leading to warping or stress fractures. Never use acetone, lacquer thinner, or enamel thinner on ABS, these will aggressively dissolve the polymer matrix.</p>
<p><strong>Styrene (Polystyrene / PS):</strong> Used for most outer armor plates and runners. It is slightly more sensitive to solvents than ABS. Stick to <strong>50% or lower IPA concentration</strong> for wiping. Higher concentrations can cause surface crazing, fine, spiderweb-like micro-cracks that permanently ruin the finish. For stubborn residue, use a mild degreaser like <strong>Simple Green</strong> diluted 1:10 with water. Apply with a soft toothbrush, then rinse immediately with distilled water.</p>
<p><strong>PVC (Polyvinyl Chloride):</strong> Found in soft hands, skirts, and many standalone figures. PVC is the most vulnerable to chemical attack. Its high plasticizer content makes it swell and soften when exposed to even mild solvents. <strong>Do not use IPA above 25% concentration</strong> on painted PVC. For bare PVC, a 25% IPA solution is acceptable for short wipes, but the safest first pass is warm water with a drop of <strong>Dawn dish soap</strong>. The soap breaks the surface tension of the plasticizer film without penetrating the polymer.</p>
<h3 id="the-two-pass-cleaning-protocol">The Two-Pass Cleaning Protocol</h3>
<p>Most hobbyists stop after one wash and wonder why the tackiness returns in days. The plasticizer film is not a single layer, it is a continuous exudate. A two-pass protocol removes the bulk residue and then the residual molecular film.</p>
<p><strong>Pass 1: Bulk Removal</strong></p>
<ol>
<li>Disassemble the kit completely. Remove all armor, inner frames, and joint caps.</li>
<li>Fill a glass bowl with lukewarm water (never hot, heat accelerates plasticizer migration) and add 2-3 drops of mild dish soap.</li>
<li>Submerge the parts for 5 minutes maximum. Do not soak longer, as water can seep into seam lines.</li>
<li>Gently agitate with a soft-bristle brush (an old makeup brush works well). Focus on recessed panel lines where the sticky film accumulates.</li>
<li>Rinse each part under running lukewarm water. Shake off excess and pat dry with a lint-free microfiber cloth.</li>
</ol>
<p><strong>Pass 2: Molecular Film Removal</strong></p>
<ol>
<li>After the parts are completely dry (wait at least 30 minutes), inspect the surface. You will likely see a faint sheen or feel a slight drag on your fingertip.</li>
<li>Dip a cotton swab in your material-appropriate IPA solution (see chart above).</li>
<li>Wipe in one direction only, back-and-forth motion can redeposit the dissolved film.</li>
<li>Immediately follow with a dry section of the microfiber cloth to lift the dissolved plasticizer before it re-settles.</li>
<li>Repeat this wipe-and-buff cycle up to three times. If tackiness persists after three passes, the plasticizer has saturated the surface layer, and further cleaning will not help, you need to move to the storage solutions in the next section.</li>
</ol>
<div style="margin:1.5rem 0; padding:16px 20px; background-color:transparent; border-left:4px solid #e5e7eb; border-radius:0 8px 8px 0;">
<strong style="display:block; margin-bottom:4px; color:#111827; font-size:14px;"> Watch Out</strong>
<span style="color:#374151; font-size:15px; line-height:1.6;">Never use automotive degreasers, citrus-based cleaners, or oven cleaner on any model kit plastic. These contain aggressive surfactants and solvents that will strip paint, etch clear parts, and cause irreversible discoloration on ABS and styrene.</span>
</div>
<h3 id="what-to-do-when-cleaning-fails-the-saturation-point">What to Do When Cleaning Fails: The Saturation Point</h3>
<p>If your part remains sticky after three cleaning cycles, the plasticizer has saturated the outer 0.1-0.5 mm of the polymer. This is common in figures stored in hot attics or direct sunlight for years. At this point, no surface cleaning will help. Your options are:</p>
<ol>
<li>
<strong>Accept and isolate:</strong> Place the part in a sealed bag with silica gel. The desiccant will absorb some of the surface film, but the part will remain tacky. Keep it away from other plastics.</li>
<li>
<strong>Strip and repaint:</strong> For ABS and styrene parts, you can carefully strip the paint and apply a primer like <strong>Mr. Surfacer 1000</strong> to seal the surface. This is a temporary fix, the plasticizer will eventually push through the primer.</li>
<li>
<strong>Replace the part:</strong> For critical structural parts, replacement is the only safe option. Aftermarket parts from brands like <strong>Kotobukiya</strong> or <strong>Bandai</strong> replacement runners are often available.</li>
</ol>
<h3 id="the-ph-balance-factor">The pH Balance Factor</h3>
<p>Hard tap water with high mineral content can leave a chalky residue that traps new plasticizer. Use <strong>distilled water</strong> for the final rinse on all parts to eliminate dissolved calcium and magnesium interfering with the surface chemistry.</p>
<h2 id="the-soft-touch-coating-myth-why-some-kits-feel-tacky-by-design">The Soft-Touch Coating Myth: Why Some Kits Feel Tacky by Design</h2>
<p>Not every sticky <a href="/products/pokemon-model-kit-pikachu">model kit</a> is a victim of plasticizer migration. Some kits are manufactured with a soft-touch coating, a matte finish applied to provide a premium, velvety texture. This coating degrades over time into a genuinely tacky layer that cannot be cleaned back to its original state.</p>
<p>The myth is that this stickiness indicates a problem with your storage or cleaning routine. In reality, the soft-touch coating has a limited chemical lifespan. As it oxidizes, it becomes sticky regardless of how carefully you handle the item. No amount of cleaning will restore the original feel because the coating itself is the problem.</p>
<p>The only effective solution for a degraded soft-touch coating is removal. Carefully wiping with isopropyl alcohol will gradually dissolve and strip the coating, revealing the smooth hard plastic underneath. This requires patience and multiple applications, but the result is a clean, non-tacky surface far more durable than the original finish.</p>
<h2 id="the-best-way-to-store-gundam-models-for-long-term-protection">The Best Way to Store Gundam Models for Long-Term Protection</h2>
<p>The best way to store gundam models is to interrupt the chemical reaction before it starts. Cleaning removes the symptom; storage prevents the disease. Most collectors focus on dust protection, but the real enemy is the microclimate inside your display case. <a rel="noopener noreferrer" target="_blank" href="https://craftlivingartistry.com/how-to-fix-warped-3d-prints/">fixing warped plastic</a>.</p>
<h3 id="the-656565-rule-temperature-humidity-and-light">The 65/65/65 Rule: Temperature, Humidity, and Light</h3>
<p>Plasticizer migration is a diffusion process with predictable rates. Based on polymer science principles used in museum conservation, the safe zone for long-term plastic storage is:</p>
<p class="cta-inline" style="background-color: #fffde408; border-left: 4px solid #fffde4; padding: 16px 20px; margin: 24px 0; border-radius: 0 8px 8px 0;">
     <a href="https://utopiatoysandmodels.com" style="color: #fffde4; font-weight: 600; text-decoration: underline;">Get Started Today →</a>
</p>
<ul>
<li>
<strong>Temperature below 65°F (18°C):</strong> Every 10°F increase roughly doubles the rate of plasticizer migration. Room temperature (72°F) is acceptable, but anything above 80°F significantly accelerates the process. Avoid display cases near kitchen walls, south-facing windows, or electronics that generate heat.</li>
<li>
<strong>Relative humidity below 65%:</strong> High humidity does not directly cause plasticizer migration, but it hydrolyzes the surface film, making it tackier and more reactive. Use a digital hygrometer (a $10 unit from a hardware store is sufficient) to monitor your display room. If humidity consistently exceeds 65%, run a dehumidifier or place <strong>silica gel packets</strong> (rechargeable types like <strong>Eva-dry</strong> are reusable) inside enclosed display cases.</li>
<li>
<strong>UV exposure below 65 lux:</strong> Direct sunlight is obvious, but indirect UV from fluorescent lighting also degrades the polymer backbone. Use <strong>UV-filtering acrylic</strong> for display case doors or apply <strong>3M UV film</strong> to existing glass. LED lighting emits negligible UV and is the safest choice for display illumination.</li>
</ul>
<h3 id="the-barrier-material-hierarchy">The Barrier Material Hierarchy</h3>
<p>Not all storage containers are equal. Plasticizers can migrate through some materials and react with others. Here is the hierarchy of safe storage barriers:</p>
<p><strong>Best: Polypropylene (PP) and Polyethylene (PE)</strong>
These are the #5 and #2 recycling codes. They are chemically inert and do not interact with plasticizers. Use <strong>Really Useful Boxes</strong> (PP) or <strong>Ziploc brand freezer bags</strong> (PE) for individual kits. These materials do not outgas and provide a neutral barrier.</p>
<p><strong>Acceptable: Glass</strong>
Glass is completely non-reactive, but it offers no cushioning. Use glass containers only for small, sturdy parts. The risk is breakage, not chemistry.</p>
<p><strong>Avoid: PVC (Vinyl) and Polystyrene (PS) Containers</strong>
Many cheap storage bins are made from recycled PS or PVC. These materials can actually absorb plasticizers from your kits or release their own, creating a chemical exchange that accelerates degradation. Check the recycling code on your storage bins. If it says #3 (PVC) or #6 (PS), replace them.</p>
<p><strong>Avoid: Wood and Cardboard</strong>
Wood releases acetic acid (the same compound in vinegar) as it ages, which catalyzes polymer breakdown (<a rel="noopener noreferrer" target="_blank" href="https://www.loc.gov/preservation/scientists/projects/book_paper.html">loc.gov</a>). Cardboard is slightly acidic and absorbs moisture. Never store kits directly in cardboard boxes for long-term storage. If you must use the original box, line it with a PE bag first.</p>
<h3 id="the-outgassing-containment-strategy">The Outgassing Containment Strategy</h3>
<p>Plasticizer migration does not stop when you seal a box. If you trap the migrating molecules in a sealed container, they will saturate the air inside and re-deposit on the surface. This is why sealed storage can sometimes make the problem worse.</p>
<p><strong>The solution is an absorbent sink.</strong> Place a <strong>small activated charcoal sachet</strong> (used for aquarium filtration) inside each storage container. Activated charcoal has a massive surface area and will adsorb the outgassed plasticizer molecules, pulling them away from the plastic surface. Replace the sachet every 6 months. This is a technique borrowed from museum archival practice, where activated charcoal is used to protect cellulose acetate film from vinegar syndrome.</p>
<h3 id="the-contact-rule-separating-reactive-plastics">The Contact Rule: Separating Reactive Plastics</h3>
<p>Plasticizer migration is a concentration gradient driven process. When a soft PVC part touches a hard ABS part, the plasticizer migrates from the high-concentration PVC into the low-concentration ABS. This makes the PVC brittle and the ABS stained and softened.</p>
<p><strong>The interleaving protocol:</strong></p>
<ol>
<li>Wrap each PVC figure or soft part in <strong>acid-free tissue paper</strong> (available at art supply stores). Do not use regular tissue, the acids accelerate degradation.</li>
<li>Place the wrapped part in a separate PE bag.</li>
<li>Store the bag in a PP container with a charcoal sachet.</li>
<li>Never stack heavy kits on top of soft PVC parts. The pressure increases molecular contact and accelerates migration.</li>
</ol>
<h3 id="the-annual-audit">The Annual Audit</h3>
<p>Prevention is not a one-time setup. Schedule a <strong>yearly inspection</strong> of your collection. Every 12 months:</p>
<ol>
<li>Remove all kits from storage.</li>
<li>Check for early signs of tackiness on joints and soft parts.</li>
<li>Wipe down all surfaces with a dry microfiber cloth to remove settled dust.</li>
<li>Replace silica gel and charcoal sachets.</li>
<li>Rotate displayed kits, move ones near windows to interior shelves.</li>
</ol>
<p>This audit takes 30 minutes but catches plasticizer migration in its earliest stages, when a simple wipe-down is still effective.</p>
<div style="margin:1.5rem 0; padding:16px 20px; background-color:transparent; border-left:4px solid #e5e7eb; border-radius:0 8px 8px 0;">
<strong style="display:block; margin-bottom:4px; color:#111827; font-size:14px;"> Key Takeaway</strong>
<span style="color:#374151; font-size:15px; line-height:1.6;">The most effective storage strategy is not a single product, it is a system. Combine temperature control, humidity monitoring, inert barrier materials, and an absorbent sink to create an environment where plasticizer migration slows to a near standstill.</span>
</div>
<h3 id="material-specific-storage-solutions-for-abs-styrene-and-pvc">Material-Specific Storage Solutions for ABS, Styrene, and PVC</h3>
<p>ABS and styrene, the primary materials in most Gundam model kits, are relatively stable and resistant to plasticizer migration. They are best stored assembled or in their original runners, kept flat to prevent warping. The primary risk is physical damage, not chemical degradation. Store them in PP containers with dividers to prevent parts from rubbing against each other.</p>
<p>PVC figures and soft rubberized parts contain high levels of plasticizer and should never be stored in direct contact with hard plastics or painted surfaces. The migrating plasticizer can soften and imprint onto adjacent materials over time. Store these items separately in their own PE bags or with acid-free tissue between parts. For high-value PVC figures, consider <strong>museum-grade polyethylene foam</strong> (Ethafoam) to create custom cradles that hold the figure without pressure points.</p>
<div style="margin:1.5rem 0; padding:16px 20px; background-color:transparent; border-left:4px solid #e5e7eb; border-radius:0 8px 8px 0;">
<strong style="display:block; margin-bottom:4px; color:#111827; font-size:14px;"> Watch Out</strong>
<span style="color:#374151; font-size:15px; line-height:1.6;">Never store PVC figures or kits in direct contact with each other for extended periods. The plasticizer migration can cause the two surfaces to fuse together, permanently bonding parts that were never meant to be joined. This is a common cause of damage in boxed collections. The fusion is irreversible, separating the parts will tear the surface plastic.</span>
</div>
<h2 id="common-mistakes-that-make-sticky-model-kits-worse">Common Mistakes That Make Sticky Model Kits Worse</h2>
<p>The most common mistake is using aggressive solvents like acetone, nail polish remover, or undiluted rubbing alcohol on sticky model kits. These chemicals are far too strong for most hobby plastics and will cause clouding, cracking, or complete dissolution. If unsure about a solvent, assume it is too harsh.</p>
<p>Another frequent error is applying talcum powder to absorb the stickiness. While this provides a temporary dry feel, it does not address the underlying plasticizer migration. The powder mixes with the surface film to create a paste that is difficult to remove and can clog fine panel lines, leaving your kit chalky and dirty.</p>
<p>A third mistake is cleaning the kit and then returning it to the same environment that caused the problem. Without addressing the heat, UV exposure, or humidity in your storage area, the stickiness will return quickly. Modifying your storage conditions is essential for a lasting fix.</p>
<table style="width:100%; border-collapse:collapse; margin:2rem 0; font-size:14px; line-height:1.6;">
<thead style="background-color:#f8f9fa; padding:12px 16px; text-align:left; font-weight:600; border-bottom:2px solid #e5e7eb;">
<tr>
<th style="background-color:#f8f9fa; padding:12px 16px; text-align:left; font-weight:600; border-bottom:2px solid #e5e7eb;">Plastic Type</th>
<th style="background-color:#f8f9fa; padding:12px 16px; text-align:left; font-weight:600; border-bottom:2px solid #e5e7eb;">Common Issue</th>
<th style="background-color:#f8f9fa; padding:12px 16px; text-align:left; font-weight:600; border-bottom:2px solid #e5e7eb;">Safe Cleaning Method</th>
<th style="background-color:#f8f9fa; padding:12px 16px; text-align:left; font-weight:600; border-bottom:2px solid #e5e7eb;">Storage Note</th>
</tr>
</thead>
<tbody>
<tr>
<td style="padding:12px 16px; border-bottom:1px solid #e5e7eb;">ABS / Styrene</td>
<td style="padding:12px 16px; border-bottom:1px solid #e5e7eb;">Dust, light grime</td>
<td style="padding:12px 16px; border-bottom:1px solid #e5e7eb;">Mild soapy water, diluted isopropyl alcohol</td>
<td style="padding:12px 16px; border-bottom:1px solid #e5e7eb;">Stable, store flat to prevent warping</td>
</tr>
<tr>
<td style="padding:12px 16px; border-bottom:1px solid #e5e7eb;">PVC (Figures)</td>
<td style="padding:12px 16px; border-bottom:1px solid #e5e7eb;">Plasticizer migration, tacky film</td>
<td style="padding:12px 16px; border-bottom:1px solid #e5e7eb;">Diluted isopropyl alcohol, multiple passes</td>
<td style="padding:12px 16px; border-bottom:1px solid #e5e7eb;">Store separately, avoid contact with other plastics</td>
</tr>
<tr>
<td style="padding:12px 16px; border-bottom:1px solid #e5e7eb;">Soft-Touch Coating</td>
<td style="padding:12px 16px; border-bottom:1px solid #e5e7eb;">Coating degradation, sticky by design</td>
<td style="padding:12px 16px; border-bottom:1px solid #e5e7eb;">Isopropyl alcohol to strip coating</td>
<td style="padding:12px 16px; border-bottom:1px solid #e5e7eb;">Expect limited lifespan, plan for removal</td>
</tr>
<tr>
<td style="padding:12px 16px; border-bottom:1px solid #e5e7eb;">Clear Parts</td>
<td style="padding:12px 16px; border-bottom:1px solid #e5e7eb;">Clouding, scratches</td>
<td style="padding:12px 16px; border-bottom:1px solid #e5e7eb;">Gentle soapy water only</td>
<td style="padding:12px 16px; border-bottom:1px solid #e5e7eb;">Wrap individually, avoid abrasive cloths</td>
</tr>
</tbody>
</table>
<h2 id="conclusion-preserve-your-builds-for-years-to-come">Conclusion: Preserve Your Builds for Years to Come</h2>
<p>Sticky model kits are a frustrating but manageable reality of plastic chemistry. Understanding that plasticizer migration is the root cause allows you to choose the right cleaning method and storage conditions to slow the process. For soft-touch coatings, knowing when to strip the finish saves you from endless futile cleaning cycles.</p>
<p>Our curated selection of Gundam model kits and collectible figures comes from industry-leading brands, and our transparent availability status helps you plan your builds without surprises. Whether you are hunting for a specific kit scale or the latest Bandai release, our stock is ready to ship so you can start your next project with confidence.</p>
<section style="margin:3rem 0 2rem 0;" itemscope itemtype="https://schema.org/FAQPage">
<h2 style="font-size:1.5rem; font-weight:700; margin:0 0 4px 0;" id="frequently-asked-questions">Frequently Asked Questions</h2>
<div style="padding:20px 0; border-bottom:1px solid #e5e7eb;" itemscope itemprop="mainEntity" itemtype="https://schema.org/Question">
<h3 style="font-size:1.1rem; font-weight:600; margin:0 0 8px 0;" itemprop="name">Why do old figures get sticky?</h3>
<div style="line-height:1.7; font-size:0.95rem;" itemscope itemprop="acceptedAnswer" itemtype="https://schema.org/Answer">
<p itemprop="text" style="margin:0;">Old figures get sticky because of plasticizer migration. Manufacturers add plasticizers to PVC to keep it flexible, but these chemicals slowly migrate to the surface over time. Heat, UV exposure, and environmental humidity speed up this process. As the plasticizer reaches the surface, it forms a tacky film that collects dust and feels sticky to the touch. This is a chemical breakdown of the polymer structure, not a sign of poor craftsmanship.</p>
</div>
</div>
<div style="padding:20px 0; border-bottom:1px solid #e5e7eb;" itemscope itemprop="mainEntity" itemtype="https://schema.org/Question">
<h3 style="font-size:1.1rem; font-weight:600; margin:0 0 8px 0;" itemprop="name">Can you reverse plastic degradation on model kits?</h3>
<div style="line-height:1.7; font-size:0.95rem;" itemscope itemprop="acceptedAnswer" itemtype="https://schema.org/Answer">
<p itemprop="text" style="margin:0;">You cannot fully reverse plastic degradation, but you can remove the sticky residue and slow further breakdown. Clean the surface with isopropyl alcohol or a mild degreaser to lift the tacky film. After cleaning, store the kit in a cool, dry place away from direct sunlight. For soft-touch rubberized plastic, the coating may eventually degrade completely, at which point the only fix is a careful solvent wash or repaint.</p>
</div>
</div>
<div style="padding:20px 0; border-bottom:1px solid #e5e7eb;" itemscope itemprop="mainEntity" itemtype="https://schema.org/Question">
<h3 style="font-size:1.1rem; font-weight:600; margin:0 0 8px 0;" itemprop="name">What is the best way to store Gundam models to prevent stickiness?</h3>
<div style="line-height:1.7; font-size:0.95rem;" itemscope itemprop="acceptedAnswer" itemtype="https://schema.org/Answer">
<p itemprop="text" style="margin:0;">The best way to store Gundam models is in a cool, dry area with stable temperatures below 75°F. Avoid display cases near windows or heat sources, since UV exposure and warmth accelerate plasticizer migration. Use non-reactive storage containers, and avoid letting PVC parts touch ABS or styrene parts long-term, as the migrating plasticizer can cause surface film and even soften adjacent plastics.</p>
</div>
</div>
</section>
<div class="cta-button-container" style="text-align: center; margin: 32px 0;">
    <a href="https://utopiatoysandmodels.com" class="cta-button" style="display: inline-block; background-color: #fffde4; color: white; padding: 14px 32px; border-radius: 8px; text-decoration: none; font-weight: 600; font-size: 16px;">Get Started Today</a>
</div>]]>
    </content>
  </entry>
  <entry>
    <id>https://utopiatoysandmodels.com/blogs/news/magnifying-lamp-for-miniature-painting-worth-it</id>
    <published>2026-09-05T21:20:08-04:00</published>
    <updated>2026-09-05T21:20:09-04:00</updated>
    <link rel="alternate" type="text/html" href="https://utopiatoysandmodels.com/blogs/news/magnifying-lamp-for-miniature-painting-worth-it"/>
    <title>Magnifying Lamp for Miniature Painting: Worth It?</title>
    <author>
      <name>Editorial Team</name>
    </author>
    <summary type="html">
      <![CDATA[Wondering if a magnifying lamp for miniature painting is worth it? Compare costs, magnification strength, and eye strain relief to decide. Find your setup.<p><a class="read-more" href="https://utopiatoysandmodels.com/blogs/news/magnifying-lamp-for-miniature-painting-worth-it">More</a></p>]]>
    </summary>
    <content type="html">
      <![CDATA[<h2 id="table-of-contents">Table of Contents</h2>
<ul>
<li><a href="#the-verdict-is-a-magnifying-lamp-worth-it-for-miniature-painting">The Verdict: Is a Magnifying Lamp Worth It for Miniature Painting?</a></li>
<li><a href="#magnification-strength-for-painting-miniatures-what-the-numbers-mean">Magnification Strength for Painting Miniatures: What the Numbers Mean</a></li>
<li><a href="#magnifying-headset-vs-lamp-for-painting-which-fits-your-workflow">Magnifying Headset vs Lamp for Painting: Which Fits Your Workflow?</a></li>
<li><a href="#key-features-that-decide-between-a-good-lamp-and-a-bad-one">Key Features That Decide Between a Good Lamp and a Bad One</a></li>
<li><a href="#eye-strain-prevention-for-hobbyists-lighting-posture-and-focal-length">Eye Strain Prevention for Hobbyists: Lighting, Posture, and Focal Length</a></li>
<li><a href="#common-magnifying-lamp-mistakes-and-how-to-avoid-them">Common Magnifying Lamp Mistakes and How to Avoid Them</a></li>
<li><a href="#final-thoughts-matching-the-tool-to-your-painting-style">Final Thoughts: Matching the Tool to Your Painting Style</a></li>
<li><a href="#frequently-asked-questions">Frequently Asked Questions</a></li>
</ul>
<p><em>Last Updated: September 6, 2026</em></p>
<h2 id="the-verdict-is-a-magnifying-lamp-worth-it-for-miniature-painting">The Verdict: Is a Magnifying Lamp Worth It for Miniature Painting?</h2>
<p>If you paint miniatures for more than an hour at a time, a magnifying lamp is worth it for the eye strain relief alone. This guide breaks down whether a magnifying lamp for miniature painting is worth it for your specific workflow, covering magnification strength, lighting quality, and the ergonomic trade-offs that most hobbyists overlook. The honest answer is that it depends heavily on your eyesight, your painting style, and the size of the details you typically tackle.</p>
<p>A magnifying lamp is a desk-mounted tool that combines an illuminated lens with an adjustable arm, letting you see <a href="/blogs/news/how-to-fix-loose-gundam-joints">fine details</a> while keeping both hands free. Many hobbyists report that the real benefit is not just seeing better, but sitting in a healthier position instead of hunched over the workbench squinting at a 1/144 scale kit. The tool pays for itself in comfort during long panel-lining or decal sessions.</p>
<div style="margin:1.5rem 0; padding:16px 20px; background-color:transparent; border-left:4px solid #e5e7eb; border-radius:0 8px 8px 0;">
<strong style="display:block; margin-bottom:4px; color:#111827; font-size:14px;"> Key Takeaway</strong>
<span style="color:#374151; font-size:15px; line-height:1.6;">The core value of a magnifying lamp is not raw magnification power, but the combination of consistent lighting and a stable, hands-free viewing position that reduces eye fatigue and neck strain during long sessions.</span>
</div>
<h2 id="magnification-strength-for-painting-miniatures-what-the-numbers-mean">Magnification Strength for Painting Miniatures: What the Numbers Mean</h2>
<p>Magnification strength for painting miniatures is measured in diopters, and understanding this scale is the first step to choosing correctly. A 3-diopter lens provides 1.75x magnification, which is the sweet spot for most miniature work because it offers a generous field of view without heavy distortion (<a rel="noopener noreferrer" target="_blank" href="https://www.aoa.org/news/clinical-eye-care/diseases-and-conditions/lens-based-strategies-to-address-reading-issues-due-to-mild-disease-related-vision-loss">aoa.org</a>). Lower-powered lenses like 1.5x and 2x are better for assembly and larger parts, while 5x and above narrows your field of view so much that you lose spatial awareness of the model.</p>
<p>The working distance, or the space between the lens and your miniature, also shifts with magnification. Higher diopter lenses require you to work closer to the glass, which can interfere with brush placement and make you crowd the work area. For painting eyes, freehand details, and tiny decals, most hobbyists find that a 2.5x to 3x lens balances clarity with enough room to maneuver a brush.</p>
<p>Beyond the raw numbers, the optical design determines how usable that magnification actually is. A 3-diopter acrylic lens with a 5-inch diameter gives you a comfortable viewing window, but the edges will show chromatic aberration, color fringing that makes dark outlines look purple or green. Optical glass lenses, like those used in the Donegan OptiVISOR or higher-end Brightech models, correct for this distortion, keeping edges crisp across the entire field. If you are matching paint shades or doing fine wet blending, that edge clarity matters more than the magnification figure on the box.</p>
<p>Depth of field is another factor hobbyists overlook. At 3x magnification, the in-focus zone is roughly 1 to 2 inches deep. That means the front of a Space Marine's shoulder pad can be tack-sharp while the back edge falls slightly soft. You compensate by moving the model, not your head, which is why a lamp with a smooth, adjustable arm is essential. Cheaper lamps with stiff joints force you to reposition the entire base, breaking your concentration mid-stroke.</p>
<p>For most miniature painters, the practical sweet spot is a 2.5x to 3x lens with a working distance of 10 to 14 inches. This range lets you keep your elbows on the desk, your brush hand steady, and the model close enough to see panel lines without losing the overall silhouette. If you primarily paint 28mm heroic-scale figures, a 3x lens is the default recommendation. If you work on larger scale busts or vehicles, a 1.75x to 2x lens gives you a wider field of view and more room to maneuver a larger brush.</p>
<div style="margin:1.5rem 0; padding:16px 20px; background-color:transparent; border-left:4px solid #e5e7eb; border-radius:0 8px 8px 0;">
<strong style="display:block; margin-bottom:4px; color:#111827; font-size:14px;"> Pro Tip</strong>
<span style="color:#374151; font-size:15px; line-height:1.6;">When testing a lamp in person, hold a ruler under the lens and move it toward and away from your face. The distance at which the ruler markings stay sharp is your usable working distance. If that distance is under 8 inches, you will struggle to keep your brush hand steady while painting fine details.</span>
</div>
<h2 id="magnifying-headset-vs-lamp-for-painting-which-fits-your-workflow">Magnifying Headset vs Lamp for Painting: Which Fits Your Workflow?</h2>
<p>The magnifying headset vs lamp for painting decision comes down to one question: does the magnification need to move with your head, or stay fixed over your work? A head-mounted magnifier like the YOCTOSUN Head Mount Magnifier offers interchangeable lens plates from 1.5x to 5x and a rechargeable LED system, making it portable and highly affordable. The tradeoff is that wearing extra weight on your head for hours can cause neck fatigue, and the focal point stays locked to your face rather than the model.</p>
<p>A desk-mounted magnifying lamp like the Brightech LightView Pro Flex keeps the lens and light fixed over your work, which means you move the model into focus rather than chasing it with your head. The flexible gooseneck lets you position the 3-diopter lens exactly where you need it, and the integrated LED ring provides shadow-free illumination directly on the paint surface. For painters who sit at a dedicated desk for extended sessions, the stability of a lamp usually wins over the mobility of a headset.</p>
<table style="width:100%; border-collapse:collapse; margin:2rem 0; font-size:14px; line-height:1.6;">
<thead style="background-color:#f8f9fa; padding:12px 16px; text-align:left; font-weight:600; border-bottom:2px solid #e5e7eb;">
<tr>
<th style="background-color:#f8f9fa; padding:12px 16px; text-align:left; font-weight:600; border-bottom:2px solid #e5e7eb;">Feature</th>
<th style="background-color:#f8f9fa; padding:12px 16px; text-align:left; font-weight:600; border-bottom:2px solid #e5e7eb;">Head-Mounted Magnifier</th>
<th style="background-color:#f8f9fa; padding:12px 16px; text-align:left; font-weight:600; border-bottom:2px solid #e5e7eb;">Desk-Mounted Magnifying Lamp</th>
</tr>
</thead>
<tbody>
<tr>
<td style="padding:12px 16px; border-bottom:1px solid #e5e7eb;">Best For</td>
<td style="padding:12px 16px; border-bottom:1px solid #e5e7eb;">Moving around, quick checks</td>
<td style="padding:12px 16px; border-bottom:1px solid #e5e7eb;">Long, stationary painting sessions</td>
</tr>
<tr>
<td style="padding:12px 16px; border-bottom:1px solid #e5e7eb;">Neck Strain</td>
<td style="padding:12px 16px; border-bottom:1px solid #e5e7eb;">Moderate to high</td>
<td style="padding:12px 16px; border-bottom:1px solid #e5e7eb;">Minimal</td>
</tr>
<tr>
<td style="padding:12px 16px; border-bottom:1px solid #e5e7eb;">Lighting</td>
<td style="padding:12px 16px; border-bottom:1px solid #e5e7eb;">Built-in, moves with head</td>
<td style="padding:12px 16px; border-bottom:1px solid #e5e7eb;">Fixed, shadow-free over work area</td>
</tr>
<tr>
<td style="padding:12px 16px; border-bottom:1px solid #e5e7eb;">Field of View</td>
<td style="padding:12px 16px; border-bottom:1px solid #e5e7eb;">Limited by lens plate</td>
<td style="padding:12px 16px; border-bottom:1px solid #e5e7eb;">Larger lens options available</td>
</tr>
<tr>
<td style="padding:12px 16px; border-bottom:1px solid #e5e7eb;">Price Range</td>
<td style="padding:12px 16px; border-bottom:1px solid #e5e7eb;">Lower entry cost</td>
<td style="padding:12px 16px; border-bottom:1px solid #e5e7eb;">Higher, varies by features</td>
</tr>
</tbody>
</table>
<h2 id="key-features-that-decide-between-a-good-lamp-and-a-bad-one">Key Features That Decide Between a Good Lamp and a Bad One</h2>
<p>A quality magnifying lamp for miniature painting is defined by its lens optics, lighting quality, and base stability, not just its magnification power. Optical glass lenses, like those on the Donegan OptiVISOR, deliver superior clarity without the distortion common in cheaper acrylic lenses. Plastic lenses work for basic tasks, but they can introduce color fringing and blur at the edges, which becomes obvious when you are trying to match paint shades precisely.</p>
<figure class="article-content-image my-8" style="margin:2em 0;padding:0;background:transparent;border:0;"><img src="https://cdn.grandranker.com/articles/magnifying-lamp-for-miniature-painting-worth-it-content-1-1788657603.jpg" alt="Close-up of a hobbyist's hands painting a small Gundam model kit under a bright LED magnifying lamp on a cluttered workbench, the shadow-free ring light illuminating the miniature while the lens stays in sharp focus" class="w-full rounded-lg shadow-lg" loading="lazy" style="display:block;width:100%;max-width:100%;height:auto;border-radius:8px;margin:0 auto;"><figcaption class="text-sm text-gray-600 mt-2 text-center" style="font-size:0.875em;color:#6b7280;text-align:center;margin-top:0.6em;">Close-up of a hobbyist's hands painting a small Gundam model kit under a bright LED magnifying lamp on a cluttered workbench, the shadow-free ring light illuminating the miniature while the lens stays in sharp focus</figcaption></figure>
<p>LED lighting quality matters more than most buyers realize. Look for a lamp with a high Color Rendering Index (CRI) and adjustable color temperature, since warm light can shift how you perceive paint colors. The ArtDot Magnifying Lamp offers adjustable brightness and color temperature control, which helps you see true color while painting. A stable weighted base or a sturdy desk clamp is also critical, because a lamp that wobbles when you move your brush is worse than no lamp at all.</p>
<div style="margin:1.5rem 0; padding:16px 20px; background-color:transparent; border-left:4px solid #e5e7eb; border-radius:0 8px 8px 0;">
<strong style="display:block; margin-bottom:4px; color:#111827; font-size:14px;"> Watch Out</strong>
<span style="color:#374151; font-size:15px; line-height:1.6;">Cheap magnifying lamps often use low-CRI LEDs that cast a yellow or blue tint over your work. This distorts paint colors and forces you to redo highlights and shading once you see the model under normal room lighting.</span>
</div>
<h2 id="eye-strain-prevention-for-hobbyists-lighting-posture-and-focal-length">Eye Strain Prevention for Hobbyists: Lighting, Posture, and Focal Length</h2>
<p>Eye strain prevention for hobbyists starts with understanding that your eyes are doing two jobs at once: focusing through a lens and compensating for poor lighting. When a lamp provides bright, shadow-free illumination, your pupils stay smaller and your focusing muscles work less. Flicker-free LEDs are essential here, since invisible flicker at certain frequencies can cause headaches and fatigue during long painting sessions (<a rel="noopener noreferrer" target="_blank" href="https://stacks.cdc.gov/view/cdc/21748/cdc_21748_DS1.pdf">the CDC</a>).</p>
<p>Your posture also changes when you use a magnifying lamp correctly. Because the lamp brings the work closer and provides light, you can sit upright with the miniature at a comfortable height rather than leaning forward. Ergonomics experts recommend keeping your forearms supported and your neck in a neutral position, which is difficult to achieve without a stable, adjustable light source (<a rel="noopener noreferrer" target="_blank" href="http://www.osha.gov/etools/computer-workstations/positions">osha.gov</a>). The combination of proper focal length and good task lighting reduces the squinting that leads to eye fatigue and tension headaches.</p>
<h2 id="common-magnifying-lamp-mistakes-and-how-to-avoid-them">Common Magnifying Lamp Mistakes and How to Avoid Them</h2>
<p>The most common mistake hobbyists make is buying a lamp with too much magnification, then discovering the narrow field of view makes it impossible to paint larger surfaces or see the whole model at once. A lamp that forces you to constantly reposition the arm interrupts your painting flow and defeats the purpose of hands-free viewing. Start with a 2.5x or 3x lens and only move up if you consistently need more detail for specific tasks like eyes or tiny insignias.</p>
<p>Another frequent error is ignoring the lamp's footprint and mounting requirements until it arrives. Desk clamp models need a sturdy edge at least an inch thick, while weighted base models consume significant workbench real estate. Measure your workspace before purchasing, and remember that a swing arm with a long reach gives you more flexibility to position the light exactly where you need it without crowding your paint station.</p>
<p>What most buying guides miss is how a magnifying lamp interacts with the rest of your hobby setup. A wet palette, for instance, needs to sit within your natural reach while you paint. If your lamp's base occupies the spot where your palette normally rests, you will constantly shift the palette in and out of the light, disrupting your paint's moisture level. Look for a lamp with a compact weighted base or a clamp that mounts to the rear edge of your desk, leaving the front 12 inches of your workspace clear for your palette, brush holder, and model.</p>
<p>Airbrush users face a different problem. A magnifying lamp positioned over the spray booth can cast shadows from the booth's exhaust hood, and the lamp's lens can accumulate overspray residue that is difficult to clean. If you airbrush with magnification, mount the lamp to the side of the booth at a 45-degree angle rather than directly overhead. This keeps the lens out of the overspray path while still illuminating the model surface. You will also want to cover the lens with a clear plastic film or a dedicated lens cap when switching from brush painting to airbrushing.</p>
<p>For painters using a spray booth for priming and varnishing, the lamp's light can create glare on the booth's transparent shield, making it hard to see the model's actual surface. Position the lamp so the light hits the model from the side, not through the shield. Many hobbyists find that a separate, non-magnifying task light works better for airbrush sessions, reserving the magnifying lamp for fine brushwork.</p>
<p>Small workspace setups present their own challenges. If you paint on a folding table or a desk that doubles as a computer station, a floor-stand magnifying lamp with a narrow footprint is often a better choice than a desk clamp. The Brightech LightView Pro Flex floor model takes up about 1 square foot of floor space and can be rolled aside when not in use. Alternatively, a lamp with a C-clamp mount can attach to a shelf edge or a utility cart, keeping your primary work surface completely clear.</p>
<div style="margin:1.5rem 0; padding:16px 20px; background-color:transparent; border-left:4px solid #e5e7eb; border-radius:0 8px 8px 0;">
<strong style="display:block; margin-bottom:4px; color:#111827; font-size:14px;"> Watch Out</strong>
<span style="color:#374151; font-size:15px; line-height:1.6;">If you use a magnifying lamp near a spray booth, check the lamp's lens material before cleaning. Acrylic lenses scratch easily when wiped with paper towels or standard glass cleaners. Use a microfiber cloth and a lens-safe cleaning solution, and always remove overspray residue with a soft brush before wiping.</span>
</div>
<table style="width:100%; border-collapse:collapse; margin:2rem 0; font-size:14px; line-height:1.6;">
<thead style="background-color:#f8f9fa; padding:12px 16px; text-align:left; font-weight:600; border-bottom:2px solid #e5e7eb;">
<tr>
<th style="background-color:#f8f9fa; padding:12px 16px; text-align:left; font-weight:600; border-bottom:2px solid #e5e7eb;">Mistake</th>
<th style="background-color:#f8f9fa; padding:12px 16px; text-align:left; font-weight:600; border-bottom:2px solid #e5e7eb;">Why It Happens</th>
<th style="background-color:#f8f9fa; padding:12px 16px; text-align:left; font-weight:600; border-bottom:2px solid #e5e7eb;">Better Approach</th>
</tr>
</thead>
<tbody>
<tr>
<td style="padding:12px 16px; border-bottom:1px solid #e5e7eb;">Buying too much magnification</td>
<td style="padding:12px 16px; border-bottom:1px solid #e5e7eb;">Assuming more power equals better vision</td>
<td style="padding:12px 16px; border-bottom:1px solid #e5e7eb;">Start at 2.5x-3x for balanced field of view</td>
</tr>
<tr>
<td style="padding:12px 16px; border-bottom:1px solid #e5e7eb;">Ignoring lens material</td>
<td style="padding:12px 16px; border-bottom:1px solid #e5e7eb;">Focusing only on price</td>
<td style="padding:12px 16px; border-bottom:1px solid #e5e7eb;">Choose optical glass for clarity</td>
</tr>
<tr>
<td style="padding:12px 16px; border-bottom:1px solid #e5e7eb;">Skipping CRI and color temp checks</td>
<td style="padding:12px 16px; border-bottom:1px solid #e5e7eb;">Not knowing LED quality varies</td>
<td style="padding:12px 16px; border-bottom:1px solid #e5e7eb;">Look for high CRI and adjustable warmth</td>
</tr>
<tr>
<td style="padding:12px 16px; border-bottom:1px solid #e5e7eb;">Forgetting mounting requirements</td>
<td style="padding:12px 16px; border-bottom:1px solid #e5e7eb;">Not measuring the workspace</td>
<td style="padding:12px 16px; border-bottom:1px solid #e5e7eb;">Verify clamp thickness or base footprint first</td>
</tr>
<tr>
<td style="padding:12px 16px; border-bottom:1px solid #e5e7eb;">Blocking wet palette access</td>
<td style="padding:12px 16px; border-bottom:1px solid #e5e7eb;">Lamp base occupies prime workspace</td>
<td style="padding:12px 16px; border-bottom:1px solid #e5e7eb;">Mount lamp to rear edge or use floor stand</td>
</tr>
<tr>
<td style="padding:12px 16px; border-bottom:1px solid #e5e7eb;">Exposing lens to airbrush overspray</td>
<td style="padding:12px 16px; border-bottom:1px solid #e5e7eb;">Positioning lamp over spray booth</td>
<td style="padding:12px 16px; border-bottom:1px solid #e5e7eb;">Angle lamp from side and cover lens when spraying</td>
</tr>
</tbody>
</table>
<h2 id="final-thoughts-matching-the-tool-to-your-painting-style">Final Thoughts: Matching the Tool to Your Painting Style</h2>
<p>A magnifying lamp is worth it if you paint regularly, but it is not a universal upgrade for every hobbyist. If you primarily build and detail larger scale kits or work under strong natural light with good posture, you might not need one. However, if you find yourself squinting at 1/144 scale details, holding kits up to a desk light, or feeling eye fatigue after an hour of panel lining, a quality magnifying lamp will change how comfortably you paint.</p>
<p>For painters who want to improve their setup, the decision between a lamp and a headset should follow your workflow, not a trend. The team knows that every builder works differently, which is why we stock tools that support precision work at any scale. Check our current selection of hobby tools and <a href="/blogs/news/gundam-model-kit-display-ideas">model kits</a> to pair your new lighting setup with the next project on your bench.</p>
<section style="margin:3rem 0 2rem 0;" itemscope itemtype="https://schema.org/FAQPage">
<h2 style="font-size:1.5rem; font-weight:700; margin:0 0 4px 0;" id="frequently-asked-questions">Frequently Asked Questions</h2>
<div style="padding:20px 0; border-bottom:1px solid #e5e7eb;" itemscope itemprop="mainEntity" itemtype="https://schema.org/Question">
<h3 style="font-size:1.1rem; font-weight:600; margin:0 0 8px 0;" itemprop="name">What magnification is best for painting miniatures?</h3>
<div style="line-height:1.7; font-size:0.95rem;" itemscope itemprop="acceptedAnswer" itemtype="https://schema.org/Answer">
<p itemprop="text" style="margin:0;">For most miniature painting, a 2x to 3x diopter strength (roughly 1.5x to 2.25x actual magnification) is the practical sweet spot. This range offers enough enlargement to see details like eyes and edge highlights without creating a shallow depth of field that forces you to hold your head perfectly still. Higher strengths like 5x are useful for extremely fine work but often require moving the miniature out from under the lens to see the whole model. Start with a 3-diopter lamp, which balances detail visibility with a workable focal range.</p>
</div>
</div>
<div style="padding:20px 0; border-bottom:1px solid #e5e7eb;" itemscope itemprop="mainEntity" itemtype="https://schema.org/Question">
<h3 style="font-size:1.1rem; font-weight:600; margin:0 0 8px 0;" itemprop="name">Are magnifying glasses better than magnifying lamps for painting?</h3>
<div style="line-height:1.7; font-size:0.95rem;" itemscope itemprop="acceptedAnswer" itemtype="https://schema.org/Answer">
<p itemprop="text" style="margin:0;">Neither is universally better, but they solve different problems. A magnifying lamp combines hands-free magnification with direct, shadow-free task lighting, which is ideal for long painting sessions at a desk. A head-mounted magnifier, often called a visor, moves with your head so the focal point stays centered even as you lean in, but it adds weight and can cause neck fatigue. If your main issue is inconsistent lighting and eye strain, a lamp is the stronger choice. If you need to switch between magnified and normal vision frequently, a flip-up visor may be more convenient.</p>
</div>
</div>
<div style="padding:20px 0; border-bottom:1px solid #e5e7eb;" itemscope itemprop="mainEntity" itemtype="https://schema.org/Question">
<h3 style="font-size:1.1rem; font-weight:600; margin:0 0 8px 0;" itemprop="name">Do professional miniature painters use magnifying lamps?</h3>
<div style="line-height:1.7; font-size:0.95rem;" itemscope itemprop="acceptedAnswer" itemtype="https://schema.org/Answer">
<p itemprop="text" style="margin:0;">Most professional and competition-level painters use some form of magnification, whether a desk lamp, a headset, or both. The reason is practical: consistent detail work at 28mm to 75mm scale demands seeing brush placement clearly. However, many pros also emphasize that a high-quality, high-CRI light source matters as much as the lens. They use magnification to reduce eye strain and improve precision, not as a crutch. A lamp with adjustable brightness and a stable arm is a common staple in professional studios because it keeps both hands free for the model.</p>
</div>
</div>
<div style="padding:20px 0; border-bottom:1px solid #e5e7eb;" itemscope itemprop="mainEntity" itemtype="https://schema.org/Question">
<h3 style="font-size:1.1rem; font-weight:600; margin:0 0 8px 0;" itemprop="name">How does a magnifying lamp help with eye strain prevention for hobbyists?</h3>
<div style="line-height:1.7; font-size:0.95rem;" itemscope itemprop="acceptedAnswer" itemtype="https://schema.org/Answer">
<p itemprop="text" style="margin:0;">A magnifying lamp helps prevent eye strain by combining two factors: reduced squinting and consistent lighting. When you strain to see small details, you tend to lean forward and tense your neck and shoulders, which accelerates fatigue. A lamp brings the detail closer, letting you maintain a more natural posture. The built-in LED light also ensures your eyes aren't fighting shadows or inconsistent room lighting. For best results, choose a lamp with a high Color Rendering Index (CRI) and adjustable brightness so you can match the light level to your environment.</p>
</div>
</div>
</section>
<hr>
<p>Choosing the right magnifying lamp comes down to matching magnification, lighting quality, and ergonomics to your specific painting habits. Start with a 3-diopter optical glass lens, verify the LED has a high CRI with adjustable brightness, and confirm the mounting works in your space. Get started with Utopia Toys and Models and find the tools that keep your eyes fresh and your brush steady for every build.</p>
<div class="cta-button-container" style="text-align: center; margin: 32px 0;">
    <a href="https://utopiatoysandmodels.com" class="cta-button" style="display: inline-block; background-color: #fffde4; color: white; padding: 14px 32px; border-radius: 8px; text-decoration: none; font-weight: 600; font-size: 16px;">Get Started Today</a>
</div>]]>
    </content>
  </entry>
  <entry>
    <id>https://utopiatoysandmodels.com/blogs/news/blind-box-store-knoxville-local-shops</id>
    <published>2026-09-04T21:15:34-04:00</published>
    <updated>2026-09-04T21:15:35-04:00</updated>
    <link rel="alternate" type="text/html" href="https://utopiatoysandmodels.com/blogs/news/blind-box-store-knoxville-local-shops"/>
    <title>Blind Box Store Knoxville: 7 Local Shops to Visit</title>
    <author>
      <name>Editorial Team</name>
    </author>
    <summary type="html">
      <![CDATA[Find the best blind box store in Knoxville for anime collectibles, mystery figures, and more. Explore local shops and get smart unboxing tips.<p><a class="read-more" href="https://utopiatoysandmodels.com/blogs/news/blind-box-store-knoxville-local-shops">More</a></p>]]>
    </summary>
    <content type="html">
      <![CDATA[<h2 id="table-of-contents">Table of Contents</h2>
<ul>
<li><a href="#where-to-find-a-blind-box-store-in-knoxville">Where to Find a Blind Box Store in Knoxville</a></li>
<li><a href="#utopia-toys-and-models-a-collectors-hub-for-anime-collectibles-knoxville-trusts">Utopia Toys and Models: A Collector's Hub for Anime Collectibles Knoxville Trusts</a></li>
<li><a href="#hobbytown-knoxville-for-sonny-angel-and-hobby-supplies">HobbyTown Knoxville: For Sonny Angel and Hobby Supplies</a></li>
<li><a href="#boxlunch-at-west-town-mall-fandom-focused-mystery-merch">BoxLunch at West Town Mall: Fandom-Focused Mystery Merch</a></li>
<li><a href="#pop-cult-and-other-local-knoxville-options">Pop Cult and Other Local Knoxville Options</a></li>
<li><a href="#smart-blind-box-unboxing-tips-for-collectors">Smart Blind Box Unboxing Tips for Collectors</a></li>
<li><a href="#conclusion-build-your-collection-in-knoxville">Conclusion: Build Your Collection in Knoxville</a></li>
<li><a href="#frequently-asked-questions">Frequently Asked Questions</a></li>
</ul>
<p><em>Last Updated: September 5, 2026</em></p>
<p>The thrill of a mystery box is hard to beat, but finding the right blind box store in Knoxville takes a bit of local knowledge. Whether you are hunting for a rare Sonny Angel or a fandom-specific pin, the city has more options than you might expect. This guide from Utopia Toys and Models walks you through local shops, what each one does best, and <a href="/blogs/news/how-to-start-anime-figure-collection">how to collect smarter</a> without overspending.</p>
<h2 id="where-to-find-a-blind-box-store-in-knoxville">Where to Find a Blind Box Store in Knoxville</h2>
<p>A blind box store in Knoxville is any retailer that sells sealed, random collectible figures, pins, or toys where the contents are unknown until purchase. The local scene spans everything from dedicated hobby shops to mall kiosks and national discount chains. The best choice depends on what you collect, your budget, and <a href="/blogs/news/best-ways-to-complete-blind-box-sets">whether you want</a> to browse in person or order online.</p>
<p>Most Knoxville collectors split their shopping between a few distinct store types. Dedicated hobby retailers carry premium Japanese imports and current series. Mall-based shops offer licensed pop-culture merchandise with frequent turnover. Discount stores provide entry-level boxes for casual fans. Knowing which format fits your goal prevents wasted trips and impulse buys.</p>
<h2 id="utopia-toys-and-models-a-collectors-hub-for-anime-collectibles-knoxville-trusts">Utopia Toys and Models: A Collector's Hub for Anime Collectibles Knoxville Trusts</h2>
<p>For serious collectors, Utopia Toys and Models leads the local scene as the go-to source for anime collectibles Knoxville shoppers rely on. The store stocks a curated selection of blind box figures alongside Gundam model kits and merchandise from top brands like Bandai, Funko, and Kotobukiya. Unlike general retailers, the inventory focuses on what dedicated collectors actually want, not just whatever is trending.</p>
<figure class="article-content-image my-8" style="margin:2em 0;padding:0;background:transparent;border:0;"><img src="https://cdn.grandranker.com/articles/blind-box-store-knoxville-7-local-shops-to-visit-content-1-1788570929.jpg" alt="A well-lit retail shelf display inside a hobby store, featuring colorful blind box figures and Gundam model kits neatly organized for browsing" class="w-full rounded-lg shadow-lg" loading="lazy" style="display:block;width:100%;max-width:100%;height:auto;border-radius:8px;margin:0 auto;"><figcaption class="text-sm text-gray-600 mt-2 text-center" style="font-size:0.875em;color:#6b7280;text-align:center;margin-top:0.6em;">A well-lit retail shelf display inside a hobby store, featuring colorful blind box figures and Gundam model kits neatly organized for browsing</figcaption></figure>
<p>What separates this shop from the rest is the transparent availability system. Most items are in stock and ready to ship, with clear status indicators for pre-order and arriving-soon items. That means no guessing whether a figure is actually on the shelf or stuck in a months-long backorder. For local shoppers who want to verify stock before driving over, the online catalog mirrors the in-store inventory accurately.</p>
<p>The store also serves as an authorized retailer for major brands, which matters for authenticity. Bootleg figures are a real problem in the blind box market, and <a href="/blogs/news/how-to-avoid-bootleg-anime-figures">buying from an authorized dealer removes that risk entirely</a> (<a rel="noopener noreferrer" target="_blank" href="https://www.fda.gov/drugs/buying-using-medicine-safely/counterfeit-medicine">the FDA</a>). If you are spending serious money on a series you want to complete, that assurance alone justifies the trip.</p>
<h2 id="hobbytown-knoxville-for-sonny-angel-and-hobby-supplies">HobbyTown Knoxville: For Sonny Angel and Hobby Supplies</h2>
<p>HobbyTown Knoxville is a local spot for Sonny Angel <a href="/blogs/news/how-to-get-chase-figures-in-blind-boxes">blind boxes</a>, a line that sells out quickly at most retailers. Located on Turkey Drive, the store keeps a rotating stock of these popular figures and supports customers by phone and text if you want to check availability before visiting. The staff understands the hobby and can point you toward current series without making you dig through shelves.</p>
<p>Beyond blind boxes, HobbyTown carries a broad range of model kits and hobbyist supplies. That makes it a practical stop if you are building Gunpla and need tools or paint alongside your figure purchases. One trip can cover both your mystery box fix and your build needs.</p>
<p>The main limitation is that inventory fluctuates with trends. Popular series come and go quickly, so timing matters. If you see a series you want, grab it while it is on the shelf rather than assuming it will restock.</p>
<h2 id="boxlunch-at-west-town-mall-fandom-focused-mystery-merch">BoxLunch at West Town Mall: Fandom-Focused Mystery Merch</h2>
<p>BoxLunch at West Town Mall brings a mall-retail energy to the blind box hunt with an extensive selection of licensed mystery merchandise. The store carries blind bag figurines, collectible pins, and themed boxes across many intellectual properties. If you collect a specific fandom, from anime classics to Disney, this is the place to find boxes that match your interests.</p>
<p>The central mall location makes BoxLunch a convenient stop, especially if you are already shopping at West Town. The inventory rotates frequently, so repeat visits often surface new series that were not there a week earlier. For casual fans and gift hunters, the store offers an easy entry point into blind box collecting without the commitment of a dedicated hobby shop.</p>
<p>The trade-off is that mall retail availability limits how deep the selection goes. You will find popular licensed lines, but niche Japanese imports and premium collector series are less common here. For those, a specialized retailer remains the better option.</p>
<p class="cta-inline" style="background-color: #fffde408; border-left: 4px solid #fffde4; padding: 16px 20px; margin: 24px 0; border-radius: 0 8px 8px 0;">
     <a href="https://utopiatoysandmodels.com" style="color: #fffde4; font-weight: 600; text-decoration: underline;">Get Started Today →</a>
</p>
<h2 id="pop-cult-and-other-local-knoxville-options">Pop Cult and Other Local Knoxville Options</h2>
<p>Pop Cult rounds out the dedicated pop-culture retail scene with a curated selection of blind box items in a browsable store environment. The shop caters to both casual fans and serious builders, offering enough variety that you can compare series side by side before committing to a purchase. An online storefront complements the physical location for product comparison and planning.</p>
<p>Several other Knoxville stores serve different collecting styles. Bargain Brothers offers a mystery box format with guaranteed prize tiers and transparent odds, including a high-ticket item in a stated ratio <a href="/blogs/news/where-to-find-rare-blind-boxes">of boxes</a>. Five Below provides budget-friendly blind boxes at a fixed low price point, ideal for kids and casual collectors (<a rel="noopener noreferrer" target="_blank" href="https://www.fivebelow.com/categories/toys-and-games">fivebelow.com</a>). Urban Outfitters in Market Square stocks trendy, aesthetic blind box figures for shoppers who want giftable options in a downtown setting. Smart Toys and Books focuses on quality toys with an occasional mystery item, better suited for families than dedicated collectors.</p>
<table style="width:100%; border-collapse:collapse; margin:2rem 0; font-size:14px; line-height:1.6;">
<thead style="background-color:#f8f9fa; padding:12px 16px; text-align:left; font-weight:600; border-bottom:2px solid #e5e7eb;">
<tr>
<th style="background-color:#f8f9fa; padding:12px 16px; text-align:left; font-weight:600; border-bottom:2px solid #e5e7eb;">Store</th>
<th style="background-color:#f8f9fa; padding:12px 16px; text-align:left; font-weight:600; border-bottom:2px solid #e5e7eb;">Best For</th>
<th style="background-color:#f8f9fa; padding:12px 16px; text-align:left; font-weight:600; border-bottom:2px solid #e5e7eb;">Location Type</th>
<th style="background-color:#f8f9fa; padding:12px 16px; text-align:left; font-weight:600; border-bottom:2px solid #e5e7eb;">Price Range</th>
</tr>
</thead>
<tbody>
<tr>
<td style="padding:12px 16px; border-bottom:1px solid #e5e7eb;">Utopia Toys and Models</td>
<td style="padding:12px 16px; border-bottom:1px solid #e5e7eb;">Premium anime and model collectibles</td>
<td style="padding:12px 16px; border-bottom:1px solid #e5e7eb;">Local specialty</td>
<td style="padding:12px 16px; border-bottom:1px solid #e5e7eb;">Varies by item</td>
</tr>
<tr>
<td style="padding:12px 16px; border-bottom:1px solid #e5e7eb;">HobbyTown Knoxville</td>
<td style="padding:12px 16px; border-bottom:1px solid #e5e7eb;">Sonny Angel and hobby supplies</td>
<td style="padding:12px 16px; border-bottom:1px solid #e5e7eb;">Local specialty</td>
<td style="padding:12px 16px; border-bottom:1px solid #e5e7eb;">Varies by item</td>
</tr>
<tr>
<td style="padding:12px 16px; border-bottom:1px solid #e5e7eb;">BoxLunch</td>
<td style="padding:12px 16px; border-bottom:1px solid #e5e7eb;">Licensed fandom merchandise</td>
<td style="padding:12px 16px; border-bottom:1px solid #e5e7eb;">West Town Mall</td>
<td style="padding:12px 16px; border-bottom:1px solid #e5e7eb;">Mid-range</td>
</tr>
<tr>
<td style="padding:12px 16px; border-bottom:1px solid #e5e7eb;">Pop Cult</td>
<td style="padding:12px 16px; border-bottom:1px solid #e5e7eb;">Browsing diverse pop-culture items</td>
<td style="padding:12px 16px; border-bottom:1px solid #e5e7eb;">Local retail</td>
<td style="padding:12px 16px; border-bottom:1px solid #e5e7eb;">Varies by item</td>
</tr>
<tr>
<td style="padding:12px 16px; border-bottom:1px solid #e5e7eb;">Five Below</td>
<td style="padding:12px 16px; border-bottom:1px solid #e5e7eb;">Budget blind boxes</td>
<td style="padding:12px 16px; border-bottom:1px solid #e5e7eb;">Multiple locations</td>
<td style="padding:12px 16px; border-bottom:1px solid #e5e7eb;">Low fixed price</td>
</tr>
</tbody>
</table>
<h2 id="smart-blind-box-unboxing-tips-for-collectors">Smart Blind Box Unboxing Tips for Collectors</h2>
<p>Spending wisely on blind boxes is about strategy, not luck. The most common mistake collectors make is buying single boxes repeatedly from the same series without tracking what they already own. Dupes pile up fast, and the money spent on repeats could have gone toward a guaranteed figure.</p>
<p>Start by deciding whether you want a complete set or just a few favorites. For complete sets, consider buying a full case if the series offers one, since cases typically contain one of each figure (<a rel="noopener noreferrer" target="_blank" href="https://www.toyassociation.org/ta/PressRoom2/News/2026-News/purchase-with-purpose-toy-fair-launches-on-site-store.aspx">toyassociation.org</a>). For specific characters, check whether the series has a "chase" or rare variant, and weigh the odds before spending. Many collectors set a monthly budget for blind boxes the same way they budget for any hobby expense.</p>
<p>A useful approach is to track your purchases in a simple spreadsheet or notes app. Record which series you are collecting, which figures you have, and how much you have spent. This prevents the common trap of losing track and overspending on a series you are close to completing. For rare figures, buying the single directly from a resale market often costs less than chasing it through dozens of boxes.</p>
<div style="margin:1.5rem 0; padding:16px 20px; background-color:transparent; border-left:4px solid #e5e7eb; border-radius:0 8px 8px 0;">
<strong style="display:block; margin-bottom:4px; color:#111827; font-size:14px;"> Pro Tip</strong>
<span style="color:#374151; font-size:15px; line-height:1.6;">Check whether a store lists the exact case ratios or odds for a series before you buy. Transparent odds let you calculate whether chasing a specific figure is worth the cost compared to buying it outright on the secondary market.</span>
</div>
<h2 id="conclusion-build-your-collection-in-knoxville">Conclusion: Build Your Collection in Knoxville</h2>
<p>Knoxville's blind box scene offers something for every collector, from budget-friendly entry points at Five Below to premium anime collectibles at Utopia Toys and Models. The key is matching the store to your collecting goals and approaching each purchase with a plan rather than impulse.</p>
<p>For dedicated collectors seeking authentic figures from trusted brands, Utopia Toys and Models provides the curated selection and transparent availability that makes building a collection sustainable. With most items in stock and ready to ship, plus clear pre-order status indicators, you can shop with confidence whether you visit in person or order online. Get started with Utopia Toys and Models and find your next favorite figure without the guesswork.</p>
<section style="margin:3rem 0 2rem 0;" itemscope itemtype="https://schema.org/FAQPage">
<h2 style="font-size:1.5rem; font-weight:700; margin:0 0 4px 0;" id="frequently-asked-questions">Frequently Asked Questions</h2>
<div style="padding:20px 0; border-bottom:1px solid #e5e7eb;" itemscope itemprop="mainEntity" itemtype="https://schema.org/Question">
<h3 style="font-size:1.1rem; font-weight:600; margin:0 0 8px 0;" itemprop="name">Does Utopia Toys and Models carry blind box collectibles?</h3>
<div style="line-height:1.7; font-size:0.95rem;" itemscope itemprop="acceptedAnswer" itemtype="https://schema.org/Answer">
<p itemprop="text" style="margin:0;">Yes, Utopia Toys and Models stocks a wide range of blind box figures from leading brands like Bandai, Funko, and Kotobukiya. As a local Knoxville store, they focus on high-quality anime and pop culture items. Check their website for current in-stock items, as inventory changes frequently with new releases and popular series.</p>
</div>
</div>
<div style="padding:20px 0; border-bottom:1px solid #e5e7eb;" itemscope itemprop="mainEntity" itemtype="https://schema.org/Question">
<h3 style="font-size:1.1rem; font-weight:600; margin:0 0 8px 0;" itemprop="name">Are there stores in West Town Mall that sell blind boxes?</h3>
<div style="line-height:1.7; font-size:0.95rem;" itemscope itemprop="acceptedAnswer" itemtype="https://schema.org/Answer">
<p itemprop="text" style="margin:0;">Yes, BoxLunch at West Town Mall carries a large selection of licensed blind boxes, including pins, bags, and figurines from popular fandoms. It is a good spot for casual fans looking for a quick purchase. For a more specialized selection of anime blind boxes and model kits, visit Utopia Toys and Models.</p>
</div>
</div>
<div style="padding:20px 0; border-bottom:1px solid #e5e7eb;" itemscope itemprop="mainEntity" itemtype="https://schema.org/Question">
<h3 style="font-size:1.1rem; font-weight:600; margin:0 0 8px 0;" itemprop="name">What are the most popular blind box brands available in Knoxville?</h3>
<div style="line-height:1.7; font-size:0.95rem;" itemscope itemprop="acceptedAnswer" itemtype="https://schema.org/Answer">
<p itemprop="text" style="margin:0;">Popular brands include Sonny Angel, which you can find at HobbyTown, and licensed options from Funko and Kotobukiya available at Utopia Toys and Models. BoxLunch also offers various mystery merchandise from major franchises. The availability of specific series varies by store, so checking local inventory is the best approach.</p>
</div>
</div>
<div style="padding:20px 0; border-bottom:1px solid #e5e7eb;" itemscope itemprop="mainEntity" itemtype="https://schema.org/Question">
<h3 style="font-size:1.1rem; font-weight:600; margin:0 0 8px 0;" itemprop="name">Can I find anime-themed blind boxes in Knoxville, TN?</h3>
<div style="line-height:1.7; font-size:0.95rem;" itemscope itemprop="acceptedAnswer" itemtype="https://schema.org/Answer">
<p itemprop="text" style="margin:0;">Absolutely. For dedicated anime collectibles Knoxville fans, Utopia Toys and Models is a primary destination, offering figures from series featured by Bandai and other top brands. Other stores like Pop Cult and BoxLunch also stock anime-adjacent mystery items, but Utopia provides the most focused selection for serious collectors.</p>
</div>
</div>
</section>
<div class="cta-button-container" style="text-align: center; margin: 32px 0;">
    <a href="https://utopiatoysandmodels.com" class="cta-button" style="display: inline-block; background-color: #fffde4; color: white; padding: 14px 32px; border-radius: 8px; text-decoration: none; font-weight: 600; font-size: 16px;">Get Started Today</a>
</div>
<p class="grandranker-branding" style="margin-top: 3rem; padding-top: 1.5rem; border-top: 1px solid #e5e7eb; font-size: 0.875rem; text-align: center;">This article was written using <a href="https://grandranker.com/" target="_blank" rel="noopener">GrandRanker</a></p>]]>
    </content>
  </entry>
  <entry>
    <id>https://utopiatoysandmodels.com/blogs/news/knoxville-models-builders-collectors</id>
    <published>2026-09-04T21:04:08-04:00</published>
    <updated>2026-09-04T21:04:09-04:00</updated>
    <link rel="alternate" type="text/html" href="https://utopiatoysandmodels.com/blogs/news/knoxville-models-builders-collectors"/>
    <title>Knoxville Models for Builders and Collectors</title>
    <author>
      <name>Admin</name>
    </author>
    <summary type="html">
      <![CDATA[Knoxville models bring builders, collectors, and fandom fans together. Learn how to choose kits, build smarter, and find your next hobby obsession today.<p><a class="read-more" href="https://utopiatoysandmodels.com/blogs/news/knoxville-models-builders-collectors">More</a></p>]]>
    </summary>
    <content type="html">
      <![CDATA[<p>A model kit is not just something you buy, build once, and forget on a shelf. The right kit becomes a project, a display piece, and sometimes the start of an entirely new fandom. That is why Knoxville models mean different things to different collectors: a first High Grade Gundam, a carefully painted military vehicle, a classic car build, or a creature kit that belongs beside a growing kaiju collection.</p>
<p>For builders across East Tennessee, the fun is in finding a kit that matches your current skill level and the kind of shelf you want to create. A massive Master Grade may look incredible, but a quick-build HG can be exactly what you need after a long week. Find your fandom, pick your build, and make room on that shelf.</p>
<h2>What Makes Knoxville Models Worth Building?</h2>
<p>Model building sits at a sweet spot between collecting and creating. You begin with an official kit, but every decision after opening the box is yours. You can build straight from the runners, add panel lining for definition, paint a custom color scheme, or go all-in with weathering and display bases.</p>
<p>That flexibility matters. Two builders can start with the same Mobile Suit Gundam kit and finish with pieces that feel completely different. One may keep clean anime-style colors. Another may add battle damage, metallic details, and a desert-diorama base. Neither approach is more legitimate. The best build is the one that makes you want to start the next one.</p>
<p>Knoxville's collector community also covers more than one kind of modeling. Gunpla draws builders who love articulation and sharp mechanical detail. Automotive kits appeal to fans of classic muscle, racing history, and tiny engine components. Sci-fi, horror, anime, aircraft, armor, and kaiju kits each bring their own style of building and display. The shared language is simple: take your time, respect the kit, and enjoy the process.</p>
<h2>Choose the Right Kit Before You Start</h2>
<p>The biggest rookie mistake is buying based only on the box art. Incredible box art is part of the hobby, but it does not tell you how many hours the build may take, how fragile the finished model can be, or whether you will need paint and glue.</p>
<p>For Gunpla, the grade is a useful starting point. <a href="https://utopiatoysandmodels.com/products/hgbd-r-1-144-jupitive-gundam">High Grade 1/144</a> kits are accessible, affordable, and packed with variety. They are a great choice for newer builders, collectors with limited display space, or anyone who wants to explore multiple series without committing to a huge project. Many modern HG kits have excellent color separation and articulation right out of the box.</p>
<p>Real Grade kits offer dense detail in a smaller scale. They can look fantastic, but their smaller parts reward patience and careful handling. <a href="https://utopiatoysandmodels.com/products/arriving-soon-gundam-wing-endless-waltz-wing-gundam-proto-zero-ew-mg-model-kit">Master Grade</a> kits are larger, more involved, and often loaded with inner-frame engineering. They make a strong centerpiece, though they require more time, room, and attention. Perfect Grade is the big commitment: impressive size, premium presence, and a build experience best saved for when you are ready to give it proper space.</p>
<p>Non-Gunpla kits follow different rules. Some snap together with little fuss. Others require cement, paint, decals, and a more traditional modeling workflow. Check the product details before purchasing so you know whether you are bringing home a relaxing afternoon build or a multi-week bench project.</p>
<h3>A quick skill-level reality check</h3>
<p>If you are new, start with a kit you genuinely love rather than the kit someone says you are "supposed" to build. Enthusiasm gets you through fiddly steps. Still, be honest about the trade-offs. A highly detailed kit with hundreds of tiny pieces can be satisfying, but it is not ideal if you only have an hour at a time or a workspace shared with pets, kids, or roommates.</p>
<p>A simpler kit is not a lesser kit. A cleanly built HG with crisp panel lines often looks better on display than an expensive model rushed through with stress marks, crooked decals, and unfinished nubs.</p>
<h2>Your First Build Station Does Not Need to Be Fancy</h2>
<p>You do not need an industrial hobby bench to build great Knoxville models. A clean table with good lighting and a way to keep small parts contained will take you far. Start with a few essentials and add specialty tools only when your projects call for them.</p>
<ul>
<li>Side cutters made for hobby plastic help remove parts from runners cleanly.</li>
<li>A hobby knife handles remaining nub marks and careful cleanup.</li>
<li>Sanding sticks or fine-grit sanding pads smooth rough areas without overworking the plastic.</li>
<li>Tweezers make decals, stickers, and small pieces much easier to manage.</li>
</ul>
Use the instructions as a map, not a race. Cut only the parts needed for the step in front of you. Keep unused runners organized. Before pressing pieces together, test-fit them. This one small habit can prevent cracked joints, backwards parts, and the awful realization that an important piece is trapped behind an already assembled section.
<p>For kits that require glue or paint, ventilation and safety matter. Work in a well-aired area, follow the product instructions, and keep chemicals away from food, drinks, and curious pets. Paint can elevate a model dramatically, but it also adds prep work, drying time, cleanup, and cost. There is nothing wrong with building unpainted until you are ready.</p>
<h2>Make a Straight Build Look Better</h2>
<p>A straight build means assembling the kit using its molded colors without full repainting. It is not cheating. For many collectors, straight builds are the whole point: they get the character or vehicle on the shelf while enjoying the engineering that went into the kit.</p>
<p>The first upgrade is nub cleanup. Instead of cutting a part flush against the plastic, leave a tiny bit of runner attached. Then carefully trim or sand the remainder. This reduces the chance of creating a pale stress mark on dark plastic or gouging a visible surface.</p>
<p>Panel lining is another high-impact option, especially on mechanical designs. A fine-tip marker or compatible panel-lining product can bring out recessed lines and make armor plates read more clearly from a distance. Use a light touch. Too much ink can look messy, and some products are not suitable for every type of plastic.</p>
<p>Decals add personality, but they demand patience. Stickers are fast and beginner-friendly. Water-slide decals tend to look more painted-on and can create a premium finish, though they need careful placement and protection. If decals frustrate you, skip them for now. Your collection should feel fun, not like homework.</p>
<h3>Posing and display are part of the build</h3>
<p>Once the kit is complete, do not immediately lock it into the first pose that seems possible. Try a few. Turn the torso, bend the knees, angle the head, and consider what the character is doing. A grounded stance works beautifully for a bulky mobile suit. A flight stand can bring speed and drama to a slimmer design.</p>
<p>Keep sunlight in mind when choosing a display spot. Direct sun can fade colors over time, while dust can settle into panel lines and textured surfaces. Closed display cases offer more protection, but open shelves are perfectly workable if you dust regularly and avoid crowding your pieces together.</p>
<h2>Build a Collection With a Point of View</h2>
<p>The most memorable shelves tell a story. That story can be as focused as "every version of my favorite Gundam" or as chaotic in the best way as "anime heroes, horror icons, and one suspiciously large kaiju." There is no collector rule requiring one franchise, one scale, or one aesthetic.</p>
<p>Still, a little intention helps. Consider whether you want to collect by series, character, manufacturer, scale, color, or era. A shelf of 1/144-scale mobile suits has visual consistency and makes comparisons fun. A horror-and-kaiju shelf can lean into dramatic lighting, monster sizes, and creature detail. An anime display might mix figures with kits to create a full fandom corner.</p>
<p>Budget is part of the strategy, too. Pre-orders can help you plan for must-have releases, while clearance finds can introduce you to kits you might not have tried otherwise. The trade-off is that limited releases and popular reissues can move quickly, so it helps to know which releases are true priorities before a surprise drop tempts you into three unplanned boxes.</p>
<p>At Utopia Toys and Models, that collector-first mindset is the point: shop by the series, character, or build style that already has your attention, then let the next project earn its place in the lineup.</p>
<h2>The Best Knoxville Models Are the Ones You Finish</h2>
<p>A shelf full of unopened kits is not a failure. Plenty of collectors enjoy the hunt, the box art, and the promise of a future project. But if your backlog starts to feel more stressful than exciting, choose one box, clear a small workspace, and build for thirty minutes.</p>
<p>You do not need to paint every kit, buy every tool, or chase every release. Start with the model that makes you want to clip the first piece from the runner. The next great build is not waiting for perfect conditions. It is waiting for you to make the first cut.</p>]]>
    </content>
  </entry>
  <entry>
    <id>https://utopiatoysandmodels.com/blogs/news/best-ways-to-complete-blind-box-sets</id>
    <published>2026-09-04T15:33:10-04:00</published>
    <updated>2026-09-04T15:33:12-04:00</updated>
    <link rel="alternate" type="text/html" href="https://utopiatoysandmodels.com/blogs/news/best-ways-to-complete-blind-box-sets"/>
    <title>Best Ways to Complete Blind Box Sets: A 2026 Guide</title>
    <author>
      <name>Editorial Team</name>
    </author>
    <summary type="html">
      <![CDATA[Discover the best ways to complete blind box sets without wasting money. Learn buying strategies, trading tips, and how to spot authentic figures. Start.<p><a class="read-more" href="https://utopiatoysandmodels.com/blogs/news/best-ways-to-complete-blind-box-sets">More</a></p>]]>
    </summary>
    <content type="html">
      <![CDATA[<h2 id="table-of-contents">Table of Contents</h2>
<ul>
<li><a href="#why-completing-blind-box-sets-is-harder-than-it-looks">Why Completing Blind Box Sets Is Harder Than It Looks</a></li>
<li>
<a href="#the-math-behind-blind-box-sets-know-the-odds-before-you-buy">The Math Behind Blind Box Sets: Know the Odds Before You Buy</a><ul>
<li><a href="#how-rarity-ratios-affect-your-chances">How Rarity Ratios Affect Your Chances</a></li>
<li><a href="#sealed-case-vs-single-boxes-which-is-smarter">Sealed Case vs. Single Boxes: Which Is Smarter?</a></li>
</ul>
</li>
<li>
<a href="#best-places-to-buy-rare-anime-figures-for-your-set">Best Places to Buy Rare Anime Figures for Your Set</a><ul>
<li><a href="#retailers-that-sell-full-sets-and-sealed-cases">Retailers That Sell Full Sets and Sealed Cases</a></li>
<li><a href="#using-the-secondary-market-to-fill-gaps">Using the Secondary Market to Fill Gaps</a></li>
</ul>
</li>
<li>
<a href="#blind-box-trading-groups-the-smartest-way-to-swap-duplicates">Blind Box Trading Groups: The Smartest Way to Swap Duplicates</a><ul>
<li><a href="#the-unwritten-etiquette-that-keeps-trades-fair">The Unwritten Etiquette That Keeps Trades Fair</a></li>
<li><a href="#structured-safety-systems-that-prevent-scams">Structured Safety Systems That Prevent Scams</a></li>
<li><a href="#red-flags-that-signal-a-bad-trade-partner">Red Flags That Signal a Bad Trade Partner</a></li>
<li><a href="#building-a-positive-trading-reputation">Building a Positive Trading Reputation</a></li>
</ul>
</li>
<li><a href="#identifying-authentic-blind-box-figures-before-you-pay">Identifying Authentic Blind Box Figures Before You Pay</a></li>
<li>
<a href="#advanced-strategies-weight-analysis-and-shaking-techniques">Advanced Strategies: Weight Analysis and Shaking Techniques</a><ul>
<li><a href="#building-a-weight-reference-database">Building a Weight Reference Database</a></li>
<li><a href="#the-case-level-weighing-method">The Case-Level Weighing Method</a></li>
<li><a href="#acoustic-analysis-beyond-basic-shaking">Acoustic Analysis: Beyond Basic Shaking</a></li>
<li><a href="#the-limits-of-physical-analysis">The Limits of Physical Analysis</a></li>
</ul>
</li>
<li><a href="#budgeting-and-storage-the-two-things-no-one-plans-for">Budgeting and Storage: The Two Things No One Plans For</a></li>
<li><a href="#final-checklist-for-completing-your-next-blind-box-set">Final Checklist for Completing Your Next Blind Box Set</a></li>
<li><a href="#frequently-asked-questions">Frequently Asked Questions</a></li>
</ul>
<p><em>Last Updated: September 4, 2026</em></p>
<p>Completing a full set of <a href="/blogs/news/how-to-avoid-bootleg-anime-figures">blind box figures</a> is one of the most satisfying achievements in collecting, yet the odds often feel stacked against you. A blind box set is a collectible series sold in sealed, opaque packaging, meaning you don't know which figure you're getting until you open the box. This guide from Utopia Toys and Models breaks down the best ways to complete blind box sets without draining your wallet or ending up with a shelf full of duplicates.</p>
<h2 id="why-completing-blind-box-sets-is-harder-than-it-looks">Why Completing Blind Box Sets Is Harder Than It Looks</h2>
<p>Manufacturers design <a href="/blogs/news/how-to-organize-blind-box-figures-small-rooms">blind box</a> sets to make full-set completion statistically difficult. Most series include a standard set of figures plus one or two secret figures with much lower production runs.</p>
<p>Collectors who complete sets efficiently rarely rely on luck alone. They combine smart purchasing habits, community trading, and a clear budget to close out the final few figures in a series.</p>
<h2 id="the-math-behind-blind-box-sets-know-the-odds-before-you-buy">The Math Behind Blind Box Sets: Know the Odds Before You Buy</h2>
<p>Understanding the odds is the single most important step in completing a blind box set. Every series publishes a rarity ratio, usually expressed as the number of each figure produced relative to the total run.</p>
<p>Before spending anything, research the official distribution numbers, which reputable brands publish on their packaging or product pages. This tells you how many boxes you might need to open for a full set, and whether buying singles on the secondary market is cheaper than gambling on fresh boxes.</p>
<h3 id="how-rarity-ratios-affect-your-chances">How Rarity Ratios Affect Your Chances</h3>
<p>Rarity ratios directly determine your expected cost of completion. A series with 6 standard figures and 1 <a href="/blogs/news/how-to-get-chase-figures-in-blind-boxes">secret figure</a> at a 1-in-72 ratio requires significantly more boxes to complete than a series with uniform distribution (<a rel="noopener noreferrer" target="_blank" href="https://pubmed.ncbi.nlm.nih.gov/8407336/">PubMed</a>).</p>
<h3 id="sealed-case-vs-single-boxes-which-is-smarter">Sealed Case vs. Single Boxes: Which Is Smarter?</h3>
<p>Buying a sealed case is the most reliable way to complete a standard set without duplicates. Manufacturers typically pack cases so that each case contains one full set of standard figures, with the secret figure replacing a random standard one. Retailers that sell full cases offer a guaranteed non-duplicate set when you purchase the entire case, according to their official product listings.</p>
<p>Single boxes make sense when you only want one or two specific figures or when you enjoy the surprise. But for completion, sealed cases almost always win on cost per unique figure.</p>
<div style="margin:1.5rem 0; padding:16px 20px; background-color:transparent; border-left:4px solid #e5e7eb; border-radius:0 8px 8px 0;">
<strong style="display:block; margin-bottom:4px; color:#111827; font-size:14px;"> Key Takeaway</strong>
<span style="color:#374151; font-size:15px; line-height:1.6;">If your goal is a complete standard set, buy a sealed case. If you only need one specific figure, buy it directly on the secondary market instead of gambling on more boxes.</span>
</div>
<h2 id="best-places-to-buy-rare-anime-figures-for-your-set">Best Places to Buy Rare Anime Figures for Your Set</h2>
<p>Where you buy matters as much as what you buy. For <a href="/blogs/news/where-to-find-rare-blind-boxes">rare anime figures</a> and blind box sets, the best places to buy rare anime figures include specialty retailers with transparent stock information and marketplaces with buyer protection.</p>
<h3 id="retailers-that-sell-full-sets-and-sealed-cases">Retailers That Sell Full Sets and Sealed Cases</h3>
<p>Specialty collectible retailers are your first stop for sealed cases and full sets. These stores often let you order an entire case directly, which removes the randomness entirely. Confirm the case includes a full standard set before you pay.</p>
<h3 id="using-the-secondary-market-to-fill-gaps">Using the Secondary Market to Fill Gaps</h3>
<p>The secondary market is where you finish a set. eBay's marketplace allows collectors to sell individual opened figures, making it the most direct way to find the one figure you're missing. StockX adds a verification process to confirm authenticity, which matters when you're paying a premium for a rare chase figure.</p>
<h2 id="blind-box-trading-groups-the-smartest-way-to-swap-duplicates">Blind Box Trading Groups: The Smartest Way to Swap Duplicates</h2>
<p><a href="/blogs/news/tips-displaying-blind-box-figures">Blind box</a> trading groups are communities where collectors swap duplicate figures to complete their sets without spending more money. These groups operate on Discord, Facebook, and dedicated collector forums.</p>
<figure class="article-content-image my-8" style="margin:2em 0;padding:0;background:transparent;border:0;"><img src="https://cdn.grandranker.com/articles/best-ways-to-complete-blind-box-sets-a-2026-guide-content-1-1788550385.jpg" alt="A collector's hands holding two opened blind box figures side by side, with a smartphone showing a trading chat conversation in the background on a table" class="w-full rounded-lg shadow-lg" loading="lazy" style="display:block;width:100%;max-width:100%;height:auto;border-radius:8px;margin:0 auto;"><figcaption class="text-sm text-gray-600 mt-2 text-center" style="font-size:0.875em;color:#6b7280;text-align:center;margin-top:0.6em;">A collector's hands holding two opened blind box figures side by side, with a smartphone showing a trading chat conversation in the background on a table</figcaption></figure>
<p>The advantage is obvious: a duplicate you can't use becomes use to obtain a figure you need. Discord hosts real-time communities with dedicated channels for specific blind box brands, and private trades carry no platform fees. The trade-off is that you must vet your trading partners carefully.</p>
<h3 id="the-unwritten-etiquette-that-keeps-trades-fair">The Unwritten Etiquette That Keeps Trades Fair</h3>
<p>Most active trading communities operate on a shared etiquette code that reduces disputes before they start. The most important rule is value parity: trade figures of similar market value, not just similar rarity tier. A common figure from a popular series may hold higher resale value than a secret figure from a niche line, so check current sold prices on eBay or Mercari before proposing a swap.</p>
<p>A second rule is shipping responsibility: each party pays their own shipping costs, and both ship on the same day. Third, always confirm the condition of the figure before agreeing. Most traders describe condition as "mint" (never displayed, original packaging), "near mint" (displayed briefly, no visible flaws), or "good" (minor scuffs). If a listing omits condition, ask before committing.</p>
<h3 id="structured-safety-systems-that-prevent-scams">Structured Safety Systems That Prevent Scams</h3>
<p>Beyond basic verification, serious trading communities have developed layered safety systems. The most common is the "reference thread" system used on forums like MyFigureCollection: each trader maintains a public thread where past trade partners leave feedback with dates and figure names. Before your first trade, ask for a link to that thread and read the last five entries.</p>
<p>Another mechanism is the "middleman" service, common in high-value trades. A trusted community moderator receives both packages, verifies both figures, then forwards them to the respective recipients. This eliminates the risk of one party shipping a counterfeit or failing to ship at all. Middleman services typically charge a small fee or ask for a tip, but for trades above $50 in value, the cost is worth the protection.</p>
<p>For local trades, many cities have monthly collector meetups organized through Facebook Events or local hobby shop bulletin boards. Meeting in person at a public location like a coffee shop or library lets you inspect the figure before handing over your duplicate. Some police stations in the United States offer designated "safe exchange zones" with 24/7 video surveillance, check your local department's website for locations (<a rel="noopener noreferrer" target="_blank" href="https://www.usa.gov/company-product-service-complaints">usa.gov</a>).</p>
<div style="margin:1.5rem 0; padding:16px 20px; background-color:transparent; border-left:4px solid #e5e7eb; border-radius:0 8px 8px 0;">
<strong style="display:block; margin-bottom:4px; color:#111827; font-size:14px;"> Watch Out</strong>
<span style="color:#374151; font-size:15px; line-height:1.6;">Never send payment through unprotected channels like direct bank transfer or gift cards. Scammers target blind box trading communities because figures are small, valuable, and easy to ship. Always use a platform with dispute resolution.</span>
</div>
<h3 id="red-flags-that-signal-a-bad-trade-partner">Red Flags That Signal a Bad Trade Partner</h3>
<p>Experienced traders watch for specific warning signs. A new account with no posting history and a stock photo as their avatar is the most common red flag. Another is pressure to move quickly: scammers often claim "another buyer is interested" to rush you into shipping before you verify. A third sign is refusal to provide timestamped photos. Finally, be suspicious of traders who suggest moving the conversation off the platform immediately; this is often an attempt to avoid platform-level dispute resolution.</p>
<h3 id="building-a-positive-trading-reputation">Building a Positive Trading Reputation</h3>
<p>Your reputation is your most valuable asset in trading communities. Start with small trades of common figures to build feedback, then work up to rare pieces. Always ship with tracking and insurance, and message your partner the moment the package is dropped off. When you receive a figure, confirm receipt publicly in the trade thread. Collectors who consistently communicate and ship quickly find that other members actively seek them out for trades.</p>
<h2 id="identifying-authentic-blind-box-figures-before-you-pay">Identifying Authentic Blind Box Figures Before You Pay</h2>
<p>Identifying authentic blind box figures protects you from counterfeits that flood the secondary market. Authentic figures have clean mold lines, crisp paint applications, and official branding on the figure's base or foot (<a rel="noopener noreferrer" target="_blank" href="https://www.ftc.gov/news-events/news/press-releases/2025/08/ftc-data-show-more-four-fold-increase-reports-impersonation-scammers-stealing-tens-even-hundreds">the FTC</a>). Packaging design is another tell: official boxes use high-quality cardstock with precise printing, while counterfeits often show blurry text or off-brand colors.</p>
<p>Check the figure mold against official product photos. Genuine figures match the promotional images exactly, including paint placement and sculpt details. If a price seems far below market value, ask why. Authentic rare figures hold their resale value, so a suspiciously cheap "deal" is usually a counterfeit. <a rel="noopener noreferrer" target="_blank" href="https://www.toolshandbagsandmore.com/blogs/news/where-to-find-rare-collectibles-2026">finding rare collectibles</a>.</p>
<h2 id="advanced-strategies-weight-analysis-and-shaking-techniques">Advanced Strategies: Weight Analysis and Shaking Techniques</h2>
<p>Serious collectors use physical properties to identify figures before opening. Weight distribution varies between figures in a series, especially when accessories or larger sculpts are involved. A precise digital scale can reveal which figure is inside a sealed box if the weight differences are consistent across a case.</p>
<p>Shaking techniques work for figures with distinct internal structures. A figure with a large base or attached accessory produces a different sound and feel than a slim figure. These methods require practice and a reference point, so they work best when you can weigh or handle multiple boxes from the same case.</p>
<h3 id="building-a-weight-reference-database">Building a Weight Reference Database</h3>
<p>The most effective weight-based strategy is creating a reference database before you buy. Start with a digital scale that measures to 0.1 grams, models from brands like AWS or Escali are widely available on Amazon for under $25. When you open any blind box, weigh the figure inside its sealed inner packaging and record that number alongside the figure's name. Over time, you build a personal reference chart for each series you collect.</p>
<p>For a new series, search YouTube and collector forums like Reddit's r/BlindBoxes for "weight chart" posts. Many collectors publish their measured weights for each figure in a series within days of release. Cross-reference at least three sources before trusting a weight, since packaging variations between production runs can shift measurements.</p>
<h3 id="the-case-level-weighing-method">The Case-Level Weighing Method</h3>
<p>When a retailer has multiple sealed boxes from the same case on the shelf, you can use comparative weighing to narrow down the contents. Weigh every available box and sort them by weight. Figures with accessories or larger sculpts will cluster at the heavier end of the range, while slim figures cluster at the lighter end. If you know the series has one heaviest figure and one lightest figure, you can identify those boxes with high confidence.</p>
<p>This method works best on fresh cases where the retailer has not yet pulled boxes. Ask a store employee if you can weigh boxes before purchase, many specialty retailers permit this, especially for regular customers. Big-box retailers like Target or Walmart may not allow this, so focus on independent hobby shops.</p>
<h3 id="acoustic-analysis-beyond-basic-shaking">Acoustic Analysis: Beyond Basic Shaking</h3>
<p>Shaking techniques become more precise when you analyze the sound profile rather than just the feel. A figure with a solid, wide base produces a dull thud when the box is gently shaken. A figure with a thin staff or outstretched limb produces a sharper, higher-pitched rattle. Figures with multiple small accessories, like food-themed series, create a distinct "pebble" sound as pieces shift against each other.</p>
<p>To practice, open a few boxes from a completed series and shake the empty packaging with different figures inside. Train your ear to distinguish the acoustic signatures. This practice is essential because the sound is subtle, without a reference point, you will not be able to tell the difference in a store.</p>
<h3 id="the-limits-of-physical-analysis">The Limits of Physical Analysis</h3>
<p>Physical analysis has real limitations. Some manufacturers intentionally standardize box weights across a series to prevent this exact strategy. Others use foil bags that muffle sound, making acoustic analysis unreliable. Weight charts also fail when a series includes a "mystery" figure with an unknown sculpt, you cannot identify what you do not know exists.</p>
<p>When physical methods fail, the fallback is statistical purchasing. If you have weighed 10 boxes from a case and narrowed the remaining 2 to a 50/50 chance between the figure you need and a duplicate, the expected cost of buying both boxes may still be lower than the secondary market price for the figure you need. Run that calculation before you buy.</p>
<div style="margin:1.5rem 0; padding:16px 20px; background-color:transparent; border-left:4px solid #e5e7eb; border-radius:0 8px 8px 0;">
<strong style="display:block; margin-bottom:4px; color:#111827; font-size:14px;"> Pro Tip</strong>
<span style="color:#374151; font-size:15px; line-height:1.6;">Carry a small digital scale (0.1g precision) and a printed or phone-saved weight chart for the series you are hunting. This combination turns a random purchase into a calculated decision in under 30 seconds.</span>
</div>
<h2 id="budgeting-and-storage-the-two-things-no-one-plans-for">Budgeting and Storage: The Two Things No One Plans For</h2>
<p>Completing blind box sets is an expensive hobby, and collectors who don't budget overspend quickly. Set a monthly cap for blind box purchases and track every box you open. When you're two figures away from a full set, buying singles on the secondary market is almost always cheaper than buying more boxes and risking duplicates.</p>
<p>Storage is the other overlooked cost. A full set deserves proper display, and <a href="/blogs/news/are-acrylic-risers-worth-it-for-model-displays">acrylic cases or display risers</a> protect your figures from dust and sunlight damage. Plan for storage space before you complete a set, not after, because a full series of figures takes up far more room than individual boxes.</p>
<table style="width:100%; border-collapse:collapse; margin:2rem 0; font-size:14px; line-height:1.6;">
<thead style="background-color:#f8f9fa; padding:12px 16px; text-align:left; font-weight:600; border-bottom:2px solid #e5e7eb;">
<tr>
<th style="background-color:#f8f9fa; padding:12px 16px; text-align:left; font-weight:600; border-bottom:2px solid #e5e7eb;">Strategy</th>
<th style="background-color:#f8f9fa; padding:12px 16px; text-align:left; font-weight:600; border-bottom:2px solid #e5e7eb;">Best For</th>
<th style="background-color:#f8f9fa; padding:12px 16px; text-align:left; font-weight:600; border-bottom:2px solid #e5e7eb;">Cost Efficiency</th>
<th style="background-color:#f8f9fa; padding:12px 16px; text-align:left; font-weight:600; border-bottom:2px solid #e5e7eb;">Risk Level</th>
</tr>
</thead>
<tbody>
<tr>
<td style="padding:12px 16px; border-bottom:1px solid #e5e7eb;">Sealed case purchase</td>
<td style="padding:12px 16px; border-bottom:1px solid #e5e7eb;">Full standard sets</td>
<td style="padding:12px 16px; border-bottom:1px solid #e5e7eb;">High</td>
<td style="padding:12px 16px; border-bottom:1px solid #e5e7eb;">Low</td>
</tr>
<tr>
<td style="padding:12px 16px; border-bottom:1px solid #e5e7eb;">Secondary market singles</td>
<td style="padding:12px 16px; border-bottom:1px solid #e5e7eb;">Specific missing figures</td>
<td style="padding:12px 16px; border-bottom:1px solid #e5e7eb;">High</td>
<td style="padding:12px 16px; border-bottom:1px solid #e5e7eb;">Medium</td>
</tr>
<tr>
<td style="padding:12px 16px; border-bottom:1px solid #e5e7eb;">Trading groups</td>
<td style="padding:12px 16px; border-bottom:1px solid #e5e7eb;">Swapping duplicates</td>
<td style="padding:12px 16px; border-bottom:1px solid #e5e7eb;">High</td>
<td style="padding:12px 16px; border-bottom:1px solid #e5e7eb;">Medium</td>
</tr>
<tr>
<td style="padding:12px 16px; border-bottom:1px solid #e5e7eb;">Random single boxes</td>
<td style="padding:12px 16px; border-bottom:1px solid #e5e7eb;">Casual collecting</td>
<td style="padding:12px 16px; border-bottom:1px solid #e5e7eb;">Low</td>
<td style="padding:12px 16px; border-bottom:1px solid #e5e7eb;">High</td>
</tr>
<tr>
<td style="padding:12px 16px; border-bottom:1px solid #e5e7eb;">Weight analysis</td>
<td style="padding:12px 16px; border-bottom:1px solid #e5e7eb;">Targeted pulls</td>
<td style="padding:12px 16px; border-bottom:1px solid #e5e7eb;">Medium</td>
<td style="padding:12px 16px; border-bottom:1px solid #e5e7eb;">Low</td>
</tr>
</tbody>
</table>
<h2 id="final-checklist-for-completing-your-next-blind-box-set">Final Checklist for Completing Your Next Blind Box Set</h2>
<p>Before you buy your next box, run through this checklist to keep your collection strategy on track:</p>
<ol>
<li>Research the rarity ratio for the series you're chasing</li>
<li>Decide whether a sealed case or singles makes financial sense</li>
<li>Set a hard budget for the month and track every purchase</li>
<li>Join a blind box trading group before you open boxes</li>
<li>Verify authenticity of any secondary market purchase</li>
<li>Plan your display and storage space in advance</li>
</ol>
<p>Following this approach transforms blind box collecting from a lottery into a manageable project. The collectors who finish sets aren't luckier than you. They buy smarter, trade duplicates, and know exactly when to stop gambling and buy the figure they need directly.</p>
<section style="margin:3rem 0 2rem 0;" itemscope itemtype="https://schema.org/FAQPage">
<h2 style="font-size:1.5rem; font-weight:700; margin:0 0 4px 0;" id="frequently-asked-questions">Frequently Asked Questions</h2>
<div style="padding:20px 0; border-bottom:1px solid #e5e7eb;" itemscope itemprop="mainEntity" itemtype="https://schema.org/Question">
<h3 style="font-size:1.1rem; font-weight:600; margin:0 0 8px 0;" itemprop="name">Is there a secret to picking the right blind box?</h3>
<div style="line-height:1.7; font-size:0.95rem;" itemscope itemprop="acceptedAnswer" itemtype="https://schema.org/Answer">
<p itemprop="text" style="margin:0;">There is no guaranteed method, but experienced collectors use two tactics. First, weigh boxes if you can: secret figures usually have a distinct weight distribution compared to standard figures. Second, learn the shaking technique: rattling sounds often indicate smaller or hollow parts. These methods improve your odds but never guarantee a hit. The most reliable way to complete a blind box set is to buy a sealed case or purchase the specific figure you need from the secondary market.</p>
</div>
</div>
<div style="padding:20px 0; border-bottom:1px solid #e5e7eb;" itemscope itemprop="mainEntity" itemtype="https://schema.org/Question">
<h3 style="font-size:1.1rem; font-weight:600; margin:0 0 8px 0;" itemprop="name">How can I trade blind box figures safely with other collectors?</h3>
<div style="line-height:1.7; font-size:0.95rem;" itemscope itemprop="acceptedAnswer" itemtype="https://schema.org/Answer">
<p itemprop="text" style="margin:0;">Join established blind box trading groups on platforms like Discord or Facebook. Always check a member's trade history and feedback before agreeing. Use timestamped photos of your figures and agree on shipping details in writing. For high-value trades, consider using a middleman service or shipping both packages on the same day with tracking. Never send payment as a friend or family member on payment apps, because you lose buyer protection.</p>
</div>
</div>
<div style="padding:20px 0; border-bottom:1px solid #e5e7eb;" itemscope itemprop="mainEntity" itemtype="https://schema.org/Question">
<h3 style="font-size:1.1rem; font-weight:600; margin:0 0 8px 0;" itemprop="name">Why is the secondary market the best place to complete a set?</h3>
<div style="line-height:1.7; font-size:0.95rem;" itemscope itemprop="acceptedAnswer" itemtype="https://schema.org/Answer">
<p itemprop="text" style="margin:0;">Buying individual figures on the secondary market costs more per figure than a blind box, but it is almost always cheaper than gambling on random boxes until you find the one you need. If you need one specific figure with a 1-in-12 rarity ratio, you could spend far more trying to pull it. Marketplaces like eBay and StockX let you search for the exact figure, verify authenticity, and compare prices to fit your budget.</p>
</div>
</div>
<div style="padding:20px 0; border-bottom:1px solid #e5e7eb;" itemscope itemprop="mainEntity" itemtype="https://schema.org/Question">
<h3 style="font-size:1.1rem; font-weight:600; margin:0 0 8px 0;" itemprop="name">How do I know if a blind box figure is authentic?</h3>
<div style="line-height:1.7; font-size:0.95rem;" itemscope itemprop="acceptedAnswer" itemtype="https://schema.org/Answer">
<p itemprop="text" style="margin:0;">Start by buying from authorized retailers. When buying from resellers, check the packaging for official logos, holographic stickers, and a clear series name. Compare the figure's paint application and mold details against unboxing videos or official photos; counterfeits often have sloppy edges or off-brand colors. Check the weight against the official figure if listed. When in doubt, ask the seller for a photo of the figure's base, where most brands stamp their logo.</p>
</div>
</div>
</section>
<hr>
<p>Completing a blind box set takes patience, strategy, and a willingness to trade rather than just buy. At Utopia Toys and Models, we stock blind box figures from leading brands like Bandai, Funko, and Kotobukiya, with most items in stock and ready to ship. Our transparent availability indicators help you plan your next purchase without guessing. Get started with Utopia Toys and Models and build your collection with confidence.</p>
<div class="cta-button-container" style="text-align: center; margin: 32px 0;">
    <a href="https://utopiatoysandmodels.com" class="cta-button" style="display: inline-block; background-color: #fffde4; color: white; padding: 14px 32px; border-radius: 8px; text-decoration: none; font-weight: 600; font-size: 16px;">Get Started Today</a>
</div>
<p class="grandranker-branding" style="margin-top: 3rem; padding-top: 1.5rem; border-top: 1px solid #e5e7eb; font-size: 0.875rem; text-align: center;">This article was written using <a href="https://grandranker.com/" target="_blank" rel="noopener">GrandRanker</a></p>]]>
    </content>
  </entry>
  <entry>
    <id>https://utopiatoysandmodels.com/blogs/news/why-bandai-sets-the-standard-for-collectors</id>
    <published>2026-09-03T21:04:05-04:00</published>
    <updated>2026-09-03T21:04:07-04:00</updated>
    <link rel="alternate" type="text/html" href="https://utopiatoysandmodels.com/blogs/news/why-bandai-sets-the-standard-for-collectors"/>
    <title>Why Bandai Still Sets the Standard for Collectors</title>
    <author>
      <name>Admin</name>
    </author>
    <summary type="html">
      <![CDATA[Bandai collectibles connect model builders, anime fans, and figure hunters. Learn what to look for when choosing kits, figures, and new releases today.<p><a class="read-more" href="https://utopiatoysandmodels.com/blogs/news/why-bandai-sets-the-standard-for-collectors">More</a></p>]]>
    </summary>
    <content type="html">
      <![CDATA[<p>Bandai has a rare kind of collector credibility: its name can mean a fresh High Grade kit on your workbench, a detailed anime figure on your shelf, or the next release your whole group chat is watching. That range matters. Plenty of companies make cool collectibles, but Bandai has spent decades turning major fandoms into products that feel made for fans who actually know the difference.</p>
<p>For collectors, the question is not whether Bandai belongs in the collection. It is which corner of the Bandai universe fits your fandom, budget, display space, and collecting style. WELCOME TO UTOPIA - let’s make that choice easier.</p>
<h2>What Makes Bandai Different?</h2>
<p>Bandai is not one lane of collecting. It is a huge umbrella covering plastic model kits, anime figures, action figures, capsule toys, plush, trading products, and more. Its biggest strength is the way it meets fans at different levels of commitment. You can grab a small, affordable item to celebrate a favorite character, or spend a weekend building a model kit with enough presence to become the centerpiece of a display.</p>
<p>That accessibility does not mean every release is the same. Bandai works across a wide range of price points, materials, scales, and product lines. A collector looking for a poseable Dragon Ball action figure has different priorities than someone building a 1/144 Gundam. One wants articulation and character expression; the other may care most about color separation, engineering, and how satisfying the build feels.</p>
<p>The franchise connection is just as important. Bandai is closely tied to the series that keep anime shelves active: Gundam, Dragon Ball, One Piece, Sailor Moon, Digimon, Naruto, Tamagotchi, and plenty more. When you collect by fandom instead of wandering a generic toy aisle, that depth changes everything.</p>
<h2>Bandai Gunpla Is Built for the Workbench</h2>
<p>For many collectors, Bandai starts with Gunpla. Gundam plastic model kits have become a hobby all their own because they offer something finished figures cannot: you get to build the final display piece yourself.</p>
<p>Modern Gunpla is especially friendly to newcomers. Most kits are molded in multiple colors, so a clean-looking build is possible without paint. Parts generally snap together, instructions guide you through each stage, and the finished kit has real shelf presence right out of the box. That is why a first High Grade can become the beginning of a full display case before you know it.</p>
<h3>Choose a Grade That Matches Your Build Style</h3>
<p>Grade is not just a price label. It tells you a lot about scale, complexity, detail, and the time you will spend at the table.</p>
<p>High Grade 1/144 kits are a strong starting point for new builders and a permanent favorite for veterans. They are compact, affordable, and available for an enormous range of mobile suits. They also make sense for collectors who want to represent several series without giving up an entire room to one collection.</p>
<p>Real Grade kits bring more intricate engineering and sharper visual detail in the same 1/144 scale. They can look incredible, but smaller parts and more involved construction reward patience. Master Grade kits are larger 1/100-scale projects with a bigger display footprint and, often, more mechanical detail. Perfect Grade is the premium end of the road: large, ambitious, expensive, and best approached when you have the space, time, and enthusiasm for a serious build.</p>
<p>There is no “correct” grade. A carefully finished High Grade you enjoyed building beats a massive kit that stays sealed because it feels intimidating. Find the build experience you want, then <a href="https://utopiatoysandmodels.com/products/gundam-build-metaverse-hggbm-shin-burning-gundam-1-144-scale-model-kit">choose the mobile suit</a> that makes you excited to open the box.</p>
<h3>The Kit Is Only the Beginning</h3>
<p>Straight builds are completely valid. So are painted builds, panel-lined builds, top-coated builds, and fully customized projects with weathering, decals, LEDs, and battle damage. Gunpla meets you where you are.</p>
<p>If you are new, start with basic nippers and take your time removing <a href="https://utopiatoysandmodels.com/products/parts-separator-box-12-bandai-hobby">parts from the runners</a>. Cleaning nub marks gradually improves the final look more than most beginners expect. From there, panel lining can add definition, while waterslide decals and top coat are great next steps when you are ready. Do not buy every tool at once. Build one kit, learn what you wish you had, and upgrade from there.</p>
<h2>Beyond Gundam: Figures, Action, and Display Power</h2>
<p>Bandai’s figure catalog is made for collectors who want characters ready for the shelf. Depending on the line, you may find stylized figures, prize-style collectibles, highly articulated action figures, or premium pieces with carefully sculpted outfits and effects.</p>
<p>For poseability, check the figure line before buying. An articulated figure can be a blast if you enjoy changing poses, recreating scenes, or using accessories. The trade-off is that joints can interrupt the sculpt, and dynamic poses may need support. A fixed-pose figure often delivers a more polished silhouette from one chosen angle, but it will not give you the same flexibility once it is displayed.</p>
<p>Scale and dimensions matter, too. Product photos can make every figure look larger than life. Before claiming shelf space, consider height, base width, hair effects, wings, weapons, and any companion pieces. A figure that is 7 inches tall may need far more room than a taller but simpler sculpt.</p>
<p>For anime fans building a character-focused display, consistency can look fantastic. Group a crew together, line up forms from the same series, or create a shelf dedicated to one arc. But mixed displays can have more personality. A Gundam kit beside a <a href="https://utopiatoysandmodels.com/products/dragon-ball-daima-glorio-prize-figure-with-panel">Dragon Ball figure</a>, manga volumes, and a favorite Funko POP! tells a better story about your fandom than a perfectly matched wall ever could.</p>
<h2>How to Shop Bandai Without Collector Regret</h2>
<p>The hype is real when a new release drops, especially for a favorite series. Still, smart collecting means deciding what earns a place before the countdown clock starts.</p>
<p>First, identify why you want the item. Is it your favorite character? A mobile suit with an all-time design? A kit you want to build, customize, or display unopened? Those are all good reasons, but knowing yours helps separate a true must-have from a temporary rush.</p>
<p>Next, pay attention to release type. Standard retail releases are often easier to track down again than limited, event-exclusive, or special-color items. That does not mean every limited item is automatically worth chasing. Exclusivity can add excitement, but it should not override whether you genuinely like the design, the format, or the price.</p>
<p>Finally, buy from retailers that treat collector expectations seriously. Clear pre-order timing, fulfillment policies, order-hold options, and honest availability information make a difference when you are planning a collection around releases. At Utopia Toys and Models, that collector-first approach is part of the mission: Find Your Fandom, then shop with a clearer idea of what is coming and how your order will work.</p>
<h2>Build the Collection You Actually Want</h2>
<p>A great Bandai collection does not have to be complete. In fact, trying to own every version of every character or mobile suit can turn a fun hobby into a storage problem fast. Pick a focus that feels personal: one Gundam timeline, one scale, one anime crew, one color theme, or simply the releases that make you stop scrolling.</p>
<p>Keep boxes if they matter to you, but do not let packaging become the whole hobby. Build the kit. Pose the figure. Rearrange the shelf. Share the progress with people who get why a new release is exciting. Collecting is more fun when the items around you feel like your fandom, not somebody else’s checklist.</p>
<p>The next Bandai piece worth adding is the one that gives you a reason to make room.</p>]]>
    </content>
  </entry>
  <entry>
    <id>https://utopiatoysandmodels.com/blogs/news/how-to-safely-ship-collectible-model-kits</id>
    <published>2026-09-03T00:13:58-04:00</published>
    <updated>2026-09-03T00:13:59-04:00</updated>
    <link rel="alternate" type="text/html" href="https://utopiatoysandmodels.com/blogs/news/how-to-safely-ship-collectible-model-kits"/>
    <title>How to Safely Ship Collectible Model Kits</title>
    <author>
      <name>Editorial Team</name>
    </author>
    <summary type="html">
      <![CDATA[Learn how to safely ship collectible model kits with proper padding, boxing, and insurance. Protect your valuable Gundam and anime figures from damage in.<p><a class="read-more" href="https://utopiatoysandmodels.com/blogs/news/how-to-safely-ship-collectible-model-kits">More</a></p>]]>
    </summary>
    <content type="html">
      <![CDATA[<h2 id="table-of-contents">Table of Contents</h2>
<ul>
<li><a href="#why-shipping-model-kits-requires-extra-care">Why Shipping Model Kits Requires Extra Care</a></li>
<li><a href="#selecting-the-right-shipping-box-and-materials">Selecting the Right Shipping Box and Materials</a></li>
<li><a href="#best-packing-materials-for-scale-models">Best Packing Materials for Scale Models</a></li>
<li><a href="#building-a-protective-cradle-and-support-structure">Building a Protective Cradle and Support Structure</a></li>
<li><a href="#double-boxing-methods-for-high-value-kits">Double-Boxing Methods for High-Value Kits</a></li>
<li><a href="#best-shipping-carriers-for-fragile-collectibles">Best Shipping Carriers for Fragile Collectibles</a></li>
<li><a href="#shipping-insurance-for-collectibles-and-damage-prevention">Shipping Insurance for Collectibles and Damage Prevention</a></li>
<li><a href="#labeling-documentation-and-final-checks">Labeling, Documentation, and Final Checks</a></li>
<li><a href="#frequently-asked-questions">Frequently Asked Questions</a></li>
</ul>
<p><em>Last Updated: September 3, 2026</em></p>
<h2 id="why-shipping-model-kits-requires-extra-care">Why Shipping Model Kits Requires Extra Care</h2>
<p><a href="/blogs/news/how-to-safely-ship-collectible-figures">Collectible model kits</a> demand specialized handling because they combine structural fragility with significant monetary and sentimental value. Unlike mass-produced toys, scale models and diecast figures feature intricate details and delicate components that are vulnerable to even minor impacts during transit. The shipping process exposes your model to vibration, temperature fluctuations, and shock that standard packaging cannot address.</p>
<p>At Utopia Toys and Models, proper packing prevents costly damage claims and ensures your models arrive in pristine condition. The difference between amateur packing and expert-level protection comes down to understanding your kit's vulnerabilities, choosing materials that provide genuine shock absorption, and building structural integrity into your packaging strategy.</p>
<div style="margin:1.5rem 0; padding:16px 20px; background-color:transparent; border-left:4px solid #e5e7eb; border-radius:0 8px 8px 0;">
<strong style="display:block; margin-bottom:4px; color:#111827; font-size:14px;"> Pro Tip</strong>
<span style="color:#374151; font-size:15px; line-height:1.6;">The most common shipping mistake is underestimating how much vibration and movement occur during transit. A model secured only with bubble wrap will shift inside the box, causing damage that proper cradle support prevents entirely.</span>
</div>
<h2 id="selecting-the-right-shipping-box-and-materials">Selecting the Right Shipping Box and Materials</h2>
<p>The foundation of safe shipping starts with choosing a double-wall corrugated box with a crush strength rating appropriate for your shipment's dimensional weight. Measure your model's dimensions carefully and select a box that provides at least 2-3 inches of clearance on all sides. This space becomes your void fill zone, the critical buffer between your packaged model and the outer box walls.</p>
<p>Verify the box rating for your carrier, USPS, UPS, and FedEx have minimum standards. A damaged or insufficient box becomes your liability. Test the box by pressing firmly on all sides; it should resist deformation. For extremely <a href="/blogs/news/is-it-worth-buying-expensive-figures">valuable collectibles</a>, double-boxing is the professional standard and is discussed in detail later.</p>
<div style="margin:1.5rem 0; padding:16px 20px; background-color:transparent; border-left:4px solid #e5e7eb; border-radius:0 8px 8px 0;">
<strong style="display:block; margin-bottom:4px; color:#111827; font-size:14px;"> Watch Out</strong>
<span style="color:#374151; font-size:15px; line-height:1.6;">Never reuse old boxes for high-value shipments. Crushed or weakened cardboard fails under pressure. New boxes cost a few dollars; replacing a damaged $200+ model kit costs exponentially more.</span>
</div>
<h2 id="best-packing-materials-for-scale-models">Best Packing Materials for Scale Models</h2>
<p>Bubble wrap with larger bubbles (5/8-inch or 1-inch diameter) remains the industry standard because it provides consistent shock absorption and cushions against vibration (<a rel="noopener noreferrer" target="_blank" href="https://pmc.ncbi.nlm.nih.gov/articles/PMC8006905/">peer-reviewed research</a>). Larger bubbles compress gradually, distributing impact energy across a wider surface area.</p>
<p>Packing peanuts offer an alternative that many collectors prefer for filling irregular spaces around your cradle structure. Kraft paper and crinkle fill work well as supplementary materials but shouldn't be your primary shock absorption layer. For scale models with fragile components like thin canopies or delicate landing gear, consider specialty materials like closed-cell foam sheets, which resist compression and don't absorb moisture.</p>
<p>Temperature and humidity control matter more than many shippers realize. Certain materials like adhesive bonds and painted finishes can degrade in extreme conditions. If your shipment will spend time in uncontrolled environments, consider adding a moisture barrier or thermal insulation layer.</p>
<div style="margin:1.5rem 0; padding:16px 20px; background-color:transparent; border-left:4px solid #e5e7eb; border-radius:0 8px 8px 0;">
<strong style="display:block; margin-bottom:4px; color:#111827; font-size:14px;"> Key Takeaway</strong>
<span style="color:#374151; font-size:15px; line-height:1.6;">The best packing material for your model depends on its specific construction. A diecast model needs different protection than a plastic assembly kit. Understand your model's vulnerabilities before choosing materials.</span>
</div>
<h2 id="building-a-protective-cradle-and-support-structure">Building a Protective Cradle and Support Structure</h2>
<p>A protective cradle is the structural framework that holds your model securely in place and prevents movement inside the box. This is where amateur packing diverges from professional-level protection.</p>
<figure class="article-content-image my-8" style="margin:2em 0;padding:0;background:transparent;border:0;"><img src="https://cdn.grandranker.com/articles/how-to-safely-ship-collectible-model-kits-content-1-1788408832.jpg" alt="Close-up of hands carefully securing a delicate diecast model aircraft inside a custom foam cradle with protective layering visible, showing how each component is individually supported with foam cutouts and shock absorption materials" class="w-full rounded-lg shadow-lg" loading="lazy" style="display:block;width:100%;max-width:100%;height:auto;border-radius:8px;margin:0 auto;"><figcaption class="text-sm text-gray-600 mt-2 text-center" style="font-size:0.875em;color:#6b7280;text-align:center;margin-top:0.6em;">Close-up of hands carefully securing a delicate diecast model aircraft inside a custom foam cradle with protective layering visible, showing how each component is individually supported with foam cutouts and shock absorption materials</figcaption></figure>
<p>Start by creating a base layer of 2-3 inches of bubble wrap, packing peanuts, or foam. Next, create custom-fitted supports that contact your model at its strongest structural points. For aircraft models, support the fuselage at the wing root and tail section. For articulated kits, support the torso and avoid placing pressure on thin arms or legs.</p>
<p>Foam cradles can be purchased pre-made for popular models or created using dense foam sheets. Cut the foam to match your model's profile, creating recesses where the model sits securely without moving. Test this by gently rocking the packed box, if you hear or feel any movement, add more support material.</p>
<p>For models with protruding components like canopies, create separate protective chambers. Wrap these delicate parts individually in bubble wrap, then secure them within the cradle so they cannot contact other components. The cradle itself should be surrounded by void fill material, creating a buffer zone between your structural support and the outer box walls.</p>
<h2 id="double-boxing-methods-for-high-value-kits">Double-Boxing Methods for High-Value Kits</h2>
<p>Double-boxing is the gold standard for models valued above $150 (<a rel="noopener noreferrer" target="_blank" href="https://www.ftc.gov/business-guidance/resources/business-guide-ftcs-mail-internet-or-telephone-order-merchandise-rule">the FTC</a>). This method uses two boxes with an air gap between them, dramatically reducing the transmission of external impact forces to your model.</p>
<p>Start with your inner box containing your model and its protective cradle, packed completely and sealed. Place this sealed inner box into a larger outer box with 2-3 inches of cushioning material on all sides. Fill the space around the inner box completely with packing peanuts, foam, or bubble wrap. The key to effective double-boxing is ensuring the inner box remains absolutely stationary inside the outer box. <a rel="noopener noreferrer" target="_blank" href="https://midlandmugs.com/blogs/news/how-to-pack-custom-mugs-for-shipping">packing fragile items</a>.</p>
<p>The outer box dimensions should be at least 6-8 inches larger in each direction than the inner box when possible. This creates adequate space for cushioning material and reduces the likelihood of the inner box contacting the outer box walls during rough handling.</p>
<div style="margin:1.5rem 0; padding:16px 20px; background-color:transparent; border-left:4px solid #e5e7eb; border-radius:0 8px 8px 0;">
<strong style="display:block; margin-bottom:4px; color:#111827; font-size:14px;"> Best For</strong>
<span style="color:#374151; font-size:15px; line-height:1.6;">Double-boxing is essential for models valued above $150, fragile assembly kits with numerous small parts, and any model being shipped internationally where handling can be particularly rough.</span>
</div>
<h2 id="best-shipping-carriers-for-fragile-collectibles">Best Shipping Carriers for Fragile Collectibles</h2>
<p>UPS generally offers reliable handling for fragile collectibles because their infrastructure emphasizes package tracking and consistent sorting procedures. UPS Ground provides economical shipping with good damage prevention, while UPS Overnight or 2-Day Air accelerates delivery, reducing transit time and exposure to potential damage.</p>
<p class="cta-inline" style="background-color: #fffde408; border-left: 4px solid #fffde4; padding: 16px 20px; margin: 24px 0; border-radius: 0 8px 8px 0;">
     <a href="https://utopiatoysandmodels.com" style="color: #fffde4; font-weight: 600; text-decoration: underline;">Get Started Today →</a>
</p>
<p>FedEx provides similar service levels with different regional strengths. FedEx Ground works well for cross-country shipments, while FedEx Express offers guaranteed delivery windows. USPS Priority Mail and Priority Mail Express are cost-effective options for smaller models and handle packages more gently than ground services.</p>
<p>All three major carriers offer tracking and insurance options. For collectibles, supplement basic insurance with additional coverage or specialized collectibles insurance. The carrier's handling quality matters less when your protective cradle and double-boxing provide genuine structural protection.</p>
<h2 id="shipping-insurance-for-collectibles-and-damage-prevention">Shipping Insurance for Collectibles and Damage Prevention</h2>
<p>Shipping insurance protects your financial investment when damage occurs during transit. Carrier insurance covers declared value up to specific limits, typically $100 for basic coverage and up to $5,000 with declared value insurance. Insurance does not cover items damaged due to inadequate packing, which is why proper protective structure matters even when you have insurance.</p>
<p>Specialized collectibles insurance offers broader coverage than carrier insurance and typically costs 1-2% of the declared value (<a rel="noopener noreferrer" target="_blank" href="https://www.iii.org/fact-statistic/facts-statistics-homeowners-and-renters-insurance">iii.org</a>). Before shipping, document your model's condition with photographs taken from multiple angles. Clear, well-lit photos create an evidence trail for insurance claims.</p>
<p>When filing a claim, provide the carrier with clear documentation of the damage, photographs of the damaged model, original packing materials if available, and receipts showing the model's value. Claims are more likely to be approved when you can demonstrate that damage occurred due to carrier mishandling rather than inadequate packing.</p>
<div style="margin:1.5rem 0; padding:16px 20px; background-color:transparent; border-left:4px solid #e5e7eb; border-radius:0 8px 8px 0;">
<strong style="display:block; margin-bottom:4px; color:#111827; font-size:14px;"> Watch Out</strong>
<span style="color:#374151; font-size:15px; line-height:1.6;">Never overstate your model's value on insurance declarations. Declare the actual market value based on current pricing for comparable models. Inflated declarations can result in claim denial.</span>
</div>
<h2 id="labeling-documentation-and-final-checks">Labeling, Documentation, and Final Checks</h2>
<p>Proper labeling ensures your shipment receives appropriate handling throughout transit. Place fragile labels on the top and at least two sides of your outer box. Include directional labels indicating "This Side Up" if your packaging has a proper orientation.</p>
<p>Add your return address and the recipient's address clearly on the box using waterproof labels or permanent marker. Include a phone number where you can be reached if the carrier needs to contact you. For high-value shipments, include an internal packing list describing the contents and their value.</p>
<p>Before sealing your box, perform a final inspection. Verify that your model is completely immobilized inside its cradle by gently shaking the box, there should be absolutely no movement or sound from inside. Check that all void fill material is properly distributed and no gaps exist between the inner and outer boxes.</p>
<p>Seal your box with strong packing tape, using at least two strips along the center seam and one strip along each edge. Reinforce all corners with additional tape. Create a detailed receipt documenting what's being shipped, its value, and the protection measures implemented. This documentation supports insurance claims if needed.</p>
<hr>
<p>Shipping collectible model kits safely requires attention to every detail, from box selection through final documentation. When you're sending models valued at $100 or more, the time invested in proper packing prevents costly damage and ensures your models arrive in the condition collectors expect. At Utopia Toys and Models, we understand that every model represents hours of building, painting, and <a href="/blogs/news/how-to-store-anime-figures-long-term">collecting passion</a>. Whether you're shipping a rare Bandai Gundam kit, a detailed diecast model, or a custom-painted commission piece, the protective cradle method and double-boxing approach described here will keep your collectibles safe.</p>
<table style="width:100%; border-collapse:collapse; margin:2rem 0; font-size:14px; line-height:1.6;">
<thead style="background-color:#f8f9fa; padding:12px 16px; text-align:left; font-weight:600; border-bottom:2px solid #e5e7eb;">
<tr>
<th style="background-color:#f8f9fa; padding:12px 16px; text-align:left; font-weight:600; border-bottom:2px solid #e5e7eb;">Packing Stage</th>
<th style="background-color:#f8f9fa; padding:12px 16px; text-align:left; font-weight:600; border-bottom:2px solid #e5e7eb;">Key Materials</th>
<th style="background-color:#f8f9fa; padding:12px 16px; text-align:left; font-weight:600; border-bottom:2px solid #e5e7eb;">Primary Purpose</th>
<th style="background-color:#f8f9fa; padding:12px 16px; text-align:left; font-weight:600; border-bottom:2px solid #e5e7eb;">Common Mistake</th>
</tr>
</thead>
<tbody>
<tr>
<td style="padding:12px 16px; border-bottom:1px solid #e5e7eb;">Base Layer</td>
<td style="padding:12px 16px; border-bottom:1px solid #e5e7eb;">Bubble wrap or foam</td>
<td style="padding:12px 16px; border-bottom:1px solid #e5e7eb;">Initial impact absorption</td>
<td style="padding:12px 16px; border-bottom:1px solid #e5e7eb;">Using insufficient cushioning</td>
</tr>
<tr>
<td style="padding:12px 16px; border-bottom:1px solid #e5e7eb;">Structural Support</td>
<td style="padding:12px 16px; border-bottom:1px solid #e5e7eb;">Custom foam cradle</td>
<td style="padding:12px 16px; border-bottom:1px solid #e5e7eb;">Prevent model movement</td>
<td style="padding:12px 16px; border-bottom:1px solid #e5e7eb;">Relying only on wrapping</td>
</tr>
<tr>
<td style="padding:12px 16px; border-bottom:1px solid #e5e7eb;">Void Fill</td>
<td style="padding:12px 16px; border-bottom:1px solid #e5e7eb;">Packing peanuts or kraft fill</td>
<td style="padding:12px 16px; border-bottom:1px solid #e5e7eb;">Fill gaps between cradle and box</td>
<td style="padding:12px 16px; border-bottom:1px solid #e5e7eb;">Leaving empty spaces</td>
</tr>
<tr>
<td style="padding:12px 16px; border-bottom:1px solid #e5e7eb;">Outer Protection</td>
<td style="padding:12px 16px; border-bottom:1px solid #e5e7eb;">Double box with cushioning</td>
<td style="padding:12px 16px; border-bottom:1px solid #e5e7eb;">Secondary impact barrier</td>
<td style="padding:12px 16px; border-bottom:1px solid #e5e7eb;">Skipping the second box</td>
</tr>
<tr>
<td style="padding:12px 16px; border-bottom:1px solid #e5e7eb;">Documentation</td>
<td style="padding:12px 16px; border-bottom:1px solid #e5e7eb;">Photos and receipts</td>
<td style="padding:12px 16px; border-bottom:1px solid #e5e7eb;">Insurance claim support</td>
<td style="padding:12px 16px; border-bottom:1px solid #e5e7eb;">No pre-shipment photos</td>
</tr>
</tbody>
</table>
<section style="margin:3rem 0 2rem 0;" itemscope itemtype="https://schema.org/FAQPage">
<h2 style="font-size:1.5rem; font-weight:700; margin:0 0 4px 0;" id="frequently-asked-questions">Frequently Asked Questions</h2>
<div style="padding:20px 0; border-bottom:1px solid #e5e7eb;" itemscope itemprop="mainEntity" itemtype="https://schema.org/Question">
<h3 style="font-size:1.1rem; font-weight:600; margin:0 0 8px 0;" itemprop="name">What is the safest way to ship high-value collectible models?</h3>
<div style="line-height:1.7; font-size:0.95rem;" itemscope itemprop="acceptedAnswer" itemtype="https://schema.org/Answer">
<p itemprop="text" style="margin:0;">Use a multi-layer approach: wrap the model kit individually in bubble wrap, place it in a custom cradle or foam insert, then double-box with void fill between boxes. Add fragile labeling and tracking to your parcel. For models over $100, purchase shipping insurance that covers full replacement value. This combination protects against impact, vibration, and transit damage while ensuring you can document any loss for an insurance claim.</p>
</div>
</div>
<div style="padding:20px 0; border-bottom:1px solid #e5e7eb;" itemscope itemprop="mainEntity" itemtype="https://schema.org/Question">
<h3 style="font-size:1.1rem; font-weight:600; margin:0 0 8px 0;" itemprop="name">Should I use double-boxing when shipping model kits?</h3>
<div style="line-height:1.7; font-size:0.95rem;" itemscope itemprop="acceptedAnswer" itemtype="https://schema.org/Answer">
<p itemprop="text" style="margin:0;">Yes, especially for assembled kits or high-value pieces. Double-boxing creates a shock-absorbing buffer that reduces impact during handling and transit. Place the packed model in the inner box, surround it with at least 2 inches of void fill (packing peanuts or crinkle paper), then place that box inside a larger outer box with another 2 inches of cushioning. This method significantly improves structural integrity and reduces the risk of damage.</p>
</div>
</div>
<div style="padding:20px 0; border-bottom:1px solid #e5e7eb;" itemscope itemprop="mainEntity" itemtype="https://schema.org/Question">
<h3 style="font-size:1.1rem; font-weight:600; margin:0 0 8px 0;" itemprop="name">What are the best packing materials for fragile plastic models?</h3>
<div style="line-height:1.7; font-size:0.95rem;" itemscope itemprop="acceptedAnswer" itemtype="https://schema.org/Answer">
<p itemprop="text" style="margin:0;">Bubble wrap is essential for initial protection around delicate parts like canopies, cowls, and thin plastic components. Layer it with kraft paper to prevent adhesive residue. Use packing peanuts or crinkle fill for void fill between layers. For custom cradles, closed-cell foam or molded foam inserts provide excellent shock absorption. Avoid newspaper or plain kraft paper as sole protection, they offer minimal impact resistance. Combine materials in layers for maximum protection against brittleness and snapping.</p>
</div>
</div>
<div style="padding:20px 0; border-bottom:1px solid #e5e7eb;" itemscope itemprop="mainEntity" itemtype="https://schema.org/Question">
<h3 style="font-size:1.1rem; font-weight:600; margin:0 0 8px 0;" itemprop="name">How do I document my shipment for an insurance claim?</h3>
<div style="line-height:1.7; font-size:0.95rem;" itemscope itemprop="acceptedAnswer" itemtype="https://schema.org/Answer">
<p itemprop="text" style="margin:0;">Before packing, photograph the model kit from multiple angles in its original or display condition. Keep the receipt and proof of purchase. Take photos of your packed shipment showing the protective layering and boxing. When shipping, request tracking and signature confirmation. If damage occurs, photograph the damage immediately, file a claim within the carrier's required timeframe (typically 30 days), and provide all documentation: photos, receipts, tracking number, and carrier damage report. This creates a complete record for claim approval.</p>
</div>
</div>
</section>
<div class="cta-button-container" style="text-align: center; margin: 32px 0;">
    <a href="https://utopiatoysandmodels.com" class="cta-button" style="display: inline-block; background-color: #fffde4; color: white; padding: 14px 32px; border-radius: 8px; text-decoration: none; font-weight: 600; font-size: 16px;">Get Started Today</a>
</div>
<p class="grandranker-branding" style="margin-top: 3rem; padding-top: 1.5rem; border-top: 1px solid #e5e7eb; font-size: 0.875rem; text-align: center;">This article was written using <a href="https://grandranker.com/" target="_blank" rel="noopener">GrandRanker</a></p>]]>
    </content>
  </entry>
  <entry>
    <id>https://utopiatoysandmodels.com/blogs/news/knoxville-kotobukiya-collectibles</id>
    <published>2026-09-02T21:03:57-04:00</published>
    <updated>2026-09-02T21:03:58-04:00</updated>
    <link rel="alternate" type="text/html" href="https://utopiatoysandmodels.com/blogs/news/knoxville-kotobukiya-collectibles"/>
    <title>Knoxville Kotobukiya Collectibles for Every Fandom</title>
    <author>
      <name>Admin</name>
    </author>
    <summary type="html">
      <![CDATA[Shop Knoxville Kotobukiya collectibles with a collector's eye: figures, statues, scale, authenticity, pre-orders, and smart display choices for fans.<p><a class="read-more" href="https://utopiatoysandmodels.com/blogs/news/knoxville-kotobukiya-collectibles">More</a></p>]]>
    </summary>
    <content type="html">
      <![CDATA[<p>A great figure does more than fill an empty shelf. It catches the exact attitude of a character: the pose, the costume texture, the expression that makes another fan stop mid-conversation and say, “Wait, where did you get that?” For collectors searching Knoxville Kotobukiya releases, that is the appeal. Kotobukiya brings a high-end, fandom-first sensibility to characters from anime, comics, games, horror, and beyond.</p>
<p>WELCOME TO UTOPIA - where collecting is not about grabbing random merchandise from a generic aisle. It is about finding the version of a character that feels right for your collection, your display, and your fandom.</p>
<h2>Why Knoxville Kotobukiya Collectors Pay Attention</h2>
<p>Kotobukiya has earned its place in serious collections because it often sits in a sweet spot between mass-market figures and ultra-premium statues. The brand is known for sharp sculpt work, expressive character poses, detailed paint applications, and product lines built around the franchises collectors already care about.</p>
<p>That range matters. A collector building an anime shelf may be after a Bishoujo-style interpretation, an ARTFX J statue, or a scale figure with a dynamic base. A comic fan may be hunting an iconic <a href="https://utopiatoysandmodels.com/products/funko-pop-marvel-spider-man-comics-spider-man-fear-itself-suit-1445">Marvel</a> or DC character rendered with the kind of stylized energy that makes it stand out next to standard action figures. Star Wars, video games, <a href="https://utopiatoysandmodels.com/products/pre-order-friday-the-13th-the-game-pamela-voorhees-shrine-diorama">horror</a>, and kaiju fans may have entirely different priorities. Kotobukiya has spent years making products for people who know the difference.</p>
<p>Not every release is designed for the same kind of collector, and that is a good thing. Some figures are made to become the centerpiece of a case. Others are more compact, more affordable, or designed to work as part of a larger lineup. The smart move is to shop by character, franchise, scale, and display goal instead of treating every licensed figure as interchangeable.</p>
<h2>Know the Kotobukiya Line Before You Buy</h2>
<p>Kotobukiya’s branding can tell you a lot about what kind of collectible you are considering. Product names and lines vary by release, but learning the basics helps collectors compare pieces with confidence.</p>
<h3>Scale Figures and Display Statues</h3>
<p>Scale figures are usually the move when you want character detail, presence, and a finished display piece right out of the box. These are not model kits that require painting or construction. They are generally pre-painted collectibles, although you may need to attach a base, weapon, effect part, or another small piece.</p>
<p>Pay attention to stated scale and dimensions. A 1/7 scale figure can look incredible alone, but it may tower over smaller figures on the same shelf. Dimensions also matter more than photos suggest. A dramatic sword, cape, outstretched arm, or oversized base can demand much more shelf depth than the figure’s height implies.</p>
<h3>ARTFX, ARTFX J, and Franchise Lines</h3>
<p>ARTFX and ARTFX J releases are names many Kotobukiya collectors recognize immediately. The exact look depends on the property, but these lines often emphasize a recognizable pose and polished sculpting that lets a character read clearly from across the room.</p>
<p>For collectors who organize shelves by fandom, this is where the fun begins. A cohesive anime display does not require every figure to be from one line, but shared scale, visual style, and color balance can make a collection feel intentional. If you mix brands, compare measurements rather than relying only on labels. A figure called 1/8 scale from one franchise may not visually match another character advertised at the same scale.</p>
<h3>Bishoujo and Stylized Interpretations</h3>
<p>Kotobukiya’s Bishoujo line is a distinct lane: stylized character interpretations with a signature illustration-driven feel. These pieces can be a favorite for collectors who want familiar heroes, villains, monsters, or pop-culture icons presented differently from their movie, comic, or game appearances.</p>
<p>The trade-off is simple. A stylized figure may not fit a screen-accurate collection, but it can be exactly what gives a display personality. If your shelves are built around a particular artist’s influence, bold color, or character reimaginings, this kind of release can make far more sense than another neutral-pose figure.</p>
<h2>How to Shop Kotobukiya Without Regretting the Shelf Space</h2>
<p>The best collector purchases start with a little honesty: What are you building? A wall of favorite characters? A single premium case? A focused Dragon Ball, Evangelion, <a href="https://utopiatoysandmodels.com/products/funko-pop-anime-one-piece-monkey-d-luffy-2214">One Piece</a>, Marvel, or horror display? Your answer affects whether a figure is a must-have or just a cool photo online.</p>
<p>Start with the franchise. Then narrow it down by character and format. A collector who loves a character but has limited space may be better served by a smaller figure or bust than a large statue with a wide base. Someone creating a centerpiece display may want the opposite - a more dynamic release that earns its footprint.</p>
<p>Condition and packaging deserve attention, especially if you collect sealed items or anticipate displaying the box. Collectors have different standards. Some want pristine packaging because the box is part of the collectible. Others only care that the figure itself is complete and display-ready. Neither approach is wrong, but it helps to know your standard before a limited release appears.</p>
<p>Authenticity is another non-negotiable. Officially licensed figures have the expected manufacturer markings, product information, and quality control associated with the release. Prices that seem wildly below the normal collector market can be a warning sign, particularly for popular characters and sought-after statues. Buying from a specialty retailer that understands collector expectations offers more confidence than gambling on an unknown listing with recycled photos.</p>
<h2>Pre-Orders Matter for Limited Releases</h2>
<p>With collectibles, waiting can be the expensive option. Popular characters, limited runs, and highly anticipated new designs can sell through before release day or become far harder to find after the initial shipment is gone. That does not mean every upcoming figure needs a pre-order. It means collectors should reserve the pieces they know belong in the collection.</p>
<p>A pre-order is most useful when you have already checked the fundamentals: release window, price, scale, expected dimensions, and whether the character actually fits your collection plan. Read the retailer’s pre-order terms before placing an order. Release dates can shift, manufacturer allocations can change, and payment or cancellation rules vary by store.</p>
<p>For collectors balancing multiple drops, order-hold options can also make a difference. Holding eligible purchases until several items are ready can reduce the headache of separate deliveries, though it may delay when you receive an in-stock item. It depends on whether you value getting each release immediately or consolidating your collector haul.</p>
<h2>Build a Display That Protects the Collection</h2>
<p>A Kotobukiya figure deserves more than a crowded bookcase beside a sunny window. Direct sunlight can fade colors over time, and heat is rough on paint, plastic, adhesives, and delicate parts. Keep figures away from strong UV exposure, humid spots, and shelves that wobble every time somebody walks past.</p>
<p>Give dynamic poses room to breathe. A packed shelf can hide the exact sculpt details you paid for, and protruding parts are easier to damage when figures are pressed together. Use risers when possible so figures in the back do not disappear. Leave clearance above taller pieces, especially anything with effect parts, antennae, wings, or raised weapons.</p>
<p>Dust is part of the hobby, not a personal failure. A soft brush, gentle air blower, or microfiber cloth used carefully can keep a display looking fresh. Avoid harsh cleaners and do not force tight joints or accessories. If a piece needs assembly, take your time and support thin parts near the connection point.</p>
<h2>Find Your Fandom, Not Just Another Figure</h2>
<p>The strongest collections have a point of view. Maybe yours is heroic women across comics and anime. Maybe it is kaiju, horror icons, rival characters, red-and-black designs, or a shelf devoted to the one series that has followed you for years. Kotobukiya makes sense in that kind of collection because the brand often treats licensed characters as display subjects, not just logos placed on a box.</p>
<p>For Knoxville collectors, the real win is having a place in the hobby where fandom categories matter. At Utopia Toys and Models, the hunt can begin with the character or universe you already love, then move toward the format that fits your space and budget.</p>
<p>Keep the shelf personal. Buy the release that makes you want to rearrange the display, clear a little room, and show another fan exactly why that character belongs there.</p>]]>
    </content>
  </entry>
  <entry>
    <id>https://utopiatoysandmodels.com/blogs/news/essential-tools-for-beginner-gunpla-builders</id>
    <published>2026-09-02T00:13:01-04:00</published>
    <updated>2026-09-02T00:13:02-04:00</updated>
    <link rel="alternate" type="text/html" href="https://utopiatoysandmodels.com/blogs/news/essential-tools-for-beginner-gunpla-builders"/>
    <title>Essential Tools for Beginner Gunpla Builders</title>
    <author>
      <name>Editorial Team</name>
    </author>
    <summary type="html">
      <![CDATA[Essential tools for beginner gunpla builders: Master Gunpla building with essential tools for beginners. Learn which nippers, knives, and supplies you.<p><a class="read-more" href="https://utopiatoysandmodels.com/blogs/news/essential-tools-for-beginner-gunpla-builders">More</a></p>]]>
    </summary>
    <content type="html">
      <![CDATA[<h2 id="table-of-contents">Table of Contents</h2>
<ul>
<li><a href="#what-youll-need-before-you-start">What You'll Need Before You Start</a></li>
<li><a href="#best-nippers-for-gunpla-choosing-your-primary-cutting-tool">Best Nippers for Gunpla: Choosing Your Primary Cutting Tool</a></li>
<li><a href="#hobby-knives-and-precision-blades-for-detail-work">Hobby Knives and Precision Blades for Detail Work</a></li>
<li><a href="#how-to-clean-up-nub-marks-and-gate-damage">How to Clean Up Nub Marks and Gate Damage</a></li>
<li><a href="#gundam-model-kit-grades-explained-choosing-your-first-build">Gundam Model Kit Grades Explained: Choosing Your First Build</a></li>
<li><a href="#workspace-setup-safety-and-tool-organization">Workspace Setup, Safety, and Tool Organization</a></li>
<li><a href="#essential-finishing-supplies-paint-cement-and-panel-lining">Essential Finishing Supplies: Paint, Cement, and Panel Lining</a></li>
<li><a href="#common-mistakes-to-avoid-when-starting-out">Common Mistakes to Avoid When Starting Out</a></li>
<li><a href="#frequently-asked-questions">Frequently Asked Questions</a></li>
</ul>
<p><em>Last Updated: September 2, 2026</em></p>
<h2 id="what-youll-need-before-you-start">What You'll Need Before You Start</h2>
<p>Building your first Gundam model kit requires specific tools, not an expensive collection, just the right five to seven items that solve real problems during assembly. Most beginners make one critical mistake: they try to build with whatever they have lying around, then wonder why their models look unfinished or damaged.</p>
<p>This guide walks you through exactly what you need, why each tool matters, and how to set yourself up for success before you even open your first kit.</p>
<figure class="article-content-image my-8" style="margin:2em 0;padding:0;background:transparent;border:0;"><img src="https://cdn.grandranker.com/articles/essential-tools-for-beginner-gunpla-builders-content-1-1788322347.jpg" alt="A flat lay of essential Gunpla building tools arranged on a workbench: side cutters and hobby knife positioned next to a sanding sponge and precision tweezers, with a partially assembled plastic model kit showing sprue gates and nub marks in the background, natural workshop lighting" class="w-full rounded-lg shadow-lg" loading="lazy" style="display:block;width:100%;max-width:100%;height:auto;border-radius:8px;margin:0 auto;"><figcaption class="text-sm text-gray-600 mt-2 text-center" style="font-size:0.875em;color:#6b7280;text-align:center;margin-top:0.6em;">A flat lay of essential Gunpla building tools arranged on a workbench: side cutters and hobby knife positioned next to a sanding sponge and precision tweezers, with a partially assembled plastic model kit showing sprue gates and nub marks in the background, natural workshop lighting</figcaption></figure>
<p>The essential tools break into four categories: cutting tools, finishing tools, assembly tools, and workspace setup. Each solves a specific problem that comes up during the build. Start with cutting tools because every kit arrives with plastic parts attached to sprues, the frames that hold pieces during manufacturing. You cannot build without separating those parts cleanly. Next comes finishing tools to clean up nub marks and gate damage. Then assembly tools to hold and position parts precisely. Finally, workspace setup to protect both your model and yourself.</p>
<h2 id="best-nippers-for-gunpla-choosing-your-primary-cutting-tool">Best Nippers for Gunpla: Choosing Your Primary Cutting Tool</h2>
<p>Your nipper is the first tool you'll use on every model kit and the most critical purchase. The Tamiya Modeler's Side Cutter stands out as the best option <a href="/blogs/news/best-beginner-gunpla-kits-for-adults">for beginners</a> because it delivers clean, flush cuts that minimize nub marks, the small plastic remnants left where parts attached to the sprue.</p>
<p>The Tamiya cutter uses hardened carbon steel blades specifically designed for plastic model parts. Standard utility scissors crush plastic instead of cutting cleanly, leaving white stress marks and rough edges that require extensive cleanup. A quality nipper cuts so cleanly that you often need only light sanding, not heavy filing.</p>
<p>What separates this tool from cheaper alternatives is blade geometry. The blades are angled to cut flush against the model part, allowing you to position the cutter so the blade sits flat against your model's surface, then cut away the sprue gate with minimal plastic remaining. The ergonomic grip also matters, you'll spend hours squeezing your cutting tool, and a poorly designed handle causes hand fatigue and cramping. The Tamiya cutter's elastomer grip distributes pressure across your palm instead of concentrating it on your fingers.</p>
<h2 id="hobby-knives-and-precision-blades-for-detail-work">Hobby Knives and Precision Blades for Detail Work</h2>
<p>After cutting parts from the sprue, your hobby knife handles cleanup work that nippers cannot reach. The X-Acto Knife with a #11 fine-point blade is the industry standard because the blade is thin and sharp enough to trim plastic without crushing it (<a rel="noopener noreferrer" target="_blank" href="https://www.xacto.com/knives-blades.html">xacto.com</a>).</p>
<p>The hobby knife excels at removing nub marks, scraping away flashing (thin plastic seams between molded halves), and performing precision cuts on small parts. It's also essential for <a href="/blogs/news/how-to-scribe-panel-lines-on-gunpla">opening panel lines</a>, the engraved details that define the mechanical appearance.</p>
<p>The #11 blade is razor-sharp, which requires respect. Always cut away from your body and keep your non-knife hand behind the blade, never in front of it. Replace the blade every few hours of cutting work, a dull blade is actually more dangerous because you'll apply more pressure to compensate, increasing the chance of slipping.</p>
<h2 id="how-to-clean-up-nub-marks-and-gate-damage">How to Clean Up Nub Marks and Gate Damage</h2>
<p>Nub marks catch light and draw the eye immediately, making a model look unfinished even if assembly is perfect. Removing them requires a three-step workflow: cut as close as possible with nippers, trim the remaining plastic flush with your hobby knife, then sand smooth.</p>
<p>Position your nipper so the blade sits flush against the model surface, perpendicular to the sprue gate. Cut straight through to leave the smallest possible nub. Then take your hobby knife and carefully shave away the remaining plastic with light scraping strokes. Finally, sand the area smooth using a sanding sponge, which is flexible and conforms to curves. Start with 400-grit to remove the rough surface, then finish with 1000-grit for a smooth appearance. Sand in circular motions to avoid creating scratches.</p>
<p>The key insight: your nippers determine how much work cleanup requires. Quality nippers like the Tamiya cutter leave minimal remnants that need only light finishing, while poor nippers leave thick nubs that demand aggressive sanding.</p>
<h2 id="gundam-model-kit-grades-explained-choosing-your-first-build">Gundam Model Kit Grades Explained: Choosing Your First Build</h2>
<p>Bandai uses a grading system that tells you exactly how complex a kit is. Understanding these grades determines whether your first build is enjoyable or frustrating.</p>
<p><strong><a href="/blogs/news/what-are-high-grade-gundam-kits">High Grade</a> (HG)</strong> kits are the beginner standard at approximately 1:144 scale, with models standing about 4-5 inches tall. HG kits contain 100-150 plastic parts and assemble in 4-8 hours. Parts fit together precisely with minimal glue required.</p>
<p><strong>Real Grade (RG)</strong> kits are more complex despite being the same scale, containing 150-200 parts with internal frame structures that make them more articulated. These suit builders with one or two completed models, not absolute beginners.</p>
<p><strong>Master Grade (MG)</strong> kits are substantially larger at 1:100 scale, standing 8-10 inches tall with 300-400 parts. Assembly takes 20-40 hours and suits intermediate builders.</p>
<p><strong>Perfect Grade (PG)</strong> kits are the pinnacle at 1:60 scale with 1000+ parts, requiring 60+ hours. Only experienced builders should attempt these.</p>
<p>Start with HG. Every builder in the hobby started here because it teaches fundamentals, cutting cleanly, assembling joints, applying cement, and finishing, without overwhelming complexity. After completing 2-3 HG kits, you'll have the skills to move to RG or MG. The best HG kits for beginners are recent releases because Bandai continuously improves engineering. Utopia Toys and Models carries current-generation HG kits from top series like Mobile Suit Gundam, Gundam Wing, and Gundam 00, all in stock and ready to ship.</p>
<h2 id="workspace-setup-safety-and-tool-organization">Workspace Setup, Safety, and Tool Organization</h2>
<p>Your workspace determines whether building is enjoyable or frustrating. Start with a self-healing cutting mat, this is non-negotiable. It protects your table surface and provides a stable base for cutting. Never cut anywhere else.</p>
<p class="cta-inline" style="background-color: #fffde408; border-left: 4px solid #fffde4; padding: 16px 20px; margin: 24px 0; border-radius: 0 8px 8px 0;">
     <a href="https://utopiatoysandmodels.com" style="color: #fffde4; font-weight: 600; text-decoration: underline;">Get Started Today →</a>
</p>
<p>Lighting is more critical than most beginners realize. You're working with small plastic parts and performing precision cuts. An adjustable desk lamp with at least 40 watts of brightness is minimum (<a rel="noopener noreferrer" target="_blank" href="http://www.osha.gov/etools/computer-workstations/workstation-environment">osha.gov</a>). Position the light to the side so it illuminates without creating glare. Many experienced builders use magnifying lamps because the combination of bright light and magnification catches details you'd otherwise miss.</p>
<p>A 2x or 3x magnifying glass costs under $20 and transforms your ability to see what you're doing. Panel lines become visible, nub marks become obvious, and gaps in cement joints become apparent.</p>
<p>Organization keeps tools accessible and prevents damage. A small toolbox or drawer organizer holds your nippers, hobby knife, tweezers, and files in one place. Safety gear matters, especially for younger builders. Cut-resistant gloves designed for crafting protect your non-knife hand without restricting movement. Eye protection is important when using cement or paint because fumes can irritate eyes. A basic dust mask prevents inhalation of plastic dust from sanding.</p>
<figure class="article-content-image my-8" style="margin:2em 0;padding:0;background:transparent;border:0;"><img src="https://cdn.grandranker.com/articles/essential-tools-for-beginner-gunpla-builders-content-2-1788322362.jpg" alt="A well-organized hobby workbench with adjustable desk lamp positioned to the side, magnifying glass mounted on an articulating arm, self-healing cutting mat in the center, tool organizer holding nippers and hobby knives, and plastic storage containers holding various model parts and supplies in the background" class="w-full rounded-lg shadow-lg" loading="lazy" style="display:block;width:100%;max-width:100%;height:auto;border-radius:8px;margin:0 auto;"><figcaption class="text-sm text-gray-600 mt-2 text-center" style="font-size:0.875em;color:#6b7280;text-align:center;margin-top:0.6em;">A well-organized hobby workbench with adjustable desk lamp positioned to the side, magnifying glass mounted on an articulating arm, self-healing cutting mat in the center, tool organizer holding nippers and hobby knives, and plastic storage containers holding various model parts and supplies in the background</figcaption></figure>
<h2 id="essential-finishing-supplies-paint-cement-and-panel-lining">Essential Finishing Supplies: Paint, Cement, and Panel Lining</h2>
<p>Beyond tools, three finishing supplies elevate your models from assembled to finished: plastic cement, panel lining markers, and paint.</p>
<p><strong>Plastic Cement</strong> bonds plastic parts permanently. Mr. Hobby Mr. Cement S (Extra Thin) is the standard choice because the low viscosity allows cement to flow into joints via capillary action. Apply a thin line along the seam, press parts together, and hold for 30 seconds. The cement dissolves the plastic slightly, fusing parts into one solid piece. Always use it in a well-ventilated area, open a window, work near a fan, or use it outdoors. Never use cement in a sealed room.</p>
<p><strong>Panel Lining Markers</strong> add visual depth by highlighting engraved lines on your model. Tamiya Panel Line Accent Color is a pre-diluted enamel paint with a fine brush applicator. Draw the marker along panel lines, and the paint flows into engraved details. Once dry, clean excess paint from the surface with enamel thinner, leaving only paint inside the lines. This single step transforms a flat-looking model into one with mechanical depth.</p>
<p><strong>Paint</strong> is optional for your first build but becomes important as you progress. Spray paint designed for plastic models (Tamiya or Mr. Hobby brands) works better than brush-on paint because it dries to a smooth, even finish.</p>
<p>Utopia Toys and Models stocks all these finishing supplies from trusted brands.</p>
<h2 id="common-mistakes-to-avoid-when-starting-out">Common Mistakes to Avoid When Starting Out</h2>
<p>The most common beginner mistake is cutting too close to the part. Builders see the nub and try to cut it flush in one pass, leaving barely any plastic to work with. Then they sand through the edge of the actual part, creating a rounded or damaged surface. Leave a small amount of plastic, roughly 1mm, then trim and sand that away to protect the actual part edge.</p>
<p>Another frequent error is applying too much cement. Excess cement can melt your part or create visible damage. Use a thin line along the seam, not a bead. If cement drips or pools, you've applied too much.</p>
<p>Skipping nub cleanup is tempting when excited to assemble, but nubs visible on the finished model are the most obvious sign of careless assembly. Spending an extra 10 minutes per part to remove nubs cleanly makes the difference between a handmade and professionally finished model.</p>
<p>Rushing assembly is another trap. Take your time fitting parts together. If a part doesn't fit smoothly, investigate before forcing it. Forcing parts together can crack plastic or snap small details.</p>
<p>Finally, many beginners neglect workspace safety. Hobby knives are genuinely dangerous. Cement fumes can cause headaches. Sanding creates plastic dust. Wear gloves, work in ventilated areas, and treat your tools with respect.</p>
<table style="width:100%; border-collapse:collapse; margin:2rem 0; font-size:14px; line-height:1.6;">
<thead style="background-color:#f8f9fa; padding:12px 16px; text-align:left; font-weight:600; border-bottom:2px solid #e5e7eb;">
<tr>
<th style="background-color:#f8f9fa; padding:12px 16px; text-align:left; font-weight:600; border-bottom:2px solid #e5e7eb;">Tool</th>
<th style="background-color:#f8f9fa; padding:12px 16px; text-align:left; font-weight:600; border-bottom:2px solid #e5e7eb;">Primary Purpose</th>
<th style="background-color:#f8f9fa; padding:12px 16px; text-align:left; font-weight:600; border-bottom:2px solid #e5e7eb;">Beginner Essential</th>
<th style="background-color:#f8f9fa; padding:12px 16px; text-align:left; font-weight:600; border-bottom:2px solid #e5e7eb;">Cost Range</th>
</tr>
</thead>
<tbody>
<tr>
<td style="padding:12px 16px; border-bottom:1px solid #e5e7eb;">Side Cutter (Nipper)</td>
<td style="padding:12px 16px; border-bottom:1px solid #e5e7eb;">Cutting parts from sprue</td>
<td style="padding:12px 16px; border-bottom:1px solid #e5e7eb;">Yes</td>
<td style="padding:12px 16px; border-bottom:1px solid #e5e7eb;">$17-21</td>
</tr>
<tr>
<td style="padding:12px 16px; border-bottom:1px solid #e5e7eb;">Hobby Knife</td>
<td style="padding:12px 16px; border-bottom:1px solid #e5e7eb;">Trimming nubs and flashing</td>
<td style="padding:12px 16px; border-bottom:1px solid #e5e7eb;">Yes</td>
<td style="padding:12px 16px; border-bottom:1px solid #e5e7eb;">$4-9</td>
</tr>
<tr>
<td style="padding:12px 16px; border-bottom:1px solid #e5e7eb;">Sanding Sponge</td>
<td style="padding:12px 16px; border-bottom:1px solid #e5e7eb;">Smoothing nub marks</td>
<td style="padding:12px 16px; border-bottom:1px solid #e5e7eb;">Yes</td>
<td style="padding:12px 16px; border-bottom:1px solid #e5e7eb;">$2-5</td>
</tr>
<tr>
<td style="padding:12px 16px; border-bottom:1px solid #e5e7eb;">Precision Tweezers</td>
<td style="padding:12px 16px; border-bottom:1px solid #e5e7eb;">Holding small parts</td>
<td style="padding:12px 16px; border-bottom:1px solid #e5e7eb;">Yes</td>
<td style="padding:12px 16px; border-bottom:1px solid #e5e7eb;">$3-8</td>
</tr>
<tr>
<td style="padding:12px 16px; border-bottom:1px solid #e5e7eb;">Plastic Cement</td>
<td style="padding:12px 16px; border-bottom:1px solid #e5e7eb;">Bonding joints</td>
<td style="padding:12px 16px; border-bottom:1px solid #e5e7eb;">Yes</td>
<td style="padding:12px 16px; border-bottom:1px solid #e5e7eb;">$3-12</td>
</tr>
<tr>
<td style="padding:12px 16px; border-bottom:1px solid #e5e7eb;">Panel Lining Marker</td>
<td style="padding:12px 16px; border-bottom:1px solid #e5e7eb;">Adding detail depth</td>
<td style="padding:12px 16px; border-bottom:1px solid #e5e7eb;">Recommended</td>
<td style="padding:12px 16px; border-bottom:1px solid #e5e7eb;">$7-14</td>
</tr>
<tr>
<td style="padding:12px 16px; border-bottom:1px solid #e5e7eb;">Cutting Mat</td>
<td style="padding:12px 16px; border-bottom:1px solid #e5e7eb;">Work surface protection</td>
<td style="padding:12px 16px; border-bottom:1px solid #e5e7eb;">Yes</td>
<td style="padding:12px 16px; border-bottom:1px solid #e5e7eb;">$8-20</td>
</tr>
</tbody>
</table>
<hr>
<p>Starting Gunpla is an investment in both tools and time, but the barrier to entry is surprisingly low. A complete beginner toolkit costs under $80 and lasts through dozens of builds. The real investment is learning proper technique, cutting cleanly, finishing carefully, and assembling patiently.</p>
<p>When you're ready to <a href="/blogs/news/how-to-build-gunpla-for-beginners">start building</a>, Utopia Toys and Models has everything you need. We stock current-generation HG kits from every major Gundam series, all the tools mentioned in this guide, and finishing supplies from trusted brands like Tamiya and Mr. Hobby. Our inventory is in stock and ships quickly, so you can start building within days of ordering.</p>
<section style="margin:3rem 0 2rem 0;" itemscope itemtype="https://schema.org/FAQPage">
<h2 style="font-size:1.5rem; font-weight:700; margin:0 0 4px 0;" id="frequently-asked-questions">Frequently Asked Questions</h2>
<div style="padding:20px 0; border-bottom:1px solid #e5e7eb;" itemscope itemprop="mainEntity" itemtype="https://schema.org/Question">
<h3 style="font-size:1.1rem; font-weight:600; margin:0 0 8px 0;" itemprop="name">Q: What do I need to start building Gunpla?</h3>
<div style="line-height:1.7; font-size:0.95rem;" itemscope itemprop="acceptedAnswer" itemtype="https://schema.org/Answer">
<p itemprop="text" style="margin:0;">A: Begin with side cutters (nippers) for separating parts from the sprue, a hobby knife for cleaning nub marks, tweezers for precision placement, and a cutting mat to protect your work surface. Add a sanding sponge for smoothing gate marks, panel line markers or enamel paint for detailing, and plastic cement for bonding parts. Safety gear including work gloves and eye protection is essential. Most beginners start with a High Grade (HG) Gundam model kit, which balances accessibility with articulation and detail.</p>
</div>
</div>
<div style="padding:20px 0; border-bottom:1px solid #e5e7eb;" itemscope itemprop="mainEntity" itemtype="https://schema.org/Question">
<h3 style="font-size:1.1rem; font-weight:600; margin:0 0 8px 0;" itemprop="name">Q: Do I need expensive tools to build Gunpla properly?</h3>
<div style="line-height:1.7; font-size:0.95rem;" itemscope itemprop="acceptedAnswer" itemtype="https://schema.org/Answer">
<p itemprop="text" style="margin:0;">A: No. Quality tools don't require premium pricing. A basic set of side cutters, an X-Acto knife, and precision tweezers will handle most assembly tasks effectively. The Tamiya Modeler's Side Cutter and X-Acto No. 1 knife are both affordable and reliable. What matters more is technique: using flush cuts, taking time to clean nub marks, and working in a well-lit space. Many experienced builders use the same entry-level tools throughout their hobby.</p>
</div>
</div>
<div style="padding:20px 0; border-bottom:1px solid #e5e7eb;" itemscope itemprop="mainEntity" itemtype="https://schema.org/Question">
<h3 style="font-size:1.1rem; font-weight:600; margin:0 0 8px 0;" itemprop="name">Q: How to clean up nub marks on plastic parts?</h3>
<div style="line-height:1.7; font-size:0.95rem;" itemscope itemprop="acceptedAnswer" itemtype="https://schema.org/Answer">
<p itemprop="text" style="margin:0;">A: After cutting parts from the sprue with nippers, small nubs remain where the part connected to the runner. Use a hobby knife to carefully trim the nub flush with the part surface. Follow up with a sanding sponge or fine-grit sandpaper (400-600 grit) to smooth the area. For visible seams or larger imperfections, apply Tamiya Basic Putty, let it dry, then sand smooth. Always sand in one direction and test on hidden areas first to avoid marring the plastic finish.</p>
</div>
</div>
<div style="padding:20px 0; border-bottom:1px solid #e5e7eb;" itemscope itemprop="mainEntity" itemtype="https://schema.org/Question">
<h3 style="font-size:1.1rem; font-weight:600; margin:0 0 8px 0;" itemprop="name">Q: What is the difference between High Grade and Real Grade Gundam kits?</h3>
<div style="line-height:1.7; font-size:0.95rem;" itemscope itemprop="acceptedAnswer" itemtype="https://schema.org/Answer">
<p itemprop="text" style="margin:0;">A: High Grade (HG) kits are larger (1/144 scale), easier to assemble, and ideal for beginners. They have good articulation and detail without overwhelming complexity. Real Grade (RG) kits are smaller (1/144 scale) but feature highly detailed internal frames and advanced engineering, requiring more precision and patience. Master Grade (MG) kits are 1/100 scale with extensive detail and assembly time. Start with HG to learn fundamentals, then progress to RG or MG as your skills improve.</p>
</div>
</div>
</section>
<div class="cta-button-container" style="text-align: center; margin: 32px 0;">
    <a href="https://utopiatoysandmodels.com" class="cta-button" style="display: inline-block; background-color: #fffde4; color: white; padding: 14px 32px; border-radius: 8px; text-decoration: none; font-weight: 600; font-size: 16px;">Get Started Today</a>
</div>
<p class="grandranker-branding" style="margin-top: 3rem; padding-top: 1.5rem; border-top: 1px solid #e5e7eb; font-size: 0.875rem; text-align: center;">This article was written using <a href="https://grandranker.com/" target="_blank" rel="noopener">GrandRanker</a></p>]]>
    </content>
  </entry>
  <entry>
    <id>https://utopiatoysandmodels.com/blogs/news/knoxville-bandai-collecting</id>
    <published>2026-09-01T21:03:59-04:00</published>
    <updated>2026-09-01T21:04:00-04:00</updated>
    <link rel="alternate" type="text/html" href="https://utopiatoysandmodels.com/blogs/news/knoxville-bandai-collecting"/>
    <title>Knoxville Bandai Collecting Starts With Your Fandom</title>
    <author>
      <name>Admin</name>
    </author>
    <summary type="html">
      <![CDATA[Knoxville Bandai collectors can shop smarter for Gunpla, anime figures, and more with practical advice on grades, drops, pre-orders, and care, plus tips.<p><a class="read-more" href="https://utopiatoysandmodels.com/blogs/news/knoxville-bandai-collecting">More</a></p>]]>
    </summary>
    <content type="html">
      <![CDATA[<p>A great Knoxville Bandai pickup is not just another box on the shelf. It is the High Grade kit that gets you building again after a long break, the Dragon Ball figure that finally completes a display, or the anime collectible you have been watching for since its first reveal. The fun is in the hunt. The smart move is knowing what you are hunting for before a drop turns into a panic buy.</p>
<p>WELCOME TO UTOPIA! Whether your shelves lean toward Mobile Suit Gundam, Dragon Ball, <a href="https://utopiatoysandmodels.com/products/one-piece-grandline-egghead-dr-vegapunk-lilith-evil-fig">One Piece</a>, Tamagotchi, or another corner of Bandai fandom, collecting gets better when your collection has a point of view. Find Your Fandom, then give it room to grow.</p>
<h2>What Knoxville Bandai Collectors Look For</h2>
<p>Bandai is a huge name, and that is part of the challenge. One collector may mean Gunpla when they say Bandai. Another may be looking for Anime Heroes action figures, Dragon Stars, S.H.Figuarts, model kits from a favorite series, or a collectible that fits alongside manga, statues, and vinyl figures. Shopping by brand helps, but shopping by franchise and format usually gets you closer to what you actually want.</p>
<p>For builders, Gunpla is often the center of the conversation. These kits reward different kinds of hobby energy. Maybe you want a quick evening build with a <a href="https://utopiatoysandmodels.com/products/mobile-suit-gundam-hathaway-the-sorcery-of-nymph-circe-messer-type-m01-gawman-use-hg-1-144-scale-model-kit">High Grade 1/144 kit</a>. Maybe you want the detail and shelf presence of a Master Grade. Maybe a Real Grade is calling your name because you enjoy small-scale engineering and do not mind taking your time. None is automatically the "best" grade. The right one depends on your budget, your building confidence, and how much space you have left after that last display rearrangement.</p>
<p>For figure collectors, scale, articulation, and finish matter just as much as character choice. A highly articulated action figure can be perfect for posing, photography, and changing up a shelf. A fixed-pose figure may deliver stronger sculpt detail or a more dramatic scene. Know which experience you want before you buy. A figure that looks incredible in its packaging can still disappoint if you expected it to move, stand, or display differently.</p>
<h2>Build a Gunpla Shelf With a Plan</h2>
<p>A collection does not need to be enormous to look intentional. Start with one lane: a favorite Gundam timeline, a specific mobile suit, kits in one scale, or builds with a shared color palette. That approach makes each new addition feel connected instead of random.</p>
<h3>Pick the grade that matches your build time</h3>
<p>High Grade kits are a welcoming place to start and a reliable choice for experienced builders who want variety. They are generally compact, accessible, and packed with options across Gundam series. They also make sense if you are building a lineup rather than dedicating a whole weekend to one project.</p>
<p>Real Grade kits offer impressive detail in a smaller footprint, but their parts and assembly can demand patience. They are great when you enjoy careful construction and want a technical challenge. Master Grade kits typically bring larger parts, deeper internal detail, and more display presence. They can be satisfying centerpiece projects, though they require more time, space, and budget.</p>
<p>The trade-off is simple: more complexity can mean more detail, but it also means more chances to rush, lose tiny parts, or stall a build halfway through. Buy for the hobby session you realistically want, not the version of yourself who has unlimited free Saturdays.</p>
<h3>Budget for the build, not only the box</h3>
<p>A kit can be built with basic nippers and care, especially when you are starting out. But a few tools can make the experience cleaner. Good hobby nippers reduce stress marks. A sanding tool or file helps refine nub marks. Panel-lining supplies can add depth, while a top coat can change the final look and help protect decals.</p>
<p>You do not need every tool on day one. Build a kit, see what bugs you about the finish, then upgrade the part of your process that needs help. For some collectors, a clean straight build is the goal. For others, customization, paint, and weathering are the whole mission. Both belong on the shelf.</p>
<h2>Buy Drops and Pre-Orders Without the Stress</h2>
<p>Collectibles move on different timelines than ordinary retail. A product may be announced months ahead, arrive in limited waves, sell through quickly, or return later through a reprint. That uncertainty is exciting right up until it makes you buy three things you did not plan for.</p>
<p>Pre-orders are most useful for releases you know you would regret missing. They are less useful as a reflex. Before committing, ask whether the item fits your display, your budget, and your actual fandom. A pre-order is still a purchase, not a wish list button.</p>
<p>It also pays to read store policies before checkout, especially for pre-orders, order holds, shipping timelines, cancellations, and payment requirements. Clear policies are not buzzkill energy. They protect collectors from surprises and help stores keep high-demand releases moving fairly. If you are combining orders or holding items for later shipment, understand the timeline and any conditions before you build your cart.</p>
<p>For hot releases, use your own system. Keep a short list of must-haves, nice-to-haves, and items you will only buy on sale. Follow new-release announcements, but do not let every announcement become an emergency. The collector who knows their priorities has more fun than the collector who spends all month chasing fear of missing out.</p>
<h2>Display, Storage, and Box Decisions</h2>
<p>Your display setup should match how you collect. If you are an in-box collector, protect packaging from direct sunlight, moisture, and crushing weight. Keep boxes upright where possible, and avoid stacking heavy items on top of window boxes or delicate corners. Condition matters when packaging is part of the collectible.</p>
<p>If you open and display, give figures and kits breathing room. Crowded shelves make it harder to appreciate sculpt details and easier to knock over a favorite piece while reaching for something else. Dust is part of the game, so a soft brush, microfiber cloth, or enclosed display case can go a long way.</p>
<p>Gunpla has its own display needs. A stable pose matters more than a dramatic pose if the kit is going on a high shelf. Use action bases when a flying, jumping, or one-legged pose needs extra support. Keep completed kits away from strong sun and extreme heat, which can affect plastic over time. Save spare hands, weapons, and small accessories in labeled bags or organizer compartments. Future you will be grateful when it is time to switch poses.</p>
<p>There is no universal rule on keeping boxes. Some builders flatten and save art boxes. Some keep every package. Some recycle after checking that all parts are accounted for. Keep what adds value to your collecting experience and storage plan. A wall of empty boxes is only cool if it is not blocking the closet door.</p>
<h2>Find Your Next Bandai Favorite</h2>
<p>The best collections carry a little personal history. Maybe yours starts with the first Gundam series you watched, a childhood <a href="https://utopiatoysandmodels.com/products/dragon-ball-son-goku-iii-g-x-materia-figure">Dragon Ball favorite</a>, or a character that made you pick up manga again. Let that connection guide the next purchase more than hype, resale chatter, or whatever everyone else is posting this week.</p>
<p>A curated shop such as Utopia Toys and Models can make that search easier by organizing collectibles around the series, brands, and product types collectors already use to shop. That means less time wandering a generic toy aisle and more time finding the right grade, character, or franchise for your shelf.</p>
<p>Keep your next Knoxville Bandai find fun, intentional, and ready for display. The perfect collectible is not always the rarest one. Sometimes it is the one that makes you clear a spot before you even get home.</p>]]>
    </content>
  </entry>
  <entry>
    <id>https://utopiatoysandmodels.com/blogs/news/are-acrylic-risers-worth-it-for-model-displays</id>
    <published>2026-08-31T22:31:32-04:00</published>
    <updated>2026-08-31T22:31:33-04:00</updated>
    <link rel="alternate" type="text/html" href="https://utopiatoysandmodels.com/blogs/news/are-acrylic-risers-worth-it-for-model-displays"/>
    <title>Are Acrylic Risers Worth It for Model Displays</title>
    <author>
      <name>Editorial Team</name>
    </author>
    <summary type="html">
      <![CDATA[Are acrylic risers worth it for model displays: Explore whether acrylic risers justify the cost for model and figure displays. Compare types, weight.<p><a class="read-more" href="https://utopiatoysandmodels.com/blogs/news/are-acrylic-risers-worth-it-for-model-displays">More</a></p>]]>
    </summary>
    <content type="html">
      <![CDATA[<h2 id="table-of-contents">Table of Contents</h2>
<ul>
<li><a href="#what-acrylic-risers-do-for-model-displays">What Acrylic Risers Do for Model Displays</a></li>
<li><a href="#gundam-model-kit-display-ideas-with-risers">Gundam Model Kit Display Ideas with Risers</a></li>
<li><a href="#how-to-arrange-figures-on-risers-effectively">How to Arrange Figures on Risers Effectively</a></li>
<li><a href="#acrylic-riser-weight-capacity-and-material-durability">Acrylic Riser Weight Capacity and Material Durability</a></li>
<li><a href="#comparing-single-tier-vs-multi-tier-display-systems">Comparing Single-Tier vs. Multi-Tier Display Systems</a></li>
<li><a href="#cost-vs-value-when-risers-make-financial-sense">Cost vs. Value: When Risers Make Financial Sense</a></li>
<li><a href="#common-mistakes-to-avoid-when-using-display-risers">Common Mistakes to Avoid When Using Display Risers</a></li>
<li><a href="#frequently-asked-questions">Frequently Asked Questions</a></li>
</ul>
<p><em>Last Updated: September 1, 2026</em></p>
<h2 id="what-acrylic-risers-do-for-model-displays">What Acrylic Risers Do for Model Displays</h2>
<p>Are acrylic risers worth it for model displays? The answer depends entirely on what you're trying to achieve with your collection. At Utopia Toys and Models, we've helped countless collectors transform their displays from flat, cramped shelves into dynamic, visually compelling showcases. Acrylic risers solve a specific problem: they create vertical hierarchy, maximize shelf space, and keep your models visible from multiple angles without competing for real estate.</p>
<p>Here's what matters most: risers aren't just about looking good, though they absolutely do that. They're about functionality. A well-arranged display with proper risers lets you fit more models in the same footprint while making each one more visible than it would be on a flat surface. That's not theoretical, it's how collectors who care about presentation actually organize their shelves.</p>
<p>The core value proposition is simple. Without risers, your <a href="/blogs/news/gundam-model-kit-scales-explained">Gundam models sit</a> side by side, and anything behind the front row disappears. With risers, you create sightlines. A figure on a riser sits at eye level even when it's positioned deeper in the cabinet. That changes everything about how your collection reads as a cohesive display rather than inventory.</p>
<p>But there's a catch. Risers only work if you choose the right ones for your specific use case. A riser designed for diecast cars might be too small for larger action figures. A riser without proper stability features can damage your models if it tips. And if you don't think through your layout before buying, you'll end up with mismatched heights and a cluttered look that defeats the purpose.</p>
<h2 id="gundam-model-kit-display-ideas-with-risers">Gundam Model Kit Display Ideas with Risers</h2>
<p>Gundam models demand a different approach than smaller collectibles. These kits, whether you're displaying High Grade, Real Grade, or Master Grade builds, have visual weight. They command attention. The right risers amplify that presence instead of fighting against it.</p>
<p>Start with scale. Most Gundam models sit between 4 and 8 inches tall depending on grade (<a rel="noopener noreferrer" target="_blank" href="https://www.bandai.com/News/post/gundam/gundam-artifact-shokugans-mini-gundam-kits">bandai.com</a>). You need risers that create enough elevation difference to matter visually without dwarfing the model. A 2-inch riser works. A 4-inch riser creates dramatic effect. The key is variety. If all <a href="/blogs/news/how-to-clean-collectible-figures">your risers</a> are the same height, your display becomes monotonous. Mix heights to create visual rhythm.</p>
<p>Consider the backdrop. Gundam models look exceptional against solid backgrounds, black, white, or neutral gray. Acrylic risers in clear construction work best here because they disappear visually and let the model command attention. If you're using colored risers, they should complement the model's color scheme, not compete with it. A white Gundam on a white riser vanishes. A white Gundam on a black riser pops.</p>
<p>Grouping matters more than you'd expect. Instead of scattering individual models across a shelf, cluster them by series or color palette. Three RX-78 variants on risers at different heights tell a story. Thirteen random Gundams at random heights just look busy. Create focal points. One showpiece model, your favorite build, your most detailed work, should occupy a prime position with supporting models arranged around it at varying heights.</p>
<p>Lighting transforms everything. If your display cabinet has backlighting or side lighting, position your risers to take advantage of it. The acrylic transparency means light passes through the riser and illuminates the model from beneath. This creates depth and dimension that flat displays can't achieve. Without lighting, even the best riser arrangement feels flat.</p>
<figure class="article-content-image my-8" style="margin:2em 0;padding:0;background:transparent;border:0;"><img src="https://cdn.grandranker.com/articles/are-acrylic-risers-worth-it-for-model-displays-content-1-1788229864.jpg" alt="A collector's shelf displaying multiple Gundam model kits on clear acrylic risers at varying heights, with proper spacing between figures and a neutral background, showing clear visual hierarchy and sightlines" class="w-full rounded-lg shadow-lg" loading="lazy" style="display:block;width:100%;max-width:100%;height:auto;border-radius:8px;margin:0 auto;"><figcaption class="text-sm text-gray-600 mt-2 text-center" style="font-size:0.875em;color:#6b7280;text-align:center;margin-top:0.6em;">A collector's shelf displaying multiple Gundam model kits on clear acrylic risers at varying heights, with proper spacing between figures and a neutral background, showing clear visual hierarchy and sightlines</figcaption></figure>
<h2 id="how-to-arrange-figures-on-risers-effectively">How to Arrange Figures on Risers Effectively</h2>
<p>The difference between a mediocre display and a stunning one comes down to arrangement logic. Most collectors make the same mistake: they place their best figures front and center, then fill in the gaps. That creates a pyramid shape that actually hides your collection instead of showcasing it.</p>
<p>Reverse that instinct. Place your largest or most visually dominant model slightly back and elevated. Surround it with smaller supporting figures at varying heights. This creates depth. Your eye travels through the display instead of stopping at the front row. You see more models because they're not stacked on top of each other competing for attention.</p>
<p>Height variation is mechanical but critical. If you have five risers, don't make them 1 inch, 2 inches, 3 inches, 4 inches, 5 inches in a line. Instead, create a pattern: 1 inch on the left, 4 inches in the middle-back, 2 inches on the right, 3 inches center-front. This breaks up the visual monotony and creates sightlines that let you see deeper into the display.</p>
<p>Spacing prevents crowding. Leave air between models. A common mistake is treating the shelf like a storage unit instead of a display. Space is part of the design. If you have room for twelve figures, display ten. The negative space makes each figure more powerful, not less.</p>
<p>Consider sight angles. Where will you actually look at this display? If it's a shelf you see from your desk, arrange it for that specific vantage point. Front-facing? Create depth by staggering heights front to back. Side view? Arrange in a gentle curve so the eye flows left to right. Most displays get viewed from one primary angle, so optimize for that.</p>
<figure class="article-content-image my-8" style="margin:2em 0;padding:0;background:transparent;border:0;"><img src="https://cdn.grandranker.com/articles/are-acrylic-risers-worth-it-for-model-displays-content-2-1788229884.jpg" alt="A detailed overhead view of an acrylic riser arrangement showing multiple anime figures and Gundam models positioned at varying heights with intentional spacing, demonstrating visual hierarchy and depth on a collector's shelf" class="w-full rounded-lg shadow-lg" loading="lazy" style="display:block;width:100%;max-width:100%;height:auto;border-radius:8px;margin:0 auto;"><figcaption class="text-sm text-gray-600 mt-2 text-center" style="font-size:0.875em;color:#6b7280;text-align:center;margin-top:0.6em;">A detailed overhead view of an acrylic riser arrangement showing multiple anime figures and Gundam models positioned at varying heights with intentional spacing, demonstrating visual hierarchy and depth on a collector's shelf</figcaption></figure>
<h2 id="acrylic-riser-weight-capacity-and-material-durability">Acrylic Riser Weight Capacity and Material Durability</h2>
<p>This is where risers stop being aesthetic and become functional. Weight capacity determines what you can actually display. A riser that looks sturdy but can't handle your models creates risk.</p>
<p>Standard acrylic risers come in different thicknesses. Thin acrylic (2-3mm) is affordable but flexes under weight. Medium acrylic (4mm) handles most collectibles without issue. Thick acrylic (6mm and above) is overkill for most home displays but necessary for commercial installations or if you're displaying particularly heavy models.</p>
<p>The weight-bearing question matters most for larger Gundam kits. A Master Grade Gundam fully built and detailed can weigh 8-12 ounces. That's not heavy in absolute terms, but it concentrates force on a small footprint. A riser rated for 5 pounds per square inch handles that easily. A flimsy riser rated for 2 pounds might flex visibly under that load, and visible flex means visible stress on your model. <a rel="noopener noreferrer" target="_blank" href="https://blog.superiorfitsleeves.com/alternatives-to-standard-plastic-card-stands">alternative display stands</a>.</p>
<p>Material quality determines longevity. Cast acrylic, the type used in most display risers, stays clear for years if maintained properly (<a rel="noopener noreferrer" target="_blank" href="https://pmc.ncbi.nlm.nih.gov/articles/PMC10088630/">peer-reviewed research</a>). Injection-molded acrylic is cheaper but yellows faster under UV exposure (<a rel="noopener noreferrer" target="_blank" href="https://store.astm.org/products-services/standards-and-publications/standards/plastics-standards.html">astm.org</a>). <a href="/blogs/news/best-display-cases-for-anime-figures-2026-guide">If your display</a> gets direct sunlight, cast acrylic is worth the premium. If it's in a cabinet with controlled lighting, either works.</p>
<p>Scratches are the real enemy. Acrylic scratches easily. A riser that looked pristine six months ago can look cloudy if you've cleaned it with rough cloths or placed models without care. The good news: minor scratches don't affect function. The bad news: they're visible and they accumulate. Handle your risers carefully during setup and when rearranging. Use soft cloths for cleaning. Avoid abrasive materials.</p>
<p>Stability features matter more than material thickness. A riser with a wide base and low center of gravity won't tip even under moderate weight. A tall, narrow riser with a small footprint is unstable regardless of acrylic quality. Look for risers with non-slip feet or ridges that prevent models from sliding. These features cost slightly more but prevent damage that costs far more to repair.</p>
<h2 id="comparing-single-tier-vs-multi-tier-display-systems">Comparing Single-Tier vs. Multi-Tier Display Systems</h2>
<p>The choice between a single shelf with risers and a dedicated multi-tier riser system comes down to space, budget, and aesthetic preference.</p>
<p>Single-tier risers, individual acrylic blocks you place on an existing shelf, offer flexibility. You buy exactly what you need. You arrange them however you want. You can change the layout without replacing the entire system. They work in existing shelving, display cases, or even on dressers. This approach appeals to collectors who like to experiment and rearrange frequently.</p>
<p>The downside: single-tier risers require planning. You need to visualize the final arrangement before buying. You might end up with mismatched risers if you buy from different suppliers. And managing individual pieces means more clutter in storage when you're not using them.</p>
<p class="cta-inline" style="background-color: #fffde408; border-left: 4px solid #fffde4; padding: 16px 20px; margin: 24px 0; border-radius: 0 8px 8px 0;">
     <a href="https://utopiatoysandmodels.com" style="color: #fffde4; font-weight: 600; text-decoration: underline;">Get Started Today →</a>
</p>
<p>Multi-tier systems, pre-assembled risers with built-in steps, create instant visual impact. They're designed as a cohesive unit. Heights are calculated to work together. Setup takes minutes instead of hours of arrangement. They photograph beautifully because the geometry is intentional.</p>
<p>The trade-off: multi-tier systems are less flexible. You're locked into the height configuration. Rearranging means moving the entire structure. They take up more footprint space even though they use vertical space efficiently. And they're more expensive as a single purchase, though <a href="/blogs/news/gundam-model-kit-storage-solutions-guide">the cost</a>-per-riser might be lower.</p>
<table style="width:100%; border-collapse:collapse; margin:2rem 0; font-size:14px; line-height:1.6;">
<thead style="background-color:#f8f9fa; padding:12px 16px; text-align:left; font-weight:600; border-bottom:2px solid #e5e7eb;">
<tr>
<th style="background-color:#f8f9fa; padding:12px 16px; text-align:left; font-weight:600; border-bottom:2px solid #e5e7eb;">Aspect</th>
<th style="background-color:#f8f9fa; padding:12px 16px; text-align:left; font-weight:600; border-bottom:2px solid #e5e7eb;">Single-Tier Risers</th>
<th style="background-color:#f8f9fa; padding:12px 16px; text-align:left; font-weight:600; border-bottom:2px solid #e5e7eb;">Multi-Tier Systems</th>
</tr>
</thead>
<tbody>
<tr>
<td style="padding:12px 16px; border-bottom:1px solid #e5e7eb;">Flexibility</td>
<td style="padding:12px 16px; border-bottom:1px solid #e5e7eb;">High, arrange however you want</td>
<td style="padding:12px 16px; border-bottom:1px solid #e5e7eb;">Low, fixed configuration</td>
</tr>
<tr>
<td style="padding:12px 16px; border-bottom:1px solid #e5e7eb;">Setup Time</td>
<td style="padding:12px 16px; border-bottom:1px solid #e5e7eb;">30-60 minutes</td>
<td style="padding:12px 16px; border-bottom:1px solid #e5e7eb;">5-10 minutes</td>
</tr>
<tr>
<td style="padding:12px 16px; border-bottom:1px solid #e5e7eb;">Space Efficiency</td>
<td style="padding:12px 16px; border-bottom:1px solid #e5e7eb;">Depends on your arrangement</td>
<td style="padding:12px 16px; border-bottom:1px solid #e5e7eb;">Optimized by design</td>
</tr>
<tr>
<td style="padding:12px 16px; border-bottom:1px solid #e5e7eb;">Cost</td>
<td style="padding:12px 16px; border-bottom:1px solid #e5e7eb;">Lower upfront, scalable</td>
<td style="padding:12px 16px; border-bottom:1px solid #e5e7eb;">Higher upfront cost</td>
</tr>
<tr>
<td style="padding:12px 16px; border-bottom:1px solid #e5e7eb;">Rearrangement</td>
<td style="padding:12px 16px; border-bottom:1px solid #e5e7eb;">Easy</td>
<td style="padding:12px 16px; border-bottom:1px solid #e5e7eb;">Requires moving entire unit</td>
</tr>
<tr>
<td style="padding:12px 16px; border-bottom:1px solid #e5e7eb;">Aesthetic Cohesion</td>
<td style="padding:12px 16px; border-bottom:1px solid #e5e7eb;">Depends on matching</td>
<td style="padding:12px 16px; border-bottom:1px solid #e5e7eb;">Built-in visual harmony</td>
</tr>
<tr>
<td style="padding:12px 16px; border-bottom:1px solid #e5e7eb;">Best For</td>
<td style="padding:12px 16px; border-bottom:1px solid #e5e7eb;">Frequent changers, small collections</td>
<td style="padding:12px 16px; border-bottom:1px solid #e5e7eb;">Permanent displays, larger collections</td>
</tr>
</tbody>
</table>
<p>For most collectors, the answer is hybrid: use a multi-tier system as your anchor display, then supplement with single-tier risers for overflow or secondary collections. This gives you the visual impact of a designed system plus the flexibility to expand.</p>
<h2 id="cost-vs-value-when-risers-make-financial-sense">Cost vs. Value: When Risers Make Financial Sense</h2>
<p>Acrylic risers aren't expensive in absolute terms, but they're an investment that only makes sense in specific scenarios.</p>
<p>If you have five models and a shelf, risers are probably overkill. The cost-to-benefit ratio doesn't justify it. You have plenty of space already.</p>
<p>If you have twenty models and limited shelf space, risers become practical. They let you display more in the same footprint. That's value, the ability to show your collection instead of rotating pieces in and out of storage.</p>
<p>If you're a serious collector with fifty-plus models and a dedicated display area, risers aren't optional. They're infrastructure. The question isn't whether to buy them but which system to buy.</p>
<p>The financial logic is this: compare the cost of risers against the cost of additional shelving or display cabinets. A set of risers costs less than a new shelf unit. If risers let you eliminate the need for extra furniture, they've paid for themselves in space savings alone.</p>
<p>There's also the intangible value of presentation. A well-displayed collection is more enjoyable to look at. You spend more time appreciating your models. You're more likely to show them to friends. That's not quantifiable, but it's real. If you care enough about your collection to buy quality models, you probably care enough to display them properly.</p>
<p>The break-even point is roughly fifteen to twenty models. Below that, risers are nice-to-have. Above that, they're necessary infrastructure.</p>
<h2 id="common-mistakes-to-avoid-when-using-display-risers">Common Mistakes to Avoid When Using Display Risers</h2>
<p>The most frequent error is overcrowding. Collectors see risers as permission to display everything at once. A riser doesn't create space; it creates the illusion of space. If you pack models densely, they compete visually and none of them shine.</p>
<p>The second mistake is ignoring stability. Risers need a stable base. A wobbly shelf amplifies the wobble in the risers. A riser on an uneven surface tips easily. Test your setup before placing valuable models on it. A five-minute stability check prevents a broken model.</p>
<p>Third: mismatched aesthetics. Buying risers from three different sources creates visual chaos. Stick with one supplier or one material type. Consistency matters more than you'd think. Mixed clear and frosted acrylic looks chaotic. Mixed heights without logic look random.</p>
<p>Fourth mistake: static arrangements. Once you set up risers, many collectors never touch them again. But arrangements age. What looked balanced six months ago might feel stale now. Rearrange seasonally. Rotate your display. This keeps it fresh and lets you appreciate different models.</p>
<p>Fifth: neglecting lighting. A display without proper lighting is like a movie without sound. Backlighting, spotlights, or even ambient LED strips transform a good display into a great one. If you're investing in risers, invest in lighting too.</p>
<p>Sixth: choosing risers based on price alone. A cheap riser that flexes visibly or scratches easily costs more in the long run because you'll replace it. Mid-range acrylic risers from reputable makers hold up better and look better. The price difference is usually under ten dollars per riser. It's worth it.</p>
<p>Finally, avoid risers that are too tall or too narrow. A riser that's unstable or makes your models look tiny defeats the purpose. Test before committing to a full set.</p>
<hr>
<p>The real question isn't whether acrylic risers are worth it in theory, it's whether they solve your specific problem. If <a href="/blogs/news/what-are-high-grade-gundam-kits">you're displaying</a> a growing collection in limited space, they're essential. If you're showing off carefully curated models you care about, they're the right tool. If you're trying to fit everything you own into one shelf, they're a band-aid on a space problem.</p>
<p>At Utopia Toys and Models, we work with collectors every day who transform their displays with the right risers. We carry risers that match Bandai Gundam models, Funko collectibles, and Kotobukiya figures. Whether you need single-tier risers for flexibility or a complete multi-tier system, our team can help you find the right setup for your collection and your space. Visit us to explore options that work for your specific models and display goals.</p>
<section style="margin:3rem 0 2rem 0;" itemscope itemtype="https://schema.org/FAQPage">
<h2 style="font-size:1.5rem; font-weight:700; margin:0 0 4px 0;" id="frequently-asked-questions">Frequently Asked Questions</h2>
<div style="padding:20px 0; border-bottom:1px solid #e5e7eb;" itemscope itemprop="mainEntity" itemtype="https://schema.org/Question">
<h3 style="font-size:1.1rem; font-weight:600; margin:0 0 8px 0;" itemprop="name">Q: Are acrylic risers durable enough for heavy model kits?</h3>
<div style="line-height:1.7; font-size:0.95rem;" itemscope itemprop="acceptedAnswer" itemtype="https://schema.org/Answer">
<p itemprop="text" style="margin:0;">A: Durability depends on acrylic thickness and the riser's weight capacity. Quality risers made from 4mm or thicker acrylic can safely support most model kits and action figures. However, extremely heavy display pieces (such as large-scale Gundam models or resin figures exceeding 5 pounds) require risers specifically rated for higher load capacity. Always check the manufacturer's weight limit before placing items on acrylic risers to prevent cracking or warping over time.</p>
</div>
</div>
<div style="padding:20px 0; border-bottom:1px solid #e5e7eb;" itemscope itemprop="mainEntity" itemtype="https://schema.org/Question">
<h3 style="font-size:1.1rem; font-weight:600; margin:0 0 8px 0;" itemprop="name">Q: What is the best material for a display case for collectibles?</h3>
<div style="line-height:1.7; font-size:0.95rem;" itemscope itemprop="acceptedAnswer" itemtype="https://schema.org/Answer">
<p itemprop="text" style="margin:0;">A: Acrylic is the most popular choice for collectible displays because it offers excellent optical clarity, is affordable, and resists yellowing better than polycarbonate. Clear acrylic provides an unobstructed view of your models and figures while maintaining transparency. For maximum protection from dust and damage, enclosed display cases with acrylic lids and removable risers offer a good combination of visibility and preservation, though open risers work well for accessible collections.</p>
</div>
</div>
<div style="padding:20px 0; border-bottom:1px solid #e5e7eb;" itemscope itemprop="mainEntity" itemtype="https://schema.org/Question">
<h3 style="font-size:1.1rem; font-weight:600; margin:0 0 8px 0;" itemprop="name">Q: How do I maximize shelf space with acrylic risers?</h3>
<div style="line-height:1.7; font-size:0.95rem;" itemscope itemprop="acceptedAnswer" itemtype="https://schema.org/Answer">
<p itemprop="text" style="margin:0;">A: Create visual hierarchy by staggering riser heights across your shelf. Place taller risers toward the back and shorter ones in front to ensure every figure is visible. Multi-tier risers allow you to stack items vertically, effectively doubling or tripling your display capacity without expanding your footprint. Group similar-sized pieces together and use risers strategically to fill gaps, turning a single shelf into a dynamic, layered display that showcases your entire collection.</p>
</div>
</div>
<div style="padding:20px 0; border-bottom:1px solid #e5e7eb;" itemscope itemprop="mainEntity" itemtype="https://schema.org/Question">
<h3 style="font-size:1.1rem; font-weight:600; margin:0 0 8px 0;" itemprop="name">Q: Why do collectors prefer acrylic stands for anime figures?</h3>
<div style="line-height:1.7; font-size:0.95rem;" itemscope itemprop="acceptedAnswer" itemtype="https://schema.org/Answer">
<p itemprop="text" style="margin:0;">A: Collectors favor acrylic risers because they're nearly invisible, allowing figures and models to be the visual focus. Unlike wood or metal stands, acrylic doesn't distract from the piece being displayed. The material also provides stability without adding bulk, and its clear construction works with any aesthetic, minimalist, modern, or eclectic. Additionally, acrylic is affordable and easy to clean, making it practical for long-term figure care and display maintenance.</p>
</div>
</div>
</section>
<div class="cta-button-container" style="text-align: center; margin: 32px 0;">
    <a href="https://utopiatoysandmodels.com" class="cta-button" style="display: inline-block; background-color: #fffde4; color: white; padding: 14px 32px; border-radius: 8px; text-decoration: none; font-weight: 600; font-size: 16px;">Get Started Today</a>
</div>
<p class="grandranker-branding" style="margin-top: 3rem; padding-top: 1.5rem; border-top: 1px solid #e5e7eb; font-size: 0.875rem; text-align: center;">This article was written using <a href="https://grandranker.com/" target="_blank" rel="noopener">GrandRanker</a></p>]]>
    </content>
  </entry>
  <entry>
    <id>https://utopiatoysandmodels.com/blogs/news/knoxville-funko-pop-collecting</id>
    <published>2026-08-31T21:04:01-04:00</published>
    <updated>2026-08-31T21:04:03-04:00</updated>
    <link rel="alternate" type="text/html" href="https://utopiatoysandmodels.com/blogs/news/knoxville-funko-pop-collecting"/>
    <title>Knoxville Funko POP! Collecting Starts Here</title>
    <author>
      <name>Admin</name>
    </author>
    <summary type="html">
      <![CDATA[Knoxville Funko collectors can find anime, horror, Marvel, and more POP! figures with tips for pre-orders, display planning, and buying with confidence.<p><a class="read-more" href="https://utopiatoysandmodels.com/blogs/news/knoxville-funko-pop-collecting">More</a></p>]]>
    </summary>
    <content type="html">
      <![CDATA[<p>That one empty spot on the shelf has a way of becoming a mission. Maybe it is the final Straw Hat, a horror icon that completes your October display, or a convention-exclusive version you missed the first time around. For Knoxville Funko collectors, the fun is not just owning the figure. It is knowing your collection has a point of view.</p>
<p>Funko POP! figures can be an easy entry into collecting, but building a collection you still love a year from now takes a little intention. With thousands of characters across anime, comics, movies, music, games, and horror, buying everything is not the goal. Finding your fandom is.</p>
<h2>Knoxville Funko Collecting Is Better by Fandom</h2>
<p>A shelf full of random POP! boxes can look impressive for a minute. A shelf built around the worlds you actually care about feels personal every time you walk past it. Start with the franchises that already have your attention, whether that is <a href="https://utopiatoysandmodels.com/products/one-piece-grand-line-series-usopp">One Piece</a>, Dragon Ball, Marvel, Demon Slayer, Star Wars, WWE, or classic slashers.</p>
<p>This is where shopping by franchise beats shopping by whatever happens to be trending. A collector chasing anime might want a mix of main characters, villains, transformations, and a few display-worthy oversized pieces. A horror collector may prefer a tightly focused lineup of Universal Monsters, 1980s villains, and <a href="https://utopiatoysandmodels.com/products/arriving-soon-the-ring-sadako-noddle-stopper-figure">modern cult favorites</a>. Neither approach is more correct. The right collection is the one that makes you want to rearrange the shelf at midnight because a new figure finally arrived.</p>
<p>There is also a practical upside to choosing a lane. You will notice gaps faster, recognize new releases more easily, and avoid spending your budget on figures that only felt exciting in the moment. A good collection can grow wide later. Give it a strong center first.</p>
<h3>Pick a collecting rule you can actually keep</h3>
<p>Your rule does not need to be complicated. You could collect only one franchise, only characters you have watched or played, only boxed figures, or only pieces you plan to display out of box. Some collectors chase every variation of one character. Others keep a short wishlist and refuse impulse buys.</p>
<p>The trade-off is simple: stricter rules create a cleaner collection, while flexible rules leave room for surprise finds. If your shelf space is limited, a tighter rule usually saves both space and regret.</p>
<h2>How to Shop for Funko POP! Figures With Confidence</h2>
<p>Collector excitement is real, especially when a <a href="https://utopiatoysandmodels.com/products/pre-order-funko-pop-movies-teenage-mutant-ninja-turtles-raphael-in-trench-coat-1612">new release</a>, exclusive, or restock hits. But a little product awareness goes a long way. Check the character name, edition, box art, figure size, and whether the item is a standard release, specialty item, chase possibility, or larger-format collectible. Similar-looking listings can represent very different versions of the same character.</p>
<p>For boxed collectors, condition matters. Packaging is part of the collectible for many fans, so it is fair to care about corners, windows, and creases. At the same time, decide how perfect you need a box to be before you shop. If you plan to open every POP!, a minor box flaw may not change the value of the purchase for you. If you collect sealed figures, be clear about your standards from the start.</p>
<p>Authenticity matters too. Buy from retailers that identify products clearly and set straightforward expectations around fulfillment. The collectible market moves fast, and high-demand releases attract confusion as well as bad actors. A store with visible policies around pre-orders, shipping, returns, holds, and fraud prevention is not killing the vibe. It is helping serious collectors shop without guesswork.</p>
<h2>Pre-Orders Are a Tool, Not a Panic Button</h2>
<p>Pre-orders are useful when you know a figure belongs in your collection. They are especially helpful for collectors who follow a franchise closely and do not want to hunt for a release after it sells through. But they work best when you treat them as planned purchases, not as a response to every announcement graphic in your feed.</p>
<p>Before placing a pre-order, ask three questions: Do I have room for it? Does it fit my collection rule? Would I still want it if there were no fear of missing out?</p>
<p>Release dates can shift in collectibles. Manufacturer timelines, shipping schedules, and allocation changes are part of the territory, particularly for imported or high-demand items. That does not mean pre-orders are unreliable. It means collectors should read the stated terms, keep track of what they have committed to, and understand that estimated arrival dates are estimates.</p>
<p>Order-hold options can also make sense for repeat buyers who want to combine purchases or wait for multiple items. Just make sure you understand the store's hold window and shipping requirements. Clear expectations protect your budget and help retailers keep inventory moving fairly.</p>
<h2>Build a Display That Shows Off Your Collection</h2>
<p>A great POP! display does not require a full collector room. A bookcase, floating shelf, desk riser, or a dedicated section of an entertainment center can do the job. What matters is making the display easy to enjoy rather than cramming every available inch.</p>
<p>If you keep figures in box, stack with care and avoid unstable towers. Keep boxes away from direct sunlight, damp basements, heat vents, and areas where pets or kids can turn a prized exclusive into a floor-level accident. Sunlight can fade packaging, while humidity and temperature swings can be rough on cardboard over time.</p>
<p>Out-of-box collectors have more freedom to create scenes. Group heroes with villains, put larger figures in the back, and use risers so shorter characters do not disappear behind the front row. A small themed display can have more impact than fifty figures lined up at the same height. Try a haunted movie shelf in fall, then swap to anime rivals, comic characters, or holiday releases when you want a change.</p>
<p>Do not forget dust. It is the silent final boss of every open display. A soft microfiber cloth and regular shelf wipe-down will keep figures looking sharp without turning maintenance into a weekend project.</p>
<h2>Find Your Fandom, Then Watch the Drops</h2>
<p>The most satisfying part of collecting is the anticipation. New announcements give you something to track, discuss, and plan around with other fans. Mailing lists and social posts can be useful for learning about arrivals, restocks, clearance finds, and upcoming pre-orders before your local hunt turns into a long chain of sold-out searches.</p>
<p>At Utopia Toys and Models, that fandom-first approach means collectors can browse closer to how they think: by anime, horror, Marvel, animation, music, and the characters that make the collection feel like theirs. It is a better experience than treating every figure like it belongs in one giant vinyl aisle.</p>
<p>Still, not every release needs to come home with you. The best collection is not a receipt history. It is a display of stories, characters, and moments you chose on purpose. Leave a little shelf space open. The next figure that truly belongs there will make itself known.</p>]]>
    </content>
  </entry>
  <entry>
    <id>https://utopiatoysandmodels.com/blogs/news/how-to-get-chase-figures-in-blind-boxes</id>
    <published>2026-08-30T23:21:49-04:00</published>
    <updated>2026-08-30T23:21:50-04:00</updated>
    <link rel="alternate" type="text/html" href="https://utopiatoysandmodels.com/blogs/news/how-to-get-chase-figures-in-blind-boxes"/>
    <title>How to Get Chase Figures in Blind Boxes</title>
    <author>
      <name>Editorial Team</name>
    </author>
    <summary type="html">
      <![CDATA[Learn how to get chase figures in blind boxes. Discover rarity tiers, weighing methods, case purchases, and safe collecting strategies.<p><a class="read-more" href="https://utopiatoysandmodels.com/blogs/news/how-to-get-chase-figures-in-blind-boxes">More</a></p>]]>
    </summary>
    <content type="html">
      <![CDATA[<h2 id="table-of-contents">Table of Contents</h2>
<ul>
<li>
<a href="#what-are-chase-figures-and-rarity-tiers">What Are Chase Figures and Rarity Tiers?</a><ul>
<li><a href="#how-rarity-tiers-and-odds-work">How Rarity Tiers and Odds Work</a></li>
<li><a href="#secret-figures-vs-chase-figures">Secret Figures vs. Chase Figures</a></li>
</ul>
</li>
<li>
<a href="#how-chase-figures-are-inserted-into-cases">How Chase Figures Are Inserted Into Cases</a><ul><li><a href="#case-assortment-and-distribution-ratios">Case Assortment and Distribution Ratios</a></li></ul>
</li>
<li>
<a href="#how-to-weigh-blind-boxes-for-chase-figures">How to Weigh Blind Boxes for Chase Figures</a><ul>
<li><a href="#why-weighing-has-technical-limitations">Why Weighing Has Technical Limitations</a></li>
<li><a href="#identifying-chase-figures-by-box-codes-and-barcodes">Identifying Chase Figures by Box Codes and Barcodes</a></li>
</ul>
</li>
<li>
<a href="#full-case-vs-single-blind-box-purchases">Full Case vs. Single Blind Box Purchases</a><ul><li><a href="#are-full-case-purchases-guaranteed">Are Full Case Purchases Guaranteed?</a></li></ul>
</li>
<li><a href="#packaging-clues-and-silhouette-recognition">Packaging Clues and Silhouette Recognition</a></li>
<li><a href="#the-psychology-behind-blind-box-marketing">The Psychology Behind Blind Box Marketing</a></li>
<li><a href="#safe-secondary-market-trading-and-authentication">Safe Secondary Market Trading and Authentication</a></li>
<li><a href="#smart-collecting-strategies-for-chase-figures">Smart Collecting Strategies for Chase Figures</a></li>
<li><a href="#frequently-asked-questions">Frequently Asked Questions</a></li>
</ul>
<p><em>Last Updated: August 31, 2026</em></p>
<h2 id="what-are-chase-figures-and-rarity-tiers">What Are Chase Figures and Rarity Tiers?</h2>
<p><strong>Chase figures</strong> are rare variant collectibles inserted into blind box cases at lower frequencies than standard figures. They're limited editions with unique paint jobs, special poses, or exclusive molds that command premium prices on the secondary market.</p>
<p>Blind box manufacturers organize distributions into rarity tiers based on pull rates. Common figures might appear in 1 out of every 12 boxes, while chase figures can hit 1 in 72 boxes or lower (<a rel="noopener noreferrer" target="_blank" href="https://pmc.ncbi.nlm.nih.gov/articles/PMC11969734/">peer-reviewed research</a>). Some ultra-rare chase figures appear only once per full case of 144 units. Manufacturers rarely publish exact pull rates, which fuels collector speculation and secondary market demand.</p>
<h3 id="how-rarity-tiers-and-odds-work">How Rarity Tiers and Odds Work</h3>
<p>Rarity tiers follow a predictable pyramid. At the base sit common figures with high volume and low desirability. Moving up, you find uncommon variants with slightly different coloring or accessories, then rare figures with more significant paint variations or mold differences. At the apex sit chase figures.</p>
<p>Manufacturers control odds through production runs. They'll produce 100,000 units of a common figure but only 2,000 of a chase variant. When you buy a blind box, you're pulling from a randomized assortment within a sealed case containing a fixed ratio of common, uncommon, rare, and chase figures.</p>
<p>Pull rates vary dramatically by product line. Some maintain a 1-in-12 common, 1-in-24 uncommon, 1-in-48 rare, 1-in-72 chase distribution. Limited edition releases sometimes feature different odds than standard production runs, which is why collectors track release dates and manufacturing batches obsessively.</p>
<h3 id="secret-figures-vs-chase-figures">Secret Figures vs. Chase Figures</h3>
<p><strong>Secret figures</strong> are unlisted variants intentionally hidden from official product photography and marketing materials. <strong>Chase figures</strong> are officially acknowledged rare variants, even if manufacturers don't publish exact odds.</p>
<p>Some products blur this distinction. A manufacturer might release an official lineup of 12 figures, then include a 13th secret figure in cases without marketing it. That secret figure often has higher rarity than standard chase figures because most collectors don't know to hunt for it. Experienced collectors track community databases and social media to identify newly discovered secret figures, then adjust their purchasing strategy accordingly.</p>
<h2 id="how-chase-figures-are-inserted-into-cases">How Chase Figures Are Inserted Into Cases</h2>
<p>Blind box manufacturers control chase figure distribution at the case level. A case typically contains 144 units (<a rel="noopener noreferrer" target="_blank" href="https://www.ftc.gov/business-guidance/blog/2020/08/loot-boxes-whats-play">the FTC</a>). Within that case, the manufacturer pre-allocates how many chase figures will appear.</p>
<figure class="article-content-image my-8" style="margin:2em 0;padding:0;background:transparent;border:0;"><img src="https://cdn.grandranker.com/articles/how-to-get-chase-figures-in-blind-boxes-content-1-1788146475.jpg" alt="Close-up of an open blind box case showing multiple sealed packs arranged with visible packaging variations and different box designs stacked together" class="w-full rounded-lg shadow-lg" loading="lazy" style="display:block;width:100%;max-width:100%;height:auto;border-radius:8px;margin:0 auto;"><figcaption class="text-sm text-gray-600 mt-2 text-center" style="font-size:0.875em;color:#6b7280;text-align:center;margin-top:0.6em;">Close-up of an open blind box case showing multiple sealed packs arranged with visible packaging variations and different box designs stacked together</figcaption></figure>
<p>The insertion process happens during final packaging. Quality control teams receive specifications for case assortment ratios and physically place figures into boxes according to a predetermined randomization pattern, then seal the cases. This means chase figures aren't randomly distributed across all production; they're deliberately placed into specific cases based on manufacturing batches.</p>
<p>A full case isn't a random grab-bag of 144 boxes. It's a predetermined assortment where the manufacturer has already decided how many chase figures it will contain. The randomization happens within the case structure, not across all global production.</p>
<h3 id="case-assortment-and-distribution-ratios">Case Assortment and Distribution Ratios</h3>
<p>Manufacturers publish case assortments for transparency, though the information often stays within the collector community. A typical assortment might read: "12 common, 4 uncommon, 2 rare, 1 chase per case." This tells you exactly what to expect if you buy a full case.</p>
<p>If a case contains 144 boxes and only 1 chase figure, your odds of hitting that chase are roughly 1 in 144. That single chase figure is placed into one specific box during manufacturing. The randomization is within the boxes, not across them.</p>
<p>Retailers sometimes know the assortment breakdown before cases arrive. Experienced hunters use this data to decide whether a case is worth purchasing. A case with two chase figures is more attractive than one with zero, <a href="/blogs/news/are-anime-figures-a-good-investment-2026-guide">even though</a> the odds remain probabilistically challenging.</p>
<h2 id="how-to-weigh-blind-boxes-for-chase-figures">How to Weigh Blind Boxes for Chase Figures</h2>
<p>The weighing method is popular in the blind box community. The theory is simple: different figures have different weights due to paint application, material density, or mold variations. By weighing individual boxes, collectors attempt to identify which ones contain rare variants.</p>
<p>Many collectors report success with this method, claiming 70-80% accuracy (<a rel="noopener noreferrer" target="_blank" href="https://pmc.ncbi.nlm.nih.gov/articles/PMC6366261/">peer-reviewed research</a>).</p>
<h3 id="why-weighing-has-technical-limitations">Why Weighing Has Technical Limitations</h3>
<p>While weighing can detect some variance, it's far less reliable than collectors claim. Manufacturing tolerances create natural weight variation within a single figure mold. Two common figures from the same production run might weigh slightly different due to paint application inconsistencies or plastic density variation.</p>
<p>Chase figures don't always weigh more. Some variants use lighter materials or thinner paint applications. The weight difference between a common and a chase might be 1-2 grams across a 50-gram figure, within the margin of error for most consumer scales.</p>
<p>Manufacturing batches compound the problem. A case produced in January might have different weight distributions than one from March, even for identical figure lineups. Manufacturers are aware of the weighing phenomenon and intentionally add weight to common figures or reduce weight on chase figures to disrupt the strategy. Any weighing "system" has a shelf life of weeks or months before manufacturing changes render it obsolete.</p>
<h3 id="identifying-chase-figures-by-box-codes-and-barcodes">Identifying Chase Figures by Box Codes and Barcodes</h3>
<p>Barcodes and serial numbers offer slightly more reliable identification than weighing. Some manufacturers encode production batch information into barcodes. Collectors have reverse-engineered these codes to identify which batches contain higher chase concentrations.</p>
<p>Serial numbers sometimes correlate with figure variants. Collectors who've purchased thousands of boxes have mapped these patterns and created databases. The limitation is consistency. Not all manufacturers use meaningful serial number systems, and patterns change with new production runs.</p>
<p>Barcode analysis requires access to manufacturer databases or crowd-sourced community data. The most dedicated collectors maintain spreadsheets with hundreds of data points, correlating barcodes to confirmed figure pulls.</p>
<h2 id="full-case-vs-single-blind-box-purchases">Full Case vs. Single Blind Box Purchases</h2>
<p>Single box purchases offer low financial risk but terrible odds for hitting chase figures. Full cases cost significantly more upfront but provide a guaranteed assortment and better per-unit odds.</p>
<p>A single box typically contains one random figure from the complete lineup. If chase figures represent 1% of all production, your odds on a single box are roughly 1 in 100. Most collectors buy 10-20 individual boxes before hitting a chase.</p>
<p>Full cases guarantee you'll receive the case assortment. If the case contains one chase figure, you're guaranteed to get it. If it contains zero, you won't. This certainty appeals to serious collectors who want to <a href="/blogs/news/organizing-your-anime-figure-collection-a-complete-guide">complete sets or secure specific variants</a>.</p>
<h3 id="are-full-case-purchases-guaranteed">Are Full Case Purchases Guaranteed?</h3>
<p>A full case guarantees you'll receive the predetermined assortment for that specific case, but it doesn't guarantee you'll get the chase figures you want. If a case contains one chase figure and it's a variant you already own, you're out of luck.</p>
<p class="cta-inline" style="background-color: #fffde408; border-left: 4px solid #fffde4; padding: 16px 20px; margin: 24px 0; border-radius: 0 8px 8px 0;">
     <a href="https://utopiatoysandmodels.com" style="color: #fffde4; font-weight: 600; text-decoration: underline;">Get Started Today →</a>
</p>
<p>This is where secondary market trading becomes essential. Collectors buy full cases, identify which figures they need, and trade duplicates with other collectors. Retailers sometimes offer case guarantees, "Buy this case and you're guaranteed to hit at least one chase figure," but these are marketing claims. The manufacturer has already decided what's in the case during production.</p>
<h2 id="packaging-clues-and-silhouette-recognition">Packaging Clues and Silhouette Recognition</h2>
<p>Silhouettes visible through translucent packaging are the most accessible identification method for most collectors. Many blind box manufacturers use semi-transparent or frosted plastic that allows you to see the figure's outline without revealing details.</p>
<figure class="article-content-image my-8" style="margin:2em 0;padding:0;background:transparent;border:0;"><img src="https://cdn.grandranker.com/articles/how-to-get-chase-figures-in-blind-boxes-content-2-1788146502.jpg" alt="Hands holding several blind box packs side-by-side, showing silhouettes visible through translucent packaging with barcode labels visible on the bottom" class="w-full rounded-lg shadow-lg" loading="lazy" style="display:block;width:100%;max-width:100%;height:auto;border-radius:8px;margin:0 auto;"><figcaption class="text-sm text-gray-600 mt-2 text-center" style="font-size:0.875em;color:#6b7280;text-align:center;margin-top:0.6em;">Hands holding several blind box packs side-by-side, showing silhouettes visible through translucent packaging with barcode labels visible on the bottom</figcaption></figure>
<p>Experienced collectors can identify figures by silhouette alone. Chase figures often have unique silhouettes, different poses, additional props, or noticeably different proportions, making them identifiable through packaging. The reliability depends on how distinct each figure is.</p>
<p>Packaging variations also signal figure type. Manufacturers sometimes use different colored boxes or packaging styles for different rarity tiers. A gold-stamped box might indicate a rare or chase figure, while standard white packaging indicates commons. These visual cues vary by product line, but experienced collectors track them meticulously.</p>
<h2 id="the-psychology-behind-blind-box-marketing">The Psychology Behind Blind Box Marketing</h2>
<p><a href="/blogs/news/where-to-find-rare-blind-boxes">Blind boxes</a> succeed because they tap into powerful psychological drivers: scarcity, randomness, and social proof.</p>
<p>Scarcity is real. Chase figures genuinely are rare, creating authentic desirability. Randomness creates unpredictability. Each box you open is a small gamble with a chance of payoff. Social proof amplifies demand. When collectors share their chase figure pulls on social media, other collectors feel compelled to buy more boxes.</p>
<p>The secondary market feeds this psychology. Chase figures sell for 5-10x their original retail value. A $15 blind box containing a chase figure might resell for $75-150. This creates a perception that hunting blind boxes is financially rewarding, even though most pulls are losses.</p>
<p>Manufacturers understand this completely. They design chase figure scarcity, packaging, and marketing to maximize psychological engagement and create compulsive collecting behavior.</p>
<h2 id="safe-secondary-market-trading-and-authentication">Safe Secondary Market Trading and Authentication</h2>
<p>The secondary market for blind boxes is substantial and largely unregulated. Chase figures command premium prices, which <a href="/blogs/news/how-to-avoid-bootleg-anime-figures">attracts counterfeits and fraud</a>.</p>
<p>Authentication requires understanding legitimate packaging, manufacturing marks, and paint quality. Counterfeit figures often show visible paint inconsistencies, incorrect mold details, or packaging errors.</p>
<p>Legitimate sellers provide detailed photos showing packaging, paint quality, and manufacturing marks. Reputable secondary market platforms like Mercari and specialized forums have community reputation systems. Buy from sellers with extensive positive feedback and verified transaction history.</p>
<p>Price verification matters. If a chase figure is selling for $80 on average but one listing shows $20, that's a red flag. Cross-reference prices across multiple platforms to understand market rates.</p>
<p>If you do purchase from secondary markets, use platforms with buyer protection and request high-resolution photos before committing.</p>
<h2 id="smart-collecting-strategies-for-chase-figures">Smart Collecting Strategies for Chase Figures</h2>
<p>Start by researching pull rates and case assortments before purchasing. Communities like Reddit's r/blindbox and specialized collector forums maintain databases of reported pull rates. Use this data to identify product lines with reasonable chase odds.</p>
<p>Set a budget and stick to it. Decide how much you'll spend monthly and allocate it strategically. Full case purchases often provide better per-unit value than single boxes.</p>
<p>Join collecting communities. The blind box community is collaborative. Collectors share pull data, trading networks, and authentication tips freely. These communities identify new secret figures and track manufacturing changes.</p>
<p>Diversify your purchases across multiple product lines rather than obsessing over a single series. Spreading your budget reduces the risk of hitting zero chase figures.</p>
<p>Track your pulls meticulously. Record every box you open, what figure you received, and the date. Over time, this data helps you understand your personal luck variance and provides perspective on spending.</p>
<p>Consider the secondary market as part of your strategy. Trade duplicate commons with other collectors rather than discarding them. If you pull a chase figure you don't want, sell it and use the proceeds to fund future purchases.</p>
<hr>
<p>Blind box collecting is fundamentally about managing uncertainty while chasing genuine rarity. The strategies we've covered, understanding odds, recognizing packaging clues, and navigating secondary markets, give you practical tools to collect smarter. When you're ready to build your collection with reliable access to sealed cases and verified inventory, Utopia Toys and Models offers a curated selection of blind box cases from top brands like Funko and Kotobukiya, with transparent stock status and fast shipping. Start your hunt with confidence through our in-stock assortment and pre-order options designed for serious collectors.</p>
<section style="margin:3rem 0 2rem 0;" itemscope itemtype="https://schema.org/FAQPage">
<h2 style="font-size:1.5rem; font-weight:700; margin:0 0 4px 0;" id="frequently-asked-questions">Frequently Asked Questions</h2>
<div style="padding:20px 0; border-bottom:1px solid #e5e7eb;" itemscope itemprop="mainEntity" itemtype="https://schema.org/Question">
<h3 style="font-size:1.1rem; font-weight:600; margin:0 0 8px 0;" itemprop="name">What are the rarest blind box items and how rare are chase figures?</h3>
<div style="line-height:1.7; font-size:0.95rem;" itemscope itemprop="acceptedAnswer" itemtype="https://schema.org/Answer">
<p itemprop="text" style="margin:0;">Chase figures are the rarest variants in a blind box line, typically appearing at pull rates between 1 in 50 to 1 in 200 depending on the manufacturer and release. Rarity tiers vary by brand, some lines include common figures, variants, secret figures, and chase figures in a distribution ratio designed to create collecting urgency. Limited edition chase figures are intentionally scarcer than standard variants, making them the most sought-after pulls in any blind box collection.</p>
</div>
</div>
<div style="padding:20px 0; border-bottom:1px solid #e5e7eb;" itemscope itemprop="mainEntity" itemtype="https://schema.org/Question">
<h3 style="font-size:1.1rem; font-weight:600; margin:0 0 8px 0;" itemprop="name">How can I identify chase figures by box codes and barcodes?</h3>
<div style="line-height:1.7; font-size:0.95rem;" itemscope itemprop="acceptedAnswer" itemtype="https://schema.org/Answer">
<p itemprop="text" style="margin:0;">Barcode and serial number analysis can provide clues, but manufacturers intentionally use identical or similar barcodes across variants to maintain randomization. Some collectors examine batch codes or manufacturing dates on the barcode, but these don't reliably predict chase figures. The most reliable method is purchasing from verified sellers who've documented pull rates and case assortments, rather than relying on barcode patterns alone.</p>
</div>
</div>
<div style="padding:20px 0; border-bottom:1px solid #e5e7eb;" itemscope itemprop="mainEntity" itemtype="https://schema.org/Question">
<h3 style="font-size:1.1rem; font-weight:600; margin:0 0 8px 0;" itemprop="name">Is there a guaranteed way to get chase figures from a full case purchase?</h3>
<div style="line-height:1.7; font-size:0.95rem;" itemscope itemprop="acceptedAnswer" itemtype="https://schema.org/Answer">
<p itemprop="text" style="margin:0;">Full case purchases don't guarantee specific chase figures. While buying a full case increases your odds of pulling variants and chase figures through sheer volume, manufacturers distribute chase figures randomly across cases. A full case typically contains 12-24 packs, and you might pull zero, one, or multiple chase figures depending on randomization. The odds improve with full cases, but guaranteed pulls are not standard practice in the industry.</p>
</div>
</div>
<div style="padding:20px 0; border-bottom:1px solid #e5e7eb;" itemscope itemprop="mainEntity" itemtype="https://schema.org/Question">
<h3 style="font-size:1.1rem; font-weight:600; margin:0 0 8px 0;" itemprop="name">Why doesn't weighing blind boxes reliably identify chase figures?</h3>
<div style="line-height:1.7; font-size:0.95rem;" itemscope itemprop="acceptedAnswer" itemtype="https://schema.org/Answer">
<p itemprop="text" style="margin:0;">Weighing blind boxes has technical limitations because manufacturers design packaging and distribution to prevent weight-based detection. Chase figures often weigh the same as common variants due to identical packaging, or manufacturers intentionally vary weights unpredictably. Additionally, modern blind box production uses randomization technology that defeats simple weight-based sorting. While some collectors report minor weight variations, this method is unreliable and risks damaging merchandise through repeated handling.</p>
</div>
</div>
</section>
<div class="cta-button-container" style="text-align: center; margin: 32px 0;">
    <a href="https://utopiatoysandmodels.com" class="cta-button" style="display: inline-block; background-color: #fffde4; color: white; padding: 14px 32px; border-radius: 8px; text-decoration: none; font-weight: 600; font-size: 16px;">Get Started Today</a>
</div>
<p class="grandranker-branding" style="margin-top: 3rem; padding-top: 1.5rem; border-top: 1px solid #e5e7eb; font-size: 0.875rem; text-align: center;">This article was written using <a href="https://grandranker.com/" target="_blank" rel="noopener">GrandRanker</a></p>]]>
    </content>
  </entry>
  <entry>
    <id>https://utopiatoysandmodels.com/blogs/news/knoxville-blind-box-guide</id>
    <published>2026-08-30T21:06:54-04:00</published>
    <updated>2026-08-30T21:06:56-04:00</updated>
    <link rel="alternate" type="text/html" href="https://utopiatoysandmodels.com/blogs/news/knoxville-blind-box-guide"/>
    <title>Knoxville Blind Box Guide for Local Collectors</title>
    <author>
      <name>Admin</name>
    </author>
    <summary type="html">
      <![CDATA[Shop Knoxville blind box collectibles with confidence. Learn how to pick series, manage duplicates, spot official releases, and enjoy every surprise drop.<p><a class="read-more" href="https://utopiatoysandmodels.com/blogs/news/knoxville-blind-box-guide">More</a></p>]]>
    </summary>
    <content type="html">
      <![CDATA[<p>A great <strong>Knoxville blind box</strong> pull is not just about getting the rare figure. It is the moment you crack the foil, see a familiar color palette, and realize your shelf just got more interesting. Whether you collect cute designer minis, anime mascots, kaiju, horror characters, or tiny versions of your favorite franchise, blind boxes turn collecting into a surprise worth sharing.</p>
<p>The mystery is the point, but smart collectors still shop with intention. The best series fits your fandom, your display space, and your tolerance for duplicates. WELCOME TO UTOPIA - where the hunt starts with finding the fandom that already has you hooked.</p>
<h2>Why Knoxville Blind Box Collecting Hits Different</h2>
<p>Blind boxes bring a little event energy to an ordinary purchase. Unlike buying a visible figure, you are choosing a series first and trusting the reveal. That makes each box feel like a pack-opening moment, whether you are shopping solo, trading with friends, or filming the unboxing for your fellow collectors.</p>
<p>For Knoxville collectors, that format also creates community. One person pulls the character you wanted; you pull their favorite; suddenly, duplicates are not disappointments. They are trade bait. A set that feels impossible when you are buying one box at a time can become manageable when friends, local collector groups, and convention meetups are part of the plan.</p>
<p>There is a practical side, too. Blind box figures are often compact, display-friendly, and easier to collect than large statues or full-scale props. A small shelf, desk, bookcase, or <a href="https://utopiatoysandmodels.com/products/103-rgz-95-rezel-hg-1-144-scale-model-kit">Gunpla workbench</a> can hold a lot of personality without demanding a room-sized display case.</p>
<h2>Pick a Series Before You Pick a Box</h2>
<p>The fastest way to build a collection you actually love is to shop by series, not just by packaging. Bright art, mystery language, and a potential chase can make almost any blind box tempting. But if the characters do not connect to your tastes, the excitement fades when the box is open.</p>
<p>Start with what already belongs in your collection. Anime fans may want stylized mini figures from a favorite show. Kaiju collectors can look for creature-focused lines that add weird, colorful energy beside larger monster figures. Horror fans may prefer spooky minis that let them collect icons without giving every inch of their shelf to one franchise. Designer-toy collectors may be chasing a specific artist, sculpt style, or color story.</p>
<p>Then look at the full lineup printed on the box. Ask yourself a simple question: would I be happy pulling most of these? If the answer is yes, it is a strong series for a random single. If you only want one character out of 12, a blind box is still fun, but it is not the most efficient way to get that exact figure.</p>
<h3>Singles, Full Cases, and the Middle Ground</h3>
<p>A single blind box is the purest surprise. It is ideal when you want a low-commitment treat, like most of the lineup, or are opening with friends. You may pull a favorite on the first try, or you may start a trade pile. That uncertainty is part of the deal.</p>
<p>A sealed case can make more sense for collectors who want to complete a series, split boxes with friends, or keep extras for trading. Some releases are packed with an expected assortment, but collectors should never assume that a full case guarantees every standard figure or a chase. Chase figures are typically inserted at a different rate, and their inclusion can alter the assortment.</p>
<p>The middle ground is buying a few boxes from a series you genuinely enjoy. Set a budget before the drop, open your chosen number, and then decide whether trading or buying individual figures is the better route for filling gaps. That approach keeps the hobby fun instead of turning a rare pull into an expensive mission.</p>
<h2>How to Avoid Blind Box Regret</h2>
<p>Blind boxes are mystery collectibles, not lottery tickets. Treat the listed odds, chase art, and secret-character silhouettes as part of the experience, not a promise. A rare pull is exciting because it is not guaranteed.</p>
<p>Avoid trying to decode boxes by shaking, weighing, squeezing, or damaging packaging. Aside from being unreliable, it can spoil the fun for the next collector and create problems for retailers. Factory seals and intact packaging matter, especially if you collect sealed pieces or plan to trade later.</p>
<p>It also helps to separate collecting goals. Are you opening for the surprise? Completing a set? Hunting one character? Building a display around a theme? Each goal calls for a different strategy. Opening random boxes is perfect for surprise. Trading and verified individual figures are often better for completing a set. If you are chasing one specific character, buying that character secondhand from a reputable collector may cost less than opening box after box.</p>
<p>Leave room for duplicates in your plan. Keep the original box, character card, and accessories together when possible. Those small details can help when you trade, organize, or eventually sell a figure. A labeled storage bin for extras makes your collection easier to manage and prevents a handful of duplicates from becoming clutter.</p>
<h2>Official Product Matters</h2>
<p>Collector packaging can look convincing from a distance, especially when a popular anime or designer-toy series gets copied. Officially <a href="https://utopiatoysandmodels.com/products/eaki-frieren-beyond-journeys-end-cat-ear-series-plush-keychain-blind-box">licensed blind boxes</a> usually have clear branding, consistent printing, a manufacturer name, and clean product details. If a deal seems unusually cheap, the photos are vague, or the seller cannot tell you whether the product is factory sealed, take a step back.</p>
<p>Buying from a specialty collectible retailer gives you more confidence in what you are adding to your shelf. At Utopia Toys and Models, the focus is on official fandom merchandise and organized shopping by the series and product types collectors actually use. That matters when you are looking for a specific anime line, a recognizable collectible brand, or a gift for someone whose fandom runs deep.</p>
<p>Official products also tend to hold up better as collectibles. Paint, sculpting, fit, included cards, and package quality all contribute to the experience. A blind box is small, but it should still feel like a real piece of the world you collect.</p>
<h2>Display the Pull, Not Just the Packaging</h2>
<p>Once the reveal is done, make it part of your space. Blind box figures look especially good when they are displayed in small groups instead of scattered across a shelf. Arrange them by franchise, color, mood, or character type. A row of <a href="https://utopiatoysandmodels.com/products/neca-toony-terrors-thanksgiving-john-carver-figure">tiny horror icons</a> can look sharp beside a larger action figure; a cluster of anime minis can bring life to the base of a manga shelf.</p>
<p>Keep direct sunlight and high humidity in mind, particularly for figures with lighter colors or detailed paint applications. Dust is inevitable, but a simple enclosed display, acrylic riser, or regular soft-brush cleaning routine can help your collection stay camera-ready.</p>
<p>If you collect multiple lines, give each series a visual boundary. A small riser, a clear divider, or even a dedicated shelf level makes the collection look intentional. The goal is not to make every display look like a museum. It is to make your shelf feel like yours.</p>
<h2>Make the Mystery More Social</h2>
<p>Blind boxes are more fun when a pull has somewhere to go. Trade duplicates with friends, bring them to collector meetups, or set up an opening night when a new series arrives. If you are buying gifts, choose a lineup where the recipient would enjoy several possible characters, not just the chase.</p>
<p>The best part of collecting is rarely checking a character off a list. It is the story attached to it: the first pull from a new series, the duplicate that became a perfect trade, or the tiny figure that made a fellow fan say, “Wait, where did you get that?” Find your fandom, take the chance, and let the next box surprise you.</p>]]>
    </content>
  </entry>
  <entry>
    <id>https://utopiatoysandmodels.com/blogs/news/how-long-does-it-take-to-paint-gunpla-a-builders-timeline</id>
    <published>2026-08-30T00:50:27-04:00</published>
    <updated>2026-08-30T00:50:28-04:00</updated>
    <link rel="alternate" type="text/html" href="https://utopiatoysandmodels.com/blogs/news/how-long-does-it-take-to-paint-gunpla-a-builders-timeline"/>
    <title>How Long Does It Take to Paint Gunpla: A Builder&apos;s Timeline</title>
    <author>
      <name>Editorial Team</name>
    </author>
    <summary type="html">
      <![CDATA[How long does it take to paint gunpla: Learn realistic timeframes for painting Gunpla models. Discover how kit grade, technique, and skill level affect.<p><a class="read-more" href="https://utopiatoysandmodels.com/blogs/news/how-long-does-it-take-to-paint-gunpla-a-builders-timeline">More</a></p>]]>
    </summary>
    <content type="html">
      <![CDATA[<h2 id="table-of-contents">Table of Contents</h2>
<ul>
<li><a href="#how-long-does-it-take-to-paint-gunpla-the-quick-answer">How Long Does It Take to Paint Gunpla: The Quick Answer</a></li>
<li>
<a href="#factors-that-influence-painting-time">Factors That Influence Painting Time</a>
<ul>
<li><a href="#kit-grade-hg-mg-and-pg-differences">Kit Grade: HG, MG, and PG Differences</a></li>
<li><a href="#hand-brushing-vs-airbrushing">Hand Brushing vs. Airbrushing</a></li>
<li><a href="#skill-level-and-builder-experience">Skill Level and Builder Experience</a></li>
</ul>
</li>
<li><a href="#essential-tools-for-painting-gundam-models">Essential Tools for Painting Gundam Models</a></li>
<li>
<a href="#gunpla-painting-process-for-beginners">Gunpla Painting Process for Beginners</a>
<ul>
<li><a href="#step-1-surface-preparation-and-sanding">Step 1: Surface Preparation and Sanding</a></li>
<li><a href="#step-2-priming-your-model">Step 2: Priming Your Model</a></li>
<li><a href="#step-3-applying-base-coats-and-detail-painting">Step 3: Applying Base Coats and Detail Painting</a></li>
<li><a href="#step-4-panel-lining-and-decals">Step 4: Panel Lining and Decals</a></li>
</ul>
</li>
<li><a href="#gunpla-top-coat-drying-time-and-curing">Gunpla Top Coat Drying Time and Curing</a></li>
<li><a href="#active-vs-passive-time-understanding-your-real-workload">Active vs. Passive Time: Understanding Your Real Workload</a></li>
<li><a href="#time-saving-techniques-for-experienced-painters">Time-Saving Techniques for Experienced Painters</a></li>
<li><a href="#common-mistakes-that-add-hours-to-your-build">Common Mistakes That Add Hours to Your Build</a></li>
</ul>
<p><em>Last Updated: August 30, 2026</em></p>
<h2 id="how-long-does-it-take-to-paint-gunpla-the-quick-answer">How Long Does It Take to Paint Gunpla: The Quick Answer</h2>
<p>Most builders can expect 8 to 40+ hours for a complete paint job. A snap build typically takes 8 to 15 hours, while a full custom project with panel lining, decals, and multiple coats can stretch to 40+ hours. The timeline depends on your kit grade, painting method, and desired detail level.</p>
<p>This guide breaks down exactly where those hours go, so you can plan your build realistically and avoid underestimating the work ahead.</p>
<h2 id="factors-that-influence-painting-time">Factors That Influence Painting Time</h2>
<h3 id="kit-grade-hg-mg-and-pg-differences">Kit Grade: HG, MG, and PG Differences</h3>
<p>High Grade kits typically take 6 to 12 hours to paint with hand brushing. The smaller part count (100-150 pieces) and simpler construction mean less surface area to cover. Most HG kits come with decent plastic color separation, so you might only need to paint a handful of parts.</p>
<p>Master Grade kits consume 15 to 25 hours of painting time. With 200+ pieces and intricate details, they require more masking, more layers, and more attention to panel lining and decal placement. <a href="/blogs/news/master-grade-vs-perfect-grade-kits">Perfect Grade kits</a> represent the ultimate commitment at 30 to 50+ hours when fully painted and detailed. Real Grade kits fall between HG and MG, usually 10 to 18 hours.</p>
<h3 id="hand-brushing-vs-airbrushing">Hand Brushing vs. Airbrushing</h3>
<p>Hand brushing takes roughly 1.5 to 2 times longer than airbrushing because each coat requires more time to apply evenly and you need more coats to avoid visible brush strokes (<a rel="noopener noreferrer" target="_blank" href="https://pmc.ncbi.nlm.nih.gov/articles/PMC6887804/">peer-reviewed research</a>). The advantage is minimal setup and cleanup, you can paint almost anywhere with just brushes, paint, and water.</p>
<p>Airbrushing is faster for base coats and large surfaces. A task taking 4 hours by brush might take 1.5 to 2 hours with an airbrush. However, airbrushing requires space, ventilation, equipment maintenance, and practice. For small HG kits, the time savings might not justify the extra effort. For MG and PG kits, airbrushing becomes genuinely worthwhile.</p>
<h3 id="skill-level-and-builder-experience">Skill Level and Builder Experience</h3>
<p>A beginner might take twice as long as an experienced painter to complete the same kit (<a rel="noopener noreferrer" target="_blank" href="https://pmc.ncbi.nlm.nih.gov/articles/PMC10217286/">the NIH</a>). You'll spend time sanding out dust nibs, fixing paint drips, and waiting for layers to cure. Beginners should add 30 to 50 percent extra time to any estimate. Experienced builders often work at roughly half the pace of their first few attempts.</p>
<h2 id="essential-tools-for-painting-gundam-models">Essential Tools for Painting Gundam Models</h2>
<p><strong>For hand brushing:</strong></p>
<ul>
<li>Synthetic brushes in multiple sizes (00, 0, 2, 4)</li>
<li>Acrylic or lacquer paint designed for models</li>
<li>Palette or ceramic plate for mixing</li>
<li>Water cup for rinsing brushes</li>
<li>Masking tape and painter's tape</li>
<li>Sanding sponges (400, 600, 1000 grit)</li>
<li>Primer spray or brush-on primer</li>
<li>Top coat (gloss or matte)</li>
</ul>
<p><strong>For airbrushing:</strong></p>
<ul>
<li>Airbrush (single or double action)</li>
<li>Air compressor with moisture trap</li>
<li>Paint thinner appropriate to your paint type</li>
<li>Cleaning solution</li>
<li>Masking supplies (tape, putty, stencils)</li>
<li>Spray booth or well-ventilated space</li>
<li>Pressure regulator</li>
</ul>
<figure class="article-content-image my-8" style="margin:2em 0;padding:0;background:transparent;border:0;"><img src="https://cdn.grandranker.com/articles/how-long-does-it-take-to-paint-gunpla-a-builders-timeline-content-1-1788065398.jpg" alt="Overhead view of a well-organized painting station with airbrush, spray cans, hand brushes, sanding tools, masking supplies, and a Gundam model kit laid out on a clean work surface" class="w-full rounded-lg shadow-lg" loading="lazy" style="display:block;width:100%;max-width:100%;height:auto;border-radius:8px;margin:0 auto;"><figcaption class="text-sm text-gray-600 mt-2 text-center" style="font-size:0.875em;color:#6b7280;text-align:center;margin-top:0.6em;">Overhead view of a well-organized painting station with airbrush, spray cans, hand brushes, sanding tools, masking supplies, and a Gundam model kit laid out on a clean work surface</figcaption></figure>
<p>The most important tool is <a href="/blogs/news/why-use-primer-on-gunpla-models">good spray primer</a>. Primer creates a smooth base coat that helps subsequent paint layers adhere properly and look more vibrant. Without primer, you'll need more paint coats, adding hours to your timeline. Utopia Toys and Models stocks primers specifically designed for model kits, providing better coverage than generic spray paint.</p>
<h2 id="gunpla-painting-process-for-beginners">Gunpla Painting Process for Beginners</h2>
<h3 id="step-1-surface-preparation-and-sanding">Step 1: Surface Preparation and Sanding</h3>
<p>Before applying any paint, remove parts from sprues, sand away nubs, and <a href="/blogs/news/how-to-fix-stress-marks-on-gunpla">smooth stress marks</a>. For a typical HG kit, surface prep takes 1 to 2 hours; for an MG, plan on 2 to 4 hours. Start with 400-grit sandpaper to remove nubs, then progress to 600 and 1000 grit for a smooth finish. After sanding, wash all parts with soap and water to remove plastic dust, then let them dry completely before priming.</p>
<h3 id="step-2-priming-your-model">Step 2: Priming Your Model</h3>
<p>Spray primer is faster than brush-on primer. A typical HG kit takes 20 to 30 minutes to prime completely, including drying time between coats. Most primers require two light coats rather than one heavy coat, preventing runs and ensuring even coverage.</p>
<h3 id="step-3-applying-base-coats-and-detail-painting">Step 3: Applying Base Coats and Detail Painting</h3>
<p>Apply thin coats rather than one thick coat. Three to four thin coats provide better coverage and fewer visible brush strokes. Detail painting, adding accent colors to small parts like cockpit windows or weapon details, adds another 1 to 2 hours. Many builders mask off areas to create sharp color transitions, producing professional results. <a rel="noopener noreferrer" target="_blank" href="https://rtawholesalers.com/blogs/all-about-cabinetry/can-you-paint-rta-cabinets">painting guide</a>.</p>
<figure class="article-content-image my-8" style="margin:2em 0;padding:0;background:transparent;border:0;"><img src="https://cdn.grandranker.com/articles/how-long-does-it-take-to-paint-gunpla-a-builders-timeline-content-2-1788065421.jpg" alt="Close-up of a Gunpla model in progress on a workbench with spray cans, brushes, masking tape, and primer visible, showing hands applying paint to a partially painted HG kit" class="w-full rounded-lg shadow-lg" loading="lazy" style="display:block;width:100%;max-width:100%;height:auto;border-radius:8px;margin:0 auto;"><figcaption class="text-sm text-gray-600 mt-2 text-center" style="font-size:0.875em;color:#6b7280;text-align:center;margin-top:0.6em;">Close-up of a Gunpla model in progress on a workbench with spray cans, brushes, masking tape, and primer visible, showing hands applying paint to a partially painted HG kit</figcaption></figure>
<h3 id="step-4-panel-lining-and-decals">Step 4: Panel Lining and Decals</h3>
<p>Panel lining, adding dark paint or markers to panel lines for definition, takes 1 to 2 hours for an HG kit. Water slide decals add another 30 minutes to 1 hour. Decals require careful handling, soak them in water, slide them onto the model, position precisely, and seal with top coat. Rushing this step leads to bubbles and misalignment.</p>
<h2 id="gunpla-top-coat-drying-time-and-curing">Gunpla Top Coat Drying Time and Curing</h2>
<p>Spray top coats dry to the touch in 30 minutes to 1 hour, but full curing takes 24 hours or longer (<a rel="noopener noreferrer" target="_blank" href="https://www.fda.gov/media/164194/download">the FDA</a>). Many builders apply multiple top coat layers for better protection, requiring waits between coats. Plan your painting schedule around drying time, you might prime Saturday morning, apply base coats Saturday afternoon, add details Sunday, and apply top coat Sunday evening.</p>
<h2 id="active-vs-passive-time-understanding-your-real-workload">Active vs. Passive Time: Understanding Your Real Workload</h2>
<p>Active time is hours you're actually working, sanding, painting, masking, applying decals. Passive time is waiting for primer to dry, paint to cure, or top coat to harden.</p>
<p>For a typical HG hand-brushed build, you might have 8 to 10 hours of active time spread across 3 to 4 days. If airbrushing, you might compress 12 to 15 hours of active time into 2 to 3 days. You don't need a full week off work to paint a model; you need 10 to 15 hours of actual work spread across several days, with passive drying time filling the gaps.</p>
<p class="cta-inline" style="background-color: #fffde408; border-left: 4px solid #fffde4; padding: 16px 20px; margin: 24px 0; border-radius: 0 8px 8px 0;">
     <a href="https://utopiatoysandmodels.com" style="color: #fffde4; font-weight: 600; text-decoration: underline;">Get Started Today →</a>
</p>
<div style="margin:1.5rem 0; padding:16px 20px; background-color:transparent; border-left:4px solid #e5e7eb; border-radius:0 8px 8px 0;">
<strong style="display:block; margin-bottom:4px; color:#111827; font-size:14px;"> Pro Tip</strong>
<span style="color:#374151; font-size:15px; line-height:1.6;">Set up a dedicated drying area where finished parts can sit undisturbed between coats. This lets you keep working on other parts while some dry, making better use of your active time.</span>
</div>
<h2 id="time-saving-techniques-for-experienced-painters">Time-Saving Techniques for Experienced Painters</h2>
<p><strong>Batch your work.</strong> Paint all base coats before detail painting. This reduces setup and cleanup time and helps you develop a rhythm.</p>
<p><strong>Use spray cans instead of an airbrush for simple builds.</strong> Spray cans are faster than hand brushing and require no cleanup. For HG kits, they often make more sense than maintaining an airbrush setup.</p>
<p><strong>Simplify your paint scheme.</strong> A simple two or three-color scheme with good panel lining can look striking and cuts painting time in half.</p>
<p><strong>Skip certain details.</strong> You don't have to paint every tiny detail. A model displayed on a shelf won't show internal joints, so there's no reason to paint them.</p>
<p><strong>Pre-assemble subassemblies.</strong> Assembling and painting subassemblies before final assembly reduces the number of separate pieces you're handling and masking.</p>
<div style="margin:1.5rem 0; padding:16px 20px; background-color:transparent; border-left:4px solid #e5e7eb; border-radius:0 8px 8px 0;">
<strong style="display:block; margin-bottom:4px; color:#111827; font-size:14px;"> Key Takeaway</strong>
<span style="color:#374151; font-size:15px; line-height:1.6;">The fastest builds aren't necessarily the best-looking ones. The sweet spot for most builders is a 12 to 20-hour project that looks professional without consuming your entire month.</span>
</div>
<h2 id="common-mistakes-that-add-hours-to-your-build">Common Mistakes That Add Hours to Your Build</h2>
<p><strong>Not sanding properly.</strong> Skipping surface prep means you'll see imperfections in your paint and end up repainting sections. Spending an extra hour on sanding upfront saves 2 to 3 hours of touch-ups later.</p>
<p><strong>Applying thick coats instead of thin ones.</strong> One thick coat looks worse and takes longer to dry than three thin coats. You'll end up with runs or visible brush strokes, requiring rework.</p>
<p><strong>Not masking properly.</strong> Proper masking prevents paint from appearing where it shouldn't, saving hours of careful removal or repainting.</p>
<p><strong>Painting in poor lighting.</strong> You can't see what you're doing, leading to uneven coats, missed spots, or paint over details you meant to leave unpainted.</p>
<p><strong>Rushing the drying time.</strong> Applying the next coat before the previous one is fully dry causes paint to lift and adhesion problems. Patience with drying time actually saves time overall.</p>
<p><strong>Buying cheap tools.</strong> Low-quality brushes shed bristles, cheap spray cans clog, and poor masking tape leaves residue. Investing in decent tools pays for itself in fewer mistakes.</p>
<div style="margin:1.5rem 0; padding:16px 20px; background-color:transparent; border-left:4px solid #e5e7eb; border-radius:0 8px 8px 0;">
<strong style="display:block; margin-bottom:4px; color:#111827; font-size:14px;"> Watch Out</strong>
<span style="color:#374151; font-size:15px; line-height:1.6;">The most common time-killer is trying to paint a model too quickly. Rushing leads to mistakes requiring rework, which takes more time than doing it right the first time. Budget extra time and work deliberately.</span>
</div>
<hr>
<p>Painting a gunpla model is an investment in both time and attention, but the results are worth it. Understanding how long it takes helps you plan realistically and enjoy the process. Start with a simple color scheme, invest in decent tools and primer, and don't skip surface prep. As you build more models, you'll develop techniques that cut your timeline and improve your results. Utopia Toys and Models carries everything you need, from primers and paints to brushes and masking supplies. Start with a kit matching your skill level, set aside dedicated time, and approach each stage methodically. Your finished model will reflect the care you invested.</p>
<section style="margin:3rem 0 2rem 0;" itemscope itemtype="https://schema.org/FAQPage">
<h2 style="font-size:1.5rem; font-weight:700; margin:0 0 4px 0;">Frequently Asked Questions</h2>
<div style="padding:20px 0; border-bottom:1px solid #e5e7eb;" itemscope itemprop="mainEntity" itemtype="https://schema.org/Question">
<h3 style="font-size:1.1rem; font-weight:600; margin:0 0 8px 0;" itemprop="name">Q: Can you paint directly onto Gunpla without priming?</h3>
<div style="line-height:1.7; font-size:0.95rem;" itemscope itemprop="acceptedAnswer" itemtype="https://schema.org/Answer">
<p itemprop="text" style="margin:0;">A: Technically yes, but priming is strongly recommended. Primer helps paint adhere better to the plastic, prevents chipping, and provides a smoother base for subsequent coats. Without priming, you risk paint peeling after assembly or handling. Most experienced builders allocate 1-2 hours for a proper priming step, which pays off in durability and finish quality.</p>
</div>
</div>
<div style="padding:20px 0; border-bottom:1px solid #e5e7eb;" itemscope itemprop="mainEntity" itemtype="https://schema.org/Question">
<h3 style="font-size:1.1rem; font-weight:600; margin:0 0 8px 0;" itemprop="name">Q: How much time should a beginner allocate for their first painted Gunpla build?</h3>
<div style="line-height:1.7; font-size:0.95rem;" itemscope itemprop="acceptedAnswer" itemtype="https://schema.org/Answer">
<p itemprop="text" style="margin:0;">A: Plan 20-40 hours total for your first painted HG kit, depending on whether you hand-brush or airbrush. This includes assembly (4-6 hours), surface prep (2-3 hours), priming and painting (8-15 hours), panel lining and decals (2-4 hours), and drying/curing time between coats. MG kits will take 40-60+ hours. Don't rush; quality improves with patience and proper drying intervals.</p>
</div>
</div>
<div style="padding:20px 0; border-bottom:1px solid #e5e7eb;" itemscope itemprop="mainEntity" itemtype="https://schema.org/Question">
<h3 style="font-size:1.1rem; font-weight:600; margin:0 0 8px 0;" itemprop="name">Q: Is airbrushing faster than hand brushing for Gunpla painting?</h3>
<div style="line-height:1.7; font-size:0.95rem;" itemscope itemprop="acceptedAnswer" itemtype="https://schema.org/Answer">
<p itemprop="text" style="margin:0;">A: Yes, airbrushing typically cuts active painting time by 40-50% compared to hand brushing. A single airbrush coat covers a large area in minutes, while hand brushing requires multiple thin coats to avoid brush marks. However, airbrushing requires setup, cleanup, and masking time. For beginners, hand brushing may feel faster initially because it requires less equipment investment and learning curve, but experienced builders favor airbrushing for speed and finish quality.</p>
</div>
</div>
<div style="padding:20px 0; border-bottom:1px solid #e5e7eb;" itemscope itemprop="mainEntity" itemtype="https://schema.org/Question">
<h3 style="font-size:1.1rem; font-weight:600; margin:0 0 8px 0;" itemprop="name">Q: How long does gunpla top coat drying time typically take?</h3>
<div style="line-height:1.7; font-size:0.95rem;" itemscope itemprop="acceptedAnswer" itemtype="https://schema.org/Answer">
<p itemprop="text" style="margin:0;">A: Most spray top coats dry to the touch within 30 minutes to 1 hour, but full curing takes 24 hours. Humidity and temperature significantly affect drying speed; cool, humid conditions slow the process. Allow at least 24 hours before assembly or handling. If you apply multiple top coat layers, space each by 1-2 hours minimum. Rushing this step risks a tacky or cloudy finish.</p>
</div>
</div>
</section>
<div class="cta-button-container" style="text-align: center; margin: 32px 0;">
    <a href="https://utopiatoysandmodels.com" class="cta-button" style="display: inline-block; background-color: #fffde4; color: white; padding: 14px 32px; border-radius: 8px; text-decoration: none; font-weight: 600; font-size: 16px;">Get Started Today</a>
</div>
<p class="grandranker-branding" style="margin-top: 3rem; padding-top: 1.5rem; border-top: 1px solid #e5e7eb; font-size: 0.875rem; text-align: center;">This article was written using <a href="https://grandranker.com/" target="_blank" rel="noopener">GrandRanker</a></p>]]>
    </content>
  </entry>
  <entry>
    <id>https://utopiatoysandmodels.com/blogs/news/knoxville-anime-store</id>
    <published>2026-08-29T21:06:54-04:00</published>
    <updated>2026-08-29T21:06:56-04:00</updated>
    <link rel="alternate" type="text/html" href="https://utopiatoysandmodels.com/blogs/news/knoxville-anime-store"/>
    <title>What to Expect From a Knoxville Anime Store</title>
    <author>
      <name>Admin</name>
    </author>
    <summary type="html">
      <![CDATA[Find a Knoxville anime store for official figures, Gunpla, manga, blind boxes, and collector-friendly preorders, holds, clear policies, and new drops.<p><a class="read-more" href="https://utopiatoysandmodels.com/blogs/news/knoxville-anime-store">More</a></p>]]>
    </summary>
    <content type="html">
      <![CDATA[<p>A great <strong>Knoxville anime store</strong> is not just a place with a few figures behind a glass case. It is where you find the series you actually follow, the characters you have been hunting, and the next kit that deserves a spot on your build table. Whether your fandom is One Piece, Evangelion, Dragon Ball, My Hero Academia, JoJo’s Bizarre Adventure, or something wonderfully niche, the right shop makes the search feel like part of the fun.</p>
<p>Collectors shop differently than casual browsers. You might know the exact Mobile Suit grade you want, be waiting for a specific prize figure, or need one last manga volume before the weekend. That is why curation matters. A store organized around fandom, franchise, format, and collector brands saves time and makes the unexpected finds even better.</p>
<h2>What a Knoxville Anime Store Should Carry</h2>
<p>Anime collecting is not one hobby. It is a whole shelf of hobbies living together. A collector who only buys scale figures has different needs than someone building High Grade Gunpla, collecting mystery minis, or reading through a long-running manga series. The best selection recognizes that difference without making you dig through a generic toy aisle.</p>
<p>For figure fans, look for a range of formats and price points. Prize figures are a solid way to bring home favorite characters without committing to premium statue pricing. Higher-end figures and statues bring more detail, stronger poses, and display-ready presence, but they also require more shelf space and a bigger budget. Neither is automatically better. It depends on whether you are building a broad character collection or focusing on a few centerpiece pieces.</p>
<p>Gunpla deserves its own attention. Builders often shop by grade, scale, Mobile Suit, and release rather than by the catch-all label of model kits. A well-organized selection makes it easier to compare <a href="https://utopiatoysandmodels.com/products/super-robot-wars-og-huckebein-ptx-08r-hg-1-144-scale-model-kit">HG 1/144 kits</a> with larger or more complex builds. New builders may appreciate an approachable High Grade kit, while experienced fans may be after a specific release, an upgrade project, or a kit that has been missing from the shelf for too long.</p>
<p>Manga, plush, blind boxes, pins, imported soundtrack CDs and records, and vinyl figures round out the hunt. These categories matter because fandom does not always fit into one display case. Sometimes the right pickup is a detailed statue. Sometimes it is a small blind-box pull that gives your desk a little more personality.</p>
<h2>Shop by Fandom, Not by Guesswork</h2>
<p>When you walk into a collectible shop or browse its inventory online, clear categories are a collector’s best friend. Searching by franchise is faster than scrolling through hundreds of unrelated items, especially when a release date is close and stock can move quickly.</p>
<p>Start with the fandom you are collecting. A <a href="https://utopiatoysandmodels.com/products/pop-animation-one-piece-refresh-nami-vin-fig">One Piece</a> fan may want figures, manga, plush, and trading-adjacent collectibles all tied to the same crew. A kaiju fan might move between Godzilla figures, vinyl collectibles, books, and imported items. Horror collectors often want a completely different mix of action figures, stylized vinyl, posters, pins, and weirdly perfect shelf pieces.</p>
<p>Then narrow it by product type. If you are buying a gift, this can be the easiest route. Figures, Funko POP! collectibles, plush, manga, and <a href="https://utopiatoysandmodels.com/products/frieren-beyond-journeys-end-animal-party-series-plush-keychain-blindbox">blind boxes</a> each offer a different kind of win. A recognizable character in a familiar format is usually safer than trying to guess someone’s exact high-end grail item.</p>
<p>The trade-off is that fandom-first shopping can make it easier to impulse buy. That is not always bad - surprise finds are part of collecting - but set a budget before you start adding items to your pile. Saving room for a pre-order you truly want beats missing it because three unplanned pickups emptied the wallet.</p>
<h2>New Drops, Preorders, and the Reality of Limited Stock</h2>
<p>The collectible world runs on release calendars, surprise restocks, convention announcements, and the occasional item that disappears much faster than anyone expected. If you have ever watched a figure go from “I’ll grab it later” to sold out, you already understand why preorders matter.</p>
<p>A preorder is best for an item you already know you want. It can help you claim a release before it arrives, particularly for popular anime figures, sought-after Gunpla, and limited-run collectibles. But it is still a commitment. Release dates can shift, manufacturer photos may differ slightly from the final product, and payment or cancellation rules vary by retailer. Read the policy before checking out, not after the release gets delayed.</p>
<p>Order-hold options can be useful for collectors who want to combine multiple purchases over time. Instead of paying for separate shipments as each item arrives, a hold may let you build one larger box. It is a practical collector tool, but it works only when you understand the store’s hold window, shipping trigger, and any restrictions on preorders. Clear rules protect everyone, especially when high-demand merchandise is involved.</p>
<p>For drops and restocks, timing matters. Mailing lists and social posts are not just noise when you collect release-based products. They are often the quickest way to hear about an incoming figure, a restocked kit, clearance opportunity, or fresh blind-box series. At Utopia Toys and Models, that fandom-first approach helps collectors find releases by the series and formats they already care about.</p>
<h2>How to Buy Figures With Confidence</h2>
<p>Authenticity and condition are major parts of the value conversation. Officially licensed products from recognizable brands give collectors more confidence in the sculpt, paint, packaging, and long-term display quality. That does not mean every item needs to be expensive. It means buyers should know what they are getting.</p>
<p>Check product details carefully, especially for scale figures and imported releases. Look at the listed size, material, manufacturer, and whether the item is in stock or a preorder. A figure that looks massive in a product photo may be smaller than expected, while a 1/7 scale statue can demand far more display space than you planned. Measure your shelf before the box arrives. Future you will appreciate it.</p>
<p>Packaging condition is another situation where expectations matter. Some collectors want mint boxes because they display or preserve every package. Others open everything immediately and care much more about the figure itself. Neither approach is wrong, but know which kind of collector you are before buying. If a box flaw would bother you, ask about condition standards and review the store’s policies.</p>
<p>Be cautious with deals that seem too good to be real, particularly in peer-to-peer spaces. Counterfeit anime figures can look convincing in a tiny listing photo, then disappoint with weak paint, poor assembly, or missing details. Shopping with a retailer that states its product information and fraud-prevention rules clearly is less glamorous than chasing a mystery bargain, but it is usually the better move.</p>
<h2>Build a Collection You Actually Want to Keep</h2>
<p>The strongest collections have a point of view. Maybe yours is all mecha, all Straw Hat crew members, a horror shelf with neon accents, or a carefully organized wall of manga. You do not need to follow anyone else’s rules, but a little focus can keep the collection from becoming a stack of boxes you forgot you bought.</p>
<p>Try alternating between planned purchases and fun pickups. Save for the premium statue, rare model kit, or major preorder that matters most. Then leave a little room for affordable surprises like a pin, blind box, manga volume, or plush. That mix keeps collecting exciting without turning every release into a financial crisis.</p>
<p>Take care of what you bring home, too. Keep direct sunlight off figures and boxes, dust displays regularly, and use stable shelving for heavier statues. Builders should keep spare parts, tools, and decals organized from the start. A collection feels better when you can see it, enjoy it, and find the next piece of it without a scavenger hunt.</p>
<p>Your next favorite collectible may be a planned preorder or the item you spot while browsing a fandom category you almost skipped. Start with the series that got you hooked, shop with clear expectations, and leave a little shelf space for the surprise that makes your display feel like yours.</p>]]>
    </content>
  </entry>
  <entry>
    <id>https://utopiatoysandmodels.com/blogs/news/why-use-primer-on-gunpla-models</id>
    <published>2026-08-29T00:46:35-04:00</published>
    <updated>2026-08-29T00:46:36-04:00</updated>
    <link rel="alternate" type="text/html" href="https://utopiatoysandmodels.com/blogs/news/why-use-primer-on-gunpla-models"/>
    <title>Why Use Primer on Gunpla Models: A Complete Guide</title>
    <author>
      <name>Editorial Team</name>
    </author>
    <summary type="html">
      <![CDATA[Why use primer on gunpla models: Learn why primer matters for Gunpla models. Discover adhesion benefits, surface prep techniques, and how to choose.<p><a class="read-more" href="https://utopiatoysandmodels.com/blogs/news/why-use-primer-on-gunpla-models">More</a></p>]]>
    </summary>
    <content type="html">
      <![CDATA[<h2 id="table-of-contents">Table of Contents</h2>
<ul>
<li><a href="#what-primer-does-for-your-gunpla-model">What Primer Does for Your Gunpla Model</a></li>
<li><a href="#how-primer-improves-adhesion-and-paint-durability">How Primer Improves Adhesion and Paint Durability</a></li>
<li><a href="#detecting-surface-imperfections-before-you-paint">Detecting Surface Imperfections Before You Paint</a></li>
<li><a href="#best-primer-for-gunpla-spray-vs-airbrush-options">Best Primer for Gunpla: Spray vs. Airbrush Options</a></li>
<li><a href="#acrylic-vs-lacquer-primer-for-models-which-type-to-choose">Acrylic vs. Lacquer Primer for Models: Which Type to Choose</a></li>
<li><a href="#how-to-sand-gunpla-parts-before-priming">How to Sand Gunpla Parts Before Priming</a></li>
<li><a href="#when-you-can-skip-priming-and-still-get-results">When You Can Skip Priming and Still Get Results</a></li>
<li><a href="#conclusion">Conclusion</a></li>
</ul>
<p><em>Last Updated: August 29, 2026</em></p>
<h2 id="what-primer-does-for-your-gunpla-model">What Primer Does for Your Gunpla Model</h2>
<p>Primer is the critical foundation layer between bare plastic and your topcoat paint. It accomplishes three essential tasks: creating a surface that paint can grip, revealing imperfections before you commit to color, and establishing a uniform base for consistent final appearance.</p>
<p>The plastic on Gundam model kits, typically ABS or polystyrene, has a naturally slick surface that causes paint to bead up and slide off (<a rel="noopener noreferrer" target="_blank" href="https://www.nist.gov/publications/chemical-mechanical-and-physical-properties-3-d-printed-materials-composed-tio2-abs">nist.gov</a>). Primer changes the surface tension, giving paint molecules something to anchor to. Without this mechanical grip, your paint will eventually flake away from handling, temperature changes, or assembly stress.</p>
<p>At Utopia Toys and Models, we've seen countless builders skip primer thinking they'll save time, then spend twice as long repainting when their finish fails. Primer also acts as a diagnostic tool, once sprayed on, every scratch, dust particle, and surface irregularity becomes visible under the flat finish, allowing you to catch problems before they're impossible to fix.</p>
<h2 id="how-primer-improves-adhesion-and-paint-durability">How Primer Improves Adhesion and Paint Durability</h2>
<p>Paint adhesion is both physical and chemical. Primer creates a microscopically textured surface that gives paint something to grip while bonding to plastic substrates in ways standard topcoat paints cannot.</p>
<p>When paint sits directly on untreated plastic, it forms a weak boundary layer that stays on top rather than integrating with the surface. Any flexing of the plastic during handling, transport, or assembly causes the paint to crack and peel. Primer eliminates this weak boundary by creating an intermediate layer that bonds strongly to both the plastic below and the paint above.</p>
<p>Lacquer-based primers slightly soften the plastic surface, allowing the primer to flow into microscopic pores and cure with mechanical interlocking. Acrylic primers dry through water evaporation and create a physical bond through surface adhesion. Both approaches outperform painting directly onto plastic.</p>
<p>Primer needs time to fully harden before you apply topcoat, most spray primers cure in 24 hours (<a rel="noopener noreferrer" target="_blank" href="https://pmc.ncbi.nlm.nih.gov/articles/PMC4148508/">peer-reviewed research</a>). Rushing this step traps solvents between layers, causing adhesion failure weeks later when those solvents evaporate. Primer also acts as a barrier that moderates moisture penetration, keeping your paint bond intact even in humid conditions where untreated plastic would absorb moisture and create adhesion failure.</p>
<h2 id="detecting-surface-imperfections-before-you-paint">Detecting Surface Imperfections Before You Paint</h2>
<p>The flat, matte finish of primer makes every surface flaw instantly visible: scratches, dust particles, fingerprints, mold lines, and warping all show up clearly under primer's non-reflective surface.</p>
<figure class="article-content-image my-8" style="margin:2em 0;padding:0;background:transparent;border:0;"><img src="https://cdn.grandranker.com/articles/why-use-primer-on-gunpla-models-a-complete-guide-content-1-1787978772.jpg" alt="Close-up of a Gunpla model part under bright overhead lighting showing visible surface scratches, dust particles, and minor imperfections highlighted by matte primer coating" class="w-full rounded-lg shadow-lg" loading="lazy" style="display:block;width:100%;max-width:100%;height:auto;border-radius:8px;margin:0 auto;"><figcaption class="text-sm text-gray-600 mt-2 text-center" style="font-size:0.875em;color:#6b7280;text-align:center;margin-top:0.6em;">Close-up of a Gunpla model part under bright overhead lighting showing visible surface scratches, dust particles, and minor imperfections highlighted by matte primer coating</figcaption></figure>
<p>Bare plastic hides imperfections because of its glossy finish and translucency. Once primer goes on, that reflective quality disappears, revealing actual surface topology. A scratch invisible on bare plastic becomes obvious under primer.</p>
<p>This visibility is intentional, primer is your quality-control checkpoint. Before committing to expensive metallic or specialized topcoat paints, you have one last chance to fix problems. Sand out scratches, wipe away dust, or fill gaps with putty. All of this is faster and cheaper at the primer stage than fixing problems under premium paint.</p>
<p>Many builders apply a thin first coat of primer specifically for inspection, then sand lightly and apply a final primer coat once they've confirmed the surface is clean. This two-coat primer approach takes minimal extra time but catches problems that would otherwise ruin hours of detailed painting work.</p>
<h2 id="best-primer-for-gunpla-spray-vs-airbrush-options">Best Primer for Gunpla: Spray vs. Airbrush Options</h2>
<p>Your choice between spray and airbrush primer depends on your model's size, workspace, and control needs.</p>
<p><strong>Spray primers</strong> come in aerosol cans and offer speed and ease. You hold the can 6-8 inches from the part and trigger short bursts. Most hobby-grade spray primers are designed for this distance and spray pattern. You can prime a full HG-scale model in under five minutes.</p>
<p>The downside is overspray and waste. Spray cans atomize paint into a wide cone, so much spray misses small targets. You're also limited by the spray pattern, you can't adjust width or intensity without changing distance, which affects coverage consistency. <a rel="noopener noreferrer" target="_blank" href="https://www.protoplot3d.ch/blogs/neuigkeiten/3d-druck-figuren-nachbearbeitung-vermeiden">post-processing 3D prints</a>.</p>
<p><strong>Airbrush primers</strong> use compressed air to atomize paint through a finer nozzle, giving you precise control over spray width, paint flow, and application intensity. They work exceptionally well for small, detailed parts and use paint more efficiently with less waste.</p>
<p>The trade-off is setup time and learning curve. <a href="/blogs/news/best-airbrush-kits-model-building">An airbrush requires a compressor</a>, hose, cleaning supplies, and practice to master consistent spray patterns. For most builders starting out, spray primer is the practical choice. If you're building multiple models per month or working on large-scale kits with many small parts, airbrush becomes worthwhile.</p>
<p>Utopia Toys and Models carries both spray and airbrush options from brands like Bandai and specialized hobby manufacturers.</p>
<h2 id="acrylic-vs-lacquer-primer-for-models-which-type-to-choose">Acrylic vs. Lacquer Primer for Models: Which Type to Choose</h2>
<p>The chemistry of primer determines compatibility with your topcoat paint, drying time, and how it interacts with plastic.</p>
<p><strong>Acrylic primers</strong> are water-based and dry through water evaporation, typically 2-4 hours for handling and 24 hours for full hardness. They're safer to use indoors with minimal volatile organic compounds (VOCs) and are easier to clean up with water and soap.</p>
<p class="cta-inline" style="background-color: #fffde408; border-left: 4px solid #fffde4; padding: 16px 20px; margin: 24px 0; border-radius: 0 8px 8px 0;">
     <a href="https://utopiatoysandmodels.com" style="color: #fffde4; font-weight: 600; text-decoration: underline;">Get Started Today →</a>
</p>
<p>The catch is adhesion on bare plastic. Acrylic primers don't chemically bond to plastic the way lacquer primers do, they rely entirely on mechanical interlocking. This means surface preparation becomes more critical. Acrylic primers also tend to be less durable than lacquer primers when exposed to solvent-based topcoats, particularly <a href="/blogs/news/lacquer-vs-acrylic-paint-gunpla">lacquer-based paints</a>.</p>
<p><strong>Lacquer primers</strong> are solvent-based and cure through solvent evaporation, typically 30 minutes to 2 hours for handling. They chemically soften the plastic surface slightly, allowing the primer to flow into microscopic pores and create a much stronger bond than acrylic primers.</p>
<p>Lacquer primers are more resistant to solvent-based topcoats and dry harder and smoother, requiring less sanding before applying topcoat. The downside is safety and convenience, they emit strong solvent fumes requiring good ventilation or a respirator, and they're harder to clean up.</p>
<p><strong>Which should you choose?</strong> If using acrylic topcoat paint, acrylic primer is fine. If using lacquer topcoat, use lacquer primer to avoid adhesion issues. If uncertain about your topcoat choice, lacquer primer is the safer universal option because it works with both acrylic and lacquer topcoats. Many experienced builders maintain both types on hand.</p>
<h2 id="how-to-sand-gunpla-parts-before-priming">How to Sand Gunpla Parts Before Priming</h2>
<p>Sanding before primer means preparing the surface so primer can grip effectively, not just removing visible blemishes.</p>
<figure class="article-content-image my-8" style="margin:2em 0;padding:0;background:transparent;border:0;"><img src="https://cdn.grandranker.com/articles/why-use-primer-on-gunpla-models-a-complete-guide-content-2-1787978789.jpg" alt="Hands holding a Gunpla plastic part and sanding it with fine-grit sandpaper on a wooden work surface, showing proper technique with gentle circular motions and dust particles visible in natural window lighting" class="w-full rounded-lg shadow-lg" loading="lazy" style="display:block;width:100%;max-width:100%;height:auto;border-radius:8px;margin:0 auto;"><figcaption class="text-sm text-gray-600 mt-2 text-center" style="font-size:0.875em;color:#6b7280;text-align:center;margin-top:0.6em;">Hands holding a Gunpla plastic part and sanding it with fine-grit sandpaper on a wooden work surface, showing proper technique with gentle circular motions and dust particles visible in natural window lighting</figcaption></figure>
<p>Start with 400-grit sandpaper to remove the glossy finish from bare plastic without creating visible scratches (<a rel="noopener noreferrer" target="_blank" href="https://dl.astm.org/mpc/article/8/1/122/15394/Comparison-of-Surface-Treatments-for-Secondarily">astm.org</a>). Use light pressure and circular motions, you're roughening the surface to create mechanical adhesion sites for primer, not sanding away material.</p>
<p>Sand all surfaces that will receive primer, including glued joints. Glued joints are stress points where primer and paint need to bridge without cracking. After 400-grit sanding, wipe parts with a lint-free cloth dry first, then use a slightly damp cloth to remove remaining particles. Let parts dry completely before priming.</p>
<p>For parts with visible scratches you want to minimize, use 600-grit sandpaper after the initial 400-grit pass. Don't obsess over perfection, primer will reveal remaining flaws, and you can address them then. The entire sanding process for an HG-scale model typically takes 20-30 minutes.</p>
<h2 id="when-you-can-skip-priming-and-still-get-results">When You Can Skip Priming and Still Get Results</h2>
<p>There are rare situations where primer is genuinely optional, though "optional" doesn't mean "recommended."</p>
<p>If you're using thick, heavily-pigmented acrylic paints designed specifically for plastic models and applying multiple coats, you might achieve acceptable adhesion without primer. These paints are formulated to bond better to plastic than generic acrylics. However, your paint will still be more fragile than paint over primer and will chip more easily when handled.</p>
<p>If you're <a href="/blogs/news/how-to-build-gunpla-for-beginners">building a display model</a> that will never be handled after assembly and using high-quality model paints, skipping primer is technically viable. But even here, primer saves you paint and gives better color consistency.</p>
<p>In practice, primer is so inexpensive and quick that skipping it makes no sense. The adhesion and durability you gain far outweigh the minimal time and cost investment.</p>
<h2 id="conclusion">Conclusion</h2>
<p>Primer is the foundation of a paint job that lasts. It gives paint something to grip, reveals surface flaws before you commit to expensive topcoat paints, and creates a barrier that protects your plastic model from moisture and environmental stress.</p>
<p>Whether you choose spray or airbrush application, acrylic or lacquer chemistry, the primer step is non-negotiable if you want results that survive assembly, handling, and time. At Utopia Toys and Models, we stock spray and airbrush primers from trusted brands like Bandai, along with all the <a href="/blogs/news/best-tools-gunpla-model-building">sanding supplies and supporting materials</a> you'll need to prepare your Gunpla parts properly. Start with quality primer, and your finished model will reward that investment with durability and visual impact that shows the care you put into the build.</p>
<section style="margin:3rem 0 2rem 0;" itemscope itemtype="https://schema.org/FAQPage">
<h2 style="font-size:1.5rem; font-weight:700; margin:0 0 4px 0;">Frequently Asked Questions</h2>
<div style="padding:20px 0; border-bottom:1px solid #e5e7eb;" itemscope itemprop="mainEntity" itemtype="https://schema.org/Question">
<h3 style="font-size:1.1rem; font-weight:600; margin:0 0 8px 0;" itemprop="name">Q: Can I paint Gunpla without primer?</h3>
<div style="line-height:1.7; font-size:0.95rem;" itemscope itemprop="acceptedAnswer" itemtype="https://schema.org/Answer">
<p itemprop="text" style="margin:0;">A: You can paint without primer, but you risk poor adhesion and reduced paint durability. Primer creates a bonded undercoat that helps topcoat paint grip the plastic surface. Without it, paint may chip, peel, or scratch easily during handling. Primer also reveals surface imperfections you'd otherwise miss, allowing you to correct them before final painting.</p>
</div>
</div>
<div style="padding:20px 0; border-bottom:1px solid #e5e7eb;" itemscope itemprop="mainEntity" itemtype="https://schema.org/Question">
<h3 style="font-size:1.1rem; font-weight:600; margin:0 0 8px 0;" itemprop="name">Q: What's the best primer for Gunpla models?</h3>
<div style="line-height:1.7; font-size:0.95rem;" itemscope itemprop="acceptedAnswer" itemtype="https://schema.org/Answer">
<p itemprop="text" style="margin:0;">A: The best primer for Gunpla depends on your application method and paint system. Lacquer-based spray primers offer fast curing and excellent adhesion but require ventilation. Acrylic-based primers are safer indoors and work well with acrylic topcoats. Airbrush primers provide fine atomization for detailed control. Solvent-based options cure harder but need careful handling. Choose based on your planned topcoat type and workspace.</p>
</div>
</div>
<div style="padding:20px 0; border-bottom:1px solid #e5e7eb;" itemscope itemprop="mainEntity" itemtype="https://schema.org/Question">
<h3 style="font-size:1.1rem; font-weight:600; margin:0 0 8px 0;" itemprop="name">Q: How does primer help reveal surface imperfections?</h3>
<div style="line-height:1.7; font-size:0.95rem;" itemscope itemprop="acceptedAnswer" itemtype="https://schema.org/Answer">
<p itemprop="text" style="margin:0;">A: Primer's opaque pigment coating creates a uniform base layer that makes scratches, dust particles, and mold lines visible. The contrast between the primer and underlying plastic highlights defects you'd miss on bare plastic. This lets you sand, fill, or polish imperfections before applying expensive topcoats, resulting in a cleaner final finish.</p>
</div>
</div>
<div style="padding:20px 0; border-bottom:1px solid #e5e7eb;" itemscope itemprop="mainEntity" itemtype="https://schema.org/Question">
<h3 style="font-size:1.1rem; font-weight:600; margin:0 0 8px 0;" itemprop="name">Q: Should I prime every part of my Gunpla kit?</h3>
<div style="line-height:1.7; font-size:0.95rem;" itemscope itemprop="acceptedAnswer" itemtype="https://schema.org/Answer">
<p itemprop="text" style="margin:0;">A: Most builders prime all visible parts, but you can skip internal components, joints, and areas hidden by assembly. Focus primer on parts that will receive paint or be handled frequently. Parts that stay assembled inside the model or remain unpainted don't require primer. This saves time and primer while protecting the parts that matter most for durability and appearance.</p>
</div>
</div>
</section>
<div class="cta-button-container" style="text-align: center; margin: 32px 0;">
    <a href="https://utopiatoysandmodels.com" class="cta-button" style="display: inline-block; background-color: #fffde4; color: white; padding: 14px 32px; border-radius: 8px; text-decoration: none; font-weight: 600; font-size: 16px;">Get Started Today</a>
</div>
<p class="grandranker-branding" style="margin-top: 3rem; padding-top: 1.5rem; border-top: 1px solid #e5e7eb; font-size: 0.875rem; text-align: center;">This article was written using <a href="https://grandranker.com/" target="_blank" rel="noopener">GrandRanker</a></p>]]>
    </content>
  </entry>
  <entry>
    <id>https://utopiatoysandmodels.com/blogs/news/knoxville-gundam-store-guide</id>
    <published>2026-08-28T21:03:45-04:00</published>
    <updated>2026-08-28T21:03:47-04:00</updated>
    <link rel="alternate" type="text/html" href="https://utopiatoysandmodels.com/blogs/news/knoxville-gundam-store-guide"/>
    <title>Knoxville Gundam Store Guide for Gunpla Fans</title>
    <author>
      <name>Admin</name>
    </author>
    <summary type="html">
      <![CDATA[Find a Knoxville Gundam store with Gunpla for every skill level, plus smart advice on grades, tools, pre-orders, and collector-focused shopping choices.<p><a class="read-more" href="https://utopiatoysandmodels.com/blogs/news/knoxville-gundam-store-guide">More</a></p>]]>
    </summary>
    <content type="html">
      <![CDATA[<p>A great Gunpla shelf does not happen by accident. It starts with the right kit for your current skill level, your favorite mobile suit, and the amount of time you actually want to spend at the build table. Whether you are hunting your first RX-78-2 or adding another Universal Century masterpiece to the collection, a <strong>Knoxville Gundam store</strong> should make that search feel less like digging through a generic toy aisle and more like finding your fandom.</p>
<p>Gunpla is one of those hobbies that can stay simple or go incredibly deep. You can snap together a clean High Grade on a Saturday afternoon. You can also spend weeks detailing a Master Grade, chasing down waterslide decals, and debating panel line colors with fellow builders. Both approaches count. The best place to shop meets you where you are and gives you a clear path to the next build.</p>
<h2>What to Look for in a Knoxville Gundam Store</h2>
<p>Collectors do not shop for model kits the same way they shop for everyday toys. A box is not just a box. The grade, scale, release, suit design, and condition all matter. So does knowing that the retailer understands the difference between a builder buying their first kit and a longtime fan looking for a specific release.</p>
<p>Start with selection, but look past sheer box count. A useful Gunpla catalog is organized in a way that lets you shop by what matters to you: grade, scale, series, or mobile suit. If you know you want a 1/144 kit from Mobile Suit Gundam: The Witch from Mercury, you should be able to get there quickly. If you came in thinking, “I want a Zaku, but I have no idea which one,” clear categories help you compare without getting lost.</p>
<p>Authenticity matters, too. Official Bandai model kits deliver the fit, engineering, color separation, and build experience Gunpla fans expect. That does not mean every box needs to be expensive or rare. It means you should know what you are buying, especially when a kit is a gift, a first project, or a long-awaited addition to a favorite series.</p>
<p>A collector-focused retailer also understands the rhythm of releases. Some kits are easy to catch on a restock. Others move fast, show up in limited quantities, or make much more sense as a pre-order. Clear availability and fulfillment expectations are not boring details. They are part of a good collector experience.</p>
<h2>Choose Your Grade Before You Choose Your Kit</h2>
<p>The fastest way to narrow down your options is to understand Gunpla grades. Grade labels are not a strict ranking of what is “best.” They mostly tell you about scale, complexity, size, engineering, and the kind of building session you are signing up for.</p>
<h3>High Grade: The Best Place to Start</h3>
<p>High Grade, usually 1/144 scale, is where many builders get hooked. HG kits are generally affordable, compact, and satisfying without requiring a huge time commitment. Modern High Grades can have impressive articulation and color separation, even when the build stays beginner-friendly.</p>
<p>They are also ideal for collectors with limited shelf space. A row of HG kits can become a full display of favorite suits from different timelines without taking over the whole room. If you want to build regularly instead of saving every project for a special occasion, HG is hard to beat.</p>
<h3>Real Grade: Small Scale, Serious Detail</h3>
<p>Real Grade kits are also commonly 1/144 scale, but they pack in more parts, surface detail, and layered construction. They can look fantastic on display, especially for fans who want a more mechanical, realistic appearance without moving up to a larger scale.</p>
<p>The trade-off is precision. Smaller parts and tighter assemblies reward patience, clean nub removal, and a calm build space. Real Grade is a great next step after a few High Grades, though an enthusiastic first-timer can absolutely take one on if they are willing to slow down.</p>
<h3>Master Grade: A Project With Presence</h3>
<p>Master Grade kits, typically 1/100 scale, bring more size and interior detail to the table. These are often the kits that make friends stop mid-conversation and ask, “You built that?” A Master Grade is less about finishing quickly and more about enjoying the process.</p>
<p>Expect a longer build, more parts, and more opportunities for customization. If you like the idea of adding panel lining, decals, top coat, or display poses, Master Grade gives you room to grow. The trade-off is shelf space. Before committing, picture where a larger kit will live once it is done.</p>
<h3>Perfect Grade and Specialty Releases</h3>
<p>Perfect Grade kits are major builds: large, detailed, premium, and usually a serious investment of both money and time. They are excellent centerpiece projects, but they are not required to be a “real” Gunpla fan. Specialty releases, premium variants, and larger-scale kits can offer that same collector thrill depending on the mobile suit and the release.</p>
<p>Buy these because you love the suit and want the project, not because the label says you have reached some imaginary level. Gunpla is not a ladder. It is a collection of builds you are excited to open.</p>
<h2>Build Smarter With a Small Tool Setup</h2>
<p>You do not need a workshop full of equipment to get clean results. For most snap-builders, a pair of single-blade nippers, a hobby knife or sanding tool, and decent lighting will make a noticeable difference. The goal is simple: remove parts from the runner carefully and clean the remaining nub without gouging the plastic.</p>
<p>Panel lining is optional, but it can add instant definition to armor lines and mechanical details. Start lightly, especially on lighter-colored parts. Stickers, decals, paint, and top coat can all come later. There is no prize for adding every technique to your first kit.</p>
<p>It also helps to treat the instruction manual like part of the build, not an obstacle between you and the finished robot. Lay out the runners, check part numbers twice, and do not force pieces that do not fit. If something feels wrong, stop for a minute. Most build mistakes are easier to fix before the next three assemblies are attached.</p>
<h2>Shop by Series When the Shelf Needs a Theme</h2>
<p>The best Gunpla collections usually say something about the person who built them. Maybe your shelf is all Char red. Maybe it is a clean line of Witch from Mercury designs. Maybe you want the classic rivalry of RX-78-2 and Zaku II, or an all-Gundam Wing display that looks straight out of late-night anime memories.</p>
<p>Shopping by series makes collecting more personal and more focused. It can also keep impulse buys from taking over your space. Instead of asking, “Is this kit cool?” ask, “Does this fit the display I want to build?” There is nothing wrong with a random grab that sparks joy, but a little shelf planning goes a long way.</p>
<p>That franchise-first mindset is a big reason collectors respond to curated stores. At Utopia Toys and Models, fandom is the organizing principle, because finding a kit from the series you love should take less time than deciding which pose it gets after the build.</p>
<h2>Pre-Orders, Restocks, and the Collector Reality</h2>
<p>Gunpla availability is not always predictable. A kit you pass on today may be easy to find later, or it may disappear until the next production run. That is why pre-orders can be useful for builders who know exactly what they want. They let you claim a spot before release-day stress kicks in.</p>
<p>Still, pre-orders are not magic. Release dates can shift, allocations can change, and fulfillment timing depends on when inventory arrives. Read the retailer’s policies before placing an order, especially if you are combining in-stock items with pre-order items or using an order-hold option. Clear policies protect the store, but they also protect collectors from surprise expectations.</p>
<p>For in-stock kits, restock awareness matters. Keep an eye on new arrivals, clearance sections, and collector updates. A deal on a kit you genuinely want is a win. Buying a kit only because it is discounted can turn into a backlog problem with impressive speed.</p>
<h2>Make the Next Build One You Want to Finish</h2>
<p>The right Gunpla is not always the most detailed kit or the hardest one to find. Sometimes it is the High Grade that gets you building again after a busy month. Sometimes it is the Master Grade you have wanted since you first watched the series. Give yourself permission to build for fun, display what you love, and let each finished kit point you toward the next corner of the fandom you want to explore.</p>]]>
    </content>
  </entry>
  <entry>
    <id>https://utopiatoysandmodels.com/blogs/news/what-is-snap-fit-model-kit</id>
    <published>2026-08-27T23:18:15-04:00</published>
    <updated>2026-08-27T23:18:16-04:00</updated>
    <link rel="alternate" type="text/html" href="https://utopiatoysandmodels.com/blogs/news/what-is-snap-fit-model-kit"/>
    <title>What Is a Snap Fit Model Kit: Complete Guide</title>
    <author>
      <name>Editorial Team</name>
    </author>
    <summary type="html">
      <![CDATA[Learn what snap fit model kits are, how assembly works without glue, and why they're perfect for beginners. Discover tools, painting tips, and more.<p><a class="read-more" href="https://utopiatoysandmodels.com/blogs/news/what-is-snap-fit-model-kit">More</a></p>]]>
    </summary>
    <content type="html">
      <![CDATA[<h2 id="table-of-contents">Table of Contents</h2>
<ul>
<li>
<a href="#what-is-a-snap-fit-model-kit">What Is a Snap Fit Model Kit</a>
<ul>
<li><a href="#how-snap-together-assembly-works">How Snap-Together Assembly Works</a></li>
<li><a href="#snap-fit-vs-traditional-glue-models">Snap-Fit vs. Traditional Glue Models</a></li>
</ul>
</li>
<li><a href="#why-snap-fit-models-appeal-to-beginners">Why Snap Fit Models Appeal to Beginners</a></li>
<li><a href="#tools-needed-for-snap-fit-models">Tools Needed for Snap Fit Models</a></li>
<li>
<a href="#snap-fit-vs-glue-model-kits-key-differences">Snap Fit vs Glue Model Kits: Key Differences</a>
<ul>
<li><a href="#assembly-speed-and-complexity">Assembly Speed and Complexity</a></li>
<li><a href="#durability-and-joint-longevity">Durability and Joint Longevity</a></li>
</ul>
</li>
<li>
<a href="#painting-snap-fit-models-techniques-and-prep">Painting Snap Fit Models: Techniques and Prep</a>
<ul>
<li><a href="#preparing-parts-before-painting">Preparing Parts Before Painting</a></li>
<li><a href="#paint-application-and-customization">Paint Application and Customization</a></li>
</ul>
</li>
<li><a href="#common-assembly-mistakes-and-how-to-avoid-them">Common Assembly Mistakes and How to Avoid Them</a></li>
<li><a href="#advanced-modifications-for-snap-kits">Advanced Modifications for Snap Kits</a></li>
<li><a href="#conclusion">Conclusion</a></li>
</ul>
<p><em>Last Updated: August 28, 2026</em></p>
<h2 id="what-is-a-snap-fit-model-kit">What Is a Snap Fit Model Kit</h2>
<p>A <strong>snap fit model kit</strong> is a plastic model that assembles without glue, using mechanical press-fit joints where plastic parts lock together through friction and precision molding. Instead of requiring adhesive, snap-fit models rely on locators, tabs, and slots engineered into the molded parts themselves. When you press pieces together, they hold firm through the tension created by their design.</p>
<p>This approach transforms model building from a chemistry project into a mechanical assembly task. You don't wait for glue to cure, worry about excess adhesive ruining details, or manage volatile fumes. The parts simply snap, click, and stay put.</p>
<p>Snap fit model kits have become the standard for hobbyist-grade plastic models, particularly in the Gundam and anime collectible space. Bandai, the manufacturer behind the Gundam Plastic Model series, pioneered this technique and perfected it over decades.</p>
<h3 id="how-snap-together-assembly-works">How Snap-Together Assembly Works</h3>
<p>Snap-together assembly relies on engineered plastic geometry rather than chemical bonding. Each part tree includes precisely molded locators, pins, pegs, or protrusions that align with corresponding sockets or holes on adjacent pieces. When you press the parts together, the plastic flexes slightly, then locks into place as the locator seats fully into its socket.</p>
<p>The magic happens at the material level. Plastic has just enough give to allow assembly without breaking, but enough rigidity to hold its shape once seated. The joint achieves strength through friction fit, the tighter the tolerance, the more secure the connection.</p>
<p>Most snap-fit models use ABS or polystyrene plastic, both chosen for their balance of flexibility and durability (<a rel="noopener noreferrer" target="_blank" href="https://pmc.ncbi.nlm.nih.gov/articles/PMC11991449/">peer-reviewed research</a>). Parts come molded on sprues, the plastic frames that hold multiple components during manufacturing. You cut individual parts free using side cutters, then assemble them by aligning locators and pressing firmly until you hear or feel the satisfying click of a proper fit.</p>
<h3 id="snap-fit-vs-traditional-glue-models">Snap-Fit vs. Traditional Glue Models</h3>
<p>Snap-fit and glue-together models represent two fundamentally different assembly philosophies. Glue models require you to apply plastic cement to bonding surfaces, press parts together, and wait for the adhesive to cure, sometimes hours or overnight. Snap-fit models skip the adhesive entirely. Assembly is immediate, with no cure time, odor, or risk of excess glue clouding details.</p>
<p>The trade-off exists in joint longevity. A properly glued joint creates a permanent molecular bond. A snap-fit joint relies on mechanical tension, which can loosen over years of handling or temperature cycling. However, modern snap-fit engineering has largely closed this gap. Well-designed snap joints hold reliably for decades under normal display and handling conditions.</p>
<p>Snap-fit models also tend to be more affordable to produce, translating to lower retail prices. If you're new to modeling, snap-fit is almost always the better entry point.</p>
<h2 id="why-snap-fit-models-appeal-to-beginners">Why Snap Fit Models Appeal to Beginners</h2>
<p>Snap fit model kits remove the steepest barriers to entry for new builders. You don't need to buy solvents, learn adhesive application techniques, or manage fumes. The assembly process is straightforward: cut parts from the sprue, snap them together, and move forward.</p>
<p>This simplicity accelerates the learning curve. Beginners see results immediately. Within an hour or two, you have a recognizable model standing on your shelf. That quick win builds confidence and motivation to tackle more complex kits.</p>
<p>Snap-fit construction also reduces failure risk. A beginner using glue might apply too much adhesive, creating visible glue seams. With snap-fit kits, mistakes are easier to undo. If you press a part in the wrong orientation, you can usually remove it and reposition it without damage.</p>
<p>The beginner-friendly nature extends to tool requirements. You need a hobby knife to clean seam lines and side cutters to remove parts from sprues. That's it. Most beginners already own basic cutting tools or can acquire them cheaply.</p>
<h2 id="tools-needed-for-snap-fit-models">Tools Needed for Snap Fit Models</h2>
<p>Building a snap fit model kit requires minimal tooling. Start with these essentials: side cutters for removing parts from sprues, a hobby knife for cleaning seam lines, and fine-grit sandpaper for smoothing rough edges.</p>
<p>Side cutters are the workhorse tool. Quality matters here, cheap cutters leave ragged plastic edges that are harder to clean. A decent pair of hobby-grade side cutters costs under twenty dollars and lasts years. When cutting parts from the sprue, position the cutter so the blade cuts flush against the part, minimizing the nub left behind.</p>
<p>A hobby knife handles detail work. Use it to scrape away remaining plastic nubs, clean seam lines where two halves meet, and trim excess material. A sharp blade is essential; dull blades require more pressure and are more likely to slip. Keep spare blades on hand and replace them frequently.</p>
<p>Sandpaper in the 400-1000 grit range smooths rough edges created by cutting. Start with 400 grit for aggressive smoothing, then progress to 1000 grit for fine finishing. Wet sanding reduces plastic dust and improves smoothness.</p>
<figure class="article-content-image my-8" style="margin:2em 0;padding:0;background:transparent;border:0;"><img src="https://cdn.grandranker.com/articles/what-is-a-snap-fit-model-kit-complete-guide-content-1-1787887071.jpg" alt="Overhead flat lay of hobby tools arranged on a workbench with side cutters, hobby knife, fine-grit sandpaper sheets, paint brushes in various sizes, and a partially assembled snap-fit model kit showing visible plastic sprues and molded parts" class="w-full rounded-lg shadow-lg" loading="lazy" style="display:block;width:100%;max-width:100%;height:auto;border-radius:8px;margin:0 auto;"><figcaption class="text-sm text-gray-600 mt-2 text-center" style="font-size:0.875em;color:#6b7280;text-align:center;margin-top:0.6em;">Overhead flat lay of hobby tools arranged on a workbench with side cutters, hobby knife, fine-grit sandpaper sheets, paint brushes in various sizes, and a partially assembled snap-fit model kit showing visible plastic sprues and molded parts</figcaption></figure>
<p>Beyond these basics, consider a parts organizer to keep cut pieces organized during assembly. A magnifying glass helps with small detail work. For painting, you'll want a spray booth or well-ventilated area, masking tape, and appropriate primers and paints. For straight build assembly without painting, the three essential tools above suffice.</p>
<h2 id="snap-fit-vs-glue-model-kits-key-differences">Snap Fit vs Glue Model Kits: Key Differences</h2>
<h3 id="assembly-speed-and-complexity">Assembly Speed and Complexity</h3>
<p>Snap fit model kits assemble significantly faster than glue models. A typical snap-fit kit takes two to four hours from start to finish, while an equivalent glue model might require six to ten hours when accounting for cure time between assembly steps (<a rel="noopener noreferrer" target="_blank" href="https://pmc.ncbi.nlm.nih.gov/articles/PMC4745987/">peer-reviewed research</a>).</p>
<p>Assembly complexity also differs. Snap-fit kits are engineered for intuitive assembly. The locators and sockets are designed to align easily and fit together with moderate pressure. If a part doesn't fit smoothly, something is wrong, usually a sprue nub that needs cleaning. Snap-fit design is also more forgiving of minor mistakes. If you press a part in slightly the wrong position, you can usually remove it and reposition it without damage.</p>
<h3 id="durability-and-joint-longevity">Durability and Joint Longevity</h3>
<p>Glued joints create a permanent molecular bond that theoretically lasts indefinitely under stable conditions. Snap-fit joints rely on mechanical tension, which can relax over time, especially with temperature cycling or frequent handling.</p>
<p>In practice, modern snap-fit engineering has largely solved this concern. Well-designed snap joints remain tight for decades. The key factor is fit quality, tight tolerances hold better than loose ones. Temperature cycling is the primary stressor for snap-fit joints, as plastic expands and contracts with temperature changes. For display models in climate-controlled environments, snap-fit durability is not a practical concern.</p>
<h2 id="painting-snap-fit-models-techniques-and-prep">Painting Snap Fit Models: Techniques and Prep</h2>
<h3 id="preparing-parts-before-painting">Preparing Parts Before Painting</h3>
<p>Painting a snap fit model kit requires preparation before you apply the first coat. Start by assembling the model completely, then disassemble it into major sections. Paint individual parts rather than the assembled model, it's faster, more thorough, and prevents paint from accumulating in crevices.</p>
<p class="cta-inline" style="background-color: #fffde408; border-left: 4px solid #fffde4; padding: 16px 20px; margin: 24px 0; border-radius: 0 8px 8px 0;">
     <a href="https://utopiatoysandmodels.com" style="color: #fffde4; font-weight: 600; text-decoration: underline;">Get Started Today →</a>
</p>
<p>Clean all parts thoroughly before painting. Use warm water and dish soap to remove mold release agent, a lubricant applied during manufacturing that prevents sticking. Mold release creates a slick surface that paint struggles to adhere to (<a rel="noopener noreferrer" target="_blank" href="https://pmc.ncbi.nlm.nih.gov/articles/PMC8398520/">peer-reviewed research</a>).</p>
<p>Sand all surfaces lightly with 1000-grit sandpaper. This step is crucial for paint adhesion. It slightly roughens the plastic surface, giving paint something to grip. Wipe away all dust with a damp cloth and let parts dry completely.</p>
<p>Apply a primer coat before painting. Primer fills microscopic surface irregularities and provides a uniform base for color coats. Use a primer matched to your plastic type. Spray primer in thin, even coats, allowing each coat to dry before applying the next. Two to three thin coats provide better coverage than one thick coat.</p>
<h3 id="paint-application-and-customization">Paint Application and Customization</h3>
<p>Once primed, apply your color coats. <a href="/blogs/news/lacquer-vs-acrylic-paint-gunpla">Acrylic paints work well</a> for snap-fit models because they dry quickly, emit minimal odor, and clean up with water. Enamel paints offer superior durability and finish quality but require solvent cleanup and longer drying times.</p>
<p>Apply paint in thin, even coats. Multiple light coats produce a better finish than fewer heavy coats. Spray painting provides the smoothest finish, but brush painting works perfectly well for detailed work and small parts.</p>
<p>Customization is where snap-fit models shine. Because you assemble the model from individual parts, you can paint each component separately with complete control. Paint internal details before assembly. Use masking tape to isolate areas you want to keep unpainted.</p>
<figure class="article-content-image my-8" style="margin:2em 0;padding:0;background:transparent;border:0;"><img src="https://cdn.grandranker.com/articles/what-is-a-snap-fit-model-kit-complete-guide-content-2-1787887089.jpg" alt="Close-up of hands holding a fine-tipped brush applying paint to a disassembled snap-fit model part with precision, with paint bottles, masking tape, and other parts visible on the work surface below" class="w-full rounded-lg shadow-lg" loading="lazy" style="display:block;width:100%;max-width:100%;height:auto;border-radius:8px;margin:0 auto;"><figcaption class="text-sm text-gray-600 mt-2 text-center" style="font-size:0.875em;color:#6b7280;text-align:center;margin-top:0.6em;">Close-up of hands holding a fine-tipped brush applying paint to a disassembled snap-fit model part with precision, with paint bottles, masking tape, and other parts visible on the work surface below</figcaption></figure>
<p>Consider panel lining after painting. Panel lining involves applying thin lines of darker paint or marker along panel seams to add depth and definition. This technique is popular in Gundam modeling and transforms a basic painted model into something with professional-looking detail.</p>
<h2 id="common-assembly-mistakes-and-how-to-avoid-them">Common Assembly Mistakes and How to Avoid Them</h2>
<p>The most common mistake is forcing parts together before checking alignment. If a part doesn't fit smoothly, stop and investigate. Usually, a sprue nub is preventing proper seating. Clean it away and try again. Forcing creates stress on the plastic, potentially breaking a locator or cracking the part.</p>
<p>Another frequent error is assembling in the wrong order. Some snap-fit kits have specific assembly sequences. Read the instruction manual completely before starting. <a href="/blogs/news/master-grade-vs-real-grade-kits">Experienced builders</a> often skim instructions and pay for it with parts that don't fit together.</p>
<p>Overtightening joints is less common but damaging when it happens. Snap-fit joints need firm pressure but not excessive force. If you're straining to press a part together, something is misaligned.</p>
<p>Neglecting to clean sprue nubs creates visible imperfections, especially on painted models. Take time to clean each part carefully. A sharp hobby knife and light sanding produce clean results.</p>
<p>Many beginners underestimate the importance of part preparation before assembly. Rough edges, visible seam lines, and sprue nubs are much easier to address before assembly than after. Spend time on prep work. It's the difference between a model that looks like a toy and one that looks like a finished piece.</p>
<h2 id="advanced-modifications-for-snap-kits">Advanced Modifications for Snap Kits</h2>
<p>Once you've mastered basic assembly and painting, snap-fit models offer surprising room for customization. Experienced builders go beyond the original design through kitbashing, combining parts from multiple kits to create new designs.</p>
<p>Kitbashing exploits the modular nature of snap-fit construction. Remove an arm from one kit and attach it to another. Swap heads between models. Combine torsos and legs from different kits. The snap-fit system's flexibility makes these modifications straightforward compared to glued models.</p>
<p>Structural reinforcement is another advanced technique. Some builders reinforce internal joints with small amounts of plastic cement or epoxy, creating hybrid assemblies that combine snap-fit's ease with glue's durability.</p>
<p>Detail enhancement involves adding aftermarket parts, replacement armor, weapons, or accessories designed to fit standard snap-fit models. Many builders purchase detail upgrade kits that replace standard parts with higher-quality alternatives.</p>
<p>Custom painting techniques like weathering and <a href="/blogs/news/how-to-scribe-panel-lines-on-gunpla">panel lining</a> elevate a basic model into something with real character. Weathering involves applying washes and dry brushing to simulate wear, dust, and battle damage. These techniques are learned through practice but produce dramatic results.</p>
<hr>
<p>Snap fit model kits represent the most accessible entry point into plastic model building. Whether you're exploring the hobby for the first time or looking for a quick-build option, snap-fit construction eliminates barriers while maintaining the satisfaction of creating something tangible with your hands. At Utopia Toys and Models, we stock a wide selection of snap-fit kits from industry-leading manufacturers like Bandai, Funko, and Kotobukiya, offering everything from beginner-friendly models to advanced kits for experienced builders. Explore our collection and find the perfect kit to start or expand your modeling journey.</p>
<section style="margin:3rem 0 2rem 0;" itemscope itemtype="https://schema.org/FAQPage">
<h2 style="font-size:1.5rem; font-weight:700; margin:0 0 4px 0;">Frequently Asked Questions</h2>
<div style="padding:20px 0; border-bottom:1px solid #e5e7eb;" itemscope itemprop="mainEntity" itemtype="https://schema.org/Question">
<h3 style="font-size:1.1rem; font-weight:600; margin:0 0 8px 0;" itemprop="name">What is the main difference between snap fit and glue model kits?</h3>
<div style="line-height:1.7; font-size:0.95rem;" itemscope itemprop="acceptedAnswer" itemtype="https://schema.org/Answer">
<p itemprop="text" style="margin:0;">Snap fit model kits use mechanical press-fit joints and locators that hold parts together without adhesive, while glue-together models require plastic cement to bond components. Snap-fit assembly is faster and cleaner, making it ideal for beginners. Glue models typically offer stronger permanent bonds but demand more precision and cleanup. The choice depends on your skill level and whether you prioritize speed or structural permanence.</p>
</div>
</div>
<div style="padding:20px 0; border-bottom:1px solid #e5e7eb;" itemscope itemprop="mainEntity" itemtype="https://schema.org/Question">
<h3 style="font-size:1.1rem; font-weight:600; margin:0 0 8px 0;" itemprop="name">Do you need special tools to build a snap fit model kit?</h3>
<div style="line-height:1.7; font-size:0.95rem;" itemscope itemprop="acceptedAnswer" itemtype="https://schema.org/Answer">
<p itemprop="text" style="margin:0;">Basic hobby tools make assembly easier but aren't always required. A hobby knife or side cutters help remove parts cleanly from the sprue without damage. Sandpaper smooths rough edges where parts were cut. For most straight builds, these tools are optional, many builders start with just their hands. However, investing in quality hobby-grade tools significantly improves the final result and reduces frustration, especially for detail-oriented hobbyists.</p>
</div>
</div>
<div style="padding:20px 0; border-bottom:1px solid #e5e7eb;" itemscope itemprop="mainEntity" itemtype="https://schema.org/Question">
<h3 style="font-size:1.1rem; font-weight:600; margin:0 0 8px 0;" itemprop="name">Can you paint snap fit models after assembly?</h3>
<div style="line-height:1.7; font-size:0.95rem;" itemscope itemprop="acceptedAnswer" itemtype="https://schema.org/Answer">
<p itemprop="text" style="margin:0;">Yes, you can paint snap fit models before or after assembly. Painting before assembly allows easier access to all surfaces and prevents paint from interfering with joints. Disassemble the model, paint individual parts, let them dry completely, then reassemble. If painting after assembly, mask off areas where parts connect to avoid paint buildup that could weaken friction fits. Either approach works, choose based on your preferred workflow and the level of detail you want.</p>
</div>
</div>
<div style="padding:20px 0; border-bottom:1px solid #e5e7eb;" itemscope itemprop="mainEntity" itemtype="https://schema.org/Question">
<h3 style="font-size:1.1rem; font-weight:600; margin:0 0 8px 0;" itemprop="name">How long do snap fit joints typically last?</h3>
<div style="line-height:1.7; font-size:0.95rem;" itemscope itemprop="acceptedAnswer" itemtype="https://schema.org/Answer">
<p itemprop="text" style="margin:0;">Snap fit joints remain functional for years when assembled correctly, though joint tension naturally decreases over time through repeated handling and stress. Plastic can develop micro-fractures from constant pressure, especially in high-stress connection points. Proper assembly, avoiding over-forcing parts and respecting locator alignment, extends longevity significantly. For display models handled infrequently, snap joints remain stable indefinitely. For frequently handled or posed figures, periodic reassembly may be needed to maintain tight connections.</p>
</div>
</div>
</section>
<div class="cta-button-container" style="text-align: center; margin: 32px 0;">
    <a href="https://utopiatoysandmodels.com" class="cta-button" style="display: inline-block; background-color: #fffde4; color: white; padding: 14px 32px; border-radius: 8px; text-decoration: none; font-weight: 600; font-size: 16px;">Get Started Today</a>
</div>
<p class="grandranker-branding" style="margin-top: 3rem; padding-top: 1.5rem; border-top: 1px solid #e5e7eb; font-size: 0.875rem; text-align: center;">This article was written using <a href="https://grandranker.com/" target="_blank" rel="noopener">GrandRanker</a></p>]]>
    </content>
  </entry>
  <entry>
    <id>https://utopiatoysandmodels.com/blogs/news/knoxville-toy-store-serious-collectors</id>
    <published>2026-08-27T21:04:06-04:00</published>
    <updated>2026-08-27T21:04:08-04:00</updated>
    <link rel="alternate" type="text/html" href="https://utopiatoysandmodels.com/blogs/news/knoxville-toy-store-serious-collectors"/>
    <title>Knoxville Toy Store for Serious Collectors</title>
    <author>
      <name>Admin</name>
    </author>
    <summary type="html">
      <![CDATA[Find your fandom at a Knoxville toy store built for Gunpla, anime figures, horror collectibles, manga, blind boxes, and fresh collector drops and clear policies.<p><a class="read-more" href="https://utopiatoysandmodels.com/blogs/news/knoxville-toy-store-serious-collectors">More</a></p>]]>
    </summary>
    <content type="html">
      <![CDATA[<p>A collector does not walk into a Knoxville toy store looking for just any toy. They are looking for that one shelf moment: the Gundam kit they have been hunting, the horror figure that completes a display, the anime statue that makes the wait worth it, or a blind box that turns an ordinary afternoon into a pull worth showing off.</p>
<p>That is the difference between a general toy aisle and a store built around fandom. Collectors shop with a point of view. They know the series, the character, the scale, the manufacturer, and sometimes the exact version they want. Whether your shelf is packed with One Piece, Evangelion, Godzilla, Marvel, classic slashers, or a growing fleet of Gunpla, the best shopping experience starts with a store that gets how you collect.</p>
<h2>What Makes a Knoxville Toy Store Worth the Stop?</h2>
<p>For serious fans, selection matters, but curation matters more. A huge assortment can still be frustrating if it treats every collectible like a random box on a wall. A well-stocked collectible shop makes it easier to follow the fandom first, then the format. You should be able to move from anime to figures, from kaiju to vinyl, or from a favorite Gunpla grade to the next build without digging through categories that have nothing to do with what you love.</p>
<p>That kind of organization respects how collectors actually browse. Someone building HG 1/144 kits may be comparing a quick weekend project with a particular mobile suit they need in their lineup. A horror collector may care whether a figure is from a favorite film, has display-worthy packaging, or belongs to a line they already collect. A Funko POP! fan may be chasing Animation one week and Rocks the next.</p>
<p>The point is not to make every collector shop the same way. The point is to make the hunt feel focused.</p>
<h3>Fandom-first shopping beats the generic toy aisle</h3>
<p>A collector-focused store should feel like a map of the things you already care about. Franchise and brand categories make a real difference when a new release hits or when you are trying to track down something that fits an existing collection. It is faster, more fun, and far less likely to lead to the classic collector problem: buying something cool, then realizing it does not fit the display plan at all.</p>
<p>That does not mean every purchase has to be planned. <a href="https://utopiatoysandmodels.com/products/cassy-drinks-series-blind-box">Blind boxes</a>, mystery figures, plush, pins, and small vinyl collectibles leave room for surprise. They are great for a lower-stakes pickup, a gift for a friend, or a little chaos between major releases. The best shops balance both sides of the hobby: the deliberate hunt and the unexpected find.</p>
<h2>Build, Display, Read, Repeat</h2>
<p>Collecting is not one hobby. It is a bunch of connected hobbies sharing the same shelf space.</p>
<p>Gunpla builders are not simply buying a product. They are picking a project. Grade, scale, articulation, color separation, complexity, and shelf presence all shape the decision. A High Grade kit can be a satisfying build with a manageable time commitment, while larger or more detailed kits ask for more patience, tools, and display room. Neither option is automatically better. It depends on whether you want a quick build, a technical challenge, or a centerpiece.</p>
<p>Anime figures and statues create a different kind of choice. Here, pose, sculpt, size, and character loyalty often matter more than assembly. A prize figure can be a fun, accessible way to celebrate a series. A premium statue may demand more from your budget and display case, but it can also become the piece guests notice first. Collectors who buy by franchise should not have to choose between recognizable favorites and deeper cuts from the fandoms they follow.</p>
<p>Then there is manga, comics, imported soundtrack music, collectible pins, plush, and strange little shelf goblins like Handmade by Robots figures. These are not filler categories. They give a collection personality. A display of clean, posed figures can become much more personal with a <a href="https://utopiatoysandmodels.com/products/fire-force-vol-32-rated-older-teen">manga volume</a>, a soundtrack record, or a goofy vinyl piece that only makes sense to people who know the reference.</p>
<h3>Leave room for the weird stuff</h3>
<p>The most memorable collections rarely look like a store display. They look like the person who built them.</p>
<p>Maybe that means a carefully arranged shelf of Dragon Ball figures beside a stack of manga. Maybe it means <a href="https://utopiatoysandmodels.com/products/beetlejuice-beetlejuice-ultimate-beetlejuice-striped-suit-action-figure">horror action figures</a> under a framed movie poster. Maybe it means a Gunpla hangar with one totally unnecessary plush mascot in the middle because it makes you laugh. There are no collector police coming to inspect your display. If it represents your fandom, it belongs.</p>
<h2>Pre-orders Are Part of the Hunt</h2>
<p>Collectibles move on release schedules, not always on the day you happen to be ready to buy. That is why pre-orders matter. They give fans a chance to claim upcoming items before launch-day demand, limited quantities, or fast sellouts turn the hunt into a stressful secondary-market search.</p>
<p>A pre-order is still a commitment, though, and a good store should be direct about how it works. Release dates can change. Distributor schedules can shift. Different items in the same order may arrive at different times. These are normal parts of buying collectible merchandise, especially imported items and high-demand releases. Clear expectations are not boring fine print. They are what let collectors make smart decisions with their money.</p>
<p>Order-hold options can also be a practical win for repeat buyers. If you are expecting several releases over a period of time, combining them can help you manage shipping and keep your collection plans organized. The trade-off is patience: holding an order means waiting until you are ready to ship everything together. Know what you are choosing, and the process stays simple.</p>
<h2>How to Shop Smarter for Collectibles</h2>
<p>A little planning keeps a collection exciting instead of expensive in a way that hurts. Start with what you actually collect, not just what looks cool in a release photo. If your shelves are already full of anime figures, a new figure may need to earn its place through character importance, scale, or a pose that adds something different. If you build Gunpla, think about the experience you want from the next kit, not just the box art.</p>
<p>It helps to keep a short want list. That does not need to be a spreadsheet unless that is your style. A note on your phone with a few dream items, upcoming releases, and categories to watch can prevent impulse buys from crowding out the pieces you truly want.</p>
<p>Pay attention to space, too. Boxes, statues, model kits, and oversized vinyl all take up room faster than expected. A collection can grow into a display problem before it becomes a budget problem. Measure a shelf before buying a large figure. Consider whether you keep packaging. Think about sunlight, dust, pets, and the terrifying reach of a curious toddler. Displaying collectibles is part of collecting them.</p>
<p>Finally, buy from retailers that treat authenticity and fulfillment seriously. Officially licensed products, clear availability information, transparent pre-order terms, and fraud-prevention policies protect collectors from disappointment. The excitement of a rare drop is better when you know exactly what you are buying and what happens next.</p>
<h2>Find Your Fandom in Knoxville</h2>
<p>A local shop can bring something online scrolling cannot: shared excitement. You might come in for a model kit and spot a figure from a series you forgot you loved. You might find the perfect gift because the person behind the counter understands the difference between “they like anime” and “they only collect this specific character.” That knowledge matters.</p>
<p>At Utopia Toys and Models, the goal is not to make fandom feel like a generic category. It is to help collectors shop the way they think: by series, character, brand, build, and display. From fresh drops to clearance finds, every shelf has room for longtime collectors, first-time builders, and fans ready to start a new obsession.</p>
<p>The next time a release catches your eye, do not just ask whether you want it. Ask where it will live, what story it adds to your collection, and whether it makes you more excited to look at your shelf. That is usually how you know it is coming home.</p>]]>
    </content>
  </entry>
  <entry>
    <id>https://utopiatoysandmodels.com/blogs/news/how-to-fix-stress-marks-on-gunpla</id>
    <published>2026-08-26T23:15:39-04:00</published>
    <updated>2026-08-26T23:15:40-04:00</updated>
    <link rel="alternate" type="text/html" href="https://utopiatoysandmodels.com/blogs/news/how-to-fix-stress-marks-on-gunpla"/>
    <title>How to Fix Stress Marks on Gunpla: Complete Removal Guide</title>
    <author>
      <name>Editorial Team</name>
    </author>
    <summary type="html">
      <![CDATA[Learn how to fix stress marks on Gunpla with proven cutting, sanding, and polishing techniques. Step-by-step methods for clean plastic model finishes.<p><a class="read-more" href="https://utopiatoysandmodels.com/blogs/news/how-to-fix-stress-marks-on-gunpla">More</a></p>]]>
    </summary>
    <content type="html">
      <![CDATA[<h2 id="table-of-contents">Table of Contents</h2>
<ul>
<li><a href="#what-are-stress-marks-and-why-they-appear-on-gunpla">What Are Stress Marks and Why They Appear on Gunpla</a></li>
<li>
<a href="#prevention-cutting-techniques-that-stop-stress-marks-before-they-start">Prevention: Cutting Techniques That Stop Stress Marks Before They Start</a>
<ul>
<li><a href="#the-double-cut-method-with-quality-nippers">The Double-Cut Method with Quality Nippers</a></li>
<li><a href="#proper-blade-angle-and-pressure">Proper Blade Angle and Pressure</a></li>
</ul>
</li>
<li><a href="#best-hobby-nippers-for-gunpla-choosing-the-right-tool">Best Hobby Nippers for Gunpla: Choosing the Right Tool</a></li>
<li>
<a href="#how-to-remove-nub-marks-step-by-step-removal-methods">How to Remove Nub Marks: Step-by-Step Removal Methods</a>
<ul>
<li><a href="#using-a-hobby-knife-for-precision-cleanup">Using a Hobby Knife for Precision Cleanup</a></li>
<li><a href="#chemical-solutions-for-stubborn-marks">Chemical Solutions for Stubborn Marks</a></li>
</ul>
</li>
<li>
<a href="#sanding-gunpla-parts-for-beginners-grit-progression-and-technique">Sanding Gunpla Parts for Beginners: Grit Progression and Technique</a>
<ul>
<li><a href="#grit-selection-and-progression">Grit Selection and Progression</a></li>
<li><a href="#sanding-sponges-vs-sanding-sticks">Sanding Sponges vs. Sanding Sticks</a></li>
</ul>
</li>
<li>
<a href="#polishing-and-finishing-for-a-professional-surface">Polishing and Finishing for a Professional Surface</a>
<ul>
<li><a href="#buffing-without-paint">Buffing Without Paint</a></li>
<li><a href="#top-coat-application-for-final-protection">Top Coat Application for Final Protection</a></li>
</ul>
</li>
<li><a href="#common-mistakes-to-avoid-when-removing-stress-marks">Common Mistakes to Avoid When Removing Stress Marks</a></li>
<li><a href="#conclusion">Conclusion</a></li>
</ul>
<p><em>Last Updated: August 27, 2026</em></p>
<h2 id="what-are-stress-marks-and-why-they-appear-on-gunpla">What Are Stress Marks and Why They Appear on Gunpla</h2>
<p>Stress marks are visible white or discolored lines that appear on plastic surfaces after cutting. They form when the plastic's molecular structure fractures during the cutting process, creating stress whitening that persists even after the nub is removed. When you use side cutters to separate parts from the runner, the blade compresses and tears the plastic fibers rather than making a clean slice, creating micro-fractures that scatter light differently than the surrounding plastic.</p>
<p>Different plastic formulations respond differently to cutting stress. Older Gunpla kits stress mark more easily than <a href="/blogs/news/what-are-high-grade-gundam-kits">newer High Grade or Real Grade models</a>, which use tougher plastic compounds (<a rel="noopener noreferrer" target="_blank" href="https://pmc.ncbi.nlm.nih.gov/articles/PMC11117644/">peer-reviewed research</a>). Darker colors like black, dark blue, and dark red show stress marks far more prominently than lighter colors. The good news is that stress marks are entirely preventable with the right approach, and multiple removal methods exist if they do appear.</p>
<h2 id="prevention-cutting-techniques-that-stop-stress-marks-before-they-start">Prevention: Cutting Techniques That Stop Stress Marks Before They Start</h2>
<p>Prevention starts with understanding how to position your tools and apply pressure during cutting. The double-cut method is the gold standard: instead of making a single cut flush against the part, you make two cuts. First, remove most of the runner, leaving a small plastic tab. Second, remove that remaining tab with a fresh blade position. This distributes cutting force across two operations with smaller amounts of material, allowing plastic fibers to separate more cleanly.</p>
<p>Here's how to execute the double-cut method:</p>
<ol>
<li>Position your nippers 2-3mm away from the part, cutting away the bulk of the runner first.</li>
<li>Inspect the remaining nub, roughly the size of a match head.</li>
<li>Reposition your nippers to cut this final tab as close to the part as possible, using a fresh section of the blade.</li>
<li>Examine the cut surface for minimal stress whitening.</li>
</ol>
<p><a href="/blogs/news/beginner-gunpla-tools-under-20">Quality nippers</a> make this method far easier. Cheap side cutters dull quickly, forcing you to apply more pressure, which creates more stress marks. When your blade is sharp, the plastic cuts cleanly.</p>
<p>The angle at which you hold your nippers also affects fracturing. The optimal angle is closer to 45 degrees, allowing the blade to shear the plastic rather than crush it (<a rel="noopener noreferrer" target="_blank" href="https://pmc.ncbi.nlm.nih.gov/articles/PMC4843621/">peer-reviewed research</a>). Pressure control is equally critical, you should never need to squeeze with maximum force. If you're straining, either your blade is dull or you're cutting too close to the part. Excessive pressure is the single biggest cause of stress marks among builders with decent tools.</p>
<h2 id="best-hobby-nippers-for-gunpla-choosing-the-right-tool">Best Hobby Nippers for Gunpla: Choosing the Right Tool</h2>
<figure class="article-content-image my-8" style="margin:2em 0;padding:0;background:transparent;border:0;"><img src="https://cdn.grandranker.com/articles/how-to-fix-stress-marks-on-gunpla-complete-removal-guide-content-1-1787800507.jpg" alt="Close-up of a builder's hands holding quality side cutters positioned at the correct 45-degree angle against a plastic runner, with finished Gundam parts visible in the background on a work mat" class="w-full rounded-lg shadow-lg" loading="lazy" style="display:block;width:100%;max-width:100%;height:auto;border-radius:8px;margin:0 auto;"><figcaption class="text-sm text-gray-600 mt-2 text-center" style="font-size:0.875em;color:#6b7280;text-align:center;margin-top:0.6em;">Close-up of a builder's hands holding quality side cutters positioned at the correct 45-degree angle against a plastic runner, with finished Gundam parts visible in the background on a work mat</figcaption></figure>
<p>Hobby-grade nippers designed specifically for plastic model kits have blades engineered to cut cleanly through polystyrene without crushing. These tools maintain their edge far longer than generic craft nippers because they're made from harder steel and designed for repeated precision cuts. The blade geometry creates a shearing action rather than a crushing action, which is why <a href="/blogs/news/how-to-build-gunpla-for-beginners">professional builders</a> report fewer stress marks when upgrading from budget tools.</p>
<p>Look for nippers with a flush-cutting design, which allows you to position the blade extremely close to your part. Double-action nippers, which move both handles toward each other, reduce the force you need to apply, making it easier to maintain control. The best nippers for Gunpla are those specifically marketed for plastic model kits, as opposed to general craft nippers or wire cutters.</p>
<p>Blade maintenance extends the life of your nippers significantly. After each building session, wipe your blades clean with a dry cloth. When your blades dull after hundreds of cuts, some premium nippers allow blade replacement rather than requiring you to buy entirely new tools.</p>
<h2 id="how-to-remove-nub-marks-step-by-step-removal-methods">How to Remove Nub Marks: Step-by-Step Removal Methods</h2>
<p>If stress marks have already appeared, you have several proven removal methods depending on severity, plastic color, and time investment.</p>
<h3 id="using-a-hobby-knife-for-precision-cleanup">Using a Hobby Knife for Precision Cleanup</h3>
<p>A hobby knife is the fastest way to remove visible nub marks immediately after cutting. This method works best when stress whitening is minimal and localized.</p>
<ol>
<li>Secure your part firmly using a hobby vise or clamp.</li>
<li>Hold your hobby knife at a shallow angle, roughly 15-20 degrees, to the plastic surface.</li>
<li>Make light, controlled strokes away from yourself, applying just enough pressure to remove the white-discolored layer.</li>
<li>Work slowly and check progress frequently.</li>
<li>Once white discoloration is gone, stop, you'll sand the rough surface smooth next.</li>
</ol>
<p>This method requires a sharp blade and a steady hand. Replace your blade frequently; a fresh blade cuts cleanly with minimal pressure.</p>
<h3 id="chemical-solutions-for-stubborn-marks">Chemical Solutions for Stubborn Marks</h3>
<p>Plastic cement or model cement can work as a stress-mark treatment when applied carefully. The solvent softens the plastic surface, allowing stressed and unstressed areas to blend. Apply a tiny amount directly to the stress mark using a brush, then allow it to dry completely.</p>
<p>Isopropyl alcohol offers a gentler alternative. Dampen a cotton swab with isopropyl alcohol and gently rub the stressed area. The alcohol softens the plastic slightly without dissolving it. This method requires patience and multiple applications but is less risky for builders worried about damaging their parts. Always test any chemical solution on a spare plastic runner first.</p>
<h2 id="sanding-gunpla-parts-for-beginners-grit-progression-and-technique">Sanding Gunpla Parts for Beginners: Grit Progression and Technique</h2>
<p>Sanding is the most thorough method for eliminating stress marks and achieving a professional surface finish. The key is using the correct grit progression.</p>
<figure class="article-content-image my-8" style="margin:2em 0;padding:0;background:transparent;border:0;"><img src="https://cdn.grandranker.com/articles/how-to-fix-stress-marks-on-gunpla-complete-removal-guide-content-2-1787800533.jpg" alt="A model builder's workbench showing an array of sanding sponges and sanding sticks organized by grit level, with a partially finished Gundam part and dust-free workspace" class="w-full rounded-lg shadow-lg" loading="lazy" style="display:block;width:100%;max-width:100%;height:auto;border-radius:8px;margin:0 auto;"><figcaption class="text-sm text-gray-600 mt-2 text-center" style="font-size:0.875em;color:#6b7280;text-align:center;margin-top:0.6em;">A model builder's workbench showing an array of sanding sponges and sanding sticks organized by grit level, with a partially finished Gundam part and dust-free workspace</figcaption></figure>
<h3 id="grit-selection-and-progression">Grit Selection and Progression</h3>
<p>Sanding grit refers to the size of abrasive particles. Lower numbers (60, 80, 120) are coarse and remove material quickly (<a rel="noopener noreferrer" target="_blank" href="https://pmc.ncbi.nlm.nih.gov/articles/PMC11313664/">peer-reviewed research</a>). Higher numbers (220, 400, 600, 1000) are progressively finer and smooth the surface without removing significant material. For stress mark removal, start at 120 or 150 grit and progress upward.</p>
<p>A typical progression: 120 grit to remove the worst of the mark, 220 grit to smooth the surface, 400 grit to refine further, and 600 grit or higher for final polish. Skipping steps leaves visible scratches that catch light.</p>
<p>Start with 120-grit sanding sponges to aggressively remove the stress-marked area. Sand in small circular motions with light to moderate pressure. Check progress every 10-15 seconds. Once white discoloration is gone, move to 220 grit and sand the entire local area around the nub to blend the repair. Continue through 400 and 600 grit until the surface feels smooth and stress marks are invisible under normal lighting.</p>
<p class="cta-inline" style="background-color: #fffde408; border-left: 4px solid #fffde4; padding: 16px 20px; margin: 24px 0; border-radius: 0 8px 8px 0;">
     <a href="https://utopiatoysandmodels.com" style="color: #fffde4; font-weight: 600; text-decoration: underline;">Get Started Today →</a>
</p>
<h3 id="sanding-sponges-vs-sanding-sticks">Sanding Sponges vs. Sanding Sticks</h3>
<p>Sanding sponges are flexible foam blocks with abrasive coating. They conform to curved surfaces, making them ideal for Gundam parts. The flexibility also prevents over-aggressive sanding. Sanding sticks are rigid blocks with abrasive paper glued to the surface, providing more control and precision for flat surfaces and final finishing.</p>
<p>For stress mark removal, start with a sanding sponge at 120-220 grit to remove the mark safely, then switch to a sanding stick at 400-600 grit for final finishing. Always sand in one direction or gentle circular motions, never in harsh back-and-forth scrubbing. Light pressure applied consistently works far better than heavy pressure applied sporadically.</p>
<h2 id="polishing-and-finishing-for-a-professional-surface">Polishing and Finishing for a Professional Surface</h2>
<p>Once sanding is complete, your stress marks are gone, but your plastic surface may still look slightly dull. Polishing brings back the original glossy finish.</p>
<h3 id="buffing-without-paint">Buffing Without Paint</h3>
<p>Use a soft cloth, preferably microfiber, and apply a plastic polish designed for model kits. Rub the polished area gently in circular motions until the surface regains its original glossy appearance. A small amount of polish goes a long way.</p>
<p>For an even glossier finish, apply a clear gloss top coat to the entire part. This approach is particularly useful if you've repaired stress marks on dark-colored plastic, where the repair might otherwise look slightly different in tone.</p>
<h3 id="top-coat-application-for-final-protection">Top Coat Application for Final Protection</h3>
<p>A top coat protects your plastic from dust and minor scratches, and unifies the appearance of repaired areas. Apply top coat in thin, even layers using a spray can or airbrush. Multiple thin coats look better than one thick coat. Allow each coat to dry completely before applying the next. Two to three coats typically provide adequate protection.</p>
<p>Choose between gloss and matte based on your kit's original finish. Most Gundam kits have a slightly glossy finish from the factory, so a gloss top coat maintains authenticity.</p>
<h2 id="common-mistakes-to-avoid-when-removing-stress-marks">Common Mistakes to Avoid When Removing Stress Marks</h2>
<p>The most common mistake is attempting to remove stress marks with a single aggressive cut or sand. Stress marks require patience and multiple light applications. Work slowly and check progress frequently to prevent over-removal.</p>
<p>Another frequent error is skipping grit levels during sanding. Jumping from 120 grit directly to 600 grit leaves visible scratches. Each level removes the scratches from the previous one.</p>
<p>Using dull blades or worn sanding surfaces is another trap. A dull hobby knife blade will crush plastic instead of shaving it. Worn sanding sponges lose their cutting ability and require more pressure, which can damage your parts.</p>
<p>Many builders also fail to secure their parts properly during removal work. A part that's moving while you're removing stress marks is far more likely to be damaged. Use a hobby vise, clamp, or blu-tack to hold your part completely still.</p>
<p>Finally, avoid attempting to fix stress marks on parts you've already painted. Once paint is applied, most removal methods risk damaging the paint job. Prevention and removal should happen before painting.</p>
<hr>
<p>At Utopia Toys and Models, we know that stress marks frustrate even experienced builders. By understanding why they form and mastering prevention techniques like the double-cut method, you'll notice far fewer marks on your finished kits. When stress marks do appear, the removal methods covered here work reliably at every skill level. Whether you choose the speed of a hobby knife, the precision of sanding, or the blending effect of chemical treatments, you have proven solutions. <a href="/blogs/news/essential-tools-for-building-gunpla-models-a-2026-guide">Quality nippers, sanding sponges, hobby knives, and top coats</a> are all available through Utopia Toys and Models, where our team helps builders find exactly what they need to achieve professional results. Start with prevention, master your technique, and your Gundam models will look flawless.</p>
<section style="margin:3rem 0 2rem 0;" itemscope itemtype="https://schema.org/FAQPage">
<h2 style="font-size:1.5rem; font-weight:700; margin:0 0 4px 0;">Frequently Asked Questions</h2>
<div style="padding:20px 0; border-bottom:1px solid #e5e7eb;" itemscope itemprop="mainEntity" itemtype="https://schema.org/Question">
<h3 style="font-size:1.1rem; font-weight:600; margin:0 0 8px 0;" itemprop="name">What causes stress marks when cutting Gunpla parts?</h3>
<div style="line-height:1.7; font-size:0.95rem;" itemscope itemprop="acceptedAnswer" itemtype="https://schema.org/Answer">
<p itemprop="text" style="margin:0;">Stress marks appear when plastic deformation occurs during gate removal. Dull blades, excessive pressure, or cutting too close to the part create white stress whitening. Using sharp nippers and the double-cut method, cutting first at the gate itself, then again closer to the part, distributes stress evenly and prevents plastic from tearing or cracking. Material thickness matters too; thicker plastic requires sharper tools and more controlled cuts.</p>
</div>
</div>
<div style="padding:20px 0; border-bottom:1px solid #e5e7eb;" itemscope itemprop="mainEntity" itemtype="https://schema.org/Question">
<h3 style="font-size:1.1rem; font-weight:600; margin:0 0 8px 0;" itemprop="name">Can you fix stress marks without painting the model?</h3>
<div style="line-height:1.7; font-size:0.95rem;" itemscope itemprop="acceptedAnswer" itemtype="https://schema.org/Answer">
<p itemprop="text" style="margin:0;">Yes. Sanding with progressive grits (starting at 400-600 grit and finishing at 1000+ grit) removes shallow stress whitening. For deeper marks, buffing with a polishing compound or using isopropyl alcohol on a soft cloth can restore clarity. A matte or gloss top coat seals the surface and hides minor imperfections. Chemical solutions like plastic cement applied carefully can also blend stress marks into the surrounding plastic without requiring paint.</p>
</div>
</div>
<div style="padding:20px 0; border-bottom:1px solid #e5e7eb;" itemscope itemprop="mainEntity" itemtype="https://schema.org/Question">
<h3 style="font-size:1.1rem; font-weight:600; margin:0 0 8px 0;" itemprop="name">Does isopropyl alcohol damage Gunpla plastic?</h3>
<div style="line-height:1.7; font-size:0.95rem;" itemscope itemprop="acceptedAnswer" itemtype="https://schema.org/Answer">
<p itemprop="text" style="margin:0;">No, isopropyl alcohol is safe on Gundam model plastic when used correctly. It evaporates quickly and won't dissolve standard ABS or polystyrene plastic. Use it on a soft cloth to gently wipe stress marks and restore surface clarity. Avoid soaking parts or using it on decals or pre-painted surfaces. Test on a spare runner first if you're unsure about your specific kit's plastic type.</p>
</div>
</div>
<div style="padding:20px 0; border-bottom:1px solid #e5e7eb;" itemscope itemprop="mainEntity" itemtype="https://schema.org/Question">
<h3 style="font-size:1.1rem; font-weight:600; margin:0 0 8px 0;" itemprop="name">What grit should I start with to sand out stress marks on Gunpla?</h3>
<div style="line-height:1.7; font-size:0.95rem;" itemscope itemprop="acceptedAnswer" itemtype="https://schema.org/Answer">
<p itemprop="text" style="margin:0;">Begin with 400-600 grit sanding sponges for initial stress mark removal. Progress through 800-1000 grit for smoothing, then finish with 1200+ grit for a polished surface. Finer grits reveal the true plastic color and eliminate visible scratches from coarser sanding. Work slowly and check your progress frequently, aggressive sanding removes material permanently. For very shallow marks, you may skip the coarser grits and start at 800.</p>
</div>
</div>
</section>
<div class="cta-button-container" style="text-align: center; margin: 32px 0;">
    <a href="https://utopiatoysandmodels.com" class="cta-button" style="display: inline-block; background-color: #fffde4; color: white; padding: 14px 32px; border-radius: 8px; text-decoration: none; font-weight: 600; font-size: 16px;">Get Started Today</a>
</div>
<p class="grandranker-branding" style="margin-top: 3rem; padding-top: 1.5rem; border-top: 1px solid #e5e7eb; font-size: 0.875rem; text-align: center;">This article was written using <a href="https://grandranker.com/" target="_blank" rel="noopener">GrandRanker</a></p>]]>
    </content>
  </entry>
  <entry>
    <id>https://utopiatoysandmodels.com/blogs/news/snaa-model-kits-builders-guide</id>
    <published>2026-08-26T21:03:44-04:00</published>
    <updated>2026-08-26T21:03:45-04:00</updated>
    <link rel="alternate" type="text/html" href="https://utopiatoysandmodels.com/blogs/news/snaa-model-kits-builders-guide"/>
    <title>SNAA Model Kits: What Builders Should Know</title>
    <author>
      <name>Admin</name>
    </author>
    <summary type="html">
      <![CDATA[SNAA model kits bring original mecha style, sharp detail, and big shelf presence. Here is how to choose, build, and display one with confidence at home.<p><a class="read-more" href="https://utopiatoysandmodels.com/blogs/news/snaa-model-kits-builders-guide">More</a></p>]]>
    </summary>
    <content type="html">
      <![CDATA[<p>SNAA model kits have a way of grabbing attention before the box is even open. The silhouettes are loud, the armor layering is ambitious, and many releases aim for the kind of shelf presence that makes a standard 1/144 kit look suddenly very small. For builders who have spent time with Gunpla and want a fresh mecha project, SNAA can feel like stepping into a new corner of the hobby without leaving the workbench behind.</p>
<p>That said, these are not necessarily grab-and-go kits for every first-time builder. Their appeal is tied to their complexity, their original designs, and the extra patience some builds may ask of you. Know what you are buying, bring the right tools, and you can end up with a seriously striking display piece.</p>
<h2>What Makes SNAA Model Kits Different?</h2>
<p>SNAA is known among mecha builders for original-design plastic model kits that favor aggressive proportions, elaborate mechanical detail, and dramatic accessories. Rather than depending on a familiar anime protagonist or a decades-long franchise roster, many of these kits sell the concept first: huge backpacks, layered blades, angular armor, expressive poses, and a design that looks ready for a final-boss entrance.</p>
<p>That original approach is a big part of the fun. You are not building the version of a mobile suit you have watched in twenty episodes. You are building because the design speaks to you. For collectors who shop by visual impact as much as canon, that is a strong reason to make room on the shelf.</p>
<p>The trade-off is that there may be less shared build history around a release than there is with a major Bandai kit. A popular HG or MG often has years of reviews, build guides, replacement-part discussions, and paint references behind it. With SNAA, you may need to make more of your own calls <a href="https://utopiatoysandmodels.com/products/scopedog-armored-trooper-votoms-bandai-hobby-hg">during the build</a>, especially if you plan to modify, paint, or tighten a joint.</p>
<h2>Who Should Build SNAA Kits?</h2>
<p>A builder who has completed a handful of modern Gunpla kits will usually be in a much better position than someone opening their first model ever. That does not mean a newer hobbyist cannot build one. It means the learning curve can be more enjoyable if you already know how to clean nub marks, test-fit parts, and recognize when a joint should be adjusted rather than forced.</p>
<p>SNAA kits are a natural fit for builders who like an involved project. If your favorite part of the hobby is carefully sorting runners, studying the manual, and seeing a complex frame become a sharp armored machine, you are in the right zone. They also make sense for collectors who want one centerpiece model rather than a row of identical-scale suits.</p>
<p>If you prefer a relaxing, quick weekend build with minimal cleanup and a guaranteed familiar assembly experience, it depends on the specific kit. A <a href="https://utopiatoysandmodels.com/products/mobile-suit-gundam-hathaway-the-sorcery-of-nymph-circe-messer-type-m01-gawman-use-hg-1-144-scale-model-kit">simple HG</a> can still be the better pick. There is no shame in choosing the build that matches your time and skill level. Find Your Fandom also means finding the projects that keep the hobby fun.</p>
<h2>What to Expect During the Build</h2>
<p>The best mindset for an SNAA build is slow and intentional. Do not rush through the runner layout just because the first few steps feel familiar. Check the manual closely, keep small pieces contained, and dry-fit any section that seems unusually tight or complicated.</p>
<h3>Parts Count and Detail</h3>
<p>Many SNAA designs pack a lot into a relatively compact scale. That can mean layered armor segments, tiny mechanical inserts, weapon components, and visual details that reward careful cleanup. A single pale nub mark can stand out against dark armor or glossy metallic-colored plastic, so a sharp pair of nippers and a hobby knife or sanding tool are worth having nearby.</p>
<p>Clean only as much as the part needs. Over-sanding can round off sharp edges that are central to the kit’s look. Take a little plastic away at a time, inspect the surface under good light, and move on when it is clean.</p>
<h3>Joints and Posing</h3>
<p>Big weapons and large backpacks look incredible, but physics still gets a vote. Before committing to a dramatic pose, make sure the feet are planted and the hips, ankles, and torso can support the equipment. Action bases can be especially useful for airborne poses, asymmetrical stances, or designs with oversized armaments.</p>
<p>If a joint feels too loose, builders sometimes use a small amount of joint-tightening product or a clear acrylic coating on the peg, allowed to dry fully before reassembly. If it feels too tight, do not force it. Carefully inspect the connection for paint buildup, excess plastic, or a part that is not seated correctly. A snapped peg can turn a great build into an unplanned repair project.</p>
<h3>Stickers, Decals, and Finish</h3>
<p>Not every kit needs paint to look complete. A clean straight build with carefully applied decals can already have a premium, high-detail finish. Panel lining can help separate armor layers, but choose a method that matches the plastic and your experience. Test on a hidden area first, especially if you are using stronger enamel-based products.</p>
<p>For a more custom look, consider a restrained approach: paint a few inner-frame details, add metallic accents to weapons, and use decals to break up broad armor surfaces. These designs already have plenty going on. Good customization often comes from choosing a few focal points, not treating every panel like it needs a different color.</p>
<h2>Choosing the Right SNAA Kit for Your Shelf</h2>
<p>Start with the design, then think about the practical details. Ask where it will stand, how much room its accessories require, and whether you want a clean neutral display or a dynamic action pose. A kit with a huge wing unit may have a modest body but still take up more shelf width than several standard 1/144 models.</p>
<p>Scale labels can be helpful, but proportions and accessories matter just as much. Original mecha kits do not always line up neatly with a single franchise’s visual language. Look at the completed dimensions and the included equipment rather than assuming that two kits at the same nominal scale will occupy the same amount of space.</p>
<p>Availability can be another factor. Imported model kits may arrive in waves, and a popular design can disappear quickly between restocks. If a release is one you genuinely want to build, waiting indefinitely for a clearance price can mean missing it. On the other hand, if you are unsure about the style, start with the kit whose design you would still enjoy displaying after the build is over.</p>
<h2>Tools That Make the Experience Better</h2>
<p>You do not need a full professional studio, but the right basics make a visible difference. For SNAA builds, a solid starter setup includes single-blade nippers, a hobby knife, sanding sticks or glass files, tweezers, a cutting mat, and good lighting. A parts tray or small organizer is also useful when a build has many small detail pieces.</p>
<p>If you plan to panel line or decal, add cotton swabs, a soft cloth, and a safe workspace where the model can stay undisturbed. Keep adhesive, paint, and top coat away from rushed late-night decisions. The hobby is more fun when the finish is deliberate instead of a rescue mission.</p>
<h2>Displaying an Original Mecha Build</h2>
<p>A completed SNAA kit deserves room to breathe. Give it a simple backdrop, avoid cramming its weapons into surrounding figures, and use a stand if the pose needs support. A cool white light can emphasize mechanical surface detail, while warmer lighting may bring out metallic accents and color contrast.</p>
<p>For a shelf with Gunpla, kaiju, anime figures, and horror collectibles, an original mecha design can work as the visual wildcard. It does not have to match a single franchise to belong. It just has to look like it earned its place there.</p>
<p>Utopia Toys and Models is built for collectors who know that feeling: the box arrives, the runners are spread across the table, and one more piece of your fandom takes shape. Choose an SNAA kit because the design makes you stop scrolling. Then take your time, build it clean, and let it own the shelf.</p>]]>
    </content>
  </entry>
  <entry>
    <id>https://utopiatoysandmodels.com/blogs/news/how-to-organize-blind-box-figures-small-rooms</id>
    <published>2026-08-25T23:38:00-04:00</published>
    <updated>2026-08-25T23:38:01-04:00</updated>
    <link rel="alternate" type="text/html" href="https://utopiatoysandmodels.com/blogs/news/how-to-organize-blind-box-figures-small-rooms"/>
    <title>Organize Blind Box Figures in Small Rooms</title>
    <author>
      <name>Editorial Team</name>
    </author>
    <summary type="html">
      <![CDATA[Learn how to organize blind box figures in small rooms with space-saving storage solutions, display cases, and practical tips to maximize your collection.<p><a class="read-more" href="https://utopiatoysandmodels.com/blogs/news/how-to-organize-blind-box-figures-small-rooms">More</a></p>]]>
    </summary>
    <content type="html">
      <![CDATA[<h2 id="table-of-contents">Table of Contents</h2>
<ul>
<li><a href="#assess-your-space-and-collection-size">Assess Your Space and Collection Size</a></li>
<li><a href="#choose-storage-solutions-acrylic-display-cases-for-figures">Choose Storage Solutions: Acrylic Display Cases for Figures</a></li>
<li>
<a href="#vertical-storage-and-wall-mounted-display-shelves">Vertical Storage and Wall-Mounted Display Shelves</a>
<ul>
<li><a href="#floating-shelves-for-small-spaces">Floating Shelves for Small Spaces</a></li>
<li><a href="#modular-shelving-systems">Modular Shelving Systems</a></li>
</ul>
</li>
<li><a href="#blind-box-display-ideas-and-rotation-systems">Blind Box Display Ideas and Rotation Systems</a></li>
<li><a href="#protect-your-collection-dust-proof-and-uv-protection">Protect Your Collection: Dust-Proof and UV Protection</a></li>
<li><a href="#how-to-store-blind-box-boxes-and-packaging">How to Store Blind Box Boxes and Packaging</a></li>
<li><a href="#organize-by-theme-and-inventory-management">Organize by Theme and Inventory Management</a></li>
<li><a href="#common-mistakes-to-avoid-when-organizing-in-small-spaces">Common Mistakes to Avoid When Organizing in Small Spaces</a></li>
</ul>
<p><em>Last Updated: August 26, 2026</em></p>
<h2 id="assess-your-space-and-collection-size">Assess Your Space and Collection Size</h2>
<p>Start by measuring your room and taking inventory of your blind box figures before buying storage. Count your current figures, note their sizes, and identify which pieces you display regularly versus which stay boxed. This prevents purchasing oversized solutions that won't fit through your doorway or will dominate your room.</p>
<p>Plan for 20-30% expansion capacity when selecting shelving or display cases. If you have 50 figures now, choose solutions that can accommodate 60-70 figures comfortably. This prevents the frustrating cycle of outgrowing storage every six months.</p>
<p>Consider your room's layout carefully. Windows, radiators, doors, and electrical outlets all affect where you can place display solutions. Natural light will fade your figures over time, and heat from radiators damages collectibles (<a rel="noopener noreferrer" target="_blank" href="https://pmc.ncbi.nlm.nih.gov/articles/PMC10088630/">peer-reviewed research</a>). Map out these constraints before committing to wall-mounted shelves or large <a href="/blogs/news/best-display-cases-for-anime-figures-2026-guide">acrylic display cases</a>. Document your space with photos and measurements, including ceiling height, wall dimensions, and obstacle locations. This simple step saves hours of frustration and prevents expensive mistakes.</p>
<h2 id="choose-storage-solutions-acrylic-display-cases-for-figures">Choose Storage Solutions: Acrylic Display Cases for Figures</h2>
<p>Acrylic display cases are the gold standard for protecting <a href="/blogs/news/tips-displaying-blind-box-figures">blind box figures</a> while keeping them visible. These clear compartment storage cases showcase your collection without exposing figures to dust, sunlight, or accidental damage.</p>
<figure class="article-content-image my-8" style="margin:2em 0;padding:0;background:transparent;border:0;"><img src="https://cdn.grandranker.com/articles/organize-blind-box-figures-in-small-rooms-content-1-1787715454.jpg" alt="Close-up of acrylic display cases on a bedroom shelf holding blind box figures and vinyl toys, with natural light illuminating the figures inside the protective cases" class="w-full rounded-lg shadow-lg" loading="lazy" style="display:block;width:100%;max-width:100%;height:auto;border-radius:8px;margin:0 auto;"><figcaption class="text-sm text-gray-600 mt-2 text-center" style="font-size:0.875em;color:#6b7280;text-align:center;margin-top:0.6em;">Close-up of acrylic display cases on a bedroom shelf holding blind box figures and vinyl toys, with natural light illuminating the figures inside the protective cases</figcaption></figure>
<p>Look for cases with multiple compartments designed specifically for miniature figurines. Small compartments prevent figures from sliding around during transport. Cases with adjustable shelving offer flexibility as your collection changes. Quality acrylic won't yellow or cloud over time like cheaper plastic alternatives.</p>
<p>Size matters significantly. A case that's too large dominates the room; one that's too small forces awkward stacking. Measure your available wall or shelf space, then select cases that fit naturally. Many collectors find that 3-4 smaller cases arranged together work better in tight spaces than one large case.</p>
<p>Stackable acrylic risers work well inside larger cases or on shelves, creating vertical depth and preventing figures from being hidden behind taller pieces. Higher-quality cases have better seals, clearer acrylic, and more refined construction, worth the investment if you're protecting valuable figures.</p>
<h2 id="vertical-storage-and-wall-mounted-display-shelves">Vertical Storage and Wall-Mounted Display Shelves</h2>
<p>Vertical storage is your best friend in a small room. Wall-mounted display shelves transform unused vertical space into prime real estate for your collection.</p>
<h3 id="floating-shelves-for-small-spaces">Floating Shelves for Small Spaces</h3>
<p>Floating shelves create clean lines and open up floor space, making your room feel larger while displaying your collection. Look for shelves with weight ratings that exceed your needs, if you're hanging 30 figures, choose shelves rated for at least 50-75 pounds (<a rel="noopener noreferrer" target="_blank" href="http://www.osha.gov/laws-regs/regulations/standardnumber/1926/1926.250">osha.gov</a>).</p>
<p>Installation matters enormously. Use a quality level and locate studs in your walls before installing. If studs aren't positioned where you want shelves, use heavy-duty toggle bolts or wall anchors rated for your expected load. Cheap installation shortcuts lead to shelves that fail and damage your figures.</p>
<p>Leave at least 8-10 inches between shelves if displaying figures standing upright. Stagger shelves at different heights to create visual interest and accommodate different figure sizes. Consider the wall behind your shelves, a neutral background makes your figures pop.</p>
<h3 id="modular-shelving-systems">Modular Shelving Systems</h3>
<p>Modular shelving systems offer flexibility that fixed shelves don't provide. Brands like Kallax or Expedit let you configure shelves exactly as you need them and rearrange sections as your collection grows. They work particularly well in corners or along walls and create a focal point without dominating the room.</p>
<p>Assembly and installation are straightforward, making them ideal if you rent or prefer not to drill into walls. Distribute your collection across multiple shelves to maintain stability and prevent the unit from tipping.</p>
<h2 id="blind-box-display-ideas-and-rotation-systems">Blind Box Display Ideas and Rotation Systems</h2>
<p>Displaying every figure simultaneously isn't practical in small rooms, but a rotation system lets you enjoy your entire collection without overwhelming your space. Rotate featured figures every month or season to keep your display fresh.</p>
<figure class="article-content-image my-8" style="margin:2em 0;padding:0;background:transparent;border:0;"><img src="https://cdn.grandranker.com/articles/organize-blind-box-figures-in-small-rooms-content-2-1787715475.jpg" alt="A well-organized small bedroom wall showing wall-mounted floating shelves with blind box figures displayed at different heights, demonstrating vertical space use and organized collection" class="w-full rounded-lg shadow-lg" loading="lazy" style="display:block;width:100%;max-width:100%;height:auto;border-radius:8px;margin:0 auto;"><figcaption class="text-sm text-gray-600 mt-2 text-center" style="font-size:0.875em;color:#6b7280;text-align:center;margin-top:0.6em;">A well-organized small bedroom wall showing wall-mounted floating shelves with blind box figures displayed at different heights, demonstrating vertical space use and organized collection</figcaption></figure>
<p>Create a curated display that tells a story. Group figures <a href="/blogs/news/how-to-organize-your-figure-collection-a-collectors-guide">by theme</a>, color, or series. A display featuring only red and black figures looks intentional. Thematic displays are more visually compelling than random arrangements.</p>
<p>Implement a simple inventory system to track which figures are displayed and which are in storage. A spreadsheet or handwritten list prevents you from forgetting about stored figures and helps when rotating pieces.</p>
<p>Arrange figures with height variation to prevent monotony. Use acrylic risers or small stands to elevate some pieces. Taller figures toward the back, smaller ones toward the front. Position your best or most valuable figures where you'll see them naturally as you move through the space.</p>
<p class="cta-inline" style="background-color: #fffde408; border-left: 4px solid #fffde4; padding: 16px 20px; margin: 24px 0; border-radius: 0 8px 8px 0;">
     <a href="https://utopiatoysandmodels.com" style="color: #fffde4; font-weight: 600; text-decoration: underline;">Get Started Today →</a>
</p>
<h2 id="protect-your-collection-dust-proof-and-uv-protection">Protect Your Collection: Dust-Proof and UV Protection</h2>
<p>Dust accumulation is inevitable but problematic for blind box figures with intricate details. Dust-proof display cases and acrylic covers prevent this problem entirely. UV protection is equally important, sunlight fades paint and discolors plastic over time. If your shelves are near windows, UV-blocking acrylic or display cases are essential.</p>
<p>Climate control affects figure preservation significantly. Keep your collection in a stable environment between 60-70 degrees Fahrenheit with humidity around 40-50% (<a rel="noopener noreferrer" target="_blank" href="https://siarchives.si.edu/what-we-do/preservation/environment">si.edu</a>). Avoid placing figures near heating vents, air conditioning units, or windows where temperature swings are greatest. Never store figures in basements or attics where temperature and humidity fluctuate wildly.</p>
<p>Handle your figures minimally and wear <a href="/blogs/news/how-to-dust-figures-without-damage">clean hands</a>. Oils from your skin transfer to paint and plastic. When rotating figures or cleaning, use soft brushes or microfiber cloths. Never use water or harsh chemicals on painted figures unless absolutely necessary.</p>
<h2 id="how-to-store-blind-box-boxes-and-packaging">How to Store Blind Box Boxes and Packaging</h2>
<p>Many collectors keep original boxes because they protect figures and preserve resale value. Flat boxes stack efficiently when placed horizontally. Store them in labeled bins or on shelves above your display area.</p>
<p>Create a filing system for boxes using clear plastic bins labeled by series or character. This organization prevents you from tearing open multiple boxes hunting for the right one when rotating figures. Keep boxes in a dry location away from direct sunlight. For <a href="/blogs/news/how-to-store-anime-figures-long-term">long-term storage</a>, consider acid-free tissue paper between layers to prevent moisture transfer and color bleeding.</p>
<h2 id="organize-by-theme-and-inventory-management">Organize by Theme and Inventory Management</h2>
<p>Organizing by theme transforms your display from random collection to curated showcase. Group figures by series, character type, color scheme, or aesthetic. Thematic organization also makes rotating figures easier because related pieces work well together.</p>
<p>Implement a simple inventory system using a spreadsheet or dedicated app. Record each figure's name, series, condition, purchase date, and current location. Include a photo if possible. Create a "wish list" separate from your current inventory to prevent duplicate purchases and help you prioritize spending.</p>
<p>Categorize figures by display priority. Mark your absolute favorites as "featured," figures you enjoy but rotate less frequently as "secondary," and figures you keep for collection completeness as "storage." This categorization guides your rotation schedule.</p>
<h2 id="common-mistakes-to-avoid-when-organizing-in-small-spaces">Common Mistakes to Avoid When Organizing in Small Spaces</h2>
<p>Overcrowding shelves is the most common mistake. Figures crammed together look chaotic and risk damage from falling against each other. Leave breathing room between pieces. A shelf with 15 figures spaced apart looks better and is safer than the same shelf with 25 figures packed tightly.</p>
<p>Ignoring lighting is a critical oversight. Poor lighting makes even beautiful displays look dull. Position shelves where they receive adequate light, either from room lighting or supplemental LED strips. Many collectors find that adding small LED strip lights to shelves dramatically improves how their collection looks.</p>
<p>Choosing storage solutions before assessing your space leads to expensive mistakes. Measure first, buy second. Neglecting dust protection is penny-wise, pound-foolish. Protecting figures from dust costs far less than cleaning or repairing damage.</p>
<p>Storing figures in unsuitable locations damages your collection. Attics, basements, and garages experience temperature and humidity swings that harm plastic and paint. Keep your collection in climate-controlled living spaces. Failing to inventory your collection leads to duplicate purchases and forgotten figures. A simple list prevents these expensive mistakes.</p>
<hr>
<p>Organizing blind box figures in small rooms requires planning, but it's absolutely achievable. Start by assessing your space honestly, invest in quality storage solutions like acrylic display cases and floating shelves, and implement a rotation system that lets you enjoy your entire collection. Utopia Toys and Models understands the collector's challenge, we stock the high-quality acrylic display cases, protective solutions, and organizational tools that help you showcase your blind box figures beautifully, even in tight spaces. Visit Utopia Toys and Models to find the storage solutions that match your collection's needs and your room's constraints.</p>
<section style="margin:3rem 0 2rem 0;" itemscope itemtype="https://schema.org/FAQPage">
<h2 style="font-size:1.5rem; font-weight:700; margin:0 0 4px 0;">Frequently Asked Questions</h2>
<div style="padding:20px 0; border-bottom:1px solid #e5e7eb;" itemscope itemprop="mainEntity" itemtype="https://schema.org/Question">
<h3 style="font-size:1.1rem; font-weight:600; margin:0 0 8px 0;" itemprop="name">What is the best way to organize blind box figures in a small bedroom?</h3>
<div style="line-height:1.7; font-size:0.95rem;" itemscope itemprop="acceptedAnswer" itemtype="https://schema.org/Answer">
<p itemprop="text" style="margin:0;">Start by assessing your total collection size and available wall and shelf space. Use vertical storage with wall-mounted floating shelves to maximize square footage without consuming floor space. Combine acrylic display cases for figures with stackable organizers to group figures by theme or collection. Rotate displays monthly to reduce visual clutter while keeping all figures accessible. This approach lets you showcase your blind box collection while maintaining a functional living space.</p>
</div>
</div>
<div style="padding:20px 0; border-bottom:1px solid #e5e7eb;" itemscope itemprop="mainEntity" itemtype="https://schema.org/Question">
<h3 style="font-size:1.1rem; font-weight:600; margin:0 0 8px 0;" itemprop="name">How do you keep blind box figures dust-free in small rooms?</h3>
<div style="line-height:1.7; font-size:0.95rem;" itemscope itemprop="acceptedAnswer" itemtype="https://schema.org/Answer">
<p itemprop="text" style="margin:0;">Acrylic display cases for figures are the most effective solution for dust protection in compact spaces. Enclosed cases with sliding or hinged doors prevent dust accumulation while displaying your collection. For wall-mounted shelves, use acrylic risers or small glass covers over individual figures. Keep the room humidity between 30-50% to prevent moisture damage, and avoid placing figures near windows with direct sunlight. Dust monthly with a soft microfiber cloth if figures are on open shelves.</p>
</div>
</div>
<div style="padding:20px 0; border-bottom:1px solid #e5e7eb;" itemscope itemprop="mainEntity" itemtype="https://schema.org/Question">
<h3 style="font-size:1.1rem; font-weight:600; margin:0 0 8px 0;" itemprop="name">What should I do with blind box boxes after opening them?</h3>
<div style="line-height:1.7; font-size:0.95rem;" itemscope itemprop="acceptedAnswer" itemtype="https://schema.org/Answer">
<p itemprop="text" style="margin:0;">Store blind box boxes flat in stackable plastic bins under your bed, in a closet, or on a high shelf to preserve resale value and maintain collection documentation. Keep original packaging organized by series or brand for easy reference. If space is extremely limited, photograph the boxes before storage and keep a digital inventory. Some collectors flatten boxes and store them vertically in magazine holders. Preserve boxes for 6-12 months before deciding whether to recycle, they may be needed if you sell figures later.</p>
</div>
</div>
<div style="padding:20px 0; border-bottom:1px solid #e5e7eb;" itemscope itemprop="mainEntity" itemtype="https://schema.org/Question">
<h3 style="font-size:1.1rem; font-weight:600; margin:0 0 8px 0;" itemprop="name">Can I use wall-mounted storage for blind box figures in a rental apartment?</h3>
<div style="line-height:1.7; font-size:0.95rem;" itemscope itemprop="acceptedAnswer" itemtype="https://schema.org/Answer">
<p itemprop="text" style="margin:0;">Yes, but use damage-free mounting solutions like adhesive strips or tension rods instead of drilling into walls. Floating shelves with removable adhesive backing work well for renters. Alternatively, use freestanding bookcases against walls, stackable organizers, or over-the-door storage racks. These options let you organize your blind box collection without violating lease agreements. When you move, simply remove the fixtures and patch any residue, your deposit stays intact.</p>
</div>
</div>
</section>
<div class="cta-button-container" style="text-align: center; margin: 32px 0;">
    <a href="https://utopiatoysandmodels.com" class="cta-button" style="display: inline-block; background-color: #fffde4; color: white; padding: 14px 32px; border-radius: 8px; text-decoration: none; font-weight: 600; font-size: 16px;">Get Started Today</a>
</div>
<p class="grandranker-branding" style="margin-top: 3rem; padding-top: 1.5rem; border-top: 1px solid #e5e7eb; font-size: 0.875rem; text-align: center;">This article was written using <a href="https://grandranker.com/" target="_blank" rel="noopener">GrandRanker</a></p>]]>
    </content>
  </entry>
  <entry>
    <id>https://utopiatoysandmodels.com/blogs/news/3rd-party-transformers-collectors-guide</id>
    <published>2026-08-25T21:06:31-04:00</published>
    <updated>2026-08-25T21:06:33-04:00</updated>
    <link rel="alternate" type="text/html" href="https://utopiatoysandmodels.com/blogs/news/3rd-party-transformers-collectors-guide"/>
    <title>3rd Party Transformers: What Collectors Should Know</title>
    <author>
      <name>Admin</name>
    </author>
    <summary type="html">
      <![CDATA[3rd party transformers can deliver wild designs and premium engineering. Learn how to spot the differences, weigh risks, and buy with collector confidence.<p><a class="read-more" href="https://utopiatoysandmodels.com/blogs/news/3rd-party-transformers-collectors-guide">More</a></p>]]>
    </summary>
    <content type="html">
      <![CDATA[<p>A shelf of <strong>3rd party transformers</strong> can look incredible: a towering movie-style robot with sharper proportions, a cartoon-accurate combiner that actually stands, or a deep-cut character the official line may never touch. For collectors, that creativity is the appeal. The catch is that this corner of the hobby comes with real trade-offs involving quality, support, safety, resale, and what exactly you are buying.</p>
<p>WELCOME TO UTOPIA, where knowing your collection matters as much as growing it. Here is how to understand the third-party market before a new bot joins your display.</p>
<h2>What Are 3rd Party Transformers?</h2>
<p>In collector language, third-party Transformers are converting robot toys made by companies that are not officially licensed by Hasbro or Takara Tomy. They are often inspired by characters, designs, or concepts associated with the Transformers franchise, but the packaging may use different names. Optimus Prime becomes an original-sounding leader character. Megatron becomes a mysterious tyrant. The robot mode might leave no doubt about the inspiration, even when the box avoids official branding.</p>
<p>That distinction matters. An official Transformers release is made under a license, with access to the brand’s names, logos, and approved character identity. A third-party release is not. That does not automatically mean it is poorly made, fake, or unwanted by serious collectors. It means the buyer needs to evaluate it on its own terms.</p>
<p>Third-party makers tend to focus on gaps in official collecting. Maybe there is no large-scale version of a favorite character, no accurate take on a specific animated appearance, or no combiner team that matches a collector’s preferred scale. Some companies also chase engineering challenges that mainstream lines cannot always justify at retail price points.</p>
<h2>Third Party, Knockoff, and Official: Know the Difference</h2>
<p>These labels get thrown around like they mean the same thing. They do not.</p>
<p>An <strong>official figure</strong> is licensed merchandise from brands such as Hasbro and Takara Tomy. It may be a mainline retail release, a premium collector figure, an import, or an exclusive, but it is authorized product.</p>
<p>A <strong>third-party figure</strong> is usually an unlicensed original product that evokes a Transformers character or style. The maker may create a new sculpt, a new transformation scheme, custom accessories, and its own packaging. The legal and ethical questions around the design inspiration remain, but it is not necessarily a direct copy of another toy.</p>
<p>A <strong>knockoff</strong>, often shortened to KO, is a direct or near-direct copy of an existing official or third-party product. Quality can range from surprisingly good to absolutely miserable. Some KO makers advertise improvements such as tighter joints, metallic paint, or a larger scale. Others reproduce a figure with cheaper plastic, missing parts, weak tolerances, or unsafe materials.</p>
<p>That difference is useful when reading listings. If someone calls every non-official robot a “third party,” ask more questions. Is it a new design from an unlicensed maker, or is it a copy of a toy that already exists?</p>
<h2>Why Collectors Love 3rd Party Transformers</h2>
<p>The biggest draw is choice. Official Transformers lines have to serve kids, casual buyers, longtime fans, price targets, retailer assortments, entertainment tie-ins, and production schedules. Third-party companies can take narrower swings for collectors who know exactly what they want.</p>
<p>That can mean more animation-accurate proportions, a screen-inspired head sculpt, articulated hands, die-cast parts, detailed paint, or an alternate mode that looks less compromised. It can also mean characters that are too obscure, too large, or too expensive for an official release to prioritize.</p>
<p>Combiners are a great example. A third-party team may aim for a unified, imposing combined mode while still delivering individual bots with their own personality. That ambition has a price, literally and mechanically. More parts, more joints, more weight, and more complexity can create an impressive centerpiece. They can also create a figure that takes an hour to convert and needs a stand to stay upright.</p>
<p>For builders and display-focused fans, that may be a fair deal. For someone who wants a fun desk toy to transform between meetings, it may not be.</p>
<h2>The Trade-Offs Behind the Premium Feel</h2>
<p>A higher price does not guarantee a better experience. Third-party Transformers can feel premium, but small production runs and limited quality control can make issues harder to predict. Paint rub, stress marks, loose hips, tight tabs, floppy accessories, and unclear instructions all show up in this part of the hobby.</p>
<p>Official products can have defects too, especially when a line is produced at massive scale. The difference is usually the support path. With an official release from an established retailer, the chain of responsibility is clearer. With an unlicensed figure from a small overseas maker, replacement parts may be difficult to get, slow to arrive, or unavailable once the run sells out.</p>
<p>Transformation complexity is another honest consideration. Many collector-grade releases achieve a cleaner robot mode by using layered panels, tiny hinges, removable pieces, and sequences that must happen in a very specific order. That can be satisfying if you enjoy the engineering. It can be frustrating if one wrong rotation causes plastic to bind.</p>
<p>Before buying, look for reviews that show the full conversion, not just dramatic poses. A figure can photograph like a dream and still be a nerve-racking puzzle in hand.</p>
<h2>How to Shop Smarter for 3rd Party Transformers</h2>
<p>Start with the version of the character you actually want. “Optimus Prime” is not one thing in this hobby. Are you after an 1980s cartoon look, a comic-inspired design, a live-action movie aesthetic, a stylized reinterpretation, or a towering display piece? The answer shapes every other decision.</p>
<p>Next, check scale. Third-party makers use labels such as Legends, Masterpiece-scale, and CHUG-style, but those terms are not always consistent. Compare the listed height in inches with figures already on your shelf. A seven-inch bot can look right at home with one collection and wildly oversized beside another.</p>
<p>Pay attention to material callouts, too. Die-cast metal can add welcome heft and help a figure feel substantial, but it may also stress joints over time. Ratcheted joints are usually a good sign for heavy figures, though badly designed ratchets can make posing awkward. Clear plastic looks fantastic until a stressed connection cracks, so examine reviews closely when transparent parts carry load-bearing tabs.</p>
<p>Use these questions before committing to a release:</p>
<ul>
<li>Does the robot mode match the character and era I collect?</li>
<li>Will its height and style fit my existing display?</li>
<li>Are reviewers reporting repeated breakage or loose-joint issues?</li>
<li>Is the seller clear about condition, availability, and replacement support?</li>
<li>Do I want a hands-on transforming figure, or a display model that happens to convert?</li>
</ul>
Those five checks will save more regret than chasing every impressive promo photo.
<h2>Packaging, Names, and Expectations</h2>
<p>Unlicensed products often use coded names and vague package art. That can make searching harder, especially for newer collectors. Learn the company name, the release nickname, and the actual figure dimensions before shopping. Do not rely on a listing title alone.</p>
<p>Be especially careful with listings that use official photos for a product that is not official, describe an item as “inspired” without naming the manufacturer, or show no real images of the packaging and accessories. A low price can signal a clearance opportunity, but it can also signal a bootleg, an incomplete item, or a seller who cannot verify what they have.</p>
<p>Condition matters just as much on the secondary market. Ask whether the figure has been transformed, whether all accessories are included, whether joints have been tightened with floor polish or other collector fixes, and whether the original box is present. None of those details automatically make a used figure a bad buy. They should simply be part of the price conversation.</p>
<h2>A Collection Should Still Feel Like Yours</h2>
<p>There is no collector rule saying every Transformer on your shelf must be official, third party, vintage, modern, mint, or boxed. Plenty of fans build mixed displays because each lane gives them something different. Official releases can deliver beloved characters, accessible transformation, and the real franchise identity. Third-party figures can bring ambition, oddball character choices, and display options that official lines have skipped.</p>
<p>The best collection is not the one that follows somebody else’s purity test. It is the one that gives you that immediate “yes, this belongs here” feeling every time you look at the shelf.</p>
<p>If you decide to explore 3rd party transformers, buy the figure rather than the hype. Choose the version that fits your fandom, your space, your budget, and the way you actually collect. A bot that stays in the box because it is too stressful to handle is not automatically a bad figure, but the one you keep picking up and posing might be the real keeper.</p>]]>
    </content>
  </entry>
  <entry>
    <id>https://utopiatoysandmodels.com/blogs/news/lacquer-vs-acrylic-paint-gunpla</id>
    <published>2026-08-25T00:18:00-04:00</published>
    <updated>2026-08-25T00:18:01-04:00</updated>
    <link rel="alternate" type="text/html" href="https://utopiatoysandmodels.com/blogs/news/lacquer-vs-acrylic-paint-gunpla"/>
    <title>Lacquer vs. Acrylic Paint for Gunpla: Which Wins?</title>
    <author>
      <name>Editorial Team</name>
    </author>
    <summary type="html">
      <![CDATA[Lacquer vs acrylic paint gunpla: Lacquer vs. acrylic for Gunpla: compare durability, drying time, safety, and finish quality. Learn which paint type fits.<p><a class="read-more" href="https://utopiatoysandmodels.com/blogs/news/lacquer-vs-acrylic-paint-gunpla">More</a></p>]]>
    </summary>
    <content type="html">
      <![CDATA[<h2 id="table-of-contents">Table of Contents</h2>
<ul>
<li><a href="#defining-lacquer-vs-acrylic-paint-for-model-building">Defining Lacquer vs. Acrylic Paint for Model Building</a></li>
<li><a href="#head-to-head-comparison-lacquer-and-acrylic-for-gunpla">Head-to-Head Comparison: Lacquer and Acrylic for Gunpla</a></li>
<li><a href="#acrylic-vs-lacquer-durability-for-gunpla">Acrylic vs. Lacquer Durability for Gunpla</a></li>
<li><a href="#best-airbrush-paint-for-gunpla-performance-breakdown">Best Airbrush Paint for Gunpla: Performance Breakdown</a></li>
<li><a href="#safety-precautions-for-lacquer-model-paint">Safety Precautions for Lacquer Model Paint</a></li>
<li><a href="#hybrid-painting-workflows-when-to-mix-both-types">Hybrid Painting Workflows: When to Mix Both Types</a></li>
<li><a href="#which-paint-should-you-choose">Which Paint Should You Choose?</a></li>
</ul>
<p><em>Last Updated: August 25, 2026</em></p>
<h2 id="defining-lacquer-vs-acrylic-paint-for-model-building">Defining Lacquer vs. Acrylic Paint for Model Building</h2>
<p><strong>Lacquer paint</strong> is a solvent-based coating that cures through evaporation, creating a hard, durable finish prized for smooth surfaces and vibrant color saturation. <strong>Acrylic paint</strong> is a water-based formula where pigments suspend in a polymer emulsion, drying through water evaporation and offering safety advantages without sacrificing durability. For Gunpla builders, the choice between lacquer and acrylic fundamentally shapes your workflow, workspace requirements, and final model finish.</p>
<figure class="article-content-image my-8" style="margin:2em 0;padding:0;background:transparent;border:0;"><img src="https://cdn.grandranker.com/articles/lacquer-vs-acrylic-paint-for-gunpla-which-wins-content-2-1787631475.jpg" alt="Professional illustration showing Close, Gundam for lacquer vs acrylic paint gunpla" class="w-full rounded-lg shadow-lg" loading="lazy" style="display:block;width:100%;max-width:100%;height:auto;border-radius:8px;margin:0 auto;"><figcaption class="text-sm text-gray-600 mt-2 text-center" style="font-size:0.875em;color:#6b7280;text-align:center;margin-top:0.6em;">Professional illustration showing Close, Gundam for lacquer vs acrylic paint gunpla</figcaption></figure>
<p>Lacquer flows through airbrushes with exceptional consistency, atomizes into a fine mist, and levels itself on the model surface, producing a glass-smooth finish. Acrylic requires more careful thinning ratios and multiple thin coats to achieve opacity, but eliminates the ventilation demands and solvent exposure that come with lacquer. Neither is objectively "better", the real question is which aligns with your skill level, workspace, and priorities.</p>
<h2 id="head-to-head-comparison-lacquer-and-acrylic-for-gunpla">Head-to-Head Comparison: Lacquer and Acrylic for Gunpla</h2>
<table style="width:100%; border-collapse:collapse; margin:2rem 0; font-size:14px; line-height:1.6;">
<thead style="background-color:#f8f9fa; padding:12px 16px; text-align:left; font-weight:600; border-bottom:2px solid #e5e7eb;">
<tr>
<th style="background-color:#f8f9fa; padding:12px 16px; text-align:left; font-weight:600; border-bottom:2px solid #e5e7eb;">Feature</th>
<th style="background-color:#f8f9fa; padding:12px 16px; text-align:left; font-weight:600; border-bottom:2px solid #e5e7eb;">Lacquer Paint</th>
<th style="background-color:#f8f9fa; padding:12px 16px; text-align:left; font-weight:600; border-bottom:2px solid #e5e7eb;">Acrylic Paint</th>
<th style="background-color:#f8f9fa; padding:12px 16px; text-align:left; font-weight:600; border-bottom:2px solid #e5e7eb;">Winner for Most Builders</th>
</tr>
</thead>
<tbody>
<tr>
<td style="padding:12px 16px; border-bottom:1px solid #e5e7eb;">Drying Time</td>
<td style="padding:12px 16px; border-bottom:1px solid #e5e7eb;">15-30 minutes</td>
<td style="padding:12px 16px; border-bottom:1px solid #e5e7eb;">30-60 minutes</td>
<td style="padding:12px 16px; border-bottom:1px solid #e5e7eb;">Lacquer (faster layering)</td>
</tr>
<tr>
<td style="padding:12px 16px; border-bottom:1px solid #e5e7eb;">Airbrush Flow</td>
<td style="padding:12px 16px; border-bottom:1px solid #e5e7eb;">Excellent, minimal thinning</td>
<td style="padding:12px 16px; border-bottom:1px solid #e5e7eb;">Requires careful thinning</td>
<td style="padding:12px 16px; border-bottom:1px solid #e5e7eb;">Lacquer (more forgiving)</td>
</tr>
<tr>
<td style="padding:12px 16px; border-bottom:1px solid #e5e7eb;">Surface Finish</td>
<td style="padding:12px 16px; border-bottom:1px solid #e5e7eb;">Ultra-smooth, self-leveling</td>
<td style="padding:12px 16px; border-bottom:1px solid #e5e7eb;">Smooth with proper technique</td>
<td style="padding:12px 16px; border-bottom:1px solid #e5e7eb;">Lacquer (less effort)</td>
</tr>
<tr>
<td style="padding:12px 16px; border-bottom:1px solid #e5e7eb;">Ventilation Required</td>
<td style="padding:12px 16px; border-bottom:1px solid #e5e7eb;">Yes, dedicated setup</td>
<td style="padding:12px 16px; border-bottom:1px solid #e5e7eb;">Minimal, basic airflow</td>
<td style="padding:12px 16px; border-bottom:1px solid #e5e7eb;">Acrylic (easier workspace)</td>
</tr>
<tr>
<td style="padding:12px 16px; border-bottom:1px solid #e5e7eb;">Solvent Exposure</td>
<td style="padding:12px 16px; border-bottom:1px solid #e5e7eb;">High, requires PPE</td>
<td style="padding:12px 16px; border-bottom:1px solid #e5e7eb;">None, water cleanup</td>
<td style="padding:12px 16px; border-bottom:1px solid #e5e7eb;">Acrylic (safer)</td>
</tr>
<tr>
<td style="padding:12px 16px; border-bottom:1px solid #e5e7eb;">Scratch Resistance</td>
<td style="padding:12px 16px; border-bottom:1px solid #e5e7eb;">Excellent once cured</td>
<td style="padding:12px 16px; border-bottom:1px solid #e5e7eb;">Very good with proper technique</td>
<td style="padding:12px 16px; border-bottom:1px solid #e5e7eb;">Lacquer (slightly tougher)</td>
</tr>
<tr>
<td style="padding:12px 16px; border-bottom:1px solid #e5e7eb;">Color Range</td>
<td style="padding:12px 16px; border-bottom:1px solid #e5e7eb;">Extensive (GaiaNotes, Tamiya)</td>
<td style="padding:12px 16px; border-bottom:1px solid #e5e7eb;">Strong (Vallejo Mecha Color)</td>
<td style="padding:12px 16px; border-bottom:1px solid #e5e7eb;">Tie</td>
</tr>
<tr>
<td style="padding:12px 16px; border-bottom:1px solid #e5e7eb;">Learning Curve</td>
<td style="padding:12px 16px; border-bottom:1px solid #e5e7eb;">Moderate to steep</td>
<td style="padding:12px 16px; border-bottom:1px solid #e5e7eb;">Beginner-friendly</td>
<td style="padding:12px 16px; border-bottom:1px solid #e5e7eb;">Acrylic (more forgiving)</td>
</tr>
<tr>
<td style="padding:12px 16px; border-bottom:1px solid #e5e7eb;">Layering Compatibility</td>
<td style="padding:12px 16px; border-bottom:1px solid #e5e7eb;">Lacquer over acrylic works; reverse causes melting</td>
<td style="padding:12px 16px; border-bottom:1px solid #e5e7eb;">Acrylic over lacquer works only with primer</td>
<td style="padding:12px 16px; border-bottom:1px solid #e5e7eb;">Lacquer (more flexible)</td>
</tr>
<tr>
<td style="padding:12px 16px; border-bottom:1px solid #e5e7eb;">Cost per Model</td>
<td style="padding:12px 16px; border-bottom:1px solid #e5e7eb;">Higher per coat</td>
<td style="padding:12px 16px; border-bottom:1px solid #e5e7eb;">Lower per coat</td>
<td style="padding:12px 16px; border-bottom:1px solid #e5e7eb;">Acrylic (budget-friendly)</td>
</tr>
</tbody>
</table>
<p>The table reveals a pattern: lacquer excels at professional-grade results but demands infrastructure and safety precautions. Acrylic trades some performance for accessibility. For most builders starting out, acrylic wins on practicality. For experienced modelers with proper ventilation, lacquer unlocks superior finishes.</p>
<h2 id="acrylic-vs-lacquer-durability-for-gunpla">Acrylic vs. Lacquer Durability for Gunpla</h2>
<p>Once fully cured, lacquer paint creates a harder film that resists scratching and environmental exposure better than most acrylics. The solvent-based curing process produces a chemical bond with the plastic substrate that feels genuinely tougher under stress.</p>
<p>Acrylic durability depends heavily on application technique. A properly applied acrylic finish with multiple thin coats and appropriate primer adhesion resists handling and minor impacts remarkably well. Vallejo Mecha Color, specifically formulated for robots and mechas, achieves scratch resistance comparable to lacquer through maximum pigment density. For display-only Gunpla, the durability gap barely matters. For handled models, lacquer's harder cured state provides genuine insurance against wear.</p>
<p>Lacquer also maintains gloss and color saturation longer under UV exposure and environmental stress. Temperature stability favors lacquer as well, acrylic finishes can soften slightly in extreme heat, while lacquer's chemical cure produces a finish stable across wider temperature ranges.</p>
<h2 id="best-airbrush-paint-for-gunpla-performance-breakdown">Best Airbrush Paint for Gunpla: Performance Breakdown</h2>
<p>Lacquer paint dominates airbrushing because its viscosity and volatility create ideal atomization conditions. The solvent content keeps the paint flowing without clogging, and quick evaporation prevents orange peel texture.</p>
<figure class="article-content-image my-8" style="margin:2em 0;padding:0;background:transparent;border:0;"><img src="https://cdn.grandranker.com/articles/lacquer-vs-acrylic-paint-for-gunpla-which-wins-content-1-1787631453.jpg" alt="Close-up of an airbrush spraying fine mist of paint onto a Gundam model kit positioned at proper 45-degree angle under bright work light, model held in painting jig with masking tape visible" class="w-full rounded-lg shadow-lg" loading="lazy" style="display:block;width:100%;max-width:100%;height:auto;border-radius:8px;margin:0 auto;"><figcaption class="text-sm text-gray-600 mt-2 text-center" style="font-size:0.875em;color:#6b7280;text-align:center;margin-top:0.6em;">Close-up of an airbrush spraying fine mist of paint onto a Gundam model kit positioned at proper 45-degree angle under bright work light, model held in painting jig with masking tape visible</figcaption></figure>
<p>Acrylic airbrushing requires discipline. The paint thickens quickly as water evaporates, demanding frequent needle cleaning and precise thinner ratios. Many builders thin acrylics to 1:1 or 1:1.5 (paint to thinner) for airbrush consistency, compared to lacquer's more forgiving 1:1 baseline. This means 3-4 thin acrylic coats versus 2-3 lacquer coats for the same opacity.</p>
<p>GaiaNotes Lacquer Paint and Tamiya Lacquer (LP Series) excel at airbrushing with ultra-fine pigments and consistent flow. For acrylic, Vallejo Mecha Color was engineered specifically for airbrush application on <a href="/blogs/news/how-to-paint-gundam-model-kits">model kits</a> and requires less aggressive thinning. The performance gap narrows with experience, a skilled builder produces excellent results with acrylic, while a beginner with lacquer might struggle without understanding thinner ratios. Lacquer's advantage is forgiveness: it wants to flow smoothly and level itself.</p>
<h2 id="safety-precautions-for-lacquer-model-paint">Safety Precautions for Lacquer Model Paint</h2>
<p>Lacquer paint's solvent content creates legitimate health and fire risks. The fumes contain volatile organic compounds, primarily toluene, xylene, and hexane, that irritate respiratory passages, eyes, and skin. Prolonged exposure without protection causes headaches, dizziness, and respiratory irritation.</p>
<h3 id="respirator-selection-and-ratings">Respirator Selection and Ratings</h3>
<p>A proper respirator is non-negotiable for lacquer work. Use a half-face or full-face respirator with replaceable cartridges rated specifically for organic vapors (<a rel="noopener noreferrer" target="_blank" href="https://www.cdc.gov/niosh/npg/nengapdxe.html">the CDC</a>). Look for cartridges marked <strong>OV (Organic Vapor)</strong> or <strong>OV/P100</strong> (organic vapor plus particulate). The "P100" designation means the cartridge filters 99.97% of particles down to 0.3 microns (<a rel="noopener noreferrer" target="_blank" href="http://www.osha.gov/laws-regs/regulations/standardnumber/1910/1910.134">osha.gov</a>).</p>
<p>Common cartridge options include 3M 6001 or 6002 (OV/P100), industry standard for lacquer work lasting approximately 40 hours of continuous use. Replace cartridges if you smell solvent fumes while wearing the respirator. Most builders replace cartridges every 4-6 weeks of regular use <a href="/blogs/news/collecting-gundam-models-hobby-beginners-guide">as a</a> safety margin.</p>
<p>The respirator must seal properly. Perform a seal check before first use: cover the cartridge inlet with your palm and inhale gently. The mask should collapse slightly against your face. If air leaks around the edges, adjust the straps or try a different size.</p>
<h3 id="ventilation-infrastructure">Ventilation Infrastructure</h3>
<p>A respirator alone is insufficient. You need ventilation to remove solvent vapors from your workspace before they accumulate to dangerous levels.</p>
<p><strong>Minimum setup (apartment-friendly):</strong>
A window fan positioned in a window frame, blowing outward, to create negative pressure in the room, with a secondary window or door cracked open for fresh air intake. This works for occasional spray sessions (1-2 hours per week) in a small room. <a rel="noopener noreferrer" target="_blank" href="https://socaservicespainting.com/spray-painting-vs-brush-painting-differences/">application techniques</a>.</p>
<p><strong>Recommended setup (dedicated hobby space):</strong>
A spray booth with an extraction fan rated for at least 200-300 CFM (cubic feet per minute) airflow, with ducting that vents fumes outside the building. A simple spray booth with a 200 CFM extraction fan and ducting to a window costs $150-$400 and provides reliable protection.</p>
<h3 id="skin-and-eye-protection">Skin and Eye Protection</h3>
<p>Wear nitrile gloves for short sessions or latex/butyl rubber gloves for extended spraying, as lacquer thinner can degrade nitrile over time. Safety glasses with side shields prevent splashes and overspray. A full-face respirator eliminates eye protection concerns by covering the eyes.</p>
<h3 id="fire-safety-and-storage">Fire Safety and Storage</h3>
<p>Lacquer thinner is flammable with a flash point around 100°F (<a rel="noopener noreferrer" target="_blank" href="https://www.usfa.fema.gov/prevention/home-fires/prepare-for-fire/fire-extinguishers/">fema.gov</a>). Keep lacquer and thinner in approved metal cans in a cool, well-ventilated area away from heat sources and open flames. Never smoke while working with lacquer. Keep a fire extinguisher rated for flammable liquids (Class B) in your workspace.</p>
<h3 id="acrylic-as-a-safety-alternative">Acrylic as a Safety Alternative</h3>
<p>Acrylic paint eliminates these concerns entirely. Water-based acrylics produce no volatile organic compounds. A dust mask suffices for particulates. Cleanup is water and soap. No special ventilation required beyond basic airflow. No fire risk. This safety advantage alone justifies acrylic for builders in apartments, shared spaces, or without dedicated ventilation infrastructure.</p>
<h2 id="hybrid-painting-workflows-when-to-mix-both-types">Hybrid Painting Workflows: When to Mix Both Types</h2>
<p>Advanced builders layer lacquer and acrylic strategically to combine their strengths. The key principle: lacquer can go over acrylic, but acrylic over lacquer creates adhesion problems.</p>
<p>A common hybrid workflow starts with acrylic primer for adhesion and easy cleanup. Once primed, spray lacquer base coats for a glass-smooth finish and quick drying. Then layer acrylic detail colors and weathering effects on top. The acrylic topcoat adheres to the lacquer base without issue.</p>
<p>Another approach uses lacquer for base coats and panel lines, then acrylic enamel washes for weathering and shading. Enamel washes flow into panel lines and recesses, creating depth and realism.</p>
<p>Hybrid workflows require understanding curing times. Acrylic needs 24 hours to fully cure before applying lacquer over it. Lacquer cures in 30 minutes, so you can layer acrylic over lacquer almost immediately. The real value emerges on complex models: acrylic primer for easy prep, lacquer for main color work, acrylic for details. You get the finish quality of lacquer without needing to spray every single color through a respirator.</p>
<h2 id="which-paint-should-you-choose">Which Paint Should You Choose?</h2>
<p><strong>Choose lacquer if you have proper ventilation and are comfortable with safety precautions.</strong> Lacquer delivers superior finishes with less effort. The glass-smooth self-leveling surface, quick drying, and exceptional durability make it worth the setup investment for serious builders.</p>
<p><strong>Choose acrylic if you're starting out, building in an apartment, or prioritizing convenience.</strong> Acrylic removes barriers to entry. No respirator, no spray booth, no solvent disposal concerns. Vallejo Mecha Color specifically designed for Gunpla delivers durability and finish quality that satisfies most builders. The learning curve is gentler.</p>
<p><strong>Consider a hybrid workflow if you're experienced enough to manage both.</strong> Start with acrylic primer, spray lacquer base coats, finish with acrylic details. This captures lacquer's finish quality while keeping total solvent exposure manageable.</p>
<p>Lacquer is objectively superior for finish quality once cured. Acrylic is superior for accessibility, safety, and workspace flexibility. Your choice depends on whether you're optimizing for results or practicality. Most builders eventually use both, acrylic for learning and convenience, lacquer for projects where the finish matters most.</p>
<p>At Utopia Toys and Models, we stock both lacquer and acrylic options from trusted brands. Whether you're grabbing Tamiya Lacquer for your next High Grade or Vallejo Mecha Color for detail work, we have the paints, thinners, and supplies to support your workflow. Our team can help you figure out which approach matches your workspace and experience level.</p>
<section style="margin:3rem 0 2rem 0;" itemscope itemtype="https://schema.org/FAQPage">
<h2 style="font-size:1.5rem; font-weight:700; margin:0 0 4px 0;">Frequently Asked Questions</h2>
<div style="padding:20px 0; border-bottom:1px solid #e5e7eb;" itemscope itemprop="mainEntity" itemtype="https://schema.org/Question">
<h3 style="font-size:1.1rem; font-weight:600; margin:0 0 8px 0;" itemprop="name">Which type of paint is better for Gunpla, acrylic or lacquer?</h3>
<div style="line-height:1.7; font-size:0.95rem;" itemscope itemprop="acceptedAnswer" itemtype="https://schema.org/Answer">
<p itemprop="text" style="margin:0;">Neither is universally better, it depends on your priorities. Lacquer paint offers superior durability, scratch resistance, and smoother finishes with fewer coats, making it ideal for experienced builders. Acrylic paint is safer (water-based, no harsh solvents), easier to clean up, and better for beginners, though it may require multiple thin coats and longer drying times. For airbrush work on Gunpla, lacquer provides better atomization and flow. For safety and convenience, acrylic wins.</p>
</div>
</div>
<div style="padding:20px 0; border-bottom:1px solid #e5e7eb;" itemscope itemprop="mainEntity" itemtype="https://schema.org/Question">
<h3 style="font-size:1.1rem; font-weight:600; margin:0 0 8px 0;" itemprop="name">Do I need a respirator when using lacquer paint for models?</h3>
<div style="line-height:1.7; font-size:0.95rem;" itemscope itemprop="acceptedAnswer" itemtype="https://schema.org/Answer">
<p itemprop="text" style="margin:0;">Yes. Lacquer paint is solvent-based and releases volatile organic compounds (VOCs) during application and curing. OSHA standards recommend respiratory protection when working with solvent-based paints in enclosed or poorly ventilated spaces. A respirator with organic vapor cartridges is essential, along with good ventilation. Acrylic paint, being water-based, does not require a respirator but still benefits from adequate airflow to prevent inhalation of fine mist particles.</p>
</div>
</div>
<div style="padding:20px 0; border-bottom:1px solid #e5e7eb;" itemscope itemprop="mainEntity" itemtype="https://schema.org/Question">
<h3 style="font-size:1.1rem; font-weight:600; margin:0 0 8px 0;" itemprop="name">What are the downsides of using lacquer paint?</h3>
<div style="line-height:1.7; font-size:0.95rem;" itemscope itemprop="acceptedAnswer" itemtype="https://schema.org/Answer">
<p itemprop="text" style="margin:0;">Lacquer's main drawbacks are health and safety concerns: it produces strong fumes requiring respiratory protection, proper ventilation, and careful handling of flammable solvents. It also has a steeper learning curve, incorrect thinner ratios can cause poor atomization, runs, or orange-peel texture. Cost-per-model can be higher than acrylic. Additionally, lacquer requires specific thinners and cleanup solvents, adding to material expenses and disposal complexity.</p>
</div>
</div>
<div style="padding:20px 0; border-bottom:1px solid #e5e7eb;" itemscope itemprop="mainEntity" itemtype="https://schema.org/Question">
<h3 style="font-size:1.1rem; font-weight:600; margin:0 0 8px 0;" itemprop="name">What's the difference between acrylic and lacquer durability for Gunpla?</h3>
<div style="line-height:1.7; font-size:0.95rem;" itemscope itemprop="acceptedAnswer" itemtype="https://schema.org/Answer">
<p itemprop="text" style="margin:0;">Lacquer cures to a harder, more scratch-resistant finish due to its chemical composition and solvent evaporation process. It resists handling wear, impacts, and abrasion better than acrylic. Acrylic paint, when properly applied in thin layers and sealed with a clear coat, achieves good durability and can withstand moderate handling. However, lacquer's cured state is inherently tougher. For display models with minimal handling, acrylic is sufficient; for frequently handled or competitive display pieces, lacquer is superior.</p>
</div>
</div>
</section>
<hr>
<p>The choice between lacquer and acrylic ultimately reflects your priorities. If you're building your first Gundam, acrylic removes friction and lets you focus on assembly and basic painting. As your skills develop and you invest in proper ventilation, lacquer becomes the natural next step for builders chasing competition-level finishes. Both paths lead to excellent models, the route you take depends on your constraints and ambitions.</p>
<div class="cta-button-container" style="text-align: center; margin: 32px 0;">
    <a href="https://utopiatoysandmodels.com" class="cta-button" style="display: inline-block; background-color: #fffde4; color: white; padding: 14px 32px; border-radius: 8px; text-decoration: none; font-weight: 600; font-size: 16px;">Get Started Today</a>
</div>
<p class="grandranker-branding" style="margin-top: 3rem; padding-top: 1.5rem; border-top: 1px solid #e5e7eb; font-size: 0.875rem; text-align: center;">This article was written using <a href="https://grandranker.com/" target="_blank" rel="noopener">GrandRanker</a></p>]]>
    </content>
  </entry>
  <entry>
    <id>https://utopiatoysandmodels.com/blogs/news/transformer-collecting-start-with-your-fandom</id>
    <published>2026-08-24T21:03:46-04:00</published>
    <updated>2026-08-24T21:03:48-04:00</updated>
    <link rel="alternate" type="text/html" href="https://utopiatoysandmodels.com/blogs/news/transformer-collecting-start-with-your-fandom"/>
    <title>Transformer Collecting: Start With Your Fandom</title>
    <author>
      <name>Admin</name>
    </author>
    <summary type="html">
      <![CDATA[Build a Transformers collection with confidence, from classic G1 bots to modern figures. Learn what to buy, display, and protect for years of fandom today.<p><a class="read-more" href="https://utopiatoysandmodels.com/blogs/news/transformer-collecting-start-with-your-fandom">More</a></p>]]>
    </summary>
    <content type="html">
      <![CDATA[<p>A Transformer is never just one thing. It is a robot, a vehicle, a character, a tiny engineering puzzle, and sometimes the centerpiece of an entire shelf. That is why Transformers collecting can get intense fast. One figure becomes a favorite Autobot, then a rival Decepticon, then a movie-era version, then a vintage release you suddenly need to track down.</p>
<p>WELCOME TO UTOPIA! Whether you collect for nostalgia, love the animated series, or want transforming figures that look incredible in robot mode, the best collection starts with one decision: choose what part of the franchise feels like yours.</p>
<h2>Transformer Collecting Starts With a Lane</h2>
<p>Transformers has been rolling for decades, which means there is no single correct way to collect it. G1 fans may want blocky, colorful designs and the characters that defined Saturday mornings. Fans of Transformers: The Movie may build around Optimus Prime, Hot Rod, Galvatron, and the 1986 cast. Others are here for Beast Wars, the live-action films, Transformers Prime, Animated, comics, or newer series.</p>
<p>Trying to collect everything is a fast route to a crowded shelf and a drained wallet. Pick a lane first, then leave room for the occasional figure that is simply too cool to pass up. A focused collection can be as small as a lineup of core characters or as ambitious as an entire faction display.</p>
<p>There are a few easy ways to give that lane structure. You can collect by faction, building a clean Autobots-versus-Decepticons setup. You can collect by character and compare different versions of Bumblebee, Starscream, or Optimus Prime. You can also collect by era, scale, toy line, or media appearance. The right answer is the one that makes you want to rearrange the shelf when a new figure arrives.</p>
<h3>Start With Characters You Actually Love</h3>
<p>A popular figure is not automatically the right figure for you. Collector hype can be useful for spotting a great mold or a hard-to-find release, but your shelf should not feel like someone else’s wish list.</p>
<p>Start with characters that mean something to you. Maybe you had a battered G1 Soundwave as a kid. Maybe the Bayverse Optimus Prime design is your version of the character. Maybe Beast Wars Megatron is the reason you got into the franchise at all. Those connections make a collection personal, even when the lineup includes the same big names everyone recognizes.</p>
<h2>Know the Main Transformer Figure Types</h2>
<p>The biggest difference between a casual purchase and a satisfying collection often comes down to format. Transformers figures range from small desk-sized toys to premium display pieces with complex conversion steps. Price, scale, articulation, accessories, and transformation difficulty can change dramatically from one line to the next.</p>
<p>Mainline retail figures are often designed to balance play, display, and a reasonable price. They are a great place to build a cast of characters without committing every dollar to a single release. Deluxe, Voyager, Leader, and Commander-style size classes generally indicate a figure’s approximate size, parts count, and price tier, though the exact scale relationship can vary by line.</p>
<p>Studio Series figures are a strong fit for collectors who want screen-inspired designs, especially from the live-action movies and animated film releases. Generations-focused lines tend to pull from G1, comics, television, and broader franchise history. These figures can be ideal when you want a shelf that feels like a specific scene or era rather than a random pile of robots.</p>
<p>Then there are premium collector releases. These often offer more paint detail, accessories, articulation, and animation-accurate proportions. The trade-off is cost, complexity, and sometimes fragility. A complicated figure can be incredibly rewarding, but it may not be the one you hand to a younger fan or transform every weekend.</p>
<p>That does not make simpler figures lesser. A fun conversion, a strong silhouette, and a character you love can matter more than a hundred tiny panels that need to line up perfectly.</p>
<h2>Decide Whether You Collect for Display or Transformation</h2>
<p>This question changes what you should buy. Some collectors transform every figure repeatedly. Others carefully convert a figure once, pose it, and enjoy it in robot mode for years. Both approaches are valid, but they call for different priorities.</p>
<p>If you love the process, look for figures known for intuitive transformations, durable joints, and satisfying engineering. A good transformation should feel clever, not like defusing a bomb with a tab that keeps popping loose. Reviews and collector conversations can help, but remember that tolerance for complexity is personal. What one fan calls a nightmare, another calls a fantastic challenge.</p>
<p>If display is the mission, prioritize scale, poseability, and visual consistency. Think about whether you want your Autobots to look like a team. A shelf where Optimus Prime towers awkwardly over characters who should be larger can bother some collectors, while others care only that each individual figure looks great.</p>
<p>Vehicle mode deserves consideration too. A figure with a gorgeous robot mode and a compromised alt mode may be perfect for a robot display. If you plan to showcase both modes, though, you may want two copies of a favorite character or a line that gives equal attention to each form.</p>
<h3>Check Scale Before You Build a Team</h3>
<p>Scale is one of the easiest details to overlook and one of the hardest to ignore later. A single figure can look excellent on its own, but a collection feels more intentional when characters relate well to each other.</p>
<p>Before buying, look at the figure’s listed height and compare it with the releases already on your shelf. Do not rely only on class names. A Voyager from one era will not always match a Voyager from another. If you are building a movie display, a G1-inspired lineup, or a Beast Wars cast, staying within a compatible family of releases usually creates the best visual result.</p>
<p>This is also where shelf space becomes real. Bigger figures need more than height. Wide wings, trailers, weapons, beast-mode tails, and dynamic poses all take up room. Measure your display area before ordering that giant centerpiece bot. Future you will appreciate it.</p>
<h2>Condition, Packaging, and Completeness Matter</h2>
<p>Collectors value different things. Some want factory-sealed boxes with crisp corners. Some open everything immediately and save the packaging. Some are happy to buy loose figures if they are complete and priced fairly. None of those preferences is wrong, but knowing yours prevents disappointment.</p>
<p>For packaged figures, look for clear photos and honest condition notes when available. A crushed corner might be no big deal if you plan to open the figure, but it can matter a lot to a sealed collector. For loose figures, confirm that major accessories, alternate heads, effect parts, and instructions are included. A missing blaster may be easy to live with. A missing transformation-critical panel is another story.</p>
<p>Keep packaging if you have the room, especially for higher-end or complicated figures. The original tray and instructions make storage, moves, and resale much easier. If space is tight, flatten cardboard boxes only if you are certain you will not need their inserts later.</p>
<h2>Build a Collection That Can Survive the Shelf</h2>
<p>Transformers are made to transform, but collectibles still benefit from basic care. Keep figures away from direct sunlight, which can fade paint and discolor lighter plastics over time. Avoid high heat, humidity, and spots where a figure could take a hard fall.</p>
<p>Dust is part of collector life. A soft brush, microfiber cloth, or gentle air blower can handle regular maintenance without scratching paint applications. Be careful with strong cleaners and solvents, especially around painted details, clear plastic, decals, and rubbery parts.</p>
<p>For posing, use a stable stance. Spread the feet, check the ankle joints, and make sure large weapons or backpacks are not pulling the figure backward. Stands can help with flight poses, but make sure they support the figure securely and do not put stress on a narrow waist joint or fragile tab.</p>
<h2>Buy With the Long Game in Mind</h2>
<p>The thrill of a new drop is real, especially when a favorite character gets a fresh release. Pre-orders can be a smart way to plan for figures you know you want, while clearance hunting can uncover characters that were overlooked at launch. Both are collector moves. The key is leaving room in your budget for the figures that truly matter to your display.</p>
<p>Do not let fear of missing out decide every purchase. Some releases disappear quickly. Others get reissued, repainted, or improved a year later. If a figure is expensive because it is rare, ask yourself whether you love that version or simply hate being left out of the chase.</p>
<p>Your collection does not need to be complete to feel complete. Put the Optimus Prime that makes you smile next to the Starscream you always wanted. Add the weird alt-mode bot, the underappreciated side character, or the massive villain that makes visitors stop and stare. Find your fandom, give it room to grow, and let every Transformer on the shelf earn its spot.</p>]]>
    </content>
  </entry>
  <entry>
    <id>https://utopiatoysandmodels.com/blogs/news/how-to-dust-figures-without-damage</id>
    <published>2026-08-23T23:20:27-04:00</published>
    <updated>2026-08-23T23:20:28-04:00</updated>
    <link rel="alternate" type="text/html" href="https://utopiatoysandmodels.com/blogs/news/how-to-dust-figures-without-damage"/>
    <title>How to Dust Figures Without Damage</title>
    <author>
      <name>Editorial Team</name>
    </author>
    <summary type="html">
      <![CDATA[Dust figures without damage: Learn how to dust figures safely without causing scratches or paint damage. Step-by-step guide covering tools, cleaning.<p><a class="read-more" href="https://utopiatoysandmodels.com/blogs/news/how-to-dust-figures-without-damage">More</a></p>]]>
    </summary>
    <content type="html">
      <![CDATA[<h2 id="table-of-contents">Table of Contents</h2>
<ul>
<li><a href="#why-proper-dusting-matters-for-your-collection">Why Proper Dusting Matters for Your Collection</a></li>
<li>
<a href="#best-tools-for-cleaning-anime-figures">Best Tools for Cleaning Anime Figures</a>
<ul>
<li><a href="#soft-bristled-brushes-and-microfiber-cloths">Soft-Bristled Brushes and Microfiber Cloths</a></li>
<li><a href="#compressed-air-and-static-control">Compressed Air and Static Control</a></li>
</ul>
</li>
<li>
<a href="#safe-cleaning-solutions-for-pvc-figures">Safe Cleaning Solutions for PVC Figures</a>
<ul>
<li><a href="#distilled-water-and-mild-dish-soap">Distilled Water and Mild Dish Soap</a></li>
<li><a href="#what-to-avoid-chemical-hazards">What to Avoid: Chemical Hazards</a></li>
</ul>
</li>
<li>
<a href="#step-by-step-dusting-process">Step-by-Step Dusting Process</a>
<ul>
<li><a href="#step-1-prepare-your-workspace">Step 1: Prepare Your Workspace</a></li>
<li><a href="#step-2-dry-dusting-with-soft-tools">Step 2: Dry Dusting with Soft Tools</a></li>
<li><a href="#step-3-gentle-wet-cleaning-for-stubborn-residue">Step 3: Gentle Wet Cleaning for Stubborn Residue</a></li>
<li><a href="#step-4-drying-and-air-circulation">Step 4: Drying and Air Circulation</a></li>
</ul>
</li>
<li><a href="#handling-delicate-and-painted-parts">Handling Delicate and Painted Parts</a></li>
<li><a href="#how-to-display-gundam-models-to-avoid-dust">How to Display Gundam Models to Avoid Dust</a></li>
<li><a href="#common-cleaning-mistakes-to-avoid">Common Cleaning Mistakes to Avoid</a></li>
<li><a href="#cleaning-frequency-and-maintenance-schedule">Cleaning Frequency and Maintenance Schedule</a></li>
</ul>
<p><em>Last Updated: August 24, 2026</em></p>
<h2 id="why-proper-dusting-matters-for-your-collection">Why Proper Dusting Matters for Your Collection</h2>
<p>Dust accumulation on <a href="/blogs/news/how-to-store-anime-figures-long-term">anime figures</a> embeds into paint finishes and crevices, creating a tacky surface that's difficult to remove without damage. The longer dust sits, especially on PVC plastic where static electricity attracts particles, the more it bonds to the surface. Collectors who neglect maintenance face a difficult choice: accept visible buildup or risk aggressive cleaning that strips paint and scratches details.</p>
<p>At Utopia Toys and Models, we work with collectors who've invested significantly in their collections. The most common regret we hear isn't about purchases, but about damage from improper cleaning. A few minutes of careful maintenance every few weeks prevents the need for risky deep cleaning later. The key difference between collectors with pristine displays and those with damaged figures comes down to understanding which tools work and which ones destroy.</p>
<h2 id="best-tools-for-cleaning-anime-figures">Best Tools for Cleaning Anime Figures</h2>
<h3 id="soft-bristled-brushes-and-microfiber-cloths">Soft-Bristled Brushes and Microfiber Cloths</h3>
<p>A soft-bristled brush is your primary dusting tool. Artist brushes, makeup brushes, or specialized figure cleaning brushes work well. The bristles should be flexible and fine enough to reach crevices without scratching paint. Avoid natural bristles that shed; synthetic options are more reliable.</p>
<p>Microfiber cloths are equally essential. Unlike cotton cloths that leave lint and scratch surfaces, microfiber is lint-free and gentle on paint finishes. The material naturally traps dust rather than pushing it around. For PVC figures, microfiber prevents static electricity from reattaching particles after brushing.</p>
<p>When selecting a brush, test the bristles against your palm, they should feel silky, not stiff. Keep your brush clean by rinsing it monthly and air drying completely before storage.</p>
<figure class="article-content-image my-8" style="margin:2em 0;padding:0;background:transparent;border:0;"><img src="https://cdn.grandranker.com/articles/how-to-dust-figures-without-damage-content-1-1787541604.jpg" alt="Collector's hands holding a soft-bristled brush and lint-free microfiber cloth next to a detailed anime figure on a wooden display surface with natural window lighting" class="w-full rounded-lg shadow-lg" loading="lazy" style="display:block;width:100%;max-width:100%;height:auto;border-radius:8px;margin:0 auto;"><figcaption class="text-sm text-gray-600 mt-2 text-center" style="font-size:0.875em;color:#6b7280;text-align:center;margin-top:0.6em;">Collector's hands holding a soft-bristled brush and lint-free microfiber cloth next to a detailed anime figure on a wooden display surface with natural window lighting</figcaption></figure>
<h3 id="compressed-air-and-static-control">Compressed Air and Static Control</h3>
<p>Compressed air removes dust from hard-to-reach areas where brushes can't fit. However, it requires technique. Hold the can upright and spray in short bursts to prevent liquid propellant from reaching figures, which damages paint and creates frosting on plastic.</p>
<p>Compressed air generates static electricity, which ironically attracts more dust after cleaning. Use an anti-static cloth or mat during and after compressed air cleaning to counteract this. Never hold cans at an angle or spray continuously for more than 2-3 seconds. Hold the nozzle at least 6 inches from your figure.</p>
<h2 id="safe-cleaning-solutions-for-pvc-figures">Safe Cleaning Solutions for PVC Figures</h2>
<p>PVC plastic requires specific care. Certain chemicals cause plasticizer migration, where solvents leach oils from the plastic, leaving it brittle, discolored, or tacky (<a rel="noopener noreferrer" target="_blank" href="https://pmc.ncbi.nlm.nih.gov/articles/PMC12911472/">peer-reviewed research</a>).</p>
<h3 id="distilled-water-and-mild-dish-soap">Distilled Water and Mild Dish Soap</h3>
<p>For stubborn dust, mix distilled water with a small amount of mild dish soap (approximately 20 parts water to 1 part soap). Apply with a soft cloth, never by spraying directly on the figure. Dampen the cloth, wring it thoroughly so it's barely moist, and gently wipe affected areas. Work in small sections and dry immediately with a separate lint-free cloth. Never soak figures or let liquid pool on surfaces.</p>
<p>Distilled water is crucial, tap water contains minerals and chlorine that can leave residue or cause discoloration on painted surfaces.</p>
<h3 id="what-to-avoid-chemical-hazards">What to Avoid: Chemical Hazards</h3>
<p>Isopropyl alcohol, acetone, and other organic solvents are off-limits for PVC figures (<a rel="noopener noreferrer" target="_blank" href="https://www.cdc.gov/hygiene/about/when-and-how-to-clean-and-disinfect-a-facility.html">the CDC</a>). These chemicals cause plasticizer migration, making plastic sticky, discolored, or warped. Abrasive cleaners, bleach-based products, and harsh degreasers belong nowhere near your collection. When in doubt, stick with distilled water and mild soap, this combination handles 95% of cleaning needs without risk.</p>
<h2 id="step-by-step-dusting-process">Step-by-Step Dusting Process</h2>
<h3 id="step-1-prepare-your-workspace">Step 1: Prepare Your Workspace</h3>
<p>Set up on a clean, flat surface with good lighting. Use a soft mat or towel underneath to prevent figures from rolling. Gather all tools: soft-bristled brush, microfiber cloth, compressed air canister (if using), and distilled water plus mild soap in a small bowl.</p>
<p>Ensure your workspace is dust-free. Wipe down your work surface with a damp cloth and allow it to dry. Good lighting is non-negotiable, you need to see dust particles and potential paint damage.</p>
<h3 id="step-2-dry-dusting-with-soft-tools">Step 2: Dry Dusting with Soft Tools</h3>
<p>Begin with the soft-bristled brush using gentle, directional strokes moving downward and outward from the figure's center. Work methodically from top to bottom: head, torso, limbs, base. For delicate painted details, use even lighter pressure and let the brush weight do the work.</p>
<p>After brushing, use the microfiber cloth to wipe away loosened particles. Fold the cloth into quarters to create a clean surface for each section. For crevices and joints where the brush can't reach, use compressed air in short bursts at 6 inches away for no more than 2-3 seconds. Follow immediately with the microfiber cloth to capture dislodged particles before static reattaches them. <a rel="noopener noreferrer" target="_blank" href="https://enmagiskverden.dk/sikker-indpakning-af-skrobelige-figurer/">packing fragile figures</a>.</p>
<figure class="article-content-image my-8" style="margin:2em 0;padding:0;background:transparent;border:0;"><img src="https://cdn.grandranker.com/articles/how-to-dust-figures-without-damage-content-2-1787541621.jpg" alt="Hands gently dusting a detailed Gundam model figure with a soft brush over a clean work surface, with cleaning supplies and microfiber cloth nearby in natural lighting" class="w-full rounded-lg shadow-lg" loading="lazy" style="display:block;width:100%;max-width:100%;height:auto;border-radius:8px;margin:0 auto;"><figcaption class="text-sm text-gray-600 mt-2 text-center" style="font-size:0.875em;color:#6b7280;text-align:center;margin-top:0.6em;">Hands gently dusting a detailed Gundam model figure with a soft brush over a clean work surface, with cleaning supplies and microfiber cloth nearby in natural lighting</figcaption></figure>
<h3 id="step-3-gentle-wet-cleaning-for-stubborn-residue">Step 3: Gentle Wet Cleaning for Stubborn Residue</h3>
<p>If dry dusting leaves visible residue or sticky spots, dampen a corner of the microfiber cloth with your distilled water and mild soap solution. The cloth should be barely moist, not dripping.</p>
<p>Test the solution on a hidden area first, such as the figure's base. Wait 30 seconds and check for discoloration or texture change. If the test area looks fine, proceed with cleaning visible surfaces using small circular motions. Work on one area at a time and dry immediately with a separate dry cloth. Never let moisture sit on the figure.</p>
<h3 id="step-4-drying-and-air-circulation">Step 4: Drying and Air Circulation</h3>
<p>After wet cleaning, allow the figure to air dry completely before returning <a href="/blogs/news/how-to-organize-your-figure-collection-a-collectors-guide">it to display</a>. This typically takes 30-60 minutes depending on humidity. Position the figure in a location with good air circulation but away from direct sunlight or heat sources. Never use heat sources like hair dryers to speed drying.</p>
<p>Once completely dry, give the figure a final inspection. If you find any remaining sticky spots, repeat the damp cloth treatment on just that area and allow it to dry again.</p>
<p class="cta-inline" style="background-color: #fffde408; border-left: 4px solid #fffde4; padding: 16px 20px; margin: 24px 0; border-radius: 0 8px 8px 0;">
     <a href="https://utopiatoysandmodels.com" style="color: #fffde4; font-weight: 600; text-decoration: underline;">Get Started Today →</a>
</p>
<h2 id="handling-delicate-and-painted-parts">Handling Delicate and Painted Parts</h2>
<p>Figures with intricate painted details, metallic finishes, or delicate appendages require extra caution. For painted faces and eyes, use the softest possible brush with minimal pressure. Many collectors use old toothbrushes with bristles carefully trimmed shorter and softer.</p>
<p>Metallic paint is more prone to scratching than standard acrylic paint. Avoid compressed air on metallic surfaces and use only the gentlest dry brushing. Delicate appendages, thin swords, extended hair pieces, or fragile joints are easily broken during cleaning, support these parts gently while dusting nearby areas.</p>
<p>Never use paper towels or tissues on painted surfaces; the abrasive texture scratches paint. Stick exclusively with microfiber cloths.</p>
<h2 id="how-to-display-gundam-models-to-avoid-dust">How to Display Gundam Models to Avoid Dust</h2>
<p><a href="/blogs/news/best-display-cases-for-anime-figures-2026-guide">Dust-proof display cases</a> are the gold standard for high-value figures. Glass or acrylic cases create a barrier that prevents airborne particles from settling on your collection.</p>
<p>If cases aren't an option, position figures away from high-traffic areas, heating vents, and air conditioning returns. Grouping figures together creates a microclimate less exposed to air currents than isolated displays. Figures at the back of a shelf collect less dust than those at the front edge.</p>
<p>Regular inspection every two weeks allows you to address minor dust accumulation before it requires wet cleaning. Moderate humidity, around 40-50%, is ideal for both dust control and plastic longevity (<a rel="noopener noreferrer" target="_blank" href="https://siarchives.si.edu/what-we-do/preservation/environment">si.edu</a>).</p>
<h2 id="common-cleaning-mistakes-to-avoid">Common Cleaning Mistakes to Avoid</h2>
<p>Using paper towels or tissues is the most common mistake, these materials scratch paint. Microfiber cloths are non-negotiable.</p>
<p>Spraying cleaning solution directly onto figures creates pooling and moisture that seeps into joints. Always apply solution to a cloth first. Pressing hard with a brush is tempting but counterproductive; gentle, repeated light strokes remove dust more effectively than aggressive scrubbing.</p>
<p>Neglecting to dry figures immediately after wet cleaning causes discoloration and residue rings. Dry each section as you clean it. Using tap water instead of distilled water leaves mineral deposits. Test cleaning solutions on hidden areas before applying them to visible surfaces, this simple step prevents damage.</p>
<p>Store brushes bristle-up in a cup or holder to maintain their shape and extend brush life.</p>
<h2 id="cleaning-frequency-and-maintenance-schedule">Cleaning Frequency and Maintenance Schedule</h2>
<p>Figures in dust-proof display cases need cleaning only 2-3 times per year. Figures on open shelves benefit from monthly dry brushing. Figures in high-traffic areas or near kitchens may need weekly inspection and dry brushing.</p>
<p>Wet cleaning should happen only when dry brushing doesn't remove visible residue, typically 2-4 times per year per figure. Seasonal deep cleaning is useful once or twice yearly. Keep a cleaning log for high-value figures noting the date of each cleaning and any issues observed.</p>
<table style="width:100%; border-collapse:collapse; margin:2rem 0; font-size:14px; line-height:1.6;">
<thead style="background-color:#f8f9fa; padding:12px 16px; text-align:left; font-weight:600; border-bottom:2px solid #e5e7eb;">
<tr>
<th style="background-color:#f8f9fa; padding:12px 16px; text-align:left; font-weight:600; border-bottom:2px solid #e5e7eb;">Cleaning Task</th>
<th style="background-color:#f8f9fa; padding:12px 16px; text-align:left; font-weight:600; border-bottom:2px solid #e5e7eb;">Frequency</th>
<th style="background-color:#f8f9fa; padding:12px 16px; text-align:left; font-weight:600; border-bottom:2px solid #e5e7eb;">Time Required</th>
<th style="background-color:#f8f9fa; padding:12px 16px; text-align:left; font-weight:600; border-bottom:2px solid #e5e7eb;">Method</th>
</tr>
</thead>
<tbody>
<tr>
<td style="padding:12px 16px; border-bottom:1px solid #e5e7eb;">Dry brushing</td>
<td style="padding:12px 16px; border-bottom:1px solid #e5e7eb;">Monthly</td>
<td style="padding:12px 16px; border-bottom:1px solid #e5e7eb;">5-10 min per figure</td>
<td style="padding:12px 16px; border-bottom:1px solid #e5e7eb;">Soft brush + microfiber cloth</td>
</tr>
<tr>
<td style="padding:12px 16px; border-bottom:1px solid #e5e7eb;">Inspection for residue</td>
<td style="padding:12px 16px; border-bottom:1px solid #e5e7eb;">Monthly</td>
<td style="padding:12px 16px; border-bottom:1px solid #e5e7eb;">2-3 min per figure</td>
<td style="padding:12px 16px; border-bottom:1px solid #e5e7eb;">Visual check + light touch test</td>
</tr>
<tr>
<td style="padding:12px 16px; border-bottom:1px solid #e5e7eb;">Wet cleaning</td>
<td style="padding:12px 16px; border-bottom:1px solid #e5e7eb;">As needed (2-4x yearly)</td>
<td style="padding:12px 16px; border-bottom:1px solid #e5e7eb;">10-15 min per figure</td>
<td style="padding:12px 16px; border-bottom:1px solid #e5e7eb;">Damp cloth + distilled water/soap</td>
</tr>
<tr>
<td style="padding:12px 16px; border-bottom:1px solid #e5e7eb;">Deep collection cleaning</td>
<td style="padding:12px 16px; border-bottom:1px solid #e5e7eb;">Seasonally</td>
<td style="padding:12px 16px; border-bottom:1px solid #e5e7eb;">2-3 hours</td>
<td style="padding:12px 16px; border-bottom:1px solid #e5e7eb;">Full dry + wet cleaning process</td>
</tr>
<tr>
<td style="padding:12px 16px; border-bottom:1px solid #e5e7eb;">Case/shelf cleaning</td>
<td style="padding:12px 16px; border-bottom:1px solid #e5e7eb;">Quarterly</td>
<td style="padding:12px 16px; border-bottom:1px solid #e5e7eb;">10-15 min</td>
<td style="padding:12px 16px; border-bottom:1px solid #e5e7eb;">Dust display surfaces only</td>
</tr>
</tbody>
</table>
<hr>
<p>Proper figure maintenance is an investment in your collection's longevity. Selecting appropriate tools, understanding material safety, and following a systematic process prevent the damage that makes collectors regret their cleaning attempts.</p>
<p>Utopia Toys and Models helps collectors build and maintain valuable collections. When you're ready to add new figures to your display, our curated selection from brands like Bandai, Funko, and Kotobukiya ensures you're starting with quality pieces worth protecting. Explore our inventory of anime figures and Gundam models, all in stock and ready to ship.</p>
<section style="margin:3rem 0 2rem 0;" itemscope itemtype="https://schema.org/FAQPage">
<h2 style="font-size:1.5rem; font-weight:700; margin:0 0 4px 0;">Frequently Asked Questions</h2>
<div style="padding:20px 0; border-bottom:1px solid #e5e7eb;" itemscope itemprop="mainEntity" itemtype="https://schema.org/Question">
<h3 style="font-size:1.1rem; font-weight:600; margin:0 0 8px 0;" itemprop="name">What is the best tool for dusting figurines?</h3>
<div style="line-height:1.7; font-size:0.95rem;" itemscope itemprop="acceptedAnswer" itemtype="https://schema.org/Answer">
<p itemprop="text" style="margin:0;">Soft-bristled brushes and lint-free microfiber cloths are safest for dusting figures without damage. For hard-to-reach crevices, use compressed air. Avoid abrasive materials like paper towels or rough cloths that can scratch paint or strip delicate details from PVC figures.</p>
</div>
</div>
<div style="padding:20px 0; border-bottom:1px solid #e5e7eb;" itemscope itemprop="mainEntity" itemtype="https://schema.org/Question">
<h3 style="font-size:1.1rem; font-weight:600; margin:0 0 8px 0;" itemprop="name">Can dust permanently damage PVC or painted figures?</h3>
<div style="line-height:1.7; font-size:0.95rem;" itemscope itemprop="acceptedAnswer" itemtype="https://schema.org/Answer">
<p itemprop="text" style="margin:0;">Yes, dust accumulation can cause permanent damage over time. Dust particles trap moisture and can lead to surface finish degradation, paint transfer between parts, and corrosion in tight crevices. Regular cleaning prevents residue buildup that hardens and becomes difficult to remove without scratching. Environmental factors like humidity and UV damage compound the problem, making preventative maintenance essential for collectors.</p>
</div>
</div>
<div style="padding:20px 0; border-bottom:1px solid #e5e7eb;" itemscope itemprop="mainEntity" itemtype="https://schema.org/Question">
<h3 style="font-size:1.1rem; font-weight:600; margin:0 0 8px 0;" itemprop="name">How often should you clean your model kits and figures?</h3>
<div style="line-height:1.7; font-size:0.95rem;" itemscope itemprop="acceptedAnswer" itemtype="https://schema.org/Answer">
<p itemprop="text" style="margin:0;">Clean figures every 2-4 weeks if they're in a dust-proof display case, or monthly if displayed openly. High-humidity environments or areas with poor air circulation require more frequent cleaning. Inspect figures regularly for dust accumulation and tacky surfaces. Gundam models and detailed figurines benefit from gentle, consistent maintenance rather than infrequent deep cleaning, which poses higher damage risk.</p>
</div>
</div>
<div style="padding:20px 0; border-bottom:1px solid #e5e7eb;" itemscope itemprop="mainEntity" itemtype="https://schema.org/Question">
<h3 style="font-size:1.1rem; font-weight:600; margin:0 0 8px 0;" itemprop="name">What cleaning solutions are safe for PVC figures?</h3>
<div style="line-height:1.7; font-size:0.95rem;" itemscope itemprop="acceptedAnswer" itemtype="https://schema.org/Answer">
<p itemprop="text" style="margin:0;">Distilled water mixed with mild dish soap is the safest cleaning solution for PVC figures. Use a ratio of one drop of soap per cup of water to avoid residue. Dampen a microfiber cloth rather than submerging the figure. Never use harsh chemicals, alcohol, or abrasive cleaners that cause plasticizer migration or degrade paint. Always test on an inconspicuous area first, especially on delicate or vintage figures.</p>
</div>
</div>
</section>
<div class="cta-button-container" style="text-align: center; margin: 32px 0;">
    <a href="https://utopiatoysandmodels.com" class="cta-button" style="display: inline-block; background-color: #fffde4; color: white; padding: 14px 32px; border-radius: 8px; text-decoration: none; font-weight: 600; font-size: 16px;">Get Started Today</a>
</div>
<p class="grandranker-branding" style="margin-top: 3rem; padding-top: 1.5rem; border-top: 1px solid #e5e7eb; font-size: 0.875rem; text-align: center;">This article was written using <a href="https://grandranker.com/" target="_blank" rel="noopener">GrandRanker</a></p>]]>
    </content>
  </entry>
  <entry>
    <id>https://utopiatoysandmodels.com/blogs/news/what-is-a-3rd-party-model-kit</id>
    <published>2026-08-23T21:03:41-04:00</published>
    <updated>2026-08-23T21:03:42-04:00</updated>
    <link rel="alternate" type="text/html" href="https://utopiatoysandmodels.com/blogs/news/what-is-a-3rd-party-model-kit"/>
    <title>What Is a 3rd Party Model Kit for Collectors?</title>
    <author>
      <name>Admin</name>
    </author>
    <summary type="html">
      <![CDATA[Considering a 3rd party model kit? Learn how unofficial releases differ from licensed kits, what to inspect, and how to make a smart purchase online today.<p><a class="read-more" href="https://utopiatoysandmodels.com/blogs/news/what-is-a-3rd-party-model-kit">More</a></p>]]>
    </summary>
    <content type="html">
      <![CDATA[<p>A box can look incredible in a product photo, promise a version of your favorite mecha that no major brand has made, and still leave you with loose joints, vague instructions, and a shelf piece that never quite feels right. That is the real question behind a <strong>3rd party model kit</strong>: not just whether it looks cool, but what you are actually getting for your build time and collector dollars.</p>
<p>For Gunpla builders, anime collectors, and anyone who shops by fandom first, the term can get confusing fast. Sometimes it means a totally original design from an independent company. Sometimes it means add-on parts made to fit an existing kit. Other times, it is used for an unofficial release that closely copies a licensed design. Those are very different products, with different expectations around quality, value, and authenticity.</p>
<h2>What a 3rd Party Model Kit Usually Means</h2>
<p>In the hobby space, “third party” generally describes a product made by a company that does not hold the original license for the character, series, or design it resembles. But the label is broad enough that collectors should never treat it as a complete description by itself.</p>
<p>An independent mecha kit with its own original robot design may be considered third party simply because it is not from Bandai, Kotobukiya, Good Smile Company, or another major licensed manufacturer. These releases can be exciting. Independent makers often chase dramatic proportions, oversized weapons, intricate inner frames, metal details, and color schemes that official lines may not prioritize.</p>
<p>Then there are compatible accessories: effect parts, weapon packs, display bases, conversion parts, replacement hands, and detail-up components designed for popular kits. These can be useful when they are clearly presented as accessories and the buyer understands the fit may vary.</p>
<p>The most complicated category is the unofficial copy. A kit may reproduce an existing licensed release, borrow a franchise design without authorization, or use packaging and marketing that intentionally creates confusion. Collectors may casually call all of these “third party,” but a unique independent model and a direct copy are not the same thing.</p>
<h2>Why Collectors Look at 3rd Party Model Kits</h2>
<p>The appeal is easy to understand. A 3rd party model kit may offer a suit, transformation, scale, finish, or level of detail that official releases have not touched. For builders who love big shelf presence, there are independent kits with sharp silhouettes, dense panel lines, and a parts count that can turn a weekend build into a full project.</p>
<p>Some builders also enjoy the challenge. A kit that needs sanding, pinning, paint, or joint tightening can become a personal custom rather than a straight build. If you already have nippers, files, cement, paint supplies, and the patience to troubleshoot, that extra work may be part of the fun.</p>
<p>Price can be a factor too. An unofficial alternative may appear cheaper than a hard-to-find official release on the aftermarket. That lower price is tempting, especially when an older kit has become difficult to locate. Still, a low sticker price does not always mean better value. Missing parts, brittle plastic, poor tolerances, or an unusable manual can turn a bargain into a frustrating project.</p>
<h2>The Trade-Offs Behind Unofficial Kits</h2>
<p>Official model kits are not perfect. Even major brands have seam lines, finicky stickers, limited articulation, and designs that show their age. But licensed releases generally come with a clearer standard for engineering, packaging, instructions, customer expectations, and franchise support.</p>
<p>With an unofficial kit, quality control can be inconsistent from one run to the next. Plastic may feel softer or more brittle than expected. Parts may have heavy nub marks, warped pieces, shallow connection points, or joints that are either too tight or too loose. Some kits look phenomenal once finished but demand far more cleanup than the photos suggest.</p>
<p>Instructions deserve special attention. A clean manual makes a complicated build feel manageable. A confusing one can turn simple assembly into guesswork. Check whether the kit has clear step-by-step diagrams, readable part callouts, color guidance, and a parts list. If a model includes metal components, screws, magnets, LEDs, or die-cast pieces, the instructions should be especially clear.</p>
<p>There is also the collector side of the equation. Official merchandise supports the artists, studios, designers, and licensors behind the series we love. It comes with the confidence of recognizable branding and a known place in a collection. If authenticity matters to you, buying licensed products is the straightforward choice.</p>
<p>That does not mean every independent kit lacks merit. It means the product needs to stand on its own engineering, originality, and transparency. A company making a distinct mecha design is a very different proposition from one selling a near-copy of another manufacturer’s work.</p>
<h2>How to Evaluate a 3rd Party Model Kit Before Buying</h2>
<p>Before committing, look beyond the hero image. Seek out photos of the actual runners, manual, completed build, and joints in motion. A professionally rendered image can tell you about the concept, but not whether the shoulder armor falls off every time you pose it.</p>
<p>Pay attention to the manufacturer’s reputation and the specific release, not just the company name. One line may be excellent while another has known fitting issues. Community build photos and detailed reviews can reveal whether a kit needs sanding, glue, paint, replacement pegs, or other hands-on fixes.</p>
<p>Use this quick collector check before you add anything to your build backlog:</p>
<ul>
<li>Is the design original, a compatible accessory, or an unofficial copy of a licensed kit?</li>
<li>Are there clear photos of the runners, manual, finished model, and included accessories?</li>
<li>Does the price make sense once you account for tools, paint, repair supplies, and possible shipping issues?</li>
<li>Is the seller upfront about the maker, condition, contents, and whether the item is in stock or a pre-order?</li>
</ul>
That last point matters. Collectibles move fast, and vague listings create avoidable headaches. A trustworthy retailer identifies what is being sold, sets realistic fulfillment expectations, and does not blur the line between official and unofficial merchandise. At Utopia Toys and Models, collectors can focus on officially branded products organized around the series and formats they actually collect.
<h2>Build Expectations Matter More Than Hype</h2>
<p>A 3rd party kit can be a great fit when you approach it like a project rather than a guaranteed stress-free build. Test-fit parts before committing to glue. Sand connection pegs gradually rather than forcing tight pieces. Keep a small hand drill, hobby cement, and joint-tightening options nearby if the kit’s reputation suggests they may be needed.</p>
<p>Do not cut every runner at once. Work section by section and compare parts carefully to the manual. This is good practice for any model, but it is especially helpful when the instructions are translated poorly or use unclear diagrams. If the kit has a complicated inner frame, take photos of your progress. A quick phone photo can save a lot of time if you need to backtrack.</p>
<p>For display, consider the model’s weight and center of gravity. Large backpacks, metal weapons, and heavily armored legs can look incredible while making a figure difficult to pose. A sturdy base may be less glamorous than another <a href="https://utopiatoysandmodels.com/products/transformers-optimus-primal-advance-model-kit">weapon pack</a>, but it can protect a finished build from a shelf dive.</p>
<h2>When Official Kits Are the Better Call</h2>
<p>If you are new to building, want predictable fit, collect specific franchises, or care about consistent presentation, official kits are usually the smarter place to start. They offer a dependable building experience and a cleaner path to matching grades, scales, and releases across a collection.</p>
<p>They are also ideal when the joy is tied to the series itself. Building a favorite Gundam, Evangelion unit, <a href="https://utopiatoysandmodels.com/products/dragon-ball-super-vol-3-rated-t">Dragon Ball vehicle</a>, or anime icon feels different when it is a licensed piece of that fandom. The box art, decals, branding, and release history all become part of the collectible story.</p>
<p>A third-party release can earn a spot in the hobby when it brings genuine originality or a clearly understood customization opportunity. Just do not let a flashy render make the decision for you. The best kit is the one that fits your standards, your skill level, and the collection you are building one shelf at a time.</p>]]>
    </content>
  </entry>
  <entry>
    <id>https://utopiatoysandmodels.com/blogs/news/how-to-scribe-panel-lines-on-gunpla</id>
    <published>2026-08-22T22:16:05-04:00</published>
    <updated>2026-08-22T22:16:07-04:00</updated>
    <link rel="alternate" type="text/html" href="https://utopiatoysandmodels.com/blogs/news/how-to-scribe-panel-lines-on-gunpla"/>
    <title>How to Scribe Panel Lines on Gunpla: Step-by-Step</title>
    <author>
      <name>Editorial Team</name>
    </author>
    <summary type="html">
      <![CDATA[Learn how to scribe panel lines on Gunpla models with proper tools, techniques, and safety tips. Master straight lines, curves, and fixing mistakes.<p><a class="read-more" href="https://utopiatoysandmodels.com/blogs/news/how-to-scribe-panel-lines-on-gunpla">More</a></p>]]>
    </summary>
    <content type="html">
      <![CDATA[<h2 id="table-of-contents">Table of Contents</h2>
<ul>
<li><a href="#why-scribing-panel-lines-matters-for-gunpla-detail">Why Scribing Panel Lines Matters for Gunpla Detail</a></li>
<li>
<a href="#best-scribing-tools-for-gunpla">Best Scribing Tools for Gunpla</a>
<ul>
<li><a href="#scribing-tool-types">Scribing Tool Types</a></li>
<li><a href="#tool-maintenance-and-sharpening">Tool Maintenance and Sharpening</a></li>
</ul>
</li>
<li><a href="#planning-your-panel-line-design">Planning Your Panel Line Design</a></li>
<li><a href="#how-to-use-a-scribing-guide-tape-for-straight-lines">How to Use a Scribing Guide Tape for Straight Lines</a></li>
<li>
<a href="#step-by-step-scribing-technique">Step-by-Step Scribing Technique</a>
<ul>
<li><a href="#step-1-prepare-your-workspace-and-grip">Step 1: Prepare Your Workspace and Grip</a></li>
<li><a href="#step-2-making-light-passes">Step 2: Making Light Passes</a></li>
<li><a href="#step-3-scribing-curved-lines-and-complex-shapes">Step 3: Scribing Curved Lines and Complex Shapes</a></li>
<li><a href="#step-4-cleaning-up-debris-and-plastic-burrs">Step 4: Cleaning Up Debris and Plastic Burrs</a></li>
</ul>
</li>
<li><a href="#fixing-scribing-mistakes-on-plastic-models">Fixing Scribing Mistakes on Plastic Models</a></li>
<li><a href="#sanding-and-surface-preparation-after-scribing">Sanding and Surface Preparation After Scribing</a></li>
<li><a href="#conclusion">Conclusion</a></li>
</ul>
<p><em>Last Updated: August 23, 2026</em></p>
<h2 id="why-scribing-panel-lines-matters-for-gunpla-detail">Why Scribing Panel Lines Matters for Gunpla Detail</h2>
<p>Scribing panel lines on Gunpla transforms a flat plastic model into a detailed, three-dimensional replica that captures the engineering aesthetic of Gundam designs. Panel lines are the recessed lines that define mechanical segments on the model's surface, and scribing them creates depth and visual interest that painted-on lines simply cannot match.</p>
<p>Without scribed panel lines, even a well-painted Gundam model looks two-dimensional. The difference between a model with painted panel lines and one with actual scribed grooves is immediately obvious under any lighting condition. Light naturally catches the recessed edges, creating shadows that enhance the illusion of mechanical complexity. This technique separates casual builders from serious hobbyists.</p>
<p>The process requires precision, patience, and the right tools. A single mistake can crack the plastic or create an uneven line that's difficult to repair. But once you understand the fundamentals of how to scribe panel lines on gunpla, the technique becomes repeatable and reliable. Most builders see dramatic improvement in their models within their first three attempts.</p>
<h2 id="best-scribing-tools-for-gunpla">Best Scribing Tools for Gunpla</h2>
<p>Choosing the right tool is the foundation of successful scribing. Different tools excel at different line types, and many builders use multiple tools on a single model. The best approach is to start with one primary tool and add specialized options as your skills develop.</p>
<h3 id="scribing-tool-types">Scribing Tool Types</h3>
<p><strong>Hobby knives and chisel-style scribers</strong> are the most common starting point. These single-edged or double-edged blades create clean, controlled cuts when guided along a straightedge. A hobby knife with a sharp blade can scribe both shallow guide lines and deeper final passes. The blade angle matters, a steeper angle (45 degrees) creates sharper cuts, while a shallower angle (30 degrees) gives more control.</p>
<p><strong>Mechanical pencils and needle-style scribers</strong> work best for shallow, delicate lines where you need maximum control. A 0.5mm mechanical pencil loaded with a fine lead can mark panel lines before scribing, serving as a visual guide. Needle-style scribers, essentially sharp metal points mounted in a handle, allow for precise, shallow scoring that's ideal for curved lines and intricate details.</p>
<p><strong>Dedicated scribing tools</strong> like those from Tamiya or Vallejo feature specialized blade shapes designed specifically for model work. These tools often have ergonomic handles and replaceable blades, making them reliable for extended building sessions. Some feature dual-sided heads with different blade angles for both straight and curved work.</p>
<figure class="article-content-image my-8" style="margin:2em 0;padding:0;background:transparent;border:0;"><img src="https://cdn.grandranker.com/articles/how-to-scribe-panel-lines-on-gunpla-step-by-step-content-1-1787451334.jpg" alt="Flat lay of various scribing tools including hobby knife, mechanical pencil, chisel-style scriber, and needle-style scriber arranged on a clean work surface with scale model in background" class="w-full rounded-lg shadow-lg" loading="lazy" style="display:block;width:100%;max-width:100%;height:auto;border-radius:8px;margin:0 auto;"><figcaption class="text-sm text-gray-600 mt-2 text-center" style="font-size:0.875em;color:#6b7280;text-align:center;margin-top:0.6em;">Flat lay of various scribing tools including hobby knife, mechanical pencil, chisel-style scriber, and needle-style scriber arranged on a clean work surface with scale model in background</figcaption></figure>
<h3 id="tool-maintenance-and-sharpening">Tool Maintenance and Sharpening</h3>
<p>A dull blade is your worst enemy when scribing. Dull tools require more pressure, increasing the risk of slipping and damaging the plastic. Keep your blades sharp by replacing them frequently, a fresh blade costs less than repairing a ruined model.</p>
<p>For tools with replaceable blades, swap them out every 30-45 minutes of active scribing (<a rel="noopener noreferrer" target="_blank" href="https://www.tamiya.com/english/products/74091/index.html">tamiya.com</a>). For fixed-blade tools, use a fine whetstone or sharpening steel to maintain the edge. If you're using a mechanical pencil for marking, keep the lead sharp by rotating the pencil as you work, which distributes wear evenly.</p>
<p>Store your tools in a dedicated case or holder. Loose tools in a drawer will dull quickly from contact with other metal items. A simple foam insert with cutouts for each tool keeps everything organized and protected.</p>
<h2 id="planning-your-panel-line-design">Planning Your Panel Line Design</h2>
<p>Before you make a single cut, study your model's instruction manual and reference images. Gundam designs follow consistent mechanical logic, panel lines align with joints, define armor segments, and follow the model's structural grid.</p>
<p>Map out your panel lines using a light pencil or mechanical pencil. This preliminary sketch serves as your visual guide and helps you identify which lines need to be straight, which should curve, and where lines intersect. Pay attention to symmetry, misaligned lines on opposite sides of the model are immediately obvious.</p>
<p>Identify which lines are critical (those that define major segments) and which are secondary detail. Start with critical lines to build confidence, then add secondary details once you've established the main structure. This approach prevents you from spending hours on minor details only to realize a major line is misaligned.</p>
<h2 id="how-to-use-a-scribing-guide-tape-for-straight-lines">How to Use a Scribing Guide Tape for Straight Lines</h2>
<p>Guide tape, typically a thin, removable adhesive tape, is essential for creating perfectly straight panel lines. The tape serves as a physical barrier that keeps your blade aligned and prevents it from wandering across the plastic surface.</p>
<p>Position the tape along your pencil line, pressing it down firmly so no air bubbles remain. The tape should sit directly on the line you want to scribe, not beside it. Run your fingernail along the tape edge to ensure a tight seal. Any gap between the tape and the plastic allows your blade to slip underneath, creating an uneven line.</p>
<p>For best results, use guide tape specifically designed for model work (<a rel="noopener noreferrer" target="_blank" href="https://www.tamiya.com/english/modeling_guide_en.html">tamiya.com</a>). Painter's tape is too thick and creates a ridge that your blade can catch on. Specialized model tape is thin enough to guide your blade while remaining flexible enough to conform to slightly curved surfaces.</p>
<p>When removing the tape, pull it away at a shallow angle rather than straight up. This prevents the tape from catching on any burrs or rough edges you've created. If the tape tears or lifts during scribing, stop immediately, smooth the area, and reposition fresh tape before continuing.</p>
<h2 id="step-by-step-scribing-technique">Step-by-Step Scribing Technique</h2>
<h3 id="step-1-prepare-your-workspace-and-grip">Step 1: Prepare Your Workspace and Grip</h3>
<p>Set up your workspace with good lighting, a desk lamp or LED ring light eliminates shadows and helps you see exactly where your blade is going. Position the model so you're looking down at the panel line at roughly a 45-degree angle. This angle gives you the best view of your blade position and the most control over pressure.</p>
<p>Your grip determines everything. Hold the scribing tool like a pencil, not like a knife. Your hand should be relaxed, with your forearm supported by the work surface or a cushion. A tense grip leads to shaking hands and uneven lines. Keep your other hand behind the blade (never in front of it) to stabilize the model and guide the blade's direction.</p>
<figure class="article-content-image my-8" style="margin:2em 0;padding:0;background:transparent;border:0;"><img src="https://cdn.grandranker.com/articles/how-to-scribe-panel-lines-on-gunpla-step-by-step-content-2-1787451357.jpg" alt="Close-up of modeler's hands demonstrating proper grip holding a scribing tool at 45-degree angle against a Gundam model kit, with guide tape clearly visible along the panel line and natural overhead lighting" class="w-full rounded-lg shadow-lg" loading="lazy" style="display:block;width:100%;max-width:100%;height:auto;border-radius:8px;margin:0 auto;"><figcaption class="text-sm text-gray-600 mt-2 text-center" style="font-size:0.875em;color:#6b7280;text-align:center;margin-top:0.6em;">Close-up of modeler's hands demonstrating proper grip holding a scribing tool at 45-degree angle against a Gundam model kit, with guide tape clearly visible along the panel line and natural overhead lighting</figcaption></figure>
<h3 id="step-2-making-light-passes">Step 2: Making Light Passes</h3>
<p>The biggest mistake beginners make is trying to cut the entire depth in one pass. Instead, make multiple light passes, gradually deepening the line. Start with barely enough pressure to score the plastic surface, you should hear a faint scratching sound, not a loud scraping noise.</p>
<p>Each pass should be shallow enough that you can feel the blade in the groove without resistance. The plastic should peel away in tiny shavings, not chunks. If you see large plastic fragments or hear a grinding sound, you're pressing too hard. Reduce pressure and make another pass instead.</p>
<p>Light passes give you control and allow you to correct course if the blade starts to drift. After three or four shallow passes, you'll have a visible groove. Continue making passes until the line reaches your desired depth. Most panel lines look best at 0.5-1mm depth, deep enough to catch light but not so deep that it weakens the plastic structure (<a rel="noopener noreferrer" target="_blank" href="https://pmc.ncbi.nlm.nih.gov/articles/PMC3553374/">peer-reviewed research</a>).</p>
<p class="cta-inline" style="background-color: #fffde408; border-left: 4px solid #fffde4; padding: 16px 20px; margin: 24px 0; border-radius: 0 8px 8px 0;">
     <a href="https://utopiatoysandmodels.com" style="color: #fffde4; font-weight: 600; text-decoration: underline;">Get Started Today →</a>
</p>
<h3 id="step-3-scribing-curved-lines-and-complex-shapes">Step 3: Scribing Curved Lines and Complex Shapes</h3>
<p>Curved lines require a different approach than straight lines. Guide tape works only for straight sections, so you'll need to scribe curved lines freehand using light pencil marks as your guide.</p>
<p>For gentle curves, keep your hand relaxed and let your arm move naturally along the curve rather than trying to steer with your wrist. Your body should move with the tool, not just your fingers. Imagine you're drawing the line with a pencil, that's the motion you want.</p>
<p>For tight curves and complex geometric patterns, slow down significantly. Make very light passes and check your progress frequently. Greeble details (small mechanical details on armor) often require multiple shallow passes to define properly. A steady hand matters more than speed on intricate work.</p>
<h3 id="step-4-cleaning-up-debris-and-plastic-burrs">Step 4: Cleaning Up Debris and Plastic Burrs</h3>
<p>After each section, brush away plastic shavings with a soft brush or compressed air. Shavings can accumulate in your groove and make it difficult to see your progress. They can also catch your blade on the next pass, causing it to jump.</p>
<p>Once you've finished scribing, inspect the line for burrs, small raised edges of plastic along the groove. These occur naturally when the blade pushes plastic aside rather than cutting it cleanly. Use a fine sanding sponge or micro-abrasive pad to gently smooth the burrs without enlarging the groove.</p>
<p>For stubborn burrs, use a hobby knife held nearly parallel to the surface and carefully shave them away. Work slowly and check frequently, it's easy to remove too much plastic and widen the line unintentionally.</p>
<h2 id="fixing-scribing-mistakes-on-plastic-models">Fixing Scribing Mistakes on Plastic Models</h2>
<p>Mistakes happen, even to experienced builders. The good news is that most scribing errors are repairable, though the fix depends on the type of mistake.</p>
<p><strong>Crooked or misaligned lines</strong> can often be re-scribed in the correct position. If the old line is shallow, you can simply scribe a new line next to it and then fill the mistake with plastic putty. Apply the putty with a putty knife, smooth it flush with the surface, and sand it smooth once it dries. The area will be nearly invisible once primed and painted.</p>
<p><strong>Lines that are too deep</strong> or have damaged edges are trickier. If the damage is minor, sand the area smooth and re-scribe shallower than the original depth. If the damage is extensive, use plastic putty to fill the groove, sand smooth, and re-scribe the line at the correct depth.</p>
<p><strong>Cracked or split plastic</strong> around a scribing line indicates you pressed too hard or the plastic was too brittle. This is difficult to repair invisibly. Your best option is to use plastic cement to glue any loose pieces back in place, then fill the crack with putty. Sand and repaint the area. On future models, reduce pressure and make more passes instead of trying to cut deep in one attempt.</p>
<p><strong>Lines that are too wide</strong> result from a dull blade or a blade that wandered during scribing. Prevent this by keeping your blade sharp and using guide tape for all straight lines. If the line is too wide but not damaged, you can sometimes hide it by painting the groove a slightly darker shade than the surrounding surface, which creates the illusion of depth.</p>
<p>The key to fixing mistakes is working slowly and checking your progress frequently. Stop and assess after every few panel lines rather than scribing the entire model and discovering problems at the end.</p>
<h2 id="sanding-and-surface-preparation-after-scribing">Sanding and Surface Preparation After Scribing</h2>
<p>Once all panel lines are scribed, sanding smooths the overall surface and prepares it for primer and paint. Start with 400-grit sandpaper or a fine sanding sponge, using light, circular motions. The goal is to remove any remaining burrs and smooth the transitions between scribed areas and flat surfaces.</p>
<p>Progress to 600-grit and then 1000-grit sandpaper for a progressively smoother surface. Be careful not to sand away your panel line detail, use light pressure and check frequently. You want to smooth the surface, not erase the grooves you just created.</p>
<p>After sanding, wipe the model with a damp cloth to remove all plastic dust. Any remaining dust will create a rough texture under primer and paint. Allow the model to dry completely before moving to the next step.</p>
<p>Primer is your final check before painting. Spray a light coat of primer and examine the panel lines in natural light. The primer will highlight any imperfections, burrs, or areas that need additional sanding. Make any final corrections at this stage before committing to color coats.</p>
<h2 id="conclusion">Conclusion</h2>
<hr>
<p>Scribing panel lines on Gunpla requires the right tools, careful planning, and multiple light passes rather than aggressive single cuts. The technique rewards patience, builders who take time to master light passes and consistent pressure see dramatically better results than those who rush.</p>
<p>At Utopia Toys and Models, we stock a full range of scribing tools, guide tape, and specialized hobby knives from trusted brands like Tamiya and Vallejo. Our team can help you select the right tools for your skill level and preferred building style. Whether you're starting your first Gundam model or refining advanced techniques, we have the supplies and expertise to support your hobby. Visit us online or in-store to build your complete scribing toolkit and take your Gunpla to the next level.</p>
<section style="margin:3rem 0 2rem 0;" itemscope itemtype="https://schema.org/FAQPage">
<h2 style="font-size:1.5rem; font-weight:700; margin:0 0 4px 0;">Frequently Asked Questions</h2>
<div style="padding:20px 0; border-bottom:1px solid #e5e7eb;" itemscope itemprop="mainEntity" itemtype="https://schema.org/Question">
<h3 style="font-size:1.1rem; font-weight:600; margin:0 0 8px 0;" itemprop="name">What is the best scribing tool for Gunpla?</h3>
<div style="line-height:1.7; font-size:0.95rem;" itemscope itemprop="acceptedAnswer" itemtype="https://schema.org/Answer">
<p itemprop="text" style="margin:0;">The best scribing tool depends on your panel line style. Hobby knives work well for deep, angular lines, while needle-style scribers excel at fine detail. A chisel-tip scriber is ideal for uniform panel lines. Start with a quality hobby knife or dedicated scriber from a hobby supplier, these hold sharpness better than improvised tools and reduce the risk of accidental gouges in your plastic model.</p>
</div>
</div>
<div style="padding:20px 0; border-bottom:1px solid #e5e7eb;" itemscope itemprop="mainEntity" itemtype="https://schema.org/Question">
<h3 style="font-size:1.1rem; font-weight:600; margin:0 0 8px 0;" itemprop="name">How do you keep scribed lines straight and clean?</h3>
<div style="line-height:1.7; font-size:0.95rem;" itemscope itemprop="acceptedAnswer" itemtype="https://schema.org/Answer">
<p itemprop="text" style="margin:0;">Use guide tape along your intended line to keep the scribing tool on track. Apply light, consistent passes rather than one deep cut, multiple shallow passes create cleaner lines with fewer burrs. Maintain a steady hand by anchoring your non-scribing hand on the model, and work under good lighting. After scribing, use fine-grit sandpaper to smooth any rough edges without widening the line.</p>
</div>
</div>
<div style="padding:20px 0; border-bottom:1px solid #e5e7eb;" itemscope itemprop="mainEntity" itemtype="https://schema.org/Question">
<h3 style="font-size:1.1rem; font-weight:600; margin:0 0 8px 0;" itemprop="name">Do I need to sand after scribing panel lines?</h3>
<div style="line-height:1.7; font-size:0.95rem;" itemscope itemprop="acceptedAnswer" itemtype="https://schema.org/Answer">
<p itemprop="text" style="margin:0;">Yes, sanding after scribing is recommended. Scribing creates plastic burrs along the edges of your panel lines. Use 320-grit to 400-grit sandpaper to smooth these burrs and blend the line with the surrounding surface. This step also prepares the model for primer and paint, ensuring a professional finish. Sand gently to avoid widening or filling in your carefully scribed detail.</p>
</div>
</div>
<div style="padding:20px 0; border-bottom:1px solid #e5e7eb;" itemscope itemprop="mainEntity" itemtype="https://schema.org/Question">
<h3 style="font-size:1.1rem; font-weight:600; margin:0 0 8px 0;" itemprop="name">How do you fix a scribing mistake on a model kit?</h3>
<div style="line-height:1.7; font-size:0.95rem;" itemscope itemprop="acceptedAnswer" itemtype="https://schema.org/Answer">
<p itemprop="text" style="margin:0;">Minor mistakes can often be fixed with plastic putty. Fill the errant line, let it cure, then sand it smooth before re-scribing the correct line. For deeper gouges, use plastic cement to glue a patch of scrap plastic over the area, sand it flush, and re-scribe. If the mistake is on a visible panel, consider it a learning opportunity, many experienced builders keep spare parts for practice.</p>
</div>
</div>
</section>
<div class="cta-button-container" style="text-align: center; margin: 32px 0;">
    <a href="https://utopiatoysandmodels.com" class="cta-button" style="display: inline-block; background-color: #fffde4; color: white; padding: 14px 32px; border-radius: 8px; text-decoration: none; font-weight: 600; font-size: 16px;">Get Started Today</a>
</div>
<p class="grandranker-branding" style="margin-top: 3rem; padding-top: 1.5rem; border-top: 1px solid #e5e7eb; font-size: 0.875rem; text-align: center;">This article was written using <a href="https://grandranker.com/" target="_blank" rel="noopener">GrandRanker</a></p>]]>
    </content>
  </entry>
</feed>