<?xml version="1.0" encoding="UTF-8"?>
<feed xml:lang="en" xmlns="http://www.w3.org/2005/Atom" xmlns:opensearch="http://a9.com/-/spec/opensearch/1.1/" xmlns:s="http://jadedpixel.com/-/spec/shopify">
  <id>https://violettefieldthreads.com/blogs/theblog.atom</id>
  <link rel="alternate" type="text/html" href="https://violettefieldthreads.com/blogs/theblog"/>
  <link rel="self" type="application/atom+xml" href="https://violettefieldthreads.com/blogs/theblog.atom"/>
  <title>Violette Field Threads - Blog</title>
  <updated>2026-01-02T13:56:56-06:00</updated>
  <author>
    <name>Violette Field Threads</name>
  </author>
  <entry>
    <id>https://violettefieldthreads.com/blogs/theblog/gracie-pajama-hack-with-ruffles-bows</id>
    <published>2026-01-02T13:56:56-06:00</published>
    <updated>2026-01-02T13:57:02-06:00</updated>
    <link rel="alternate" type="text/html" href="https://violettefieldthreads.com/blogs/theblog/gracie-pajama-hack-with-ruffles-bows"/>
    <title>Gracie Pajama Hack with Ruffles &amp; Bows</title>
    <author>
      <name>Mary Stanley</name>
    </author>
    <content type="html">
      <![CDATA[<p style="margin-bottom: 0in; line-height: normal; mso-layout-grid-align: none; text-autospace: none;" class="MsoNormal"><span style="font-size: 13.0pt; font-family: AppleSystemUIFont; mso-bidi-font-family: AppleSystemUIFont; mso-font-kerning: 0pt;"><img alt="" src="https://cdn.shopify.com/s/files/1/0144/4922/files/Landscape_Skies_Photo_Collage_YouTube_Banner.png?v=1766956648"></span></p>
<p style="margin-bottom: 0in; line-height: normal; mso-layout-grid-align: none; text-autospace: none;" class="MsoNormal"><span style="font-size: 13.0pt; font-family: AppleSystemUIFont; mso-bidi-font-family: AppleSystemUIFont; mso-font-kerning: 0pt;">One of my favorite things about sewing is finding new ways to use patterns I already love. The Gracie pajama pattern is already adorable as written, but today I am going to show you how to create a whole new look by swapping the standard cuffs for gathered ruffles and adding sweet little bows. It gives the pajamas such a charming, feminine feel, and the best part is that you do it all with the existing cuff pieces you already have.</span></p>
<p style="margin-bottom: 0in; line-height: normal; mso-layout-grid-align: none; text-autospace: none;" class="MsoNormal"><span style="font-size: 13.0pt; font-family: AppleSystemUIFont; mso-bidi-font-family: AppleSystemUIFont; mso-font-kerning: 0pt;"><img alt="" src="https://cdn.shopify.com/s/files/1/0144/4922/files/blog1_d24bc1a0-3526-4c53-b893-6322ebe8efe2.jpg?v=1766957117"></span></p>
<p style="margin-bottom: 0in; line-height: normal; mso-layout-grid-align: none; text-autospace: none;" class="MsoNormal"><span style="font-size: 13.0pt; font-family: AppleSystemUIFont; mso-bidi-font-family: AppleSystemUIFont; mso-font-kerning: 0pt;">This hack uses the original cuff pattern pieces for both the sleeve cuff and the pant leg cuff. The only change we will make is in how they are cut. In the original pattern layout these pieces are not cut on the fold. For this version you will place those same cuff pieces on the fold and cut them that way. Cutting on the fold doubles the length of the cuff piece and gives us the fullness we need for the ruffle.</span></p>
<p style="margin-bottom: 0in; line-height: normal; mso-layout-grid-align: none; text-autospace: none;" class="MsoNormal"><span style="font-size: 13.0pt; font-family: AppleSystemUIFont; mso-bidi-font-family: AppleSystemUIFont; mso-font-kerning: 0pt;"><img alt="" src="https://cdn.shopify.com/s/files/1/0144/4922/files/blog2_2e6a29f9-522d-45fc-b1b4-fdb6bbc898fc.jpg?v=1766957142"></span></p>
<p style="margin-bottom: 0in; line-height: normal; mso-layout-grid-align: none; text-autospace: none;" class="MsoNormal"><b><span style="font-size: 13.0pt; font-family: AppleSystemUIFont; mso-bidi-font-family: AppleSystemUIFont; mso-font-kerning: 0pt;">How to create the ruffle cuff</span></b><span style="font-size: 13.0pt; font-family: AppleSystemUIFont; mso-bidi-font-family: AppleSystemUIFont; mso-font-kerning: 0pt;"></span></p>
<p style="margin-bottom: 0in; line-height: normal; mso-layout-grid-align: none; text-autospace: none;" class="MsoNormal"><span style="font-size: 13.0pt; font-family: AppleSystemUIFont; mso-bidi-font-family: AppleSystemUIFont; mso-font-kerning: 0pt;"> </span></p>
<p style="margin-bottom: 0in; line-height: normal; mso-layout-grid-align: none; text-autospace: none;" class="MsoNormal"><span style="font-size: 13.0pt; font-family: AppleSystemUIFont; mso-bidi-font-family: AppleSystemUIFont; mso-font-kerning: 0pt;">We will begin with one of the pant leg cuff pieces, but the same process will apply to the sleeve cuffs as well.</span></p>
<p style="margin-bottom: 0in; line-height: normal; mso-layout-grid-align: none; text-autospace: none;" class="MsoNormal"><span style="font-size: 13.0pt; font-family: AppleSystemUIFont; mso-bidi-font-family: AppleSystemUIFont; mso-font-kerning: 0pt;"><span style="mso-tab-count: 1;">         </span>1.<span style="mso-tab-count: 1;">      </span><b>Sew the cuff into a loop</b></span></p>
<p style="margin-bottom: 0in; line-height: normal; mso-layout-grid-align: none; text-autospace: none;" class="MsoNormal"><span style="font-size: 13.0pt; font-family: AppleSystemUIFont; mso-bidi-font-family: AppleSystemUIFont; mso-font-kerning: 0pt;">Fold the cuff piece so that right sides are touching and the short edges are aligned. Sew along the short edge using a ½” seam allowance to create one continuous loop.</span></p>
<p style="margin-bottom: 0in; line-height: normal; mso-layout-grid-align: none; text-autospace: none;" class="MsoNormal"><span style="font-size: 13.0pt; font-family: AppleSystemUIFont; mso-bidi-font-family: AppleSystemUIFont; mso-font-kerning: 0pt;"><img alt="" src="https://cdn.shopify.com/s/files/1/0144/4922/files/blog3_279f9385-bbad-46e8-a987-56c8ae6c9d24.jpg?v=1766957183"></span></p>
<p style="margin-bottom: 0in; line-height: normal; mso-layout-grid-align: none; text-autospace: none;" class="MsoNormal"><span style="font-size: 13.0pt; font-family: AppleSystemUIFont; mso-bidi-font-family: AppleSystemUIFont; mso-font-kerning: 0pt;">2.<span style="mso-tab-count: 1;">      </span><b>Press the seam</b></span></p>
<p style="margin-bottom: 0in; line-height: normal; mso-layout-grid-align: none; text-autospace: none;" class="MsoNormal"><span style="font-size: 13.0pt; font-family: AppleSystemUIFont; mso-bidi-font-family: AppleSystemUIFont; mso-font-kerning: 0pt;">Press the seam allowance open so it lies flat.</span></p>
<p style="margin-bottom: 0in; line-height: normal; mso-layout-grid-align: none; text-autospace: none;" class="MsoNormal"><span style="font-size: 13.0pt; font-family: AppleSystemUIFont; mso-bidi-font-family: AppleSystemUIFont; mso-font-kerning: 0pt;"><img alt="" src="https://cdn.shopify.com/s/files/1/0144/4922/files/blog4_f96ba61d-f129-4de4-995e-6c1aec6f8a55.jpg?v=1766957217"></span></p>
<p style="margin-bottom: 0in; line-height: normal; mso-layout-grid-align: none; text-autospace: none;" class="MsoNormal"><span style="font-size: 13.0pt; font-family: AppleSystemUIFont; mso-bidi-font-family: AppleSystemUIFont; mso-font-kerning: 0pt;">3.<span style="mso-tab-count: 1;">      </span><b>Fold to create the ruffle piece</b></span></p>
<p style="margin-bottom: 0in; line-height: normal; mso-layout-grid-align: none; text-autospace: none;" class="MsoNormal"><span style="font-size: 13.0pt; font-family: AppleSystemUIFont; mso-bidi-font-family: AppleSystemUIFont; mso-font-kerning: 0pt;">Fold the entire cuff piece in half so that wrong sides are touching and the long raw edges are lined up together.</span></p>
<p style="margin-bottom: 0in; line-height: normal; mso-layout-grid-align: none; text-autospace: none;" class="MsoNormal"><span style="font-size: 13.0pt; font-family: AppleSystemUIFont; mso-bidi-font-family: AppleSystemUIFont; mso-font-kerning: 0pt;"><img alt="" src="https://cdn.shopify.com/s/files/1/0144/4922/files/blog5_4d5bfb13-05bd-4f05-aff7-2fbd13bba830.jpg?v=1766957263"></span></p>
<p style="margin-bottom: 0in; line-height: normal; mso-layout-grid-align: none; text-autospace: none;" class="MsoNormal"><span style="font-size: 13.0pt; font-family: AppleSystemUIFont; mso-bidi-font-family: AppleSystemUIFont; mso-font-kerning: 0pt;">4.<span style="mso-tab-count: 1;">      </span><b>Add gathering stitches</b></span></p>
<p style="margin-bottom: 0in; line-height: normal; mso-layout-grid-align: none; text-autospace: none;" class="MsoNormal"><span style="font-size: 13.0pt; font-family: AppleSystemUIFont; mso-bidi-font-family: AppleSystemUIFont; mso-font-kerning: 0pt;">Sew two rows of gathering stitches along the long raw edge. Gently pull the threads to gather the fabric until the cuff matches the width of the pant leg opening.</span></p>
<p style="margin-bottom: 0in; line-height: normal; mso-layout-grid-align: none; text-autospace: none;" class="MsoNormal"><span style="font-size: 13.0pt; font-family: AppleSystemUIFont; mso-bidi-font-family: AppleSystemUIFont; mso-font-kerning: 0pt;"><img alt="" src="https://cdn.shopify.com/s/files/1/0144/4922/files/blog6_32b1747f-834a-4443-b4fc-53c8739f6b96.jpg?v=1766957296"></span></p>
<p style="margin-bottom: 0in; line-height: normal; mso-layout-grid-align: none; text-autospace: none;" class="MsoNormal"><span style="font-size: 13.0pt; font-family: AppleSystemUIFont; mso-bidi-font-family: AppleSystemUIFont; mso-font-kerning: 0pt;"><img alt="" src="https://cdn.shopify.com/s/files/1/0144/4922/files/blog7_618707a1-a565-4a3d-84c6-af0e8b87de64.jpg?v=1766957347"></span></p>
<p style="margin-bottom: 0in; line-height: normal; mso-layout-grid-align: none; text-autospace: none;" class="MsoNormal"><span style="font-size: 13.0pt; font-family: AppleSystemUIFont; mso-bidi-font-family: AppleSystemUIFont; mso-font-kerning: 0pt;">5.<span style="mso-tab-count: 1;">      </span><b>Attach the ruffle to the pants</b></span></p>
<p style="margin-bottom: 0in; line-height: normal; mso-layout-grid-align: none; text-autospace: none;" class="MsoNormal"><span style="font-size: 13.0pt; font-family: AppleSystemUIFont; mso-bidi-font-family: AppleSystemUIFont; mso-font-kerning: 0pt;">With right sides touching, slide the gathered cuff over the pant leg opening and align the raw edges. Pin evenly around.</span></p>
<p style="margin-bottom: 0in; line-height: normal; mso-layout-grid-align: none; text-autospace: none;" class="MsoNormal"><span style="font-size: 13.0pt; font-family: AppleSystemUIFont; mso-bidi-font-family: AppleSystemUIFont; mso-font-kerning: 0pt;"><img alt="" src="https://cdn.shopify.com/s/files/1/0144/4922/files/blog8_d96ad9c6-3df9-4d04-b011-48ae5793f02a.jpg?v=1766957383"></span></p>
<p style="margin-bottom: 0in; line-height: normal; mso-layout-grid-align: none; text-autospace: none;" class="MsoNormal"><span style="font-size: 13.0pt; font-family: AppleSystemUIFont; mso-bidi-font-family: AppleSystemUIFont; mso-font-kerning: 0pt;">6.<span style="mso-tab-count: 1;">      </span><b>Sew and finish the seam</b></span></p>
<p style="margin-bottom: 0in; line-height: normal; mso-layout-grid-align: none; text-autospace: none;" class="MsoNormal"><span style="font-size: 13.0pt; font-family: AppleSystemUIFont; mso-bidi-font-family: AppleSystemUIFont; mso-font-kerning: 0pt;">Sew the cuff to the pant leg using a 1/2" seam allowance. Trim the seam allowance, then finish with a zigzag stitch to enclose the raw edges. Press the cuff down so that the seam allowance is pressed up into the pant leg. You can topstitch along this seam if you would like a more finished look.</span></p>
<p style="margin-bottom: 0in; line-height: normal; mso-layout-grid-align: none; text-autospace: none;" class="MsoNormal"><span style="font-size: 13.0pt; font-family: AppleSystemUIFont; mso-bidi-font-family: AppleSystemUIFont; mso-font-kerning: 0pt;"><img alt="" src="https://cdn.shopify.com/s/files/1/0144/4922/files/blog9_95028186-9971-4424-883d-d9df8cc5635f.jpg?v=1766957418"></span></p>
<p style="margin-bottom: 0in; line-height: normal; mso-layout-grid-align: none; text-autospace: none;" class="MsoNormal"><span style="font-size: 13.0pt; font-family: AppleSystemUIFont; mso-bidi-font-family: AppleSystemUIFont; mso-font-kerning: 0pt;">You can stop right here for a simple and pretty ruffled cuff, or you can keep going and add the sweetest little bows all around the cuff.</span></p>
<p style="margin-bottom: 0in; line-height: normal; mso-layout-grid-align: none; text-autospace: none;" class="MsoNormal"><span style="font-size: 13.0pt; font-family: AppleSystemUIFont; mso-bidi-font-family: AppleSystemUIFont; mso-font-kerning: 0pt;"> </span></p>
<p style="margin-bottom: 0in; line-height: normal; mso-layout-grid-align: none; text-autospace: none;" class="MsoNormal"><b><span style="font-size: 13.0pt; font-family: AppleSystemUIFont; mso-bidi-font-family: AppleSystemUIFont; mso-font-kerning: 0pt;">Adding bias tape bows</span></b><span style="font-size: 13.0pt; font-family: AppleSystemUIFont; mso-bidi-font-family: AppleSystemUIFont; mso-font-kerning: 0pt;"></span></p>
<p style="margin-bottom: 0in; line-height: normal; mso-layout-grid-align: none; text-autospace: none;" class="MsoNormal"><span style="font-size: 13.0pt; font-family: AppleSystemUIFont; mso-bidi-font-family: AppleSystemUIFont; mso-font-kerning: 0pt;"> </span></p>
<p style="margin-bottom: 0in; line-height: normal; mso-layout-grid-align: none; text-autospace: none;" class="MsoNormal"><span style="font-size: 13.0pt; font-family: AppleSystemUIFont; mso-bidi-font-family: AppleSystemUIFont; mso-font-kerning: 0pt;">For my version, I used a 35 inch strip of 1 inch double fold bias tape for each pant leg and a 30 inch strip of 1/2 inch double fold bias tape for each sleeve. Feel free to play with both the width and the length, since the final bow size is totally up to your personal taste.</span></p>
<p style="margin-bottom: 0in; line-height: normal; mso-layout-grid-align: none; text-autospace: none;" class="MsoNormal"><span style="font-size: 13.0pt; font-family: AppleSystemUIFont; mso-bidi-font-family: AppleSystemUIFont; mso-font-kerning: 0pt;"><img alt="" src="https://cdn.shopify.com/s/files/1/0144/4922/files/blog10_6ab37bbd-bba9-4a33-a39c-5e44b80c2264.jpg?v=1766957445"></span></p>
<p style="margin-bottom: 0in; line-height: normal; mso-layout-grid-align: none; text-autospace: none;" class="MsoNormal"><span style="font-size: 13.0pt; font-family: AppleSystemUIFont; mso-bidi-font-family: AppleSystemUIFont; mso-font-kerning: 0pt;">To add the bows:</span></p>
<ol>
<li class="MsoListParagraph" style="text-indent: -0.5in; line-height: normal;">
<!-- [if !supportLists]--><span style="font-size: 13.0pt; font-family: AppleSystemUIFont; mso-fareast-font-family: AppleSystemUIFont; mso-bidi-font-family: AppleSystemUIFont; mso-font-kerning: 0pt;"><span style="mso-list: Ignore;"><span style="font: 7.0pt 'Times New Roman';">            </span></span></span><!--[endif]--><span style="font-size: 13.0pt; font-family: AppleSystemUIFont; mso-bidi-font-family: AppleSystemUIFont; mso-font-kerning: 0pt;">Find the center of your bias tape strip. <img src="https://cdn.shopify.com/s/files/1/0144/4922/files/blog11_45bcd1bb-4cdb-4244-9729-0a2c067e35a9.jpg?v=1766957484" alt=""></span>
<p class="MsoListParagraph" style="mso-add-space: auto; text-indent: -.5in; line-height: normal; mso-list: l0 level1 lfo1; mso-layout-grid-align: none; text-autospace: none; margin: 0in 0in 0in 1.0in;"><span style="font-size: 13.0pt; font-family: AppleSystemUIFont; mso-fareast-font-family: AppleSystemUIFont; mso-bidi-font-family: AppleSystemUIFont; mso-font-kerning: 0pt;"><span style="mso-list: Ignore;"><span style="font: 7.0pt 'Times New Roman';">    </span></span></span><!--[endif]--><span style="font-size: 13.0pt; font-family: AppleSystemUIFont; mso-bidi-font-family: AppleSystemUIFont; mso-font-kerning: 0pt;">Align that center point with the inner leg seam or sleeve seam. Topstitch the bias tape around the seam where the cuff is attached, keeping the tails free at the end so they can be tied.</span></p>
<span style="font-size: 13.0pt; font-family: AppleSystemUIFont; mso-bidi-font-family: AppleSystemUIFont; mso-font-kerning: 0pt;"><img src="https://cdn.shopify.com/s/files/1/0144/4922/files/blog12_3d813182-f977-4046-a1e3-7bcd5bd8000a.jpg?v=1766957654" alt=""></span>
<p class="MsoListParagraph" style="mso-add-space: auto; text-indent: -.5in; line-height: normal; mso-list: l0 level1 lfo1; mso-layout-grid-align: none; text-autospace: none; margin: 0in 0in 0in 1.0in;"><span style="font-size: 13.0pt; font-family: AppleSystemUIFont; mso-bidi-font-family: AppleSystemUIFont; mso-font-kerning: 0pt;">Tie the loose bias ends into bows and repeat for remaining leg and sleeve cuffs.</span></p>
<span style="font-size: 13.0pt; font-family: AppleSystemUIFont; mso-bidi-font-family: AppleSystemUIFont; mso-font-kerning: 0pt;"><img src="https://cdn.shopify.com/s/files/1/0144/4922/files/blog13_99e780d2-92f1-4d6d-b976-ce3a5045dc1c.jpg?v=1766957734" alt=""></span>
<p class="MsoNormal"><span style="font-size: 13.0pt; line-height: 115%; font-family: AppleSystemUIFont; mso-bidi-font-family: AppleSystemUIFont; mso-font-kerning: 0pt;">That is it. You now have the sweetest ruffled and bow-tied Gracie pajamas using a pattern you already love, with only a small tweak to the existing pieces!</span></p>
<span style="font-size: 13.0pt; line-height: 115%; font-family: AppleSystemUIFont; mso-bidi-font-family: AppleSystemUIFont; mso-font-kerning: 0pt;"><img src="https://cdn.shopify.com/s/files/1/0144/4922/files/4_1fe9fd7a-f1f2-47c7-9b63-f59fe3abc5af.jpg?v=1766957779" alt=""></span><span style="font-size: 13.0pt; line-height: 115%; font-family: AppleSystemUIFont; mso-bidi-font-family: AppleSystemUIFont; mso-font-kerning: 0pt;"><img src="https://cdn.shopify.com/s/files/1/0144/4922/files/5_a9e47d20-bc81-4372-9c40-7ca33701cf1b.jpg?v=1766957799" alt=""><img src="https://cdn.shopify.com/s/files/1/0144/4922/files/1_fa5e6cb3-ab8f-45a1-a759-59579d648dd9.jpg?v=1766957854" alt=""></span>
</li>
</ol>]]>
    </content>
  </entry>
  <entry>
    <id>https://violettefieldthreads.com/blogs/theblog/introducing-elowen</id>
    <published>2025-12-12T10:00:44-06:00</published>
    <updated>2025-12-12T10:00:44-06:00</updated>
    <link rel="alternate" type="text/html" href="https://violettefieldthreads.com/blogs/theblog/introducing-elowen"/>
    <title>Introducing Elowen</title>
    <author>
      <name>Mary Stanley</name>
    </author>
    <content type="html">
      <![CDATA[<p class="MsoNormal" style="margin-bottom: 0in; line-height: normal; mso-layout-grid-align: none; text-autospace: none;"> </p>
<p><span style="font-size: 13.0pt; line-height: 115%; font-family: AppleSystemUIFont; mso-fareast-font-family: Aptos; mso-fareast-theme-font: minor-latin; mso-bidi-font-family: AppleSystemUIFont; mso-font-kerning: 0pt; mso-ansi-language: EN-US; mso-fareast-language: EN-US; mso-bidi-language: AR-SA;">A dress that feels like a breath of elegance.</span></p>
<p><span style="font-size: 13.0pt; line-height: 115%; font-family: AppleSystemUIFont; mso-fareast-font-family: Aptos; mso-fareast-theme-font: minor-latin; mso-bidi-font-family: AppleSystemUIFont; mso-font-kerning: 0pt; mso-ansi-language: EN-US; mso-fareast-language: EN-US; mso-bidi-language: AR-SA;"><img src="https://cdn.shopify.com/s/files/1/0144/4922/files/ElowenA1.jpg?v=1764176188" alt=""></span></p>
<p class="MsoNormal" style="margin-bottom: 0in; line-height: normal; mso-layout-grid-align: none; text-autospace: none;"><span style="font-size: 13.0pt; font-family: AppleSystemUIFont; mso-bidi-font-family: AppleSystemUIFont; mso-font-kerning: 0pt;">There are patterns that delight you with their detail and patterns that win you over with their simplicity. Elowen somehow manages to be both. It was created for those moments when you want an effortless sew that still ends in something breathtaking. The kind of garment that looks like it took days of careful work yet comes together with a surprising ease.</span></p>
<p class="MsoNormal" style="margin-bottom: 0in; line-height: normal; mso-layout-grid-align: none; text-autospace: none;"><span style="font-size: 13.0pt; font-family: AppleSystemUIFont; mso-bidi-font-family: AppleSystemUIFont; mso-font-kerning: 0pt;"><img src="https://cdn.shopify.com/s/files/1/0144/4922/files/2_1.jpg?v=1765295413" alt=""></span></p>
<p class="MsoNormal" style="margin-bottom: 0in; line-height: normal; mso-layout-grid-align: none; text-autospace: none;"><span style="font-size: 13.0pt; font-family: AppleSystemUIFont; mso-bidi-font-family: AppleSystemUIFont; mso-font-kerning: 0pt;">The magic begins with the neckline. Elowen features an elegant boat neckline in the front and a soft V at the back, a combination that feels timeless and refined. Paired with gentle shaping through the darts, it brings a beautiful silhouette without asking for any complicated sewing techniques.</span></p>
<p class="MsoNormal" style="margin-bottom: 0in; line-height: normal; mso-layout-grid-align: none; text-autospace: none;"> </p>
<p class="MsoNormal" style="margin-bottom: 0in; line-height: normal; mso-layout-grid-align: none; text-autospace: none;"><span style="font-size: 13.0pt; font-family: AppleSystemUIFont; mso-bidi-font-family: AppleSystemUIFont; mso-font-kerning: 0pt;"><img src="https://cdn.shopify.com/s/files/1/0144/4922/files/10_2aaa5edb-5d74-4fad-a3e6-90e03a9ed114.jpg?v=1764120027" alt=""><img src="https://cdn.shopify.com/s/files/1/0144/4922/files/15_46de7b3b-49da-4ca1-a8c9-8a95e3797871.jpg?v=1764142235" alt=""><img src="https://cdn.shopify.com/s/files/1/0144/4922/files/8_0da8e774-13f8-4c58-8656-194cf56632a8.jpg?v=1764142235" alt=""></span></p>
<p class="MsoNormal" style="margin-bottom: 0in; line-height: normal; mso-layout-grid-align: none; text-autospace: none;"> </p>
<p class="MsoNormal" style="margin-bottom: 0in; line-height: normal; mso-layout-grid-align: none; text-autospace: none;"><span style="font-size: 13.0pt; font-family: AppleSystemUIFont; mso-bidi-font-family: AppleSystemUIFont; mso-font-kerning: 0pt;">One of our favorite things about Elowen is how quickly it can be sewn. The sleeveless maxi version takes only about three hours from cutting to pressing the final hem. It is one of those rare designs where the fabric can be the star and the sew itself feels calming and straightforward. Yet with a few simple choices, the same pattern transforms into something dramatically different. </span></p>
<p class="MsoNormal" style="margin-bottom: 0in; line-height: normal; mso-layout-grid-align: none; text-autospace: none;"> </p>
<p class="MsoNormal" style="margin-bottom: 0in; line-height: normal; mso-layout-grid-align: none; text-autospace: none;"><img src="https://cdn.shopify.com/s/files/1/0144/4922/files/VFT_Elowen_KimH-0629.jpg?v=1764140652" alt=""></p>
<p class="MsoNormal" style="margin-bottom: 0in; line-height: normal; mso-layout-grid-align: none; text-autospace: none;"><img src="https://cdn.shopify.com/s/files/1/0144/4922/files/23_032321e3-1363-452a-88fd-a578a4f98a5a.jpg?v=1764176188" alt=""><img src="https://cdn.shopify.com/s/files/1/0144/4922/files/29_7455babe-11f4-4710-98bd-df23022d5fdc.jpg?v=1764176188" alt=""><img src="https://cdn.shopify.com/s/files/1/0144/4922/files/25_60e89820-b95d-4e8f-a8e2-8458ba3561a7.jpg?v=1764176188" alt=""></p>
<p class="MsoNormal" style="margin-bottom: 0in; line-height: normal; mso-layout-grid-align: none; text-autospace: none;"> </p>
<p class="MsoNormal" style="margin-bottom: 0in; line-height: normal; mso-layout-grid-align: none; text-autospace: none;"><span style="font-size: 13.0pt; line-height: 115%; font-family: AppleSystemUIFont; mso-fareast-font-family: Aptos; mso-fareast-theme-font: minor-latin; mso-bidi-font-family: AppleSystemUIFont; mso-font-kerning: 0pt; mso-ansi-language: EN-US; mso-fareast-language: EN-US; mso-bidi-language: AR-SA;">Elowen includes several sleeve options to let you shift the mood of the garment. You can keep it light and airy with the sleeveless option as shown above, or choose the gathered cap sleeve for a touch of sweetness. </span></p>
<p class="MsoNormal" style="margin-bottom: 0in; line-height: normal; mso-layout-grid-align: none; text-autospace: none;"> </p>
<p class="MsoNormal" style="margin-bottom: 0in; line-height: normal; mso-layout-grid-align: none; text-autospace: none;"><span style="font-size: 13.0pt; line-height: 115%; font-family: AppleSystemUIFont; mso-fareast-font-family: Aptos; mso-fareast-theme-font: minor-latin; mso-bidi-font-family: AppleSystemUIFont; mso-font-kerning: 0pt; mso-ansi-language: EN-US; mso-fareast-language: EN-US; mso-bidi-language: AR-SA;"><img src="https://cdn.shopify.com/s/files/1/0144/4922/files/Hattie1.jpg?v=1764142235" alt=""><img src="https://cdn.shopify.com/s/files/1/0144/4922/files/hattie4.jpg?v=1764120027" alt=""></span></p>
<p class="MsoNormal" style="margin-bottom: 0in; line-height: normal; mso-layout-grid-align: none; text-autospace: none;"> </p>
<p class="MsoNormal" style="margin-bottom: 0in; line-height: normal; mso-layout-grid-align: none; text-autospace: none;"><span style="font-size: 13.0pt; line-height: 115%; font-family: AppleSystemUIFont; mso-fareast-font-family: Aptos; mso-fareast-theme-font: minor-latin; mso-bidi-font-family: AppleSystemUIFont; mso-font-kerning: 0pt; mso-ansi-language: EN-US; mso-fareast-language: EN-US; mso-bidi-language: AR-SA;">The long sleeves bring the most drama though, and have two finishing options! The long sleeves can be finished with a button cuff or they can be finished with a tied bow cuff that creates a gorgeous bow finish at the wrist.</span></p>
<p class="MsoNormal" style="margin-bottom: 0in; line-height: normal; mso-layout-grid-align: none; text-autospace: none;"> </p>
<p class="MsoNormal" style="margin-bottom: 0in; line-height: normal; mso-layout-grid-align: none; text-autospace: none;"><span style="font-size: 13.0pt; line-height: 115%; font-family: AppleSystemUIFont; mso-fareast-font-family: Aptos; mso-fareast-theme-font: minor-latin; mso-bidi-font-family: AppleSystemUIFont; mso-font-kerning: 0pt; mso-ansi-language: EN-US; mso-fareast-language: EN-US; mso-bidi-language: AR-SA;"><img src="https://cdn.shopify.com/s/files/1/0144/4922/files/4_2fc988de-2a4d-4bf1-a4f4-1a9635814def.jpg?v=1764142235" alt=""><img src="https://cdn.shopify.com/s/files/1/0144/4922/files/3_7b5aa182-4353-4d51-970e-f70d3b9ad873.jpg?v=1764142235" alt=""><img src="https://cdn.shopify.com/s/files/1/0144/4922/files/final28_0e884482-8455-4042-b3ac-0b88d3509805.jpg?v=1764142235" alt=""><img src="https://cdn.shopify.com/s/files/1/0144/4922/files/final23_ee010c7a-df03-4432-90dc-db3e41f97fbb.jpg?v=1764074302" alt=""></span></p>
<p class="MsoNormal" style="margin-bottom: 0in; line-height: normal; mso-layout-grid-align: none; text-autospace: none;"><span style="font-size: 13.0pt; line-height: 115%; font-family: AppleSystemUIFont; mso-fareast-font-family: Aptos; mso-fareast-theme-font: minor-latin; mso-bidi-font-family: AppleSystemUIFont; mso-font-kerning: 0pt; mso-ansi-language: EN-US; mso-fareast-language: EN-US; mso-bidi-language: AR-SA;"><img src="https://cdn.shopify.com/s/files/1/0144/4922/files/final44_ddd8ff21-7e19-4d6d-81e5-6d0c3d0ffe0c.jpg?v=1764142235" alt=""></span></p>
<p style="margin-bottom: 0in; line-height: normal; mso-layout-grid-align: none; text-autospace: none;" class="MsoNormal"> </p>
<p style="margin-bottom: 0in; line-height: normal; mso-layout-grid-align: none; text-autospace: none;" class="MsoNormal"><span style="font-size: 13.0pt; font-family: AppleSystemUIFont; mso-bidi-font-family: AppleSystemUIFont; mso-font-kerning: 0pt;">Then there is the gathered circle skirt that drapes beautifully and moves with a soft sweep. It comes in four lengths including vintage, knee, midi, and maxi so you can choose the style that suits your vision. Add a front slit for extra movement or keep it full and classic. A lining can be added for structure or left unlined for everyday comfort.</span></p>
<p style="margin-bottom: 0in; line-height: normal; mso-layout-grid-align: none; text-autospace: none;" class="MsoNormal"> </p>
<p style="margin-bottom: 0in; line-height: normal; mso-layout-grid-align: none; text-autospace: none;" class="MsoNormal"><span style="font-size: 13.0pt; font-family: AppleSystemUIFont; mso-bidi-font-family: AppleSystemUIFont; mso-font-kerning: 0pt;"><img alt="" src="https://cdn.shopify.com/s/files/1/0144/4922/files/mary4_a17d7e32-a40a-4834-bb6a-41025d67757c.jpg?v=1764073674"></span></p>
<p style="margin-bottom: 0in; line-height: normal; mso-layout-grid-align: none; text-autospace: none;" class="MsoNormal"><img src="https://cdn.shopify.com/s/files/1/0144/4922/files/Unknown-17_4a317e38-1939-4765-87a5-9301c9536490.jpg?v=1765553937" alt=""></p>
<p style="margin-bottom: 0in; line-height: normal; mso-layout-grid-align: none; text-autospace: none;" class="MsoNormal"> </p>
<p style="margin-bottom: 0in; line-height: normal; mso-layout-grid-align: none; text-autospace: none;" class="MsoNormal"><span style="font-size: 13.0pt; font-family: AppleSystemUIFont; mso-bidi-font-family: AppleSystemUIFont; mso-font-kerning: 0pt;"><img alt="" src="https://cdn.shopify.com/s/files/1/0144/4922/files/9_d2da8199-be45-403e-960d-6a21a64f00d4.jpg?v=1764142235"></span></p>
<p style="margin-bottom: 0in; line-height: normal; mso-layout-grid-align: none; text-autospace: none;" class="MsoNormal"> </p>
<p style="margin-bottom: 0in; line-height: normal; mso-layout-grid-align: none; text-autospace: none;" class="MsoNormal"><span style="font-size: 13.0pt; font-family: AppleSystemUIFont; mso-bidi-font-family: AppleSystemUIFont; mso-font-kerning: 0pt;">What we love most about Elowen is its versatility. Though it can be sewn as a red carpet worthy gown, it is just as lovely in light everyday fabrics. I have used only special fabrics so far, but I am already planning simple cotton and linen versions for casual wear. It is a pattern that can truly live in both worlds, from celebrations to quiet afternoons. </span></p>
<p style="margin-bottom: 0in; line-height: normal; mso-layout-grid-align: none; text-autospace: none;" class="MsoNormal"> </p>
<p style="margin-bottom: 0in; line-height: normal; mso-layout-grid-align: none; text-autospace: none;" class="MsoNormal"><img src="https://cdn.shopify.com/s/files/1/0144/4922/files/IMG_0959_copy.jpg?v=1765553841" alt=""></p>
<p class="MsoNormal" style="margin-bottom: 0in; line-height: normal; mso-layout-grid-align: none; text-autospace: none;"> </p>
<p class="MsoNormal" style="margin-bottom: 0in; line-height: normal; mso-layout-grid-align: none; text-autospace: none;"><span style="font-size: 13.0pt; font-family: AppleSystemUIFont; mso-bidi-font-family: AppleSystemUIFont; mso-font-kerning: 0pt;"><meta charset="utf-8">Optional details like the faux back bow allow you to customize the final look even further. Whether you prefer a clean minimalist silhouette or a more romantic finish, Elowen gives you the freedom to create exactly what you imagine.</span></p>
<p class="MsoNormal" style="margin-bottom: 0in; line-height: normal; mso-layout-grid-align: none; text-autospace: none;"> </p>
<p class="MsoNormal" style="margin-bottom: 0in; line-height: normal; mso-layout-grid-align: none; text-autospace: none;"><span style="font-size: 13.0pt; font-family: AppleSystemUIFont; mso-bidi-font-family: AppleSystemUIFont; mso-font-kerning: 0pt;"><img src="https://cdn.shopify.com/s/files/1/0144/4922/files/Unknown-21_d8a7a3fe-eae7-4b5b-a7e5-5a7aa2204cc7.jpg?v=1765553993" alt=""></span><span style="font-size: 13.0pt; font-family: AppleSystemUIFont; mso-bidi-font-family: AppleSystemUIFont; mso-font-kerning: 0pt;"></span></p>
<p class="MsoNormal" style="margin-bottom: 0in; line-height: normal; mso-layout-grid-align: none; text-autospace: none;"><span style="font-size: 13.0pt; font-family: AppleSystemUIFont; mso-bidi-font-family: AppleSystemUIFont; mso-font-kerning: 0pt;"><img alt="" src="https://cdn.shopify.com/s/files/1/0144/4922/files/6_18b2c6e2-3a96-4fa5-8458-4535e1888bdc.jpg?v=1764176188"><img alt="" src="https://cdn.shopify.com/s/files/1/0144/4922/files/final34_871dcdc3-111f-492d-8013-1807f58767d8.jpg?v=1764142235"></span></p>
<p style="margin-bottom: 0in; line-height: normal; mso-layout-grid-align: none; text-autospace: none;" class="MsoNormal"> </p>
<p style="margin-bottom: 0in; line-height: normal; mso-layout-grid-align: none; text-autospace: none;" class="MsoNormal"><span style="font-size: 13.0pt; font-family: AppleSystemUIFont; mso-bidi-font-family: AppleSystemUIFont; mso-font-kerning: 0pt;">And did you see – we have a FREE sash pattern as an add on to Elowen as well! It’s completely detachable and can be worn with the optional bow included with Elowen, or on it’s own! Such a great way to give one dress many different looks.</span></p>
<p style="margin-bottom: 0in; line-height: normal; mso-layout-grid-align: none; text-autospace: none;" class="MsoNormal"> </p>
<p style="margin-bottom: 0in; line-height: normal; mso-layout-grid-align: none; text-autospace: none;" class="MsoNormal"><span style="font-size: 13.0pt; font-family: AppleSystemUIFont; mso-bidi-font-family: AppleSystemUIFont; mso-font-kerning: 0pt;"><img alt="" src="https://cdn.shopify.com/s/files/1/0144/4922/files/3_624dccb3-b248-4ebe-88b3-da9ad63802bb.jpg?v=1764120975"></span></p>
<p style="margin-bottom: 0in; line-height: normal; mso-layout-grid-align: none; text-autospace: none;" class="MsoNormal"><span style="font-size: 13.0pt; font-family: AppleSystemUIFont; mso-bidi-font-family: AppleSystemUIFont; mso-font-kerning: 0pt;"><img alt="" src="https://cdn.shopify.com/s/files/1/0144/4922/files/1_a1b0088d-8898-4201-b6e3-0740fa4be790.jpg?v=1764142235"></span></p>
<p style="margin-bottom: 0in; line-height: normal; mso-layout-grid-align: none; text-autospace: none;" class="MsoNormal"><span style="font-size: 13.0pt; font-family: AppleSystemUIFont; mso-bidi-font-family: AppleSystemUIFont; mso-font-kerning: 0pt;"><img alt="" src="https://cdn.shopify.com/s/files/1/0144/4922/files/final10_309eac7e-7892-46ee-9a1d-ea6d8a50d105.jpg?v=1764142235"></span></p>
<p style="margin-bottom: 0in; line-height: normal; mso-layout-grid-align: none; text-autospace: none;" class="MsoNormal"> </p>
<p style="margin-bottom: 0in; line-height: normal; mso-layout-grid-align: none; text-autospace: none;" class="MsoNormal"><span style="font-size: 13.0pt; font-family: AppleSystemUIFont; mso-bidi-font-family: AppleSystemUIFont; mso-font-kerning: 0pt;">Elowen is an invitation to sew something beautiful without stress or struggle. A chance to watch a few seams turn into a dress that feels graceful, timeless, and full of possibility.</span></p>
<p style="margin-bottom: 0in; line-height: normal; mso-layout-grid-align: none; text-autospace: none;" class="MsoNormal"><span style="font-size: 13.0pt; font-family: AppleSystemUIFont; mso-bidi-font-family: AppleSystemUIFont; mso-font-kerning: 0pt;"> </span></p>
<p class="MsoNormal"><span style="font-size: 13.0pt; line-height: 115%; font-family: AppleSystemUIFont; mso-bidi-font-family: AppleSystemUIFont; mso-font-kerning: 0pt;">I hope you love creating with Elowen as much as we loved designing her.</span></p>
<p class="MsoNormal"><span style="font-size: 13.0pt; line-height: 115%; font-family: AppleSystemUIFont; mso-bidi-font-family: AppleSystemUIFont; mso-font-kerning: 0pt;"><img alt="" src="https://cdn.shopify.com/s/files/1/0144/4922/files/1_749f4b9c-5c0f-47fc-9d3c-c6b3b07d63d7.jpg?v=1765295557"></span></p>]]>
    </content>
  </entry>
  <entry>
    <id>https://violettefieldthreads.com/blogs/theblog/sewing-with-vintage-linens-new-heidi-pattern</id>
    <published>2025-05-27T11:31:03-05:00</published>
    <updated>2025-05-27T11:41:48-05:00</updated>
    <link rel="alternate" type="text/html" href="https://violettefieldthreads.com/blogs/theblog/sewing-with-vintage-linens-new-heidi-pattern"/>
    <title>Sewing with vintage linens + NEW Heidi pattern</title>
    <author>
      <name>Jessica Herning</name>
    </author>
    <content type="html">
      <![CDATA[<p data-end="205" data-start="104"><strong data-end="200" data-start="107">Introducing the Heidi Pattern + How I Upcycled a Vintage Linen Into a Beautiful Peplum Top</strong> 🌸</p>
<p data-end="555" data-start="207"><a href="https://violettefieldthreads.com/collections/heidi-1"><img alt="" src="https://cdn.shopify.com/s/files/1/0144/4922/files/BE3A4427.jpg?v=1748289198"></a></p>
<p data-end="555" data-start="207"><meta charset="UTF-8">Say hello to<a href="https://violettefieldthreads.com/collections/heidi-1" title="Heidi Collection">  <strong data-start="140" data-end="149">Heidi</strong> </a>— our newest sewing pattern, available now! 💛 Heidi is a charming peplum top or dress (with vintage + knee-length options) and three sweet sleeve styles: sleeveless, petal, or puff. It’s perfect for sewing up something special for baby, girls, or tweens<a href="https://violettefieldthreads.com/collections/heidi-1">.</a><br><br><a href="https://violettefieldthreads.com/collections/heidi-1"><img alt="" src="https://cdn.shopify.com/s/files/1/0144/4922/files/Heidi_Collage3.jpg?v=1748361648"></a><br><br>My first Heidi sample was made from a lovely, very drapey apparel fabric with a gray bow on a creamy white background fabric. I chose the split bodice with ruffle option, the puff sleeve, and the vintage skirt length. My tween daughter is very much into the feminine, romantic look that is ever so popular at stores like Alter'd State and Free People, so she was thrilled with these options. <br></p>
<p data-end="1043" data-start="557"><a href="https://violettefieldthreads.com/collections/heidi-1"><img alt="" src="https://cdn.shopify.com/s/files/1/0144/4922/files/Heidi_collage_1.jpg?v=1748360818"></a></p>
<p data-end="1043" data-start="557">The bodice has an optional split front bodice. You can add a ruffle to the split, or a trim. For her dress, I added the ruffle. For the peplum top, I added a flat lace trim. You can also omit the trim altogether. I love how the bodice ruffle echos the playful ruffle hem on the skirt versions. </p>
<p data-end="1043" data-start="557"><a href="https://violettefieldthreads.com/collections/heidi-1"><img alt="" src="https://cdn.shopify.com/s/files/1/0144/4922/files/BE3A4374_7b96a9cf-1242-4cab-bc37-6fc816b08ee2.jpg?v=1748361698"></a><br><br><a href="https://violettefieldthreads.com/collections/heidi-1" title="Heidi Collection"><strong data-end="855" data-start="846">Heidi</strong></a> is a delightful addition to any handmade wardrobe. It’s available now in <strong data-end="961" data-start="929">baby, girls, and tween sizes</strong> — so you can sew up something for every little (or not-so-little) in your life. Shown below are baby, girls, and tween sizes. <br><br><a href="https://violettefieldthreads.com/collections/heidi-1"><img alt="" src="https://cdn.shopify.com/s/files/1/0144/4922/files/Heidi_Collage2.jpg?v=1748361315"></a><br></p>
<p data-end="1043" data-start="557">My daughter loved the dress. It's feminine and playful! I love when a design works for baby, girls and also tween sizing. <br> <a href="https://violettefieldthreads.com/collections/heidi-1"><img alt="" src="https://cdn.shopify.com/s/files/1/0144/4922/files/BE3A4246.jpg?v=1748290871"></a> </p>
<p data-end="1043" data-start="557">For my second Heidi sample, I wanted to create a peplum top using the petal sleeves. They are so special. Mega heart eyes for the petal sleeves. <br><br><span>I wasn't sure what fabric to use, and then it dawned on me to see if I had any vintage linens. My daughter is <strong data-end="542" data-start="530">obsessed</strong> with how on-trend it feels! You’ve probably seen all the vintage-inspired looks this season at Alter’d State, Anthropologie, and Free People. They just happen to come with a high price tag. So, I had been thinking about incorporating some of my vintage linens into upcoming projects- and a peplum top is perfect, as it doesn't require much fabric. <br><br>I looked through my stash and had a remnant piece that if paired with some similar fabric, would just be enough! I had some white striped metallic dot on hand, so I started layout my pieces on the fabric. I didn't have much vintage linen to work with, so I thought I'd see what pieces would work. Since the bodice is split, I tried the top portion and I loved how that looked. So I cut that piece!<br><br></span><span><img src="https://cdn.shopify.com/s/files/1/0144/4922/files/IMG_4057_ffd6432c-afaf-46ec-894a-a7bd347d9810.jpg?v=1748362410" alt=""></span><span>I ruffle up a little strip to test on the bodice, but I wasn't in love with it for this style, it almost felt distracting... so I tried just a flat piece of lace and LOVED that! It's always good to lay out options and see what speaks to you!<br><br><img src="https://cdn.shopify.com/s/files/1/0144/4922/files/IMG_4059.jpg?v=1748362410" alt=""><br>When I finished the bodice, I had just enough fabric left to create a peplum skirt. The original vintage linen was a square table cloth, so the hem would be asymmetrical. I scrunched up the fabric, and thought it would look lovely, so I went for it! <br></span></p>
<p data-end="1043" data-start="557"><img alt="" src="https://cdn.shopify.com/s/files/1/0144/4922/files/IMG_4060.jpg?v=1748362403"><br><br>Here's the finished look: <br></p>
<p data-end="1043" data-start="557"><a href="https://violettefieldthreads.com/collections/heidi-1"><img src="https://cdn.shopify.com/s/files/1/0144/4922/files/BE3A4625_28f7f047-6222-41dc-bbbc-5963688a0dbb.jpg?v=1748363016" alt=""></a></p>
<p data-end="1043" data-start="557"><a href="https://violettefieldthreads.com/collections/heidi-1"><img src="https://cdn.shopify.com/s/files/1/0144/4922/files/BE3A4612_8a0a977e-fabf-4379-9c50-e357a04aba98.jpg?v=1748363013" alt=""></a></p>
<p data-end="1043" data-start="557"><a href="https://violettefieldthreads.com/collections/heidi-1"><img src="https://cdn.shopify.com/s/files/1/0144/4922/files/BE3A4616_c85078ef-d9f4-460b-859a-a42218439758.jpg?v=1748363022" alt=""></a></p>
<p data-end="1043" data-start="557"> </p>
<p><a href="https://violettefieldthreads.com/collections/heidi-1"><img src="https://cdn.shopify.com/s/files/1/0144/4922/files/BE3A4652_38fed926-462d-46f4-bd92-1858083453d1.jpg?v=1748363019" alt=""></a>We have a special event coming up, and when my daughter tried on the finished top, she said, "OOOooooo, I can wear THIS!". How my heart leapt! Is there a better feeling than when your teen says she loves something you made, and volunteers to wear it? <br><br><meta charset="UTF-8">Vintage linens are such a great fabric source — beautiful, unique, and often affordable if you thrift or repurpose. I loved giving new life to something old (with a hole!) and turning it into a gorgeous, one-of-a-kind top.</p>
<p data-start="992" data-end="1139">👉 Shop the <a href="https://violettefieldthreads.com/collections/heidi-1">Heidi </a> pattern now and start creating your own magical handmade looks! Don’t forget to tag us — we <em data-start="1106" data-end="1112">love</em>seeing what you make! 💕<span style="font-size: 0.875rem;">Have any questions? Feel free to ask below :)  </span><br></p>
<p> </p>]]>
    </content>
  </entry>
  <entry>
    <id>https://violettefieldthreads.com/blogs/theblog/how-to-create-a-lauryn-top</id>
    <published>2025-05-12T18:27:21-05:00</published>
    <updated>2025-05-12T18:29:35-05:00</updated>
    <link rel="alternate" type="text/html" href="https://violettefieldthreads.com/blogs/theblog/how-to-create-a-lauryn-top"/>
    <title>A Fresh Take on the Lauren Pattern</title>
    <author>
      <name>Mary Stanley</name>
    </author>
    <summary type="html">
      <![CDATA[<p><meta charset="utf-8"><span style="font-size: 13.0pt; font-family: AppleSystemUIFont; mso-bidi-font-family: AppleSystemUIFont; mso-font-kerning: 0pt;">We’re always looking for ways to get the most out of our favorite patterns, and the Lauren dress pattern is no exception. As the weather heats up, Lauren is always a go-to option for a sweet summer silhouette! <span style="mso-spacerun: yes;"> </span>Instead of sewing it up as a full dress though, we’re turning it into a breezy <b>summer top</b>, perfect for staying stylish and cool through the long summer days full of outside adventures.</span></p><p><a class="read-more" href="https://violettefieldthreads.com/blogs/theblog/how-to-create-a-lauryn-top">More</a></p>]]>
    </summary>
    <content type="html">
      <![CDATA[<p><img src="https://cdn.shopify.com/s/files/1/0144/4922/files/1_5e937ab2-e31f-4626-9bdb-4701723b0f08.jpg?v=1746831051" alt=""></p>
<p class="MsoNormal" style="margin-bottom: 0in; line-height: normal; mso-layout-grid-align: none; text-autospace: none;"><b><span style="font-size: 13.0pt; font-family: AppleSystemUIFont; mso-bidi-font-family: AppleSystemUIFont; mso-font-kerning: 0pt;">A Fresh Take on the Lauren Pattern</span></b><span style="font-size: 13.0pt; font-family: AppleSystemUIFont; mso-bidi-font-family: AppleSystemUIFont; mso-font-kerning: 0pt;"></span></p>
<p class="MsoNormal" style="margin-bottom: 0in; line-height: normal; mso-layout-grid-align: none; text-autospace: none;"><span style="font-size: 13.0pt; font-family: AppleSystemUIFont; mso-bidi-font-family: AppleSystemUIFont; mso-font-kerning: 0pt;"> </span></p>
<p class="MsoNormal" style="margin-bottom: 0in; line-height: normal; mso-layout-grid-align: none; text-autospace: none;"><span style="font-size: 13.0pt; font-family: AppleSystemUIFont; mso-bidi-font-family: AppleSystemUIFont; mso-font-kerning: 0pt;">We’re always looking for ways to get the most out of our favorite patterns, and the Lauren dress pattern is no exception. As the weather heats up, Lauren is always a go-to option for a sweet summer silhouette! <span style="mso-spacerun: yes;"> </span>Instead of sewing it up as a full dress though, we’re turning it into a breezy <b>summer top</b>, perfect for staying stylish and cool through the long summer days full of outside adventures.</span></p>
<p class="MsoNormal" style="margin-bottom: 0in; line-height: normal; mso-layout-grid-align: none; text-autospace: none;"> </p>
<p class="MsoNormal" style="margin-bottom: 0in; line-height: normal; mso-layout-grid-align: none; text-autospace: none;"><span style="font-size: 13.0pt; font-family: AppleSystemUIFont; mso-bidi-font-family: AppleSystemUIFont; mso-font-kerning: 0pt;"><img src="https://cdn.shopify.com/s/files/1/0144/4922/files/4_604bd556-27fa-4c2c-ba66-9b04e02af780.jpg?v=1746831051" alt=""></span></p>
<p class="MsoNormal" style="margin-bottom: 0in; line-height: normal; mso-layout-grid-align: none; text-autospace: none;"><span style="font-size: 13.0pt; font-family: AppleSystemUIFont; mso-bidi-font-family: AppleSystemUIFont; mso-font-kerning: 0pt;"> </span></p>
<p class="MsoNormal" style="margin-bottom: 0in; line-height: normal; mso-layout-grid-align: none; text-autospace: none;"><b><span style="font-size: 13.0pt; font-family: AppleSystemUIFont; mso-bidi-font-family: AppleSystemUIFont; mso-font-kerning: 0pt;">The Idea</span></b><span style="font-size: 13.0pt; font-family: AppleSystemUIFont; mso-bidi-font-family: AppleSystemUIFont; mso-font-kerning: 0pt;"></span></p>
<p class="MsoNormal" style="margin-bottom: 0in; line-height: normal; mso-layout-grid-align: none; text-autospace: none;"><span style="font-size: 13.0pt; font-family: AppleSystemUIFont; mso-bidi-font-family: AppleSystemUIFont; mso-font-kerning: 0pt;"> </span></p>
<p class="MsoNormal" style="margin-bottom: 0in; line-height: normal; mso-layout-grid-align: none; text-autospace: none;"><span style="font-size: 13.0pt; font-family: AppleSystemUIFont; mso-bidi-font-family: AppleSystemUIFont; mso-font-kerning: 0pt;">The Lauren dress is known for its baby doll silhouette, feminine details, and ultra useful cross strap back design to keep those shoulder straps from sliding off. <span style="mso-spacerun: yes;"> </span>But with just one simple tweak—<b>shortening the skirt</b>—you can transform it into a wear-everywhere top, perfect for pairing with high-waisted jeans, linen shorts, or a cute summer skirt.</span></p>
<p class="MsoNormal" style="margin-bottom: 0in; line-height: normal; mso-layout-grid-align: none; text-autospace: none;"><span style="font-size: 13.0pt; font-family: AppleSystemUIFont; mso-bidi-font-family: AppleSystemUIFont; mso-font-kerning: 0pt;"> </span></p>
<p class="MsoNormal" style="margin-bottom: 0in; line-height: normal; mso-layout-grid-align: none; text-autospace: none;"><b><span style="font-size: 13.0pt; font-family: AppleSystemUIFont; mso-bidi-font-family: AppleSystemUIFont; mso-font-kerning: 0pt;">How We’re Doing It</span></b><span style="font-size: 13.0pt; font-family: AppleSystemUIFont; mso-bidi-font-family: AppleSystemUIFont; mso-font-kerning: 0pt;"></span></p>
<p class="MsoNormal" style="margin-bottom: 0in; line-height: normal; mso-layout-grid-align: none; text-autospace: none;"><span style="font-size: 13.0pt; font-family: AppleSystemUIFont; mso-bidi-font-family: AppleSystemUIFont; mso-font-kerning: 0pt;"> </span></p>
<p class="MsoNormal" style="margin-bottom: 0in; line-height: normal; mso-layout-grid-align: none; text-autospace: none;"><span style="font-size: 13.0pt; font-family: AppleSystemUIFont; mso-bidi-font-family: AppleSystemUIFont; mso-font-kerning: 0pt;">Instead of attaching the full-length skirt that comes with the Lauren pattern, we’re cutting it several inches shorter—hitting just around the hip or slightly below, depending on your style. The goal is to maintain the same gentle drape and shape that makes Lauren so flattering, but in a length that feels light and easy for summer. We recommend a <b>finished</b> length for a top being:</span></p>
<p class="MsoNormal" style="margin-bottom: 0in; line-height: normal; mso-layout-grid-align: none; text-autospace: none;"><span style="font-size: 13.0pt; font-family: AppleSystemUIFont; mso-bidi-font-family: AppleSystemUIFont; mso-font-kerning: 0pt;"> </span></p>
<table class="MsoTableGrid" border="1" cellspacing="0" cellpadding="0" style="border-collapse: collapse; border: none; mso-border-alt: solid windowtext .5pt; mso-yfti-tbllook: 1184; mso-padding-alt: 0in 5.4pt 0in 5.4pt;">
<tbody>
<tr style="mso-yfti-irow: 0; mso-yfti-firstrow: yes;">
<td width="78" valign="top" style="width: 58.4pt; border: solid windowtext 1.0pt; mso-border-alt: solid windowtext .5pt; padding: 0in 5.4pt 0in 5.4pt;">
<p class="MsoNormal" align="center" style="margin-bottom: 0in; text-align: center; line-height: normal; mso-layout-grid-align: none; text-autospace: none;"><b><span style="font-size: 13.0pt; font-family: AppleSystemUIFont; mso-bidi-font-family: AppleSystemUIFont; mso-font-kerning: 0pt;">2T</span></b></p>
</td>
<td width="78" valign="top" style="width: 58.4pt; border: solid windowtext 1.0pt; border-left: none; mso-border-left-alt: solid windowtext .5pt; mso-border-alt: solid windowtext .5pt; padding: 0in 5.4pt 0in 5.4pt;">
<p class="MsoNormal" align="center" style="margin-bottom: 0in; text-align: center; line-height: normal; mso-layout-grid-align: none; text-autospace: none;"><b><span style="font-size: 13.0pt; font-family: AppleSystemUIFont; mso-bidi-font-family: AppleSystemUIFont; mso-font-kerning: 0pt;">3T</span></b></p>
</td>
<td width="78" valign="top" style="width: 58.45pt; border: solid windowtext 1.0pt; border-left: none; mso-border-left-alt: solid windowtext .5pt; mso-border-alt: solid windowtext .5pt; padding: 0in 5.4pt 0in 5.4pt;">
<p class="MsoNormal" align="center" style="margin-bottom: 0in; text-align: center; line-height: normal; mso-layout-grid-align: none; text-autospace: none;"><b><span style="font-size: 13.0pt; font-family: AppleSystemUIFont; mso-bidi-font-family: AppleSystemUIFont; mso-font-kerning: 0pt;">4T</span></b></p>
</td>
<td width="78" valign="top" style="width: 58.45pt; border: solid windowtext 1.0pt; border-left: none; mso-border-left-alt: solid windowtext .5pt; mso-border-alt: solid windowtext .5pt; padding: 0in 5.4pt 0in 5.4pt;">
<p class="MsoNormal" align="center" style="margin-bottom: 0in; text-align: center; line-height: normal; mso-layout-grid-align: none; text-autospace: none;"><b><span style="font-size: 13.0pt; font-family: AppleSystemUIFont; mso-bidi-font-family: AppleSystemUIFont; mso-font-kerning: 0pt;">5</span></b></p>
</td>
<td width="78" valign="top" style="width: 58.45pt; border: solid windowtext 1.0pt; border-left: none; mso-border-left-alt: solid windowtext .5pt; mso-border-alt: solid windowtext .5pt; padding: 0in 5.4pt 0in 5.4pt;">
<p class="MsoNormal" align="center" style="margin-bottom: 0in; text-align: center; line-height: normal; mso-layout-grid-align: none; text-autospace: none;"><b><span style="font-size: 13.0pt; font-family: AppleSystemUIFont; mso-bidi-font-family: AppleSystemUIFont; mso-font-kerning: 0pt;">6</span></b></p>
</td>
<td width="78" valign="top" style="width: 58.45pt; border: solid windowtext 1.0pt; border-left: none; mso-border-left-alt: solid windowtext .5pt; mso-border-alt: solid windowtext .5pt; padding: 0in 5.4pt 0in 5.4pt;">
<p class="MsoNormal" align="center" style="margin-bottom: 0in; text-align: center; line-height: normal; mso-layout-grid-align: none; text-autospace: none;"><b><span style="font-size: 13.0pt; font-family: AppleSystemUIFont; mso-bidi-font-family: AppleSystemUIFont; mso-font-kerning: 0pt;">7</span></b></p>
</td>
<td width="78" valign="top" style="width: 58.45pt; border: solid windowtext 1.0pt; border-left: none; mso-border-left-alt: solid windowtext .5pt; mso-border-alt: solid windowtext .5pt; padding: 0in 5.4pt 0in 5.4pt;">
<p class="MsoNormal" align="center" style="margin-bottom: 0in; text-align: center; line-height: normal; mso-layout-grid-align: none; text-autospace: none;"><b><span style="font-size: 13.0pt; font-family: AppleSystemUIFont; mso-bidi-font-family: AppleSystemUIFont; mso-font-kerning: 0pt;">8</span></b></p>
</td>
<td width="78" valign="top" style="width: 58.45pt; border: solid windowtext 1.0pt; border-left: none; mso-border-left-alt: solid windowtext .5pt; mso-border-alt: solid windowtext .5pt; padding: 0in 5.4pt 0in 5.4pt;">
<p class="MsoNormal" align="center" style="margin-bottom: 0in; text-align: center; line-height: normal; mso-layout-grid-align: none; text-autospace: none;"><b><span style="font-size: 13.0pt; font-family: AppleSystemUIFont; mso-bidi-font-family: AppleSystemUIFont; mso-font-kerning: 0pt;">9/10</span></b></p>
</td>
</tr>
<tr style="mso-yfti-irow: 1; mso-yfti-lastrow: yes;">
<td width="78" valign="top" style="width: 58.4pt; border: solid windowtext 1.0pt; border-top: none; mso-border-top-alt: solid windowtext .5pt; mso-border-alt: solid windowtext .5pt; padding: 0in 5.4pt 0in 5.4pt;">
<p class="MsoNormal" align="center" style="margin-bottom: 0in; text-align: center; line-height: normal; mso-layout-grid-align: none; text-autospace: none;"><span style="font-size: 13.0pt; font-family: AppleSystemUIFont; mso-bidi-font-family: AppleSystemUIFont; mso-font-kerning: 0pt;">8 ¾”</span></p>
</td>
<td width="78" valign="top" style="width: 58.4pt; border-top: none; border-left: none; border-bottom: solid windowtext 1.0pt; border-right: solid windowtext 1.0pt; mso-border-top-alt: solid windowtext .5pt; mso-border-left-alt: solid windowtext .5pt; mso-border-alt: solid windowtext .5pt; padding: 0in 5.4pt 0in 5.4pt;">
<p class="MsoNormal" align="center" style="margin-bottom: 0in; text-align: center; line-height: normal; mso-layout-grid-align: none; text-autospace: none;"><span style="font-size: 13.0pt; font-family: AppleSystemUIFont; mso-bidi-font-family: AppleSystemUIFont; mso-font-kerning: 0pt;">9 ½”</span></p>
</td>
<td width="78" valign="top" style="width: 58.45pt; border-top: none; border-left: none; border-bottom: solid windowtext 1.0pt; border-right: solid windowtext 1.0pt; mso-border-top-alt: solid windowtext .5pt; mso-border-left-alt: solid windowtext .5pt; mso-border-alt: solid windowtext .5pt; padding: 0in 5.4pt 0in 5.4pt;">
<p class="MsoNormal" align="center" style="margin-bottom: 0in; text-align: center; line-height: normal; mso-layout-grid-align: none; text-autospace: none;"><span style="font-size: 13.0pt; font-family: AppleSystemUIFont; mso-bidi-font-family: AppleSystemUIFont; mso-font-kerning: 0pt;">10 ½”</span></p>
</td>
<td width="78" valign="top" style="width: 58.45pt; border-top: none; border-left: none; border-bottom: solid windowtext 1.0pt; border-right: solid windowtext 1.0pt; mso-border-top-alt: solid windowtext .5pt; mso-border-left-alt: solid windowtext .5pt; mso-border-alt: solid windowtext .5pt; padding: 0in 5.4pt 0in 5.4pt;">
<p class="MsoNormal" align="center" style="margin-bottom: 0in; text-align: center; line-height: normal; mso-layout-grid-align: none; text-autospace: none;"><span style="font-size: 13.0pt; font-family: AppleSystemUIFont; mso-bidi-font-family: AppleSystemUIFont; mso-font-kerning: 0pt;">11 ¾”</span></p>
</td>
<td width="78" valign="top" style="width: 58.45pt; border-top: none; border-left: none; border-bottom: solid windowtext 1.0pt; border-right: solid windowtext 1.0pt; mso-border-top-alt: solid windowtext .5pt; mso-border-left-alt: solid windowtext .5pt; mso-border-alt: solid windowtext .5pt; padding: 0in 5.4pt 0in 5.4pt;">
<p class="MsoNormal" align="center" style="margin-bottom: 0in; text-align: center; line-height: normal; mso-layout-grid-align: none; text-autospace: none;"><span style="font-size: 13.0pt; font-family: AppleSystemUIFont; mso-bidi-font-family: AppleSystemUIFont; mso-font-kerning: 0pt;">12 ½”</span></p>
</td>
<td width="78" valign="top" style="width: 58.45pt; border-top: none; border-left: none; border-bottom: solid windowtext 1.0pt; border-right: solid windowtext 1.0pt; mso-border-top-alt: solid windowtext .5pt; mso-border-left-alt: solid windowtext .5pt; mso-border-alt: solid windowtext .5pt; padding: 0in 5.4pt 0in 5.4pt;">
<p class="MsoNormal" align="center" style="margin-bottom: 0in; text-align: center; line-height: normal; mso-layout-grid-align: none; text-autospace: none;"><span style="font-size: 13.0pt; font-family: AppleSystemUIFont; mso-bidi-font-family: AppleSystemUIFont; mso-font-kerning: 0pt;">13 ¾”</span></p>
</td>
<td width="78" valign="top" style="width: 58.45pt; border-top: none; border-left: none; border-bottom: solid windowtext 1.0pt; border-right: solid windowtext 1.0pt; mso-border-top-alt: solid windowtext .5pt; mso-border-left-alt: solid windowtext .5pt; mso-border-alt: solid windowtext .5pt; padding: 0in 5.4pt 0in 5.4pt;">
<p class="MsoNormal" align="center" style="margin-bottom: 0in; text-align: center; line-height: normal; mso-layout-grid-align: none; text-autospace: none;"><span style="font-size: 13.0pt; font-family: AppleSystemUIFont; mso-bidi-font-family: AppleSystemUIFont; mso-font-kerning: 0pt;">15 ¼”</span></p>
</td>
<td width="78" valign="top" style="width: 58.45pt; border-top: none; border-left: none; border-bottom: solid windowtext 1.0pt; border-right: solid windowtext 1.0pt; mso-border-top-alt: solid windowtext .5pt; mso-border-left-alt: solid windowtext .5pt; mso-border-alt: solid windowtext .5pt; padding: 0in 5.4pt 0in 5.4pt;">
<p class="MsoNormal" align="center" style="margin-bottom: 0in; text-align: center; line-height: normal; mso-layout-grid-align: none; text-autospace: none;"><span style="font-size: 13.0pt; font-family: AppleSystemUIFont; mso-bidi-font-family: AppleSystemUIFont; mso-font-kerning: 0pt;">16”</span></p>
</td>
</tr>
</tbody>
</table>
<p class="MsoNormal" style="margin-bottom: 0in; line-height: normal; mso-layout-grid-align: none; text-autospace: none;"><span style="font-family: AppleSystemUIFont; mso-bidi-font-family: AppleSystemUIFont; mso-font-kerning: 0pt;">*Since the shoulder ties are adjustable, the finished length is measured from the top of the bodice to the hem.</span></p>
<p class="MsoNormal" style="margin-bottom: 0in; line-height: normal; mso-layout-grid-align: none; text-autospace: none;"><span style="font-size: 13.0pt; font-family: AppleSystemUIFont; mso-bidi-font-family: AppleSystemUIFont; mso-font-kerning: 0pt;"><span style="mso-spacerun: yes;"> </span></span></p>
<p class="MsoNormal" style="margin-bottom: 0in; line-height: normal; mso-layout-grid-align: none; text-autospace: none;"><span style="font-size: 13.0pt; font-family: AppleSystemUIFont; mso-bidi-font-family: AppleSystemUIFont; mso-font-kerning: 0pt;">You can keep the same construction process for the bodice, and simply adjust the skirt length while cutting it at the same width mentioned in the pattern. We recommend doing a quick muslin to test your ideal top length. Whether you want something cropped or tunic-style, the Lauren pattern gives you a great foundation to customize from.</span></p>
<p class="MsoNormal" style="margin-bottom: 0in; line-height: normal; mso-layout-grid-align: none; text-autospace: none;"> </p>
<p class="MsoNormal" style="margin-bottom: 0in; line-height: normal; mso-layout-grid-align: none; text-autospace: none;"><span style="font-size: 13.0pt; font-family: AppleSystemUIFont; mso-bidi-font-family: AppleSystemUIFont; mso-font-kerning: 0pt;"> <img src="https://cdn.shopify.com/s/files/1/0144/4922/files/2_83a03bac-39f6-465e-9637-c909770c3417.jpg?v=1746831052" alt=""></span></p>
<p class="MsoNormal" style="margin-bottom: 0in; line-height: normal; mso-layout-grid-align: none; text-autospace: none;"> </p>
<p class="MsoNormal" style="margin-bottom: 0in; line-height: normal; mso-layout-grid-align: none; text-autospace: none;"><b><span style="font-size: 13.0pt; font-family: AppleSystemUIFont; mso-bidi-font-family: AppleSystemUIFont; mso-font-kerning: 0pt;">Why We Love It</span></b><span style="font-size: 13.0pt; font-family: AppleSystemUIFont; mso-bidi-font-family: AppleSystemUIFont; mso-font-kerning: 0pt;"></span></p>
<p class="MsoNormal" style="margin-bottom: 0in; line-height: normal; mso-layout-grid-align: none; text-autospace: none;"><span style="font-size: 13.0pt; font-family: AppleSystemUIFont; mso-bidi-font-family: AppleSystemUIFont; mso-font-kerning: 0pt;"> </span></p>
<p class="MsoNormal" style="margin-bottom: 0in; line-height: normal; mso-layout-grid-align: none; text-autospace: none;"><span style="font-size: 13.0pt; font-family: AppleSystemUIFont; mso-bidi-font-family: AppleSystemUIFont; mso-font-kerning: 0pt;">This kind of pattern hack is a great reminder that sewing your own clothes gives you ultimate versatility. With just one pattern, you can create multiple wardrobe staples. The Lauren dress-turned-top is easy to make, endlessly wearable, and a fun way to refresh your sewing plans without starting from scratch.</span></p>
<p class="MsoNormal" style="margin-bottom: 0in; line-height: normal; mso-layout-grid-align: none; text-autospace: none;"><span style="font-size: 13.0pt; font-family: AppleSystemUIFont; mso-bidi-font-family: AppleSystemUIFont; mso-font-kerning: 0pt;">Plus, since the top straps are not fixed, and the back has elastic in it, this truly can be a “grow with me” garment, by simply creating a deep hem as we have shown here that you could let down as you need a longer length!</span></p>
<p class="MsoNormal" style="margin-bottom: 0in; line-height: normal; mso-layout-grid-align: none; text-autospace: none;"> </p>
<p class="MsoNormal" style="margin-bottom: 0in; line-height: normal; mso-layout-grid-align: none; text-autospace: none;"><span style="font-size: 13.0pt; font-family: AppleSystemUIFont; mso-bidi-font-family: AppleSystemUIFont; mso-font-kerning: 0pt;"><img src="https://cdn.shopify.com/s/files/1/0144/4922/files/5_ed4dcd26-7d98-4353-92b3-e23ca5401607.jpg?v=1746831051" alt=""></span></p>
<p class="MsoNormal" style="margin-bottom: 0in; line-height: normal; mso-layout-grid-align: none; text-autospace: none;"><span style="font-size: 13.0pt; font-family: AppleSystemUIFont; mso-bidi-font-family: AppleSystemUIFont; mso-font-kerning: 0pt;"> </span></p>
<p class="MsoNormal" style="margin-bottom: 0in; line-height: normal; mso-layout-grid-align: none; text-autospace: none;"><span style="font-size: 13.0pt; font-family: AppleSystemUIFont; mso-bidi-font-family: AppleSystemUIFont; mso-font-kerning: 0pt;">So if you’re looking for your next summer project, grab your Lauren pattern, your favorite fabric, and try this simple, stylish twist—we promise you’ll love it just as much as the original!</span></p>
<p class="MsoNormal" style="margin-bottom: 0in; line-height: normal; mso-layout-grid-align: none; text-autospace: none;"> </p>
<p class="MsoNormal" style="margin-bottom: 0in; line-height: normal; mso-layout-grid-align: none; text-autospace: none;"><meta charset="utf-8"><br></p>
<p class="MsoNormal" style="margin-bottom: 0in; line-height: normal; mso-layout-grid-align: none; text-autospace: none;"> </p>]]>
    </content>
  </entry>
  <entry>
    <id>https://violettefieldthreads.com/blogs/theblog/regency-inspired-looks-for-the-theater-return-of-pride-and-prejudice</id>
    <published>2025-04-17T13:09:23-05:00</published>
    <updated>2025-05-04T14:31:22-05:00</updated>
    <link rel="alternate" type="text/html" href="https://violettefieldthreads.com/blogs/theblog/regency-inspired-looks-for-the-theater-return-of-pride-and-prejudice"/>
    <title>Regency Inspired Looks for the Theater Return of Pride and Prejudice!</title>
    <author>
      <name>Mary Stanley</name>
    </author>
    <summary type="html">
      <![CDATA[<p class="p1">Our entire team couldn’t be more excited for the timeless tale of Elizabeth Bennet and Mr. Darcy to return to theaters again in the 20th year anniversary and rerelease of “Pride and Prejudice.” To celebrate, we thought it would be so fun to come up with a few regency inspired looks created with patterns from our collection!</p>
<p class="p1">From flowing empire waistlines, to delicate puff sleeves, these patterns and mash ups will carry you back into the charm and romance of the Regency era.</p><p><a class="read-more" href="https://violettefieldthreads.com/blogs/theblog/regency-inspired-looks-for-the-theater-return-of-pride-and-prejudice">More</a></p>]]>
    </summary>
    <content type="html">
      <![CDATA[<p class="p1">Our entire team couldn’t be more excited for the timeless tale of Elizabeth Bennet and Mr. Darcy to return to theaters again in the 20th year anniversary and rerelease of “Pride and Prejudice.” To celebrate, we thought it would be so fun to come up with a few regency inspired looks created with patterns from our collection!</p>
<p class="p1"><img alt="" src="https://cdn.shopify.com/s/files/1/0144/4922/files/Pride_and_Prejudice.png?v=1744911915"></p>
<p class="p1">From flowing empire waistlines, to delicate puff sleeves, these patterns and mash ups will carry you back into the charm and romance of the Regency era. Whether you are an experienced sewist or just beginning your sewing journey, it is the perfect time to indulge your love for period drama and stitch up something with which to step into your own Austen story. We will be updating this blog often over the next week featuring different Bennet sister looks and explaining which patterns were used to create the look. Plus, each pattern we are featuring will be marked down to a $6 and below priced sale!!</p>
<p class="p1"><img alt="" src="https://cdn.shopify.com/s/files/1/0144/4922/files/KimberlySeegmillerP_P-03.jpg?v=1744912020"></p>
<p class="p1"><img src="https://cdn.shopify.com/s/files/1/0144/4922/files/KimberlySeegmillerP_P-05.jpg?v=1744912021" alt=""></p>
<p class="p1">Kicking us off with our first Pride and Prejudice inspired look is this stunning pattern mash up created by our ever-so-talented, Kimberly Seegmiller!<span class="Apple-converted-space">  </span>Details for how to recreate this look:</p>
<p class="p1">-The bodice is our Colette Pattern, with no modifications made.</p>
<p class="p1"><img src="https://cdn.shopify.com/s/files/1/0144/4922/files/KimberlySeegmillerP_P-08.jpg?v=1744912017" alt=""></p>
<p class="p1">-The skirt portion is created from our Audrina maxi skirt, slightly modified to be less full so that it would fit within the 45” width of fabric.</p>
<p class="p1">-The sleeves are the tie sleeves from our specialty sleeve pack, shorted by 1.5 inches and finished with the thinner colette cuff instead of the ties.</p>
<p class="p1"><img src="https://cdn.shopify.com/s/files/1/0144/4922/files/KimberlySeegmillerP_P-10.jpg?v=1744912020" alt=""></p>
<p class="p1"><img src="https://cdn.shopify.com/s/files/1/0144/4922/files/KimberlySeegmillerP_P-07.jpg?v=1744912020" alt=""></p>
<p class="p1">Not only did she create this stunning dress, but she fashioned the perfect regency era themed jacket as well by using our Clementine Pattern!<span class="Apple-converted-space">  </span></p>
<p class="p1"><img src="https://cdn.shopify.com/s/files/1/0144/4922/files/KimberlySeegmillerP_P-18.jpg?v=1744912021" alt=""><img src="https://cdn.shopify.com/s/files/1/0144/4922/files/KimberlySeegmillerP_P-12.jpg?v=1744912017" alt=""></p>
<p class="p1">Details for how to recreate this Clementine Jacket:</p>
<p class="p1">-Neckline is lowered about 1/2”, the back neckline was cut the same as the front and the collar was omitted.</p>
<p class="p1">-Add another set of the specialty sleeves on top of the clementine sleeves and aded elastic at the hem</p>
<p class="p1"><img src="https://cdn.shopify.com/s/files/1/0144/4922/files/KimberlySeegmillerP_P-17.jpg?v=1744912020" alt=""></p>
<p class="p1">Next up -step into the elegance of the early 19th century with our Emily pattern!<span class="Apple-converted-space"> </span></p>
<p class="p1"><span class="Apple-converted-space"><img src="https://cdn.shopify.com/s/files/1/0144/4922/files/EH4A8165_486fdb1e-daa2-4782-b98a-bafba9f2556a.jpg?v=1744985975" alt=""></span></p>
<p class="p1">This regency inspired dress pattern is ready to go with no pattern mashing required! Emily features a flattering empire waist, a romantic ruffle neckline and a dainty waist sash to tie it all together.  Emily can be sewn sleeveless, but the pattern does include the perfect cap sleeve shown here for the authentic touch.</p>
<p class="p1"><img src="https://cdn.shopify.com/s/files/1/0144/4922/files/EH4A8141_e90588c1-da37-42da-9c8f-1aad8a3070f8.jpg?v=1744985972" alt=""><img src="https://cdn.shopify.com/s/files/1/0144/4922/files/EH4A8428_eeb716c8-de67-48c7-8249-b658ce01750b.jpg?v=1744985974" alt=""></p>
<p class="p1">The skirt has a few different options, depending on the look you are going for!  Emily can have a one length maxi which is great in cottons or linens for a rustic countryside look, or a double maxi that is perfect for chiffons and light weight voile for that classic Regency drape.  The back is finished with a row of buttons and the perfect bow for that classical era feel!</p>
<p class="p2"><b><img src="https://cdn.shopify.com/s/files/1/0144/4922/files/hattieemily4.jpg?v=1744986036" alt=""><img src="https://cdn.shopify.com/s/files/1/0144/4922/files/Hattieemily3.jpg?v=1744986036" alt=""></b><br></p>
<p class="p1">Styling Tips to pull off the Look:</p>
<ul class="ul1">
<li class="li1">
<span class="s1"></span>Consider using a delicate lace for the neckline ruffle</li>
<li class="li1">
<span class="s1"></span>Use a contrasting fabric color for the sash</li>
<li class="li1">
<span class="s1"></span>Pair with soft slippers or ballet flats and a dainty shaw</li>
</ul>
<p class="p2"><img src="https://cdn.shopify.com/s/files/1/0144/4922/files/hattieemily5.jpg?v=1744986036" alt=""></p>
<p class="p1">So many ways to make the romantic silhouette of our Emily pattern the perfect sew for your Regency inspired dream!</p>
<p class="p1">Our third option in historical sewing inspired looks is our Ramsey pattern.<span class="Apple-converted-space">  </span>Regency fashion is all about romance and subtle details - and with this one easy modification our talented Christina Skinner added, you can create your own dreamy look using this Ramsey pattern that has been a fan favorite for a couple of years now! </p>
<p class="p1"><img src="https://cdn.shopify.com/s/files/1/0144/4922/files/ramsey8.jpg?v=1745257351" alt=""></p>
<p class="p1">Adding in a corset style tie to the back of Ramsey nods to Regency corsetry, and it’s such a simple modification with no boning or grommets needed.</p>
<p class="p1"><img src="https://cdn.shopify.com/s/files/1/0144/4922/files/ramsey7.jpg?v=1745257349" alt=""></p>
<p class="p1"><img src="https://cdn.shopify.com/s/files/1/0144/4922/files/Ramsey1.jpg?v=1745257348" alt=""></p>
<p class="p1">All you need to do is to create multiple loops from bias tape, or cording.<span class="Apple-converted-space">  </span>The size of dress you are sewing will determine how many loops you need for each side, Christina used 4 loops per side, so 8 total here, with her loops starting as rectangles about 2” long. Then you can sandwich your loops in between your back elastic panel and back bodice piece, or you can sew them right on top of the already sewn back as well - like Christina did here.</p>
<p class="p1"><img src="https://cdn.shopify.com/s/files/1/0144/4922/files/Unknown-13.jpg?v=1745257518" alt=""></p>
<p class="p1">Once those are sewn in, you will simple use a piece of ribbon to thread back and forth down the loops on each side to give that sweet corset look!</p>
<p class="p2"><img src="https://cdn.shopify.com/s/files/1/0144/4922/files/Ramsey2.jpg?v=1745257348" alt=""></p>
<p class="p1">We love this simple skirt sewn per pattern instructions at knee length, but can you image how pretty this would also be as a floor length skirt with that corset back as well?</p>
<p class="p2"><img src="https://cdn.shopify.com/s/files/1/0144/4922/files/Ramsey5.jpg?v=1745257349" alt=""></p>
<p class="p2"><img src="https://cdn.shopify.com/s/files/1/0144/4922/files/ramsey3.jpg?v=1745257348" alt=""></p>
<p class="p1">Find all of these patterns mentioned in this blog here: <meta charset="utf-8"><a href="https://violettefieldthreads.com/collections/regency-inspired-looks" title="Regency Inspired Patterns">https://violettefieldthreads.com/collections/regency-inspired-looks</a> </p>]]>
    </content>
  </entry>
  <entry>
    <id>https://violettefieldthreads.com/blogs/theblog/matilda-to-easy-grow-with-me-nightgown</id>
    <published>2023-11-09T13:18:57-06:00</published>
    <updated>2023-11-09T22:34:35-06:00</updated>
    <link rel="alternate" type="text/html" href="https://violettefieldthreads.com/blogs/theblog/matilda-to-easy-grow-with-me-nightgown"/>
    <title>Matilda to Easy &quot;Grow With Me&quot; Nightgown</title>
    <author>
      <name>Mary Stanley</name>
    </author>
    <summary type="html">
      <![CDATA[<p data-mce-fragment="1">Grow with me nightgown, in under an hour from cut to finish?! Yes please!  This little pattern hack using our Matilda pattern for the base creates the quickest nightgown that really works for years since the elastic neckline gives it so much ease!</p>
<p data-mce-fragment="1"><img alt="" src="https://cdn.shopify.com/s/files/1/0144/4922/files/25_2f537aec-149b-421c-894e-14d666c05f1b_1024x1024.jpg?v=1699555988"></p><p><a class="read-more" href="https://violettefieldthreads.com/blogs/theblog/matilda-to-easy-grow-with-me-nightgown">More</a></p>]]>
    </summary>
    <content type="html">
      <![CDATA[<p data-mce-fragment="1">Grow with me nightgown, in under an hour from cut to finish?! Yes please!  This little pattern hack using our Matilda pattern for the base creates the quickest nightgown that really works for years since the elastic neckline gives it so much ease!</p>
<p data-mce-fragment="1"><img src="https://cdn.shopify.com/s/files/1/0144/4922/files/25_2f537aec-149b-421c-894e-14d666c05f1b_1024x1024.jpg?v=1699555988" alt=""></p>
<p>I don’t know about you, but it’s the time of the year when I am creating lots of pajama sets for my kids, and nieces and nephews too!  So I’m here to share with you how to create this quick nightgown option- any length you’d like with an optional ruffle as well!</p>
<p>So first off, you will want to print off the Matilda bodice piece and the Matilda flutter sleeve piece.  Optionally, you could use one of the other sleeve pattern pieces as well if you prefer a longer sleeve.  My kids all seem to be hot sleepers and they do not like long sleeves, so we do flutter sleeves year-round for sleeping. So lets get started!</p>
<p data-mce-fragment="1"><img alt="" src="https://cdn.shopify.com/s/files/1/0144/4922/files/1_55a13f9d-6d33-4079-959a-2d85b0b9d7f1_1024x1024.jpg?v=1699556183" data-mce-fragment="1" data-mce-src="https://cdn.shopify.com/s/files/1/0144/4922/files/1_55a13f9d-6d33-4079-959a-2d85b0b9d7f1_1024x1024.jpg?v=1699556183"></p>
<ol>
<li>Measure your child from their arm pit down to how long you would like your gown to be. I will be showing two options – a floor length without ruffle (gray plaid) and a knee length with ruffle (pink and cream stripe). My daughter measures 39” from her armpit to the top of her foot, and 26” from her armpit to a little above her knee. To each of these measurements you will want to add 1” to give you length for your hem.  From here on out we will refer to this measurement as our STRAIGHT SKIRT MEASUREMENT – 40” for maxi length and 27” for knee length in my case.</li>
</ol>
<p> </p>
<p>{Now, you’ll need to decide if you want to create the super quick version without the ruffle, or the slightly more time consuming option of adding the ruffle (adding the ruffle took an extra 45 minutes for me, and of course is more fabric as well- but how darling is it?)  If you are creating the super quick straight version, you can continue on to step 2.  If you are wanting to add the ruffle then from your SKIRT MEASUREMENT that we just determined you will want to subtract from that length how long you want your ruffle piece will be.  For a vintage or knee length gown, we suggest using a 4”-5” long ruffle, or for a maxi length gown we suggest going with 5.5-7” for the length of the ruffle so that it keeps with the overall proportion of the gown. Since I am going for a shorter option for my ruffled version I will take my knee length SKIRT MEASUREMENT of 27” and subtract the 5” for my ruffle, giving me a knew length of 22” for my RUFFLE SKIRT MEASUREMENT.}</p>
<p data-mce-fragment="1"> <img alt="" src="https://cdn.shopify.com/s/files/1/0144/4922/files/2_464026a0-bb10-4660-ac05-10357dcb4133_1024x1024.jpg?v=1699556248" data-mce-fragment="1" data-mce-src="https://cdn.shopify.com/s/files/1/0144/4922/files/2_464026a0-bb10-4660-ac05-10357dcb4133_1024x1024.jpg?v=1699556248"></p>
<ol start="2">
<li>Now we will take that STRAIGHT SKIRT or RUFFLE SKIRT measurement we just determined to cut out our front and back pieces. You can see here I am following cut instructions for the Matilda with the fabric folded over and my pattern piece aligned with the fold. From the bottom of the arm cycle of that bodice I will measure down the 40” for my STRAIGHT SKIRT version or 22” for my RUFFLE SKIRT version. I am using the full width of my fabric at the bottom for my maxi length gown, so I have as much fabric as possible for width to give lots of ease in wearing. For my knee length gown, I am using a width of 26.5” for each piece, however you can make this wider if you would prefer a more gathered and flowy gown, but just keep in mind that it could cause more bulk, especially if you are using a cotton. In the picture below you can see I placed a clip at the bottom to show the final width of the bottom of the gown so I could create my line from arm cycle down to bottom of the gown.</li>
</ol>
<p><img src="https://cdn.shopify.com/s/files/1/0144/4922/files/3_24340fd0-2390-4a09-a287-b10c5ef7060b_1024x1024.jpg?v=1699556308" alt=""></p>
<p><img src="https://cdn.shopify.com/s/files/1/0144/4922/files/4_0001c5be-7f5f-4c95-b57e-6865b6f57e9f_1024x1024.jpg?v=1699556345" alt=""></p>
<p> </p>
<ol start="3">
<li>And now we can cut out our front and back pieces following the line from the arm cycle down to the edge of the fabric. Then cut straight over back to the fold (if you weren’t aligned at the bottom of your fabric edge already).</li>
</ol>
<p><img src="https://cdn.shopify.com/s/files/1/0144/4922/files/6_da9ddfb5-4397-4635-afa6-e56a5ef1effd_1024x1024.jpg?v=1699556420" alt=""></p>
<p>From here, if you are creating the straight gown without ruffle, you can follow all of the instructions in the Matilda pattern the same, using your new front and back bodice pieces as the full gown.</p>
<p> </p>
<p><img src="https://cdn.shopify.com/s/files/1/0144/4922/files/7_92d98841-fbfa-4490-a334-f8dc840ab7ad_1024x1024.jpg?v=1699556548" alt=""></p>
<p><img src="https://cdn.shopify.com/s/files/1/0144/4922/files/21_b68d94d1-38b5-4b8c-af39-4ecc8dd539d0_1024x1024.jpg?v=1699556604" alt=""></p>
<p>If you are creating the ruffle bottom version, you will follow the steps in the Matilda pattern as well, up until the part to hem the bottom.  At this point, you will need to figure out our ruffle measurement. </p>
<p><img src="https://cdn.shopify.com/s/files/1/0144/4922/files/8_03db7948-a423-4010-852d-da1941118841_1024x1024.jpg?v=1699556680" alt=""></p>
<ol start="4">
<li>When you determined your skirt length back in step 1 you had decided on how long to make your ruffle (5” in my case). So now to figure out the width, you will simply measure the bottom of your dress front and multiply that by 2. So I have 26.5” for my bottom length, which means I need to cut my width for each ruffle piece at 53”. My 2 separate rectangles to create my ruffles will be 5”x53”.  If your fabric is directional and you don’t have enough width to cut your panels in 2, you can divide your width by 4 instead and create 4 rectangles for your ruffle pieces.</li>
</ol>
<p><img src="https://cdn.shopify.com/s/files/1/0144/4922/files/9_a4661a6c-fa49-483e-81be-42d338952c27_1024x1024.jpg?v=1699556723" alt=""></p>
<ol start="5">
<li>Now we will sew our 2 ruffle pieces together at the short ends to form a large circle. Once you have them joined you will trim off ½ of the seam allowance at those short, joined edges and zig zag stitch or finish with a serger. Then, from the bottom edge, you will fold up ¼” with the wrong sides touching and iron flat. Fold up another ¼” and iron flat. Sew the ironed hem right along the top of the folded hem. </li>
</ol>
<p><img src="https://cdn.shopify.com/s/files/1/0144/4922/files/15_5e426ef0-969b-401d-b62c-a94e9d14b596_1024x1024.jpg?v=1699556854" alt=""></p>
<ol start="6">
<li>Now we will sew 2 rows of gathering stitches along the top raw edge. The gathering stitches should be ¼” and 3/8” down from the top raw edge. Gather the ruffle to the width of the bottom raw edge of the gown. The gathers will be small. </li>
</ol>
<p><img src="https://cdn.shopify.com/s/files/1/0144/4922/files/16_6802cea8-8add-43d0-9ba9-72daece10b5b_1024x1024.jpg?v=1699556909" alt=""></p>
<ol start="7">
<li>Pin the ruffle to the gown with the right sides touching and the raw edges lining up. Sew the pinned seams.</li>
</ol>
<p><img src="https://cdn.shopify.com/s/files/1/0144/4922/files/17_bff7d303-9f22-477b-aca2-54a321c74bbc_1024x1024.jpg?v=1699556958" alt=""></p>
<ol start="8">
<li>For a professional finish, trim off ½ of the seam allowance and zig zag stitch or finish with a serger. Iron the seam allowance up towards the top of the gown and top stitch to secure.</li>
</ol>
<p><img src="https://cdn.shopify.com/s/files/1/0144/4922/files/18_5a386794-5895-4515-8216-3c9b79005b4a_1024x1024.jpg?v=1699557016" alt=""></p>
<p>And now you can finish off the top of the gown per instructions from the Matilda pattern, and VOILA! A super comfy and totally darling nightgown that will fit for years to come!</p>
<p><img src="https://cdn.shopify.com/s/files/1/0144/4922/files/19_38303696-9b35-42cd-b0c6-51929ca2b9c1_1024x1024.jpg?v=1699557072" alt=""><img alt="" src="https://cdn.shopify.com/s/files/1/0144/4922/files/22_d6f688c9-8d8e-4cd4-aaf3-ee24722aaf2c_1024x1024.jpg?v=1699557099" data-mce-fragment="1" data-mce-src="https://cdn.shopify.com/s/files/1/0144/4922/files/22_d6f688c9-8d8e-4cd4-aaf3-ee24722aaf2c_1024x1024.jpg?v=1699557099"><img alt="" src="https://cdn.shopify.com/s/files/1/0144/4922/files/20_8e1eccc2-6908-40dc-9ae1-7be4e0ad134e_1024x1024.jpg?v=1699557119" data-mce-fragment="1" data-mce-src="https://cdn.shopify.com/s/files/1/0144/4922/files/20_8e1eccc2-6908-40dc-9ae1-7be4e0ad134e_1024x1024.jpg?v=1699557119"><img alt="" src="https://cdn.shopify.com/s/files/1/0144/4922/files/23_4c8a9a46-659e-45ee-9888-3bc3a426331d_1024x1024.jpg?v=1699557146" data-mce-fragment="1" data-mce-src="https://cdn.shopify.com/s/files/1/0144/4922/files/23_4c8a9a46-659e-45ee-9888-3bc3a426331d_1024x1024.jpg?v=1699557146"><img alt="" src="https://cdn.shopify.com/s/files/1/0144/4922/files/24_c5804f55-a780-4c9d-bad1-75dac6359c4c_1024x1024.jpg?v=1699557194" data-mce-fragment="1" data-mce-src="https://cdn.shopify.com/s/files/1/0144/4922/files/24_c5804f55-a780-4c9d-bad1-75dac6359c4c_1024x1024.jpg?v=1699557194"></p>
<p> </p>
<p>Grab your Matilda patterns now for 50% off in our Pre-Black Friday Slumber Party Sale!</p>
<p>Baby:</p>
<p><a href="https://violettefieldthreads.com/products/matilda-dress-baby">https://violettefieldthreads.com/products/matilda-dress-baby</a></p>
<p>Girls:</p>
<p><a href="https://violettefieldthreads.com/products/matilda-dress">https://violettefieldthreads.com/products/matilda-dress</a></p>
<p>Tween:</p>
<p><a href="https://violettefieldthreads.com/products/matilda-dress-tween">https://violettefieldthreads.com/products/matilda-dress-tween</a></p>
<p>Doll:</p>
<p><a href="https://violettefieldthreads.com/products/matilda-doll-dress">https://violettefieldthreads.com/products/matilda-doll-dress</a></p>]]>
    </content>
  </entry>
  <entry>
    <id>https://violettefieldthreads.com/blogs/theblog/ashton-misses-peplum-hack</id>
    <published>2021-04-21T10:32:28-05:00</published>
    <updated>2025-03-13T10:45:58-05:00</updated>
    <link rel="alternate" type="text/html" href="https://violettefieldthreads.com/blogs/theblog/ashton-misses-peplum-hack"/>
    <title>{Ashton} Misses Peplum Hack!</title>
    <author>
      <name>Mary Stanley</name>
    </author>
    <summary type="html">
      <![CDATA[<div><img src="https://cdn.shopify.com/s/files/1/0144/4922/files/mainblogimage_2048x2048.jpg?v=1619018444" alt="" style="display: block; margin-left: auto; margin-right: auto;"></div>
<div style="text-align: center;"><meta charset="utf-8"></div>
<div style="text-align: center;"><span>Hi sewing friends! I’m Jennifer and have been using Violette Field Threads patterns for almost 6 years now, but have been sewing since I was a little girl. I used to make my own clothes when I was a kid and even designed and sewed my own wedding dress without a pattern. I’m just now getting back into trying to make more of my wardrobe after quite a few years of having babies. I’m wanting to fill it with things that aren’t so, well, basic, so I’m excited VFT is creating more women’s patterns. Yay!</span></div><p><a class="read-more" href="https://violettefieldthreads.com/blogs/theblog/ashton-misses-peplum-hack">More</a></p>]]>
    </summary>
    <content type="html">
      <![CDATA[<div><span><img src="https://cdn.shopify.com/s/files/1/0144/4922/files/Picture1_2048x2048.jpg?v=1615852632" alt="" style="display: block; margin-left: auto; margin-right: auto;"></span></div>
<div style="text-align: center;"><span>Hi sewing friends! I’m Jennifer and have been using Violette Field Threads patterns for almost 6 years now, but have been sewing since I was a little girl. I used to make my own clothes when I was a kid and even designed and sewed my own wedding dress without a pattern. I’m just now getting back into trying to make more of my wardrobe after quite a few years of having babies. I’m wanting to fill it with things that aren’t so, well, basic, so I’m excited VFT is creating more women’s patterns. Yay! </span></div>
<div style="text-align: center;"><span> <img src="https://cdn.shopify.com/s/files/1/0144/4922/files/blog1_05edabaa-090c-479d-a920-e6f37a478992_2048x2048.jpg?v=1619017004" alt=""></span></div>
<div style="text-align: center;"><span>Of course, when I saw they were releasing Ashton in misses I fell in love the same way I had with the Ashton girls and baby. Those sleeves (insert heart eyes)! The first Ashton version I made was the short sleeve dress. Love! While sewing, I couldn’t help my creative wandering mind from thinking up my next version. I am sure many of you can relate to that. I wanted my next one to be a peplum top because that has always been a very flattering shape on me. I was in love with the button-down back that the blouse version offered. I had also recently Pinned a ready-to-wear top because of its ruffles in the bodice seams. I knew I wanted to include all of these details in my next sew. Easy peasy, thanks to all of the construction techniques I had gleaned sewing up VFT patterns. As I was trying my garment on between steps, I caught a glimpse of a v-shaped back, just like VFT’s Pixie! Yes! So I adjusted to add that in my design too. As I laid my finished Ashton down to snap some pics, I wondered in my head if I couldn’t wear it backwards, and wallah, this hacked version of Ashton was born.</span></div>
<div style="text-align: center;"><span><img src="https://cdn.shopify.com/s/files/1/0144/4922/files/Picture2_1024x1024.jpg?v=1615852725" alt=""></span></div>
<div style="text-align: center;"><span><img src="https://cdn.shopify.com/s/files/1/0144/4922/files/picture3_1024x1024.jpg?v=1615852760" alt=""></span></div>
<div style="text-align: center;"><span><img src="https://cdn.shopify.com/s/files/1/0144/4922/files/picture4_1024x1024.jpg?v=1615852809" alt=""></span></div>
<div style="text-align: center;"><span>I’m excited to walk you through the simple changes you can make to create a similar one for yourself. Don’t worry, I created these steps to put the button placket down the front bodice pieces so you won’t have to wear it backwards!</span></div>
<div style="text-align: center;"><span>Have your pattern instructions handy as I will be referring you to use those at the appropriate times.</span></div>
<div style="text-align: center;"><span>Also, forgive any splotches on my cutting mat. It got used for a painting project. Whoops!</span></div>
<div style="text-align: center;"><span> </span></div>
<div style="text-align: center;"><strong><span>ALTERING PATTERN PIECES FOR FRONT BUTTON PANELS, V NECKLINE AND PEPLUM SKIRT</span></strong></div>
<div style="text-align: center;">
<ol>
<li><span>Print off and tape together the Ashton Misses dress bodice and sleeve pattern pieces in the size you need. *I sized down for a slimmer fit.</span></li>
<li><span>Add ¾” from the center side edge of the FRONT bodice pattern piece before cutting out. Remove ¾” from the center side edge of the BACK bodice pattern piece. Cut out both pieces.</span></li>
</ol>
</div>
<div style="text-align: center;"><span><img src="https://cdn.shopify.com/s/files/1/0144/4922/files/Picture5_1024x1024.jpg?v=1615852902" alt=""></span></div>
<div style="text-align: center;"><span><img src="https://cdn.shopify.com/s/files/1/0144/4922/files/Picture6_1024x1024.jpg?v=1615852932" alt=""></span></div>
<div style="text-align: center;"><span>3. Next, you will measure down the center edge of the FRONT BODICE piece and mark where you would like the V-cut to hit. I marked 6 1/4” down from the top. Remember this will be ½” lower still after sewing due to seam allowance. **You may wish to make this plunge less or more or not at all depending on what suits your body shape best or what you feel comfortable with. (I could do a v-cut down to my waist and I promise you nothing of interest would show when I wore it, haha!). You will then take a ruler and place it against the neckline where the shoulder starts to curve and lay it across to meet up with the marking you just made. Mark a line and cut off this portion of the FRONT BODICE piece.</span></div>
<div style="text-align: center;"><span><img src="https://cdn.shopify.com/s/files/1/0144/4922/files/Picture7_2048x2048.jpg?v=1615853071" alt=""></span></div>
<div style="text-align: center;"><span><img src="https://cdn.shopify.com/s/files/1/0144/4922/files/Picture8_2048x2048.jpg?v=1615853101" alt=""></span></div>
<div style="text-align: center;"><span>**Note: I suggest cutting and sewing the shoulder seams of your lining and trying it on to see the V is sitting where you like it before moving forward with cutting your main fabric. If you choose to do this, follow steps 1-4 in the pattern instructions with your lining only before proceeding with further cutting. I also recommend doing a quick muslin of your entire bodice as the designers of Violette Field Threads mention to make sure you get a custom fit for your body shape. I personally had to make some adjustments for my short height and small bust.</span></div>
<div style="text-align: center;">4. You will now need to cut 4 MIRRORED of the FRONT BODICE piece (2 main, 2 lining). Cut 2 on the FOLD of the BACK BODICE piece (1 main, 1 lining). This is the opposite of the original pattern. You may cut out the ties if you are using them and whichever sleeve version you choose at this time. There are no changes to these pieces. We will cut out the bodice ruffles a bit later on.</div>
<div style="text-align: center;"><span><img src="https://cdn.shopify.com/s/files/1/0144/4922/files/Picture10_1024x1024.jpg?v=1615853196" alt=""></span></div>
<div style="text-align: center;">
<span>5. </span><span><span>Determine the length of the skirt pieces. The peplum skirt I made in the brown rayon and short sleeve windowpane linen was </span>(<span>width of skirt pattern x 13”). I made it to hit right at the widest part of my hips. Keep in mind I am 5’3” and this length might hit differently on you, or you may wish to have it hit higher up. For the eyelet top I wanted it to sit a little above my hips so I cut (width of skirt pattern x 11”). You can always measure from your natural waist to the spot you would like the bottom of your peplum to hit, then add on 1.5” for seam allowances to custom fit the length you are wanting. My motto is “You can always shorten it!” Cut 2 or 4 depending on the cut chart for your size.</span></span>
</div>
<div style="text-align: center;"><strong><span>FOLLOW PATTERN INSTRUCTIONS AS WRITTEN, BEGINNING AT STEP 1</span></strong></div>
<div style="text-align: center;"><span>All instructions will be the same except “center back” will now be the “center front”.</span></div>
<div style="text-align: center;"><span> </span></div>
<div style="text-align: center;"><strong><span>CONTINUE THROUGH STEP 8 IN THE PATTERN INSTRUCTIONS</span></strong></div>
<div style="text-align: center;"><span> </span></div>
<div style="text-align: center;">
<strong><span>ADDING BODICE SEAM RUFFLE</span></strong><span> (if you choose to not do these continue in pattern instructions through step 15)</span>
</div>
<div style="text-align: center;"><span><strong>1. Cut out 2 bodice seam ruffles</strong>. For my brown top I cut my pieces 2” wide making my finished ruffle 1”. My white eyelet I wanted more of a statement ruffle, so I cut it at 3” wide so it would end up at 2” once finished. You could even taper the ruffle if you’d like. Essentially we are making our own “trim”. To find the length of your ruffle piece, measure the bodice edge front and back after sewn together. You will multiply that number by 2 and that is the approximate length you would want for your ruffle piece. </span></div>
<div style="text-align: center;"> <img src="https://cdn.shopify.com/s/files/1/0144/4922/files/Picture11_1024x1024.jpg?v=1615853345" alt="">
</div>
<div style="text-align: center;"> </div>
<div style="text-align: center;">If your width of fabric is close to the length you need, you can use that for your  length.</div>
<div style="text-align: center;"> </div>
<div style="text-align: center;"><img src="https://cdn.shopify.com/s/files/1/0144/4922/files/Picture13_2048x2048.jpg?v=1615853423" alt=""></div>
<div style="text-align: center;">If your width of fabric isn’t long enough, you can cut 2 pieces and seam them together to create 1 ruffle piece in a long enough length. If you do that, make sure to finish the seam with a serger or zig zag stitch. Honestly, if your pieces are a little short it’s not going to be a big deal, just will be a little less gathered.</div>
<div style="text-align: center;">2. Turn and press 1/4” along one side of the long ruffle piece edge. Turn and press another 1/4”, then sew close to the fold. Repeat for 2nd bodice ruffle piece. </div>
<div style="text-align: center;"><img src="https://cdn.shopify.com/s/files/1/0144/4922/files/Picture14_1024x1024.jpg?v=1615853510" alt=""></div>
<div style="text-align: center;">3. Mark the halfway spot of ruffle pieces with a pin. Sew 2 rows of gathering stitches along the raw long edges of the ruffle pieces. Gather the ruffle so that it is approximately the length of your bodice.</div>
<div style="text-align: center;"><img src="https://cdn.shopify.com/s/files/1/0144/4922/files/Picture15_1024x1024.jpg?v=1615853594" alt=""></div>
<div style="text-align: center;">4. You will now pin the ruffle piece right sides together and raw edges lining up along the bodice main edge, making sure the lining is pulled out of the way. Pin the halfway marking of ruffle to shoulder seam. Continue pinning ruffle evenly along edge and baste to bodice with 3/8” seam.</div>
<div style="text-align: center;"><img src="https://cdn.shopify.com/s/files/1/0144/4922/files/Picture16_1024x1024.jpg?v=1615853668" alt=""></div>
<div style="text-align: center;"><span> </span></div>
<div style="text-align: center;"><strong><span>CONTINUE WITH PATTERN INSTRUCTIONS THROUGH STEP 15.</span></strong></div>
<div style="text-align: center;"><span> </span></div>
<div style="text-align: center;"><span>After step 15, top stitch 1/2” from the edge of the center front bodice, around the neckline and down the other side of the center front bodice. This will mimic the stitching you will do for the skirt button placket.</span></div>
<div style="text-align: center;"><span><img src="https://cdn.shopify.com/s/files/1/0144/4922/files/Picture17_1024x1024.jpg?v=1615853751" alt=""></span></div>
<div style="text-align: center;"><strong><span>CONTINUE WITH PATTERN INSTRUCTIONS THROUGH STEP 23.</span></strong></div>
<div style="text-align: center;"><span> </span></div>
<div style="text-align: center;"><span>AT STEP 23 WHEN ADDING BUTTONS TO THE V TOP FRONT, I SUGGEST ADDING LEAST 3 OR 4 BUTTONS HERE TO PREVENT ANY GAPING ISSUES.</span></div>
<div style="text-align: center;"><span><img src="https://cdn.shopify.com/s/files/1/0144/4922/files/Picture18_1024x1024.jpg?v=1615853810" alt=""></span></div>
<div style="text-align: center;"><span> </span></div>
<div style="text-align: center;"><strong><span>CONTINUE WITH PATTERN INSTRUCTIONS THROUGH STEP 25. </span></strong></div>
<div style="text-align: center;"><span> </span></div>
<div style="text-align: center;"><strong><span>ADDING BUTTON PLACKET DOWN SKIRT FRONT</span></strong></div>
<div style="text-align: center;"><span>  1. Cut down the entire middle of your front skirt panel piece.</span></div>
<div style="text-align: center;"><span><img src="https://cdn.shopify.com/s/files/1/0144/4922/files/Picture19_2048x2048.jpg?v=1615853881" alt=""></span></div>
<div style="text-align: center;"><span>2. Cut 2 pieces of fusible interfacing (1/2” x length of skirt panel). Iron to the wrong side of fabric of both raw edges you just cut. </span></div>
<div style="text-align: center;"><span><img src="https://cdn.shopify.com/s/files/1/0144/4922/files/Picture20_1024x1024.jpg?v=1615853956" alt=""></span></div>
<div style="text-align: center;"><span>Fold 1/2” and press. Fold another 1/2” and press. Stitch close to fold. Do this for both edges.</span></div>
<div style="text-align: center;"> </div>
<div style="text-align: center;"><span><img src="https://cdn.shopify.com/s/files/1/0144/4922/files/Picture21_1024x1024.jpg?v=1615854041" alt=""></span></div>
<div style="text-align: center;"><span> </span></div>
<div style="text-align: center;"><strong><span>WAIT TO HEM (STEP 26) UNTIL AFTER ADDING THE BUTTON HOLES TO SKIRT.</span></strong></div>
<div style="text-align: center;"><span> </span></div>
<div style="text-align: center;"><strong><span>CONTINUE WITH PATTERN INSTRUCTIONS THROUGH STEP 28.</span></strong></div>
<div style="text-align: center;"><span> </span></div>
<div style="text-align: center;"><strong><span>AT STEPS 27-29, ATTACHING THE SKIRT, FOLLOW THE PATTERN INSTRUCTIONS, MAKING THESE CHANGES:</span></strong></div>
<div style="text-align: center;">
<ol>
<ol>
<li><span>Gather the skirt from one middle front opening to the other making sure to not gather the button placket.</span></li>
<li><span>Make sure your ruffle is laying flat to the bodice while pinning on the skirt or you may baste it first if you’d like. </span></li>
</ol>
</ol>
</div>
<div style="text-align: center;"><span><img src="https://cdn.shopify.com/s/files/1/0144/4922/files/Picture23_2048x2048.jpg?v=1615854144" alt=""></span></div>
<div style="text-align: center;">3. Pin and sew the skirt by lining up the middle front skirt opening to the V front button opening right sides together</div>
<div style="text-align: center;"><img src="https://cdn.shopify.com/s/files/1/0144/4922/files/Picture24_1024x1024.jpg?v=1615854199" alt=""></div>
<div style="text-align: center;"><strong><span>ADDING BUTTONHOLES TO SKIRT</span></strong></div>
<div style="text-align: center;">Continue buttonholes down the skirt front with the same spacing as bodice buttonholes. Do not add buttonholes closer than 2” of the bottom of your skirt to allow for the hem.  </div>
<div style="text-align: center;"><img src="https://cdn.shopify.com/s/files/1/0144/4922/files/Picture25_1024x1024.jpg?v=1615854260" alt=""></div>
<div style="text-align: center;"><span> </span></div>
<div style="text-align: center;"><span>You may now hem the skirt (STEP 26)</span></div>
<div style="text-align: center;"><span> </span></div>
<div style="text-align: center;"><strong><span>CONTINUE WITH PATTERN INSTRUCTIONS TO FINISH YOUR TOP</span></strong></div>
<div style="text-align: center;"><span> </span></div>
<div style="text-align: center;"><span>Thank you for sewing along with me and I hope to see some of your Ashton Hack versions soon! I have 3 now and each one is so comfortable and flattering on my figure. I love them all in their own way. I needed an eyelet with statement sleeves for spring and a short sleeve linen for summer to add to my Ashton collection!</span></div>
<div style="text-align: center;"> <img src="https://cdn.shopify.com/s/files/1/0144/4922/files/Picture26_2048x2048.jpg?v=1615854338" alt="">
</div>
<div style="text-align: center;"><img src="https://cdn.shopify.com/s/files/1/0144/4922/files/Picture27_2048x2048.jpg?v=1615854368" alt=""></div>
<div style="text-align: center;"><img src="https://cdn.shopify.com/s/files/1/0144/4922/files/blog2_cb4ec2d0-9df2-496a-8a16-e7724f887613_2048x2048.jpg?v=1619018005" alt=""></div>
<div style="text-align: center;"><img src="https://cdn.shopify.com/s/files/1/0144/4922/files/Picture28_2048x2048.jpg?v=1615854395" alt=""></div>
<div style="text-align: center;"><img src="https://cdn.shopify.com/s/files/1/0144/4922/files/blog5_1abdefea-e47e-460f-a369-7be4b0968ce0_2048x2048.jpg?v=1619018236" alt=""></div>
<div style="text-align: center;"><span>Feel free to reach out in the Facebook group or on my Instagram page (@jpressgrove) if you have any questions. I’m always happy to help!</span></div>
<div style="text-align: center;"><span> </span></div>
<div style="text-align: center;"><span>Happy sewing!</span></div>
<div style="text-align: center;"><span>Jennifer Pressgrove </span></div>]]>
    </content>
  </entry>
  <entry>
    <id>https://violettefieldthreads.com/blogs/theblog/isobel-misses-pattern-hack-how-to-create-a-top</id>
    <published>2021-03-19T11:17:29-05:00</published>
    <updated>2025-03-13T11:14:50-05:00</updated>
    <link rel="alternate" type="text/html" href="https://violettefieldthreads.com/blogs/theblog/isobel-misses-pattern-hack-how-to-create-a-top"/>
    <title>Isobel Misses Pattern Hack {How to create a Top}</title>
    <author>
      <name>Ericka Wright</name>
    </author>
    <summary type="html">
      <![CDATA[<p><img alt="" src="https://cdn.shopify.com/s/files/1/0144/4922/files/BE3A2876_8c269622-a94d-4f4b-bde1-f2eeed4365bd.jpg?v=1741880854"></p>
<p><meta charset="utf-8">When sewing up my 3rd or 4th Isobel, I realized that I really needed to alter this into a top for myself. As much as I love a cute summer dress, I tend to gravitate towards tops for day to day wear. Therefore, the Isobel Top pattern hack was born..</p><p><a class="read-more" href="https://violettefieldthreads.com/blogs/theblog/isobel-misses-pattern-hack-how-to-create-a-top">More</a></p>]]>
    </summary>
    <content type="html">
      <![CDATA[<p><img src="https://cdn.shopify.com/s/files/1/0144/4922/files/Untitled_48_1024x1024.png?v=1616089659" alt="Main image" style="display: block; margin-left: auto; margin-right: auto;"></p>
<p>Isobel Tween and Misses are finally here!!! Isobel (in Baby and Girls) is one of our best selling and most loved patterns of all time and we are so pleased that it is now available in our entire range of pattern sizes. Isobel is a dress pattern with loads of options that can be mixed and matched to make the perfect summer dress. </p>
<p>When sewing up my 3rd or 4th Isobel, I realized that I really needed to alter this into a top for myself. As much as I love a cute summer dress, I tend to gravitate towards tops for day to day wear. Therefore, the Isobel Top pattern hack was born..hahaha!! (Scroll to the End to find the hack for the Doll version as well!)</p>
<p><img src="https://cdn.shopify.com/s/files/1/0144/4922/files/BE3A2854_1024x1024.jpg?v=1616089555" alt="1" style="display: block; margin-left: auto; margin-right: auto;"></p>
<p>In case you were wondering, yes, I absolutely had "Watermelon Sugar High" stuck in my head for days after sewing this top. Seriously though, how cute is this fabric?!? I picked it up from <a href="https://alyssa-may-design.com/" title="Alyssa May Design Textiles" rel="noopener noreferrer" target="_blank">Alyssa May Design</a>. She has a wide variety of apparel fabrics and super fun prints.</p>
<p><img src="https://cdn.shopify.com/s/files/1/0144/4922/files/BE3A2872_1024x1024.jpg?v=1616089933" alt="3" style="display: block; margin-left: auto; margin-right: auto;"></p>
<p>The Isobel top features a button up front and peplum bottom ruffle. You can still use either the bodice ruffle or flutter sleeve options on the top. This top is so simple to make, the hardest part will be deciding how many you realistically need in your closet!</p>
<h1>Let's get started:</h1>
<p>1. Print and cut the Bodice Front, Bodice Side Insets and Bodice Back pattern pieces out according to your size.</p>
<p><i>Note on sizing: Isobel has 1 1/4" ease at the bust and 1 3/4" ease at the waist. When sewing the dress option, sizing down (to have less ease and a more fitted look) is optional. Reducing the ease is a straight forward alteration, as the back closes with a zipper. For this top hack option, I recommend either sticking with the eases given in the pattern, or ONLY reducing the waist ease. Without sufficient ease at the bust, the button up front will most likely gape open. </i></p>
<p>2. We are going to make a few small adjustments to these three pattern pieces:</p>
<ul>
<li>Bodice Back - The back is closed, and will not have a zipper. Measure in from the back center seam 1/2" and draw a line. Then measure up 3/4" from the bottom edge, to shorten the pattern piece and draw a straight line. The bodice back pattern will now be Cut 2 on the fold {one main, one lining}.</li>
</ul>
<div><img src="https://cdn.shopify.com/s/files/1/0144/4922/files/isobel1_1024x1024.png?v=1616090278" alt="4" style="display: block; margin-left: auto; margin-right: auto;"></div>
<ul>
<li>Bodice Front - Add some width to the front center line to accommodate for the button front opening. Tape some paper to the front center and measure over 1 1/4" and draw a line. This will allow for 1/2" seam allowance as well as the front overlap. It also gives a touch more ease to prevent any potential gaping at the bust once buttoned. Then measure up 3/4" from the bottom edge, to shorten the pattern piece and draw a straight line.  The bodice front pattern piece will now be Cut 4 {two main mirrored, two lining mirrored}.</li>
</ul>
<p><img src="https://cdn.shopify.com/s/files/1/0144/4922/files/isobel2_1024x1024.png?v=1616090405" alt="5" style="display: block; margin-left: auto; margin-right: auto;"></p>
<ul>
<li>Bodice Side Insets - Measure up 3/4 from the bottom edge, shortening the pattern piece and draw a new straight line.</li>
</ul>
<p><img src="https://cdn.shopify.com/s/files/1/0144/4922/files/Isobel3_1024x1024.png?v=1616090600" alt="6" style="display: block; margin-left: auto; margin-right: auto;"></p>
<p>3. Cut the pattern pieces out around all your new lines and then use them to cut out the main and lining fabric.</p>
<p>4. Begin following the Isobel tutorial to create the Bodice, sewing Bodice Ruffles or Flutter Sleeves if desired. *When you are sewing, remember that the tutorial shows the Bodice Front as solid, and the Bodice Back split in two pieces. This is so a zipper can be installed in the back. For this hack, the Bodice Front is split in two pieces and the Bodice Back is solid. The instructions remain the same, but the tutorial pictures will look a little different. </p>
<p>5. Once you reach step #21 of the tutorial, remember that you are now pinning around the back neckline, around the shoulders, across the front neckline and down both of the front middle seams.</p>
<p><img src="https://cdn.shopify.com/s/files/1/0144/4922/files/Isobel4_1024x1024.png?v=1616090936" alt="7" style="display: block; margin-left: auto; margin-right: auto;"></p>
<p>6. Once sewn, but before turning right side out, we recommend applying a 1" wide strip of fusible stablizer to the wrong side of the bodice lining right next to the center seam.  This will assist in ease of buttonholes and buttons later.</p>
<p><img src="https://cdn.shopify.com/s/files/1/0144/4922/files/Isobel5_1024x1024.png?v=1616091057" alt="8" style="display: block; margin-left: auto; margin-right: auto;"></p>
<p>7. Trim off 1/2 of the seam allowance and clip into the corners, being careful not to cut the stitch line. Turn the bodice right side out and if desired, top stitch up the front middle seam and around the front and back necklines.</p>
<p><img src="https://cdn.shopify.com/s/files/1/0144/4922/files/Isobel6_1024x1024.png?v=1616091118" alt="9" style="display: block; margin-left: auto; margin-right: auto;"></p>
<p><strong>Creating the Peplum Ruffle:</strong></p>
<p>8. Follow steps #23-25 of the Isobel tutorial to finish the bodice. Lay the bodice out in front of you with the front edges lining up.  Measure along the bottom edge of the bodice. You will use this measurement to determine the width of the ruffle.</p>
<p><img src="https://cdn.shopify.com/s/files/1/0144/4922/files/Isobel7_1024x1024.png?v=1616091334" alt="9" style="display: block; margin-left: auto; margin-right: auto;"></p>
<p> </p>
<p>a. Write down the measurement across the bottom of the bodice. The example in the photo measures <strong>16"</strong>.</p>
<p>b. Multiply that <strong>measurement x 2</strong>.  So my ruffle will be <strong>16 x 2 = 31" wide</strong>.  You will be cutting 2 ruffles. </p>
<p>Use the below chart to determine the height of the ruffle: </p>
<table width="720">
<tbody>
<tr>
<td colspan="4" width="720">
<p>Tween Sizes</p>
</td>
</tr>
<tr>
<td width="171">
<p>10</p>
</td>
<td width="174">
<p>12</p>
</td>
<td width="180">
<p>14</p>
</td>
<td width="195">
<p>16</p>
</td>
</tr>
<tr>
<td width="171">
<p>5 1/8”</p>
</td>
<td width="174">
<p>5 ¼”</p>
</td>
<td width="180">
<p>5 3/8”</p>
</td>
<td width="195">
<p>5 ½”</p>
</td>
</tr>
</tbody>
</table>
<p> </p>
<table style="width: 551px;">
<tbody>
<tr>
<td colspan="12" style="width: 475px;">
<p>Misses Sizes</p>
</td>
</tr>
<tr>
<td style="width: 33px;">
<p>00</p>
</td>
<td style="width: 48px;">
<p>0</p>
</td>
<td style="width: 35px;">
<p>2</p>
</td>
<td style="width: 47px;">
<p>4</p>
</td>
<td style="width: 24px;">
<p>6</p>
</td>
<td style="width: 45px;">
<p>8</p>
</td>
<td style="width: 39px;">
<p>10</p>
</td>
<td style="width: 45px;">
<p>12</p>
</td>
<td style="width: 42px;">
<p>14</p>
</td>
<td style="width: 45px;">
<p>16</p>
</td>
<td style="width: 37px;">
<p>18</p>
</td>
<td style="width: 35px;">
<p>20</p>
</td>
</tr>
<tr>
<td style="width: 33px;">
<p>5 ½”</p>
</td>
<td style="width: 48px;">
<p>5 5/8”</p>
</td>
<td style="width: 35px;">
<p>5 ¾”</p>
</td>
<td style="width: 47px;">
<p>5 7/8”</p>
</td>
<td style="width: 24px;">
<p>6”</p>
</td>
<td style="width: 45px;">
<p>6 1/8”</p>
</td>
<td style="width: 39px;">
<p>6 ¼”</p>
</td>
<td style="width: 45px;">
<p>6 3/8”</p>
</td>
<td style="width: 42px;">
<p>6 ½”</p>
</td>
<td style="width: 45px;">
<p>6 5/8”</p>
</td>
<td style="width: 37px;">
<p>6 ¾”</p>
</td>
<td style="width: 35px;">
<p>7”</p>
</td>
</tr>
</tbody>
</table>
<p> </p>
<p><strong><span style="text-decoration: underline;">Example: If you are sewing a size 6 Isobel Top, you will cut two ruffles that are 31" wide x 6" tall.</span></strong></p>
<p>9. Cut one of the ruffles in 1/2 widthwise to create two front ruffles. You will now have two front ruffles and one back ruffle.</p>
<p><img src="https://cdn.shopify.com/s/files/1/0144/4922/files/Isobel8_1024x1024.png?v=1616094936" alt="10" style="display: block; margin-left: auto; margin-right: auto;"></p>
<p>10. Place the two front ruffles on top of the back ruffle with the right sides touching and the raw edges lining up. Pin together along the short side edges. Sew along the pinned seams.  For a professional look, finish the seams with a serger or trim off 1/2 of the seam allowance and finish with a zig zag stitch.</p>
<p><img src="https://cdn.shopify.com/s/files/1/0144/4922/files/Isobel9_1024x1024.png?v=1616095022" alt="11" style="display: block; margin-left: auto; margin-right: auto;"></p>
<p>11. Hem the bottom raw edge of the ruffle. Turn the edge up 1/4" and iron flat, then turn up another 1/4" and iron flat. Sew right along the folded edge.</p>
<p><img src="https://cdn.shopify.com/s/files/1/0144/4922/files/Isobel10_1024x1024.png?v=1616095083" alt="12" style="display: block; margin-left: auto; margin-right: auto;"></p>
<p>12. Finish the raw short ends. Turn the ends in 1/4" and iron flat, then turn under another 1/4" and iron flat. Sew right along the folded edges.</p>
<p><img src="https://cdn.shopify.com/s/files/1/0144/4922/files/Isobel11_1024x1024.png?v=1616095140" alt="12" style="display: block; margin-left: auto; margin-right: auto;"></p>
<p>13. Sew two rows of gathering stitches along the top raw edge of the ruffle. Mark the center of the ruffle with a pin.</p>
<p><img src="https://cdn.shopify.com/s/files/1/0144/4922/files/Isobel12_1024x1024.png?v=1616095188" alt="13" style="display: block; margin-left: auto; margin-right: auto;"></p>
<p>14. Lay the bodice out in front of you and mark the center of the bottom edge of both side panels. These marks will serve as the side seams.</p>
<p><img src="https://cdn.shopify.com/s/files/1/0144/4922/files/Isobel13_1024x1024.png?v=1616095238" alt="14" style="display: block; margin-left: auto; margin-right: auto;"></p>
<p>15. Gather the ruffle up until it is the same width as the bodice. Place it on top of the bodice with the right sides touching and the raw edges lining up.  Match up the center of the back ruffle with the center of the bodice back and pin. Then match up the side seam and pin. Finally, match up the finished edges of the ruffle with the finished edges of the bodice front center seams.</p>
<p><img src="https://cdn.shopify.com/s/files/1/0144/4922/files/Isobel14_1024x1024.png?v=1616095354" alt="15" style="display: block; margin-left: auto; margin-right: auto;"></p>
<p>16. Sew along the pinned seams. For a professional look, finish the seam with a serger or trim off 1/2 of the seam allowance and finish with a zig zag stitch. Iron the seam allowance up towards the bodice and topstitch if desired.</p>
<p>17. Mark for button holes on the wearers right side of the bodice front. The front will overlap 1". We recommend using 4-5 buttons and placing them on the bodice only (not the ruffle). Place the first button 1/4"-3/8" down from the finished top edge and space the remaining buttons evenly.</p>
<p><img src="https://cdn.shopify.com/s/files/1/0144/4922/files/Isobel15_1024x1024.png?v=1616095514" alt="16" style="display: block; margin-left: auto; margin-right: auto;"></p>
<p>17. Sew the button holes using your sewing machine. Open the button holes. If you are using a seam ripper, be sure to place a pin at the top of each button hole, so you do not accidentally rip the garment.</p>
<p><img src="https://cdn.shopify.com/s/files/1/0144/4922/files/Isobel16_1024x1024.png?v=1616095624" alt="15" style="display: block; margin-left: auto; margin-right: auto;"></p>
<p>18. Overlap the front center bodice by 1" and mark for buttons. Sew the buttons either by hand or with your machine.</p>
<p><img src="https://cdn.shopify.com/s/files/1/0144/4922/files/Isobel17_1024x1024.png?v=1616095676" alt="17" style="display: block; margin-left: auto; margin-right: auto;"></p>
<p>That's it!! You have now created an Isobel Top!!</p>
<p><img src="https://cdn.shopify.com/s/files/1/0144/4922/files/Isobel18_1024x1024.png?v=1616095716" alt="19" style="display: block; margin-left: auto; margin-right: auto;"></p>
<p>This top is going to quickly become your summer staple. Please be sure to post them in the FB group and Instagram and tag us in your post!</p>
<p><img src="https://cdn.shopify.com/s/files/1/0144/4922/files/BE3A2863_1024x1024.jpg?v=1616095792" alt="" style="display: block; margin-left: auto; margin-right: auto;"></p>
<p><img src="https://cdn.shopify.com/s/files/1/0144/4922/files/BE3A2867_1024x1024.jpg?v=1616095836" alt="" style="display: block; margin-left: auto; margin-right: auto;"></p>
<p><img src="https://cdn.shopify.com/s/files/1/0144/4922/files/BE3A2876_1024x1024.jpg?v=1616095859" alt="" style="display: block; margin-left: auto; margin-right: auto;"></p>
<p>xoxo,</p>
<p>Ericka/VFT</p>
<p> </p>
<p>Edited to Add:</p>
<p>The Amazing Caroline Gehman has created this hack for the doll version of Isobel as well!</p>
<p><img src="https://cdn.shopify.com/s/files/1/0144/4922/files/IMG_1385_1024x1024.jpg?v=1621891825" alt=""></p>
<p><img src="https://cdn.shopify.com/s/files/1/0144/4922/files/VE5B1738_1024x1024.jpg?v=1621893050" alt=""><img src="https://cdn.shopify.com/s/files/1/0144/4922/files/VE5B1771_1024x1024.jpg?v=1621893100" alt=""></p>
<p> </p>
<div dir="auto">To create this doll version you will follow Ericka's instructions above, with only these changes to the pattern pieces:</div>
<div dir="auto"><br></div>
<div dir="auto">Bodice front: add 0.5” to the center and subtract 0.25” from the bottom. Cut 4 (2 mirror image sets)</div>
<div dir="auto"><img src="https://cdn.shopify.com/s/files/1/0144/4922/files/VE5B1624_1024x1024.jpg?v=1621893939" alt=""></div>
<div dir="auto"><br></div>
<div dir="auto">Bodice back: subtract 1.5” from the center and subtract 0.25” from the bottom. Cut 2 on the fold. </div>
<div dir="auto"><br></div>
<div dir="auto"><img src="https://cdn.shopify.com/s/files/1/0144/4922/files/VE5B1628_1024x1024.jpg?v=1621894056" alt=""></div>
<div dir="auto"><br></div>
<div dir="auto">Side panel: subtract 0.25” from the bottom. Cut 4.</div>
<div dir="auto"><br></div>
<div dir="auto"><img src="https://cdn.shopify.com/s/files/1/0144/4922/files/VE5B1631_1024x1024.jpg?v=1621894185" alt=""></div>
<div dir="auto"><br></div>
<div dir="auto">Peplum skirt: piece is 7.5” x 2.5”. Cut one on fold for the back and cut 2 (one mirror image set) for the front. </div>
<div dir="auto"><br></div>
<div dir="auto"><img src="https://cdn.shopify.com/s/files/1/0144/4922/files/VE5B1632_1024x1024.jpg?v=1621894338" alt=""></div>
<div dir="auto"><br></div>
<div dir="auto">The front overlap is 0.75”  and you can fit three 3/8” buttons very comfortably. For hemming it, you will turn under the bottom raw edge 0.25", iron it and then turn it under  0.25" again and sew!</div>
<div dir="auto"><br></div>
<div dir="auto"><img src="https://cdn.shopify.com/s/files/1/0144/4922/files/VE5B1634_1024x1024.jpg?v=1621894531" alt=""></div>
<div dir="auto"><img src="https://cdn.shopify.com/s/files/1/0144/4922/files/IMG_1383_1024x1024.jpg?v=1621894772" alt=""></div>]]>
    </content>
  </entry>
  <entry>
    <id>https://violettefieldthreads.com/blogs/theblog/ainsley-pattern-hack-how-to-create-a-ruffled-pant-leg</id>
    <published>2021-03-12T08:25:08-06:00</published>
    <updated>2025-03-13T11:15:21-05:00</updated>
    <link rel="alternate" type="text/html" href="https://violettefieldthreads.com/blogs/theblog/ainsley-pattern-hack-how-to-create-a-ruffled-pant-leg"/>
    <title>Ainsley Pattern Hack {How to create a Ruffled Pant Leg}</title>
    <author>
      <name>Ericka Wright</name>
    </author>
    <summary type="html">
      <![CDATA[<p><img alt="" src="https://cdn.shopify.com/s/files/1/0144/4922/files/Screenshot_2025-03-13_at_12.14.22_PM.png?v=1741882513"></p>
<p><meta charset="utf-8">Even without a hack, Ainsley is such a great pattern with options for a jumpsuit, knee-length or maxi dress! I feel like knit garments are so rewarding to sew because they are easier to fit, require less tailoring and, lets be honest, you feel like you are wearing your pajamas while looking fabulous..hahaha!  But this ruffle pant trend kept popping up everywhere I looked...</p>
<p> </p><p><a class="read-more" href="https://violettefieldthreads.com/blogs/theblog/ainsley-pattern-hack-how-to-create-a-ruffled-pant-leg">More</a></p>]]>
    </summary>
    <content type="html">
      <![CDATA[<p><img src="https://cdn.shopify.com/s/files/1/0144/4922/files/Untitled_44_2048x2048.png?v=1615491161" alt="Ainsley pattern hack"></p>
<p>Even without a hack, Ainsley is such a great pattern with options for a jumpsuit, knee-length or maxi dress! I feel like knit garments are so rewarding to sew because they are easier to fit, require less tailoring and, lets be honest, you feel like you are wearing your pajamas while looking fabulous..hahaha!  But this ruffle pant trend kept popping up everywhere I looked; it was on my Pinterest, Instagram and even in some of my favorite boutiques. Here are a few of the jumpsuits that were inspiring my hack:</p>
<p><img src="https://cdn.shopify.com/s/files/1/0144/4922/files/Blank_2085_x_2085_2048x2048.png?v=1615492234" alt="Inspiration Jumpsuits"></p>
<p> I finally realized that this would be such an easy pattern hack for Ainsley, giving my go to pattern even more options! So I gave it a try and I LOVE IT!!!!!!!  I feel like it is so on trend and gives it a an extra feminine detail that I can't get enough of. I actually loved it so much that I wanted to share what I did with you guys too! </p>
<p><img src="https://cdn.shopify.com/s/files/1/0144/4922/files/BE3A2700_2048x2048.jpg?v=1615493429" alt=""></p>
<p> <img src="https://cdn.shopify.com/s/files/1/0144/4922/files/BE3A2729_1024x1024.jpg?v=1615495089" alt=""></p>
<p><img src="https://cdn.shopify.com/s/files/1/0144/4922/files/BE3A2731_1_1024x1024.jpg?v=1615495115" alt=""></p>
<p><img src="https://cdn.shopify.com/s/files/1/0144/4922/files/BE3A2747_1024x1024.jpg?v=1615495137" alt=""></p>
<p>So let's get started!!</p>
<p>First, go ahead and print out all the Ainsley pieces and assemble them as normal. But I have one important tip before you start hacking your pattern pieces: </p>
<p><strong>TIP: Measure the inseam of the pant pattern pieces to ensure accurate length prior to cutting and sewing the hem ruffle. If necessary, cut off or add additional length. </strong></p>
<p><strong>Measure your own inseam to the desired length. This ruffle mod would look cute with a full length pant leg that brushed the foot or a cropped ankle length. </strong></p>
<p>Okay, now that we know the length is correct, lets get started:</p>
<p>1. Begin by placing the back pant leg pattern piece in front of you. Use the charts below to determine how far to measure up from the bottom edge and mark.</p>
<p><img src="https://cdn.shopify.com/s/files/1/0144/4922/files/ainsleymod1_1024x1024.png?v=1615492834" alt="step 1"></p>
<p><strong>INSEAM EDGE</strong>: Measure up from the bottom edge of the back leg pattern piece according to the chart below and draw a ½” line.</p>
<table width="720">
<tbody>
<tr>
<td colspan="8" width="720">
<p>Girls Sizes</p>
</td>
</tr>
<tr>
<td width="99">
<p>2T</p>
</td>
<td width="107">
<p>3T</p>
</td>
<td width="91">
<p>4T</p>
</td>
<td width="84">
<p>5</p>
</td>
<td width="84">
<p>6</p>
</td>
<td width="84">
<p>7</p>
</td>
<td width="84">
<p>8</p>
</td>
<td width="88">
<p>9,10</p>
</td>
</tr>
<tr>
<td width="99">
<p>3 ¼”</p>
</td>
<td width="107">
<p>3 ½”</p>
</td>
<td width="91">
<p>3 ¾”</p>
</td>
<td width="84">
<p>4”</p>
</td>
<td width="84">
<p>4 ¼”</p>
</td>
<td width="84">
<p>4 ½”</p>
</td>
<td width="84">
<p>4 ¾”</p>
</td>
<td width="88">
<p>5”</p>
</td>
</tr>
</tbody>
</table>
<p><br></p>
<table width="720">
<tbody>
<tr>
<td colspan="4" width="720">
<p>Tween Sizes</p>
</td>
</tr>
<tr>
<td width="171">
<p>10</p>
</td>
<td width="174">
<p>12</p>
</td>
<td width="180">
<p>14</p>
</td>
<td width="195">
<p>16</p>
</td>
</tr>
<tr>
<td width="171">
<p>5 ¼”</p>
</td>
<td width="174">
<p>5 ½”</p>
</td>
<td width="180">
<p>5 ¾”</p>
</td>
<td width="195">
<p>6”</p>
</td>
</tr>
</tbody>
</table>
<p><br></p>
<table width="724">
<tbody>
<tr>
<td colspan="7" width="724">
<p>Misses Sizes</p>
</td>
</tr>
<tr>
<td width="82">
<p>XXS</p>
</td>
<td width="84">
<p>XS</p>
</td>
<td width="108">
<p>S</p>
</td>
<td width="120">
<p>M</p>
</td>
<td width="108">
<p>L</p>
</td>
<td width="114">
<p>XL</p>
</td>
<td width="108">
<p>XXL</p>
</td>
</tr>
<tr>
<td width="82">
<p>6 ½”</p>
</td>
<td width="84">
<p>6 ¾”</p>
</td>
<td width="108">
<p>7”</p>
</td>
<td width="120">
<p>7 ¼”</p>
</td>
<td width="108">
<p>7 ½”</p>
</td>
<td width="114">
<p>7 ¾”</p>
</td>
<td width="108">
<p>8”</p>
</td>
</tr>
</tbody>
</table>
<p> </p>
<p> </p>
<table width="100%">
<tbody>
<tr>
<td><span>18" Doll Pattern </span></td>
</tr>
</tbody>
</table>
<p> </p>
<p><span>1½”</span></p>
<p> </p>
<p><strong>SIDE EDGE</strong>: Measure up from the bottom edge of the back leg pattern piece according to the chart below and draw a ½” line.</p>
<table style="width: 551px;">
<tbody>
<tr>
<td colspan="8" style="width: 499px;">
<p>Girls Sizes</p>
</td>
</tr>
<tr>
<td style="width: 66px;">
<p>2T</p>
</td>
<td style="width: 64px;">
<p>3T</p>
</td>
<td style="width: 70px;">
<p>4T</p>
</td>
<td style="width: 58px;">
<p>5</p>
</td>
<td style="width: 59px;">
<p>6</p>
</td>
<td style="width: 57px;">
<p>7</p>
</td>
<td style="width: 59px;">
<p>8</p>
</td>
<td style="width: 66px;">
<p>9,10</p>
</td>
</tr>
<tr>
<td style="width: 66px;">
<p>6 ¾”</p>
</td>
<td style="width: 64px;">
<p>7”</p>
</td>
<td style="width: 70px;">
<p>7 ¼”</p>
</td>
<td style="width: 58px;">
<p>7 ½”</p>
</td>
<td style="width: 59px;">
<p>7 ¾”</p>
</td>
<td style="width: 57px;">
<p>8”</p>
</td>
<td style="width: 59px;">
<p>8 ¼”</p>
</td>
<td style="width: 66px;">
<p>8 ½”</p>
</td>
</tr>
</tbody>
</table>
<p> </p>
<table width="720">
<tbody>
<tr>
<td colspan="4" width="720">
<p>Tween Sizes</p>
</td>
</tr>
<tr>
<td width="171">
<p>10</p>
</td>
<td width="174">
<p>12</p>
</td>
<td width="180">
<p>14</p>
</td>
<td width="195">
<p>16</p>
</td>
</tr>
<tr>
<td width="171">
<p>9 ¼”</p>
</td>
<td width="174">
<p>9 ½”</p>
</td>
<td width="180">
<p>9 ¾”</p>
</td>
<td width="195">
<p>10”</p>
</td>
</tr>
</tbody>
</table>
<p> </p>
<table width="724">
<tbody>
<tr>
<td colspan="7" width="724">
<p>Misses Sizes</p>
</td>
</tr>
<tr>
<td width="82">
<p>XXS</p>
</td>
<td width="84">
<p>XS</p>
</td>
<td width="108">
<p>S</p>
</td>
<td width="120">
<p>M</p>
</td>
<td width="108">
<p>L</p>
</td>
<td width="114">
<p>XL</p>
</td>
<td width="108">
<p>XXL</p>
</td>
</tr>
<tr>
<td width="82">
<p>11”</p>
</td>
<td width="84">
<p>11 ¼”</p>
</td>
<td width="108">
<p>11 ½”</p>
</td>
<td width="120">
<p>11 ¾”</p>
</td>
<td width="108">
<p>12”</p>
</td>
<td width="114">
<p>12 ¼”</p>
</td>
<td width="108">
<p>12 ½”</p>
</td>
</tr>
</tbody>
</table>
<p> </p>
<table width="100%">
<tbody>
<tr>
<td> 18" Doll Pattern</td>
</tr>
</tbody>
</table>
<p> 2.75"</p>
<p> </p>
<p>2. Draw a curved line from the outside edge line across to the inseam edge line that you drew in the previous step. You can either use a curved ruler or simply freehand draw the line as accurately as possible.</p>
<p><img src="https://cdn.shopify.com/s/files/1/0144/4922/files/AinsleyMod2_93af8cd5-d73b-4948-b114-e9d852f8cc40_1024x1024.png?v=1615559093" alt="step 2"></p>
<p> </p>
<p> 3. Cut right along the drawn line, creating two pieces, the back pants top and back pants bottom ruffle.</p>
<p><img src="https://cdn.shopify.com/s/files/1/0144/4922/files/AinsleyMod3_1024x1024.png?v=1615493019" alt="step 3"></p>
<p> 4. You now need to add a 1/2" seam allowance (or 1/4" seam allowance for the 18" doll version) to the bottom edge of the new back pants top pattern piece and the top edge of the back pants ruffle.  Tape a piece of paper to the edge and trace a new line that extends ½” past the cut.</p>
<p> 5. We now need to add width to the bottom ruffle piece, this will allow us to gather it up. To determine how much width to add, lay the ruffle out in front of you and measure it along the bottom edge.</p>
<p><img src="https://cdn.shopify.com/s/files/1/0144/4922/files/ainsleymod4_1024x1024.png?v=1615493117" alt="step4"></p>
<p>6. Write down the full measurement. Now take that number and divide it by 2.  Cut a piece of paper that is the same height as the tallest side edge of the pattern piece and as wide as your new number. Tape it to the pattern piece as shown below to create a new, longer pattern piece. </p>
<p> i.e., If the bottom edge of your pattern piece measures 13.5”, divide that in two and you get 6.75”</p>
<div style="text-align: left;"><img src="https://cdn.shopify.com/s/files/1/0144/4922/files/ainsleyblog_1024x1024.jpg?v=1666394477" alt=""></div>
<p> </p>
<p>You now have a new pattern piece that is Cut 2 on the fold.  This will create a gathered bottom ruffle.</p>
<p><em>Note: I ran the pattern piece straight along the top edge of the new piece that extends out. Once the ruffle is gathered and attached back onto the pant leg, it is not obvious that area runs straight. </em></p>
<p>7. Cut out the Bottom ruffles and sew 1-2 rows of gathering stitches along the top raw edge.</p>
<p><img src="https://cdn.shopify.com/s/files/1/0144/4922/files/ainsleymod6_1024x1024.png?v=1615493385" alt="step 6"></p>
<p>8. Place the gathered ruffle on top of the cut bottom edge of one pant leg with the right sides touching and the raw edges lining up.  Ensure that the shorter ruffle edge is lining up with the inseam edge of the pant leg and the longer edge is lining up with the outside edge of the pant leg.  Pin to secure.</p>
<p><img src="https://cdn.shopify.com/s/files/1/0144/4922/files/ainsleymod7_1024x1024.png?v=1615495224" alt="step7"></p>
<p>9. Sew along the pinned seam with either a stretch stich or zig zag stitch. For a professional look, finish the seam with a serger or trim off ½ of the seam allowance and finish with a zig zag stitch.</p>
<p><img src="https://cdn.shopify.com/s/files/1/0144/4922/files/ainsleymod8_1024x1024.png?v=1615495280" alt="step 8"></p>
<p>10.Repeat for the remaining ruffle and opposite back pant leg. Ensure you are created two mirrored pant legs, this can be an easy mistake since not all knit as an easily distinguishable right and wrong side.</p>
<p>11.Repeats steps 1-10 to create the front pant legs with bottom ruffle.</p>
<p>Now you will just follow the Ainsley tutorial as stated to complete your jumpsuit!  I hope you enjoy this hack :) </p>
<p><img src="https://cdn.shopify.com/s/files/1/0144/4922/files/BE3A2749_1024x1024.jpg?v=1615495487" alt=""></p>
<p><img src="https://cdn.shopify.com/s/files/1/0144/4922/files/BE3A2706_1024x1024.jpg?v=1615495475" alt=""></p>
<p><img src="https://cdn.shopify.com/s/files/1/0144/4922/files/BE3A2739_1024x1024.jpg?v=1615495494" alt=""></p>
<p> </p>
<p>xoxo,</p>
<p>Ericka {VFT}</p>]]>
    </content>
  </entry>
  <entry>
    <id>https://violettefieldthreads.com/blogs/theblog/how-to-create-leo-lamb-free-tutorial-using-lovey-lamb</id>
    <published>2021-01-08T11:23:16-06:00</published>
    <updated>2025-03-13T10:51:45-05:00</updated>
    <link rel="alternate" type="text/html" href="https://violettefieldthreads.com/blogs/theblog/how-to-create-leo-lamb-free-tutorial-using-lovey-lamb"/>
    <title>How to create Leo Lamb- Free Tutorial using Lovey Lamb</title>
    <author>
      <name>Jessica Herning</name>
    </author>
    <summary type="html">
      <![CDATA[<meta charset="UTF-8">
<div><span><img src="https://cdn.shopify.com/s/files/1/0144/4922/files/IMG_8734_1024x1024.jpg?v=1610122443" alt="" style="display: block; margin-left: auto; margin-right: auto;"></span></div>
<div style="text-align: center;"><span>Have you seen our Lovey Lamb? She's the sweetest little lamb, and has just joined the Violette Field Threads stuffie family! Now, meet Leo Lamb!</span></div>
<div style="text-align: center;"> </div><p><a class="read-more" href="https://violettefieldthreads.com/blogs/theblog/how-to-create-leo-lamb-free-tutorial-using-lovey-lamb">More</a></p>]]>
    </summary>
    <content type="html">
      <![CDATA[<div><meta charset="UTF-8"></div>
<div>
<p style="text-align: center;"><span><img src="https://cdn.shopify.com/s/files/1/0144/4922/files/IMG_8734_1024x1024.jpg?v=1610122443" alt=""></span></p>
<p style="text-align: center;"><span>Have you seen our Lovey Lamb? She's the sweetest little lamb, and has just joined the Violette Field Threads stuffie family! Now, meet Leo Lamb!</span></p>
<p style="text-align: center;"><span><img src="https://cdn.shopify.com/s/files/1/0144/4922/files/IMG_8795_1024x1024.jpg?v=1610122643" alt="" style="display: block; margin-left: auto; margin-right: auto;"></span></p>
<p style="text-align: center;"><img src="https://cdn.shopify.com/s/files/1/0144/4922/files/IMG_7050-2_1024x1024.jpg?v=1610125193" alt=""></p>
<p style="text-align: center;"><span>Not wanting to leave her little boy out of the stuffed animal fun, Ashley (designer of Lovey Lamb) re-designed Lovey to become Leo! She created an adorable boy face template &amp; SVG file, modified the Lovey bloomers to become overalls, and added elastic to the bow to become a bowtie!</span></p>
</div>
<div style="text-align: center;">
<p><span><img src="https://cdn.shopify.com/s/files/1/0144/4922/files/IMG_8749_1024x1024.jpg?v=1610122730" alt="" style="display: block; margin-left: auto; margin-right: auto;"></span></p>
<p><img src="https://cdn.shopify.com/s/files/1/0144/4922/files/IMG_7047_1024x1024.jpg?v=1610125387" alt=""></p>
<p><span>Included below are instructions to create Leo Lamb using the original pattern for Lovey Lamb and a free printable template for the boy face, as well as an SVG file if you have a vinyl cutting machine. If you do not already own the PDF pattern for Lovey Lamb, click </span><a href="https://violettefieldthreads.com/products/lovey-lamb-18-stuffie-animal-pattern" title="Link to Lovey Lamb "><span>here</span></a><span> to purchase. Click </span><span><a href="https://cdn.shopify.com/s/files/1/0144/4922/files/Leo_Lamb_Face_Template.pdf?v=1610126376" title="Leo Lamb Face Template">(here)</a> </span><span>to download the face template and <a href="https://cdn.shopify.com/s/files/1/0144/4922/files/Lovey_Lamb_boy_face.svg?v=1610126477" title="Leo Lamb SVG">(here)</a> to download the SVG file.</span></p>
<p><img src="https://cdn.shopify.com/s/files/1/0144/4922/files/ID1A1287_1024x1024.jpg?v=1610125504" alt="" style="display: block; margin-left: auto; margin-right: auto;"> </p>
</div>
<div style="text-align: center;">
<p><span>Additional materials needed:</span></p>
<p>-  7<span>½”</span> of ¾” elastic </p>
</div>
<div style="text-align: center;">
<p><span>-</span>7½” of ¼” elastic</p>
</div>
<div>
<p style="text-align: center;"><span>To make Leo, follow all of the steps from the Lovey Lamb pattern &amp; tutorial, but print out the face template for the boy and trace it in step #7, or use the SVG file and apply heat transfer vinyl. Continue all of the steps to make the lamb.</span></p>
<p style="text-align: center;"><span>Now that Leo lamb has been created, it's time for his clothes!</span></p>
<meta charset="UTF-8">
<p style="text-align: center;"><span>To create the overalls, cut two bloomers using the pattern pieces included for Lovey. Sew the inseams of each bloomer.  </span></p>
</div>
<div>
<p style="text-align: center;"><span><img src="https://cdn.shopify.com/s/files/1/0144/4922/files/1_5df0357b-7e74-4669-9e37-95ee62ee3aa5_1024x1024.jpg?v=1610120714" alt=""></span></p>
</div>
<div>
<meta charset="UTF-8">
<p style="text-align: center;"><span>Serge the finished seams of each leg. Iron the bottom raw edge of each leg ½” and then another ½” and sew along folded edge to create the hem.</span></p>
<p><img src="https://cdn.shopify.com/s/files/1/0144/4922/files/2_3a1a370c-bcd1-4e1f-b04e-840bff4e9c12_1024x1024.jpg?v=1610120804" alt="" style="display: block; margin-left: auto; margin-right: auto;"></p>
<p> </p>
<p><img src="https://cdn.shopify.com/s/files/1/0144/4922/files/3_9947f39a-be9a-4db0-a218-9dfa1318a260_1024x1024.jpg?v=1610120829" alt="" style="display: block; margin-left: auto; margin-right: auto;"></p>
<p style="text-align: center;"><span>Continue with the instructions for Lovey from step #42 through creating the buttonhole in step #45.  </span></p>
<p style="text-align: center;"><span>To create the straps:</span></p>
<p style="text-align: center;"><span>Cut two strap pieces (</span>9” by 2”) in the bloomer fabric. Fold each in half with the right sides together. Stitch along the long raw edge as well as one short edge.</p>
<p><span><img src="https://cdn.shopify.com/s/files/1/0144/4922/files/4_2d1ce1a5-fa35-4301-a9a4-086f9e7f57fe_1024x1024.jpg?v=1610120857" alt="" style="display: block; margin-left: auto; margin-right: auto;"></span></p>
<p style="text-align: center;"><span>Turn the straps right side out and iron flat. Top stitch along all three sewn edges.</span></p>
<p align="center"><img src="https://cdn.shopify.com/s/files/1/0144/4922/files/5_fda0ecf6-1f3b-4d9c-96cc-a1db87fac927_1024x1024.jpg?v=1610120882" alt="" style="display: block; margin-left: auto; margin-right: auto;"></p>
<p style="text-align: center;"><span>Prepare the top hem of the shorts. Fold the top raw edge down ¼” and iron. Fold down another 1” and iron flat. </span></p>
<p style="text-align: center;"> </p>
<p style="text-align: center;"><span>On the front of the shorts, place a pin 1</span>½” from the center seam on each side. The space between the pins will be left open to insert the elastic, also creating the flat front.</p>
<p align="center"><img src="https://cdn.shopify.com/s/files/1/0144/4922/files/6_96f5e06d-c436-4b66-abb8-4e0801569394_1024x1024.jpg?v=1610120924" alt="" style="display: block; margin-left: auto; margin-right: auto;"></p>
<p style="text-align: center;"><span>Insert the straps into the back of the shorts. Place the straps ½” inside the prepped hem. Each strap will be ½” away from the back center seam. </span></p>
<p><span><img src="https://cdn.shopify.com/s/files/1/0144/4922/files/7_9df7d49e-8261-462e-8402-b4bdfa3fc63a_1024x1024.jpg?v=1610120948" alt="" style="display: block; margin-left: auto; margin-right: auto;"></span></p>
<p style="text-align: center;"><span>Starting at one pin on the front of the shorts, stitch all the way around to the second pin. Take your 7</span>½” piece of ¾” elastic and attach to a safety pin or bodkin. Insert the elastic through one open end of the front shorts.</p>
<p><span><img src="https://cdn.shopify.com/s/files/1/0144/4922/files/8_9595cfa0-4a6c-43be-88ad-e30b7e56ba2d_1024x1024.jpg?v=1610120987" alt="" style="display: block; margin-left: auto; margin-right: auto;"></span></p>
<p style="text-align: center;"><span>When the elastic has only ¼” remaining, pin to secure the elastic and continue pulling the elastic through to the other open end, again leaving ¼” elastic past the sewn casing and pin to secure. Sew vertically along the waistband to secure the elastic at both edges.</span></p>
<p align="center"><img src="https://cdn.shopify.com/s/files/1/0144/4922/files/9_970b961a-2a3d-4b03-ba4c-cd6581f02125_1024x1024.jpg?v=1610121015" alt="" style="display: block; margin-left: auto; margin-right: auto;"></p>
<p style="text-align: center;"><span>If desired, continue the stitches across the bottom of the waistband, between the two elastic edges. </span></p>
<p><span><img src="https://cdn.shopify.com/s/files/1/0144/4922/files/10_96bca66f-b5e9-4bd1-b4ea-399bbf3cc875_1024x1024.jpg?v=1610121042" alt="" style="display: block; margin-left: auto; margin-right: auto;"></span></p>
<p style="text-align: center;"><span>Criss cross the straps and pin to secure. </span></p>
<p><span><img src="https://cdn.shopify.com/s/files/1/0144/4922/files/11_0e8b45d8-48f0-4b5b-a4dd-c29324c23d9f_1024x1024.jpg?v=1610121063" alt="" style="display: block; margin-left: auto; margin-right: auto;"></span></p>
<p style="text-align: center;"><span>Create a small stitch along the top edge of the waistband to secure the straps up. </span></p>
<p><span><img src="https://cdn.shopify.com/s/files/1/0144/4922/files/12_db769276-c327-4c5f-9053-7a7065403a3a_1024x1024.jpg?v=1610121097" alt="" style="display: block; margin-left: auto; margin-right: auto;"></span></p>
<p style="text-align: center;"><span>Making sure to continue with the straps crossed, bring to the front and pin just inside the stitches you created to secure the elastic. Stitch to secure, along the same stitches as previously topstitched. </span></p>
<p><span><img src="https://cdn.shopify.com/s/files/1/0144/4922/files/13_1c73e2a8-52ab-4ea2-ae1f-1a77528e31f3_1024x1024.jpg?v=1610121126" alt="" style="display: block; margin-left: auto; margin-right: auto;"></span></p>
<p style="text-align: center;"><span>Stitch buttons at the bottom of the front straps if desired.</span></p>
<p><span><img src="https://cdn.shopify.com/s/files/1/0144/4922/files/14_474ffd55-5af9-474c-aef3-a40579a2db98_1024x1024.jpg?v=1610121158" alt="" style="display: block; margin-left: auto; margin-right: auto;"></span></p>
<p style="text-align: center;"><span>To create the bowtie, follow the tutorial for Lovey’s hair bow. Cut a 7</span>½” piece of ¼” elastic and thread through the back of the bow.</p>
<p><span><img src="https://cdn.shopify.com/s/files/1/0144/4922/files/15_402da8cc-238a-43be-a617-927ab2fce145_1024x1024.jpg?v=1610121187" alt="" style="display: block; margin-left: auto; margin-right: auto;"></span></p>
<p style="text-align: center;"><span>Overlap the edges by ¼” and stitch to secure. </span></p>
<p><span><img src="https://cdn.shopify.com/s/files/1/0144/4922/files/16_c19e6232-bead-4274-a210-151f1d99a152_1024x1024.jpg?v=1610121214" alt="" style="display: block; margin-left: auto; margin-right: auto;"></span></p>
<p style="text-align: center;"><span>Pull the elastic around and hide behind the bow center. </span></p>
<p><span><img src="https://cdn.shopify.com/s/files/1/0144/4922/files/17_442d098c-1982-4ba8-8e60-f04f0cc819e3_1024x1024.jpg?v=1610121236" alt="" style="display: block; margin-left: auto; margin-right: auto;"></span> </p>
<p style="text-align: center;">That's it for Leo the Lamb!  Super simple, right?!  We can't wait to see all of the amazing creations made using this tutorial!  Be sure to share your creations on the Violette Field Threads Facebook page. </p>
<p style="text-align: center;"><img src="https://cdn.shopify.com/s/files/1/0144/4922/files/Leo_c27e820f-fe03-42ec-b0fd-6a9e6ad81af8_1024x1024.jpg?v=1610123805" alt=""></p>
<p style="text-align: center;"> <img src="https://cdn.shopify.com/s/files/1/0144/4922/files/IMG_8728_1024x1024.jpg?v=1610123895" alt=""></p>
<p> </p>
<p align="center"><span> </span></p>
<p><span> </span></p>
<p> </p>
<p> </p>
<p style="text-align: center;"> </p>
</div>]]>
    </content>
  </entry>
  <entry>
    <id>https://violettefieldthreads.com/blogs/theblog/introducing-harriett</id>
    <published>2020-09-14T14:40:53-05:00</published>
    <updated>2025-03-13T10:53:46-05:00</updated>
    <link rel="alternate" type="text/html" href="https://violettefieldthreads.com/blogs/theblog/introducing-harriett"/>
    <title>Introducing {Harriett}</title>
    <author>
      <name>Jessica Herning</name>
    </author>
    <summary type="html">
      <![CDATA[<p><img src="//cdn.shopify.com/s/files/1/0144/4922/files/1_32b2a3a7-7905-4606-93fe-eb3db3d70f17_2048x2048.jpg?v=1599147221" alt=""></p>
<meta charset="utf-8"><meta charset="utf-8">
<p style="text-align: center;"><span>Hey Friends!! Back to School season is here and we are so excited to introduce you to one of our three new designs in our 2020 B2S collection: HARRIETT!</span></p><p><a class="read-more" href="https://violettefieldthreads.com/blogs/theblog/introducing-harriett">More</a></p>]]>
    </summary>
    <content type="html">
      <![CDATA[<p><img src="//cdn.shopify.com/s/files/1/0144/4922/files/1_32b2a3a7-7905-4606-93fe-eb3db3d70f17_2048x2048.jpg?v=1599147221" alt=""></p>
<p style="text-align: center;"> </p>
<p style="text-align: center;">Hey Friends!! Back to School season is here and we are so excited to introduce you to one of our three new designs in our 2020 B2S collection: HARRIETT!</p>
<p style="text-align: center;"> </p>
<p style="text-align: center;"><img src="//cdn.shopify.com/s/files/1/0144/4922/files/10_copy_2048x2048.jpg?v=1599148392" alt=""></p>
<p style="text-align: center;"><img src="//cdn.shopify.com/s/files/1/0144/4922/files/10_147a776f-962e-479e-9019-180ee04380ca_2048x2048.jpg?v=1599151421" alt=""></p>
<p style="text-align: center;"><img src="//cdn.shopify.com/s/files/1/0144/4922/files/8_86c2dda4-eed8-4aeb-9b32-994197a024e1_2048x2048.jpg?v=1599148531" alt=""></p>
<p style="text-align: center;"><img src="//cdn.shopify.com/s/files/1/0144/4922/files/Harriett6_web_43a3884c-d1f2-4b4a-81fa-5e986be11643_2048x2048.jpg?v=1599148621" alt=""></p>
<p style="text-align: center;"> </p>
<p style="text-align: center;"> Harriett is the epitome of vintage yumminess that makes our hearts swoon! It is  available in the following size ranges - Baby, Girls, Tween and even Doll! This classic silhouette is a straightforward sew, and includes a new design feature, button shoulders! The skirt is a gathered 1/2 circle skirt, for show-stopping twirls!</p>
<p style="text-align: center;"> </p>
<p style="text-align: center;"><img src="//cdn.shopify.com/s/files/1/0144/4922/files/5_576a09ce-5531-4d93-b1d9-dd8407654e61_1024x1024.jpg?v=1599148468" alt=""></p>
<p style="text-align: center;"><img src="//cdn.shopify.com/s/files/1/0144/4922/files/45_1024x1024.jpg?v=1599151347" alt=""></p>
<p style="text-align: center;"><img src="//cdn.shopify.com/s/files/1/0144/4922/files/5_c479dd37-ddec-45ec-b838-d6fe25939bde_1024x1024.jpg?v=1599151599" alt=""></p>
<p style="text-align: center;"><img src="//cdn.shopify.com/s/files/1/0144/4922/files/47_1024x1024.jpg?v=1599152032" alt=""></p>
<p style="text-align: center;"><img src="//cdn.shopify.com/s/files/1/0144/4922/files/BE3A1193_e7143330-07ca-4eb0-935a-2dca74fa6b5c_1024x1024.jpg?v=1599152113" alt=""></p>
<p style="text-align: center;"> </p>
<p style="text-align: center;">Harriett can be sewn as a top:</p>
<p style="text-align: center;"> </p>
<p style="text-align: center;"><img src="//cdn.shopify.com/s/files/1/0144/4922/files/12_67248622-04fa-402b-996e-7624826a979d_1024x1024.jpg?v=1599152328" alt=""></p>
<p style="text-align: center;"> </p>
<p style="text-align: center;"><img src="//cdn.shopify.com/s/files/1/0144/4922/files/2_59433ec2-101d-46eb-bd95-34dc26d20752_1024x1024.jpg?v=1599150448" alt=""></p>
<p style="text-align: center;"> </p>
<p style="text-align: center;">as a dress with a simple skirt:</p>
<p style="text-align: center;"> </p>
<p style="text-align: center;"><img src="//cdn.shopify.com/s/files/1/0144/4922/files/65_1024x1024.jpg?v=1599150899" alt=""></p>
<p style="text-align: center;"><img src="//cdn.shopify.com/s/files/1/0144/4922/files/22_4f3e236d-4f6c-4379-b823-91b11a2f5191_1024x1024.jpg?v=1599152415" alt=""></p>
<p style="text-align: center;">  </p>
<p style="text-align: center;">or as a dress with the wide ruffle on the bottom:</p>
<p style="text-align: center;"> </p>
<p style="text-align: center;"><img src="//cdn.shopify.com/s/files/1/0144/4922/files/30_1024x1024.jpg?v=1599152745" alt=""> </p>
<p style="text-align: center;"><img src="//cdn.shopify.com/s/files/1/0144/4922/files/1_ffb8c02a-fe87-41f6-a9b4-6c95e6dac52f_1024x1024.jpg?v=1599153607" alt=""></p>
<p style="text-align: center;"> </p>
<p style="text-align: center;">But you know what everyone's favorite detail has been so far?!  It's not the optional side seam pockets... because, let's be real, you know EVERYONE loves pockets....no, it's the....</p>
<p style="text-align: center;"> <img src="//cdn.shopify.com/s/files/1/0144/4922/files/14_9b1d7fae-3e2c-4397-bcc6-81c38e659023_1024x1024.jpg?v=1599150694" alt=""></p>
<p style="text-align: center;"> </p>
<p style="text-align: center;">...shoulder placket with the darling button closure!! </p>
<p style="text-align: center;"> </p>
<p style="text-align: center;"><img src="//cdn.shopify.com/s/files/1/0144/4922/files/23_7c9c1a46-c24d-4ad7-b312-b97a5100170c_1024x1024.jpg?v=1599153347" alt=""></p>
<p style="text-align: center;"> </p>
<p style="text-align: center;"><img src="//cdn.shopify.com/s/files/1/0144/4922/files/17_5c6deb29-3062-4c53-8c11-8dce9abcc334_1024x1024.jpg?v=1599153256" alt=""></p>
<p style="text-align: center;"><img src="//cdn.shopify.com/s/files/1/0144/4922/files/29_5b1cc5fb-d748-4705-ab0d-3382e759632c_1024x1024.jpg?v=1599154196" alt=""></p>
<p style="text-align: center;"> </p>
<p style="text-align: center;">The button shoulder has us all swooning...it's both unique and classic and we are IN LOVE!!  Have you noticed the other fun styling option for Harriett?! Look closely.... it's the optional ruffles on the sleeve cycle!  </p>
<p style="text-align: center;"> </p>
<p style="text-align: center;"><img src="//cdn.shopify.com/s/files/1/0144/4922/files/68_1024x1024.jpg?v=1599152284" alt=""></p>
<p style="text-align: center;"> </p>
<p style="text-align: center;"><img src="//cdn.shopify.com/s/files/1/0144/4922/files/z1_1024x1024.jpg?v=1599153703" alt=""></p>
<p style="text-align: center;"><img src="//cdn.shopify.com/s/files/1/0144/4922/files/27_388f649a-d190-4959-91a9-508c5fef0894_1024x1024.jpg?v=1599153999" alt=""></p>
<p style="text-align: center;"> </p>
<p style="text-align: center;">What do you think? Have you decided which version you want to sew up first?!  No matter which options you choose, you really can't go wrong!  </p>
<p style="text-align: center;"> </p>
<p style="text-align: center;"><img src="//cdn.shopify.com/s/files/1/0144/4922/files/35_bae7213c-5181-4231-a93b-78981e5b863e_2048x2048.jpg?v=1599154477" alt=""></p>
<p style="text-align: center;">Happy Sewing and Back to School!</p>
<p style="text-align: center;"> </p>]]>
    </content>
  </entry>
  <entry>
    <id>https://violettefieldthreads.com/blogs/theblog/back-to-school-2020-style</id>
    <published>2020-09-01T09:23:00-05:00</published>
    <updated>2025-03-13T10:56:10-05:00</updated>
    <link rel="alternate" type="text/html" href="https://violettefieldthreads.com/blogs/theblog/back-to-school-2020-style"/>
    <title>Back to School - 2020 style!</title>
    <author>
      <name>Ericka Wright</name>
    </author>
    <summary type="html">
      <![CDATA[<p><img src="//cdn.shopify.com/s/files/1/0144/4922/files/BE3A1545_2048x2048.jpeg?v=1598041555" alt=""></p>
<meta charset="utf-8">
<p style="text-align: center;"><span>Hey Friends!!  Back to school 2020 is in full swing and </span><span>w</span><span>hile some routines and traditions may be changing this year, we don't think a cute back to school wardrobe should be one of them! </span></p><p><a class="read-more" href="https://violettefieldthreads.com/blogs/theblog/back-to-school-2020-style">More</a></p>]]>
    </summary>
    <content type="html">
      <![CDATA[<p><img src="//cdn.shopify.com/s/files/1/0144/4922/files/BE3A1545_2048x2048.jpeg?v=1598041555" alt=""></p>
<p style="text-align: center;">Hey Friends!!  Back to school 2020 is in full swing and while some routines and traditions may be changing this year, a cute back to school wardrobe shouldn't be one of them!  And on that note, we are so excited to introduce you to our 3 newest patterns!</p>
<p style="text-align: center;">Introducing:</p>
<meta charset="utf-8">
<p style="text-align: center;"><span class="q9uorilb tbxw36s4 knj5qynh kvgmc6g5 ditlmg2l oygrvhab nvdbi5me fgm26odu gl3lb2sf hhz5lgdu"><img height="16" width="16" alt="🍎" src="https://static.xx.fbcdn.net/images/emoji.php/v9/tdb/2/16/1f34e.png"></span><span class="q9uorilb tbxw36s4 knj5qynh kvgmc6g5 ditlmg2l oygrvhab nvdbi5me fgm26odu gl3lb2sf hhz5lgdu"><img height="16" width="16" alt="📚" src="https://static.xx.fbcdn.net/images/emoji.php/v9/te8/2/16/1f4da.png"></span><span> Reagan </span><span class="q9uorilb tbxw36s4 knj5qynh kvgmc6g5 ditlmg2l oygrvhab nvdbi5me fgm26odu gl3lb2sf hhz5lgdu"><img height="16" width="16" alt="📚" src="https://static.xx.fbcdn.net/images/emoji.php/v9/te8/2/16/1f4da.png"></span><span class="q9uorilb tbxw36s4 knj5qynh kvgmc6g5 ditlmg2l oygrvhab nvdbi5me fgm26odu gl3lb2sf hhz5lgdu"><img height="16" width="16" alt="🍎" src="https://static.xx.fbcdn.net/images/emoji.php/v9/tdb/2/16/1f34e.png"></span><span> </span></p>
<p style="text-align: center;"><span>Available in Girls, Tween and Doll</span></p>
<p style="text-align: center;"> </p>
<p style="text-align: center;"><span><img src="//cdn.shopify.com/s/files/1/0144/4922/files/2_1f0025e1-e396-4112-a3e1-98194b4c1896_2048x2048.jpg?v=1598292578" alt=""></span></p>
<p style="text-align: center;"> </p>
<p style="text-align: center;"><span><img src="//cdn.shopify.com/s/files/1/0144/4922/files/BE3A1270_1024x1024.jpg?v=1598047332" alt=""></span></p>
<p style="text-align: center;"><span><img src="//cdn.shopify.com/s/files/1/0144/4922/files/BE3A1312_1024x1024.jpg?v=1598047425" alt=""></span></p>
<p style="text-align: center;"><span><img src="//cdn.shopify.com/s/files/1/0144/4922/files/BE3A1260_1024x1024.jpg?v=1598047487" alt=""></span></p>
<p style="text-align: center;"><span><img src="//cdn.shopify.com/s/files/1/0144/4922/files/ReaganWhite1_web_2048x2048.jpg?v=1598288006" alt=""></span></p>
<p style="text-align: center;"><span><img src="//cdn.shopify.com/s/files/1/0144/4922/files/ReaganWhite6_web_2048x2048.jpg?v=1598288071" alt=""></span></p>
<p style="text-align: center;"><span><img src="//cdn.shopify.com/s/files/1/0144/4922/files/ReaganWhite4_web_2048x2048.jpg?v=1598288122" alt=""></span></p>
<p style="text-align: center;"><span><img src="//cdn.shopify.com/s/files/1/0144/4922/files/1_39079332-1698-45ec-9439-5a5013119f92_1024x1024.jpg?v=1598297477" alt=""></span></p>
<p style="text-align: center;"> </p>
<meta charset="utf-8">
<div class="kvgmc6g5 cxmmr5t8 oygrvhab hcukyx3x c1et5uql ii04i59q">
<div dir="auto" style="text-align: center;">
<span class="q9uorilb tbxw36s4 knj5qynh kvgmc6g5 ditlmg2l oygrvhab nvdbi5me fgm26odu gl3lb2sf hhz5lgdu"><img height="16" width="16" alt="🍎" src="https://static.xx.fbcdn.net/images/emoji.php/v9/tdb/2/16/1f34e.png"></span><span class="q9uorilb tbxw36s4 knj5qynh kvgmc6g5 ditlmg2l oygrvhab nvdbi5me fgm26odu gl3lb2sf hhz5lgdu"><img height="16" width="16" alt="📚" src="https://static.xx.fbcdn.net/images/emoji.php/v9/te8/2/16/1f4da.png"></span> HARRIETT <span class="q9uorilb tbxw36s4 knj5qynh kvgmc6g5 ditlmg2l oygrvhab nvdbi5me fgm26odu gl3lb2sf hhz5lgdu"><img height="16" width="16" alt="📚" src="https://static.xx.fbcdn.net/images/emoji.php/v9/te8/2/16/1f4da.png"></span><span class="q9uorilb tbxw36s4 knj5qynh kvgmc6g5 ditlmg2l oygrvhab nvdbi5me fgm26odu gl3lb2sf hhz5lgdu"><img height="16" width="16" alt="🍎" src="https://static.xx.fbcdn.net/images/emoji.php/v9/tdb/2/16/1f34e.png"></span> </div>
<div dir="auto" style="text-align: center;">Available in Baby, Girls, Tween &amp; Doll</div>
<div dir="auto" style="text-align: center;"></div>
<div dir="auto" style="text-align: center;"><img src="//cdn.shopify.com/s/files/1/0144/4922/files/3_f8d8d015-c214-45fd-a969-6eccfaee02b5_2048x2048.jpg?v=1598292641" alt=""></div>
<div dir="auto" style="text-align: center;"></div>
<div dir="auto" style="text-align: center;"><img src="//cdn.shopify.com/s/files/1/0144/4922/files/5_924f4c6f-0ece-4dc1-a2e1-c7cc69383091_1024x1024.jpg?v=1598288771" alt=""></div>
<div dir="auto" style="text-align: center;"><img src="//cdn.shopify.com/s/files/1/0144/4922/files/8_b93ddf2c-7184-4531-887b-408263874b20_1024x1024.jpg?v=1598288836" alt=""></div>
<div dir="auto" style="text-align: center;"><img src="//cdn.shopify.com/s/files/1/0144/4922/files/4_ae4a1a56-a99b-4cdf-b8ff-048fa615e7f8_1024x1024.jpg?v=1598288888" alt=""></div>
<div dir="auto" style="text-align: center;"><img src="//cdn.shopify.com/s/files/1/0144/4922/files/BE3A1000_1024x1024.jpg?v=1598289770" alt=""></div>
<div dir="auto" style="text-align: center;"><img src="//cdn.shopify.com/s/files/1/0144/4922/files/BE3A1193_1024x1024.jpg?v=1598289859" alt=""></div>
<div dir="auto" style="text-align: center;"><img src="//cdn.shopify.com/s/files/1/0144/4922/files/BE3A1012_1024x1024.jpg?v=1598291635" alt=""></div>
<div dir="auto" style="text-align: center;"><img src="//cdn.shopify.com/s/files/1/0144/4922/files/Harriett6_web_2048x2048.jpg?v=1598291727" alt=""></div>
<div dir="auto" style="text-align: center;"><img src="//cdn.shopify.com/s/files/1/0144/4922/files/Harriett1_web_2048x2048.jpg?v=1598291780" alt=""></div>
<div dir="auto" style="text-align: center;"><img src="//cdn.shopify.com/s/files/1/0144/4922/files/Harriett2_web_2048x2048.jpg?v=1598291817" alt=""></div>
<div dir="auto" style="text-align: center;"><img src="//cdn.shopify.com/s/files/1/0144/4922/files/1_2203d1c4-e467-42cc-89dc-539fd68baff7_1024x1024.jpg?v=1598297543" alt=""></div>
<div dir="auto" style="text-align: center;"></div>
</div>
<div class="o9v6fnle cxmmr5t8 oygrvhab hcukyx3x c1et5uql ii04i59q" style="text-align: center;">
<div dir="auto"></div>
</div>
<div style="text-align: center;"><meta charset="utf-8"></div>
<div style="text-align: center;"><span> </span></div>
<div style="text-align: center;"><span></span></div>
<div style="text-align: center;">
<meta charset="utf-8">
<span><span class="q9uorilb tbxw36s4 knj5qynh kvgmc6g5 ditlmg2l oygrvhab nvdbi5me fgm26odu gl3lb2sf hhz5lgdu"></span></span>
</div>
<div style="text-align: center;"><span><span class="q9uorilb tbxw36s4 knj5qynh kvgmc6g5 ditlmg2l oygrvhab nvdbi5me fgm26odu gl3lb2sf hhz5lgdu"><img height="16" width="16" alt="🍎" src="https://static.xx.fbcdn.net/images/emoji.php/v9/tdb/2/16/1f34e.png"></span><span class="q9uorilb tbxw36s4 knj5qynh kvgmc6g5 ditlmg2l oygrvhab nvdbi5me fgm26odu gl3lb2sf hhz5lgdu"><img height="16" width="16" alt="📚" src="https://static.xx.fbcdn.net/images/emoji.php/v9/te8/2/16/1f4da.png"></span> VIVI<span class="q9uorilb tbxw36s4 knj5qynh kvgmc6g5 ditlmg2l oygrvhab nvdbi5me fgm26odu gl3lb2sf hhz5lgdu"><img height="16" width="16" alt="📚" src="https://static.xx.fbcdn.net/images/emoji.php/v9/te8/2/16/1f4da.png"></span><span class="q9uorilb tbxw36s4 knj5qynh kvgmc6g5 ditlmg2l oygrvhab nvdbi5me fgm26odu gl3lb2sf hhz5lgdu"><img height="16" width="16" alt="🍎" src="https://static.xx.fbcdn.net/images/emoji.php/v9/tdb/2/16/1f34e.png"></span> </span></div>
<div style="text-align: center;"><span>Available in Girls &amp; Doll</span></div>
<div style="text-align: center;"><span></span></div>
<div style="text-align: center;"><span><img src="//cdn.shopify.com/s/files/1/0144/4922/files/1_30ac0ac6-82cf-4f2e-ae1a-08cc657c8905_2048x2048.jpg?v=1598292512" alt=""></span></div>
<div style="text-align: center;"><span></span></div>
<div style="text-align: center;"><span><img src="//cdn.shopify.com/s/files/1/0144/4922/files/vivi2_2048x2048.jpg?v=1598292317" alt=""></span></div>
<div style="text-align: center;"><span><img src="//cdn.shopify.com/s/files/1/0144/4922/files/12_e1622741-44f0-4e6a-8f1b-7bf1d60d52d5_1024x1024.jpg?v=1598292834" alt=""></span></div>
<div style="text-align: center;"><span><img src="//cdn.shopify.com/s/files/1/0144/4922/files/13_36916943-1759-4ad7-8a95-dfb5e153ac6c_1024x1024.jpg?v=1598292883" alt=""></span></div>
<div style="text-align: center;"><span><img src="//cdn.shopify.com/s/files/1/0144/4922/files/2_d0285c88-a064-4f24-a6b5-1bb5ca1fb7b6_1024x1024.jpg?v=1598298405" alt=""></span></div>
<div style="text-align: center;"><span><img src="//cdn.shopify.com/s/files/1/0144/4922/files/1_a7dd00fd-bf36-4957-9854-e3404777ffe7_1024x1024.jpg?v=1598298453" alt=""></span></div>
<div style="text-align: center;"><span></span></div>
<div style="text-align: center;"><span>Harriett, Reagan &amp; Vivi are sure to spruce up your little's wardrobe, whether classes will be from home, virtual or spread out in school rooms!</span></div>
<div style="text-align: center;"><span></span></div>
<div style="text-align: center;"></div>
<div style="text-align: center;">Stay tuned over the next week as we have detailed blog posts for each of these darling patterns with lots of more precious pictures and examples! </div>
<div style="text-align: center;">As always, Happy Sewing!!</div>]]>
    </content>
  </entry>
  <entry>
    <id>https://violettefieldthreads.com/blogs/theblog/back-2-class-favorites-6-weekend</id>
    <published>2020-07-18T10:56:00-05:00</published>
    <updated>2025-03-13T11:02:04-05:00</updated>
    <link rel="alternate" type="text/html" href="https://violettefieldthreads.com/blogs/theblog/back-2-class-favorites-6-weekend"/>
    <title>Back 2 Class Favorites {$6 Weekend}!</title>
    <author>
      <name>Jessica Herning</name>
    </author>
    <summary type="html">
      <![CDATA[<p><img src="//cdn.shopify.com/s/files/1/0144/4922/files/16_f1cdb97b-36d0-45b4-9f16-002ebb29360f_2048x2048.jpg?v=1595026228" alt=""></p>
<meta charset="utf-8">
<div style="text-align: center;">Hey Friends!! We have seen lots of Mamas in our group excited to get started on some "Back 2 Class" outfits for their girlies, and decided it would be a great time to have a $6 weekend sale for a few of our {Back 2 Class} Favorites!  </div>
<div style="text-align: center;"></div>
<div style="text-align: center;">Reintroducing to you all - {Penelope}, {Autumn &amp; Alexandra} and {Harper &amp; Lulu}!!!</div><p><a class="read-more" href="https://violettefieldthreads.com/blogs/theblog/back-2-class-favorites-6-weekend">More</a></p>]]>
    </summary>
    <content type="html">
      <![CDATA[<div style="text-align: center;"></div>
<div style="text-align: center;"></div>
<div style="text-align: center;"><img src="//cdn.shopify.com/s/files/1/0144/4922/files/16_f1cdb97b-36d0-45b4-9f16-002ebb29360f_2048x2048.jpg?v=1595026228" alt=""></div>
<div style="text-align: center;"></div>
<div style="text-align: center;">.</div>
<div style="text-align: center;">Hey Friends!! We have seen lots of Mamas in our group excited to get started on some "Back 2 Class" outfits for their girlies, and decided it would be a great time to have a $6 weekend sale for 3 of our {Back 2 Class} FAVORITES!  </div>
<div style="text-align: center;">.</div>
<div style="text-align: center;"></div>
<div style="text-align: center;">Reintroducing to you all - {Penelope}, {Autumn &amp; Alexandra} and {Harper &amp; Lulu}!!!</div>
<div style="text-align: center;">.</div>
<div style="text-align: center;"></div>
<div style="text-align: center;"><img src="//cdn.shopify.com/s/files/1/0144/4922/files/b2c1_2048x2048.jpg?v=1594999939" alt=""></div>
<div style="text-align: center;"></div>
<div style="text-align: center;">
<meta charset="utf-8">
<p> </p>
<h3> <span style="text-decoration: underline;">{Alexandra + Autumn} : A match made in heaven!</span>
</h3>
<p><img src="//cdn.shopify.com/s/files/1/0144/4922/files/14_97bf5d60-87b9-4ac5-993a-572a6858164d_1024x1024.jpg?v=1595026365" alt=""> </p>
<p><span>Alexandra is a vintage inspired beauty! The front of the bodice can have optional pin-tucks and the back of the bodice closes with buttons. Due to the drop waist style of the dress option, no placket is required. Alexandra has a darling </span><span>hand tied bow knot collar and includes two sleeve options: cap sleeve and 3/4 length sleeve with ruffle hem. </span>Alexandra can be made a drop waist dress or as a blouse that perfectly pairs with so many VFT Bottoms, including our favorite combo, the Autumn Pinafore. </p>
<p><img src="//cdn.shopify.com/s/files/1/0144/4922/files/alexandrameka_1024x1024.jpg?v=1595000136" alt=""></p>
<p><img src="//cdn.shopify.com/s/files/1/0144/4922/files/12_8fc21229-4edb-461a-a5d4-b8ac02162600_1024x1024.jpg?v=1595026583" alt=""></p>
<p><img src="//cdn.shopify.com/s/files/1/0144/4922/files/alexandrameka2_1024x1024.jpg?v=1595000175" alt=""></p>
<p><img src="//cdn.shopify.com/s/files/1/0144/4922/files/13_69948a6b-58c3-4aaf-94b9-229cf0ed4445_1024x1024.jpg?v=1595026636" alt=""></p>
<p> The Autumn Pinafore is a must have layering piece! Autumn features a sweet vintage length and high waist fit.  The straps are finished in the back with a crisscross basket weave tie back. Autumn is perfectly paired over a variety of VFT tops and dresses, including the Alexandra top/dress.</p>
<p><img src="//cdn.shopify.com/s/files/1/0144/4922/files/IMG_6373editedplaidSMALL_2048x2048.jpg?v=1595087225" alt=""></p>
<p><img src="//cdn.shopify.com/s/files/1/0144/4922/files/1_fe7a3a08-199e-4fe7-b0ad-398e9c4950b2_1024x1024.jpg?v=1594996793" alt=""></p>
<p><img src="//cdn.shopify.com/s/files/1/0144/4922/files/17_72fd0912-579f-4d1f-b16d-9466c5732cb8_1024x1024.jpg?v=1595026422" alt=""></p>
<p><img src="//cdn.shopify.com/s/files/1/0144/4922/files/2_6aeafda3-4f3b-4dd8-9ff8-3618bd7b92b8_1024x1024.jpg?v=1594996824" alt=""></p>
<p><img src="//cdn.shopify.com/s/files/1/0144/4922/files/18_41c1e9f0-c26e-4ad5-a6cd-8be8a6c86f65_1024x1024.jpg?v=1595026495" alt=""></p>
<p><img src="//cdn.shopify.com/s/files/1/0144/4922/files/5_37a23e07-73b3-47f3-a13b-f26e0fd9c239_1024x1024.jpg?v=1594996857" alt=""></p>
<p><img src="//cdn.shopify.com/s/files/1/0144/4922/files/16_f1cdb97b-36d0-45b4-9f16-002ebb29360f_1024x1024.jpg?v=1595026228" alt=""></p>
<p><img src="//cdn.shopify.com/s/files/1/0144/4922/files/6_027e5da1-93b6-4af2-a757-101e797db5aa_1024x1024.jpg?v=1594996956" alt=""></p>
<p> </p>
<h3><span style="text-decoration: underline;">{Harper + Lulu}: The Perfect Pair!</span></h3>
<p><img src="//cdn.shopify.com/s/files/1/0144/4922/files/BE3A5563_2048x2048.jpg?v=1595086645" alt=""> </p>
<meta charset="utf-8">
<p><span>Harper is a vintage inspired w</span><span>oven dolman dress with a round high neckline. The Harper bodice features front darts to allow for a tailored waistline. Harper can be sewn with short sleeve or an elbow length sleeve with a cute ruffle. Harper also includes an optional collar and waist sash. The Harper bodice closes with buttons down the back and has a skirt placket. Harper can be sewn as a top length or dress.</span></p>
<p><span style="text-decoration: underline;"><img src="//cdn.shopify.com/s/files/1/0144/4922/files/JH_L2_1024x1024.jpg?v=1594997679" alt=""></span></p>
<p><span style="text-decoration: underline;"><img src="//cdn.shopify.com/s/files/1/0144/4922/files/Jh_L_1024x1024.jpg?v=1594997844" alt=""></span></p>
</div>
<div style="text-align: center;">
<p><img src="//cdn.shopify.com/s/files/1/0144/4922/files/Jharper_1024x1024.jpg?v=1594997886" alt=""></p>
<p><img src="//cdn.shopify.com/s/files/1/0144/4922/files/Jharper2_1024x1024.jpg?v=1594997932" alt=""> </p>
<p><span>Lulu is a darling pinafore that layers wonderfully over your favorite Violette Field Threads dress, but we especially love Lulu layered over Harper. Lulu is a woven circle skirt high-waisted pinafore. The cute suspender style straps are held together in the back with either ribbon ties or a little button tab. Lulu features a short zipper closure in the back.</span></p>
<p> </p>
<p><span><img src="//cdn.shopify.com/s/files/1/0144/4922/files/h_l3_1024x1024.jpg?v=1594997984" alt=""></span></p>
<p><span><img src="//cdn.shopify.com/s/files/1/0144/4922/files/h_l_1024x1024.jpg?v=1594998022" alt=""></span></p>
<p><span><img src="//cdn.shopify.com/s/files/1/0144/4922/files/h_l2_1024x1024.jpg?v=1594998061" alt=""></span></p>
<p><span>These patterns are darling separately, but combined created an unbeatable combo!  And they are also available in our Tween size range as well!!!</span></p>
<p><span><img src="//cdn.shopify.com/s/files/1/0144/4922/files/EH_L_1024x1024.jpg?v=1594998296" alt=""></span></p>
<p><span><img src="//cdn.shopify.com/s/files/1/0144/4922/files/EH_L2_1024x1024.jpg?v=1594998325" alt=""></span></p>
</div>
<div style="text-align: center;"></div>
<div style="text-align: center;"><span style="text-decoration: underline;"></span></div>
<h3 style="text-align: center;"><span style="text-decoration: underline;">{Penelope} : A Classic Favorite! </span></h3>
<div style="text-align: center;"><span style="text-decoration: underline;"></span></div>
<div style="text-align: center;"><span style="text-decoration: underline;"><img src="//cdn.shopify.com/s/files/1/0144/4922/files/MekaPenelope2_1024x1024.jpg?v=1594998701" alt=""></span></div>
<div style="text-align: center;"><span style="text-decoration: underline;"><img src="//cdn.shopify.com/s/files/1/0144/4922/files/MekaPenelope_1024x1024.jpg?v=1594998741" alt=""></span></div>
<div style="text-align: center;"><span style="text-decoration: underline;"><img src="//cdn.shopify.com/s/files/1/0144/4922/files/amberp_1024x1024.jpg?v=1594999265" alt=""></span></div>
<div style="text-align: center;"><span style="text-decoration: underline;"></span></div>
<div style="text-align: center;">
<meta charset="utf-8">
<p> </p>
<p>Penelope is well known for our special occasion tulle skirt, but did you realize this one pattern also includes the every day version as well? It features a perfect peter pan collar that extends around to the bodice back. The front bodice has 4 pin-tucked rows and a waist sash with side ties. The back features button closure.</p>
<p>Penelope can either be made sleeveless or has two sleeve options: cap and 3/4 sleeves with bow details, making it the perfect dress year round and for all day school play!</p>
<p><img src="//cdn.shopify.com/s/files/1/0144/4922/files/penelope_1024x1024.jpg?v=1594999341" alt=""></p>
<p><img src="//cdn.shopify.com/s/files/1/0144/4922/files/BE3A0202_2048x2048.jpg?v=1595093569" alt=""></p>
<p><img src="//cdn.shopify.com/s/files/1/0144/4922/files/BE3A0212_2048x2048.jpg?v=1595093592" alt=""></p>
<p><img src="//cdn.shopify.com/s/files/1/0144/4922/files/BE3A0226_110ae419-bce8-4e5d-a0e2-62864052a385_2048x2048.jpg?v=1595093615" alt=""></p>
<p><img src="//cdn.shopify.com/s/files/1/0144/4922/files/hattiep_1024x1024.jpg?v=1594999386" alt=""></p>
<p><img src="//cdn.shopify.com/s/files/1/0144/4922/files/penelope2_1024x1024.jpg?v=1594999424" alt=""></p>
<p> Sooo what'll it be for you?!  Which of these is your favorite Back 2 Class style?!?!  Comment below and next week we will choose TWO people to win a Back 2 Class bundle of their choosing (2 patterns out of these 5 listed)!</p>
<p>As always, HAPPY SEWING!!!</p>
<p>🎉🎉🎉 CONGRATULATIONS to our winners: Carla Wisdom and Kim Babin!  We will send you an email so you can claim your prize!!  🎉🎉🎉 </p>
</div>
<div style="text-align: center;"></div>
<div style="text-align: center;"></div>]]>
    </content>
  </entry>
  <entry>
    <id>https://violettefieldthreads.com/blogs/theblog/misses-summer-mini-collection</id>
    <published>2020-07-15T13:03:00-05:00</published>
    <updated>2025-03-13T11:03:24-05:00</updated>
    <link rel="alternate" type="text/html" href="https://violettefieldthreads.com/blogs/theblog/misses-summer-mini-collection"/>
    <title>{Celine, Iris, Katia &amp; Faye} Misses Summer Mini Collection</title>
    <author>
      <name>Cassie M</name>
    </author>
    <summary type="html">
      <![CDATA[<p><img src="//cdn.shopify.com/s/files/1/0144/4922/files/11_83cfd70f-377e-461d-9e88-f40e0755a2ed_2048x2048.jpg?v=1594819660" alt=""></p>
<meta charset="utf-8">
<p style="text-align: center;"><span>We are SOOOOO excited to share with you our FIRST EVER Summer Misses Mini Collection!! Introducing Celine, Iris, Katia and Faye... the perfect styles to mix and match all summer long!</span></p><p><a class="read-more" href="https://violettefieldthreads.com/blogs/theblog/misses-summer-mini-collection">More</a></p>]]>
    </summary>
    <content type="html">
      <![CDATA[<p><img src="//cdn.shopify.com/s/files/1/0144/4922/files/11_83cfd70f-377e-461d-9e88-f40e0755a2ed_2048x2048.jpg?v=1594819660" alt=""></p>
<p style="text-align: center;">We are SOOOOO excited to share with you our FIRST EVER Summer Misses Mini Collection!! Introducing Celine, Iris, Katia and Faye... the perfect styles to mix and match all summer long! </p>
<p style="text-align: center;">We'll break down each new design, detailing out all of the pattern options and then we'll show how beautifully each piece can be paired and mixed and matched with the other pieces in the collection to create loads of stying options. </p>
<p style="text-align: center;">{CELINE}</p>
<p style="text-align: center;"><img src="//cdn.shopify.com/s/files/1/0144/4922/files/Celine-Misses-Sketch-_1_95a9514f-3f81-494e-bb36-5d51906ee5ed_1024x1024.jpg?v=1594824953" alt=""></p>
<meta charset="utf-8">
<p style="text-align: center;"><span>Our new {Celine} Top is a super trendy, cool and comfortable, knit top with sleeveless, cap or short sleeve options!! Celine can be sewn with plain front or you can also create the option for the chic front twist at the waist. Celine includes three length options: cropped, tee or tunic length, so you can choose which works best for your style! </span></p>
<p style="text-align: center;"><span>Celine pairs beautifully with the Katia Skirt, Iris Shorts or Iris Skirt!</span></p>
<p style="text-align: center;"> </p>
<p style="text-align: center;"><img src="//cdn.shopify.com/s/files/1/0144/4922/files/74_1024x1024.jpg?v=1594825056" alt=""></p>
<p style="text-align: center;"><img src="//cdn.shopify.com/s/files/1/0144/4922/files/78_1024x1024.jpg?v=1594825235" alt=""></p>
<p style="text-align: center;"> </p>
<p style="text-align: center;"><img src="//cdn.shopify.com/s/files/1/0144/4922/files/77_1024x1024.jpg?v=1594825188" alt=""></p>
<p style="text-align: center;">{IRIS}</p>
<p style="text-align: center;"><img src="//cdn.shopify.com/s/files/1/0144/4922/files/Iris-Misses-Sketch_27775c4f-5d88-4893-8c75-30cab854ddcf_1024x1024.jpg?v=1594826147" alt=""></p>
<meta charset="utf-8">
<p style="text-align: center;"><span>{Iris} is the perfect paper bag waist style skirt or shorts!!  With optional slash or rectangle pockets you definitely can't go wrong, and who doesn't love the optional  cute bow belt! The shorts can be cuffed or sewn with a facing for a clean finish. The skirt has the option for a faux button placket for extra detail (FAUX, you read that right - so no button holes)! Iris has an elastic waistband for easy fit and comfortable wear and pairs perfect with the Celine Top or Katia Top!</span></p>
<p style="text-align: center;"><span><img src="//cdn.shopify.com/s/files/1/0144/4922/files/5_46707909-8379-4dcd-892e-14ed7c1887a1_1024x1024.jpg?v=1594826362" alt=""></span></p>
<p style="text-align: center;"><span><img src="//cdn.shopify.com/s/files/1/0144/4922/files/3_b1582d6d-f288-45cb-87f6-4918e1459319_1024x1024.jpg?v=1594826410" alt=""></span></p>
<p style="text-align: center;"><span><img src="//cdn.shopify.com/s/files/1/0144/4922/files/4_52fa1a53-281a-4ffd-9a19-a2ecc72358a9_1024x1024.jpg?v=1594826475" alt=""></span></p>
<p style="text-align: center;"> {Katia}</p>
<p style="text-align: center;"><img src="//cdn.shopify.com/s/files/1/0144/4922/files/Katia-Misses-Sketch_da96f77e-13b8-4949-98d3-e6e3ef04ced4_1024x1024.jpg?v=1594826528" alt=""></p>
<meta charset="utf-8">
<p style="text-align: center;"><span>{Katia} is one gorgeous, breezy pattern with so many options!  It can be used to create a top, a skirt and/or a dress!!  The top features a gorgeous square neckline, adjustable straps and pairs great with the Katia skirt or Iris! The skirt &amp; dress can be sewn as a mini, knee length or maxi length. Katia Maxi has the option for a simple skirt or a *five* tier skirt that graduates in length and width for a really spectacular style! The Katia skirt &amp; dress has an elastic waistband for easy fit and comfortable wear.</span></p>
<p style="text-align: center;"><img src="//cdn.shopify.com/s/files/1/0144/4922/files/1_b8e4215f-74f4-408d-8cf6-054c39c08c05_1024x1024.jpg?v=1594830037" alt=""></p>
<p style="text-align: center;"><img src="//cdn.shopify.com/s/files/1/0144/4922/files/8_e42661de-1507-444c-9276-ef94ab459990_1024x1024.jpg?v=1594830284" alt=""></p>
<p style="text-align: center;"><img src="//cdn.shopify.com/s/files/1/0144/4922/files/15_2f319216-d870-4925-bfef-8914201c2648_1024x1024.jpg?v=1594830471" alt=""> </p>
<p style="text-align: center;">{Faye}</p>
<meta charset="utf-8">
<p style="text-align: center;"><span>To wrap up our first Misses Mini collection, what better than the Faye Headband? This elastic back headband features a super cute twist detail. Faye pairs perfectly with the entire collection and is great for keeping your hair back during workouts, while removing or applying makeup and is super stylish for everyday wear!</span></p>
<p style="text-align: center;"><span><img src="//cdn.shopify.com/s/files/1/0144/4922/files/6_36ab9661-eff1-4fc3-b7d0-e1c093b9372a_1024x1024.jpg?v=1594830739" alt=""></span></p>
<meta charset="utf-8">
<div class="_2cuy _3dgx _2vxa" style="text-align: center;">We've designed this Mini Collection to mix and match to easily fill your summer closet in a matter of a few quick sews! All three styles are great for beginners, sew up with very little notions and can be constructed in a jiffy! HOW COOL IS THAT?!?! Check out how Cassie shows these new patterns to create 8 pieces resulting in 17 different looks!</div>
<div class="_2cuy _3dgx _2vxa" style="text-align: center;">
<img src="//cdn.shopify.com/s/files/1/0144/4922/files/look1_grande.jpg?v=1594830918" alt=""><img src="//cdn.shopify.com/s/files/1/0144/4922/files/look2_grande.jpg?v=1594830992" alt="">
</div>
<div class="_2cuy _3dgx _2vxa" style="text-align: center;">
<img src="//cdn.shopify.com/s/files/1/0144/4922/files/look3_grande.jpg?v=1594831033" alt=""><img src="//cdn.shopify.com/s/files/1/0144/4922/files/look4_grande.jpg?v=1594831411" alt=""><img src="//cdn.shopify.com/s/files/1/0144/4922/files/look5_grande.jpg?v=1594831456" alt=""><img src="//cdn.shopify.com/s/files/1/0144/4922/files/look6_grande.jpg?v=1594831494" alt=""><img src="//cdn.shopify.com/s/files/1/0144/4922/files/look7_grande.jpg?v=1594831629" alt=""><img src="//cdn.shopify.com/s/files/1/0144/4922/files/look8_grande.jpg?v=1594831691" alt=""><img src="//cdn.shopify.com/s/files/1/0144/4922/files/look9_grande.jpg?v=1594831740" alt=""><img src="//cdn.shopify.com/s/files/1/0144/4922/files/look10_grande.jpg?v=1594831783" alt=""><img src="//cdn.shopify.com/s/files/1/0144/4922/files/look11_grande.jpg?v=1594831822" alt=""><img src="//cdn.shopify.com/s/files/1/0144/4922/files/look12_grande.jpg?v=1594831872" alt=""><img src="//cdn.shopify.com/s/files/1/0144/4922/files/look13_grande.jpg?v=1594831910" alt=""><img src="//cdn.shopify.com/s/files/1/0144/4922/files/look14_grande.jpg?v=1594831959" alt=""><img src="//cdn.shopify.com/s/files/1/0144/4922/files/look15_grande.jpg?v=1594831997" alt=""><img src="//cdn.shopify.com/s/files/1/0144/4922/files/look16_grande.jpg?v=1594832034" alt=""><img src="//cdn.shopify.com/s/files/1/0144/4922/files/look17_grande.jpg?v=1594832070" alt="">
</div>
<div class="_2cuy _3dgx _2vxa" style="text-align: center;">But wait...<span class="_4yxo">IT GETS BETTER!!! </span>Katia, Iris and Celine were our first ever patterns to  include the A0 printing option <span class="_5mfr"><span class="_6qdm">🙌</span></span><span class="_5mfr"><span class="_6qdm">🌟</span></span><span class="_5mfr"><span class="_6qdm">🎉</span></span><span class="_5mfr"><span class="_6qdm">👏</span></span> (both A0 and our standard layered printing from home format option are available in your download!) </div>
<div class="_2cuy _3dgx _2vxa" style="text-align: center;"></div>
<div class="_2cuy _3dgx _2vxa" style="text-align: center;">So what are you waiting for?!?!  Now is the perfect time to create your own capsule wardrobe with these perfect summer Misses pieces, and we cannot wait to see your lovely creations!</div>
<div class="_2cuy _3dgx _2vxa" style="text-align: center;">As always - Happy Sewing!!</div>]]>
    </content>
  </entry>
  <entry>
    <id>https://violettefieldthreads.com/blogs/theblog/after-the-storm-june-rainbow-tutorial</id>
    <published>2020-06-29T12:58:00-05:00</published>
    <updated>2025-03-13T11:05:37-05:00</updated>
    <link rel="alternate" type="text/html" href="https://violettefieldthreads.com/blogs/theblog/after-the-storm-june-rainbow-tutorial"/>
    <title>{After the Storm} June Rainbow Tutorial</title>
    <author>
      <name>Jessica Herning</name>
    </author>
    <summary type="html">
      <![CDATA[<p><img src="//cdn.shopify.com/s/files/1/0144/4922/files/After_the_storm2_2048x2048.jpg?v=1592520229" alt=""></p>
<meta charset="utf-8">
<div style="text-align: center;"><span>Only a couple of weeks ago, we released our beloved June dress pattern in extended size ranges. When our June pattern originally released a few years ago, it was only available in Children (2-10 years) and 18" doll sizing. Now, June is available in Baby (0-24 months), Tween (10-16 years), and Misses (00-20) sizing!</span></div>
<div style="text-align: center;"><span>With the release of these additional size ranges, our tester team got busy (and creative) while sewing up our June pattern. One of our testers, Laura Hilton, created an absolutely STUNNING June that received lots of admiration and praise! We have had dozens of inquires into the modifications she made to create this jaw dropping masterpiece.</span></div><p><a class="read-more" href="https://violettefieldthreads.com/blogs/theblog/after-the-storm-june-rainbow-tutorial">More</a></p>]]>
    </summary>
    <content type="html">
      <![CDATA[<p><img src="//cdn.shopify.com/s/files/1/0144/4922/files/after_the_storm5_2048x2048.jpg?v=1592517590" alt=""></p>
<p style="text-align: center;"><span style="font-weight: 400;">Only a couple of weeks ago, we released our beloved June dress pattern in extended size ranges. When our June pattern originally released a few years ago, it was only available in Children (2-10 years) and 18" doll sizing. Now, June is available in Baby (0-24 months), Tween (10-16 years), and Misses (00-20) sizing! </span></p>
<p style="text-align: center;"><span style="font-weight: 400;">With the release of these additional size ranges, our tester team got busy (and creative) while sewing up our June pattern. One of our testers, Laura Hilton, created an absolutely STUNNING June that received lots of admiration and praise! We have had dozens of inquires into the modifications she made to create this jaw dropping masterpiece. </span></p>
<p style="text-align: center;"><span style="font-weight: 400;">Laura has graciously agreed to create a blog tutorial detailing out her modifications! So without further adieu, we give over the VFT Blog to Laura!!!</span></p>
<p style="text-align: center;"><span style="font-weight: 400;">Laura: </span></p>
<p style="text-align: center;"><span style="font-weight: 400;">"Hello everyone! I am so excited to share my "After the Storm" rainbow version of the June dress with all of you today! This dress means so much to me. Rainbows have always been a symbol of hope to me. Hope for the beauty of things to come after we weather the storm.</span></p>
<p style="text-align: center;"><span style="font-weight: 400;"><img src="//cdn.shopify.com/s/files/1/0144/4922/files/After_the_storm8_2048x2048.jpg?v=1592518209" alt=""></span></p>
<div style="text-align: center;"><span style="font-weight: 400;">I used the "June" pattern, by Violette Field Threads, and made a few simple modifications, which I'm happy to share! First, I modified the front and back bodice. On the front, I cut small strips of rainbow and topstitched them on in a V shape. On the back, I overlaid the rainbow strip fabric over the main fabric, curving the rainbow fabric around the signature June back opening. Then I enlarged the back bodice ties and shaped them to create a big bow. Lastly, I paneled the skirt with the rainbow fabric to balance the skirt with the top. </span></div>
<div style="text-align: center;"><span style="font-weight: 400;"></span></div>
<div style="text-align: center;">To create this look, you are going to need a few things:</div>
<div style="text-align: center;"><span style="font-weight: 400;"> </span></div>
<div style="text-align: center;">
<span style="font-weight: 400;">The </span><a href="https://violettefieldthreads.com/products/june-dress"><span style="font-weight: 400;">VFT June pattern</span></a><span style="font-weight: 400;"> (and all supplies listed in the pattern)</span>
</div>
<div style="text-align: center;">
<span style="font-weight: 400;">The </span><a href="https://violettefieldthreads.com/products/sleeve-basics"><span style="font-weight: 400;"> VTF sleeve basics pattern</span></a>
</div>
<div style="text-align: center;"><span style="font-weight: 400;">The main fabric (I used small polka dots)</span></div>
<div style="text-align: center;"><span style="font-weight: 400;">The rainbow fabric (44” for bigger girls sizes)</span></div>
<div style="text-align: center;"><span style="font-weight: 400;">Thread in coordinating colors to your rainbow</span></div>
<div style="text-align: center;"><span style="font-weight: 400;">Square Omnigrid</span></div>
<div style="text-align: center;"><span style="font-weight: 400;">Chalk Pencil</span></div>
<div style="text-align: center;"><span style="font-weight: 400;"></span></div>
<div style="text-align: center;"><span style="font-weight: 400;"><img src="//cdn.shopify.com/s/files/1/0144/4922/files/DSC01633_1024x1024.jpg?v=1592518303" alt=""></span></div>
<div style="text-align: center;"><span style="font-weight: 400;"><img src="//cdn.shopify.com/s/files/1/0144/4922/files/DSC01653_1024x1024.jpg?v=1592518359" alt=""></span></div>
<div style="text-align: center;">
<p><span style="font-weight: 400;">Start by cutting out the rainbow fabric:</span></p>
<p><span style="font-weight: 400;">- (2) 8.5” x 44” rainbow strips. These pieces will be used on the skirt.  </span></p>
<p><span style="font-weight: 400;">- (3) 4.75” x 44” rainbow strips. These pieces will be used for the back bodice and back bodice ties.</span></p>
<p><span style="font-weight: 400;">- (2) individual strips of *each* of the colors in the rainbow fabric. These strips for the front ruffled V shapes. (I used 6 color strips, but you can use any you determine based on your personal preference.)</span></p>
<p><span style="font-weight: 400;"><img src="//cdn.shopify.com/s/files/1/0144/4922/files/DSC01651_2048x2048.jpg?v=1592518444" alt=""></span></p>
<p><span style="font-weight: 400;"><b>Creating the Bodice Back Rainbow</b></span></p>
<p><span style="font-weight: 400;">Depending on the rainbow fabric you are using, you might need to make a slight modification to the back bodice pattern pieces. It is easiest to do this before you cut the back bodice pattern piece out. My rainbow fabric was a little wider than the back bodice pattern piece, so I made the back opening slightly smaller to accommodate all of the colors of the rainbow fabric. First, cut out the rainbow at the width you would like and lay it over the top of the bodice back pattern piece. If the fabric is wider than the back bodice, draw out the needed extra width, making the adjustments to the opening in the back, not the side seam. Remember, if adjust the back opening, you will need to adjust the elastic back panel, decreasing it by the same amount you increased the back bodice.</span></p>
<p><img src="//cdn.shopify.com/s/files/1/0144/4922/files/DSC01659_2048x2048.jpg?v=1592518536" alt=""></p>
<p><span style="font-weight: 400;">Now cut out the main fabric as instructed in the June pattern. To create the back </span><span style="font-weight: 400;">rainbow, lay the rainbow fabric on top of the main fabric. Both the main fabric and the rainbow fabric will be facing up. </span></p>
<p><span style="font-weight: 400;"><img src="//cdn.shopify.com/s/files/1/0144/4922/files/DSC01664_1_2048x2048.jpg?v=1592518895" alt=""></span></p>
<p><span style="font-weight: 400;">Next tuck and pleat your rainbow fabric so it fits along the curve of the bodice back main fabric. Press the pleats as you go, being sure that the colors are lining up. </span></p>
<p><span style="font-weight: 400;"><img src="//cdn.shopify.com/s/files/1/0144/4922/files/DSC01677_2048x2048.jpg?v=1592518966" alt=""></span></p>
<p><span style="font-weight: 400;">Now repeat this process for the other side. It is easiest if you place the side seam sides together.</span></p>
<p><span style="font-weight: 400;"><img src="//cdn.shopify.com/s/files/1/0144/4922/files/DSC01684_1024x1024.jpg?v=1592519041" alt=""></span></p>
<p> </p>
<p><span style="font-weight: 400;">Now, pin down your pleats and top stitch them down, making sure to line up the colors. </span></p>
<p><span style="font-weight: 400;"><img src="//cdn.shopify.com/s/files/1/0144/4922/files/DSC01692_2048x2048.jpg?v=1592519119" alt=""></span></p>
<p><span style="font-weight: 400;">It is easiest to start with the inside stripe and work your way out to the outside stripe, nearest the side seam. When you get to the outside stripe, you will need to tuck and iron it under so that the top stitch will hold it down. As you can see from the picture, this is the top part of the curve, and the raw edges would have been exposed on the back bodice. Once all of the stripes of the rainbow are all stitched down, turn the pieces over and cut away any extra rainbow fabric that extends past the main back bodice fabric. </span></p>
<p><img src="//cdn.shopify.com/s/files/1/0144/4922/files/DSC01694_2048x2048.jpg?v=1592519182" alt=""></p>
<p> </p>
<p><span style="font-weight: 400;">Now the back bodice pieces are ready and you can treat them just how you would following the June pattern.</span></p>
<p><span style="font-weight: 400;"><img src="//cdn.shopify.com/s/files/1/0144/4922/files/After_the_storm1_2048x2048.jpg?v=1592519269" alt=""></span></p>
<p><b>Creating the Ruffled Vs on the Front Bodice:</b></p>
<p><span style="font-weight: 400;">To create the ruffled Vs on the front bodice, start by cutting out the individual stripes from the rainbow fabric into strips. I would have preferred to be able to cut the strips on the bias, but I really loved the colors in this fabric, and it was printed horizontal. If you are using a different fabric that allows for the strips to be cut on the bias, I suggest doing that. Cutting on the bias will cause the raw edges to chenille up, rather than fray. I left my edges raw, as I like the frayed edge look.</span></p>
<p><span style="font-weight: 400;">Cut (2) of each individual color stripe and stack the matching strips together with the wrong sides touching (the right sides will be showing on the outside). Then run a gathering stitch down the center of the strip and pull the top thread to gather the ruffle. You will want to use thread colors that coordinate with each color strip.</span></p>
<p> <img src="//cdn.shopify.com/s/files/1/0144/4922/files/DSC01701_2048x2048.jpg?v=1592519357" alt=""></p>
<p><span style="font-weight: 400;">Prep the bodice front main by folding it in half widthwise and press it with an iron to create a guide line down the front center. Using the Square Omnigrid and a washable pencil, draw on the lines you will use as a guide to place your ruffles. I used a 30 degree angle, but you may want to adjust your angle depending on the size you are making and your preference for the finished look.</span></p>
<p><span style="font-weight: 400;"><img src="//cdn.shopify.com/s/files/1/0144/4922/files/DSC01696_1024x1024.jpg?v=1592519468" alt=""></span></p>
<p> </p>
<p> <span style="font-weight: 400;">Carefully pin the ruffle to the bodice and use a zigzag stitch to secure it to the bodice. Make sure the raw edges of the strips are lined up with the raw edge of the bodice so they get caught in the seam allowance. Repeat this step for each color strip.  </span></p>
<p><img src="//cdn.shopify.com/s/files/1/0144/4922/files/DSC01704_2048x2048.jpg?v=1592519551" alt=""></p>
<p><span style="font-weight: 400;">Now follow the June pattern for the bodice front main.</span></p>
<p><b>Creating the Bow Ties</b></p>
<p><span style="font-weight: 400;">To create the ties, fold one of your 4.75” strips in half lengthwise and sketch out the bow shape. One side of your ties will be about an inch longer at the beginning before it goes wide for the bow part. Sew the right sides together, trimming away any excess, and turn the bow right side out. Repeat for the remaining bow tie.</span></p>
<p><img src="//cdn.shopify.com/s/files/1/0144/4922/files/DSC01707_2048x2048.jpg?v=1592519633" alt=""> </p>
<p> <span style="font-weight: 400;">Top stitch through the colors. </span></p>
<p><img src="//cdn.shopify.com/s/files/1/0144/4922/files/DSC01710_2048x2048.jpg?v=1592519690" alt=""></p>
<p><span style="font-weight: 400;">Make sure you line the color stripes on the ties up with the stripes on the ties.  Attach the ties following the June pattern.</span></p>
<p><span style="font-weight: 400;"><img src="//cdn.shopify.com/s/files/1/0144/4922/files/DSC01643_2048x2048.jpg?v=1592519806" alt=""></span></p>
<meta charset="utf-8">
<p><b>Creating the Paneled Skirt</b> </p>
<p><span style="font-weight: 400;">The last two (8.5”x44”) strips will be attached to the bottom of the skirt. I used 8.5" for the size I was making, but you may want to shorten or lengthen this based on the size you are sewing. When you cut the main skirt front and back, make sure to cut it shorter than the pattern calls for to reflect the amount the rainbow strips will add. </span></p>
<meta charset="utf-8">
<p><span style="font-weight: 400;">I also used the<span> </span></span><a href="https://violettefieldthreads.com/products/sleeve-basics"><span style="font-weight: 400;">VFT sleeves basic curved cap sleeve</span></a><span style="font-weight: 400;"><span> </span>and the<span> </span></span><a href="https://violettefieldthreads.com/blogs/theblog/70745541-inseam-pockets-how-to-add-inseam-pockets-to-any-pattern-free-pocket-pattern"><span style="font-weight: 400;">inseam pocket tutorial</span></a><span style="font-weight: 400;"><span> </span>to create this dress.</span></p>
<p><br><span style="font-weight: 400;">I hope this tutorial helps any who would like to create their own "After the Storm" Rainbow June dress.</span><span style="font-weight: 400;">" - Laura Hilton</span></p>
<p><span style="font-weight: 400;"><img src="//cdn.shopify.com/s/files/1/0144/4922/files/After_the_Storm_2048x2048.jpg?v=1592520127" alt=""></span></p>
<p><span style="font-weight: 400;"><img src="//cdn.shopify.com/s/files/1/0144/4922/files/After_the_storm2_2048x2048.jpg?v=1592520229" alt=""> </span></p>
<p>We hope you enjoyed this beautiful tutorial created by Laura - one of our amazing testers on our team! Isn't this dress jaw-droppingly beautiful?! If you are on instagram, we would love for you to give her account a follow and let her know how amazing she is! You can follow her at @littlebonniebelle </p>
<p>We cannot wait to see what you all create with her lovely hacks! </p>
<p>As always, Happy Sewing!!</p>
<p> </p>
</div>
<div style="text-align: center;"><span style="font-weight: 400;"></span></div>
<div style="text-align: center;"><span style="font-weight: 400;"></span></div>]]>
    </content>
  </entry>
  <entry>
    <id>https://violettefieldthreads.com/blogs/theblog/re-introducing-june</id>
    <published>2020-06-25T10:45:00-05:00</published>
    <updated>2025-03-13T11:07:17-05:00</updated>
    <link rel="alternate" type="text/html" href="https://violettefieldthreads.com/blogs/theblog/re-introducing-june"/>
    <title>Re-Introducing {June}</title>
    <author>
      <name>Ericka Wright</name>
    </author>
    <summary type="html">
      <![CDATA[<p><img src="//cdn.shopify.com/s/files/1/0144/4922/files/2_d3c9e9cd-40fa-410f-bfbd-dad34e5162fe_2048x2048.jpg?v=1592925341" alt=""></p>
<meta charset="utf-8">
<div style="text-align: center;">Hey, hey Friends!  You asked, and we answered! </div>
<div style="text-align: center;">Our {June} pattern has been a classic summer staple for the past few years, but was originally only available in our girls (2-10 yrs) and doll size range.  Well, after multiple requests, comments and emails, we have expanded our catalog to include our June pattern in all our size ranges - Baby (0-24m), Girls (2-10yrs), Tween (10-16) AND Misses (00-20)!!</div><p><a class="read-more" href="https://violettefieldthreads.com/blogs/theblog/re-introducing-june">More</a></p>]]>
    </summary>
    <content type="html">
      <![CDATA[<p style="text-align: left;"><img alt="" src="//cdn.shopify.com/s/files/1/0144/4922/files/1_592542eb-2859-461a-9370-d7199860657a_2048x2048.jpg?v=1593012572" style="display: block; margin-left: auto; margin-right: auto; float: none;"></p>
<p style="text-align: center;">Hey, hey Friends!  You asked, and we answered! </p>
<p style="text-align: center;">Our {June} pattern has been a classic summer staple for the past few years, but was originally only available in our girls (2-10 yrs) and doll size range.  Well, after multiple requests, comments and emails, we have expanded our catalog to include our June pattern in all our size ranges - Baby (0-24m), Girls (2-10yrs), Tween (10-16) AND Misses (00-20)!!</p>
<p style="text-align: center;"><img src="//cdn.shopify.com/s/files/1/0144/4922/files/7_f952e86e-528c-4e4a-8f2b-70d0730a3e77_2048x2048.jpg?v=1593012389" alt=""></p>
<p style="text-align: center;"><img src="//cdn.shopify.com/s/files/1/0144/4922/files/2_d3c9e9cd-40fa-410f-bfbd-dad34e5162fe_2048x2048.jpg?v=1592925341" alt=""></p>
<p style="text-align: center;"><img src="//cdn.shopify.com/s/files/1/0144/4922/files/5_49153efe-5610-47f6-bb8f-df5c6972a892_2048x2048.jpg?v=1593012598" alt=""></p>
<p style="text-align: center;"><img src="//cdn.shopify.com/s/files/1/0144/4922/files/44_1024x1024.jpg?v=1593014081" alt=""></p>
<p style="text-align: center;"><img src="//cdn.shopify.com/s/files/1/0144/4922/files/22_2483845d-6342-4987-8b8c-356d589144e1_1024x1024.jpg?v=1593013056" alt=""></p>
<p style="text-align: center;"><img src="//cdn.shopify.com/s/files/1/0144/4922/files/23_26ea3122-1404-4414-bd06-1f302e50a38c_1024x1024.jpg?v=1593013083" alt=""></p>
<p style="text-align: center;"><img src="//cdn.shopify.com/s/files/1/0144/4922/files/24_73ebd3cc-eaa9-4b6c-95c9-9ec2c17d0e69_1024x1024.jpg?v=1593013111" alt=""></p>
<p style="text-align: center;"><img src="//cdn.shopify.com/s/files/1/0144/4922/files/35_1024x1024.jpg?v=1593013395" alt=""></p>
<p style="text-align: center;"><img src="//cdn.shopify.com/s/files/1/0144/4922/files/22_f35be5eb-88f5-470c-9449-fd78c697d544_1024x1024.jpg?v=1593013449" alt=""></p>
<p style="text-align: center;"><img src="//cdn.shopify.com/s/files/1/0144/4922/files/4_0baeaf52-a37e-481e-9fe7-7fd61f339282_1024x1024.jpg?v=1593013508" alt=""></p>
<p style="text-align: center;"><img src="//cdn.shopify.com/s/files/1/0144/4922/files/50_1024x1024.jpg?v=1593013535" alt=""></p>
<p style="text-align: center;"> </p>
<p style="text-align: center;"> Not only is the June pattern now available in these expanded size ranges, but we have also included a few new options, including two new back options for the Tween and  Misses sizes. </p>
<p style="text-align: center;"><img src="//cdn.shopify.com/s/files/1/0144/4922/files/June-Misses-Sketch_1138151e-dc50-4bf7-ab72-3c7238a61ab4_2048x2048.jpg?v=1593012822" alt=""></p>
<p style="text-align: center;"> </p>
<p style="text-align: center;">The open back is the traditional style for our June dress and DOES hide the bottom band of your  bra, so you can easily wear a strapless bra with it!  Or, if you prefer  more coverage, you can sew up the partial open back that covers straps for a normal bra or even the fully closed back with a zipper option!   </p>
<p style="text-align: center;">We also made a few additions to the skirt! ALL SIZES of June now include the option to make a simple gathered skirt in addition to the paneled skirt pockets. Both skirts feature vintage and knee lengths as well. So many choices all in one amazing pattern!  </p>
<p style="text-align: center;"><img src="//cdn.shopify.com/s/files/1/0144/4922/files/7_930fdb0c-7175-4c95-acbb-2fa73565d1a0_1024x1024.jpg?v=1593012912" alt=""></p>
<p style="text-align: center;"><img src="//cdn.shopify.com/s/files/1/0144/4922/files/13_cad27d65-37c3-4625-bc5a-ca56c4d23a00_1024x1024.jpg?v=1593012949" alt=""></p>
<p style="text-align: center;"><img src="//cdn.shopify.com/s/files/1/0144/4922/files/5_b245eadc-eb10-4288-bee3-41b6bec79303_1024x1024.jpg?v=1593012972" alt=""></p>
<p style="text-align: center;">It has never been easier to create precious Mommy &amp; Me sets now that we have June Available in all size ranges from Doll up to our Misses!  And to top it off, June was chosen as the pattern for our July Sew Along coming up soon!  So if you have ever wanted to try this pattern out, now is definitely the time! </p>
<p style="text-align: center;"><img src="//cdn.shopify.com/s/files/1/0144/4922/files/8_42d2ba57-8585-4229-8078-d68eab797bcb_2048x2048.jpg?v=1593013749" alt=""></p>
<p style="text-align: center;"><img src="//cdn.shopify.com/s/files/1/0144/4922/files/4_e3869ed0-cd75-4bad-8529-e12bcaf5c679_2048x2048.jpg?v=1593013695" alt=""></p>
<p style="text-align: center;"><img src="//cdn.shopify.com/s/files/1/0144/4922/files/10_3bd0141c-6570-4f62-a5d5-74837cb6adb5_2048x2048.jpg?v=1593013726" alt=""></p>
<meta charset="utf-8">
<p style="text-align: center;"><span>We're dying to know, which size are you the most excited to sew up?!  </span></p>
<p style="text-align: center;"><span>And just a little hint, we have an extra special guest blog coming up soon with details for a certain "magical" June one of our testers created!  Trust me, you are not going to want to miss it, so stay tuned!!!</span></p>
<p style="text-align: center;"><span><img src="//cdn.shopify.com/s/files/1/0144/4922/files/DSC01643_2048x2048.jpg?v=1592519806" alt=""></span></p>
<p style="text-align: center;"> </p>
<p style="text-align: center;"> </p>]]>
    </content>
  </entry>
  <entry>
    <id>https://violettefieldthreads.com/blogs/theblog/introducing-viola</id>
    <published>2020-06-09T15:07:00-05:00</published>
    <updated>2020-06-09T15:07:38-05:00</updated>
    <link rel="alternate" type="text/html" href="https://violettefieldthreads.com/blogs/theblog/introducing-viola"/>
    <title>{Introducing} Viola</title>
    <author>
      <name>Ericka Wright</name>
    </author>
    <summary type="html">
      <![CDATA[<p><img src="//cdn.shopify.com/s/files/1/0144/4922/files/0J9A0107_2048x2048.jpg?v=1590766524" alt=""></p>
<meta charset="utf-8">
<p><span>Hey Friends!!  How are you all holding up?!  Summer is just around the corner, can you feel it?!  Time to break out of all this isolation and  get some fresh air (at a distance from everyone else of course 😁).  And we have the perfect new pattern to celebrate with: introducing {Viola}!</span></p><p><a class="read-more" href="https://violettefieldthreads.com/blogs/theblog/introducing-viola">More</a></p>]]>
    </summary>
    <content type="html">
      <![CDATA[<p><img src="//cdn.shopify.com/s/files/1/0144/4922/files/0J9A0107_2048x2048.jpg?v=1590766524" alt=""></p>
<p>Hey Friends!!  How are you all holding up?!  Summer is just around the corner, can you feel it?!  Time to break out of all this isolation and  get some fresh air (at a distance from everyone else of course 😁).  And we have the perfect new pattern to celebrate with: introducing {Viola}!</p>
<p><img src="//cdn.shopify.com/s/files/1/0144/4922/files/0J9A0013_1_2048x2048.jpg?v=1590768635" alt=""></p>
<p><img src="//cdn.shopify.com/s/files/1/0144/4922/files/0J9A0190_2048x2048.jpg?v=1590768705" alt=""></p>
<p><img src="//cdn.shopify.com/s/files/1/0144/4922/files/0J9A0157_2048x2048.jpg?v=1590768741" alt=""> </p>
<meta charset="utf-8">
<div class="_2cuy _3dgx" data-block="true" data-editor="7dc0j" data-offset-key="22lah-0-0">
<div data-offset-key="22lah-0-0" class="_1mf _1mj"><span data-offset-key="22lah-0-0">Viola is the sweetest little sundress AND romper pattern...yes, yes you read that right - one pattern with option for a sundress or romper!!!!  How awesome is that? It is available in baby, girls and doll sizes, so summertime sews are definitely going to be easy to coordinate if you have multiple little ones!  </span></div>
<div data-offset-key="22lah-0-0" class="_1mf _1mj"><span data-offset-key="22lah-0-0"></span></div>
<div data-offset-key="22lah-0-0" class="_1mf _1mj"><img src="//cdn.shopify.com/s/files/1/0144/4922/files/IMG_3900_1024x1024.JPG?v=1590770526" alt=""></div>
<div data-offset-key="22lah-0-0" class="_1mf _1mj"><img src="//cdn.shopify.com/s/files/1/0144/4922/files/IMG_3926_1024x1024.JPG?v=1590770580" alt=""></div>
<div data-offset-key="22lah-0-0" class="_1mf _1mj"><img src="//cdn.shopify.com/s/files/1/0144/4922/files/IMG_3936_1_1024x1024.JPG?v=1590770615" alt=""></div>
<div data-offset-key="22lah-0-0" class="_1mf _1mj"><span data-offset-key="22lah-0-0"></span></div>
<div data-offset-key="22lah-0-0" class="_1mf _1mj">
<meta charset="utf-8">
<div data-offset-key="22lah-0-0" class="_1mf _1mj">
<span data-offset-key="22lah-0-0">Viola features a delicate hi/low shape to the front bodice, with simple straps to allow for all day play without fussy sleeves or risk of overheating.  You can create the bodice plain, with a flounce, or create a plain bodice with a mini waist ruffle!  </span>Viola also features an elastic back panel for easy fit and comfortable wear!!<br><span data-offset-key="22lah-0-0"></span>
</div>
</div>
<div data-offset-key="22lah-0-0" class="_1mf _1mj"><span data-offset-key="22lah-0-0"></span></div>
<div data-offset-key="22lah-0-0" class="_1mf _1mj"><span data-offset-key="22lah-0-0"><img src="//cdn.shopify.com/s/files/1/0144/4922/files/0515_1_1024x1024.jpg?v=1590770026" alt=""></span></div>
<div data-offset-key="22lah-0-0" class="_1mf _1mj"><span data-offset-key="22lah-0-0"><img src="//cdn.shopify.com/s/files/1/0144/4922/files/0515_7_1024x1024.jpg?v=1590770131" alt=""></span></div>
<div data-offset-key="22lah-0-0" class="_1mf _1mj"><span data-offset-key="22lah-0-0"><img src="//cdn.shopify.com/s/files/1/0144/4922/files/0515_32_1_1024x1024.jpg?v=1590770182" alt=""></span></div>
<div data-offset-key="22lah-0-0" class="_1mf _1mj"></div>
</div>
<div class="_2cuy _3dgx" data-block="true" data-editor="7dc0j" data-offset-key="d4el4-0-0">
<div data-offset-key="d4el4-0-0" class="_1mf _1mj">Whether you decide to create your first Viola as a cropped romper for all-day play and exploration, or create the dress option for a little more of a fancy look, this will definitely be a pattern you are coming back to use, over and over again!  Oh, and did I mention, it also includes optional side seam pockets?! YAAASSS!!!!</div>
<div data-offset-key="d4el4-0-0" class="_1mf _1mj"><img src="//cdn.shopify.com/s/files/1/0144/4922/files/IMG_5777_2048x2048.gif?v=1590770860" alt=""></div>
<div data-offset-key="d4el4-0-0" class="_1mf _1mj"><img src="//cdn.shopify.com/s/files/1/0144/4922/files/IMG_5786_2048x2048.gif?v=1590770886" alt=""></div>
<div data-offset-key="d4el4-0-0" class="_1mf _1mj"><img src="//cdn.shopify.com/s/files/1/0144/4922/files/IMG_5771_fb_2048x2048.gif?v=1590770912" alt=""></div>
<div data-offset-key="d4el4-0-0" class="_1mf _1mj">We'd love to know in the comments below - which option are you going to sew up first!?!?  Such a hard choice, am I right?!</div>
<div data-offset-key="d4el4-0-0" class="_1mf _1mj"></div>
<div data-offset-key="d4el4-0-0" class="_1mf _1mj">As always, Happy Sewing!!</div>
<div data-offset-key="d4el4-0-0" class="_1mf _1mj"><img src="//cdn.shopify.com/s/files/1/0144/4922/files/BE3A9536_1_2048x2048.jpg?v=1591732934" alt=""></div>
<div data-offset-key="d4el4-0-0" class="_1mf _1mj"><img src="//cdn.shopify.com/s/files/1/0144/4922/files/BE3A9390_1_2048x2048.jpg?v=1591732997" alt=""></div>
<div data-offset-key="d4el4-0-0" class="_1mf _1mj"><img src="//cdn.shopify.com/s/files/1/0144/4922/files/BE3A9485_1_2048x2048.jpg?v=1591733030" alt=""></div>
<div data-offset-key="d4el4-0-0" class="_1mf _1mj"><img src="//cdn.shopify.com/s/files/1/0144/4922/files/BE3A9306_1_2048x2048.jpg?v=1591733071" alt=""></div>
<div data-offset-key="d4el4-0-0" class="_1mf _1mj"></div>
</div>]]>
    </content>
  </entry>
  <entry>
    <id>https://violettefieldthreads.com/blogs/theblog/soak-up-the-sun-swim-giveeaway</id>
    <published>2020-06-06T10:14:00-05:00</published>
    <updated>2020-06-11T10:26:13-05:00</updated>
    <link rel="alternate" type="text/html" href="https://violettefieldthreads.com/blogs/theblog/soak-up-the-sun-swim-giveeaway"/>
    <title>{Soak Up the Sun} Swim Giveaway!</title>
    <author>
      <name>Jessica Herning</name>
    </author>
    <summary type="html">
      <![CDATA[<p><img src="//cdn.shopify.com/s/files/1/0144/4922/files/Soakupthesun_2048x2048.jpg?v=1591233909" alt=""></p>
<meta charset="utf-8"><meta charset="utf-8">
<p><span>Hey Friends!!!  June is here and it has definitely brought along the excitement of splashing away the warm summer days!  We are all feeling the urge to get outdoors and live out the Ralph Waldo Emerson quote - "</span><span>Live in the sunshine, swim in the sea, drink the wild air,"  and we realized that now would be an awesome time to remind you about all of our amazing swim options!  It was so much fun reaching out to many of our customers to be able to include their pictures in this blog, and we have to say thank you to all of you who share your lovely creations with us to see!!  So definitely follow along and participate in the giveaway we have listed at the end! </span></p><p><a class="read-more" href="https://violettefieldthreads.com/blogs/theblog/soak-up-the-sun-swim-giveeaway">More</a></p>]]>
    </summary>
    <content type="html">
      <![CDATA[<div><img src="//cdn.shopify.com/s/files/1/0144/4922/files/Soakupthesun_2048x2048.jpg?v=1591233909" alt="" style="display: block; margin-left: auto; margin-right: auto;"></div>
<div style="text-align: center;"></div>
<div style="text-align: center;">Hey Friends!!!  June is here and it has definitely brought along the excitement of splashing away the warm summer days!  We are all feeling the urge to get outdoors and live out the Ralph Waldo Emerson quote - "<span>Live in the sunshine, swim in the sea, drink the wild air,"  and we realized that now would be an awesome time to remind you about all of our amazing swim options with a $6 weekend sale for our swim line!!!  It was so much fun reaching out to many of our customers to be able to include their pictures in this blog, and we have to say thank you to everyone who shared their lovely creations with us to see!!  So please follow along, participate in the giveaway we have listed at the end and grab a few of these swim patterns while they are on sale!! </span>
</div>
<div style="text-align: center;"><span></span></div>
<div style="text-align: center;"><span>Since we have quite a few options, and they are all just too stinking cute, we decided that listing them in alphabetical order is going to be the easiest!  </span></div>
<div style="text-align: center;"><span></span></div>
<div style="text-align: center;"><span>Which </span></div>
<div style="text-align: center;">means we are starting off with our beautiful {Bridgette}!</div>
<div style="text-align: center;"></div>
<div style="text-align: center;"><span><img src="//cdn.shopify.com/s/files/1/0144/4922/files/image0_2_1024x1024.jpeg?v=1591305747" alt=""></span></div>
<div style="text-align: center;"></div>
<div style="text-align: center;"><span><img src="//cdn.shopify.com/s/files/1/0144/4922/files/image1_2_1024x1024.jpeg?v=1591305813" alt=""></span></div>
<div style="text-align: center;"></div>
<div style="text-align: center;">The Bridgette swimsuit has so many features and can be sewn as a one piece or a tankini.  Both versions can be sewn with the full top ruffle or it can be made as a simple suit with no ruffle.  The Bridgette suit has a wonderful fit that will provide the coverage and comfort needed to play all day without any worries.</div>
<div style="text-align: center;"></div>
<div style="text-align: center;"><img src="//cdn.shopify.com/s/files/1/0144/4922/files/KIMBERLYSEEGMILLER2_1024x1024.jpg?v=1591305893" alt=""></div>
<div style="text-align: center;"><img src="//cdn.shopify.com/s/files/1/0144/4922/files/154C5755-A432-4691-BE2D-5D3E7A52AAF2_Original_1024x1024.jpg?v=1591305921" alt=""></div>
<div style="text-align: center;"></div>
<div style="text-align: center;"> </div>
<div style="text-align: center;"></div>
<div style="text-align: center;">Up next is the cutie {Catalina}!</div>
<div style="text-align: center;"></div>
<div style="text-align: center;"><img src="//cdn.shopify.com/s/files/1/0144/4922/files/Catalina_Floral-1_2048x2048.jpg?v=1591306395" alt=""></div>
<div style="text-align: center;">
<meta charset="utf-8">
<span></span>
</div>
<div style="text-align: center;"><span></span></div>
<div style="text-align: center;"><span>Catalina is a one piece swimsuit that is so chic for the pool or beach! It features the most adorable little flutter sleeves and an optional front keyhole cutout!! Both the keyhole and solid version showcase a darling collar and bow tie.  The legs have the optional ruffles... but who can say no to ruffles?!  We definitely can't!!!</span></div>
<div style="text-align: center;"><span></span></div>
<div style="text-align: center;"><span><img src="//cdn.shopify.com/s/files/1/0144/4922/files/F3821657-A65B-4F39-BC98-F7AFE7F782E0_1024x1024.jpeg?v=1591306782" alt=""></span></div>
<div style="text-align: center;"><span><img src="//cdn.shopify.com/s/files/1/0144/4922/files/IMG_1439_1024x1024.jpg?v=1591306829" alt=""></span></div>
<div style="text-align: center;"><img src="//cdn.shopify.com/s/files/1/0144/4922/files/Catalina-2_2048x2048.jpg?v=1591307054" alt=""></div>
<div style="text-align: center;"></div>
<div style="text-align: center;">Our third swim option that I can't wait to re-introduce you to is the posh {Pippa}!!</div>
<div style="text-align: center;"></div>
<div style="text-align: center;"><img src="//cdn.shopify.com/s/files/1/0144/4922/files/ERICKAP2_2048x2048.jpg?v=1591307234" alt=""></div>
<div style="text-align: center;"><img src="//cdn.shopify.com/s/files/1/0144/4922/files/ERICKAP3_2048x2048.jpg?v=1591307154" alt=""></div>
<div style="text-align: center;"></div>
<div style="text-align: center;">
<meta charset="utf-8">
<p> </p>
<p>Pippa is bringing glamour to the beach!  This darling retro inspired two piece swimsuit features a sweetheart neckline with halter ties around the neck.  The front is adorned with a bow that allows for tons of fun coordinating swimsuit colors and prints!   </p>
<p>Pippa bottoms are  comfy to wear and have amazing fit and coverage. A playful skirt version is also included! The skirt can be dressed up with pom-pom trims or tulle for a special one a kind look.</p>
<p> </p>
<p><img src="//cdn.shopify.com/s/files/1/0144/4922/files/IMG_0972tt_1024x1024.jpg?v=1591307489" alt=""></p>
<p><img src="//cdn.shopify.com/s/files/1/0144/4922/files/IMG_0979tt_1024x1024.jpg?v=1591307509" alt=""></p>
<p> </p>
<p>Up next?!  Our Ruffle-y {Roxie}!!</p>
<p> </p>
<p><img src="//cdn.shopify.com/s/files/1/0144/4922/files/IMG_5227_1_2048x2048.jpg?v=1591307673" alt=""> <img src="//cdn.shopify.com/s/files/1/0144/4922/files/IMG_0061_1_1024x1024.jpeg?v=1591307606" alt=""></p>
<p><img src="//cdn.shopify.com/s/files/1/0144/4922/files/IMG_0058_1_1024x1024.jpeg?v=1591307822" alt=""> </p>
<p>Roxie is a feminine two-piece swimsuit that features super stylish high waist bottoms with optional leg ruffles and full bottom coverage. The Roxie top has two options: three tiers of ruffles or one longer ruffle, which means you can't go wrong since we all love ruffles!!! </p>
<p>Speaking of ruffles, the straps criss-cross and tie at the back and, of course, have the option to add ruffles!!  Really want to go all out with this beauty?  The ruffles can also be embellished with lace, trims or pom-poms for extra customization!! </p>
<p><img src="//cdn.shopify.com/s/files/1/0144/4922/files/Roxie_Strawberry-4_1024x1024.jpg?v=1591308200" alt=""></p>
<p><img src="//cdn.shopify.com/s/files/1/0144/4922/files/kellyjohnston_1024x1024.jpg?v=1591308095" alt=""></p>
<p><img src="//cdn.shopify.com/s/files/1/0144/4922/files/Roxie_Mermaid-5_1024x1024.jpg?v=1591308153" alt=""> </p>
<p>And finally, our last swimsuit option to re-introduce you to is our sweet {Saylor}!</p>
<p> </p>
<p><img src="//cdn.shopify.com/s/files/1/0144/4922/files/97C40834-FB7E-4F48-91BE-AD7117DA1ACB_2048x2048.jpeg?v=1591308489" alt=""> </p>
<meta charset="utf-8">
<p><span>The Saylor swimsuit is retro at it's best, featuring a rounded front collar and inset that is perfect for mixing and matching patterns.  Saylor can be made with an optional side flounce or button tabs and have halter ties or fixed criss-cross back straps</span> Who ever said all day water play couldn't be glamorous?!?</p>
<p> </p>
<p><img src="//cdn.shopify.com/s/files/1/0144/4922/files/IMG_0124_1024x1024.JPG?v=1591308885" alt=""></p>
<p><img src="//cdn.shopify.com/s/files/1/0144/4922/files/fancy8_1024x1024.jpg?v=1591308791" alt=""></p>
<p><img src="//cdn.shopify.com/s/files/1/0144/4922/files/IMG_0270_92cac311-700b-4725-9173-cb130684929e_1024x1024.JPG?v=1591308847" alt=""></p>
<p> </p>
<p>Now that you've seen our fabulous 5 swim suits, did you know we also offer a couple of cover up options as well?!?  Our Samantha tunic cover up is an amazing option for pulling over a wet suit while taking a break, and our Leilani mermaid coverup will be your daughters most favorite addition to her closet!</p>
<p> </p>
<p><img src="//cdn.shopify.com/s/files/1/0144/4922/files/85D873E0-F651-4785-B00B-0B7779A32052_1024x1024.jpeg?v=1591310251" alt=""></p>
<p><img src="//cdn.shopify.com/s/files/1/0144/4922/files/IMG_0029_1_1024x1024.jpeg?v=1591310307" alt=""></p>
<p> </p>
<meta charset="utf-8">
<p><span>In case you are new to swim fabric and aren't sure if you are ready to take "the plunge," let us reassure you of one thing.... YOU CAN DO IT!!!  Sewing with swim fabric is much easier than most people realize and all of our swim patterns will walk you through each and every step from choosing the right size to finishing techniques. At the beginning of each swim pattern, we have also included a 14 page "Sewing with Swim 101" guide that is chalk full of tips and tricks on fabric selection, sewing information and sewing machine settings like shown here:</span></p>
<p> </p>
<p><span><img src="//cdn.shopify.com/s/files/1/0144/4922/files/Screen_Shot_2020-06-04_at_5.33.11_PM_2048x2048.png?v=1591310713" alt="">So, what do you think?! Are you ready to create your custom swimwear?!? </span></p>
<p><span>Now on to the extra fun part - who is ready for a GIVEAWAY!?!?!  Would you like to win a $50 gift certificate to our shop?!?  How about that PLUS a $50 gift certificate for new fabric?!!  WHOOO HOOOO!!!!</span></p>
<p><span>We are excited we were able to to partner with Purpleseamstress fabric to offer you this combined giveaway worth $100!!!!</span></p>
<p><img src="//cdn.shopify.com/s/files/1/0144/4922/files/voucher_1024x1024.jpg?v=1591313265" alt=""></p>
<p><span>Entering is easy...all you have to do is comment below with which swimsuit you would choose to create if you were to go on your dream vacation (and let us know where that is so we can all daydream along with you!!) </span>Be sure you are following both of our facebook pages (linked below) to be qualified to win!  And that is it!!</p>
<p>We will be drawing for our winner next week, so go ahead and comment below!!</p>
<meta charset="utf-8">
<p><a href="https://www.facebook.com/violettefieldthreads/">https://www.facebook.com/violettefieldthreads/</a></p>
<p> <a href="https://www.facebook.com/PurpleseamstressFabric/">https://www.facebook.com/PurpleseamstressFabric/</a></p>
<p> EDIT: CONGRATULATIONS to </p>
<meta charset="utf-8">
<p><span>🎉Julianne Ratliff🎉</span></p>
<p><span>for winning this contest!!! Please send us an email to </span></p>
<meta charset="utf-8">
<p>info@violettefieldthreads.com and we will get your prizes set up! </p>
</div>]]>
    </content>
  </entry>
  <entry>
    <id>https://violettefieldthreads.com/blogs/theblog/introducing-shiloh</id>
    <published>2020-05-15T13:18:00-05:00</published>
    <updated>2020-05-15T13:18:52-05:00</updated>
    <link rel="alternate" type="text/html" href="https://violettefieldthreads.com/blogs/theblog/introducing-shiloh"/>
    <title>{Introducing} Shiloh</title>
    <author>
      <name>Jessica Herning</name>
    </author>
    <summary type="html">
      <![CDATA[<p><img src="//cdn.shopify.com/s/files/1/0144/4922/files/blog1_b40a9c77-6667-486a-baa9-233328f51b19_2048x2048.jpg?v=1589557832" alt=""></p>
<meta charset="utf-8">
<p><span>If you are anything like us, you are dreaming of long, hot summer days spent exploring in the sunshine and basking in the beauty of the outdoors!  Our talented Maya had just that in mind as she was designing our newest pattern: {Shiloh}!</span></p><p><a class="read-more" href="https://violettefieldthreads.com/blogs/theblog/introducing-shiloh">More</a></p>]]>
    </summary>
    <content type="html">
      <![CDATA[<p><img src="//cdn.shopify.com/s/files/1/0144/4922/files/blog1_b40a9c77-6667-486a-baa9-233328f51b19_2048x2048.jpg?v=1589557832" alt=""></p>
<p>If you are anything like us, you are dreaming of long, hot summer days spent exploring in the sunshine and basking in the beauty of the outdoors!  Our talented Maya had just that in mind as she was designing our newest pattern: {Shiloh}!</p>
<meta charset="utf-8">
<p><span>Introducing Shiloh- the perfect little sundress, available in baby, girl, and doll sizes!!</span></p>
<p><img src="//cdn.shopify.com/s/files/1/0144/4922/files/1234blog_2048x2048.jpg?v=1589558329" alt=""></p>
<p><img src="//cdn.shopify.com/s/files/1/0144/4922/files/123blog_2048x2048.jpg?v=1589558364" alt=""></p>
<p><img src="//cdn.shopify.com/s/files/1/0144/4922/files/blog10_ae4036d6-dc8e-47ef-9c36-f3d7e3b11916_2048x2048.jpg?v=1589562308" alt=""></p>
<p><img src="//cdn.shopify.com/s/files/1/0144/4922/files/1blog_2048x2048.jpg?v=1589558392" alt=""></p>
<p>Shiloh is a precious pattern designed for woven fabrics with endless options and possibilities all rolled into one! </p>
<p><img src="//cdn.shopify.com/s/files/1/0144/4922/files/Shilohsketch_5c3de641-c578-45e3-b905-b6a1fa4b6f8f_2048x2048.jpg?v=1589566509" alt=""></p>
<p>Let's talk skirt options first...</p>
<p>Want to create a super twirly dress?  You're all set - just choose the gathered DOUBLE circle skirt option as a dress length! (Yes, yes, you read that right - DOUBLE CIRCLE SKIRT!)</p>
<p> <img src="//cdn.shopify.com/s/files/1/0144/4922/files/blog5_3136e919-b4aa-498e-8161-7e1127bb784b_2048x2048.jpg?v=1589558917" alt=""></p>
<p>Wanting to create a sweet little top for all-day-play to pair with shorts (like our Daisy shorts... on sale this weekend)?  You're good to go - just choose the simple gathered skirt option in the top length!</p>
<p style="text-align: center;"><img src="//cdn.shopify.com/s/files/1/0144/4922/files/blog4_74bae7e4-a81b-4c42-ab9e-0dd98884a327_1024x1024.jpg?v=1589558822" alt=""></p>
<p>But you know, skirt options aren't the only thing that makes each Shiloh created different and unique... oh no!  Have you see the back options?!  Ooooh the back options!!!</p>
<p>What elicits the feeling of childhood nostalgia quite like a dress with criss-cross back straps, flutters and a twirly skirt? Shiloh offers all of that and more!</p>
<p><img src="//cdn.shopify.com/s/files/1/0144/4922/files/blog6_9e480407-3640-4957-a0de-049a99779a1a_2048x2048.jpg?v=1589560965" alt=""></p>
<p>This back option features an elastic casing at the waist and the criss-cross straps that button at the side seam.  You can create these straps as basic straps OR you can add full or partial flutters down the straps as well!</p>
<p style="text-align: center;"><img src="//cdn.shopify.com/s/files/1/0144/4922/files/blog7_d414288a-5be2-4d23-94a0-685408d8f3de_1024x1024.jpg?v=1589561961" alt=""></p>
<p style="text-align: center;"><img src="//cdn.shopify.com/s/files/1/0144/4922/files/blog3_4d4d71bb-dd07-4c3a-9d16-5766067b5ffd_1024x1024.jpg?v=1589558789" alt=""></p>
<p>If the cross back option isn't your style though, OR you would simply like to change it up after you've created a few hundred of that style, Shiloh also includes an option for a button back style that ties at the neck and offers a bit more coverage across the back!  This pattern is just FULL of so many ways to customize it and change it up!</p>
<p style="text-align: center;"><img src="//cdn.shopify.com/s/files/1/0144/4922/files/blog8_7656afd5-b53c-4d9c-87fd-3413c997b503_1024x1024.jpg?v=1589562368" alt=""></p>
<p style="text-align: center;"><img src="//cdn.shopify.com/s/files/1/0144/4922/files/blog11_a914235e-2fc9-45ed-bf83-f1cd6e33aada_1024x1024.jpg?v=1589562393" alt=""></p>
<p style="text-align: center;"><img src="//cdn.shopify.com/s/files/1/0144/4922/files/blog9_96b5e82d-3aba-4178-bef7-954f4a11915f_1024x1024.jpg?v=1589562353" alt=""></p>
<p>You know what else is awesome about this newest release!?  Maya is hosting the VFT Sew Along in our dedicated Facebook Sew Along group....which means there are multiple videos in that group with step by step instructions of sewing a Shiloh, from start to finish!  So you can check out that group and review the videos to help walk you through sewing up one of these beauties all on your own!</p>
<p style="text-align: center;"><img src="//cdn.shopify.com/s/files/1/0144/4922/files/ShilohSALSchedule_1024x1024.jpg?v=1589562812" alt=""></p>
<p> So, what you do you think?  So many amazing options for your next summer sew!!   Let us know in the comments below which option you are planning to sew up first!!</p>
<p><img src="//cdn.shopify.com/s/files/1/0144/4922/files/blog12_7494120f-c72f-4e79-8c4c-1743ad3d2eb3_2048x2048.jpg?v=1589563174" alt=""></p>
<p>As always, Happy Sewing!!</p>]]>
    </content>
  </entry>
  <entry>
    <id>https://violettefieldthreads.com/blogs/theblog/staying-home-with-cecilia-delphine</id>
    <published>2020-05-01T12:07:00-05:00</published>
    <updated>2020-05-01T12:08:02-05:00</updated>
    <link rel="alternate" type="text/html" href="https://violettefieldthreads.com/blogs/theblog/staying-home-with-cecilia-delphine"/>
    <title>Staying Home with {Cecilia &amp; Delphine}!</title>
    <author>
      <name>Jessica Herning</name>
    </author>
    <summary type="html">
      <![CDATA[<p><img src="//cdn.shopify.com/s/files/1/0144/4922/files/BE3A8138_2048x2048.jpg?v=1588278508" alt=""></p>
<meta charset="utf-8">
<p style="text-align: center;"><span>Hey Friends?!  How are you holding up during this isolation time?!  2020 sure has been throwing us all sorts of curves, but we hope you are doing well and maybe even getting some more sewing time in!  </span></p><p><a class="read-more" href="https://violettefieldthreads.com/blogs/theblog/staying-home-with-cecilia-delphine">More</a></p>]]>
    </summary>
    <content type="html">
      <![CDATA[<p><img src="//cdn.shopify.com/s/files/1/0144/4922/files/BE3A8138_2048x2048.jpg?v=1588278508" alt="">Hey Friends!!  We hope you are all are doing as well as you can be during these trying times. 2020 sure has been throwing us all sorts of curves, but we hope you are staying healthy at home and maybe even getting a little extra sewing time in!  </p>
<p style="text-align: center;">With many states (and countries) implementing stay at home orders, we decided now was a good time to introduce you all to a new way to lounge in style! </p>
<p style="text-align: center;"><img src="//cdn.shopify.com/s/files/1/0144/4922/files/BE3A8154_1024x1024.jpg?v=1588279231" alt=""></p>
<meta charset="utf-8">
<p style="text-align: center;"><span>Meet Cecilia &amp; Delphine - the perfect combination of comfort and class!</span></p>
<p style="text-align: center;"><img src="//cdn.shopify.com/s/files/1/0144/4922/files/BE3A7924_1024x1024.jpg?v=1588279167" alt=""></p>
<p style="text-align: center;">{Cecilia} is a GORGEOUS and classic cami and shorts set, that has no closures - so you know what that means, right?!  This entire set sews up like a BREEZE! And it will literally feel like a breeze when sewn in lightweight fabrics like rayon challis or voile.</p>
<p style="text-align: center;">The Cecilia scoop neck cami top can be sewn with a small facing inside, or with a partial lining that can include an optional shelf bra!!  The straps can be left simple or they are also the perfect place to add some lace detail or even a little ruffle as well!  </p>
<p style="text-align: center;"><img src="//cdn.shopify.com/s/files/1/0144/4922/files/BE3A7898_2048x2048.jpg?v=1588280076" alt=""></p>
<p style="text-align: center;"><img src="//cdn.shopify.com/s/files/1/0144/4922/files/BE3A7914_2048x2048.jpg?v=1588280141" alt=""></p>
<p style="text-align: center;"><img src="//cdn.shopify.com/s/files/1/0144/4922/files/BE3A7915_2048x2048.jpg?v=1588280165" alt=""></p>
<p style="text-align: center;">The Cecilia Shorts are an easy fit short with a super comfy elastic waist!  You can easily shorten or lengthen them, to achieve the look you would like for your set.  And how perfect are they for showcasing some lace or trim for the bottom edges? These really will make you feel like your "loungewear" has become a treat to wear and show off!  One warning though, you may have to physically pry them off of your littles :)</p>
<p style="text-align: center;"> <img src="//cdn.shopify.com/s/files/1/0144/4922/files/BE3A7896_1024x1024.jpg?v=1588280062" alt=""></p>
<p style="text-align: center;"><img src="//cdn.shopify.com/s/files/1/0144/4922/files/BE3A7961_1024x1024.jpg?v=1588280860" alt=""></p>
<p style="text-align: center;"><img src="//cdn.shopify.com/s/files/1/0144/4922/files/BE3A7991_1024x1024.jpg?v=1588280911" alt=""></p>
<p style="text-align: center;"><img src="//cdn.shopify.com/s/files/1/0144/4922/files/BE3A8061_2048x2048.jpg?v=1588280950" alt=""></p>
<p style="text-align: center;">And what is the perfect lounge set, without the perfect robe to top it off?  Introducing {Delphine}!  The classic, lightweight robe of your dreams!!</p>
<p style="text-align: center;"><img src="//cdn.shopify.com/s/files/1/0144/4922/files/BE3A8242_2048x2048.jpg?v=1588279280" alt=""></p>
<p style="text-align: center;">Have you ever created a robe for yourself?!  Me either...and we decided it's high time we have fixed that!  Robes are such a great piece to have in your closet - whether it's for after showers, unsuspecting door bell rings, or just that added comfort on top of your loungewear!  This is one item you will be grabbing to use non-stop! </p>
<p style="text-align: center;"><img src="//cdn.shopify.com/s/files/1/0144/4922/files/BE3A8185_ef8ca714-87a5-451f-9865-281ecea93e78_1024x1024.jpg?v=1588281582" alt=""></p>
<p style="text-align: center;"><img src="//cdn.shopify.com/s/files/1/0144/4922/files/BE3A8305_1024x1024.jpg?v=1588281631" alt=""></p>
<p style="text-align: center;"><img src="//cdn.shopify.com/s/files/1/0144/4922/files/BE3A8255_035a56a9-be15-4c2e-8598-016924d12edb_1024x1024.jpg?v=1588281682" alt=""></p>
<p style="text-align: center;">Delphine features drop shoulders for a relaxed fit and a fold over traditional collar.  It also includes an optional sash with belt loops and optional front patch pockets (hello phone/keys/sanity holder)!  </p>
<p style="text-align: center;">Creating Delphine in light and breezy fabrics such as rayon and voile is sure to give you an extra dreamy and feminine feeling robe!!  We also just LOVE adding lace and trims along the sleeves and hemline to give it an even higher end feel! </p>
<p style="text-align: center;"><img src="//cdn.shopify.com/s/files/1/0144/4922/files/BE3A8554_2048x2048.jpg?v=1588282351" alt=""></p>
<p style="text-align: center;"><img src="//cdn.shopify.com/s/files/1/0144/4922/files/BE3A8509_1024x1024.jpg?v=1588282385" alt=""></p>
<p style="text-align: center;"><img src="//cdn.shopify.com/s/files/1/0144/4922/files/BE3A8516_1024x1024.jpg?v=1588282427" alt=""></p>
<p style="text-align: center;">Both Cecilia and Delphine are available in Girls, Tween, Misses and Doll sizing, which means these create the PERFECT sets for so many occasions! </p>
<p style="text-align: center;">Slumber party?...CHECK! </p>
<p style="text-align: center;">Bachelorette party?...CHECK! </p>
<p style="text-align: center;">Spa day?...CHECK!</p>
<p style="text-align: center;">Just staying home and lounging around?...DOUBLE CHECK! </p>
<p style="text-align: center;">Just wait and see, Cecilia and Delphine will become your most used items you've ever sewn up! </p>
<p style="text-align: center;"><img src="//cdn.shopify.com/s/files/1/0144/4922/files/Delphine1a_5fd942ff-9ac7-4106-928c-551f87aeb422_2048x2048.jpg?v=1588282934" alt=""></p>
<p style="text-align: center;"><img src="//cdn.shopify.com/s/files/1/0144/4922/files/Delphine14_1024x1024.jpg?v=1588282965" alt=""></p>
<p style="text-align: center;"><img src="//cdn.shopify.com/s/files/1/0144/4922/files/Delphine2a_a560b8cf-1802-4d8e-9e13-b408ffe5dd21_1024x1024.jpg?v=1588282998" alt=""></p>
<p style="text-align: center;"><img src="//cdn.shopify.com/s/files/1/0144/4922/files/Delphine11_2048x2048.jpg?v=1588283045" alt=""></p>
<p style="text-align: center;"><img alt="" src="//cdn.shopify.com/s/files/1/0144/4922/files/Delphine12_2048x2048.jpg?v=1588352300" style="float: none;"></p>
<p style="text-align: center;"><img src="//cdn.shopify.com/s/files/1/0144/4922/files/Delphine6a_2048x2048.jpg?v=1588352433" alt=""></p>
<p style="text-align: center;"> </p>
<p style="text-align: center;">Regardless of how you create your lounge set, we hope you all are doing well, staying safe and finding the silver linings through all of this!  And of course, Happy SEWING!</p>]]>
    </content>
  </entry>
  <entry>
    <id>https://violettefieldthreads.com/blogs/theblog/evangeline-for-everything</id>
    <published>2020-04-10T16:06:00-05:00</published>
    <updated>2020-04-16T14:27:28-05:00</updated>
    <link rel="alternate" type="text/html" href="https://violettefieldthreads.com/blogs/theblog/evangeline-for-everything"/>
    <title>{Evangeline} for Everything + Giveaway!!</title>
    <author>
      <name>Jessica Herning</name>
    </author>
    <summary type="html">
      <![CDATA[<p><img src="//cdn.shopify.com/s/files/1/0144/4922/files/blogmain_0d19ed60-4eab-4207-a977-a3d17bc0fd75_2048x2048.jpg?v=1586458088" alt=""></p>
<meta charset="utf-8">
<p><span>Evangeline is the final pattern we are introducing of our new 2020 Spring patterns, and we may just have saved the best introduction for last! </span></p><p><a class="read-more" href="https://violettefieldthreads.com/blogs/theblog/evangeline-for-everything">More</a></p>]]>
    </summary>
    <content type="html">
      <![CDATA[<p style="text-align: center;"><img src="//cdn.shopify.com/s/files/1/0144/4922/files/BE3A5533_2048x2048.jpg?v=1586551590" alt=""></p>
<p style="text-align: center;">Evangeline is the final pattern we are introducing of our new 2020 Spring patterns, and we may just have saved the best introduction for last!  </p>
<p><img src="//cdn.shopify.com/s/files/1/0144/4922/files/BE3A5561_2048x2048.jpg?v=1586551564" alt=""></p>
<p style="text-align: center;"><img src="//cdn.shopify.com/s/files/1/0144/4922/files/BE3A5489_2048x2048.jpg?v=1586551538" alt=""></p>
<p style="text-align: center;"><img src="//cdn.shopify.com/s/files/1/0144/4922/files/BE3A5572_2048x2048.jpg?v=1586552067" alt=""></p>
<p style="text-align: center;">Evangeline is a woven dress or top that has the most whimsically, flattering silhouette.  When we put these on, we couldn't help but imagine we were actually walking through small Parisian alleyways or art walks.  The trendiness of Evangeline is spot on and is sure to have you envisioning your next outing or travels as well! </p>
<p style="text-align: center;"><img src="//cdn.shopify.com/s/files/1/0144/4922/files/BE3A5871_2048x2048.jpg?v=1586552155" alt=""></p>
<p style="text-align: center;"><img src="//cdn.shopify.com/s/files/1/0144/4922/files/BE3A5795_2048x2048.jpg?v=1586551738" alt=""></p>
<p style="text-align: center;"><img src="//cdn.shopify.com/s/files/1/0144/4922/files/BE3A5760_2048x2048.jpg?v=1586551764" alt=""></p>
<p style="text-align: center;"><img src="//cdn.shopify.com/s/files/1/0144/4922/files/BE3A5731_2048x2048.jpg?v=1586551807" alt=""></p>
<p style="text-align: center;"><img src="//cdn.shopify.com/s/files/1/0144/4922/files/BE3A5675_2048x2048.jpg?v=1586552252" alt=""></p>
<p style="text-align: center;"><img src="//cdn.shopify.com/s/files/1/0144/4922/files/BE3A5702_2048x2048.jpg?v=1586552419" alt=""></p>
<p style="text-align: center;"><img src="//cdn.shopify.com/s/files/1/0144/4922/files/BE3A5672_2048x2048.jpg?v=1586552443" alt=""></p>
<p style="text-align: center;">Evangeline features a squared neckline and is available in girls, tween, misses &amp; doll sizing! The bodice features waist darts, as well as bust darts in the tween &amp; misses sizes, to give you the perfect fit every time! </p>
<p style="text-align: center;"><img src="//cdn.shopify.com/s/files/1/0144/4922/files/blog23_2048x2048.jpg?v=1586459407" alt=""></p>
<p style="text-align: center;"><img src="//cdn.shopify.com/s/files/1/0144/4922/files/blog21_2048x2048.jpg?v=1586459434" alt=""></p>
<p style="text-align: center;"><img src="//cdn.shopify.com/s/files/1/0144/4922/files/blog22_f983323c-78a1-4c87-9231-7989499501f3_2048x2048.jpg?v=1586459472" alt=""></p>
<p style="text-align: center;">Evangeline includes three different options for sleeves. Both the short puff sleeve and elbow puff sleeves are shown in the dress examples above and the sleeveless option with feminine ties is shown in Ericka's dress pictures below. The short and elbow puff sleeves feature elastic at the top and the bottom for an easy, comfortable fit every time.</p>
<p style="text-align: center;"><img src="//cdn.shopify.com/s/files/1/0144/4922/files/blog15_7fcd67ae-7764-4d95-8fae-d98e0c5a9cfe_1024x1024.jpg?v=1586459790" alt=""></p>
<p style="text-align: center;"><img src="//cdn.shopify.com/s/files/1/0144/4922/files/blog14_685fb2aa-c03c-4274-98a9-a2eeb24d1ab5_2048x2048.jpg?v=1586459821" alt=""></p>
<p style="text-align: center;"><img src="//cdn.shopify.com/s/files/1/0144/4922/files/blog16_1024x1024.jpg?v=1586459854" alt=""></p>
<p style="text-align: center;"><img src="//cdn.shopify.com/s/files/1/0144/4922/files/blog13_b303ab6f-f3a0-4260-a9d9-d0d2cb8dad3f_1024x1024.jpg?v=1586459922" alt=""></p>
<p style="text-align: center;">Evangeline has a zipper back closure and includes multiple skirt options. You can create the simple skirt in vintage or knee length or create the tiered ruffle skirt in knee length as well!</p>
<p style="text-align: center;"><img src="//cdn.shopify.com/s/files/1/0144/4922/files/BE3A6270_2048x2048.jpg?v=1586552729" alt=""></p>
<p style="text-align: center;"><img src="//cdn.shopify.com/s/files/1/0144/4922/files/BE3A6187_2048x2048.jpg?v=1586552693" alt=""></p>
<p style="text-align: center;"><img src="//cdn.shopify.com/s/files/1/0144/4922/files/BE3A6134_2048x2048.jpg?v=1586552612" alt=""></p>
<p style="text-align: center;"><img src="//cdn.shopify.com/s/files/1/0144/4922/files/BE3A6260_2048x2048.jpg?v=1586552637" alt=""> <img src="//cdn.shopify.com/s/files/1/0144/4922/files/BE3A6197_2048x2048.jpg?v=1586552663" alt=""></p>
<p style="text-align: center;"><img src="//cdn.shopify.com/s/files/1/0144/4922/files/BE3A6208_2048x2048.jpg?v=1586552759" alt=""></p>
<p style="text-align: center;"> So let us know - where are YOU dreaming of escaping to once we are all able to travel again?!  Are you going to be bringing an Abigail, Bianca or Evangeline along???</p>
<p style="text-align: center;">Comment below, and we will choose one lucky participant to receive all 3 new patterns in their size of choice!! </p>
<p style="text-align: center;"> </p>
<p style="text-align: center;">*** Contest Closed***</p>
<p style="text-align: center;">Congratulations to </p>
<meta charset="utf-8">
<p style="text-align: center;"><strong>Samantha Rodriguez</strong></p>]]>
    </content>
  </entry>
  <entry>
    <id>https://violettefieldthreads.com/blogs/theblog/beautiful-in-bianca</id>
    <published>2020-04-09T12:28:00-05:00</published>
    <updated>2020-04-09T12:54:14-05:00</updated>
    <link rel="alternate" type="text/html" href="https://violettefieldthreads.com/blogs/theblog/beautiful-in-bianca"/>
    <title>Beautiful in {Bianca}</title>
    <author>
      <name>Jessica Herning</name>
    </author>
    <summary type="html">
      <![CDATA[<p><img src="//cdn.shopify.com/s/files/1/0144/4922/files/blogmain_72ef3a30-faaf-4c19-b050-6862466014d0_2048x2048.jpg?v=1586286148" alt=""></p>
<meta charset="utf-8"><meta charset="utf-8">
<p>Continuing on with our Spring Pattern release, we are happy to introduce you to - Bianca!!! </p>
<p>Once all of our studio samples were sewn up, and images of all of our testers' samples were sent in, it was easy to conclude that Bianca is just the perfect sundress! It's so flattering on all sizes.</p><p><a class="read-more" href="https://violettefieldthreads.com/blogs/theblog/beautiful-in-bianca">More</a></p>]]>
    </summary>
    <content type="html">
      <![CDATA[<p><img src="//cdn.shopify.com/s/files/1/0144/4922/files/BE3A6531_2048x2048.jpg?v=1586451688" alt="" style="display: block; margin-left: auto; margin-right: auto;"></p>
<p style="text-align: center;">Continuing on with our Spring Pattern release, we are happy to introduce you to - Bianca!!! </p>
<p style="text-align: center;">Once all of own studio samples were sewn up, and images of all of our testers' samples were sent in, it was easy to conclude that Bianca is just the perfect sundress! It's so flattering on all sizes.</p>
<p style="text-align: center;">Bianca has quite a few different style options, and spans from Girls size 2 all the way to Misses size 20. Whoever you're sewing for, your little girl, tween, or yourself, we're confident Bianca will become a go to pattern. </p>
<p><img src="//cdn.shopify.com/s/files/1/0144/4922/files/blog2_59a9a351-3d63-4976-a36a-cd9dd88c8346_1024x1024.jpg?v=1586290144" alt="" style="display: block; margin-left: auto; margin-right: auto;"></p>
<p style="text-align: center;"><img src="//cdn.shopify.com/s/files/1/0144/4922/files/blog3_ea910301-fe1b-4c1b-955f-2d84961ba29f_1024x1024.jpg?v=1586290169" alt=""></p>
<p style="text-align: center;"><img src="//cdn.shopify.com/s/files/1/0144/4922/files/blog4_67c0e1ab-1c36-4f92-a384-a90569f15f9e_1024x1024.jpg?v=1586290192" alt=""></p>
<p style="text-align: center;">Here we've sewn Maxi and Midi length Bianca dresses. Both dresses feature princess seams and a zipper back closure. </p>
<p style="text-align: center;"><img src="//cdn.shopify.com/s/files/1/0144/4922/files/blog9_41ab76ee-24fb-4502-b175-64eee9d84116_1024x1024.jpg?v=1586290225" alt=""></p>
<p style="text-align: center;"><img src="//cdn.shopify.com/s/files/1/0144/4922/files/blog8_611809bf-2fb8-4e4c-b945-0322e237cb54_1024x1024.jpg?v=1586290251" alt=""></p>
<p style="text-align: center;">The Bianca skirt is a gathered half circle skirt. This provides a beautiful and flattering shape. There are three skirt length options: knee length, midi length with ruffle and maxi length with ruffle. </p>
<p style="text-align: center;">Family pictures on the beach? Maxi-length Bianca! Weekend picnic at the park? Knee length Bianca! Outdoor wedding to attend? Midi or Maxi length Bianca! This dress will have you reaching for it in your closet non-stop!</p>
<p style="text-align: center;"><img src="//cdn.shopify.com/s/files/1/0144/4922/files/blog10_8b42c48a-dace-40a9-9834-ead61c5a45c2_1024x1024.jpg?v=1586290653" alt=""></p>
<p style="text-align: center;"><img src="//cdn.shopify.com/s/files/1/0144/4922/files/blog11_3d6455ad-7a0d-42c7-ad4e-a687e7f806c4_1024x1024.jpg?v=1586290679" alt=""></p>
<p style="text-align: center;"><img src="//cdn.shopify.com/s/files/1/0144/4922/files/blog12_740e0a4d-e999-40ba-b37f-c716183669d3_1024x1024.jpg?v=1586290706" alt=""></p>
<p style="text-align: center;"><img src="//cdn.shopify.com/s/files/1/0144/4922/files/blog13_95a73796-1ab7-4a41-bcb2-f335d828017e_1024x1024.jpg?v=1586290740" alt=""> </p>
<p style="text-align: center;">Bianca is available in Girls, Tween, Misses and also Doll sizing!</p>
<p style="text-align: center;">Bianca is easy to wear, both for every day and also for special occasions. </p>
<p style="text-align: center;"><img src="//cdn.shopify.com/s/files/1/0144/4922/files/blog14_5440759a-5457-40d6-9253-494d8f381ef0_1024x1024.jpg?v=1586291601" alt=""></p>
<p style="text-align: center;"><img src="//cdn.shopify.com/s/files/1/0144/4922/files/blog15_076bc569-0f38-4f5d-bca0-011f5a7aa7a6_1024x1024.jpg?v=1586291631" alt=""></p>
<p style="text-align: center;"><img src="//cdn.shopify.com/s/files/1/0144/4922/files/blog17_1024x1024.jpg?v=1586291670" alt=""></p>
<p style="text-align: center;"><img src="//cdn.shopify.com/s/files/1/0144/4922/files/blog22_1024x1024.jpg?v=1586291705" alt=""></p>
<p style="text-align: center;">The Bianca dress features gorgeous princess seams and includes two bodice style options. The simple bodice style, shown above in the beach photos and ice cream shop, is a super quick sew, with the perfect fit! The ruffle bodice option, as shown above with the rainbow dress pictures and below with the strawberries &amp; plaid, has a darling ruffle sewn into the princess seams and extends up and over the shoulder straps...it really adds such a lovely touch to an already perfect dress!</p>
<p style="text-align: center;"><img src="//cdn.shopify.com/s/files/1/0144/4922/files/blog18_2048x2048.jpg?v=1586292575" alt=""></p>
<p style="text-align: center;"><img src="//cdn.shopify.com/s/files/1/0144/4922/files/blog20_1024x1024.jpg?v=1586292676" alt=""></p>
<p style="text-align: center;"><img src="//cdn.shopify.com/s/files/1/0144/4922/files/blog19_1024x1024.jpg?v=1586292737" alt=""></p>
<p style="text-align: center;">So, which options are you planning to sew up first? Knee length with bodice ruffles, maxi length with simple bodice? Midi length with the simple bodice? </p>
<p style="text-align: center;">We cannot wait to see what you create!</p>
<p style="text-align: center;">The bodice of Bianca is also the perfect place to add a faux button placket. Super easy and adds so much detail.  </p>
<p style="text-align: center;"><img src="//cdn.shopify.com/s/files/1/0144/4922/files/blog24_2048x2048.jpg?v=1586292952" alt=""></p>
<p style="text-align: center;"><img src="//cdn.shopify.com/s/files/1/0144/4922/files/blog26_2048x2048.jpg?v=1586292978" alt=""></p>
<p style="text-align: center;">Happy Sewing!</p>]]>
    </content>
  </entry>
  <entry>
    <id>https://violettefieldthreads.com/blogs/theblog/introducing-abigail</id>
    <published>2020-04-08T12:06:00-05:00</published>
    <updated>2020-04-08T12:06:19-05:00</updated>
    <link rel="alternate" type="text/html" href="https://violettefieldthreads.com/blogs/theblog/introducing-abigail"/>
    <title>Introducing {Abigail}</title>
    <author>
      <name>Jessica Herning</name>
    </author>
    <summary type="html">
      <![CDATA[<p><img src="//cdn.shopify.com/s/files/1/0144/4922/files/Blogmain_2048x2048.jpg?v=1586221548" alt=""></p>
<meta charset="utf-8">
<p><span>Hey Friends!!  Spring has sprung, and you know what that means?!  Our new 2020 spring patterns have sprung as well!  </span></p>
<meta charset="utf-8">
<p><span>The first PDF pattern we cannot wait to introduce you all to is our brand new Abigail dress!</span></p><p><a class="read-more" href="https://violettefieldthreads.com/blogs/theblog/introducing-abigail">More</a></p>]]>
    </summary>
    <content type="html">
      <![CDATA[<p><img src="//cdn.shopify.com/s/files/1/0144/4922/files/Blogmain_2048x2048.jpg?v=1586221548" alt=""></p>
<div style="text-align: center;">Hey Friends!!  Spring has sprung, and you know what that means...</div>
<div style="text-align: center;">our new 2020 Spring Dress Collection have sprung as well!!!</div>
<div style="text-align: center;">The first PDF pattern we cannot wait to introduce you all to is our brand new Abigail dress! This vintage inspired design is the epitome of dainty details and innocent, sweet goodness that we love and can't get enough of. </div>
<p><img src="//cdn.shopify.com/s/files/1/0144/4922/files/Blog1_1398c566-3d00-4fe3-963a-364687ef42d3_2048x2048.jpg?v=1586222726" alt=""></p>
<meta charset="utf-8">
<p style="text-align: center;"><span>Abigail is a truly vintage inspired beauty that will make your heart do little flips each time you see your darling doll wearing it! </span></p>
<p><img src="//cdn.shopify.com/s/files/1/0144/4922/files/blog3_e191d6f4-eafb-4744-acff-2c089f687cfb_1024x1024.jpg?v=1586222826" alt="" style="display: block; margin-left: auto; margin-right: auto;"></p>
<meta charset="utf-8">
<p style="text-align: center;"><span>It is a woven pattern featuring a unique bodice and skirt design with a front panel running down the middle of the dress. The high front and back neckline is rounded, and includes an optional small, dainty ruffle. One of the sleeve options is a small dainty ruffle, mimicking the same ruffle on the neckline. </span></p>
<meta charset="utf-8">
<p><span><img src="//cdn.shopify.com/s/files/1/0144/4922/files/BE3A7217_2048x2048.jpg?v=1586364332" alt=""></span></p>
<p style="text-align: center;">The front bodice panel and front skirt panel are absolutely perfect for showcasing embroidery work and specialty fabrics!! Here, Jessica created this strawberry look by repurposing a white vintage table cloth that had the strawberries already embroidered on and we are just in love with how well Abigail showcased this!</p>
<meta charset="utf-8">
<p style="text-align: center;"><span>When creating Abigail, you can choose between three different options for your skirt! You can choose to create the precious vintage length, a knee length (shown below in blue linen) or the show stopping double skirt option shown in these strawberry and gingham pictures!  </span></p>
<p style="text-align: center;"><span>The sash might be one of our favorite features of Abigail. The sash is attached into the front panel. It's gathered to create a wide, beautiful sash tied into a bow at the back center. </span></p>
<p><img src="//cdn.shopify.com/s/files/1/0144/4922/files/blog2_461f2fb3-1053-4b9e-90bb-440d9eb0ca5e_1024x1024.jpg?v=1586222764" alt="" style="display: block; margin-left: auto; margin-right: auto;"></p>
<p><img src="//cdn.shopify.com/s/files/1/0144/4922/files/BE3A7166_1024x1024.jpg?v=1586365066" alt="" style="display: block; margin-left: auto; margin-right: auto;"></p>
<div style="text-align: center;">Shown next is Abigail in a light blue linen. </div>
<div style="text-align: center;"><meta charset="utf-8"></div>
<div style="text-align: center;"><span>We used a lace for the ruffles on the sleeve and neckline. We coordinated the ruffles with the same color as the sash and are in love how well it tied it together! We used the same lace between the bodice front panels to showcase that design feature. You can use piping, lace, or any sort of trim. </span></div>
<div><span></span></div>
<p><img src="//cdn.shopify.com/s/files/1/0144/4922/files/blog12_1024x1024.jpg?v=1586223237" alt="" style="display: block; margin-left: auto; margin-right: auto;"></p>
<p><img src="//cdn.shopify.com/s/files/1/0144/4922/files/blog5_556cec69-3e51-4147-ab31-4aeb2a85ef21_1024x1024.jpg?v=1586223435" alt="" style="display: block; margin-left: auto; margin-right: auto;"></p>
<p><img src="//cdn.shopify.com/s/files/1/0144/4922/files/blog7_fccfd1d2-15d0-48de-af84-8997527996b8_1024x1024.jpg?v=1586223488" alt="" style="display: block; margin-left: auto; margin-right: auto;"></p>
<meta charset="utf-8">
<p style="text-align: center;"><span>All options for the skirt feature a flat front panel, with gathered sides. For this light blue linen dress, we made a slight modification (detailed in the Abigail PDF tutorial) and used (2) back underskirt pieces to create a traditional gathered skirt. </span></p>
<p style="text-align: center;"><span>Easy peasy! </span></p>
<p><img src="//cdn.shopify.com/s/files/1/0144/4922/files/blog10_67742295-ba6a-4ab7-83d4-e852279499cd_1024x1024.jpg?v=1586223521" alt="" style="display: block; margin-left: auto; margin-right: auto;"></p>
<p><img src="//cdn.shopify.com/s/files/1/0144/4922/files/blog11_b6efd66a-d97a-49ed-81be-db1fd430aa6f_2048x2048.jpg?v=1586223564" alt=""></p>
<p>And what is a vintage inspired dress without an option for a puff sleeve?! Whether you create it with the precious puff sleeve, the dainty small ruffle sleeve or with none for a sleeveless version, you really can't go wrong!</p>
<p><img src="//cdn.shopify.com/s/files/1/0144/4922/files/blog13_2048x2048.jpg?v=1586225794" alt=""></p>
<p><img src="//cdn.shopify.com/s/files/1/0144/4922/files/blog14_2048x2048.jpg?v=1586225853" alt=""><img src="//cdn.shopify.com/s/files/1/0144/4922/files/blog15_2048x2048.jpg?v=1586225904" alt=""></p>
<div style="text-align: center;">Abigail is available in Baby, Girls, and 18" Doll sizing. Make sure to grab your Abigail pattern this week while our spring sale discount code ( SPRING2020 ) is still live!</div>
<div style="text-align: center;">Happy Sewing!</div>]]>
    </content>
  </entry>
  <entry>
    <id>https://violettefieldthreads.com/blogs/theblog/pleating-like-a-pro-a-detailed-tutorial-on-how-to-pleat</id>
    <published>2020-03-06T12:50:00-06:00</published>
    <updated>2020-03-06T12:50:14-06:00</updated>
    <link rel="alternate" type="text/html" href="https://violettefieldthreads.com/blogs/theblog/pleating-like-a-pro-a-detailed-tutorial-on-how-to-pleat"/>
    <title>{Pleating Like A Pro} A detailed tutorial on how to pleat!</title>
    <author>
      <name>Ericka Wright</name>
    </author>
    <summary type="html">
      <![CDATA[<p><img src="//cdn.shopify.com/s/files/1/0144/4922/files/BE3A3873_1_2048x2048.jpg?v=1583266121" alt=""></p>
<meta charset="utf-8">
<p><span>At Violette Field Threads we love all of the vintage details that remind us of the darling, classic looks from the past.  Our newest pattern, Teagan, just released and many of our customers were interested in the horizontal pleats that Jessica Herning added to her version.using Bec Williams “Sweet Nothings” fabric from Hawthorne Supply Company. </span></p><p><a class="read-more" href="https://violettefieldthreads.com/blogs/theblog/pleating-like-a-pro-a-detailed-tutorial-on-how-to-pleat">More</a></p>]]>
    </summary>
    <content type="html">
      <![CDATA[<p><img src="//cdn.shopify.com/s/files/1/0144/4922/files/BE3A3873_1_2048x2048.jpg?v=1583266121" alt="">Hey Friends!!  You know by now, here at Violette Field Threads we love all of the vintage details that remind us of the darling, classic looks from the past!!  Our newest pattern, Teagan, just released and many of our customers were interested in the horizontal pleats that Jessica Herning added to her version using Bec Williams “Sweet Nothings” fabric from Hawthorne Supply Company.  So today I am going to explain TWO methods of adding horizontal pleats to any non-circle skirt pattern, PLUS some tips on adding trim to pleats as well!!!</p>
<p><img src="//cdn.shopify.com/s/files/1/0144/4922/files/VFT__Elodie8804_2048x2048.jpg?v=1583268672" alt=""></p>
<p>First off, you’ll want to start by choosing any pattern with a rectangle skirt.  Violette Field Threads provides cut charts with the measurements for rectangular pieces, but you can easily add the extra length to paper pattern pieces if you’re more comfortable using that method.  I’ve used Harper and Elodie for my examples and you’ve already seen Teagan with pleats added in Jessica's initial version!</p>
<p><img src="//cdn.shopify.com/s/files/1/0144/4922/files/VFT__Harper8796_1024x1024.jpg?v=1583268994" alt=""></p>
<p><img src="//cdn.shopify.com/s/files/1/0144/4922/files/VFT__Elodie8806_1024x1024.jpg?v=1583268786" alt=""></p>
<p> After you’ve chosen your pattern, you'll want to decide the look you want.  On my Rose themed Elodie above, I chose one large 3” pleat and for my pinstripe Harper above, I created two 3/4” pleats.  On Teagan, Jessica created two 2” horizontal pleats. <em>*Tip - Using a scrap piece of fabric to try out pleat sizes and spacing can help you visualize your final look.</em></p>
<p><em><img src="//cdn.shopify.com/s/files/1/0144/4922/files/BE3A3998_1_1024x1024.jpg?v=1583269337" alt=""></em></p>
<p>Next you’ll need to figure out how much length to add to your skirt pieces.  <em>*Note - If your chosen pattern instructs you to add a lining to the skirt (such as Elodie) you will not need to make any changes to the length of your skirt lining pieces.</em></p>
<p><strong><em><img src="//cdn.shopify.com/s/files/1/0144/4922/files/pleatchart_2048x2048.jpg?v=1583269656" alt=""></em></strong></p>
<p>Formula:</p>
<p>Length of finished Pleat x 2 =_______ x Number of Pleats = Total length to Add on to the bottom of the skirt measurement</p>
<p>Example:  For Harper I wanted two 3/4” pleats so my math looked like this -</p>
<p>3/4 x 2 = 1 1/2 (This is for one pleat and I wanted two.)  I then took that total and multiplied it by how many pleats I wanted to add.  1 1/2 x 2 = 3.  That gave me a total of 3” I needed to add to the length of my skirt to create two 3/4” horizontal pleats.</p>
<p><img src="//cdn.shopify.com/s/files/1/0144/4922/files/VFT__Harper8789_2048x2048.jpg?v=1583268712" alt=""></p>
<p>Once you have your total, add that measurement to the appropriate length using the cut chart in your pattern (or the pattern piece itself) and cut your skirt pieces out.  Follow the directions for sewing side seams and hemming in your tutorial.  Now it's time for the fun part - adding the pleats!!!</p>
<p><strong>Method 1:</strong></p>
<p>First off, you measure how far up from the hem you want the folded edge of the bottom pleat to fall.  I wanted the bottom pleat folded edge to be 4” from the hemmed edge of the skirt.</p>
<p><img src="//cdn.shopify.com/s/files/1/0144/4922/files/VFT__Pleat_BlogPostFeb20208751_1024x1024.jpg?v=1583271442" alt=""></p>
<p> From there, add the total length you added for one pleat.  For this version I’m creating 3/4” pleats so I added 1 1/2” for each pleat.  Added to the 4”, I measured up a total of 5 1/2”.  Using your preferred method of marking (pins or disappearing ink pen for example) mark that measurement all the way around the skirt.</p>
<p><img src="//cdn.shopify.com/s/files/1/0144/4922/files/VFT__Pleat_BlogPostFeb20208755_1024x1024.jpg?v=1583271880" alt=""></p>
<p>Fold your skirt <strong>wrong</strong> sides together at your markings and iron the fold flat.</p>
<p><img src="//cdn.shopify.com/s/files/1/0144/4922/files/VFT__Pleat_BlogPostFeb20208754_1024x1024.jpg?v=1583272311" alt=""></p>
<p>Now sew along the folded edge using the length of your finished pleat as your seam allowance.  My finished pleat is 3/4” so that was my seam allowance.</p>
<p><img src="//cdn.shopify.com/s/files/1/0144/4922/files/VFT__Pleat_BlogPostFeb20208760_1024x1024.jpg?v=1583272548" alt=""></p>
<p>Once you’ve sewn your pleat, unfold the skirt so that it is laying flat with the wrong side down and right side facing up.  Now you can iron the pleat down towards the hem.</p>
<p><img src="//cdn.shopify.com/s/files/1/0144/4922/files/VFT__Pleat_BlogPostFeb20208765_1024x1024.jpg?v=1583341597" alt=""></p>
<p>Repeat the steps for your next pleat using the stitch line of the pleat you’ve just sewn as your starting line for measuring your next pleat placement.</p>
<p><em> </em><em>*Note - Spacing between the pleats is a personal design choice.  Use whatever length between pleats gets you the look you want.  I prefer small pleats being closer together, but it</em><em>’</em><em>s completely up to you!</em></p>
<p><em> </em>I chose to have my next pleat 1/2” above the first one.  So I measured up a total of 3” from the stitch line of my first pleat.  I marked it just like before.</p>
<p><img src="//cdn.shopify.com/s/files/1/0144/4922/files/VFT__Pleat_BlogPostFeb20208768_2048x2048.jpg?v=1583342397" alt=""></p>
<p>Then, once again, I folded the fabric with the wrong sides together at my markings and ironed flat.</p>
<p><img src="//cdn.shopify.com/s/files/1/0144/4922/files/VFT__Pleat_BlogPostFeb20208769_1024x1024.jpg?v=1583342526" alt=""> Finally, I sewed that pleat using the same  3/4” seam allowance....and voilà!  All you have left to do is iron it down towards the hem like you did for the first pleat and you are done!!</p>
<p><img src="//cdn.shopify.com/s/files/1/0144/4922/files/VFT__Pleat_BlogPostFeb20208770_1024x1024.jpg?v=1583342683" alt=""></p>
<p> <strong>Method 2:</strong></p>
<p>For this skirt, I wanted the pleat closer to the middle of the skirt since I was creating a large pleat.  After sewing my side seams and hemming, I folded my skirt in half and ironed a fold all the way around.</p>
<p><img src="//cdn.shopify.com/s/files/1/0144/4922/files/VFT__Pleat_BlogPostFeb20208772_2048x2048.jpg?v=1583342950" alt=""></p>
<p>I then unfolded the skirt and used that fold line to measure down towards the hem the length of my finished pleat.  I wanted a 3” pleat so that’s the length I measured.</p>
<p><img src="//cdn.shopify.com/s/files/1/0144/4922/files/VFT__Pleat_BlogPostFeb20208773_1024x1024.jpg?v=1583343057" alt=""></p>
<p>Next, mark with pins and fold wrong sides together.  Iron the fold.</p>
<p><img src="//cdn.shopify.com/s/files/1/0144/4922/files/VFT__Pleat_BlogPostFeb20208774_1024x1024.jpg?v=1583343177" alt=""></p>
<p>Sew using the length of your finished pleat like before which should be the fold you ironed earlier when you folded the skirt in half.  For mine, I used 3” for a 3” finished pleat.</p>
<p><img src="//cdn.shopify.com/s/files/1/0144/4922/files/VFT__Pleat_BlogPostFeb20208775_1024x1024.jpg?v=1583343279" alt=""> </p>
<p>Iron the newly sewn pleat down towards the hem.  And then you can finish the skirt according to your tutorial!!</p>
<p><img src="//cdn.shopify.com/s/files/1/0144/4922/files/VFT__Pleat_BlogPostFeb20208777_1024x1024.jpg?v=1583343433" alt=""></p>
<p><strong>Adding Trim:</strong></p>
<p> Fold the pleat up to sew your trim on to the bottom edge underneath side of the pleat.  Sew very carefully and slowly along the edge of the pleat attaching the very top edge of the lace trim to the underside of the pleat.</p>
<p><img src="//cdn.shopify.com/s/files/1/0144/4922/files/VFT__Pleat_BlogPostFeb20208779_1024x1024.jpg?v=1583343611" alt=""></p>
<p> When finished, iron the pleat and trim back down.  Your top lace edge should be on the underside of the pleat.</p>
<p><img src="//cdn.shopify.com/s/files/1/0144/4922/files/VFT__Pleat_BlogPostFeb20208780_1_1024x1024.jpg?v=1583343701" alt=""></p>
<p>And now you can sit back and look at the gorgeous pleats you have just created on your classic and timeless garment!!!</p>
<p>XOXO,</p>
<p>Kim Hembree</p>
<p><img src="//cdn.shopify.com/s/files/1/0144/4922/files/BE3A3817_2_2048x2048.jpg?v=1583344924" alt=""></p>]]>
    </content>
  </entry>
  <entry>
    <id>https://violettefieldthreads.com/blogs/theblog/introducing-flora-claire-what-sleepover-dreams-are-made-of</id>
    <published>2020-02-18T13:53:00-06:00</published>
    <updated>2020-02-19T12:56:29-06:00</updated>
    <link rel="alternate" type="text/html" href="https://violettefieldthreads.com/blogs/theblog/introducing-flora-claire-what-sleepover-dreams-are-made-of"/>
    <title>{Introducing} Flora &amp; Claire : What Sleepover Dreams are Made of!</title>
    <author>
      <name>Jessica Herning</name>
    </author>
    <summary type="html">
      <![CDATA[<img src="//cdn.shopify.com/s/files/1/0144/4922/files/blog8_2048x2048.jpg?v=1581634550" alt=""><meta charset="utf-8"><span>Hey, hey sew sisters!!  Our FIRST release of 2020 is here!!!  We are so excited to introduce you to TWO absolutely DREAMY patterns!  </span><p><a class="read-more" href="https://violettefieldthreads.com/blogs/theblog/introducing-flora-claire-what-sleepover-dreams-are-made-of">More</a></p>]]>
    </summary>
    <content type="html">
      <![CDATA[<p><img src="//cdn.shopify.com/s/files/1/0144/4922/files/BE3A4395_2_2048x2048.jpg?v=1581615829" alt=""></p>
<p>Hey, hey sew sisters!!  Our FIRST release of 2020 is here!!!  We are so excited to introduce you to TWO absolutely DREAMY patterns!  </p>
<p>Meet: {Flora}, the comfiest knit nightgown pattern, guaranteed to turn your little one (or Momma) into your very own sleeping beauty! </p>
<p><img src="//cdn.shopify.com/s/files/1/0144/4922/files/blog1_b22fbc3a-fd71-4be4-9075-c7fd1e142358_2048x2048.jpg?v=1581633685" alt=""></p>
<p>When creating Flora, there are so many great ways to customize this pattern to suite the season!  Whether you want to create the long sleeves with gathers, or the long sleeves with cuffs - it's sure to keep Sleeping Beauty warm during those cooler months.  But no one wants long sleeves in the summer time...so make sure to create a sleeveless version while you are at it!  Add the darling ties to the shoulders and you have a nightgown fit for a princess!</p>
<p><img src="//cdn.shopify.com/s/files/1/0144/4922/files/blog2_66566392-6908-4d20-95ba-921a2ec78913_2048x2048.jpg?v=1581633927" alt=""></p>
<p>Whether you're planning a movie night, a trip to grandmas, or even some fancy glamping, this is the pattern for you!  Flora is available in sizes for Misses, Tween, Girls, Baby and even Doll...so this pattern is THE one for all your matchy-matchy goodness.  </p>
<p style="text-align: center;"><img src="//cdn.shopify.com/s/files/1/0144/4922/files/blog11_1024x1024.jpg?v=1581636379" alt=""></p>
<p style="text-align: center;"><img src="//cdn.shopify.com/s/files/1/0144/4922/files/blog3_1024x1024.jpg?v=1581634032" alt=""></p>
<p>And speaking of glamping, we have JUST the pattern for you....Meet CLAIRE!</p>
<p><img src="//cdn.shopify.com/s/files/1/0144/4922/files/blog6_2048x2048.jpg?v=1581634226" alt=""></p>
<p>Have you ever thought about creating a sleeping bag, but you weren't quite sure where to start?!  Look no further, as we have taken all of the guess work out of it for you!!! </p>
<p><img src="//cdn.shopify.com/s/files/1/0144/4922/files/blog7_2048x2048.jpg?v=1581634386" alt=""> Claire is a fully functioning sleeping bag, with all the bells and whistles for customizing exactly to your liking!!  The front main can be created as a solid fabric, or with 3, 4 or 5 panels!  Add some ruffles to that, and you not only have a super comfy sleeping bag, but your movie nights will be the talk of the town!</p>
<p style="text-align: center;"><img src="//cdn.shopify.com/s/files/1/0144/4922/files/blog8_1024x1024.jpg?v=1581634550" alt=""></p>
<p>And that darling carrying strap you see in the picture above?! That is an optional attached strap, and the directions for that are included in the pattern!  Throw in a coordinating pillowcase (also included in this pattern) and your little one will be ready for all the adventures coming her way!!</p>
<p><img src="//cdn.shopify.com/s/files/1/0144/4922/files/blog10_2048x2048.jpg?v=1581634850" alt=""> Now, we know some of you may be a little intimidated by sewing in the standard full zipper that sleeping bags usually have...but you really have no reason to be worried!  Our instructions help explain things step by step, and if that is still not enough to convince you to make one- we also include 2 other closure options as well - the full ribbon tie closure or a half zipper/half ribbon tie version!  Really, you CAN do it!!</p>
<p>And did we forget to mention?  Claire is available in DOLL sizes as well?!?! SQUEAL!!!</p>
<p style="text-align: center;"><img src="//cdn.shopify.com/s/files/1/0144/4922/files/blog4_1024x1024.jpg?v=1581634816" alt=""><img src="//cdn.shopify.com/s/files/1/0144/4922/files/blog5_1024x1024.jpg?v=1581634879" alt=""></p>
<p> What are you waiting for?!  Grab your copies of Flora and Claire and let's get this party started!!</p>
<p><img src="//cdn.shopify.com/s/files/1/0144/4922/files/blog9_2048x2048.jpg?v=1581634743" alt=""></p>]]>
    </content>
  </entry>
  <entry>
    <id>https://violettefieldthreads.com/blogs/theblog/2019-tips-tricks-recap-r-z-giveaway</id>
    <published>2020-01-17T15:15:00-06:00</published>
    <updated>2020-01-25T13:02:41-06:00</updated>
    <link rel="alternate" type="text/html" href="https://violettefieldthreads.com/blogs/theblog/2019-tips-tricks-recap-r-z-giveaway"/>
    <title>2019 Tips &amp; Tricks Recap {R-Z} + Giveaway!</title>
    <author>
      <name>Jessica Herning</name>
    </author>
    <summary type="html">
      <![CDATA[<p><img src="//cdn.shopify.com/s/files/1/0144/4922/files/pinktipsandtricks_2048x2048.jpg?v=1577484146" alt=""></p>
<meta charset="utf-8">
<p><span>Welcome back to the FINAL week of our tips and tricks recap from 2019!  We will be reviewing tips from letters R-Z and then we will post a GIVEAWAY at the end... so lets get started!!</span></p><p><a class="read-more" href="https://violettefieldthreads.com/blogs/theblog/2019-tips-tricks-recap-r-z-giveaway">More</a></p>]]>
    </summary>
    <content type="html">
      <![CDATA[<p><img src="//cdn.shopify.com/s/files/1/0144/4922/files/pinktipsandtricks_2048x2048.jpg?v=1577484146" alt="" style="display: block; margin-left: auto; margin-right: auto;"></p>
<p>Welcome back to the FINAL week of our tips and tricks recap from 2019!  We will be reviewing tips from letters R-Z and then we will post a GIVEAWAY at the end... so lets get started!!</p>
<p><img src="//cdn.shopify.com/s/files/1/0144/4922/files/R_1024x1024.jpg?v=1578583332" alt="" style="display: block; margin-left: auto; margin-right: auto;"></p>
<p>R is for a Rolled Hem!  A rolled hem is a very narrow finish and can be made on a regular sewing machine or using a serger!  </p>
<p><img src="//cdn.shopify.com/s/files/1/0144/4922/files/rolled-hem3_1024x1024.jpg?v=1578586204" alt="" style="display: block; margin-left: auto; margin-right: auto;"></p>
<p>If you are sewing on a serger, you will only use three threads.  The settings may vary from machine to machine, and on some you may need to remove the stitch finger.  You may want to consult your manual for the correct settings for your specific machine.  If you are sewing a rolled hem on your regular machine, there is a specific foot you can use (although they come in several different sizes).  It features a groove on the back and a funnel on the front side.</p>
<p><img src="//cdn.shopify.com/s/files/1/0144/4922/files/rolled-hem1_1024x1024.jpg?v=1578586798" alt="" style="display: block; margin-left: auto; margin-right: auto;"></p>
<p>This is where your fabric will roll up into and will go out through the back, running through the groove while the needle goes through it, creating a very small hem.  Rolled hems are usually done on a regular machine when working with light-weight to medium-weight woven fabrics, but is most common with delicate fabrics.  On either the regular machine or serger, it is a beautiful finish and can be especially helpful if you need to squeak out a hem that takes up less than a 1/2" of fabric.</p>
<p><img src="//cdn.shopify.com/s/files/1/0144/4922/files/rolled-hem2_1024x1024.jpg?v=1578587469" alt="" style="display: block; margin-left: auto; margin-right: auto;"></p>
<p><img src="//cdn.shopify.com/s/files/1/0144/4922/files/S_1024x1024.jpg?v=1578593219" alt="" style="display: block; margin-left: auto; margin-right: auto;"></p>
<p>S stands for Selvage!  A selvage is the side of fabric where the finished edge stops the edges from fraying.  The warp threads run parallel down the length of the fabric and the selvage is created when the weft threads are folded back on themselves at the end of each row as the fabric is woven.  <img src="//cdn.shopify.com/s/files/1/0144/4922/files/selvage3_1024x1024.jpg?v=1578593477" alt="" style="display: block; margin-left: auto; margin-right: auto;"></p>
<p>The selvage has become a beautiful part of the fabric design, and holds a wealth of information, such as the name of the fabric manufacturer and fabric make up.  We have seen people use them on quilts and in other small projects.  Another great use for them is as size tags on your projects.  The color swatch circles usually have numbers printed inside of them and, since they don't fray, they work well for small size tags.</p>
<p><img src="//cdn.shopify.com/s/files/1/0144/4922/files/selvage4_1024x1024.jpg?v=1578593758" alt="" style="display: block; margin-left: auto; margin-right: auto;"></p>
<p><img src="//cdn.shopify.com/s/files/1/0144/4922/files/T_1024x1024.jpg?v=1578593856" alt="" style="display: block; margin-left: auto; margin-right: auto;"></p>
<p>T is for tension! In the sewing worth this can easily bring on a headache if you do not understand it properly. If you are somewhat new to sewing, you may be asking what in the world it is?  Tension is what keeps your bottom and top stitches in equal timing with one another.  This ensures that the stitching on the front and back of your fabric looks the same, and that neither the upper nor the bobbin thread shows up on the opposite side of the fabric.</p>
<p><img src="//cdn.shopify.com/s/files/1/0144/4922/files/tension3_1024x1024.jpg?v=1578596760" alt="" style="display: block; margin-left: auto; margin-right: auto;"></p>
<meta charset="utf-8">
<p><span>When the upper thread (what's going through your needle) is showing on the wrong side of the fabric, this means your tension is too low.  In order to fix it, you raise the tension little by little, by rotating your tension knob to the right.</span></p>
<p><img src="//cdn.shopify.com/s/files/1/0144/4922/files/tension1_1024x1024.jpg?v=1578596456" alt="" style="display: block; margin-left: auto; margin-right: auto;"></p>
<p>If the bottom thread from your bobbin is showing on the right side of the fabric, then it means that the tension disk is too tense.  Slowly begin rotating your disk to the left, checking with each movement of the dial to see if the thread tension has evened back out when you're sewing.  </p>
<p><img src="//cdn.shopify.com/s/files/1/0144/4922/files/tension4_1024x1024.jpg?v=1578597032" alt="" style="display: block; margin-left: auto; margin-right: auto;"></p>
<p>If you have tried troubleshooting using these tips above, but are still having issues with your thread tension, your problem might be with your bobbin.  The bobbin case also has some tension for the thread, and depending on what machine you use, you may be able to adjust it slightly by tightening or loosening a screw located on the side of your bobbin case. It is definitely a trial and error situation, but once you get the settings adjusted to the proper tension, you will notice right away if something is off again in the future! </p>
<p><img src="//cdn.shopify.com/s/files/1/0144/4922/files/U_1024x1024.jpg?v=1578597215" alt="" style="display: block; margin-left: auto; margin-right: auto;"></p>
<p>U is for Universal Needles!! Whether you have the newest model sewing machine or a basic, entry level machine, the most important tool used is your needle! </p>
<p><img src="//cdn.shopify.com/s/files/1/0144/4922/files/universal1_1024x1024.jpg?v=1578599823" alt="" style="display: block; margin-left: auto; margin-right: auto;"></p>
<p>Did you know?  The sewing life of a needle is 8 hours!  After that, the point will become worn and stitch quality may become compromised.  We always keep some on-hand to change regularly.  A good rule of thumb is to use a new needle at the start of every project.  </p>
<p><img src="//cdn.shopify.com/s/files/1/0144/4922/files/universal2_1024x1024.jpg?v=1578599936" alt="" style="display: block; margin-left: auto; margin-right: auto;"></p>
<p>Now, on to the Universal needle.  The name says it all - universal - because it can be used on the majority of projects.  We can use universal needles for both woven and knit fabrics because the point of a universal needle is both sharp and rounded, allowing the needle to have the characteristics of both sharp and ballpoint needles alike.  They are not optimal for knits though, like true ballpoint stretch needles.  Here is a great guide to knowing what needles you have and/or need!</p>
<p><img src="//cdn.shopify.com/s/files/1/0144/4922/files/universal3_1024x1024.jpg?v=1578600123" alt="" style="display: block; margin-left: auto; margin-right: auto;"></p>
<p><img src="//cdn.shopify.com/s/files/1/0144/4922/files/V_1024x1024.jpg?v=1578600211" alt="" style="display: block; margin-left: auto; margin-right: auto;"></p>
<p> </p>
<p>V is for Vinyl!  One of the latest and greatest things to enter the craft world over the last several years. With the Cricut, Silhouette, Brother Scan &amp; Cut and other home vinyl cutting machines available, we've seen all sorts of great uses for this product.  </p>
<p><img src="//cdn.shopify.com/s/files/1/0144/4922/files/vinyl1_1024x1024.jpg?v=1578601933" alt="" style="display: block; margin-left: auto; margin-right: auto;"></p>
<p>We have seen so many creative ways that our members have incorporated vinyl into their at home sewing projects, to include details for princess costumes, wording for special occasion tops/dresses, and even adding size tags inside clothing with the vinyl!  One of my personal favorites though, is how Ashley Cowan used vinyl to create the face for her blushing bunny! </p>
<p><img src="//cdn.shopify.com/s/files/1/0144/4922/files/vinyl2_1024x1024.jpg?v=1578602117" alt=""></p>
<p>You can use a vinyl machine to add so many personal touches to your sewing projects!  The options truly are endless!</p>
<p><em><img src="//cdn.shopify.com/s/files/1/0144/4922/files/vinyl3_1024x1024.jpg?v=1578602128" alt="" style="display: block; margin-left: auto; margin-right: auto;"></em></p>
<p> </p>
<p><img src="//cdn.shopify.com/s/files/1/0144/4922/files/W_1024x1024.jpg?v=1578602662" alt="" style="display: block; margin-left: auto; margin-right: auto;"></p>
<p>W is for the Walking Foot!  The walking foot is a presser foot that allows even sewing over lots of layers or thicker fabric.</p>
<p><img src="//cdn.shopify.com/s/files/1/0144/4922/files/walkingfoot2_1024x1024.jpg?v=1578604812" alt="" style="display: block; margin-left: auto; margin-right: auto;"></p>
<p>It grips the fabric on the top, while the feed dogs grip the bottom, and they work together to help the fabric to walk through when sewing.  It is a very bulky and strange looking foot, but has a few different uses. </p>
<p><img src="//cdn.shopify.com/s/files/1/0144/4922/files/walkingfoot3_1024x1024.jpg?v=1578604932" alt="" style="display: block; margin-left: auto; margin-right: auto;"></p>
<p>Many people use it to sew knits, but we don't think they are necessarily helpful on all machines.  Some machines sew knits just fine without it, but there are people who have lots of success sewing knit with the aid of this foot, so it may be worth experimenting.  It can also be very useful when sewing multiple layers, like on straps or binding.  It will keep those ripples that can sometimes show up from happening because all layers of the fabric will be fed evenly through.  Whatever you decide to use your walking foot for, it is a very handy foot to own!</p>
<p><img src="//cdn.shopify.com/s/files/1/0144/4922/files/X_1024x1024.jpg?v=1578605112" alt="" style="display: block; margin-left: auto; margin-right: auto;"></p>
<p> X is for X-tra! We are getting close to the end of the alphabet, and finding "sewing" themed tips for each letter has been a lot of fun...but the letter "X" had us stumped!  Not being able to come up with a term that started with the letter "X" we decided to get a little creative!!  Letter "X" for our tips and tricks is going to stand for being a little "X-tra" = something we always encourage!!  We provide the patterns, and what's great about them is all the room for creativity you have with them!  We love it when we see designs that have gone the extra mile: put on that extra trim or those special buttons.  Sometimes it's the extraordinary touches that brings an outfit from great to spectacular!  So, don't be afraid to be a little "X-tra!" Make your garment unique to you and "X-tra" special!! </p>
<p><img src="//cdn.shopify.com/s/files/1/0144/4922/files/extra_1024x1024.jpg?v=1578606053" alt="" style="display: block; margin-left: auto; margin-right: auto;"></p>
<p><img src="//cdn.shopify.com/s/files/1/0144/4922/files/Y_1024x1024.jpg?v=1578608797" alt="" style="display: block; margin-left: auto; margin-right: auto;">Y is for a Yardage Chart!  When you are out and about at a fabric store, having a handy yardage chart for easy access can make deciding on how much you need cut a simple task!  Just print (or save a screen shot) of this cute little chart below and keep it for a quick reference!  </p>
<p><img src="//cdn.shopify.com/s/files/1/0144/4922/files/yardagechart_1024x1024.jpg?v=1578609513" alt="" style="display: block; margin-left: auto; margin-right: auto;"></p>
<p>And moving on to our FINAL letter of the alphabet - AND our giveaway as well.....</p>
<p><img src="//cdn.shopify.com/s/files/1/0144/4922/files/Z_1024x1024.jpg?v=1578609580" alt="" style="display: block; margin-left: auto; margin-right: auto;"></p>
<p>Z is for ZIPPERS!!!  Zippers are something we are ALL familiar with using in our day to day lives, but did you know there are many different kinds of zippers? Depending on what project you are working on would decide which type of zipper you should purchase?! </p>
<p><img src="//cdn.shopify.com/s/files/1/0144/4922/files/zipper1_1024x1024.jpg?v=1578611272" alt="" style="display: block; margin-left: auto; margin-right: auto;"></p>
<p>Although there are many types of zippers, for times sake, we are going to cover the 3 most commonly used zippers!</p>
<p><img src="//cdn.shopify.com/s/files/1/0144/4922/files/zipper3_1024x1024.jpg?v=1578612229" alt="" style="display: block; margin-left: auto; margin-right: auto;"></p>
<p>The first type of zipper (shown above) is the Nylon Coil Zipper (also knows as an all-purpose zipper) and is the most common zipper option and can be used to make a variety of projects. Coil zippers are thin, lightweight zippers with small teeth. They are made of plastic with polyester sides and come in a variety of colors. The endless varieties of colors available make this zipper a great choice when making our patterns, since you can usually find a match for the fabric you’re working with. This lightweight zipper can bend and flow with the garment and doesn’t weigh down the material like a heavier type of zipper would.</p>
<p><img src="//cdn.shopify.com/s/files/1/0144/4922/files/zipper4_1024x1024.jpg?v=1578612393" alt="" style="display: block; margin-left: auto; margin-right: auto;"></p>
<p>The second type of zipper (shown above) is the Invisible zipper!  Unlike the nylon coil zipper, the coil for an invisible zipper is located on the back of the zipper, which hides it from view. The only part of the zipper that is exposed is the tear drop pull at the top of the zipper. This zipper is also lightweight and has very fine teeth. An invisible zipper can be tricky to sew, and I recommend ironing the zipper open before pinning it to your garment. You can also use an invisible zipper foot which helps to create the best seam.</p>
<p><img src="//cdn.shopify.com/s/files/1/0144/4922/files/zipper5_1024x1024.jpg?v=1578612587" alt="" style="display: block; margin-left: auto; margin-right: auto;"></p>
<p>The third type of zipper is the metal and plastic molded zippers.  Both molded plastic and metal zippers have teeth that have been molded at regular intervals on both sides of the zipper tape.  Both of these zipper options are very sturdy and do well when using heavier material, so better to be used for jeans, bags or jackets versus lightweight dresses.</p>
<p><img src="//cdn.shopify.com/s/files/1/0144/4922/files/a-z_1024x1024.jpg?v=1578612931" alt="" style="display: block; margin-left: auto; margin-right: auto;"></p>
<p>And there you have it - our A-Z Sewing Tips &amp; Tricks Roundup!! We hope you enjoyed these helpful tips and tricks being posted in one handy location for future reference!  And to end it with a bang, we would love to do a GIVEAWAY for one lucky reader to be able to choose ANY 3 of our patterns to download, FREE OF CHARGE!!  All you have to do to enter is comment below with your 3 favorite tips we have shared (they can be from any of these 3 past blog posts from our A-Z roundup!) and we will choose one random winner to receive the patterns of their choice next week! </p>
<p>Edited to add:  CONGRATULATIONS to our winner = <strong>Lindsay Gibson!! </strong></p>
<p> We will be sending you an email so you can claim your prize!</p>
<meta charset="utf-8">
<p><span>HAPPY SEWING!!!</span></p>
<p> </p>]]>
    </content>
  </entry>
  <entry>
    <id>https://violettefieldthreads.com/blogs/theblog/2019-tips-tricks-recap-i-q</id>
    <published>2020-01-08T11:01:00-06:00</published>
    <updated>2020-01-08T12:35:55-06:00</updated>
    <link rel="alternate" type="text/html" href="https://violettefieldthreads.com/blogs/theblog/2019-tips-tricks-recap-i-q"/>
    <title>2019 Tips &amp; Tricks Recap! {I-Q}</title>
    <author>
      <name>Ericka Wright</name>
    </author>
    <summary type="html">
      <![CDATA[<meta charset="utf-8">
<p><span><img src="//cdn.shopify.com/s/files/1/0144/4922/files/pinktipsandtricks_2048x2048.jpg?v=1577484146" alt="">Hey Sewing Sisters!! Welcome to 2020!!  And to the 2nd edition of our Tips and Tricks Recap!  Today we are going to continue our recap of last years tips and tricks that were shared in our newsletters, continuing on with the letter I and going through letter Q!  </span></p><p><a class="read-more" href="https://violettefieldthreads.com/blogs/theblog/2019-tips-tricks-recap-i-q">More</a></p>]]>
    </summary>
    <content type="html">
      <![CDATA[<p style="text-align: left;"><img alt="" src="//cdn.shopify.com/s/files/1/0144/4922/files/pinktipsandtricks_2048x2048.jpg?v=1577484146" style="float: none; display: block; margin-left: auto; margin-right: auto;"></p>
<p>Hey Sewing Sisters!! Welcome to 2020!!  And to the 2nd edition of our Tips and Tricks Recap!  Today we are going to continue our recap of last years tips and tricks that were shared in our newsletters, continuing on with the letter I and going through letter Q!  </p>
<p><img src="//cdn.shopify.com/s/files/1/0144/4922/files/I_1024x1024.jpg?v=1578000562" alt="" style="display: block; margin-left: auto; margin-right: auto;"></p>
<p>I is for interfacing. What is interfacing and why is it important? Interfacing is used to provide stability, shaping and support.   </p>
<p style="text-align: center;"><img src="//cdn.shopify.com/s/files/1/0144/4922/files/interfacing_2048x2048.jpg?v=1578000812" alt=""></p>
<p>Collars, cuffs, facings and plackets are the most commonly interfaced areas, but are not the only areas it can be used.  For example, our Wren weekender bag is a great place to use interfacing!  </p>
<p><img src="//cdn.shopify.com/s/files/1/0144/4922/files/interfacing2_2048x2048.jpg?v=1578001071" alt=""></p>
<p>There are several types of interfacing, such as fusible and sew-in.  Some very lightweight fabrics cannot withstand the heat of fusible interfacing and it also adds a little more stiffness.  If that isn't your desired outcome, you may want to go with sew-in or lightweight interfacing as lightweight interfacing will not take away from the drape or airiness of your fabric.  Another great place to use interfacing is in your button plackets.  Using it there will reinforce your holes, which is especially helpful if you have little ones who like to dress themselves.</p>
<p><img src="//cdn.shopify.com/s/files/1/0144/4922/files/J_1024x1024.jpg?v=1578001434" alt="" style="display: block; margin-left: auto; margin-right: auto;"></p>
<p style="text-align: left;">J is for JUST DO YOUR BEST!!!  It was one of our favorite tips from this collection, as it applies to EVERYONE!  Each of us are in different places in our sewing journey.  Some of us have been sewing for many years and some may have picked up the craft just this week.  No matter where you are on your path of sewing, remember to just do your best.  Give yourself grace and time to improve and grow as a sewist!  Don't get discouraged, and just take each project one step at a time!  </p>
<p style="text-align: left;"><img src="//cdn.shopify.com/s/files/1/0144/4922/files/Just_do_your_best_2048x2048.jpg?v=1576261026" alt="" style="display: block; margin-left: auto; margin-right: auto;"></p>
<p>If you are looking for a place to share your projects or get answers to questions, our Facebook group is a great place to get encouragement from others who many have been where you are &amp; might have wonderful words of wisdom to share!  We are all in this together and love to rejoice in each other's successes!</p>
<p><img src="//cdn.shopify.com/s/files/1/0144/4922/files/K_1024x1024.jpg?v=1578001828" alt="">K is for Knits. We are sharing some of our favorite tips and tricks for sewing with knits.  Sewing with knits may seem a little foreign, especially if you are only used to working with woven fabric, but it is such a great tool to have in your toolbox as knits are always kid-approved and many times knit patterns are super quick sews! </p>
<p><img src="//cdn.shopify.com/s/files/1/0144/4922/files/knits_ca6cdce0-88a8-4610-b303-a5f709df4efa_1024x1024.jpg?v=1578002179" alt="" style="display: block; margin-left: auto; margin-right: auto;"></p>
<p>The first thing to learn when working with knits, is that there are many types, and each works better for different projects.  Some knits are easier to sew with than others.  The less stretch a knit has, the easier it is to sew with, however it might not be the right knit for the project.  Knowing a little about the types of knits available will help you choose the correct type of knit for a specific pattern.  Here is a list of 7 more commonly used knits:</p>
<p style="text-align: center;"><img src="//cdn.shopify.com/s/files/1/0144/4922/files/Cotton-Single-jersey_2048x2048.jpg?v=1578002526" alt=""></p>
<p>Cotton Jersey (shown above): A knit fabric made of natural cotton and used mostly in t-shirts.  This knit has a sturdy hand and wear with minimal stretch.  Note: unless the T-shirt has a wide neck opening, another type of knit would be needed for the neckband.</p>
<p style="text-align: center;"><img src="//cdn.shopify.com/s/files/1/0144/4922/files/lycra-single-jersey_2048x2048.jpg?v=1578003313" alt=""></p>
<p>Cotton Lycra (shown above): Known for its smooth hand, excellent stretch and recovery.  This is what we would suggest for most of our patterns.</p>
<p style="text-align: center;"><img src="//cdn.shopify.com/s/files/1/0144/4922/files/interlock_1024x1024.jpg?v=1578004147" alt=""></p>
<p>Cotton Interlock (Shown above): A double knit that is thicker and a little heavier than a single knit, which can make it a bit easier to sew with.  This knit typically is the most stable of all knits, keeping its shape very well.</p>
<p style="text-align: center;"><img src="//cdn.shopify.com/s/files/1/0144/4922/files/ribbed_1024x1024.jpg?v=1578004599" alt=""></p>
<p>Cotton Ribbed (shown above):  A double-knit fabric in which the wales or vertical rows of stitches intermesh alternatively on the face and the back (like a t-shirt neckband)</p>
<p style="text-align: center;"><img src="//cdn.shopify.com/s/files/1/0144/4922/files/JerseyITY_1024x1024.jpg?v=1578004925" alt=""></p>
<p> Jersey ITY (shown above): Typically comprised of 92% Polyester/8% Lycra, this knit is ultra soft, does not wrinkle and has great stretch and drape.  It is perfect for active-wear, dresses and tops.  </p>
<p style="text-align: center;"><img src="//cdn.shopify.com/s/files/1/0144/4922/files/frenchterry_1024x1024.jpg?v=1578005311" alt=""></p>
<p>French Terry (shown above): Features looping and piling on one side only and has a flat, unlooped back.  Typically this knit is 100% (meaning not much stretch), but it can be found with spandex or other fibers for increased stretch and recovery.</p>
<p style="text-align: center;"><img src="//cdn.shopify.com/s/files/1/0144/4922/files/lycra_1024x1024.jpg?v=1578005558" alt=""></p>
<p>Lycra Spandex (Shown above): This type of knit has a heavier weight, very smooth hand, and a four way stretch for a dded comfort and ease.  Perfect for swim wear and dance wear!</p>
<p>As we were discussing those 7 types of knits above, we often referred to the stretch and recovery of the knit.  Why is this important?  Most knit patterns will instruct what time of knit is recommended, by some will even instruct the percentage of knit stretch recommended.  This is important because most knit patterns are  designed with 0 or negative ease.  This means the garment is designed so that the knit will stretch to the subject's measurements when worn.  If your fabric does not stretch enough, your garment may end up being too tight or small.  </p>
<p>The other thing to keep in mind when choosing knit is stretch recovery.  Some knits (like rayons) will stretch a ton, but they tend to have bad recovery, meaning they stay stretched out.  This can be a problem.  For example, if you are making a neckband (which is typically 10% smaller than the neck opening) you want the neckband to stretch out while you sew it to the neckline and then bounce back to its original length to "shape" the neckline.  If the knit has poor stretch recovery, then it will stretch and stay stretched making a really huge, stretched out neckline.  You can easily test stretch recovery of a fabric!  All you have to do is take a 10" strip and stretch it.  After it is stretched, if it returns to 10" then it has great stretch recovery, since it bounced right back to proper size.  If it's anywhere bigger than the original size, then it doesn't have the best recovery.  </p>
<p>Additional knit tips:</p>
<p>~Knit doesn't fray, so hemming isn't absolutely necessary</p>
<p>~Do not stretch the knit as you sew</p>
<p>~Use a stretch or ball point needle (discussed in last weeks blog)</p>
<p>~Although a serger, walking foot or cover-stitch machine are not necessary for sewing with knits, you may find the addition of these tools takes your knit skills to "store-bought" level.</p>
<p>Bottom line - Don't be afraid to try knits!!  They may open a whole new world of possibilities for you!</p>
<p><img src="//cdn.shopify.com/s/files/1/0144/4922/files/L_1024x1024.jpg?v=1578006458" alt=""></p>
<p>L is for Linings!  Linings are included in most of our patterns.  They are used to hide seam construction, help the garment to hang better and, in some instances, keep a garment from being see-through.  A helpful tip would be to use plain white cotton as your lining fabric instead of wasting your good fabric in a place where it won't be seen.</p>
<p> <img src="//cdn.shopify.com/s/files/1/0144/4922/files/79329103_476357019526680_5627601974712074240_n_1024x1024.jpg?v=1576261536" alt=""></p>
<p><img src="//cdn.shopify.com/s/files/1/0144/4922/files/M_1024x1024.jpg?v=1578007289" alt=""></p>
<p> M is for Muslin. You might be wondering, "Why do i need to create a muslin?"  Well, have you ever used your expensive or treasured fabric on a garment, only to find that the fit isn't what you intended? </p>
<p style="text-align: center;"><img src="//cdn.shopify.com/s/files/1/0144/4922/files/80691724_443361679668748_7908689479626391552_n_2048x2048.jpg?v=1576261651" alt=""></p>
<p>Not all people or kiddos are the same shape and size!  We try our very best to make sure that our patterns fit a wide ranges of shapes and sizes, but sometimes they still may need to be tweaked for your taste or intended fit.  This is when making a muslin would come in handy!  </p>
<p style="text-align: center;"><img src="//cdn.shopify.com/s/files/1/0144/4922/files/79896702_2574281996184764_1554427279503785984_n_1024x1024.jpg?v=1576261680" alt=""></p>
<p>Making a quick muslin with an inexpensive fabric would allow you to get the exact fit you desire, perfect the process, avoid frustration, and in the end, you could even have an extra wearable garment! </p>
<p>There are a few things to think about when constructing your muslin.  One would be to use fabric that is similar to your intended fabric so that you can achieve similar drape and fit.  Second, even though you might be sewing a super quick test garment, make sure you still take the time to make it correctly!  Be sure to cut your pieces carefully and pay attention to the grain so there is no warping or weird fabric issues with the muslin.  Also, be sure to follow the seam allowances as you would on the final garment.  Lastly, baste everything so it is super easy to tear apart if needed.  You can always got back and reinforce the stitches if you decide you want to keep it as a wearable garment!</p>
<p><img src="//cdn.shopify.com/s/files/1/0144/4922/files/N_1024x1024.jpg?v=1578007881" alt="">N is for Nap!  Nap is the texture of a fabric with the raised fibers of the fabric going in a particular direction.  It is most noticeable in velvets, corduroys and fleece fabrics, but it is also present in silks, satins and other smooth surfaced fabrics.  Most of the time you can determine if a fabric has a nap by brushing your hand over the fabric in one direction to see whether it changes color or shade. </p>
<p><img src="//cdn.shopify.com/s/files/1/0144/4922/files/nap_1024x1024.jpg?v=1578008459" alt=""></p>
<p>If your fabric is textured or has a one-way pattern, follow the "with nap" layout.  This requires all of the nap to run from top to bottom.  If there are pattern pieces where the nap is running a different direction, it will be noticeable.  So, when you are working with one of the above mentioned fabrics, cut carefully and with your pattern pieces going in the same direction! </p>
<p><img src="//cdn.shopify.com/s/files/1/0144/4922/files/nap2_1024x1024.jpg?v=1578008602" alt=""></p>
<p><img src="//cdn.shopify.com/s/files/1/0144/4922/files/O_1024x1024.jpg?v=1578008683" alt="">O is for Overlocker!! Is an overlocker (otherwise know as a serger) necessary? The answer is no!  However, it does make life a lot easier and makes your finishing look much neater!   And overlocker is a sewing machine that cuts and overlocks the edge of your fabric at the same time.  </p>
<p style="text-align: center;"><img src="//cdn.shopify.com/s/files/1/0144/4922/files/serger_1024x1024.jpg?v=1578009424" alt=""></p>
<p>It can be 3-8 threads and can be used for a variety of creative stitching.  Some people even use their machines for gathering!  If you want to take your sewing to the next level, a serger would be a great investment! </p>
<p><img src="//cdn.shopify.com/s/files/1/0144/4922/files/P_1024x1024.jpg?v=1578009457" alt=""> P is for Pre-shrinking!!  This is one debated topic among seamstresses!  We are going to err on the pre-shrinking side though, especially for your knit fabrics. </p>
<p><img src="//cdn.shopify.com/s/files/1/0144/4922/files/washer_1024x1024.jpg?v=1578010099" alt=""></p>
<p>There is a few reasons to pre-wash/pre-shrink your fabrics.  For example, most fabrics are treated with chemicals and dyes while in the manufacturing process, and pre-washing washes out any of those treatments.  Also, pre-shrinking means that your fabric becomes washable when made into a garment because the shrinking has already be done!  This is the main reason we mentioned pre-shrinking your knits.  They have a tendency to shrink up more than wovens, so pre-shrinking will ensure a proper fit after washing. </p>
<p><img src="//cdn.shopify.com/s/files/1/0144/4922/files/Q_1024x1024.jpg?v=1578010123" alt="">
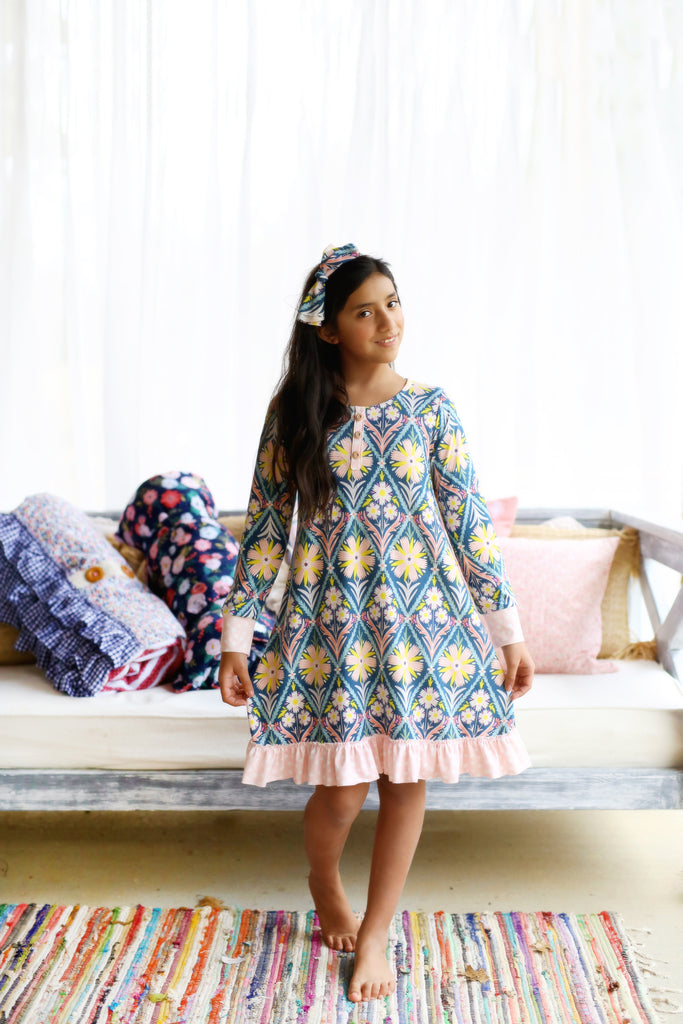
Q is for quilting!  Quilting is not just for blankets and pillows!  It is a really interesting technique that you can use on bodices, side panels, and even skirts!  We love how Carrie Tweten from Maggie Mae used a chevron quilting technique on her bodice for this darling dress:</p>
<p><img src="//cdn.shopify.com/s/files/1/0144/4922/files/quilting_1024x1024.jpg?v=1578020215" alt=""></p>
<p>There are many quilting designs available which could provide great inspiration for your next sewing project!!</p>
<p>We hope you are enjoying these recaps helpful tips and tricks!  Join us next week for our final letters of the alphabet - {R-Z} and we can't wait to see what you sew up next!</p>
<p>Happy Sewing!!</p>
<p> </p>
<p> </p>
<p> </p>]]>
    </content>
  </entry>
  <entry>
    <id>https://violettefieldthreads.com/blogs/theblog/2019-tips-tricks-recap-a-m</id>
    <published>2019-12-27T07:29:00-06:00</published>
    <updated>2020-01-03T10:50:19-06:00</updated>
    <link rel="alternate" type="text/html" href="https://violettefieldthreads.com/blogs/theblog/2019-tips-tricks-recap-a-m"/>
    <title>2019~Tips &amp; Tricks Recap! {A-H}</title>
    <author>
      <name>Jessica Herning</name>
    </author>
    <summary type="html">
      <![CDATA[<meta charset="utf-8">
<p><span>Hey Friends!!  Can you believe 2019 is coming to a close soon?!  I guess what they say is true - "Time flies when you're having fun!"  We've had so much fun this year and thought a great way to wrap up 2019 would be to recap some of our favorite tips and tricks we shared in our newsletters throughout the year!</span></p><p><a class="read-more" href="https://violettefieldthreads.com/blogs/theblog/2019-tips-tricks-recap-a-m">More</a></p>]]>
    </summary>
    <content type="html">
      <![CDATA[<p><img src="//cdn.shopify.com/s/files/1/0144/4922/files/pinktipsandtricks_2048x2048.jpg?v=1577484146" alt=""></p>
<p>Hey Friends!!  Can you believe 2019 is coming to a close soon?!  I guess what they say is true - "Time flies when you're having fun!"  We've had so much fun this year and thought a great way to wrap up 2019 would be to recap some of our favorite tips and tricks we shared in our newsletters throughout the year!</p>
<p>Back in January we started a series in the newsletter called “Tips and Tricks from A-Z.”  We told you about a unique tip, trick, or reminder each week for each letter of the alphabet.  We thought it would be fun to do a blog post about it with a quick recap of each tip.  Since there are 26 letters in the alphabet, we decided to break the blog post into three sections, so it's not too much to read through at once...so here's our A-H recap!</p>
<p><img src="//cdn.shopify.com/s/files/1/0144/4922/files/A_1024x1024.jpg?v=1577389923" alt="" style="display: block; margin-left: auto; margin-right: auto;">A is for Aurifil! The reason we always recommend Aurifil thread in our patterns is both the quality and the color.  Aurifil has several types of threads.  We recommend 40wt for sewing and Aurifil's 6-strand 100% cotton floss for embroidery.  </p>
<p><img src="//cdn.shopify.com/s/files/1/0144/4922/files/79017389_2268089736624557_5088310694021955584_n_1024x1024.jpg?v=1576256919" alt="" style="display: block; margin-left: auto; margin-right: auto;"></p>
<p>Aurifil's 100% Cotton 40wt thread is available in 270 cotton colors and is wound on a green spool.  Because of its slightly thicker weight, it is perfect for use with sewing bags, toys, dolls or garments.  It comes on a small spool which contains 164 yards, a large spool containing 1094 yards, and a cone containing 5140 yards.</p>
<p><img src="//cdn.shopify.com/s/files/1/0144/4922/files/79518982_443918943230040_8801799285692694528_n_1024x1024.jpg?v=1576256955" alt="" style="display: block; margin-left: auto; margin-right: auto;"></p>
<p>Aurifil's 6-strand cotton floss is wound on a gorgeous wooden spool, perfect for easy travel and the prevention of pesky tangles!  It is also available in 270 colors and boasts 18 yards per spool.  </p>
<p>You only have to use it once to see the difference and why we recommend it!</p>
<p><img src="//cdn.shopify.com/s/files/1/0144/4922/files/B_1024x1024.jpg?v=1577390698" alt="" style="display: block; margin-left: auto; margin-right: auto;">B is for ball point needles! Ball point needles are needles with slightly rounded tips.  They are designed to part the fibers of the knit fabric rather than pierce them to prevent damaging the fabric. </p>
<p><img src="//cdn.shopify.com/s/files/1/0144/4922/files/79368326_456741198581929_3678688954162348032_n_grande.jpg?v=1576257034" alt="" style="display: block; margin-left: auto; margin-right: auto;"></p>
<p> When you are sewing a woven fabric, you want a needle with a sharper point so that it will go through the fabric without snagging it.  However, if you used that same needle when sewing knits it would poke a hole in your fabric that usually tends to grow with wash and wear.  Using a ball point needle or a stretch needle will prevent this from happening.  It is one of the most important things you need when sewing knits! </p>
<p><img src="//cdn.shopify.com/s/files/1/0144/4922/files/78953774_2401072650015659_6188448296101478400_n_1024x1024.jpg?v=1576257069" alt="" style="display: block; margin-left: auto; margin-right: auto;"></p>
<p><img src="//cdn.shopify.com/s/files/1/0144/4922/files/C_1024x1024.jpg?v=1577393057" alt="" style="display: block; margin-left: auto; margin-right: auto;"></p>
<p>C is for clear elastic!  Clear elastic is great when you are sewing with knits.  It prevents necklines, shoulders, and bodices from stretching out and looking wavy or wonky once sewn.   </p>
<p><img src="//cdn.shopify.com/s/files/1/0144/4922/files/79843240_802293586875681_6472238096975921152_n_1024x1024.jpg?v=1576258408" alt="" style="display: block; margin-left: auto; margin-right: auto;"></p>
<p>If can be a little difficult to handle, so if you find that it is sticking to your presser foot while you sew, you may want to use a special Teflon-coated sewing foot. When sewing the elastic onto the fabric, you should sew without stretching the elastic. Also, we recommend cutting the elastic a bit longer than necessary for easy handling as you sew. Clear elastic is a game changer when attaching a knit bodice to a woven skirt!</p>
<p><img src="//cdn.shopify.com/s/files/1/0144/4922/files/clear_elastic_large.jpg?v=1577401752" alt="" style="display: block; margin-left: auto; margin-right: auto;"></p>
<p><img src="//cdn.shopify.com/s/files/1/0144/4922/files/D_1024x1024.jpg?v=1577393225" alt="" style="display: block; margin-left: auto; margin-right: auto;"></p>
<p>D is for the Darby Cloche Hat Pattern! Our tip from this week is more of reminder of one of our lesser known but very cute and functional patterns = the Darby Cloche Hat.</p>
<p><img src="//cdn.shopify.com/s/files/1/0144/4922/files/darby2_1024x1024.jpg?v=1576259149" alt="" style="display: block; margin-left: auto; margin-right: auto;"></p>
<p>The Darby Cloche Hat is one stylish accessory to add to your daughter's wardrobe, or even your own, as this pattern is sized toddler - adult!  Darby features a 1920's styling with a low asymmetrical brim. Add a bow or felt flower for endless options.    This stylish and classic cloche hat is easy and fast to sew and requires very little fabric! </p>
<p><img src="//cdn.shopify.com/s/files/1/0144/4922/files/79279914_501541824092505_1998456748209340416_n_1024x1024.jpg?v=1576258818" alt="" style="display: block; margin-left: auto; margin-right: auto;"></p>
<p><img src="//cdn.shopify.com/s/files/1/0144/4922/files/E_1024x1024.jpg?v=1577393556" alt="" style="display: block; margin-left: auto; margin-right: auto;">E is for Embroidery!  Embroidery is decorative stitches used to create a pattern on fabric. </p>
<p><img src="//cdn.shopify.com/s/files/1/0144/4922/files/embroidery_large.jpg?v=1577402244" alt="" style="display: block; margin-left: auto; margin-right: auto;"></p>
<p>If you have ever seen some of the beautiful hand embroidery that a lot of our group members use on their garments, but don't know where to start, there is a great video on the Violette Field Threads Gathering place page that will show you how to make embroidered roses.  (If you aren't <span>yet a member, we suggest you join the group and check it out!)</span> Hand embroidery is a great way to take your sewing to the next level and such a fun &amp; relaxing skill to learn!<img src="//cdn.shopify.com/s/files/1/0144/4922/files/78487827_604570743683144_2913735066628653056_n_2048x2048.jpg?v=1576259616" alt=""></p>
<p><img src="//cdn.shopify.com/s/files/1/0144/4922/files/F_1024x1024.jpg?v=1577394115" alt="" style="display: block; margin-left: auto; margin-right: auto;"></p>
<p>F is for French Seams!  For those of you who do not have a serger, French seams are a beautiful way to hide those pesky inside, unfinished seams.  Once you try french seams, you may even prefer to finish this way, even if you do have a serger.  A french seam is a seam finish that encloses the raw edge so the reverse side is neat &amp; finished.  </p>
<p><img src="//cdn.shopify.com/s/files/1/0144/4922/files/frenchseams_1024x1024.jpg?v=1577395805" alt="" style="display: block; margin-left: auto; margin-right: auto;"></p>
<p>Here is the process for creating a French seam.  Pin your fabric together so that the wrong sides are facing each other.  Sew the fabric together using a 1/4 inch seam allowance, removing the pins as you go.  Trim the outside edge of the seam so you are left with 1/8 inch seam allowance.  Open the pieces of fabric and lay it out flat on an ironing board.  Iron across the seam on both the right side and the wrong side of the fabric so it lays perfectly flat.  Then, fold the fabric so that the right sides are facing each other.  Sew your second seam, this time using a 1/4 inch seam allowance.  Iron the completed double seam one more time and there you have it - French Seams!!!</p>
<p><img src="//cdn.shopify.com/s/files/1/0144/4922/files/79183411_662292067636204_7856768204100599808_n_1024x1024.jpg?v=1576259777" alt="" style="display: block; margin-left: auto; margin-right: auto;"></p>
<p><img src="//cdn.shopify.com/s/files/1/0144/4922/files/G_1024x1024.jpg?v=1577395829" alt="" style="display: block; margin-left: auto; margin-right: auto;"></p>
<p>G is for grainlines!  The grainlines are the direction in which the threads are woven.  The straightgrain (lengthwise grain or warp) runs parallel to the selvedge and is the strongest. The crosswise grain (weft) runs perpendicular to the selvedge and has the weaker weave.  This is important if there is going to be a lot of stress on the garment, you would want your stronger yarns to be where the stress of the garment is.  It isn't particularly important for most of our garments, that is why people usually say you can cut it in either direction, as long as you are cutting straight.  If you happen to cut off grain, it will cause our garment to be skewed or twisted.  </p>
<p><img src="//cdn.shopify.com/s/files/1/0144/4922/files/80394243_484000578914110_9131535237950472192_n_1024x1024.jpg?v=1576259865" alt="" style="display: block; margin-left: auto; margin-right: auto;"></p>
<p>You can also cut fabrics on the bias, which is at a 45 degree angle between the warp and weft.  Cutting on the bias gives you maximum amount of stretch in woven fabrics.  It is often used as binding around curves.  The most important thing to note, is to be careful to cut on the grainline, be it the warp or weft.  <img src="//cdn.shopify.com/s/files/1/0144/4922/files/78911129_2633139050109520_4931203002242433024_n_1024x1024.jpg?v=1576259888" alt="" style="display: block; margin-left: auto; margin-right: auto;"></p>
<p><img src="//cdn.shopify.com/s/files/1/0144/4922/files/H_1024x1024.jpg?v=1577396628" alt="" style="display: block; margin-left: auto; margin-right: auto;"></p>
<p>H is for Hong Kong seams! Hong Kong seams are another neat way to finish your seams.  They are similar to French Seams, as the raw edges are encased.   However, instead of encasing them within themselves, they are bound either to one side or in the case of thicker fabrics, you can press the seam allowances open and bind each side separately.</p>
<p><img src="//cdn.shopify.com/s/files/1/0144/4922/files/78829592_439087180367964_8259633241657442304_n_2048x2048.jpg?v=1576260135" alt="" style="display: block; margin-left: auto; margin-right: auto;"></p>
<p>Any of our pants patterns, such as Sloane Skinnies, Avery Pants &amp; Presley pants would be a great place to try this method!!  </p>
<p><img src="//cdn.shopify.com/s/files/1/0144/4922/files/76918408_591299574775131_2939175523722461184_n_1024x1024.jpg?v=1576260114" alt=""></p>
<p> </p>
<p>We hope you enjoyed the first part of our {A-Z } recap!  Come back to read next weeks blog post where we will recap tips {I-Q}!</p>
<p><img src="//cdn.shopify.com/s/files/1/0144/4922/files/darby_8320d5a6-12d5-4908-a07b-e17eceff62d1_2048x2048.jpg?v=1576261841" alt="" style="display: block; margin-left: auto; margin-right: auto;"></p>
<p>Happy Sewing!!</p>]]>
    </content>
  </entry>
  <entry>
    <id>https://violettefieldthreads.com/blogs/theblog/the-snuggliest-surprise-ever-brianna</id>
    <published>2019-12-09T10:38:00-06:00</published>
    <updated>2019-12-09T10:38:00-06:00</updated>
    <link rel="alternate" type="text/html" href="https://violettefieldthreads.com/blogs/theblog/the-snuggliest-surprise-ever-brianna"/>
    <title>{The Snuggliest Surprise Ever} Brianna</title>
    <author>
      <name>Alexis Wright</name>
    </author>
    <summary type="html">
      <![CDATA[<p><img src="//cdn.shopify.com/s/files/1/0144/4922/files/BBLog_83c22a92-4498-44a3-a339-e1f46384f4a8_2048x2048.jpg?v=1575608761" alt=""></p>
<meta charset="utf-8">
<p><span>The most difficult secret to keep from 2019 = Brianna!!</span><span class="Apple-converted-space"> <span> </span></span><span>This is the classic, comfy &amp; cozy PDF pajama pattern for knit fabrics everyone has literally been dreaming of!!</span><span class="Apple-converted-space"> <span> </span></span></p><p><a class="read-more" href="https://violettefieldthreads.com/blogs/theblog/the-snuggliest-surprise-ever-brianna">More</a></p>]]>
    </summary>
    <content type="html">
      <![CDATA[<p class="p1"> <img src="//cdn.shopify.com/s/files/1/0144/4922/files/BBLog_2048x2048.jpg?v=1575606285" alt=""></p>
<p class="p2">The most difficult secret to keep from 2019 = Brianna!!<span class="Apple-converted-space">  </span>This is the classic, comfy &amp; cozy PDF pajama pattern for knit fabrics everyone has literally been dreaming of!!<span class="Apple-converted-space">  </span>It has us all up in our feels, soaking in every second of our little ones in their snuggliest and comfiest attire.</p>
<p class="p2"><img src="//cdn.shopify.com/s/files/1/0144/4922/files/BBLOG1_2048x2048.jpg?v=1575606578" alt=""></p>
<p class="p2"><img src="//cdn.shopify.com/s/files/1/0144/4922/files/bblog6_2048x2048.jpg?v=1575606657" alt=""></p>
<p class="p2"> </p>
<p class="p2">Bedtime cuddles…such a precious time of the day when all the stress melts away as you snuggle up for a bedtime story!! <span class="Apple-converted-space">  </span>Feeling the breathing of your little one slow as their heartbeat matches in rhythm with yours.<span class="Apple-converted-space">  </span>These moments are what we as mothers live for… the physical connection of relaxing with your child and the emotional closeness brought on by you being their safe space, ushering in dreamland. </p>
<p class="p1"> <img src="//cdn.shopify.com/s/files/1/0144/4922/files/Bblog5_1024x1024.jpg?v=1575606698" alt=""></p>
<p class="p1"><img src="//cdn.shopify.com/s/files/1/0144/4922/files/Bblog7_1024x1024.jpg?v=1575606984" alt=""></p>
<p class="p1"><img src="//cdn.shopify.com/s/files/1/0144/4922/files/Bblog2_1024x1024.jpg?v=1575606636" alt=""></p>
<p class="p1"> </p>
<p class="p2">Are matching pajamas a necessity for this?!<span class="Apple-converted-space">  </span>Absolutely not!<span class="Apple-converted-space">  </span>However, knowing mommy (or Grandma) made their sweetest sleep set definitely is the icing on the cake!! <span class="Apple-converted-space">  </span>And who doesn’t love matching PJ’s? <span class="Apple-converted-space">  </span>Especially when they come with options for the whole family to enjoy!!!</p>
<p class="p2"><img src="//cdn.shopify.com/s/files/1/0144/4922/files/Bblog8_1024x1024.jpg?v=1575607346" alt=""></p>
<p class="p2"><img src="//cdn.shopify.com/s/files/1/0144/4922/files/BBlog13_1024x1024.jpg?v=1575607882" alt=""></p>
<p class="p2"><img src="//cdn.shopify.com/s/files/1/0144/4922/files/Bblog9_1024x1024.jpg?v=1575607437" alt=""></p>
<p class="p2">Regardless of whether you choose to create Brianna with long sleeve, or short sleeves, cuffed pants or shorts…this is one quick sew that is super rewarding!! And did you see  - Brianna is available in all our size ranges - Baby, Girls, Tween, Misses AND Doll... there really Is an option for everyone to get their cuddle on using this pattern!! </p>
<p class="p2"><img src="//cdn.shopify.com/s/files/1/0144/4922/files/Bblog12_1024x1024.jpg?v=1575607588" alt=""></p>
<p class="p2"><img src="//cdn.shopify.com/s/files/1/0144/4922/files/Bblog10_1024x1024.jpg?v=1575607386" alt=""></p>
<p class="p2"><img src="//cdn.shopify.com/s/files/1/0144/4922/files/Bblog14_1024x1024.jpg?v=1575608014" alt=""></p>
<p class="p1"> </p>
<p class="p2">And because I know you all will be dying to know - All of the super soft and GORGEOUS knit fabric seen in these pictures comes from the amazing Hawthorne Supply Co.<span class="Apple-converted-space">  </span>(Direct links posted under these pictures for the fabrics!) . Definitely head over to their website to discover your new favorite Fabric source!!</p>
<p class="p2"><img src="//cdn.shopify.com/s/files/1/0144/4922/files/Bblog15_2048x2048.jpg?v=1575608352" alt=""></p>
<p class="p2">Our Mommy + Me set was created using fabric from Hawthorn Supply Co's Tundra line in the Winter Freeze color way - listed here:</p>
<meta charset="utf-8">
<p class="p2"><a href="https://www.hawthornesupplyco.com/tundra-fabric-collection-by-hawthorne-supply-co/39B8BA8F066C/?fbclid=IwAR3QWo4igA0O3P0F1hAVmUfndO9c5Wl9i2KVwmnqjqSxilpYbQqrZgxSZ4A">https://www.hawthornesupplyco.com/tundra-fabric-collection-by-hawthorne-supply-co/39B8BA8F066C/?fbclid=IwAR3QWo4igA0O3P0F1hAVmUfndO9c5Wl9i2KVwmnqjqSxilpYbQqrZgxSZ4A</a></p>
<p class="p2"><img src="//cdn.shopify.com/s/files/1/0144/4922/files/Bblog17_2048x2048.jpg?v=1575608530" alt=""></p>
<p class="p2"> Our coordinating Tween set was made from Hawthorn Supply Co's Glamorous Christmas line by Indy Bloom, shown here:</p>
<meta charset="utf-8">
<p class="p2"><a href="https://www.hawthornesupplyco.com/glamorous-christmas-fabric-collection-by-indy-bloom/63AC7CD18DD0/">https://www.hawthornesupplyco.com/glamorous-christmas-fabric-collection-by-indy-bloom/63AC7CD18DD0/</a></p>]]>
    </content>
  </entry>
  <entry>
    <id>https://violettefieldthreads.com/blogs/theblog/pretty-in-primrose</id>
    <published>2019-11-26T11:44:00-06:00</published>
    <updated>2019-12-05T12:34:24-06:00</updated>
    <link rel="alternate" type="text/html" href="https://violettefieldthreads.com/blogs/theblog/pretty-in-primrose"/>
    <title>Pretty in {Primrose}</title>
    <author>
      <name>Jessica Herning</name>
    </author>
    <summary type="html">
      <![CDATA[<p><img src="//cdn.shopify.com/s/files/1/0144/4922/files/BE3A2509_2048x2048.jpg?v=1574778643" alt=""></p>
<meta charset="utf-8">
<p><span>“Sugar and spice and everything nice, that’s what little girls AND our newest Primrose dress pattern are made of”. This super sweet and timeless PDF pattern will have your little one floating on air and your heart doing little leaps every time you see her moving through the room in it!</span></p><p><a class="read-more" href="https://violettefieldthreads.com/blogs/theblog/pretty-in-primrose">More</a></p>]]>
    </summary>
    <content type="html">
      <![CDATA[<p class="p1"><img src="//cdn.shopify.com/s/files/1/0144/4922/files/BE3A2509_2048x2048.jpg?v=1574778643" alt="" style="display: block; margin-left: auto; margin-right: auto;"></p>
<meta charset="utf-8">
<p class="p1"><span>“Sugar and spice and everything nice, that’s what little girls AND our newest Primrose dress pattern are made of”. This super sweet and timeless PDF pattern will have your little one floating on air and your heart doing little leaps every time you see her moving through the room in it!</span></p>
<p class="p1"><span><img src="//cdn.shopify.com/s/files/1/0144/4922/files/BE3A2563_1024x1024.jpg?v=1574778823" alt="" style="display: block; margin-left: auto; margin-right: auto;"></span></p>
<p class="p1"><span><img src="//cdn.shopify.com/s/files/1/0144/4922/files/BE3A2621_1024x1024.jpg?v=1574778855" alt="" style="display: block; margin-left: auto; margin-right: auto;"></span></p>
<p class="p1"> Primrose is a DARLING babydoll inspired dress that can be sewn with tulle for all of those special occasions or in simple woven fabric for all of her everyday adventures!! The dress is knee-length with loads of options for sleeve styles including - a long sleeve, a long sleeve with shirring, and our brand new cap/flounce sleeve design!</p>
<p class="p1"><span><img src="//cdn.shopify.com/s/files/1/0144/4922/files/BE3A1864_1024x1024.jpg?v=1574778904" alt="" style="display: block; margin-left: auto; margin-right: auto;"><img src="//cdn.shopify.com/s/files/1/0144/4922/files/BE3A1975_1024x1024.jpg?v=1574778937" alt="" style="display: block; margin-left: auto; margin-right: auto;"></span></p>
<p class="p1"><span><img src="//cdn.shopify.com/s/files/1/0144/4922/files/BE3A2671_1024x1024.jpg?v=1574779000" alt="" style="display: block; margin-left: auto; margin-right: auto;"></span></p>
<p class="p1"><span><img src="//cdn.shopify.com/s/files/1/0144/4922/files/BE3A2544_1024x1024.jpg?v=1574779057" alt="" style="display: block; margin-left: auto; margin-right: auto;"></span></p>
<p class="p1"><span> </span>Create the simple skirt version for a quicker sew, or the tiered skirt option for a dress that will have your sweetie twirling the day away, capturing time and endless memories in her Primrose!</p>
<p class="p1"><span><img src="//cdn.shopify.com/s/files/1/0144/4922/files/BE3A1990_60d2509e-1e11-420f-bcc2-4cb45ed6d39f_2048x2048.jpg?v=1574779118" alt="" style="display: block; margin-left: auto; margin-right: auto;"></span></p>
<p class="p1"><span><img src="//cdn.shopify.com/s/files/1/0144/4922/files/BE3A1969_1024x1024.jpg?v=1574779167" alt="" style="display: block; margin-left: auto; margin-right: auto;"></span></p>
<p class="p1"><span><img src="//cdn.shopify.com/s/files/1/0144/4922/files/BE3A2111_c9fbbf80-d3d4-4c92-894f-86d21d9a81a1_2048x2048.jpg?v=1574779209" alt="" style="display: block; margin-left: auto; margin-right: auto;"></span></p>
<p class="p1"><span><img src="//cdn.shopify.com/s/files/1/0144/4922/files/BE3A2638_1024x1024.jpg?v=1574779318" alt="" style="display: block; margin-left: auto; margin-right: auto;"></span></p>
<p class="p1"><span><img src="//cdn.shopify.com/s/files/1/0144/4922/files/BE3A2586_2048x2048.jpg?v=1574779362" alt="" style="display: block; margin-left: auto; margin-right: auto;"></span></p>
<p class="p1"> Our gorgeous embellished star tulle is from the amazing <a href="https://www.fancypantsfabrics.com" title="Fancy Pants Fabric">Fancy Pants Fabric</a> shop! They offer so many beautiful, soft tulles that are perfect for creating one of kind Primrose dresses!</p>
<p class="p1">We are giving away a $50.00 gift certificate to one reader to Fancy Pants Fabric!! Simply leave us a little love in the comments below to be entered to win. </p>
<p class="p1">{UPDATE} Congratulations to Kate Yetter for winning the $50 gift certificate to Fancy Pants Fabric!</p>
<p class="p1"> </p>
<p class="p1"> </p>]]>
    </content>
  </entry>
</feed>
