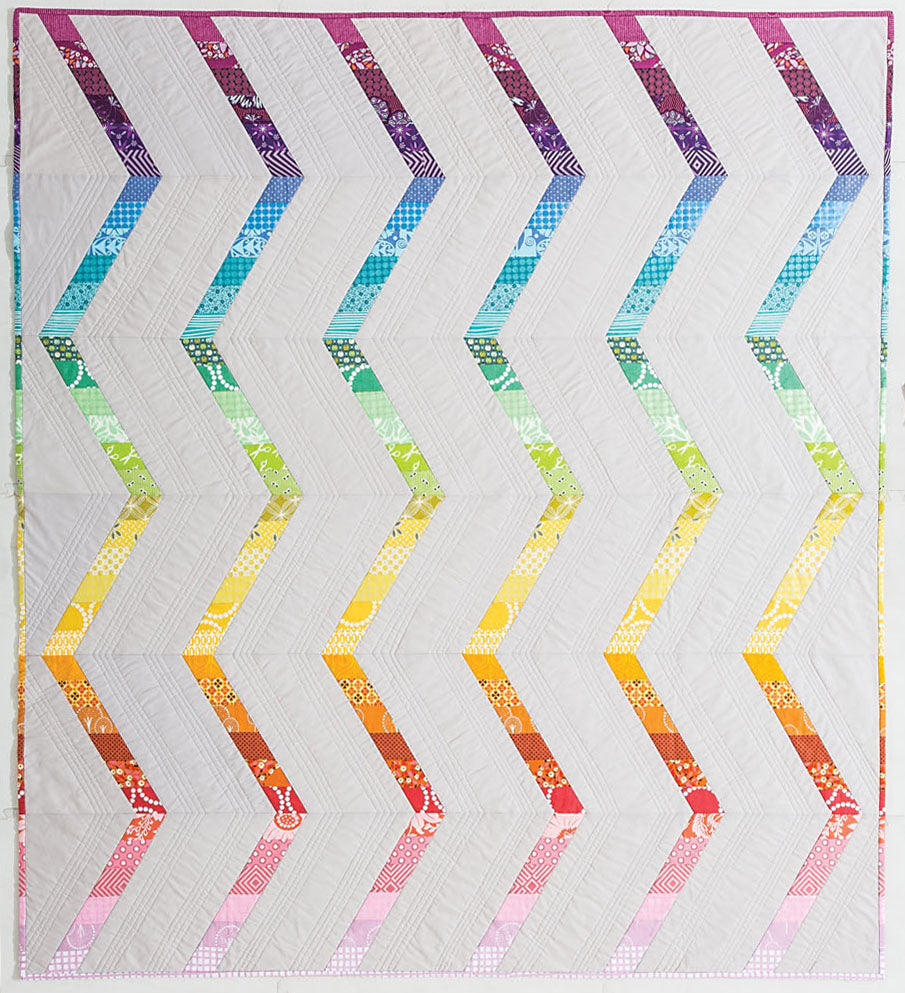
I love how Rebecca uses neutrals in the above quilt, Flame. She provides a lot of great suggestions/tips for using neutrals for negative space, emphasis, etc.
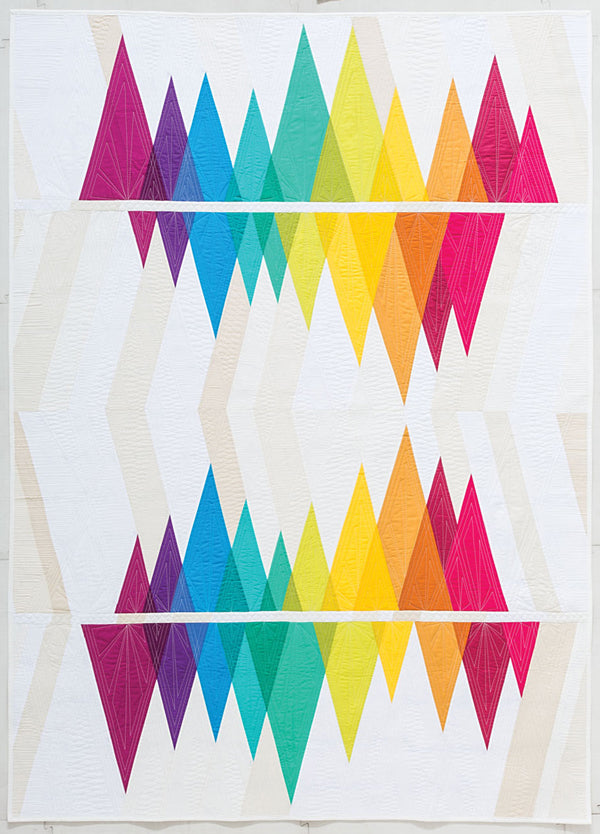
She also discusses how to seamlessly transition from color to color across the spectrum, as in the above quilt, Rainbow Streak.
And the cover quilt, Wavelength, is probably my favorite. I love the vibrant colors she chose and how they transition so beautifully. I also love how she used multiple shades of neutrals for the background for interest and to minimize the contrast. And
Angela Walters' incredible quilting doesn't hurt either!
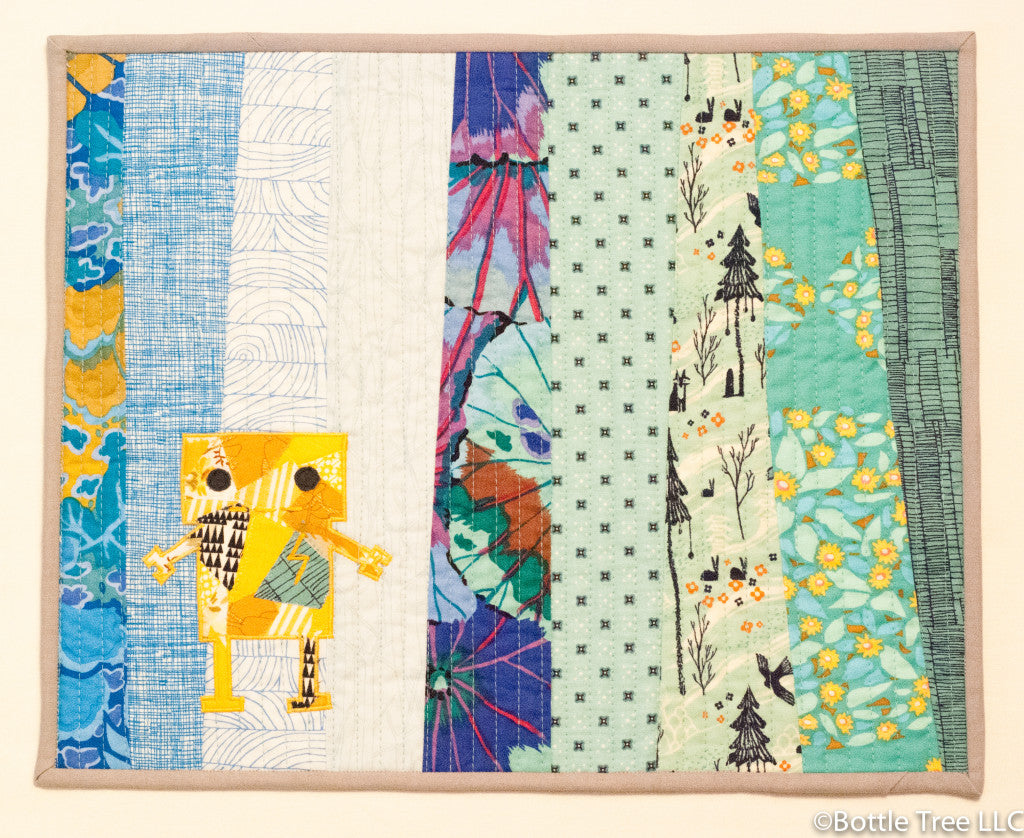
So for my post, I was planning on just using Rebecca's suggestions to pull a rainbow palette from my stash to show as an example, but I got so excited with my pull, that I had to make something out of them! Thus these rainbow placemats.
I especially love the suggestions Rebecca has for transitioning the colors across the spectrum and used them in my fabric selection.
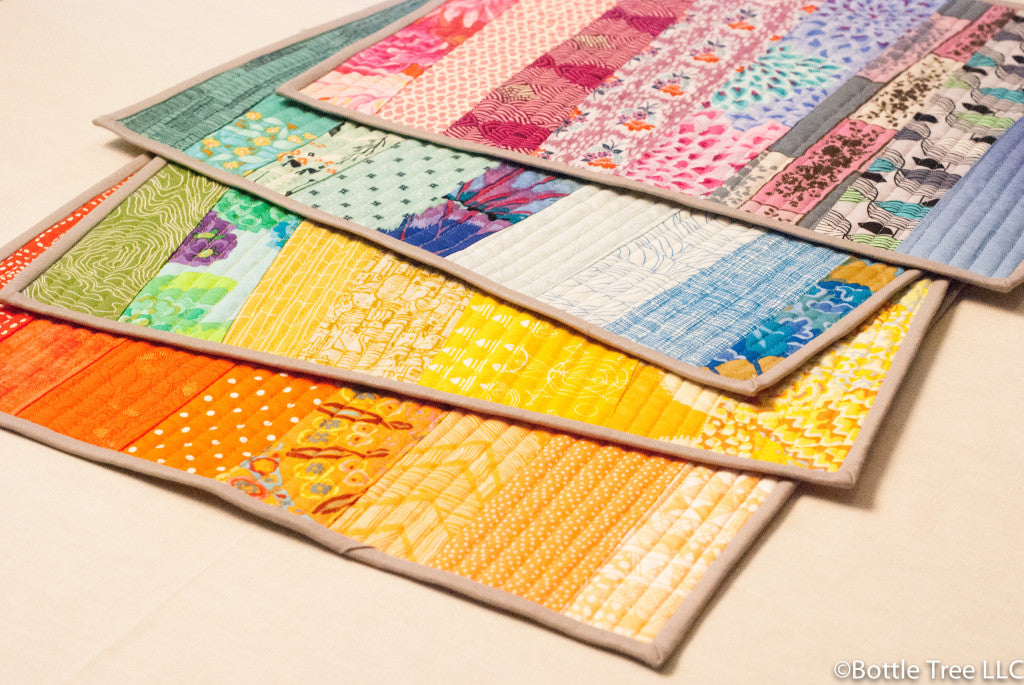
They were super easy to whip up! I simply cut 8-9 3" strips for each mat, and pieced them together at wonky angles. I trimmed the seam allowances to 1/4" and cut each quilt top to 13" x 16".
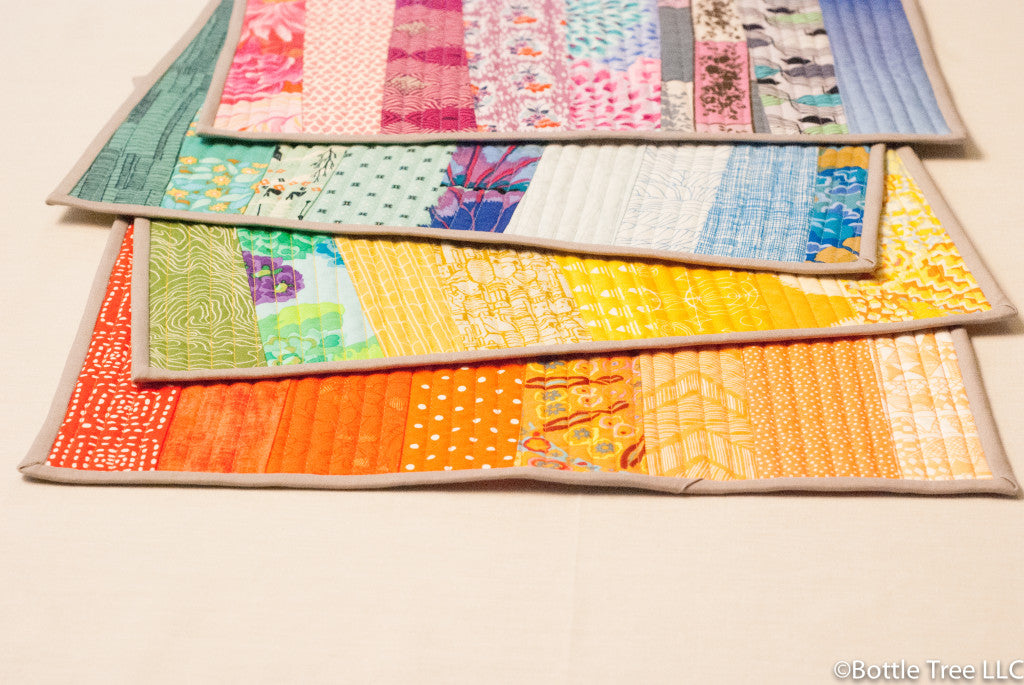
I straight lined quilted each placemat with coordinating thread about 1/2" apart.
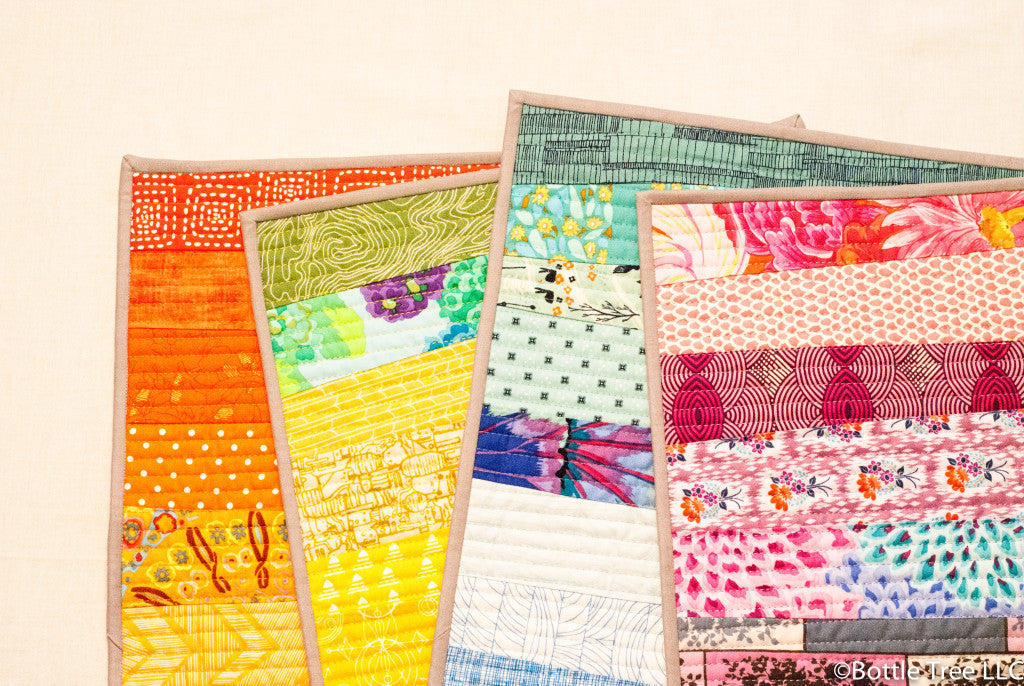
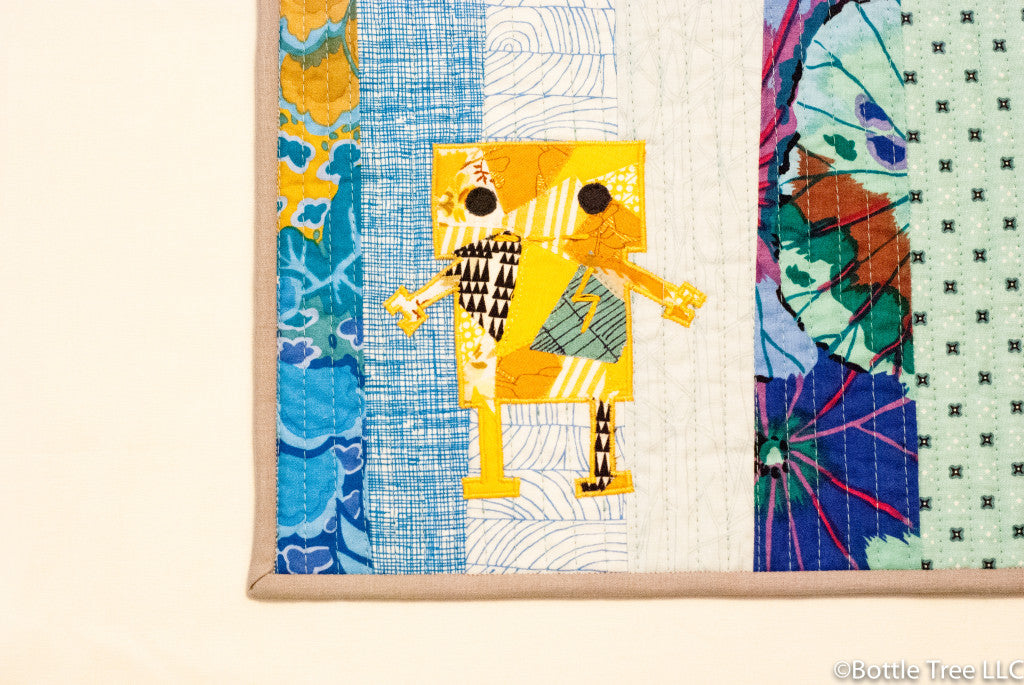
Also, I couldn't resist adding one of my scrappy applique friends to one of the mats. I love this little
robot.
Giveaway time! Rebecca and
C&T are generously giving away a copy of
Modern Rainbow at each stop on the hop! To enter, leave a comment below!
Be sure to check out Giuseppe Ribaudo's (
@giucy_giuce) Instagram post today for another chance to win! The blog hop ends tomorrow at
Rebecca's blog, so be sure to check that one out too!
]]>
 I made this quilt for the daughter of an avid hunter. I love this super feminine version. The pieced background is SUPER quick and easy -- I give instructions for it, here.
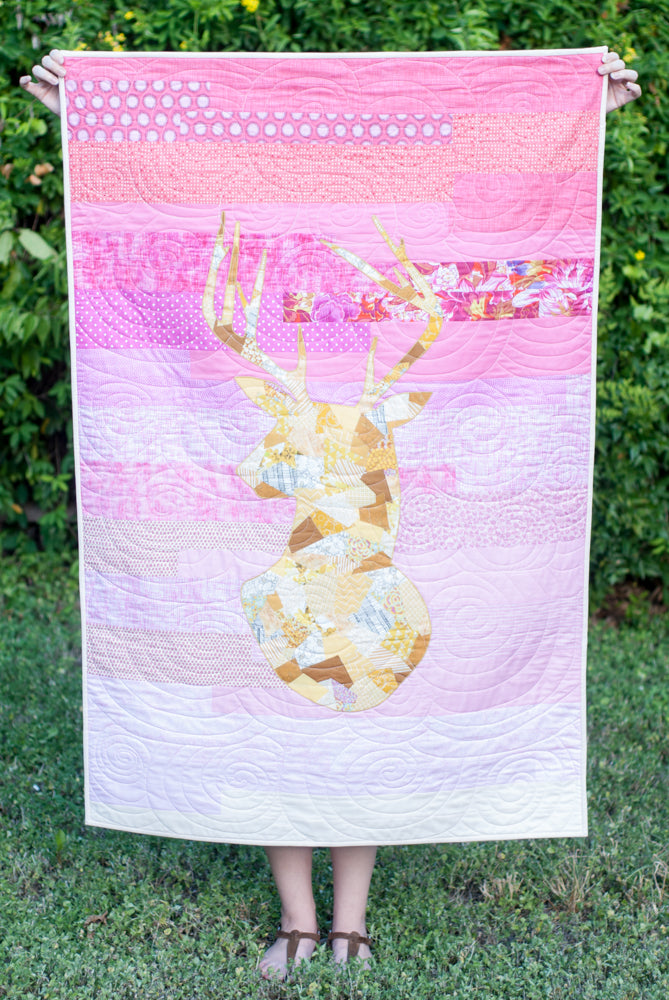
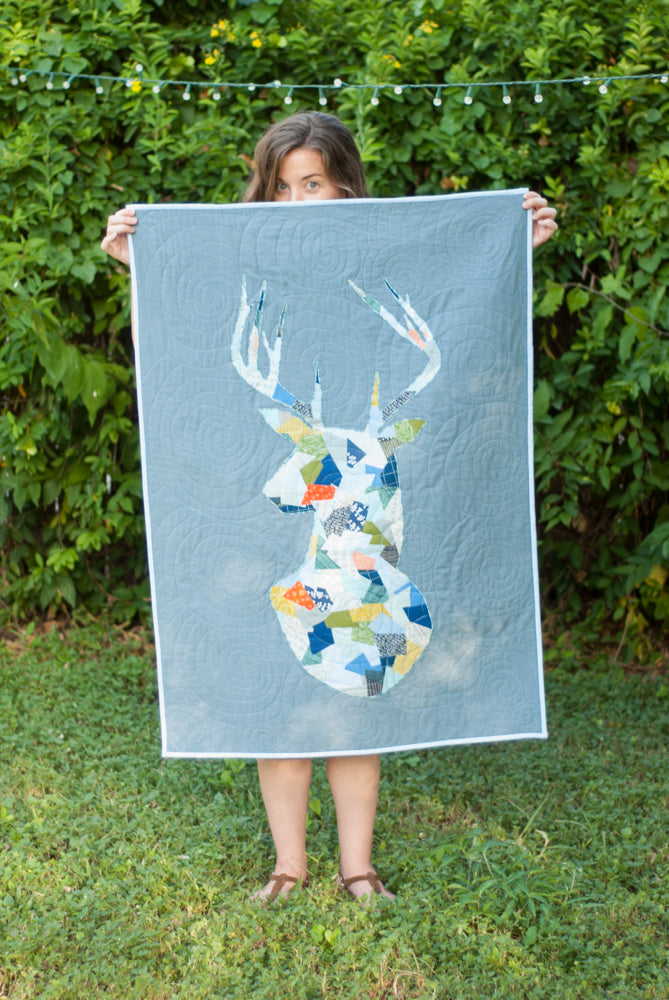
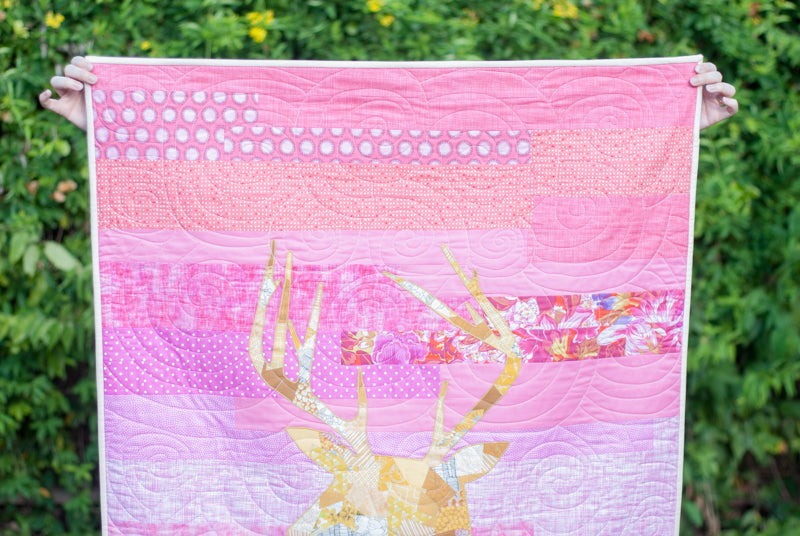 I love this guy on the simple patchwork background (instructions for the background, here). I decided to keep the collage fabric in the deer pretty monochromatic to keep it in sharp contrast with the piece-y background.
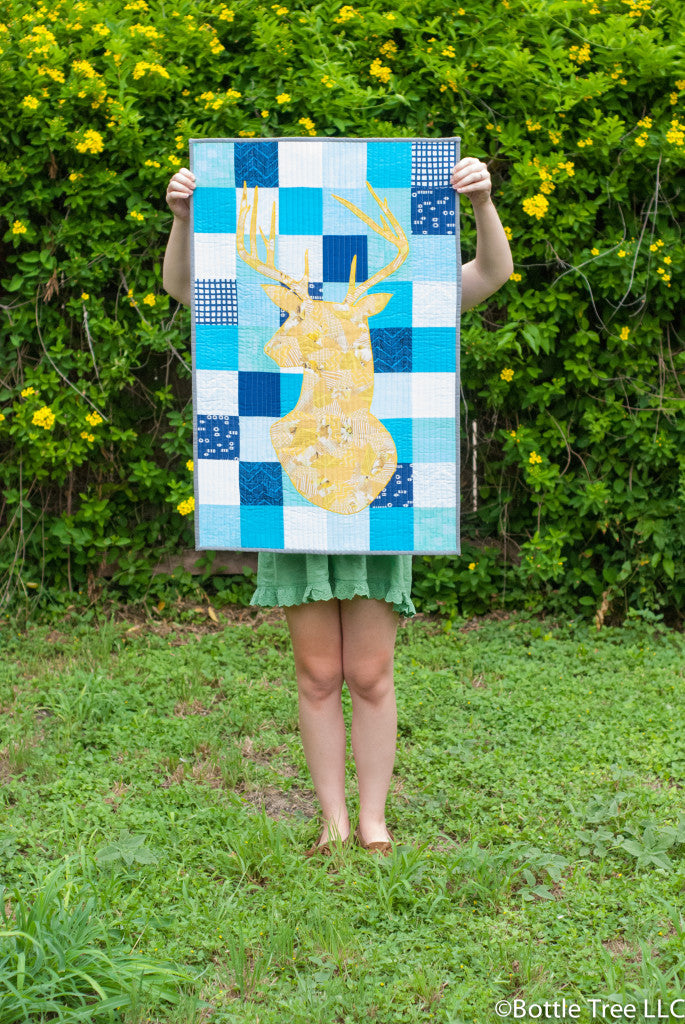 And since all my patterns come in multiple sizes, you can even make a little guy, like this one! This mini is about 12" x 16".
 Happy sewing friends!]]>
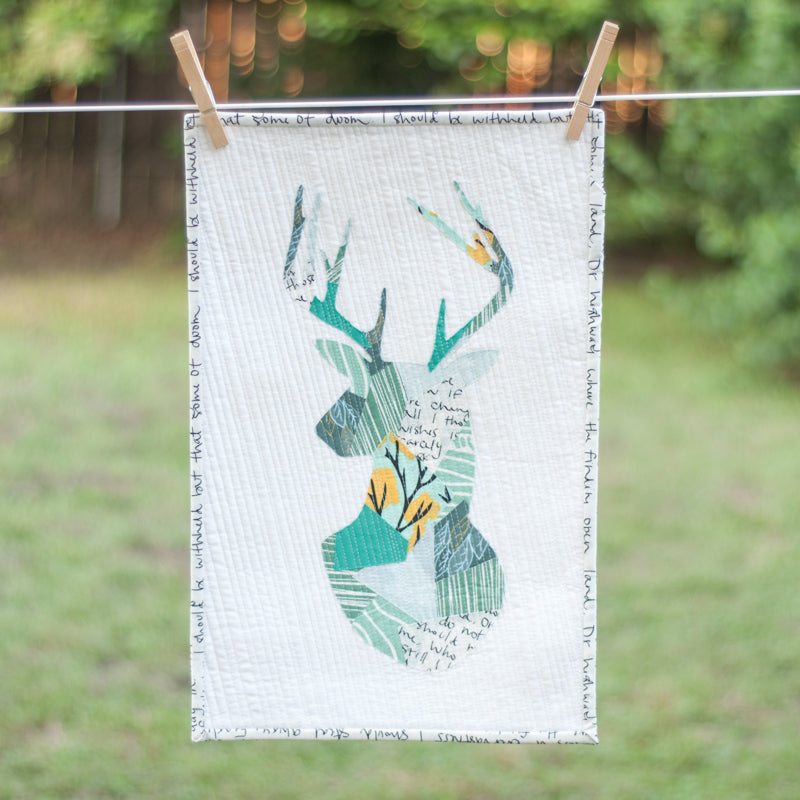
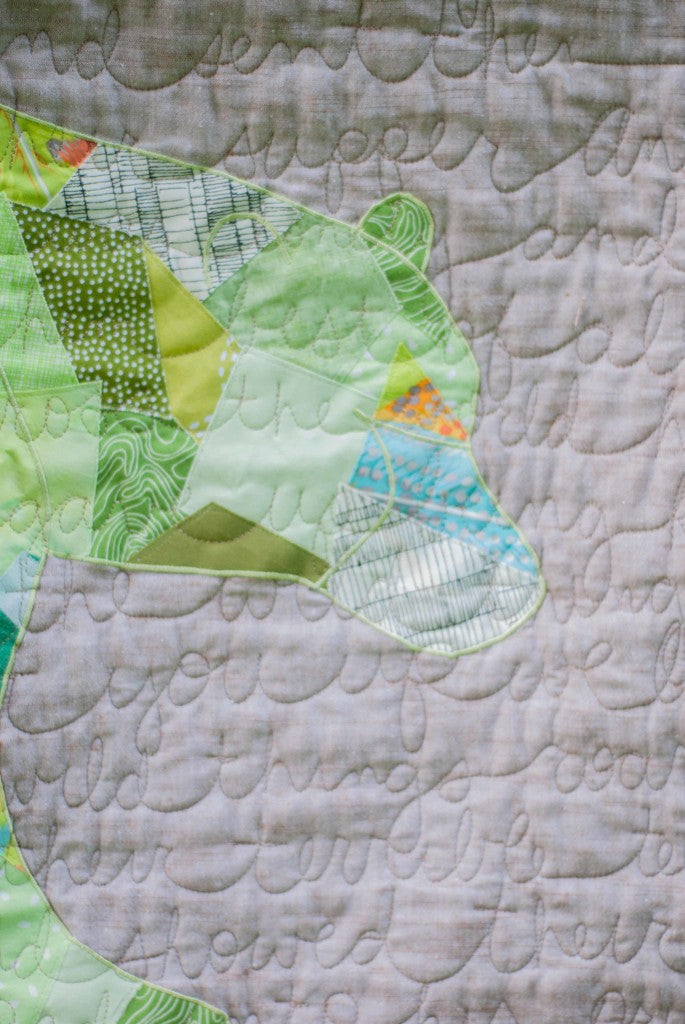
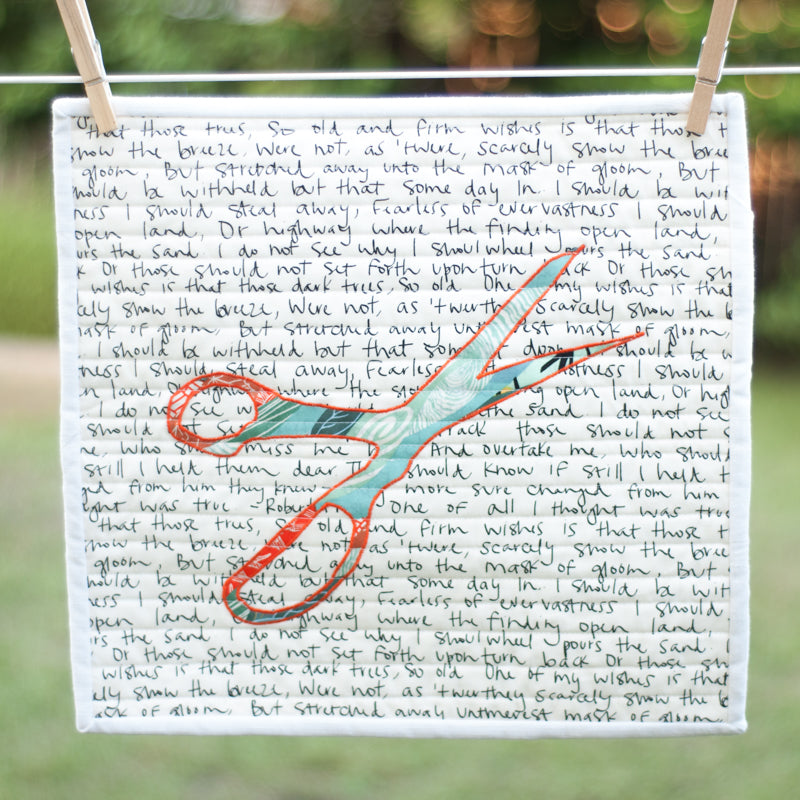
 I quilted this on a longarm, but I've "quilt written" using a domestic machine as well. It certainly is easier to keep my lines relatively straight using the longarm, though. When I "quilt write" I connect all the words, and don't worry about punctuation or capitalization. I do cross the 't's, but don't break my thread to do so, just trace back up the stem of the 't' to cross it. I also don't worry about dotting my 'i's.
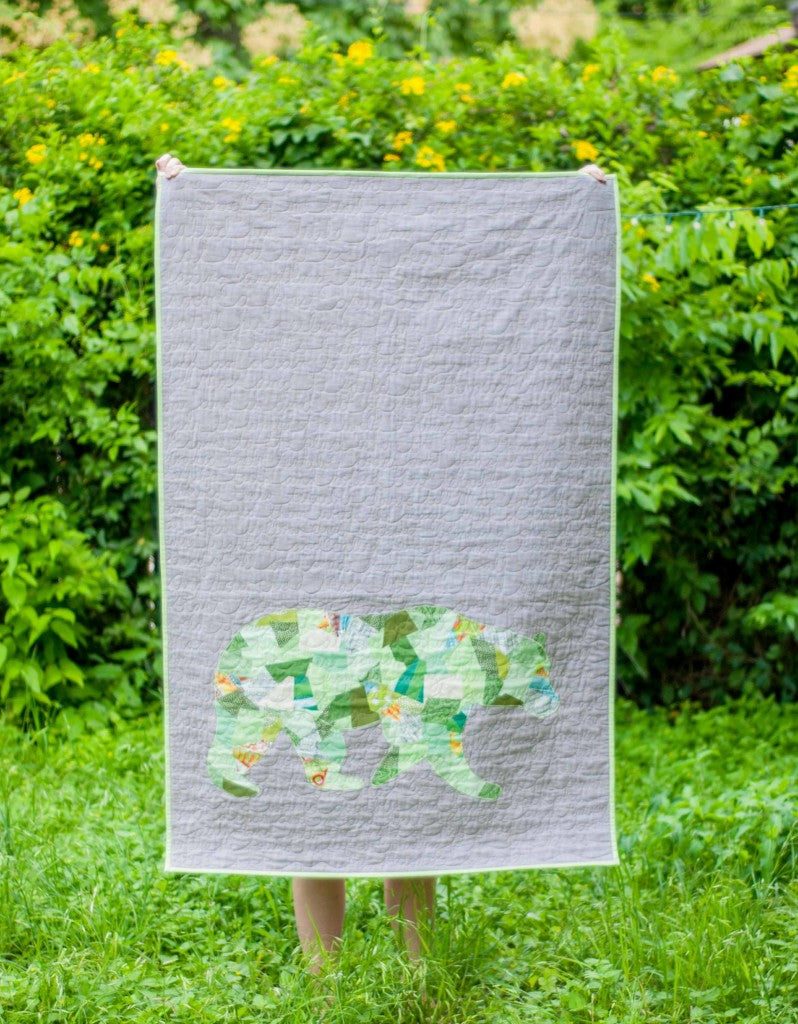
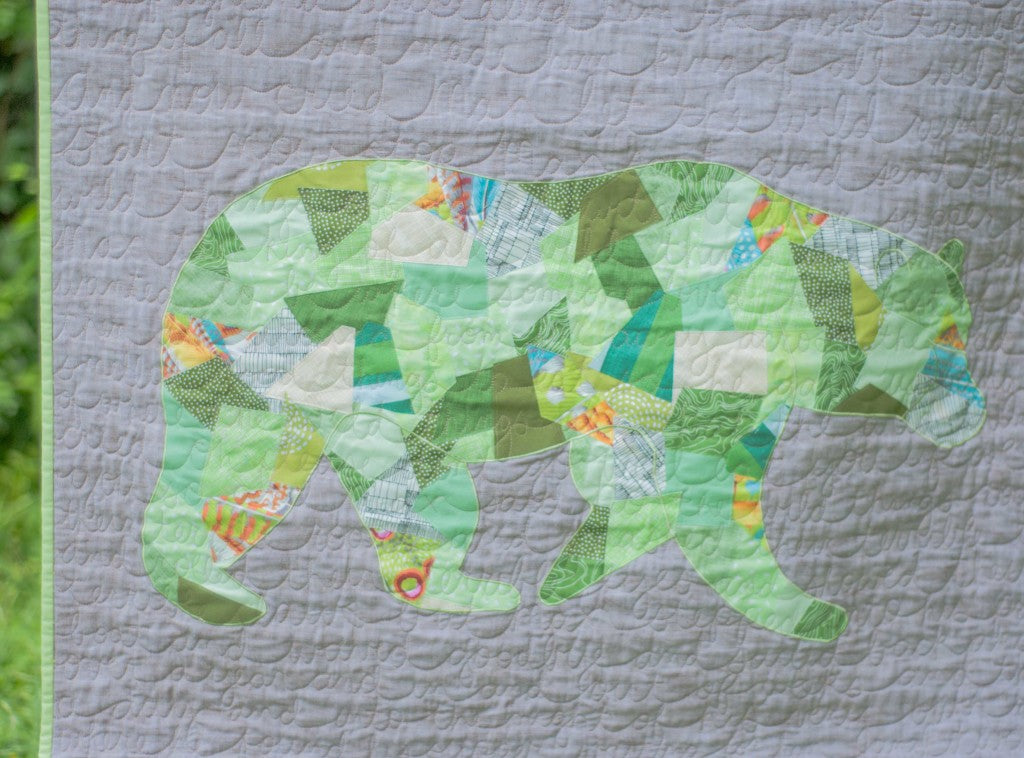
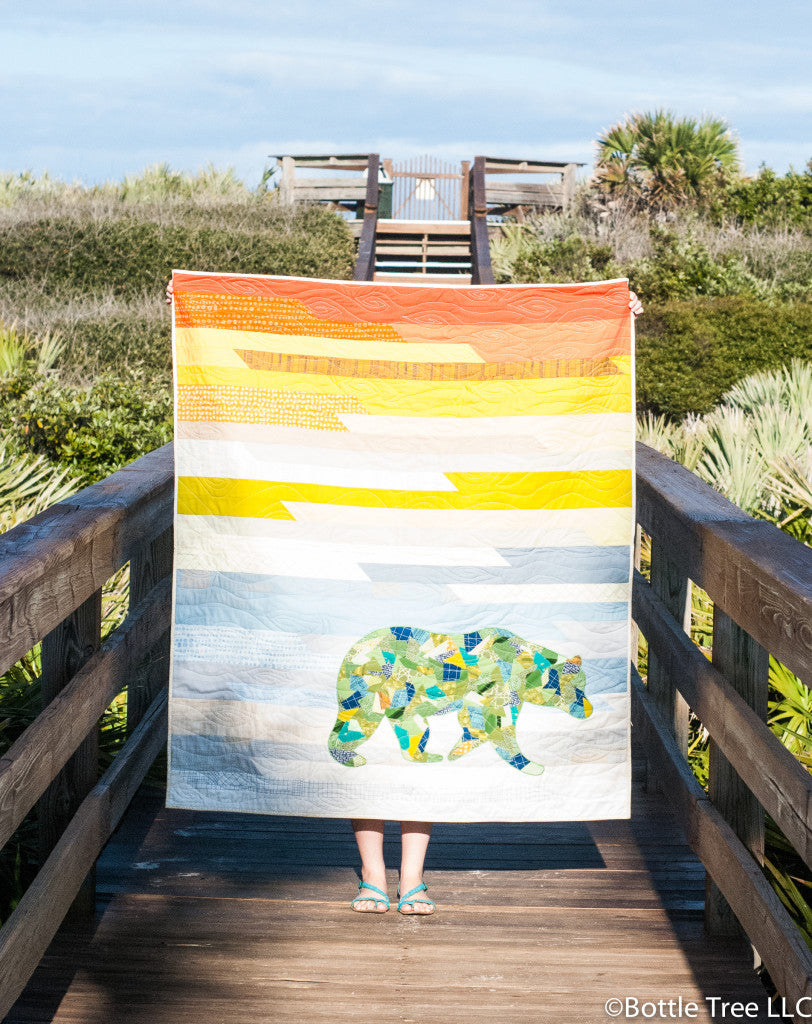
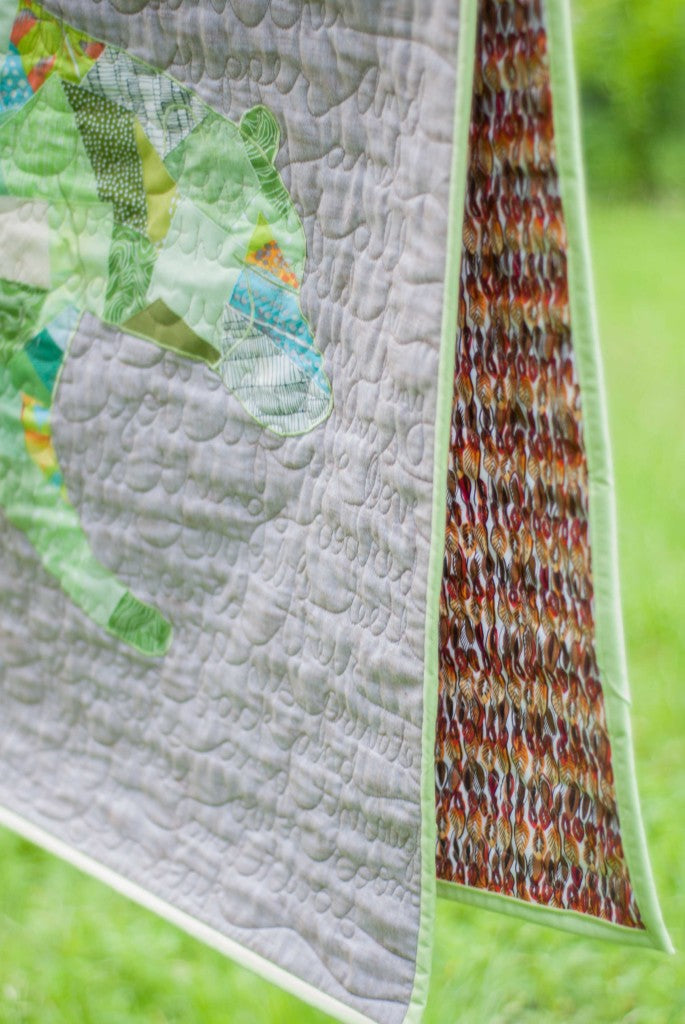 The Wandering Bear pattern is available as both a print and PDF pattern. I've made him many times -- he is one of my favorites.

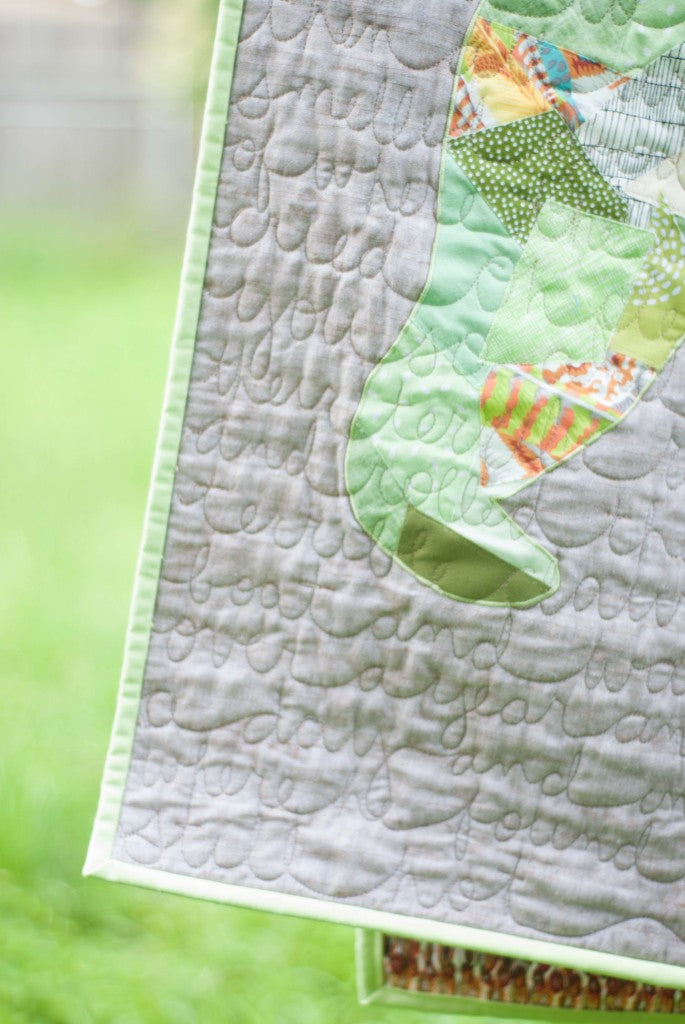

 It's raining today in Austin, a perfect kind of day to spend in the studio playing with fabric, so I'm going to get back to it!
Have you tried "quilt writing" before?]]>
It's raining today in Austin, a perfect kind of day to spend in the studio playing with fabric, so I'm going to get back to it!
Have you tried "quilt writing" before?]]>
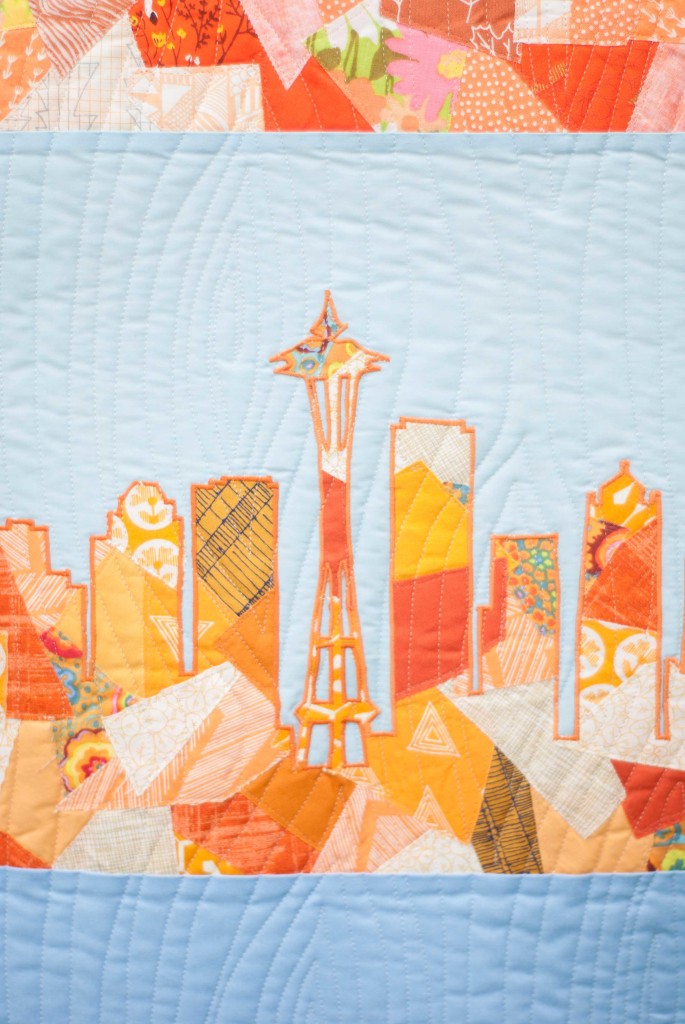
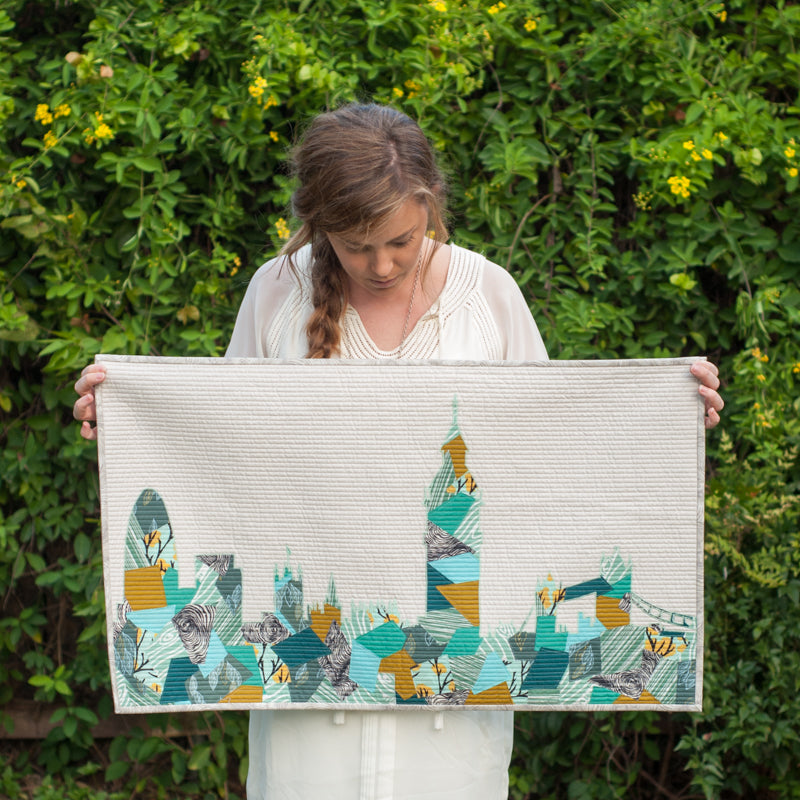
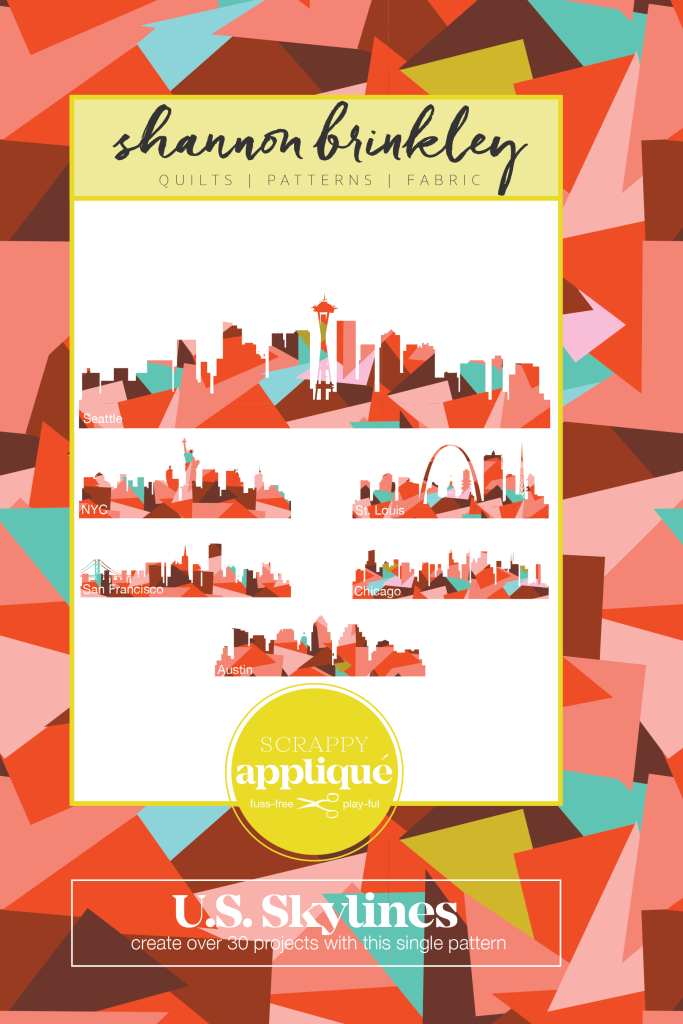
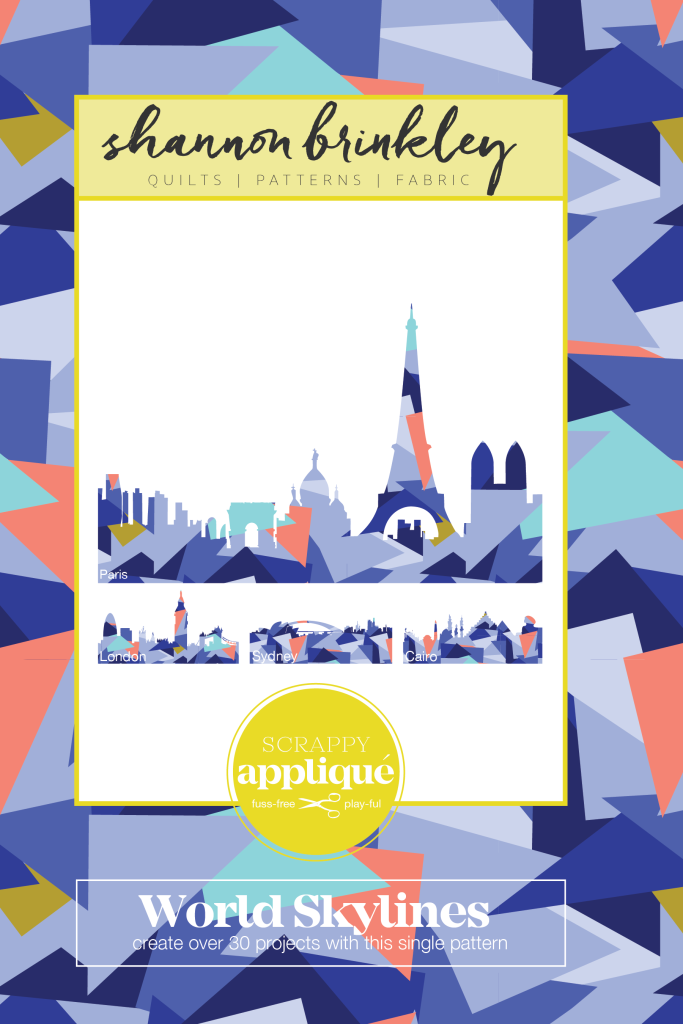
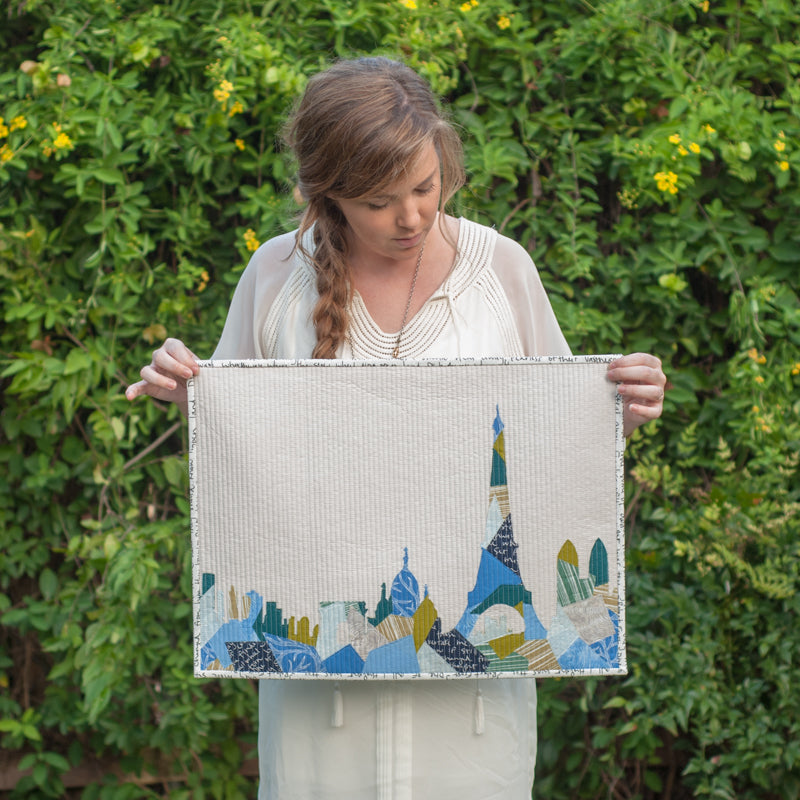
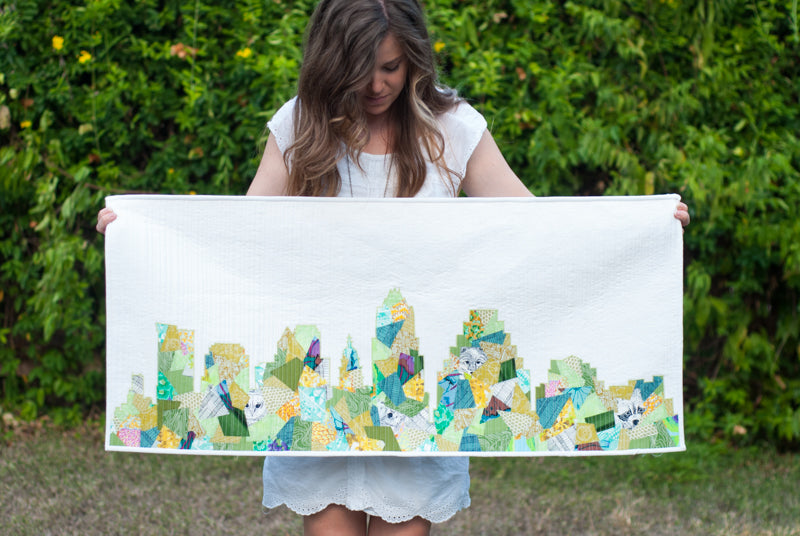
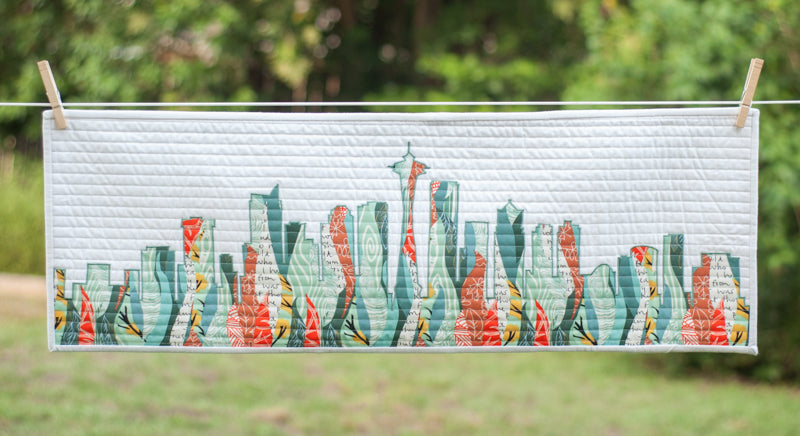
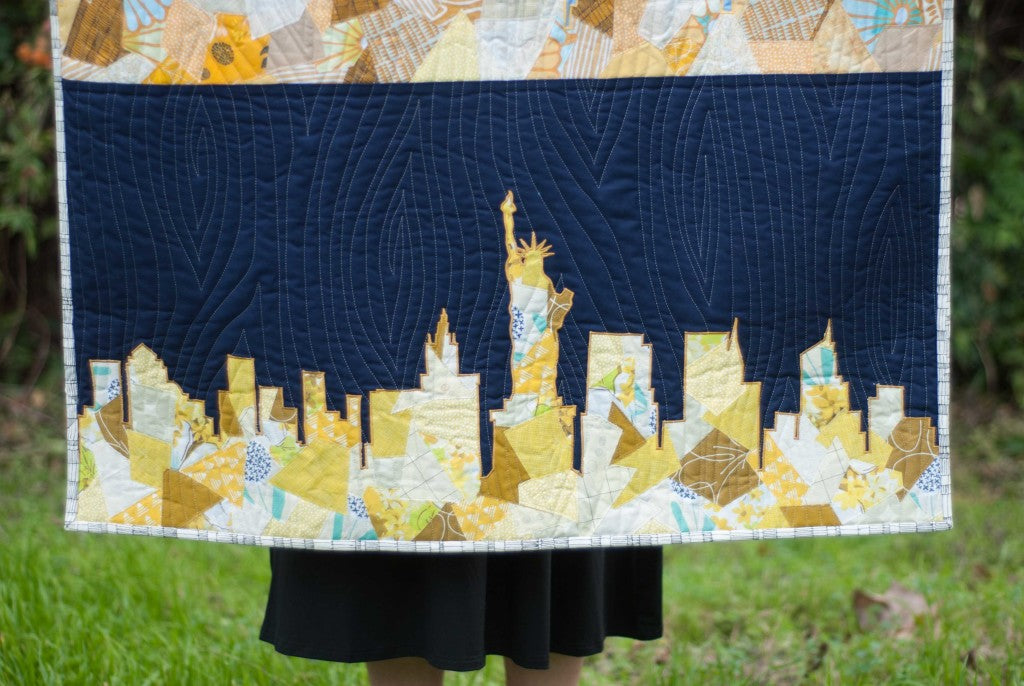 I have over 80 different city skyline patterns in my PDF shop. I also have 2 printed skyline patterns, a US Skyline Pattern and World Skyline Pattern. I used the US Skyline Pattern to make this quilt -- it includes 6 skylines, San Francisco, NYC, Seattle, Austin, Chicago, and St. Louis. I decided to only include 4 skylines in this quilt, but the nice thing about a row quilt is that you can easily add rows. Since I have so many different cities, you can mix and match to build a quilt with cities that are important to you and your family.
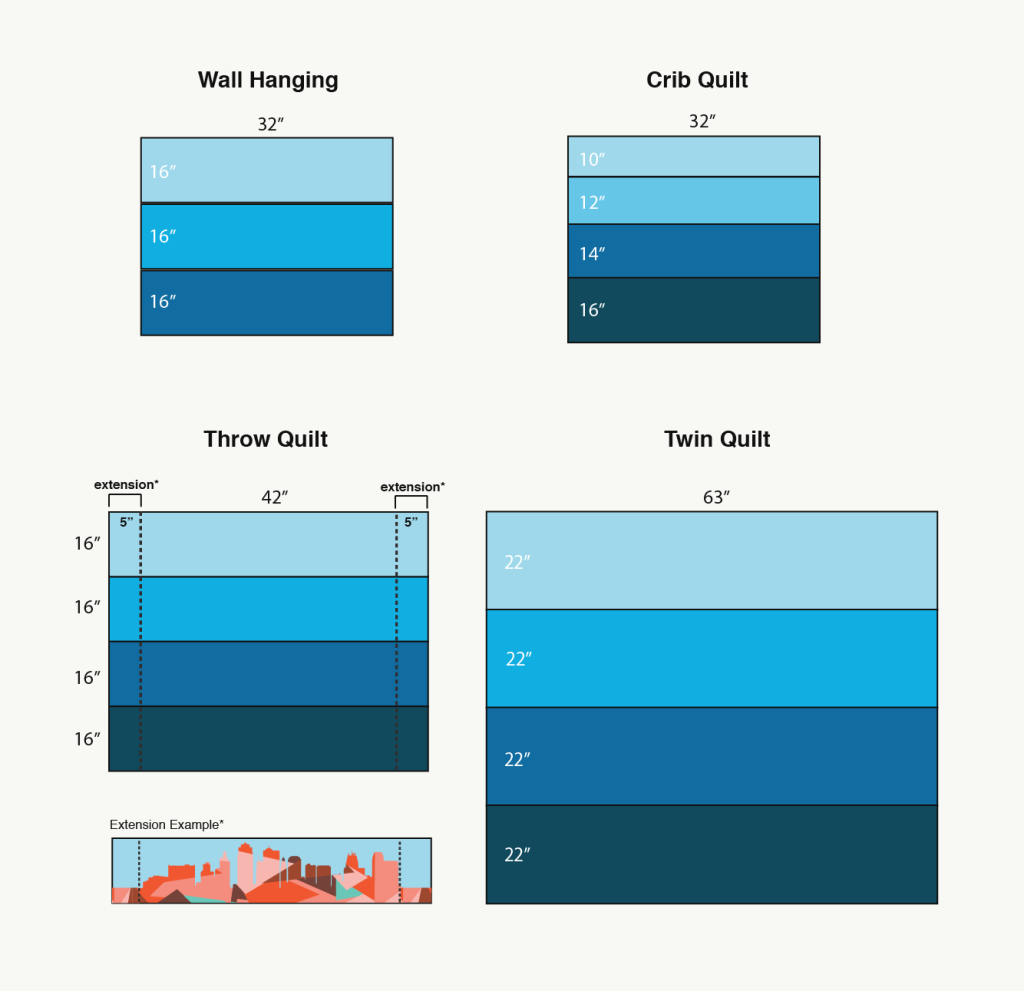
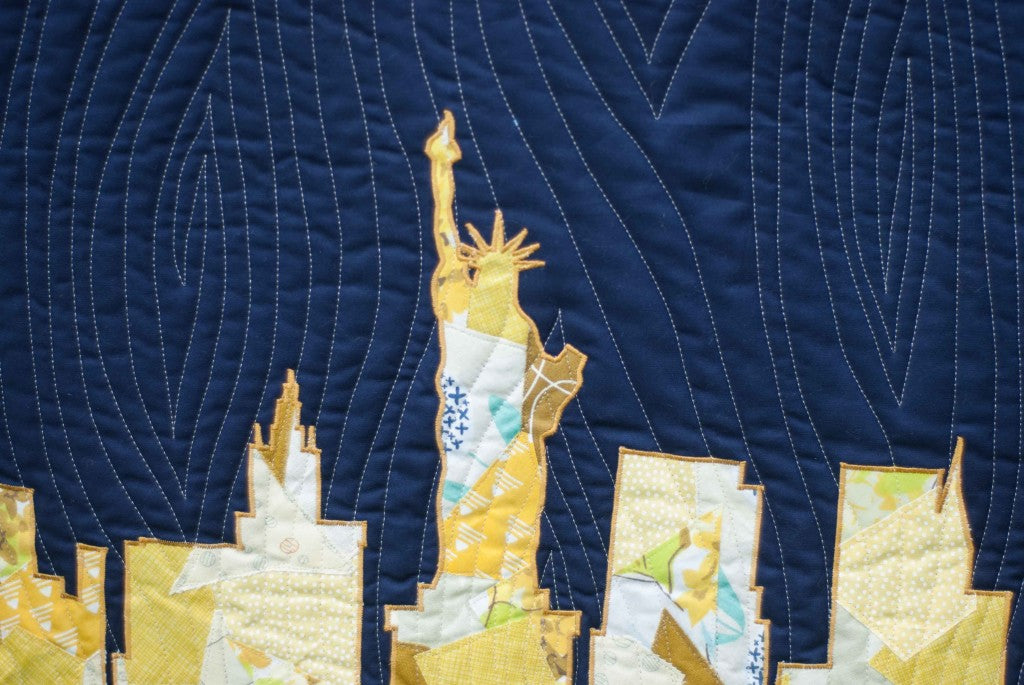
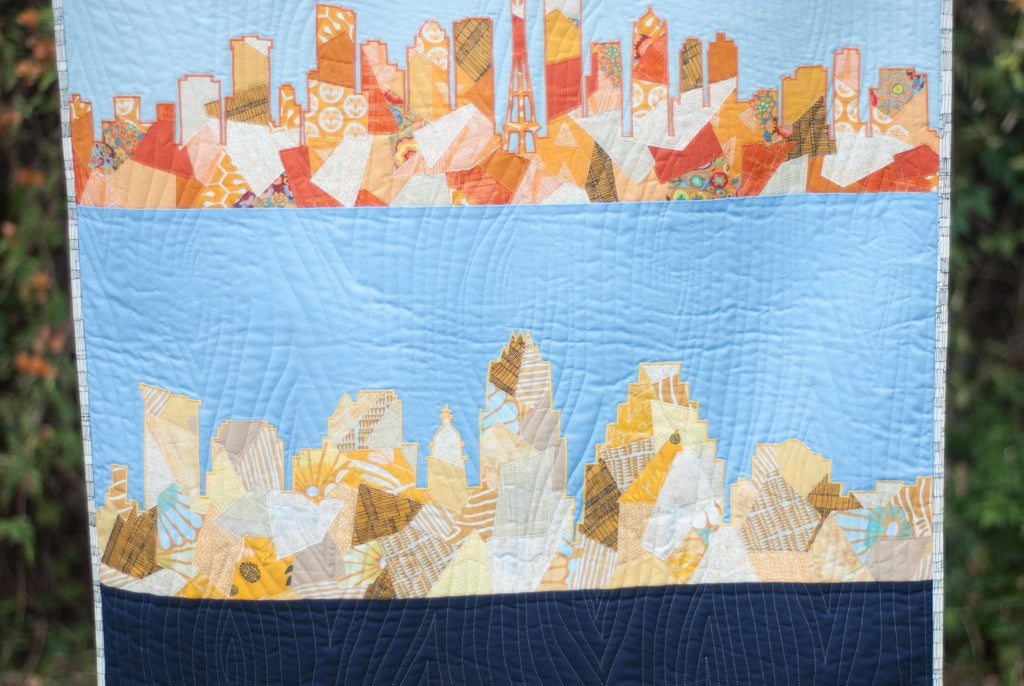 I wanted to create an ombre effect, so i chose 4 different shades of blue, and collage fabric ranging from yellow to orange-red. I had originally planned to have all the rows be equal in height, but one of the light blues I had in my stash, was tall enough for Seattle, but the height wasn't tall enough for the Statue of Liberty. So I decided to have the height increase as you go down the quilt.
**To help you with your project, I wanted to give you a discount. From now until Sunday (Jan 8, 2017), when you buy 3 skyline PDF patterns, you get one free! Just add your 4 favorite city skylines to your cart, then use the discount code FREESKYLINE at checkout.**
I wanted to create an ombre effect, so i chose 4 different shades of blue, and collage fabric ranging from yellow to orange-red. I had originally planned to have all the rows be equal in height, but one of the light blues I had in my stash, was tall enough for Seattle, but the height wasn't tall enough for the Statue of Liberty. So I decided to have the height increase as you go down the quilt.
**To help you with your project, I wanted to give you a discount. From now until Sunday (Jan 8, 2017), when you buy 3 skyline PDF patterns, you get one free! Just add your 4 favorite city skylines to your cart, then use the discount code FREESKYLINE at checkout.**

 I cannot wait to see your row quilts! If you post photos anywhere, be sure to tag me, I want to see them! Happy sewing and happy travels, friends.
]]>
I cannot wait to see your row quilts! If you post photos anywhere, be sure to tag me, I want to see them! Happy sewing and happy travels, friends.
]]>
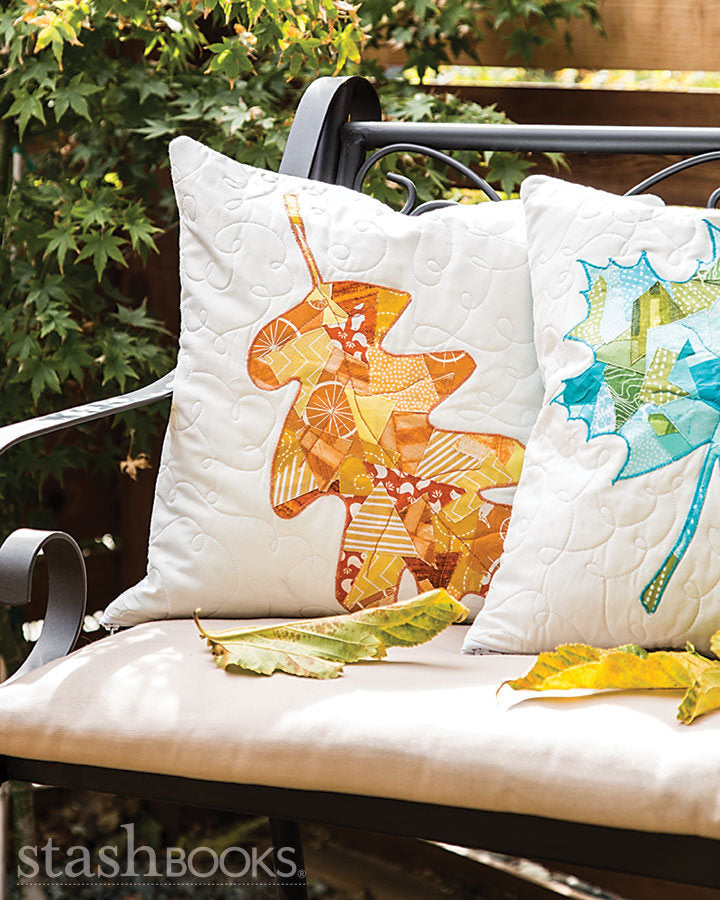
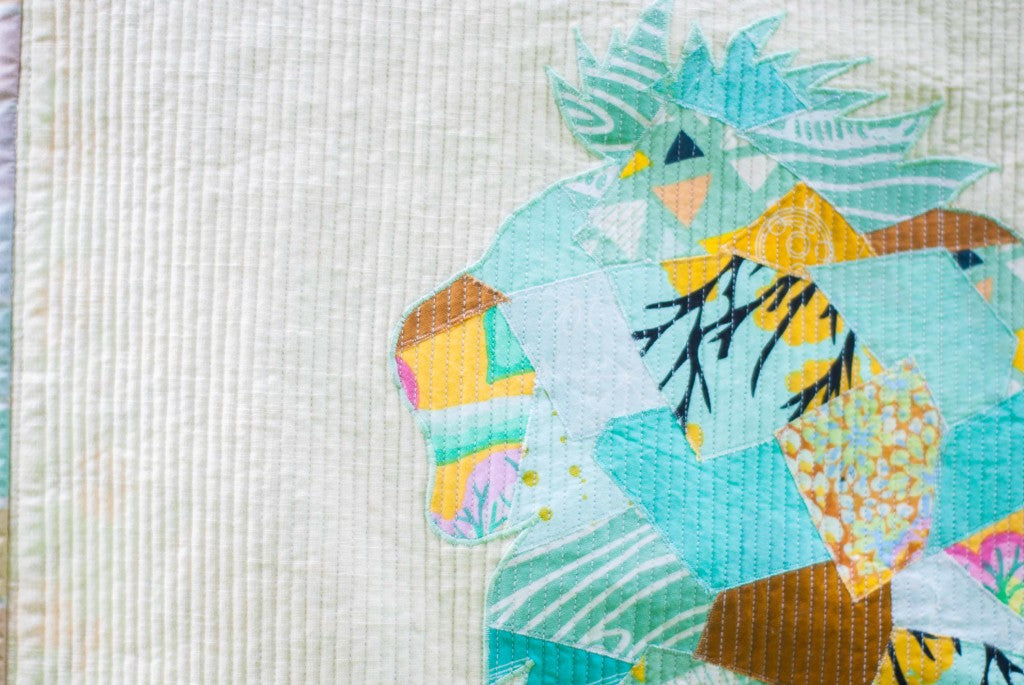
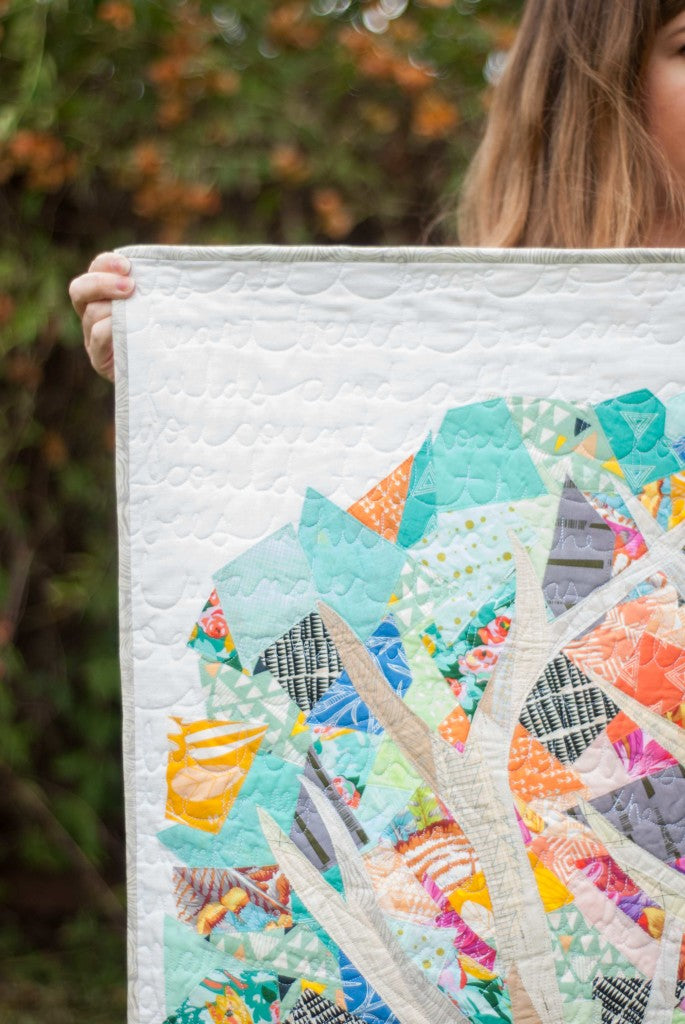 I knew I wanted the leaves to be really vibrant, so I decided to keep the tree and background super neutral. I first created the tree using the pattern from my book, choosing a variety of cream and beige fabrics. After I finished collaging and cut out the tree, I laid it on the background I had chosen. It is an Andover Textured Solid fabric, so it has the lovely texture of linen while behaving like cotton! I use their Textured Solids all the time.
Using a Frixon pen, I drew a large circle around the tree, where I wanted the leaf line to be. I set aside the tree, and began to collage the leaves directly onto the background fabric, still using my Scrappy Appliqué technique. I started in the center of the circle with the warmer fabrics, and worked my way out, slowly introducing the cooler fabrics. I used that black Carolyn Friedlander print throughout the collage as an accent, and also to add a bit more depth to the collage.
I knew I wanted the leaves to be really vibrant, so I decided to keep the tree and background super neutral. I first created the tree using the pattern from my book, choosing a variety of cream and beige fabrics. After I finished collaging and cut out the tree, I laid it on the background I had chosen. It is an Andover Textured Solid fabric, so it has the lovely texture of linen while behaving like cotton! I use their Textured Solids all the time.
Using a Frixon pen, I drew a large circle around the tree, where I wanted the leaf line to be. I set aside the tree, and began to collage the leaves directly onto the background fabric, still using my Scrappy Appliqué technique. I started in the center of the circle with the warmer fabrics, and worked my way out, slowly introducing the cooler fabrics. I used that black Carolyn Friedlander print throughout the collage as an accent, and also to add a bit more depth to the collage.
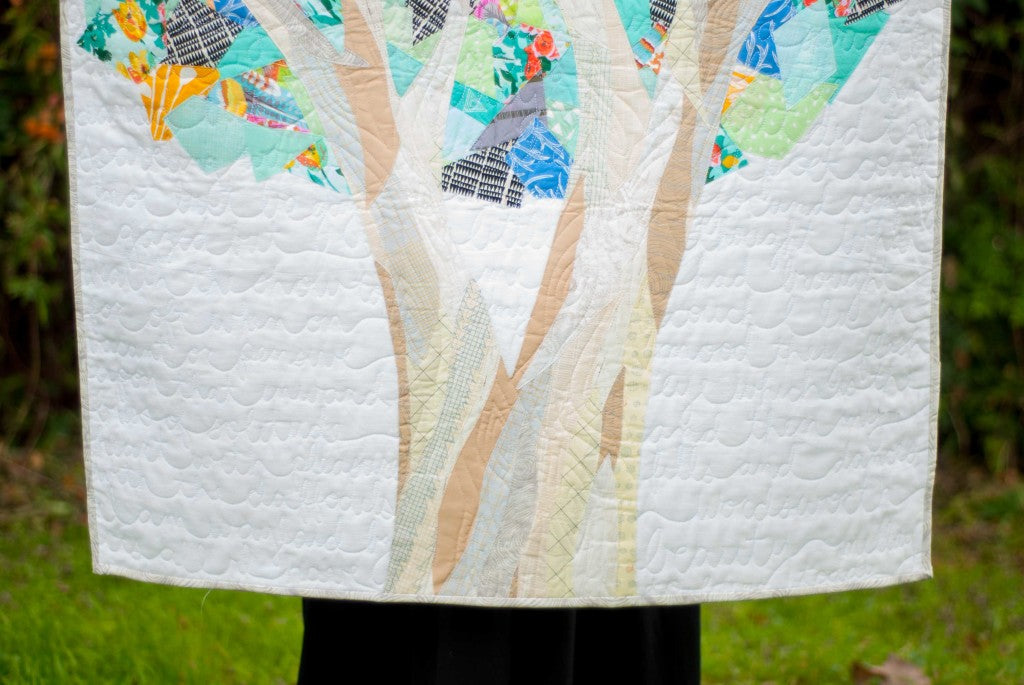 After the leaves were finished and fused, I laid the tree on top and fused it down.
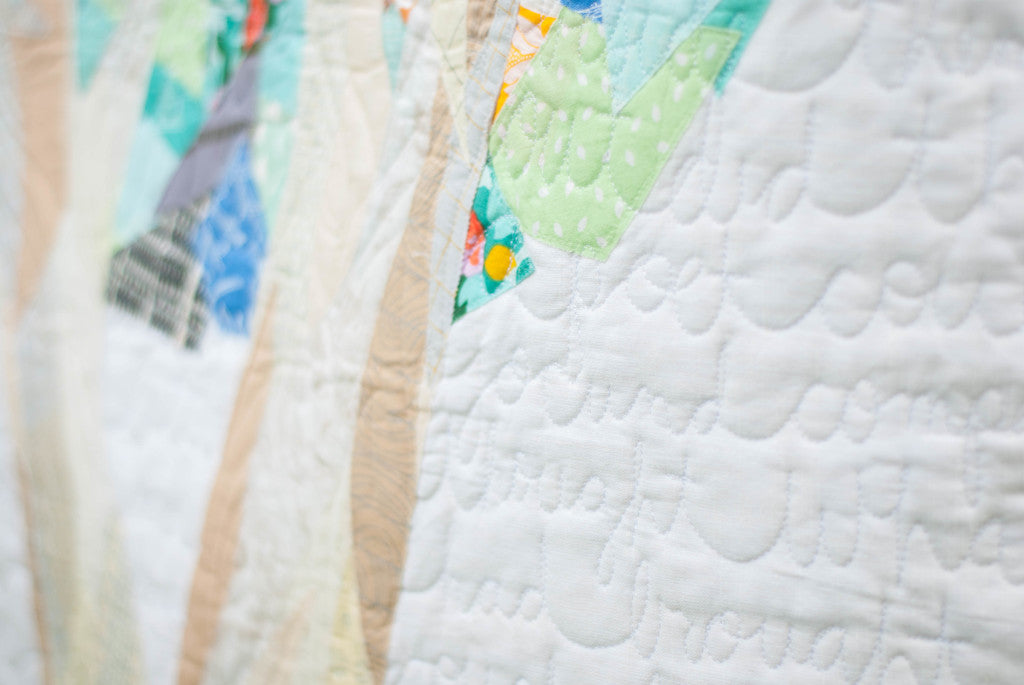 I decided to quilt some of my favorite poems into it, including Emily Dickinson's, It's all I have to bring today..., Wordsworth's Lonely as a Cloud, and an Edna St. Vincent Millay poem at the end. I quilt most of my quilts on a longarm -- I rent time on an APQS longarm from the lovely ladies at Over the Top Quilting in Cedar Park, Tx. I've really been enjoying "quilt-writing" lately (is that a term? Let's coin it!). I quilt in cursive, connecting all the words. I don't worry about dotting the 'i"s or about punctuation.
 I love how this quilt turned out -- it's one of my favorites from 2016! Want to make your own? Grab a book!
Have you ever tried "quilt-writing"? I plan to do a lot more of it! Happy New Year and happy sewing, friends!
]]>
I love how this quilt turned out -- it's one of my favorites from 2016! Want to make your own? Grab a book!
Have you ever tried "quilt-writing"? I plan to do a lot more of it! Happy New Year and happy sewing, friends!
]]>
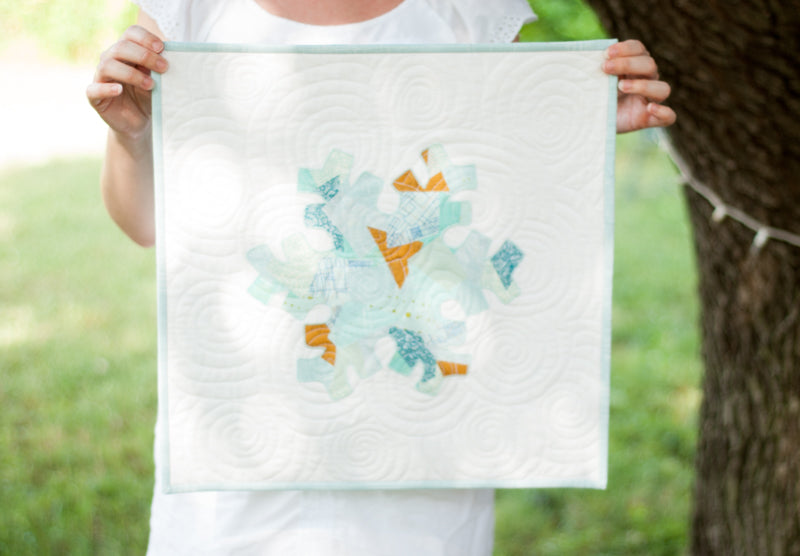
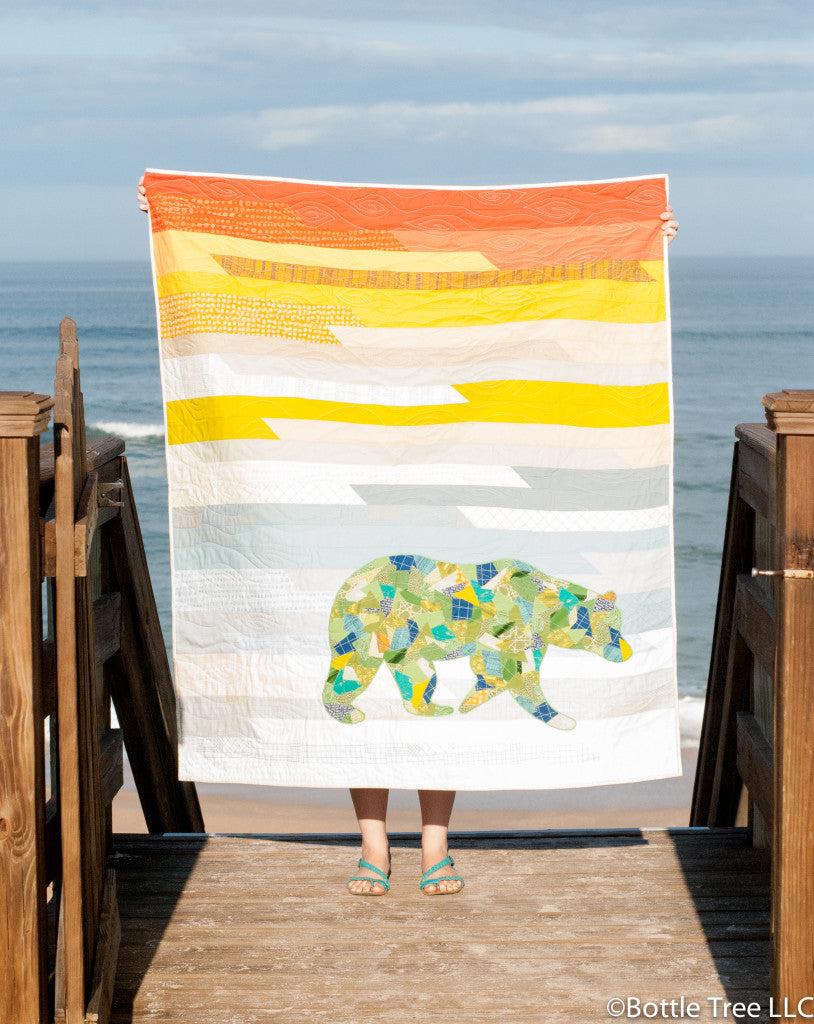
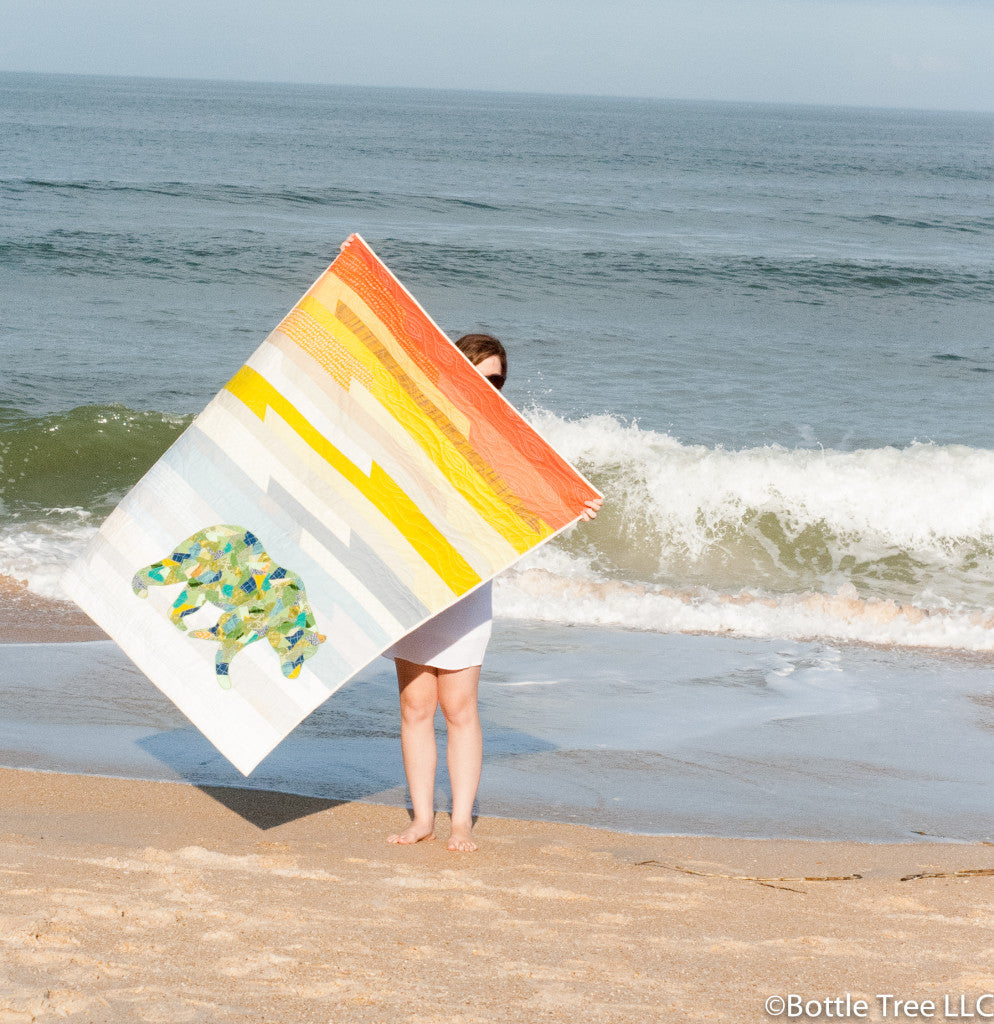
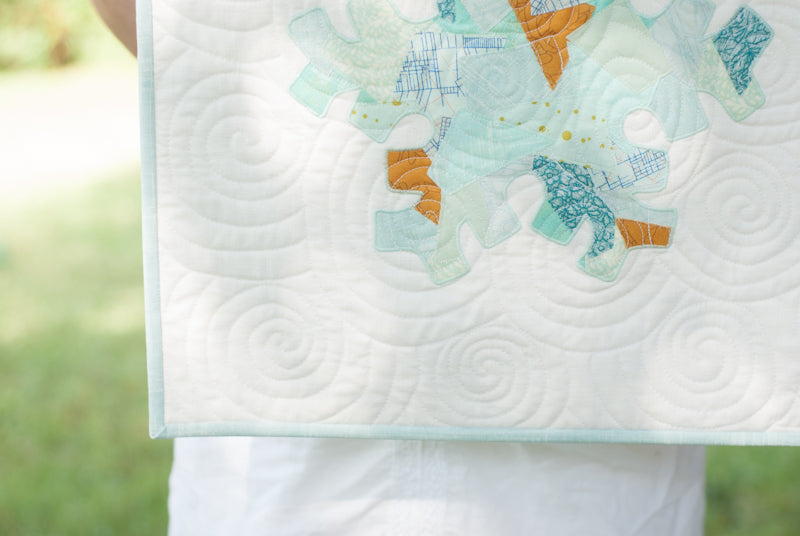 Icy blues and gold gave this quilt a modern, classy look. I satin stitched around the snowflake for a nice, clean finish.
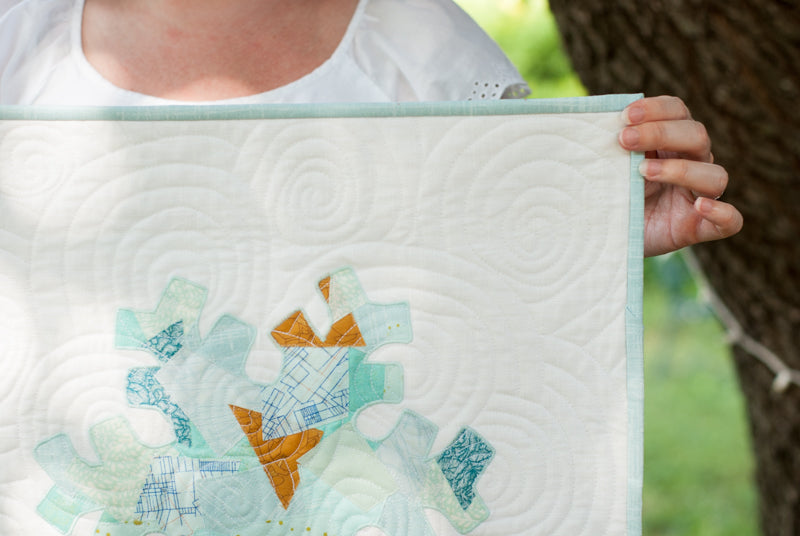 This quilt is made using my Scrappy Applique technique, where I collage fabric scraps to create the applique piece; you can find my book, Scrappy Bits Applique and my Scrappy Applique patterns here. Our tutorial today shows you how to whip this up using one piece of fabric for the snowflake with my Simple Raw-Edge Applique technique.
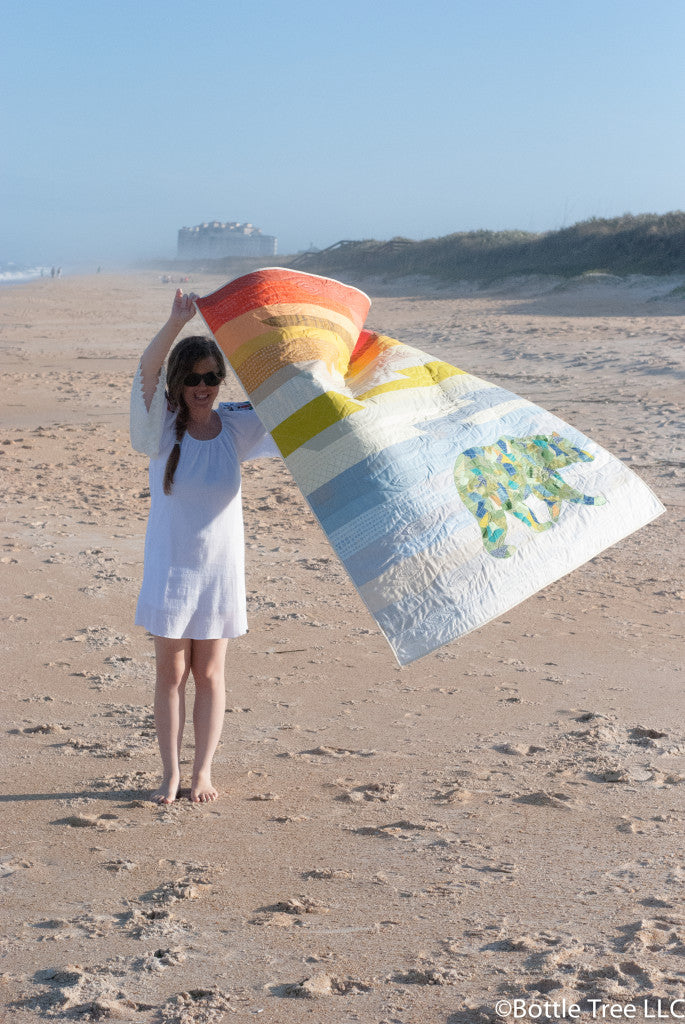
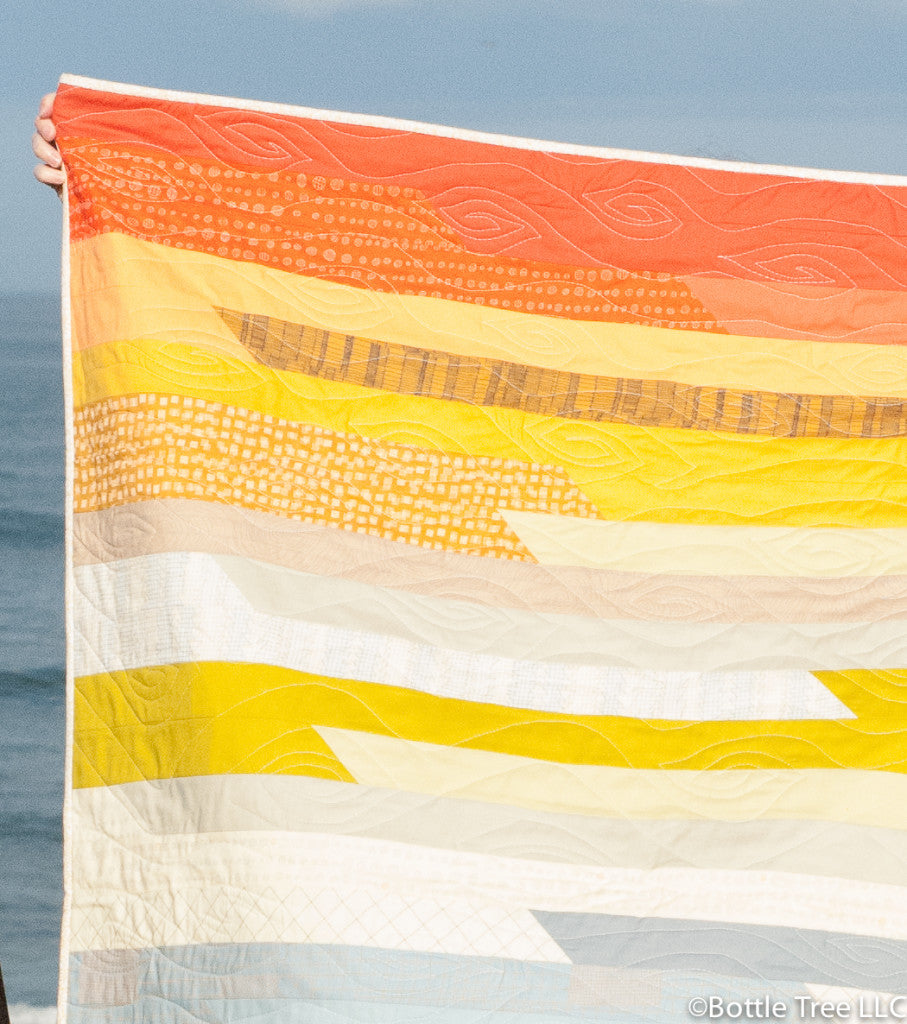
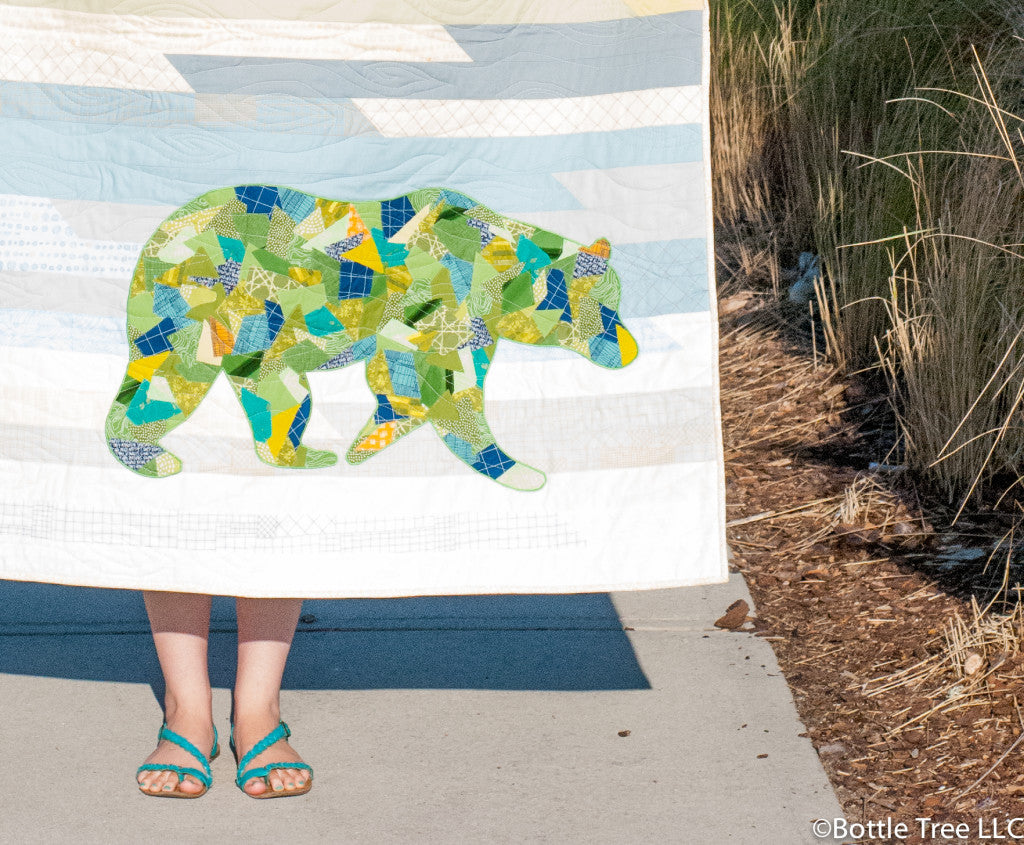
 For the bear, I made a simple strip pieced background to put the sweet bear on. Tutorial for him can be found here.
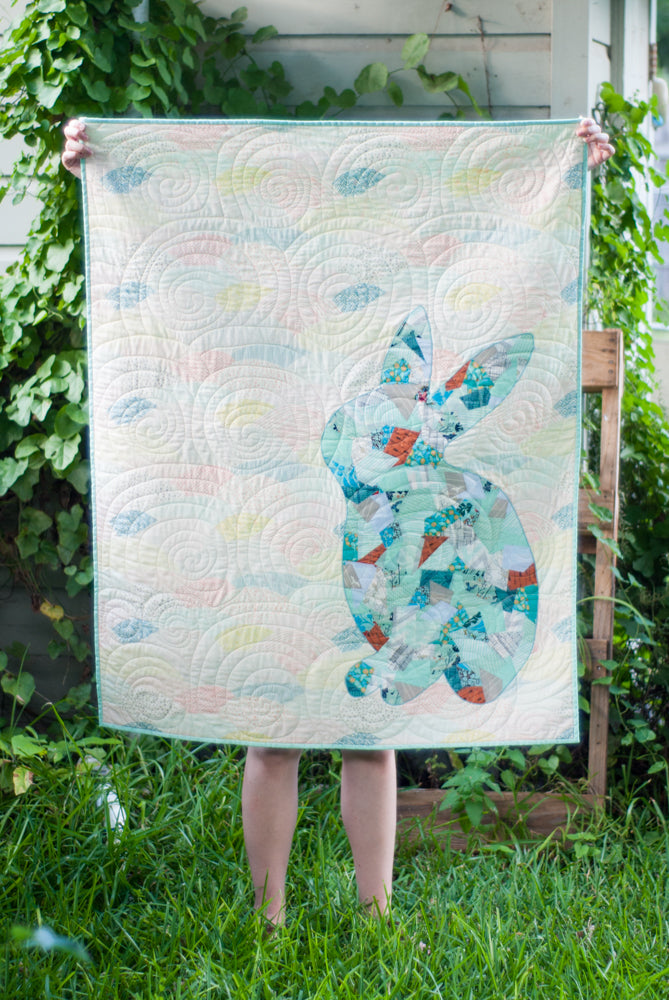
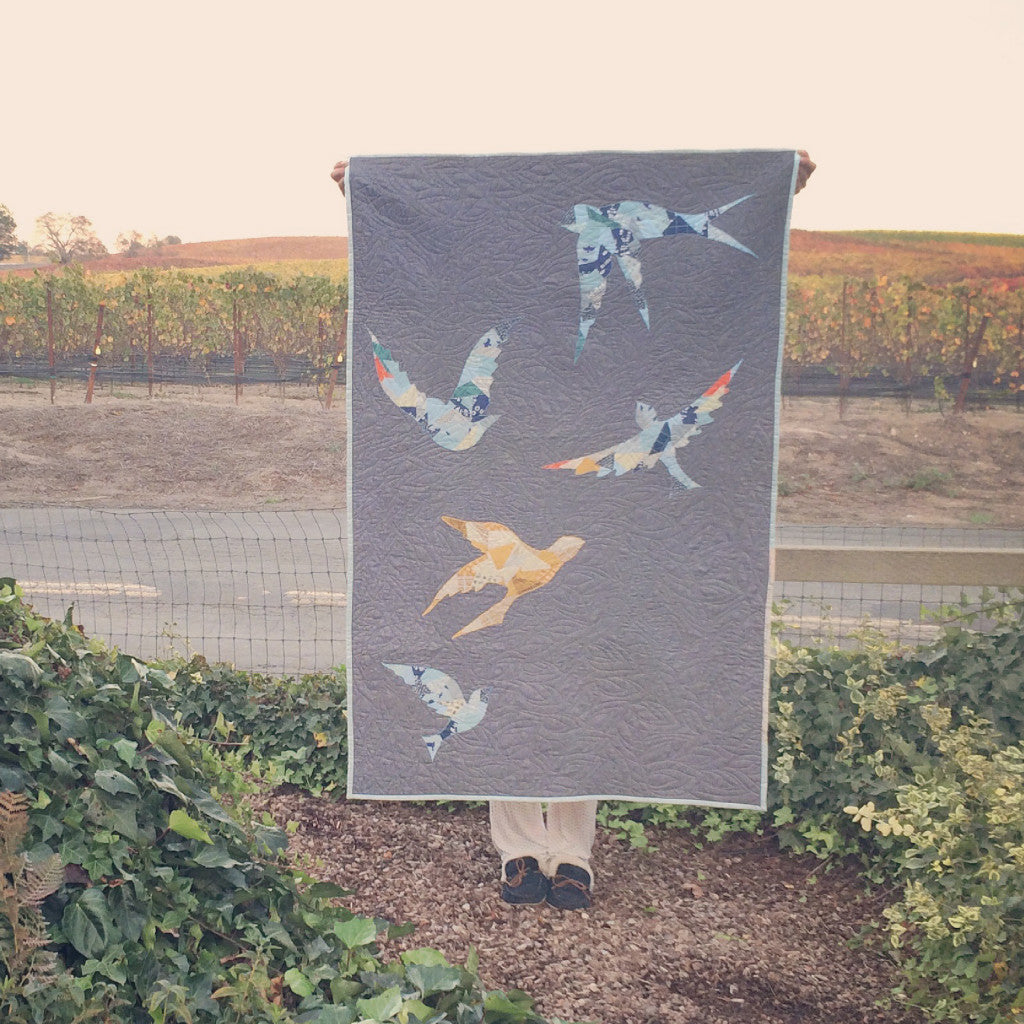
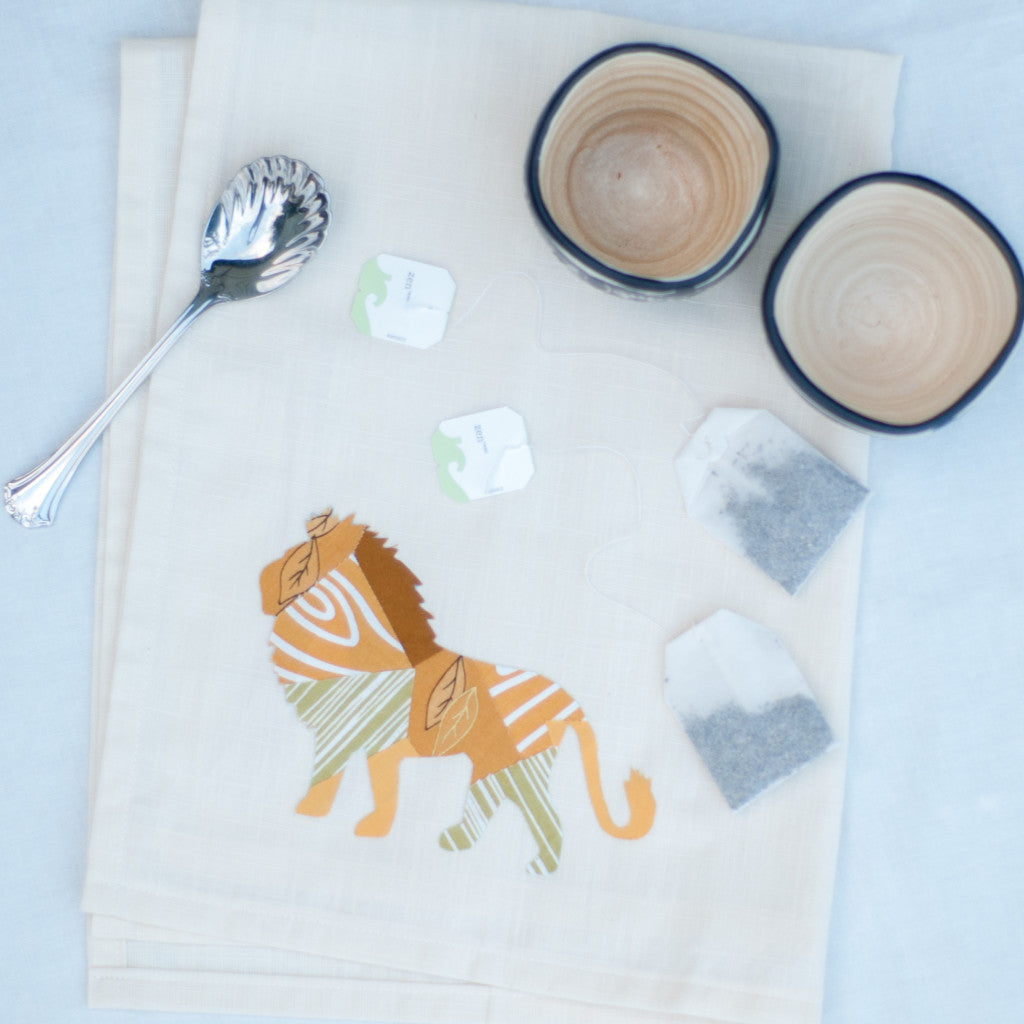
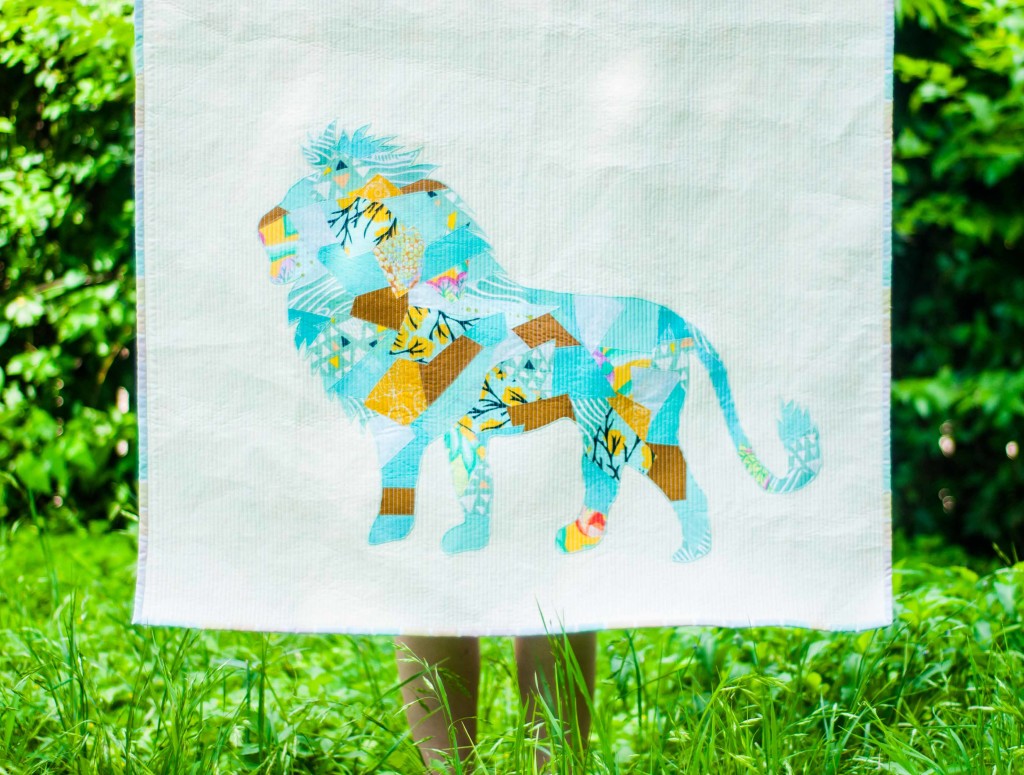 You can also, just place the animal on a solid piece of fabric for the background, like I did with the lion, deer bust, flock of birds, and bunny! Quick and easy. All these patterns are available as both printed and PDF patterns.


 Did I mention that all the patterns include multiple sizes? So with one pattern, you could make tea towels, a tote bag, pillows, a wall hanging, and a quilt! And all these projects sew up very quickly, most can be finished in a day or weekend. Happy sewing!
 [caption id="attachment_2147" align="aligncenter" width="1024"]
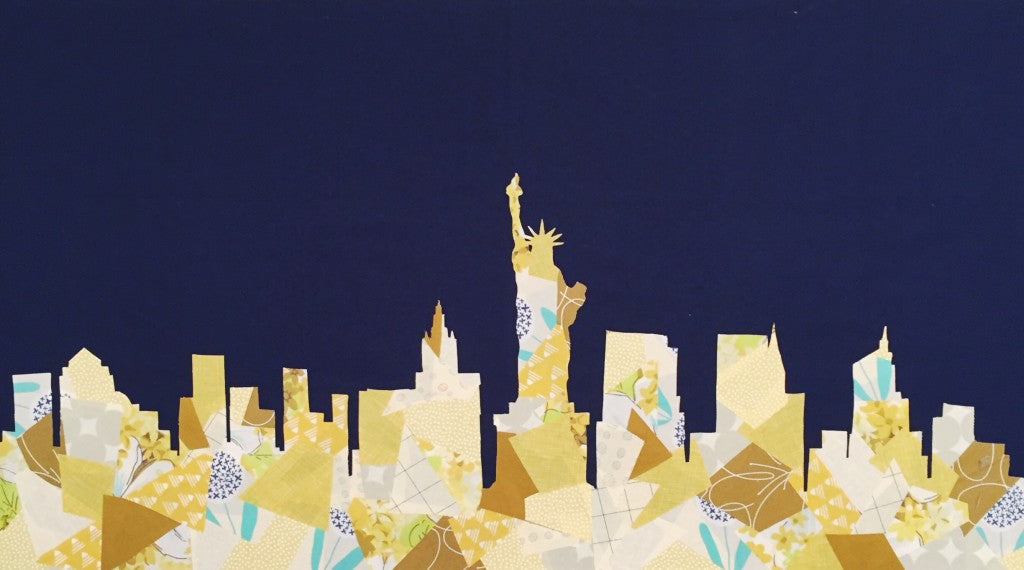 See if we have your favorite city! [/caption]
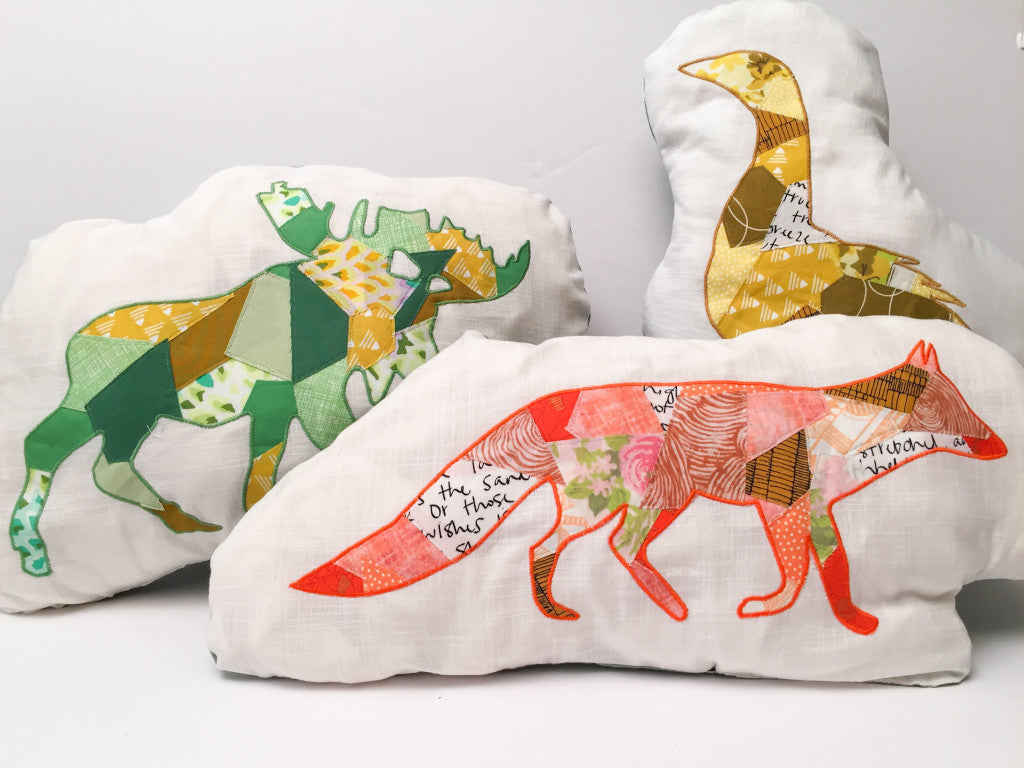

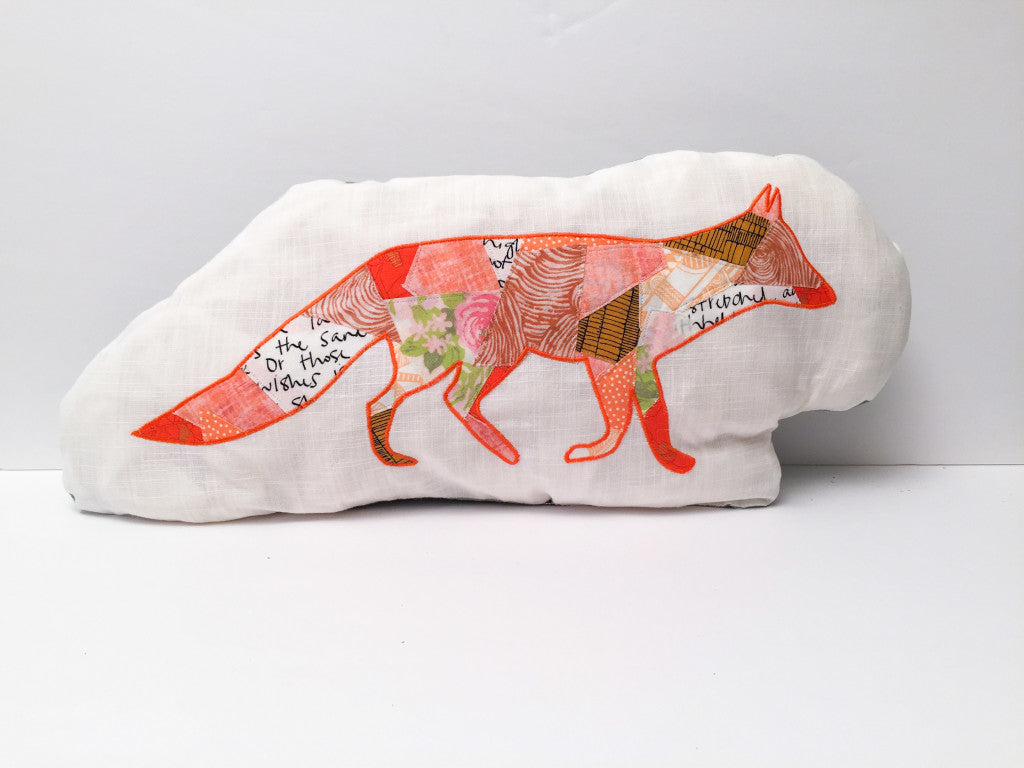
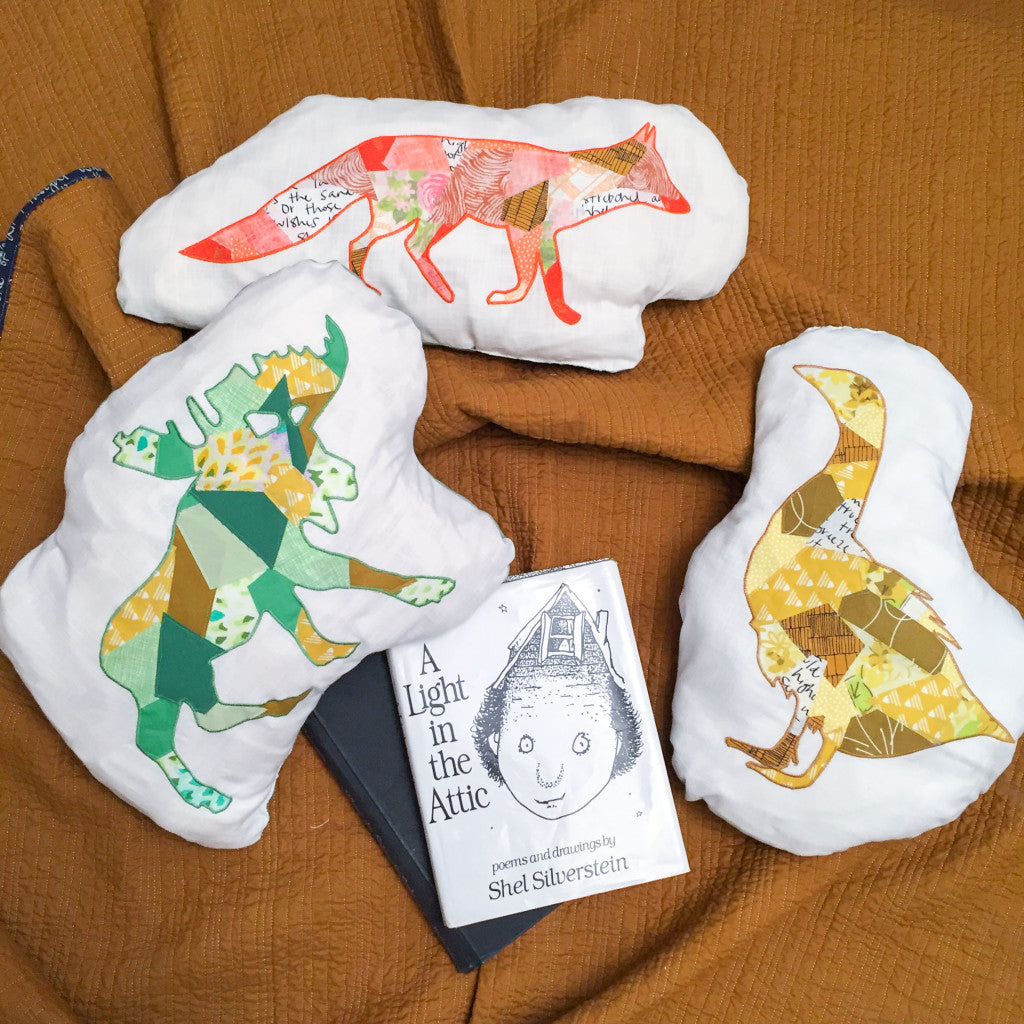
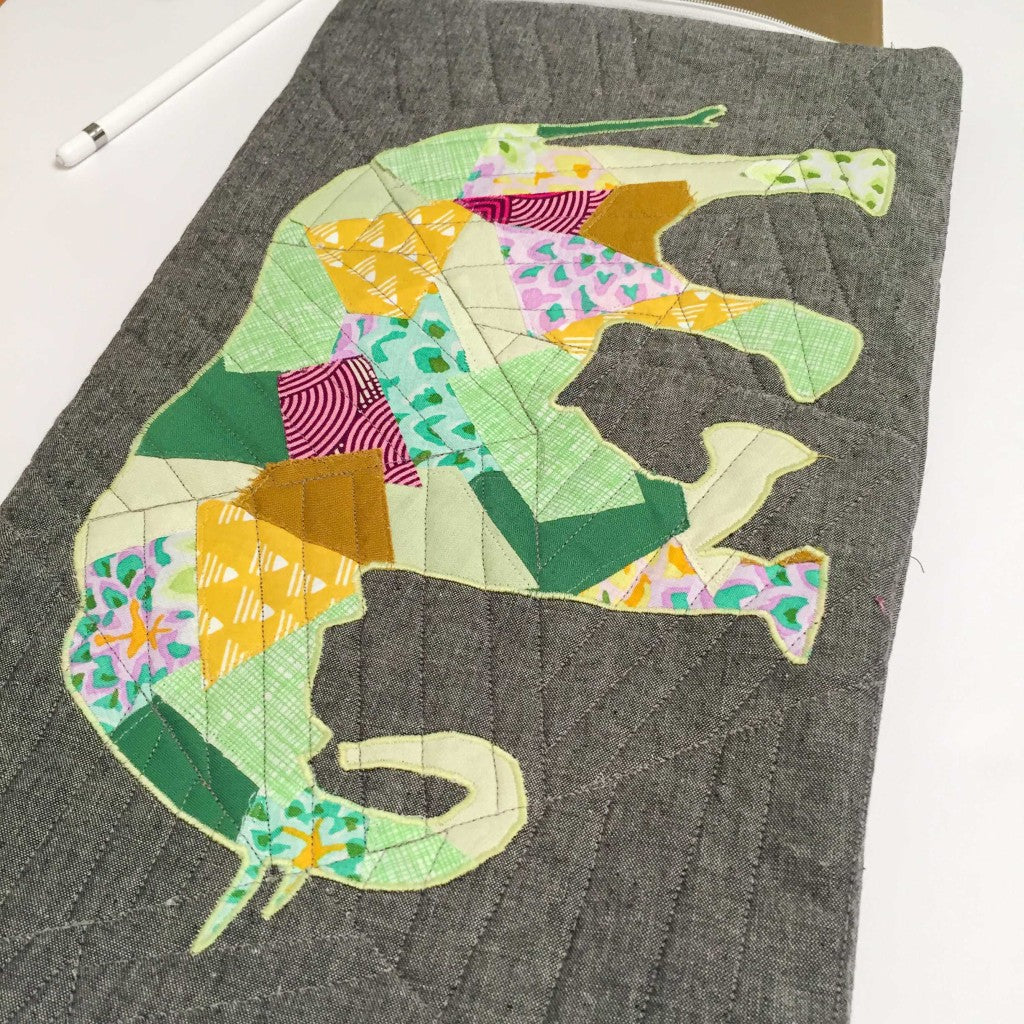
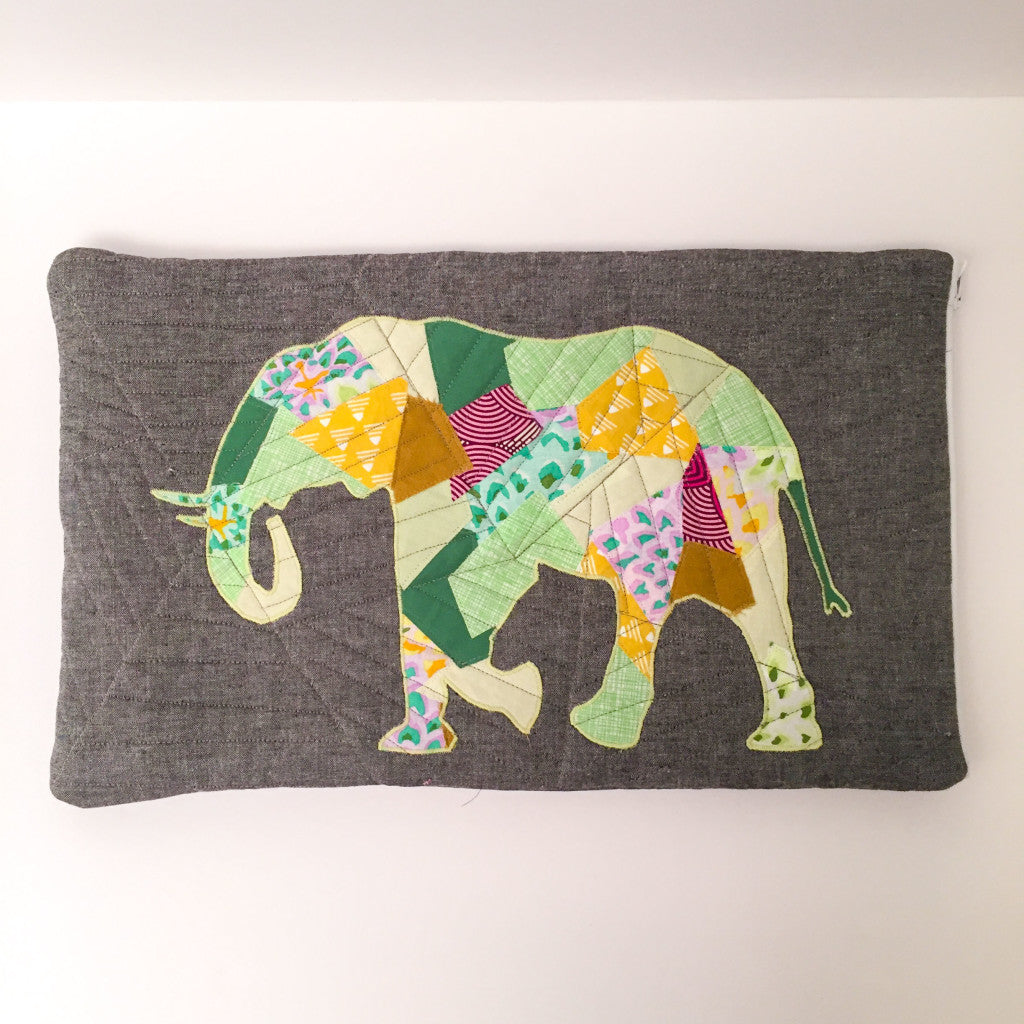
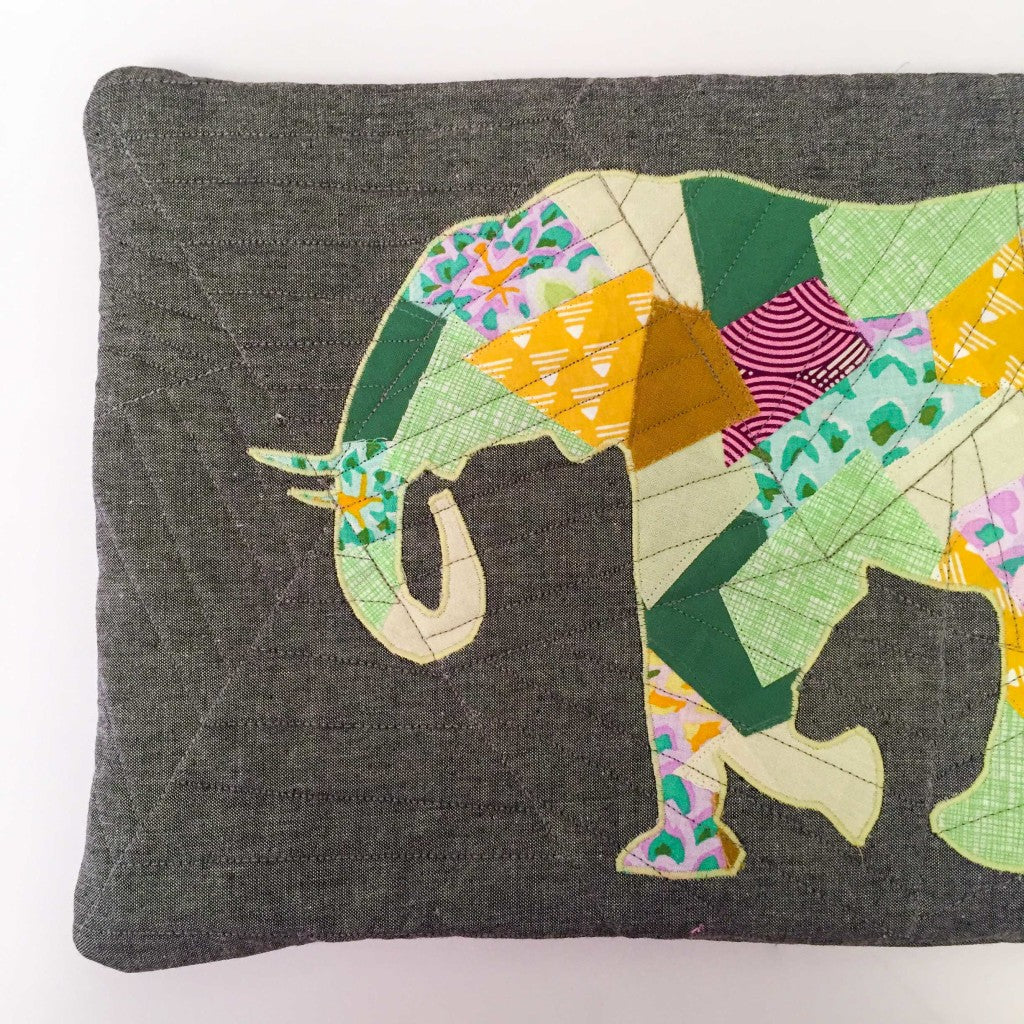
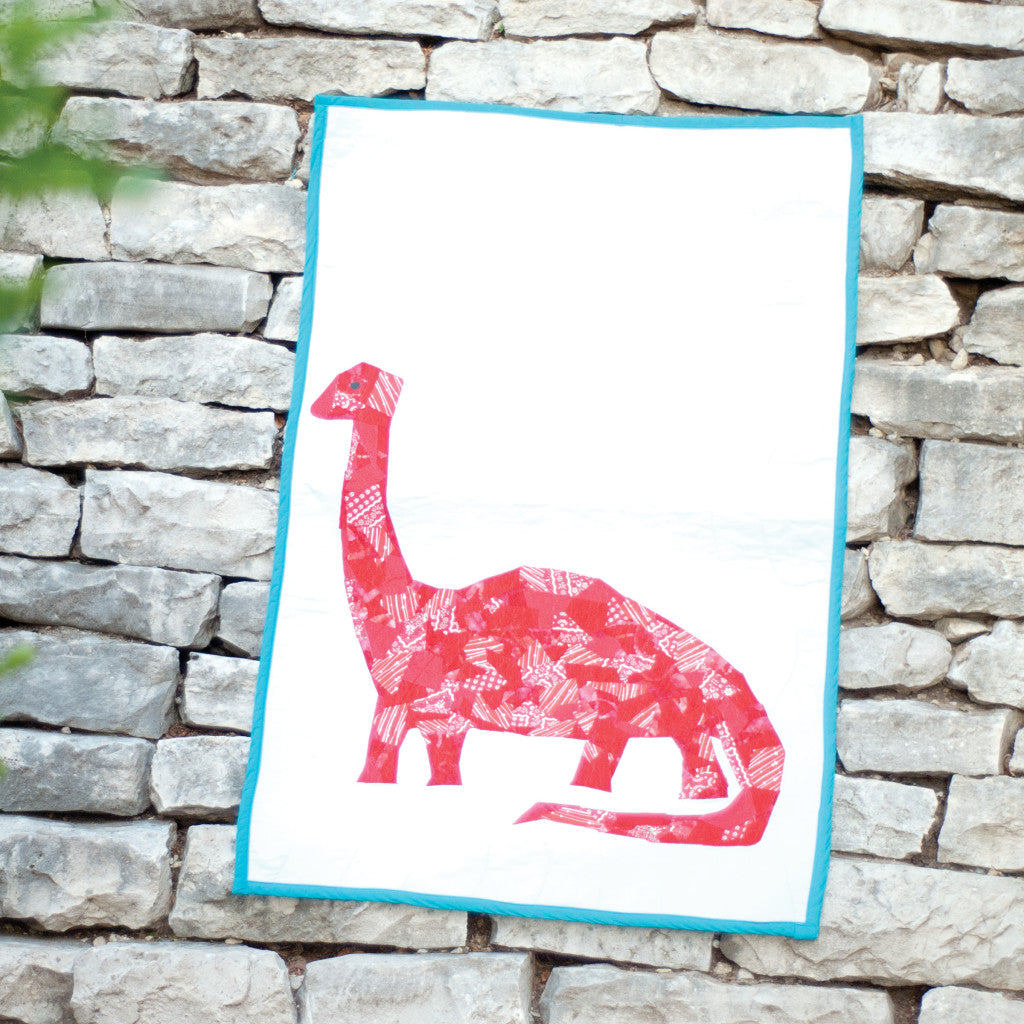
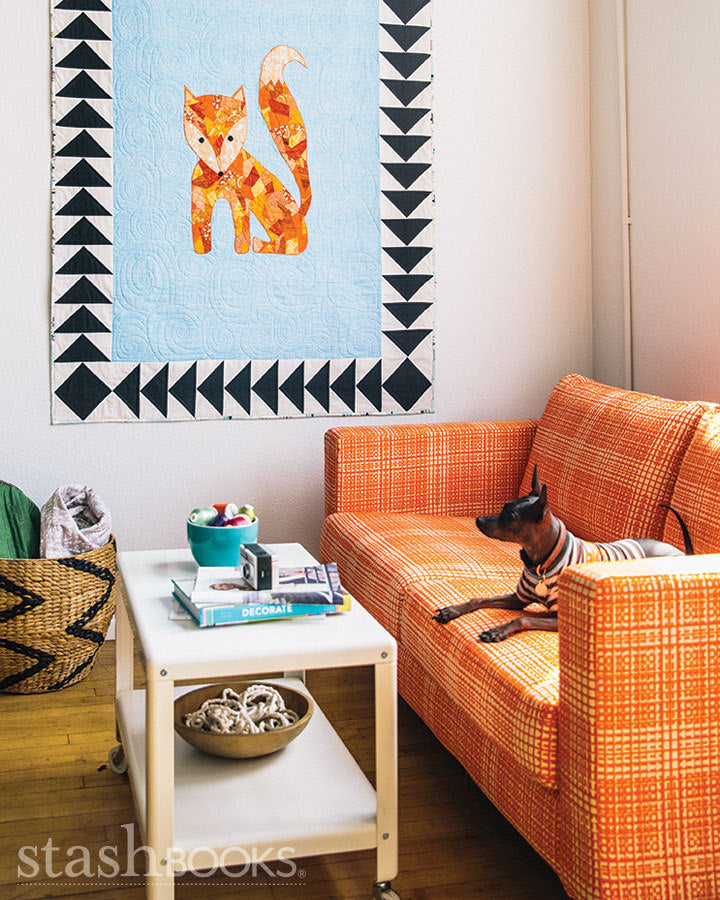
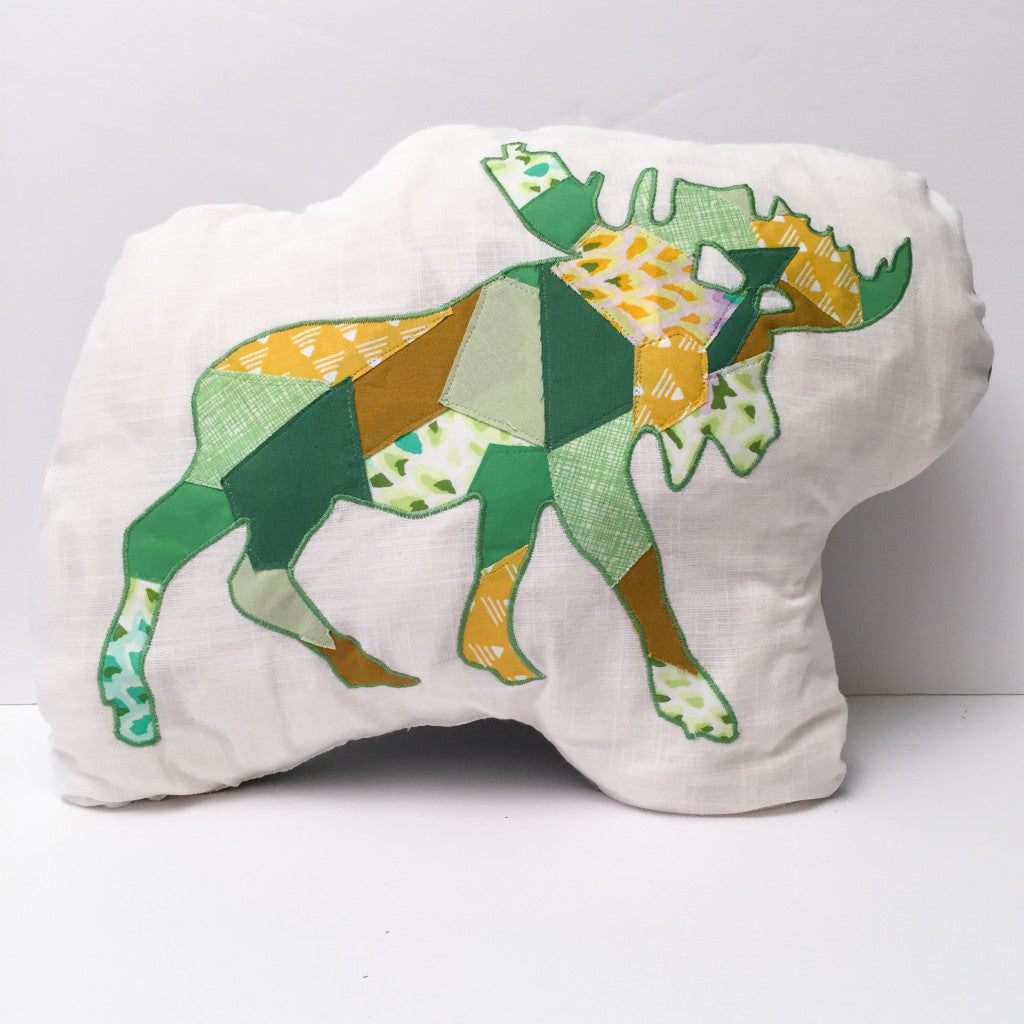 These are perfect in a kids room, but heck, we also have 3 on our living room couch! I think they're super fun. Since all my digital patterns include 4 different sized templates, you could use a larger one to make a lap or bed quilt and make a matching pillow(s) to go with it!]]>
 These might just be my family's Christmas gifts this year! What animal would you put on yours??
]]>
These might just be my family's Christmas gifts this year! What animal would you put on yours??
]]>
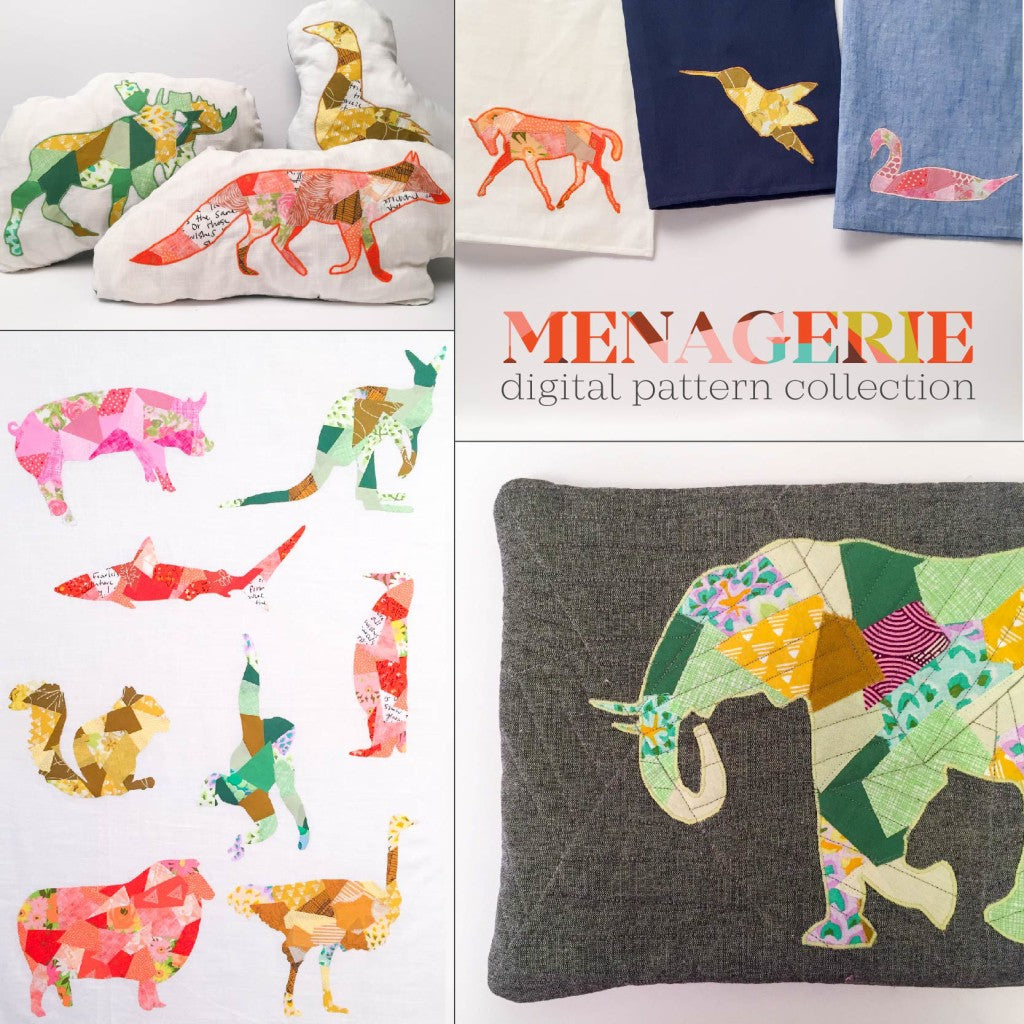 Each pattern includes multiple finishing options and 4 different sized templates! So you can make over a dozen projects with a single pattern! Sizes go from mini-large.
See if we have your favorite animal!
Each pattern includes multiple finishing options and 4 different sized templates! So you can make over a dozen projects with a single pattern! Sizes go from mini-large.
See if we have your favorite animal!
 I'm not going to share all the quilt's secrets, but they spanned from inside jokes, to favorite quotes, to pet names for one another, to the actual names of pets they had had together and loved.
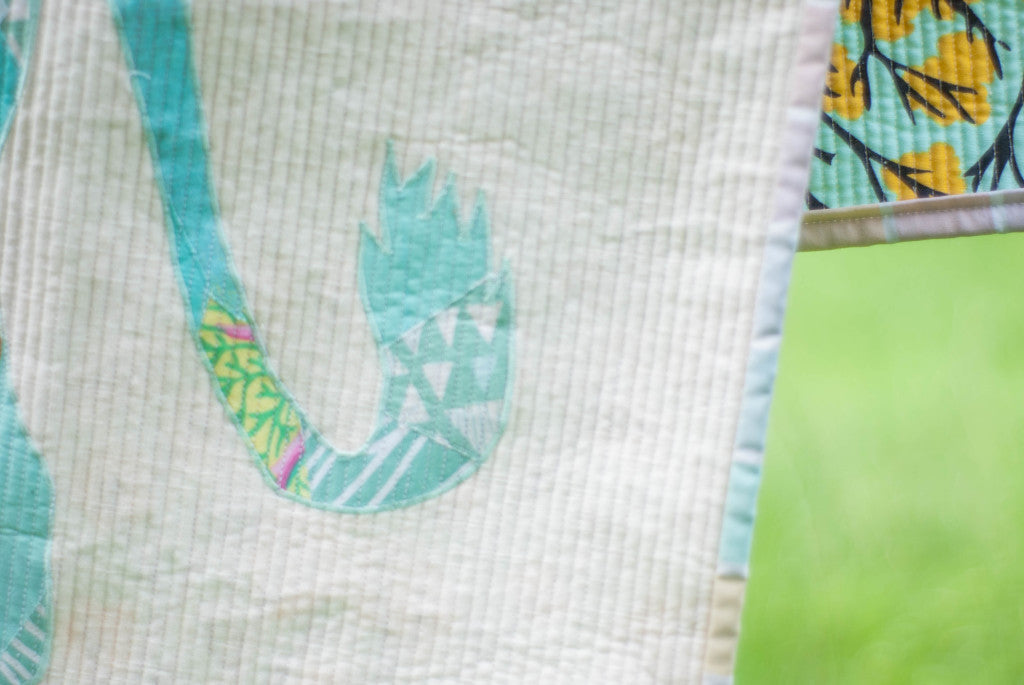
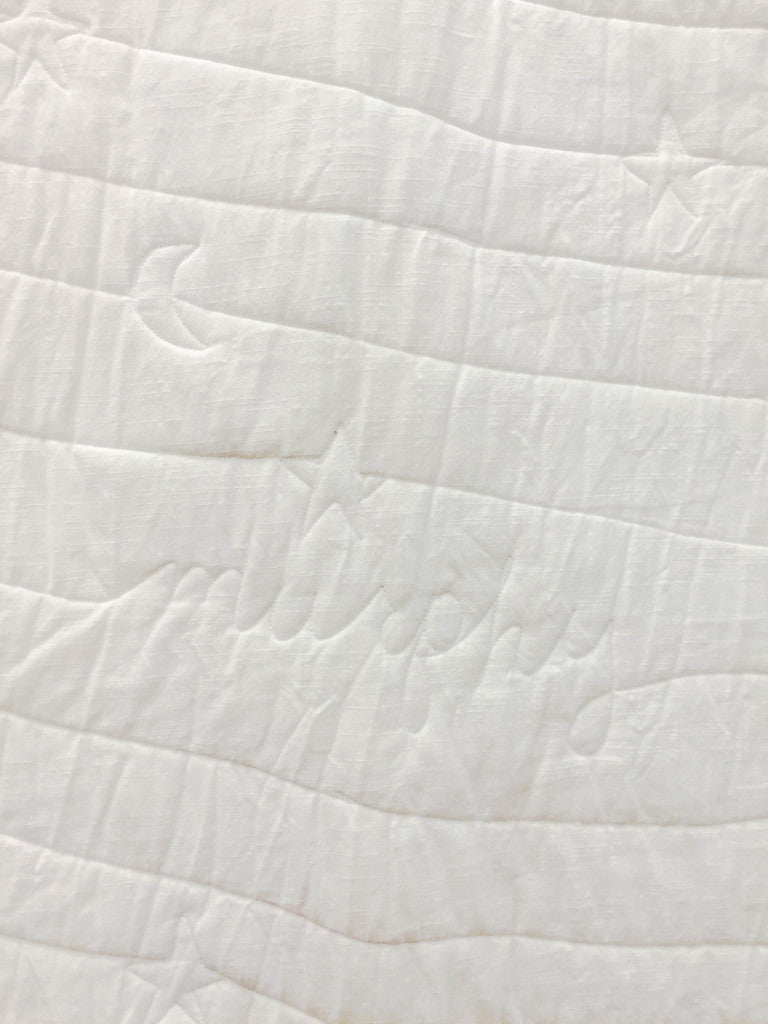 Stars and moons were also significant to them and she wanted them to be scattered throughout the quilt.
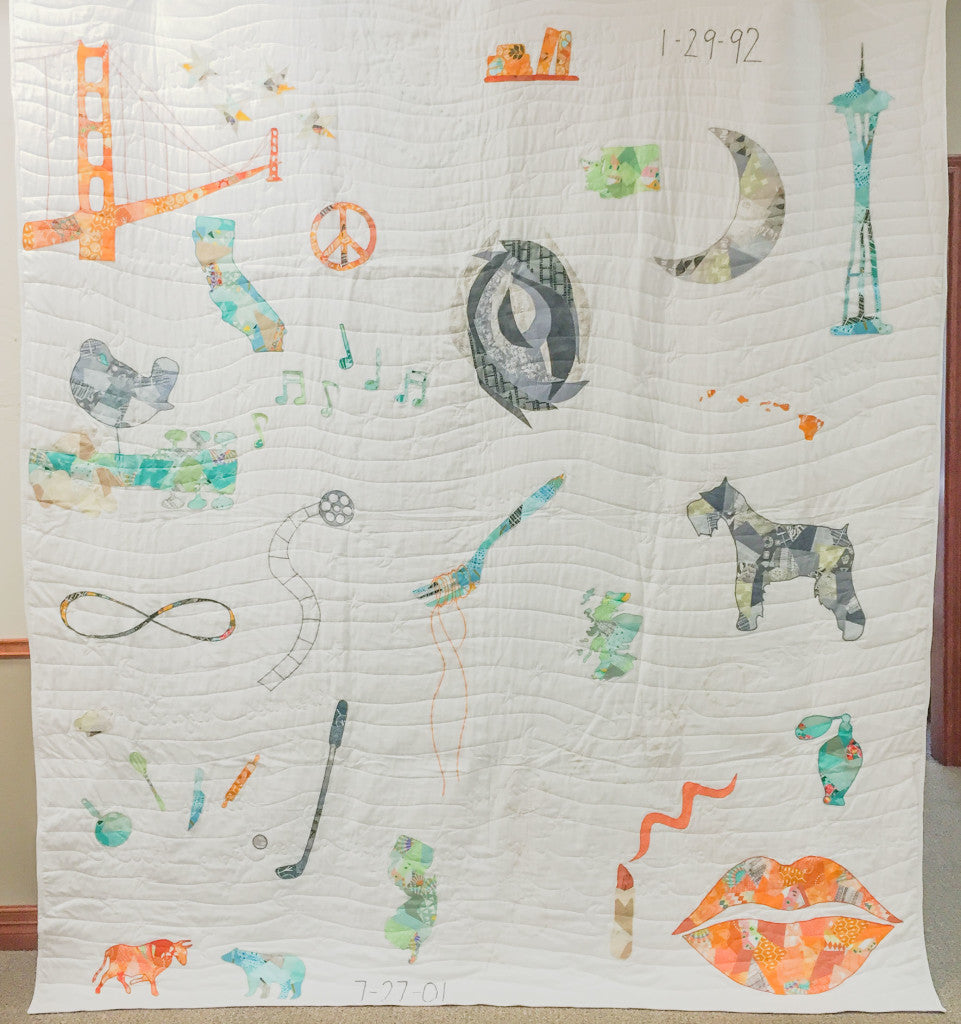
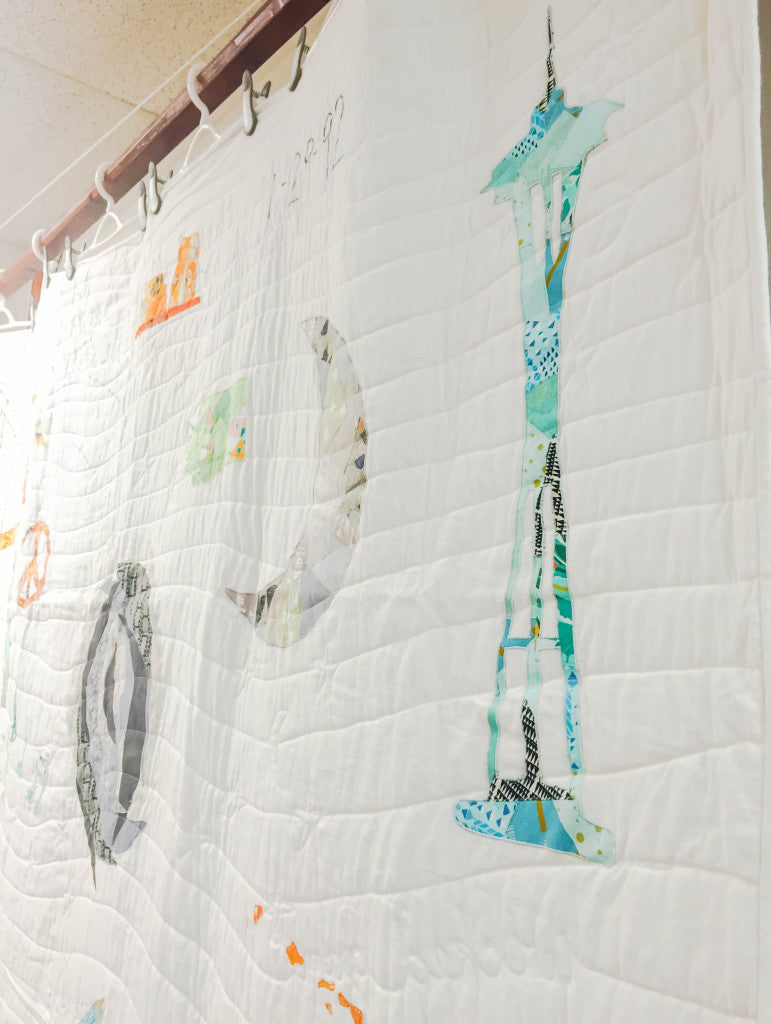
For the main fabric in the quilt, we chose this fabulous 100% cotton that had the beautiful texture of linen. It gave the quilt a dynamic and airy appearance. Dayna has a great eye for color and design and chose the color palette. She wanted various oranges, sea blues and greens, warm vanilla, grey and charcoals.
Since there was such a plethora of different, sometimes unrelated items to include, we decided to create a quilted collage of all of these items. So we started with a design. I did a lot of sketching and came to her with a black and white sketch of the shapes and their layout. She responded with an email, "I LOVE this so much- I actually welled up with tears when I looked at the images!"
She gave me notes on a couple tweaks to make, then we moved on to fabric! I have a large collection of fabric, and I pulled some that I thought would work well in this piece. I then went around to my favorite local fabric shops, collecting more to fill out the palette. My unique method of quilting (on which I wrote a book) calls for dozens of different fabrics collaged together to form a single image. This quilt contains many hundreds of tiny pieces of fabric, intentionally selected and thoughtfully collaged.
Stars and moons were also significant to them and she wanted them to be scattered throughout the quilt.
For the main fabric in the quilt, we chose this fabulous 100% cotton that had the beautiful texture of linen. It gave the quilt a dynamic and airy appearance. Dayna has a great eye for color and design and chose the color palette. She wanted various oranges, sea blues and greens, warm vanilla, grey and charcoals.
Since there was such a plethora of different, sometimes unrelated items to include, we decided to create a quilted collage of all of these items. So we started with a design. I did a lot of sketching and came to her with a black and white sketch of the shapes and their layout. She responded with an email, "I LOVE this so much- I actually welled up with tears when I looked at the images!"
She gave me notes on a couple tweaks to make, then we moved on to fabric! I have a large collection of fabric, and I pulled some that I thought would work well in this piece. I then went around to my favorite local fabric shops, collecting more to fill out the palette. My unique method of quilting (on which I wrote a book) calls for dozens of different fabrics collaged together to form a single image. This quilt contains many hundreds of tiny pieces of fabric, intentionally selected and thoughtfully collaged.
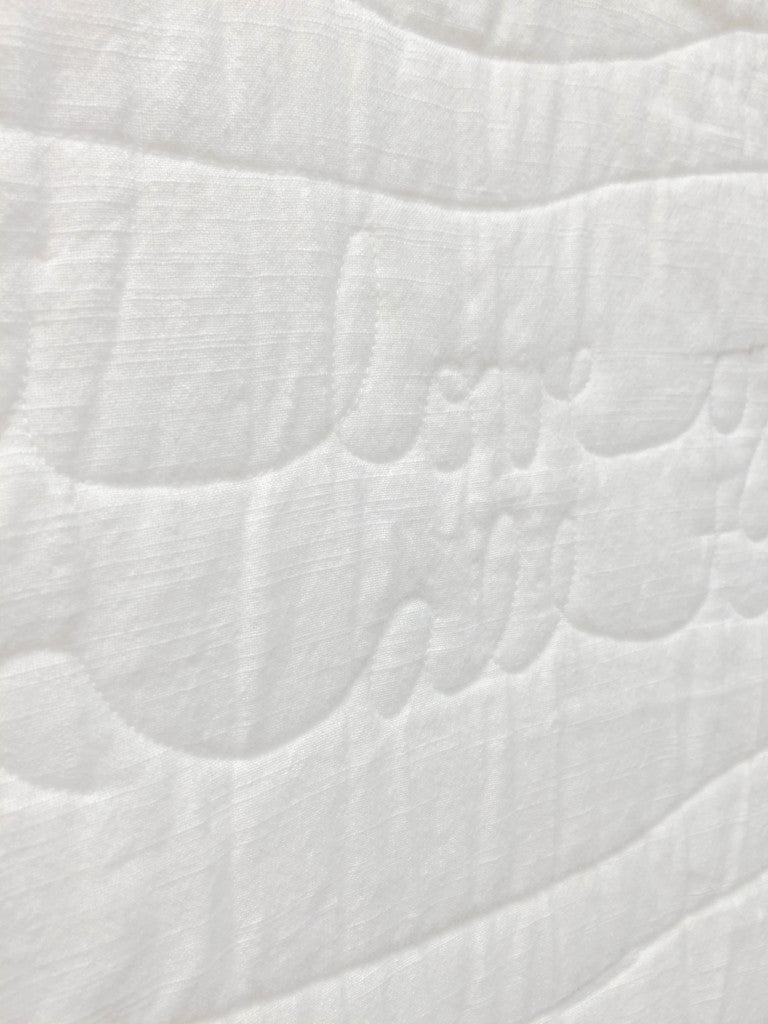
 Every single one of those 600 + pieces is carefully satin-stitched on all sides to ensure that this quilt will last for generations.
 To keep the images sacred and subtle, Dayna decided she wanted the actual images to be on the backside of the quilt. This would allow her to pull it back in different ways to reveal different images. All of the words are quilted into the front (all white) side of the quilt, and the images are all appliquéd and embroidered on the back side of the quilt.
 Dayna was excited to be a part of the design process and to watch as it came together, so I sent her photos at each stage of the project.
After receiving and opening the quilt, she wrote to me:
Dayna was excited to be a part of the design process and to watch as it came together, so I sent her photos at each stage of the project.
After receiving and opening the quilt, she wrote to me:

 The quilting is 1/4" and has, I think, a calm but striking effect. The mother wanted me to encorporate her old baby blanket into the quilt, so I used the backing of that blanket for the binding of this quilt, and let it dictate the color palette.
 Have you tried quilting this densely before? What do you think about it?]]>
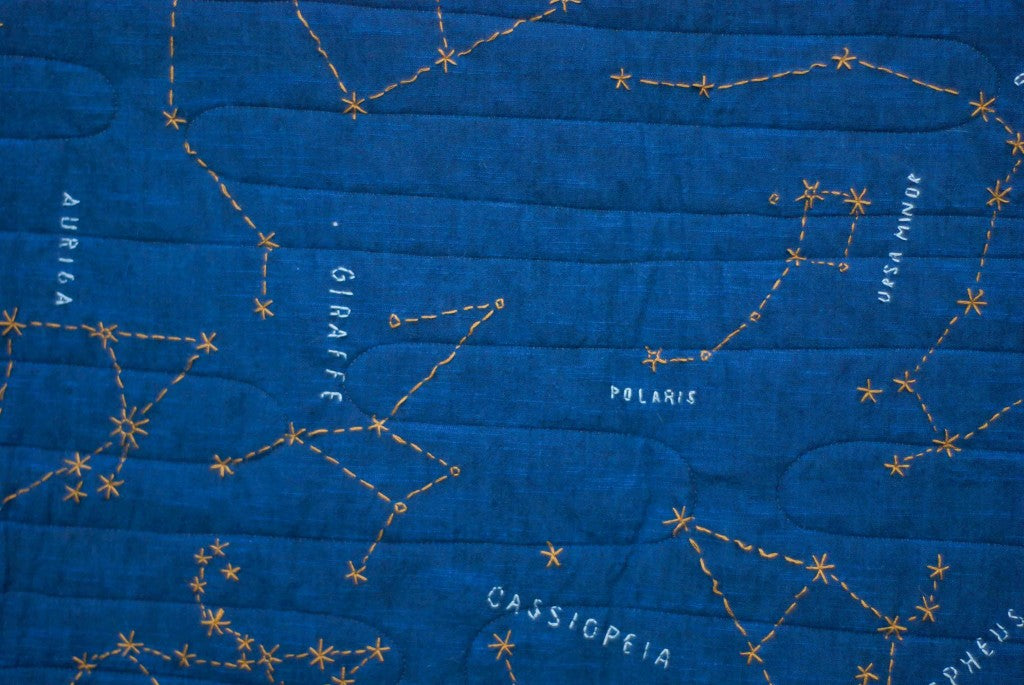
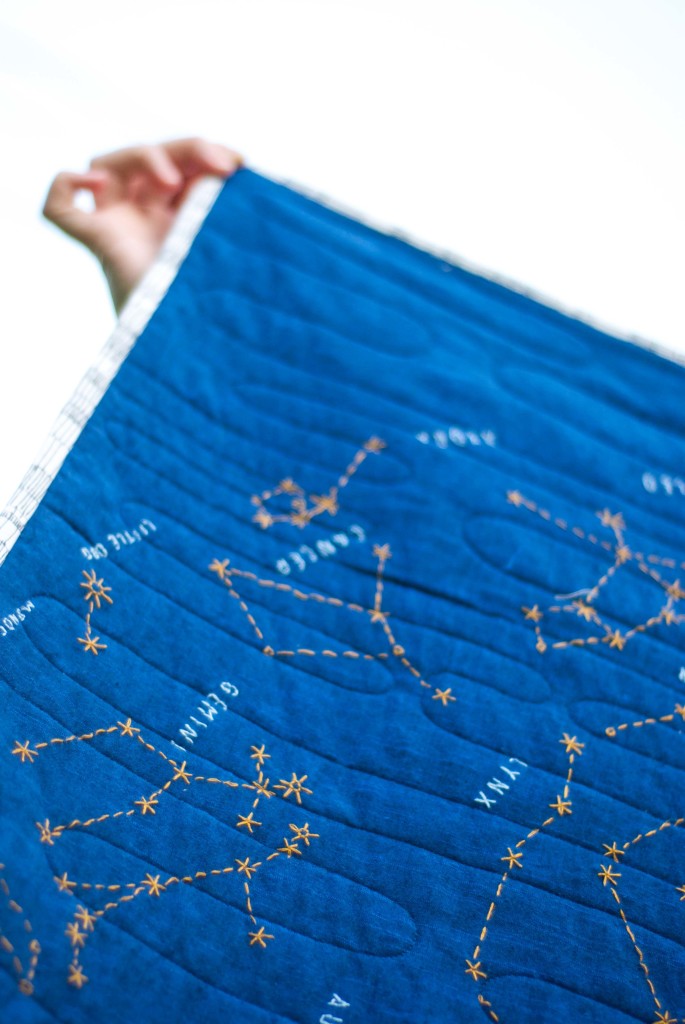
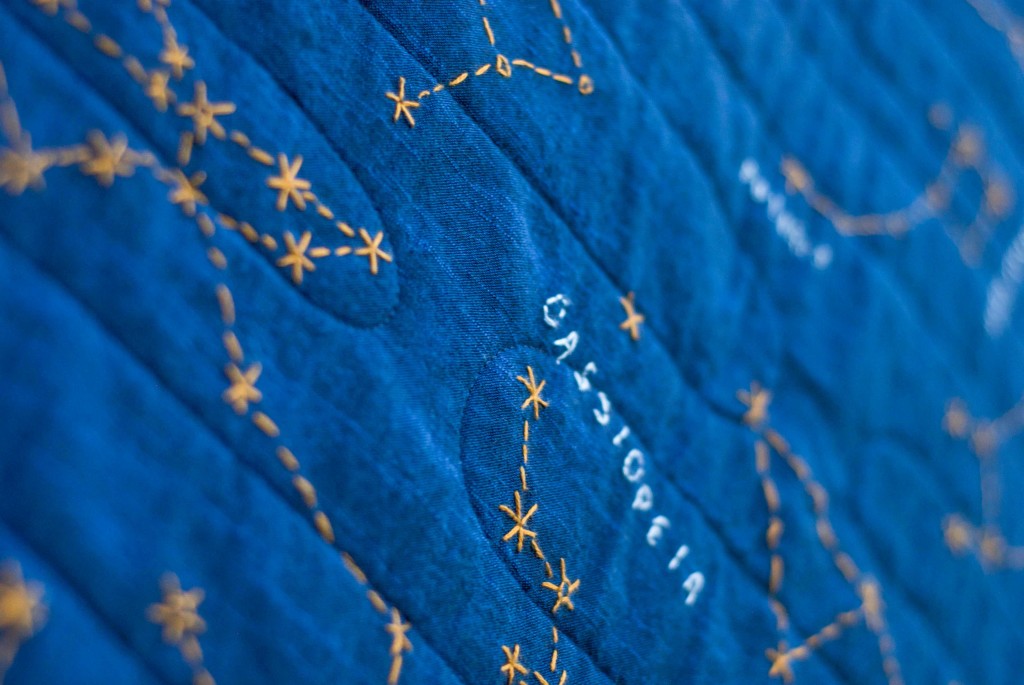
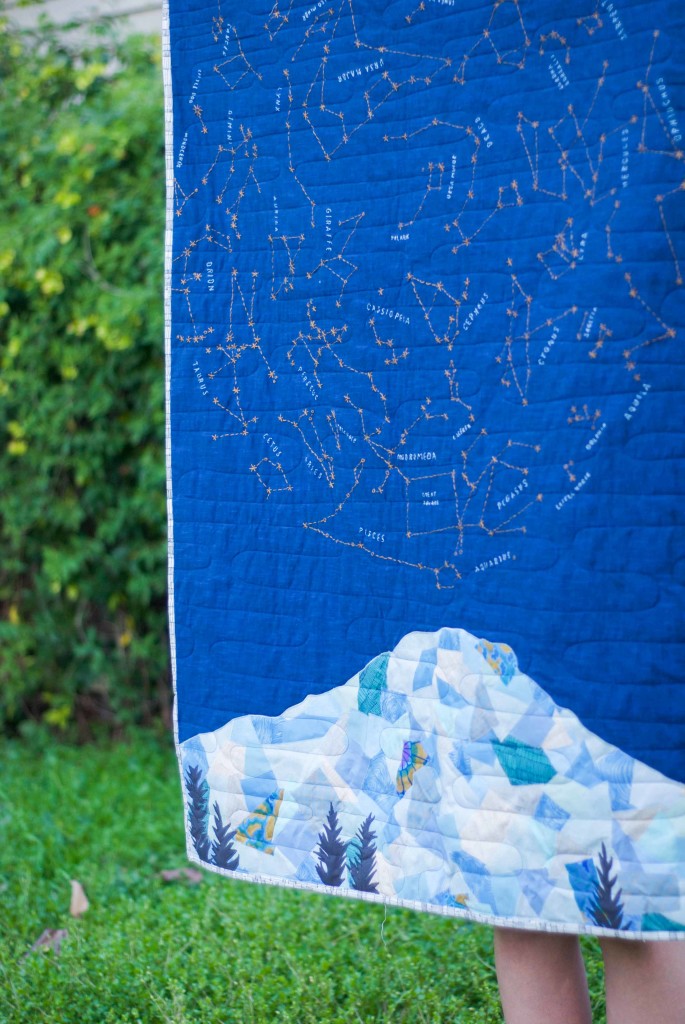
 The constellations are all embroidered by hand in the quilt top. I used Haptic Lab's star map pattern for this. Included are all the major constellations in the Northern Hemisphere. I love the idea of Lochlan sitting with his quilt in his lap, and using it to identify the constellations above him.

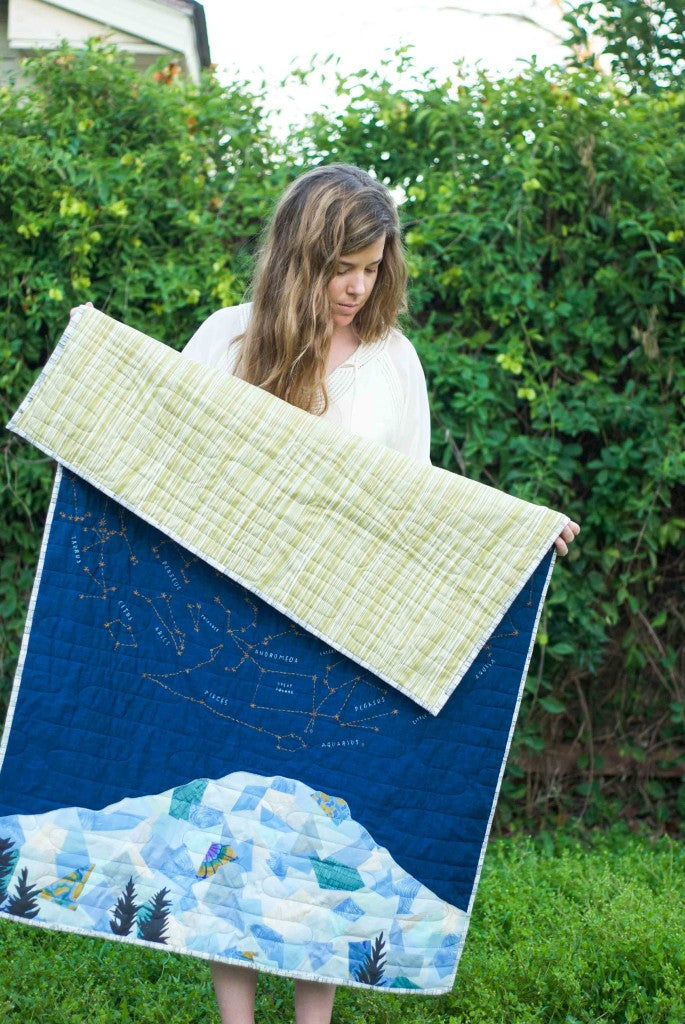
 I made the mountain from a silhouette of Mt. Rainier (one of Lochlan's parents' favorite spots), creating the appliqué piece using my Scrappy Appliqué technique.
 I decided to quilt it using a super simple back and forth meander-- I didn't want the quilting to take away from the embroidery.
 I loved incorporating the embroidery in this project and have big plans for doing so more in the future!]]>


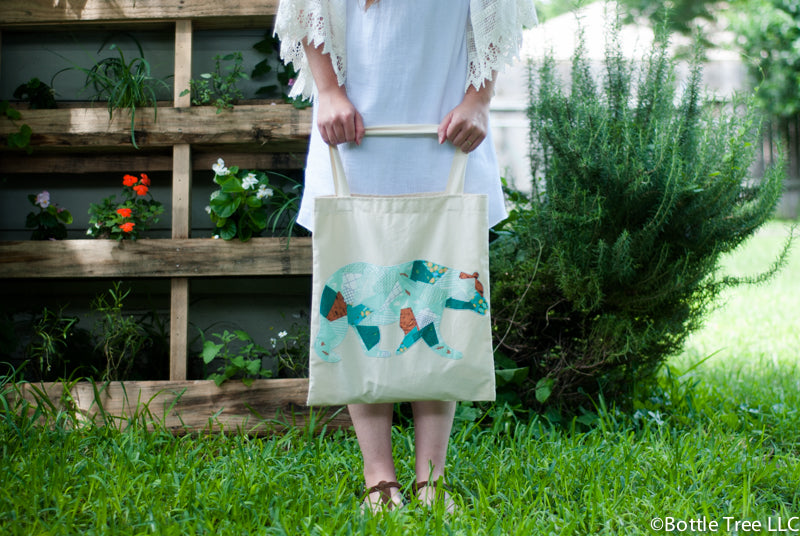
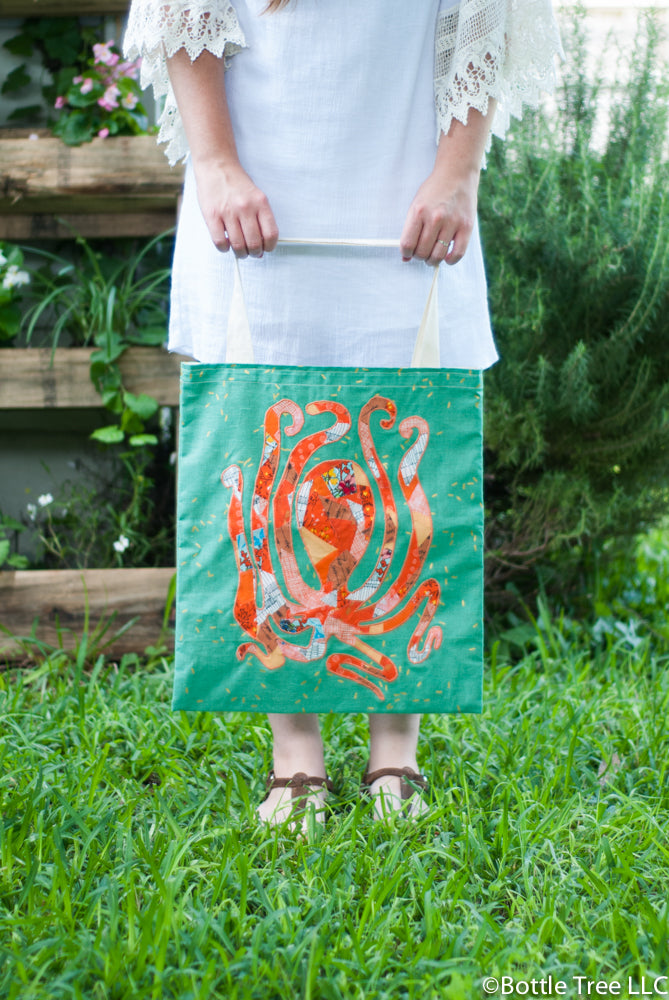
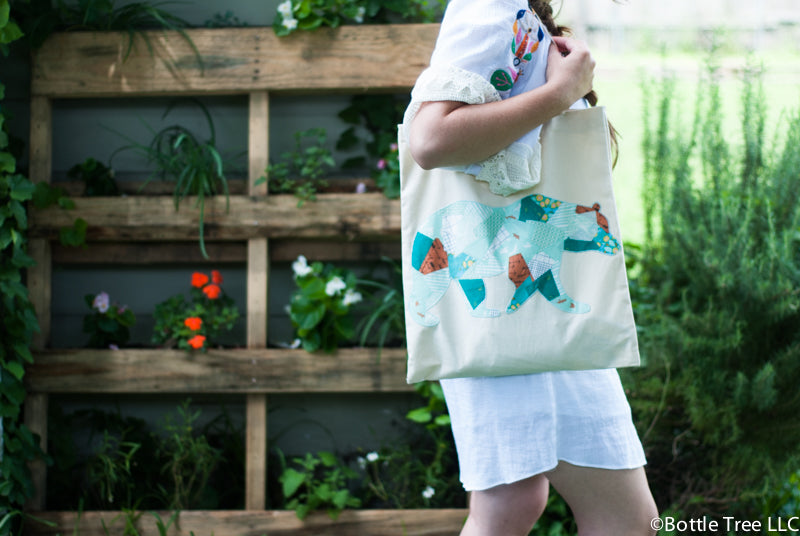
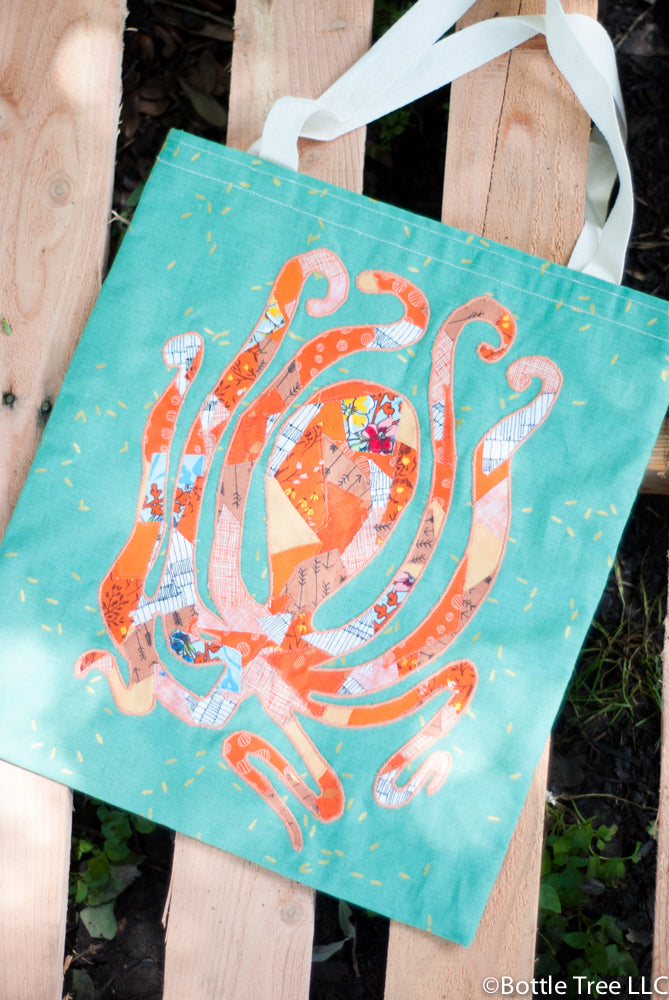
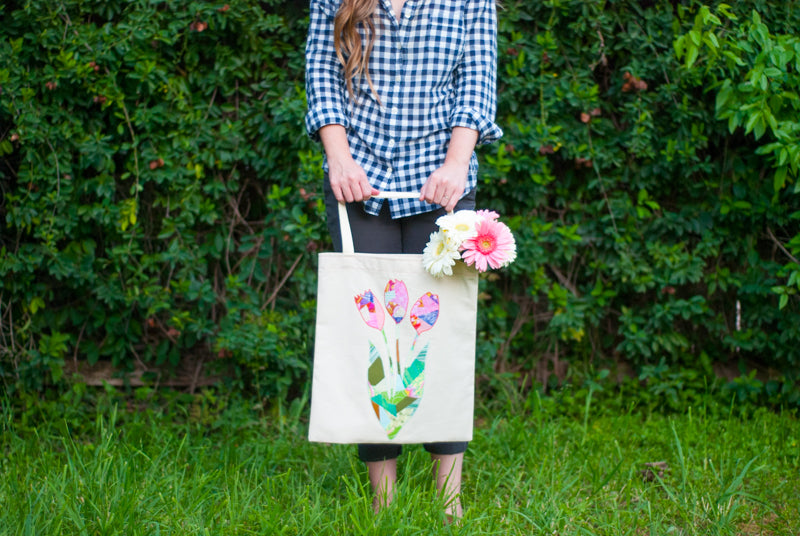 The instructions show you how to make it using my Simple Raw-Edge Applique method. The tote in the picture is made using my Scrappy Applique technique, you can learn that method from my book, any of my patterns, or my online class!
Get Free Pattern
The instructions show you how to make it using my Simple Raw-Edge Applique method. The tote in the picture is made using my Scrappy Applique technique, you can learn that method from my book, any of my patterns, or my online class!
Get Free Pattern
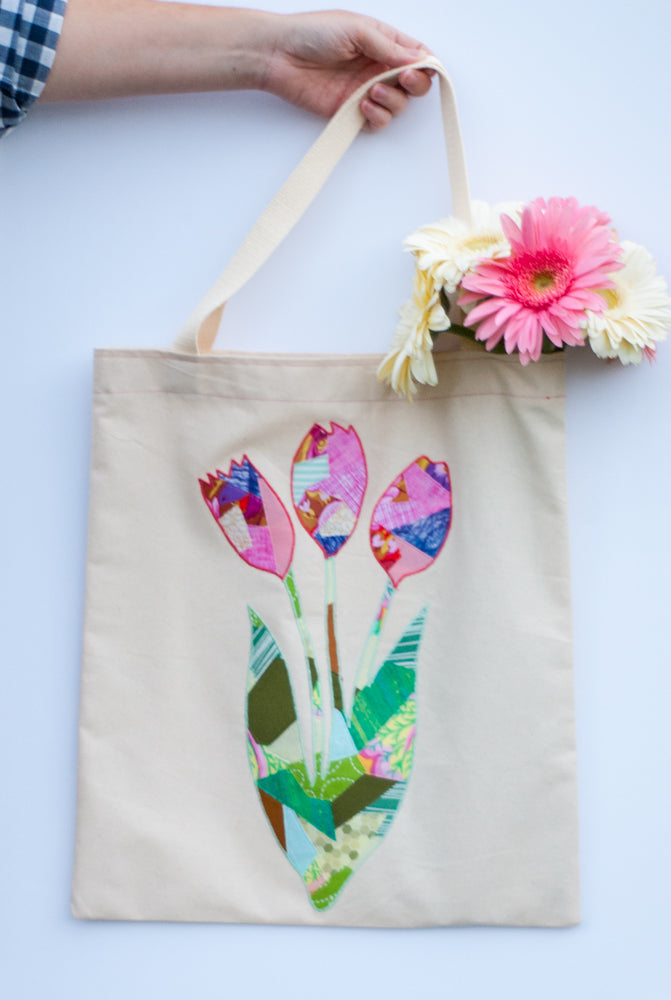 I hope you enjoy your Spring, wherever you are!]]>
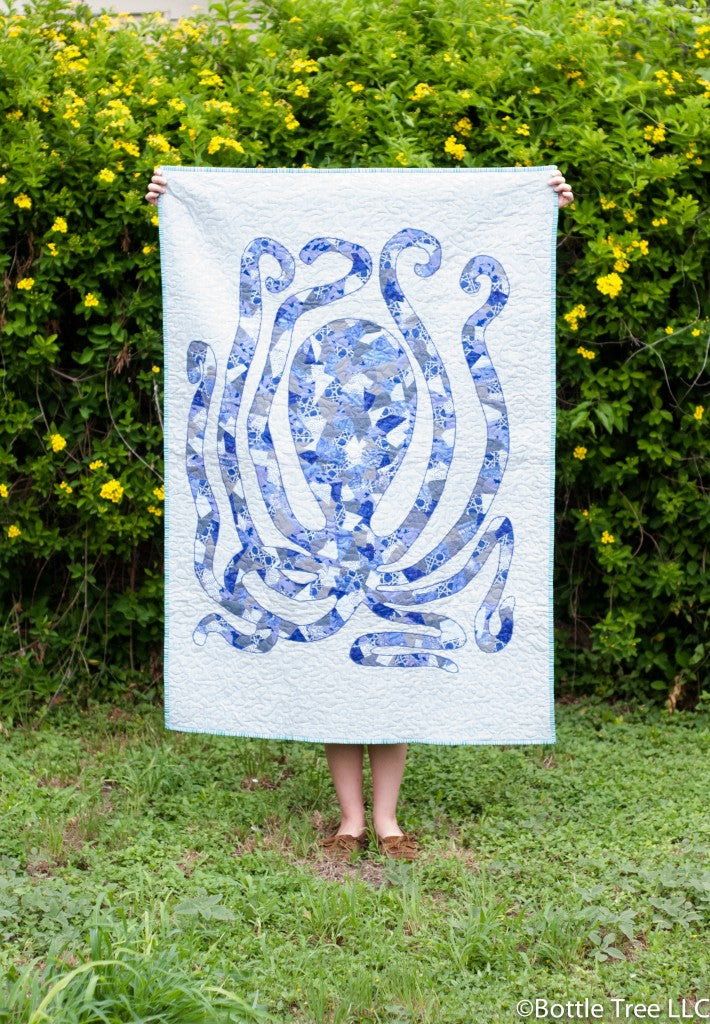
 This guy is in one of the patterns I released last year, and I just adore him. He is the sweetest addition to a baby quilt, and because of his simple shape, is super quick to finish!
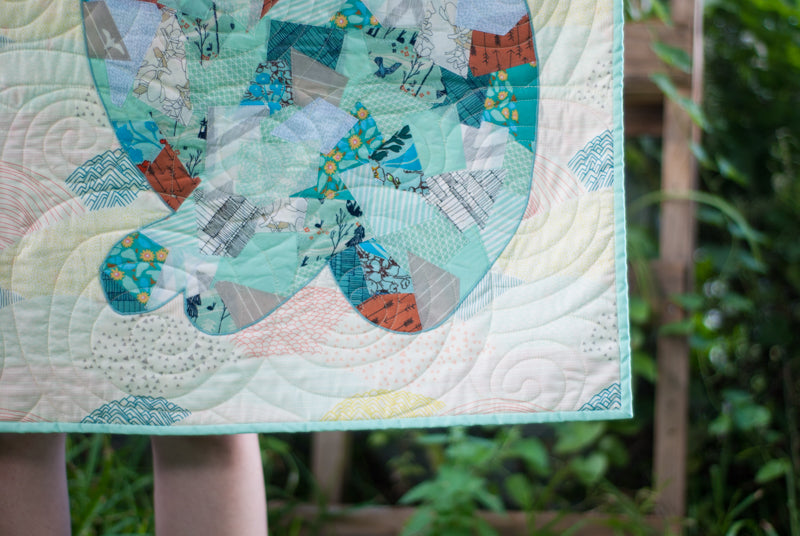 I made this quilt for the first child of one of my best friends for college.
 The background is a single piece of fabric, though the design makes it look more complex. I quilted a simple all-over swirl motif.
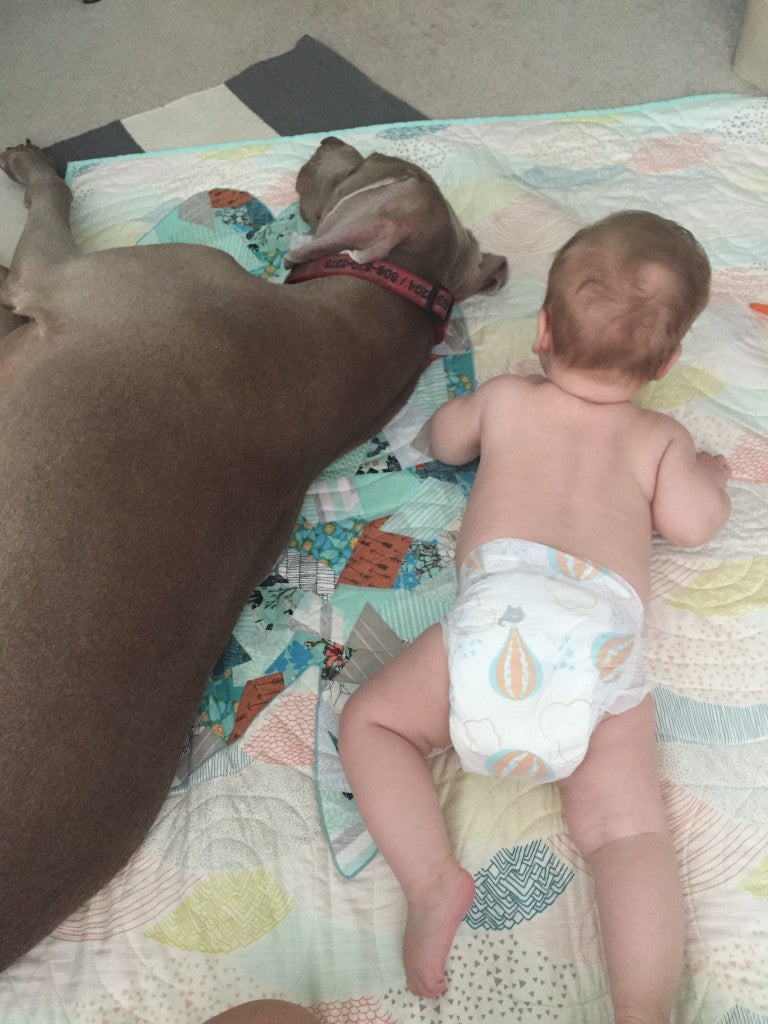
 Here is the quilt in action-- tummy time with her best bud! Cuteness overload.
 All my patterns include multiple sizes, and here is the small size Bunny made up into this fun throw pillow!
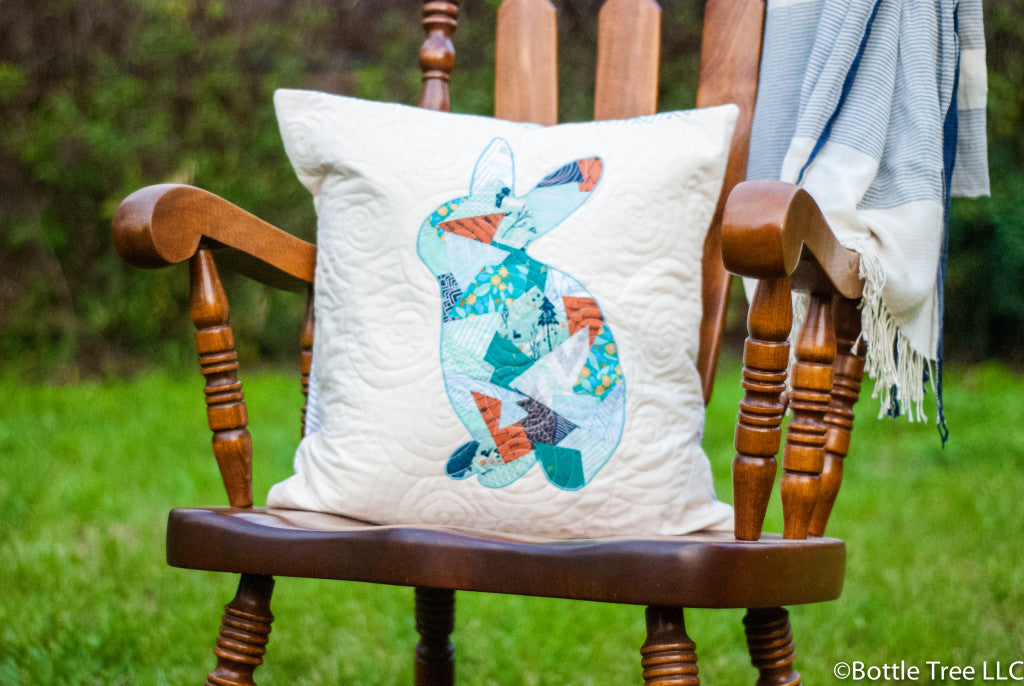 Available as a print pattern or pdf -- grab yours here!
Happy Spring and happy sewing, friends!]]>
Available as a print pattern or pdf -- grab yours here!
Happy Spring and happy sewing, friends!]]>
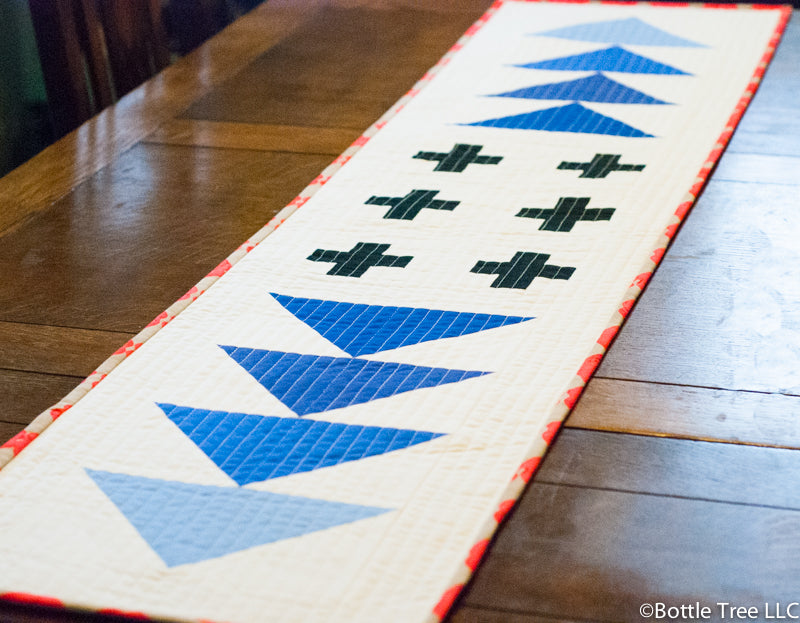
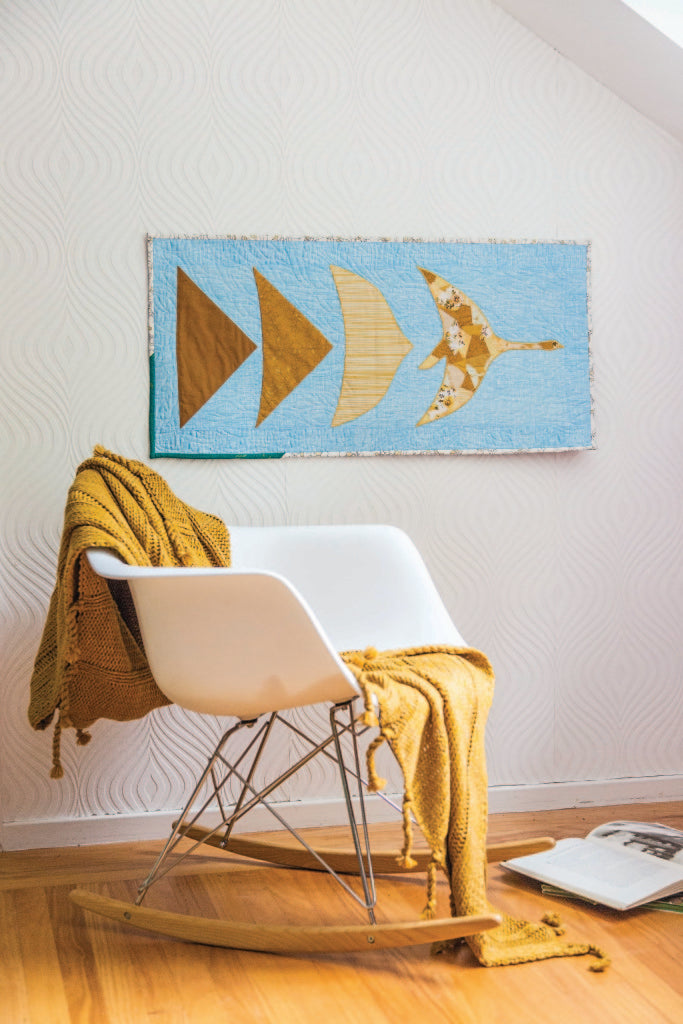 This was a fun project to create. Since the book explores the breadth of applique, I wanted to create a sampler. I had been thinking of this concept for a while, and when approached by Casey, thought it the perfect opportunity for it! The Flying Geese block is a classic and favorite among modern and traditional quilters, alike. I wanted to show that iconic design using several different quiltmaking techniques. On the left we have a tidy, classic block, then as we move to the right, the goose transforms from the abstractly shaped geese into a more literally shaped "scrappy" goose!
The goose on the left is pieced, the next over uses needle-turn applique, the next is raw-edge with a hand chain stitched finish (inspired by Casey York's fabulous hand embroidery in her applique), and the goose on the right uses my Scrappy Applique technique and has a machine satin stitch finish.
This was a fun project to create. Since the book explores the breadth of applique, I wanted to create a sampler. I had been thinking of this concept for a while, and when approached by Casey, thought it the perfect opportunity for it! The Flying Geese block is a classic and favorite among modern and traditional quilters, alike. I wanted to show that iconic design using several different quiltmaking techniques. On the left we have a tidy, classic block, then as we move to the right, the goose transforms from the abstractly shaped geese into a more literally shaped "scrappy" goose!
The goose on the left is pieced, the next over uses needle-turn applique, the next is raw-edge with a hand chain stitched finish (inspired by Casey York's fabulous hand embroidery in her applique), and the goose on the right uses my Scrappy Applique technique and has a machine satin stitch finish.
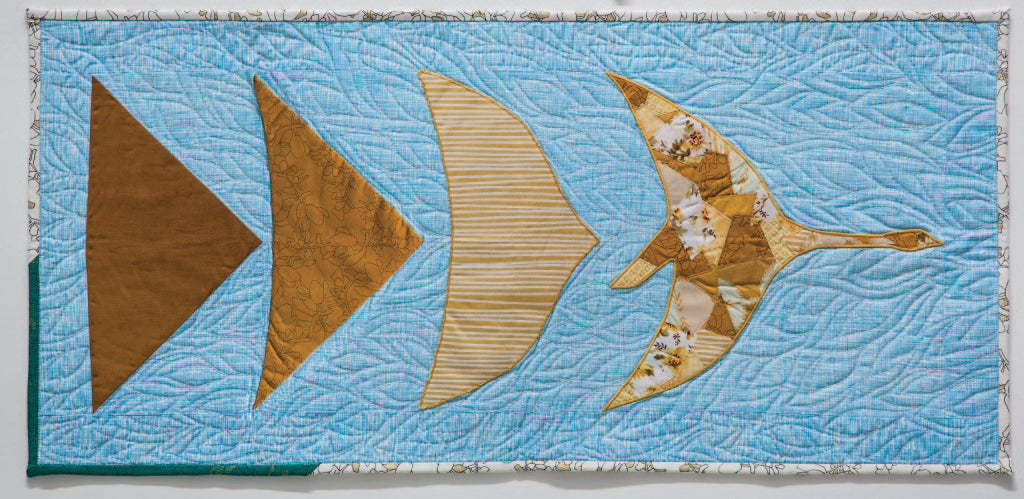 I quilted it with a free-form leaf/feather-like motif and added a pop of color in a corner of the binding.
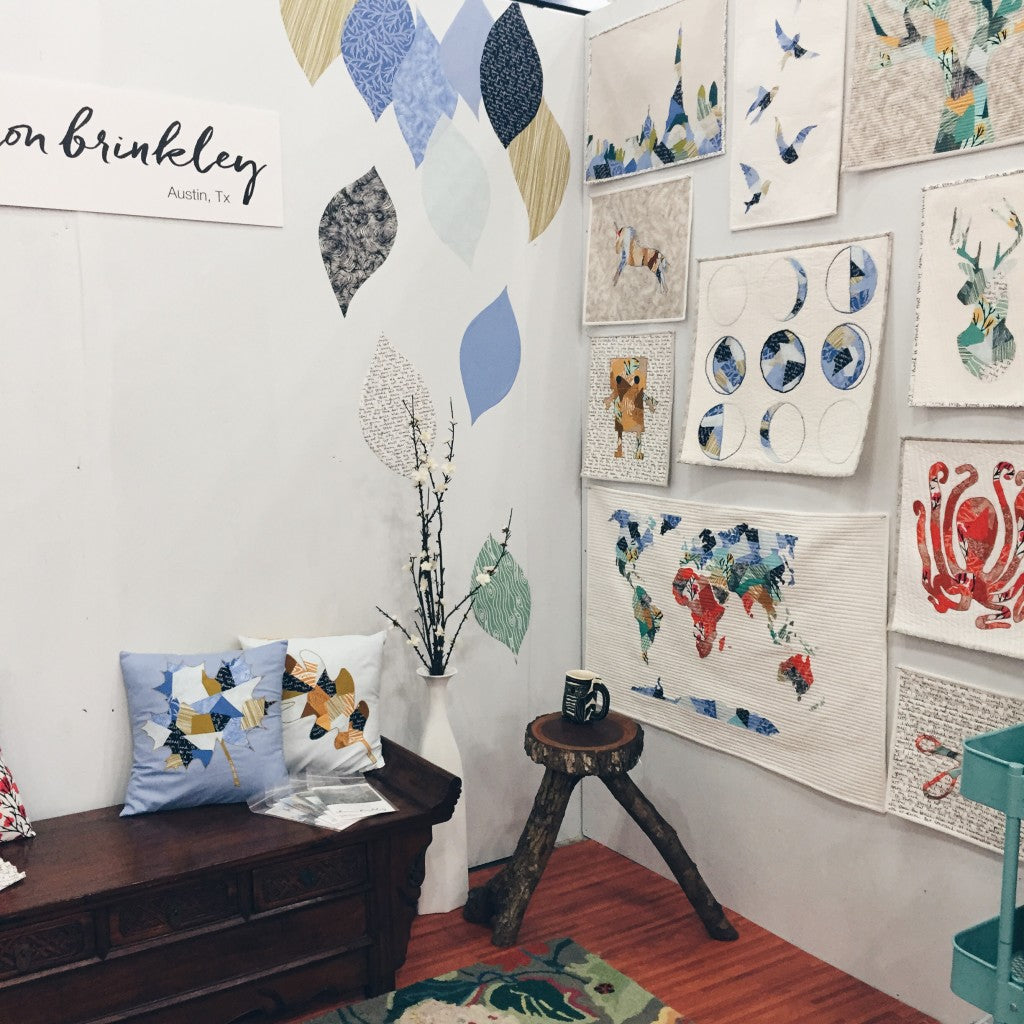
 There are also a couple low volume prints which make for great backgrounds. Check out the wall from my Quilt Market booth, all the quilts have a low volume background/binding-- I think it made for a cool effect.
 I'm really pleased with how the collection turned out, and am excited for you to see more of it these next 2 weeks! The collection is available now, you can ask your local quilt shop to order it (if they don't already carry it), also, Angela Walters is carrying it in her new shop and is offering 10% off the line during the blog hop! Use the code DRYAD at checkout.
Be sure to follow along with the hop for more chances to win fabric, books, and Aurifil thread!
I'm really pleased with how the collection turned out, and am excited for you to see more of it these next 2 weeks! The collection is available now, you can ask your local quilt shop to order it (if they don't already carry it), also, Angela Walters is carrying it in her new shop and is offering 10% off the line during the blog hop! Use the code DRYAD at checkout.
Be sure to follow along with the hop for more chances to win fabric, books, and Aurifil thread!
 We are also giving away a solids bundle, so you can make your very own Geese + Ombre runner! To enter, follow Fabri-Quilt's blog and/or Facebook Page and leave a comment below!
**The giveaway is now closed, congratulations to duchick! **]]>
We are also giving away a solids bundle, so you can make your very own Geese + Ombre runner! To enter, follow Fabri-Quilt's blog and/or Facebook Page and leave a comment below!
**The giveaway is now closed, congratulations to duchick! **]]>

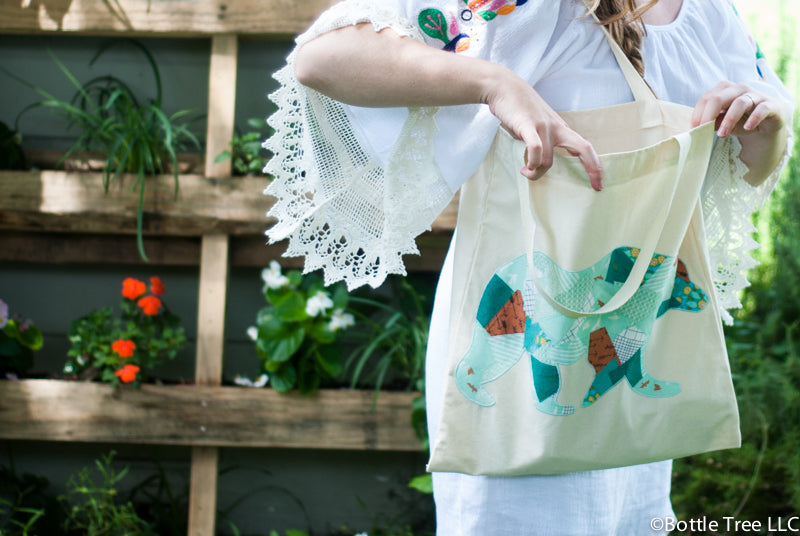 I love this little bear. He might be my favorite of my creature friends....
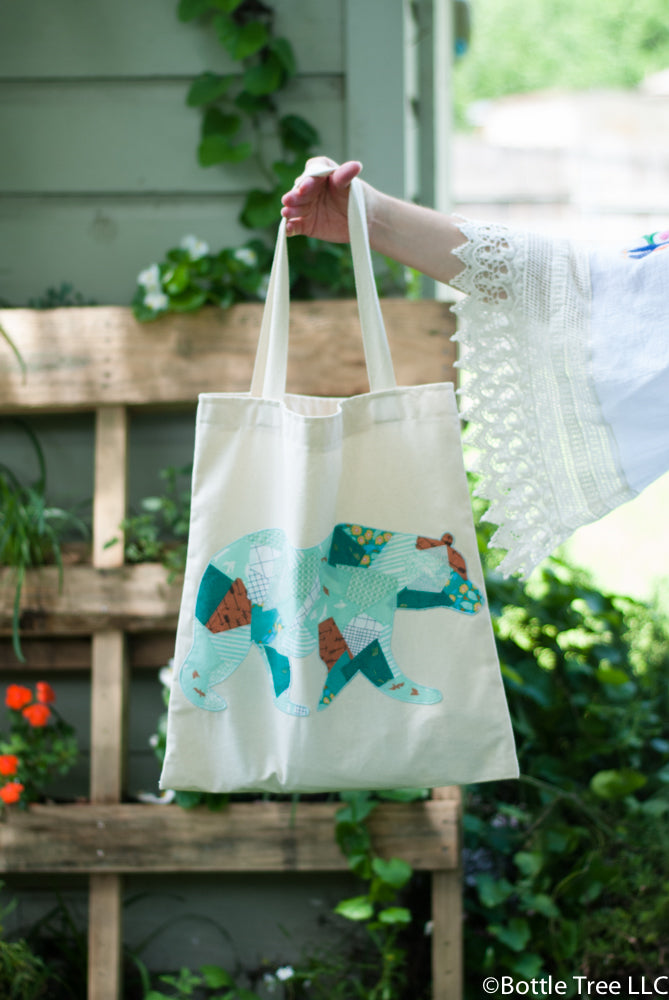
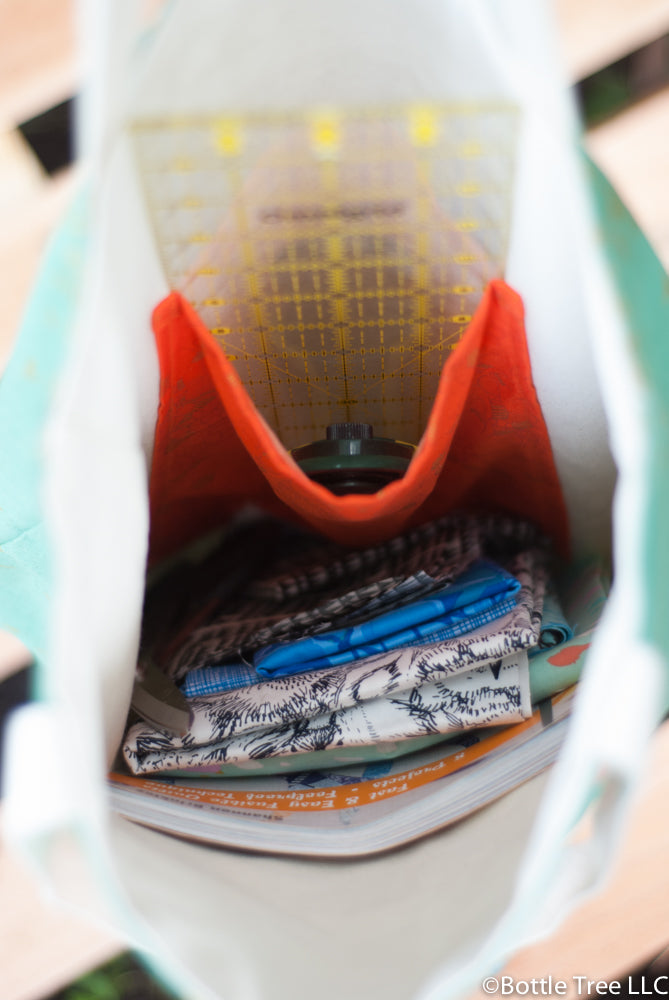
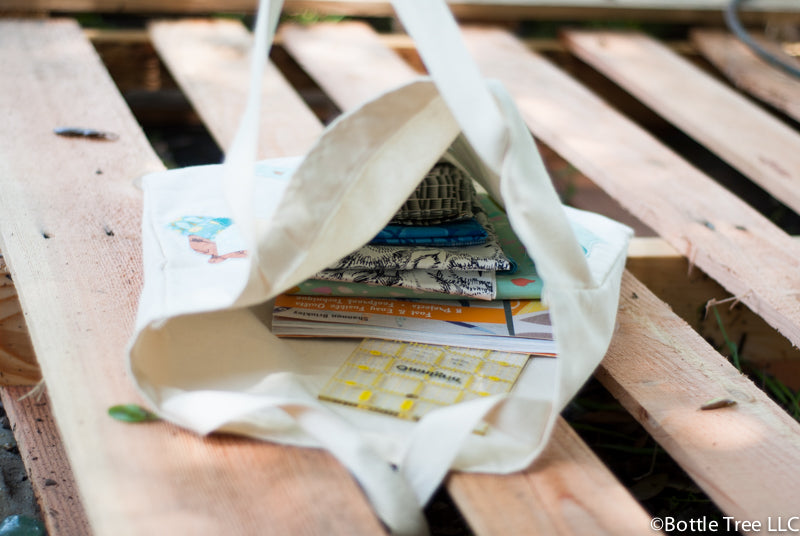 Here is the inside without lining. Both options are super roomy.
 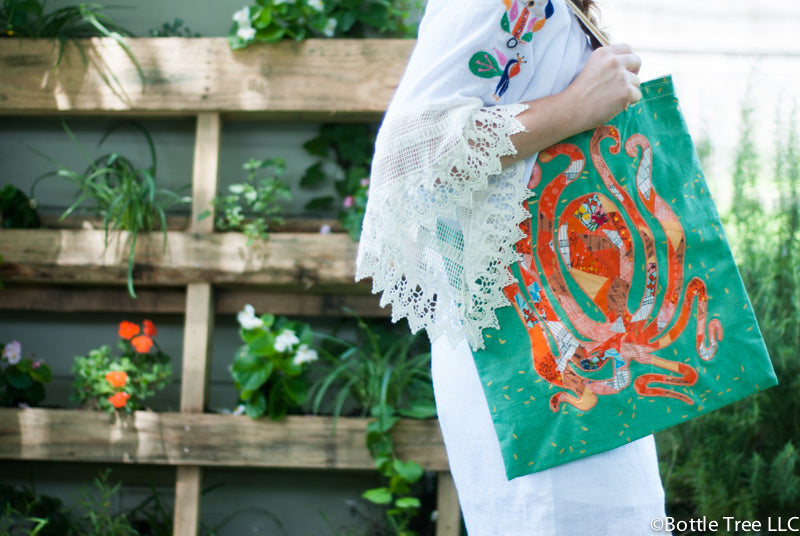 I love this Cotton and Steel Scattered Canvas print.
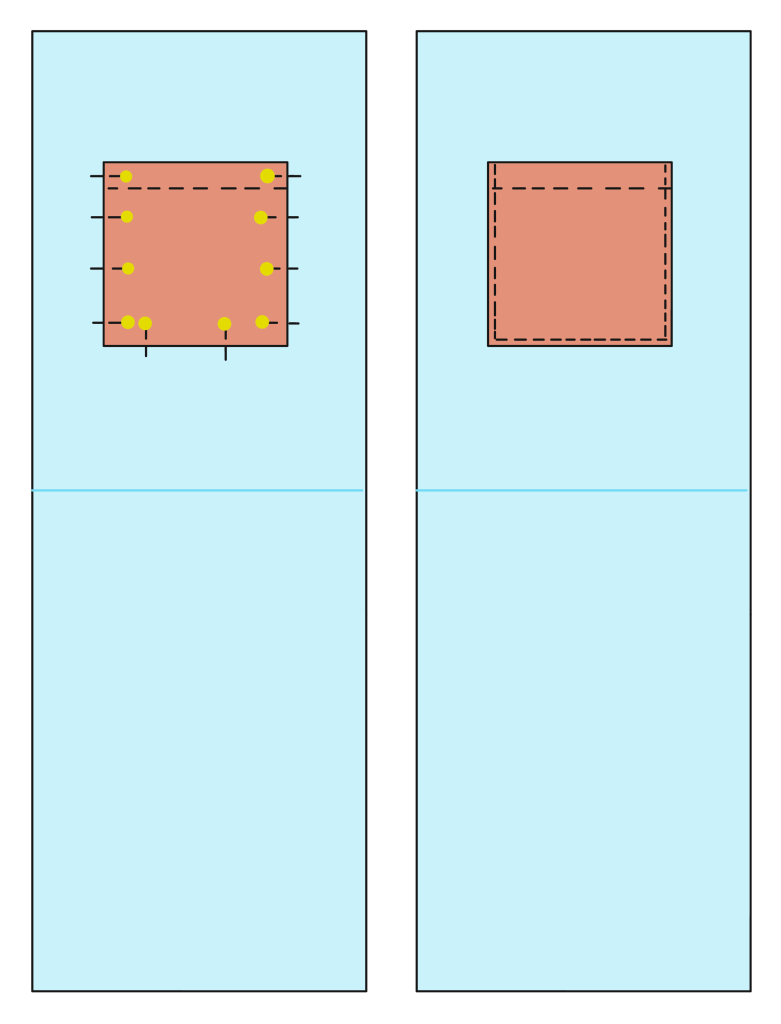
 This is tote has the optional lining with it's nice, big pocket! Adding the lining doesn't take much longer, and it's always nice to have a pocket.

 Don't you just want to make about a dozen of these now?
]]>
Don't you just want to make about a dozen of these now?
]]>
 I was SO pleased with how it turned out, it was hard to put it in the mail and ship it away!
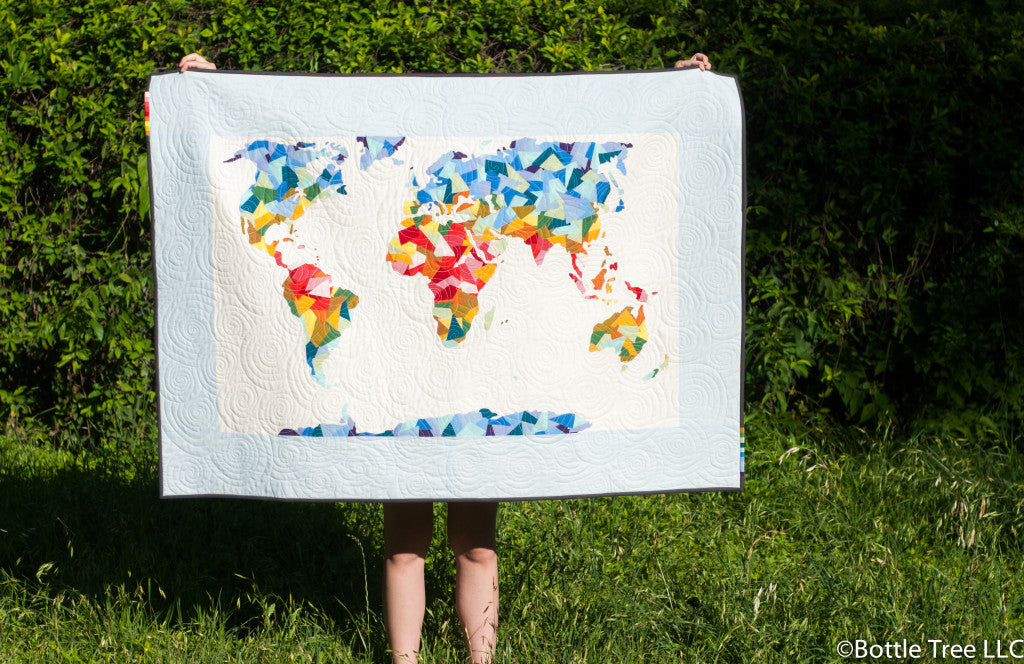
 This pattern is from my book, Scrappy Bits Applique. Like all the patterns in my book, a pull out template is included, which makes things nice and easy! I did increase the size by 125% for a finished size of about 66" x 47". You could increase the size on your own, or send it to a local print shop and have them do it for a few bucks (which is what I did).
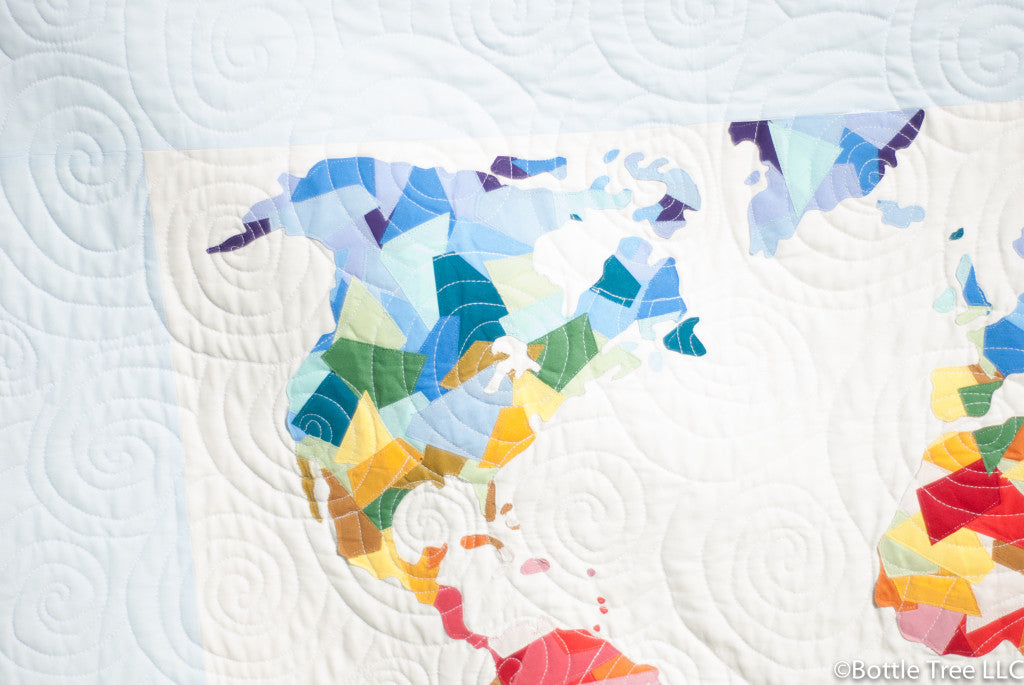
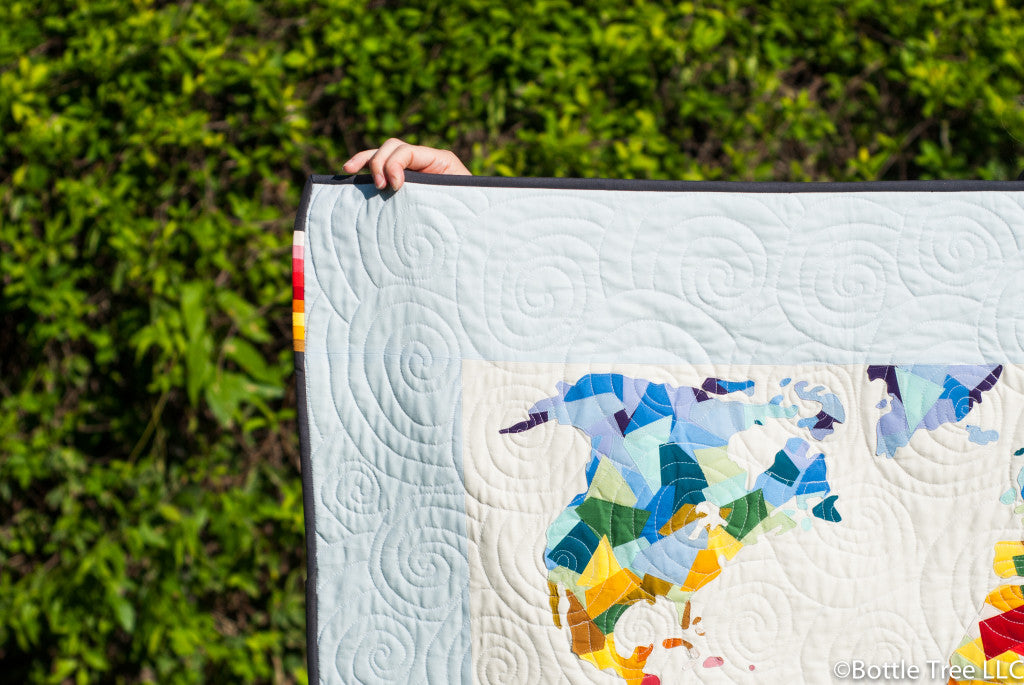
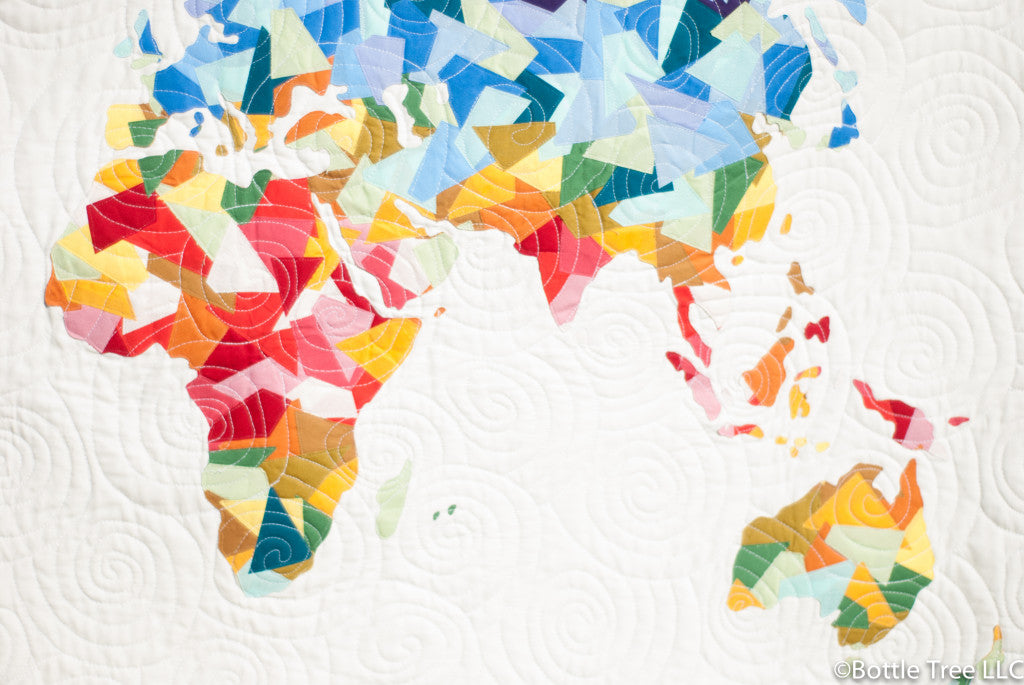 Like the sample from my book, I arranged the colors to show temperature-- starting at the poles with cool colors, and transitioning to the equator for progressively warmer colors.
 I added a sky blue border to frame the map, and used a charcoal for the binding.
 I also pieced these little stripes into the binding to show off the spectrum of colors used! I love the effect of that tiny detail!
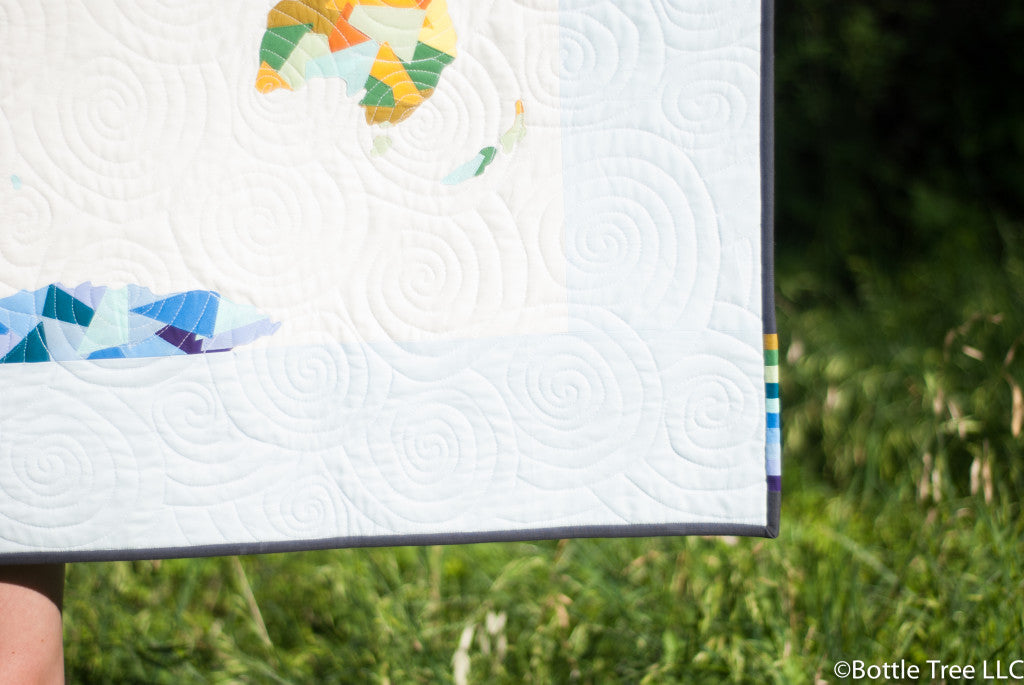 Positioning the stripes in the right spot made the binding process take a bit longer, but it was well worth it. To ensure they would be in the right spot, I didn't connect all of my binding into one long strip before I started. I added each pieced section to one strip of binding, then attached another strip to the other side-- so I had two different pieces of binding that were pieced : charcoal strip, colored stripes, charcoal strip. I started the binding at the colored strips, positioning them, then sewing them down first (first in one direction, then the other, since the colored stripes were in the middle leaving about 10" at the end of each ). Once those pieces were sewn down, I added additional strips to complete the binding, attaching the pieces like you do at the end of your binding strip.
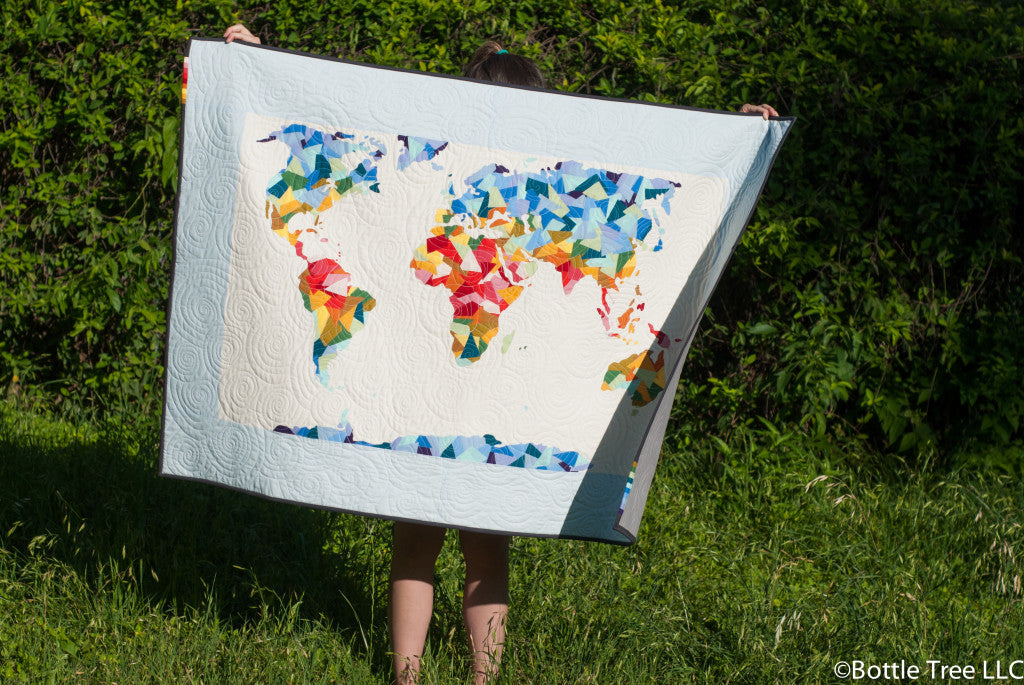
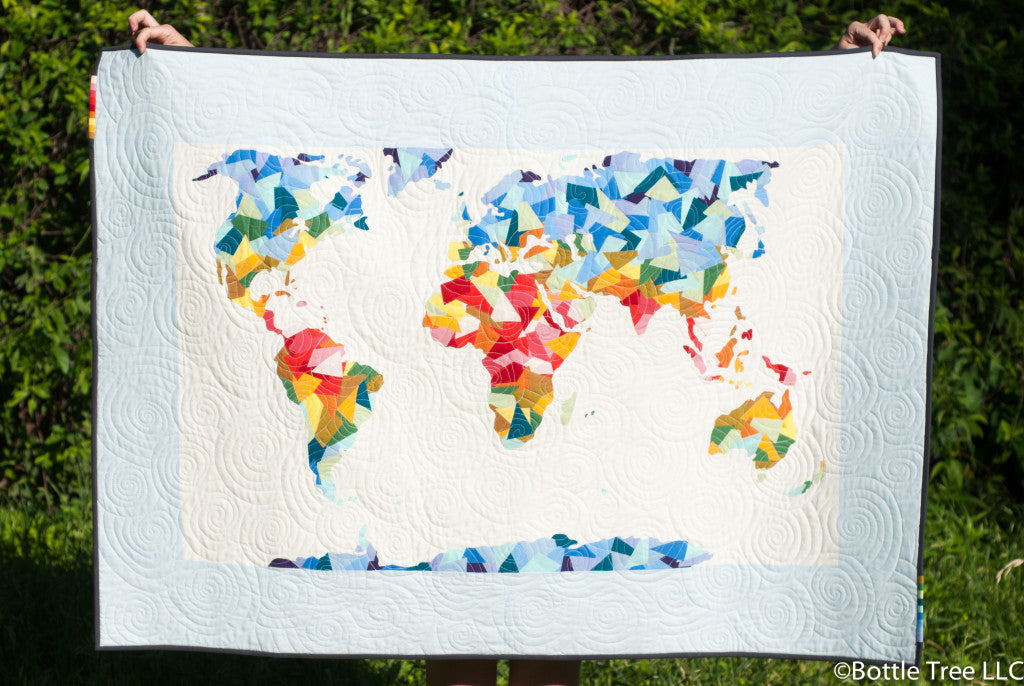 I quilted a swirl pattern over the whole quilt. I love my first all solids Scrappy Applique quilt, and I plan to do many more! Perhaps I need another one of these for myself.... !
]]>
I quilted a swirl pattern over the whole quilt. I love my first all solids Scrappy Applique quilt, and I plan to do many more! Perhaps I need another one of these for myself.... !
]]>


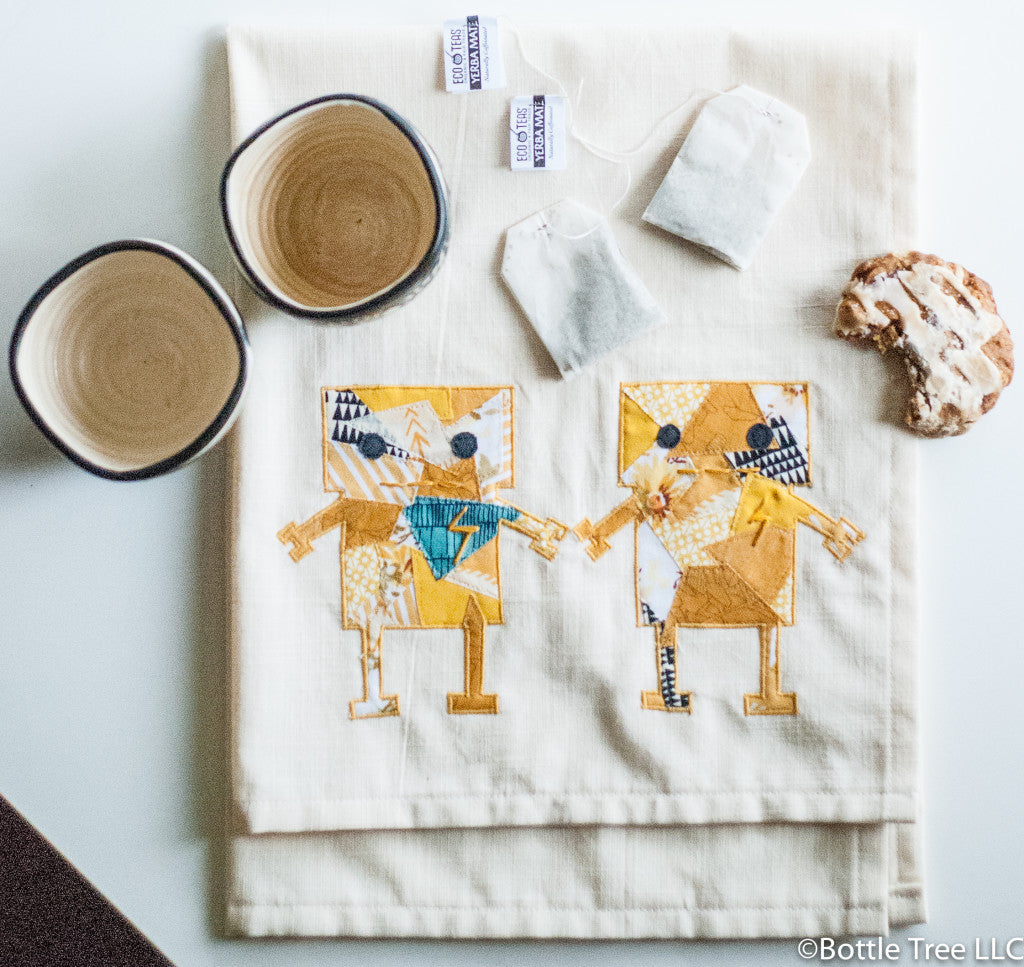
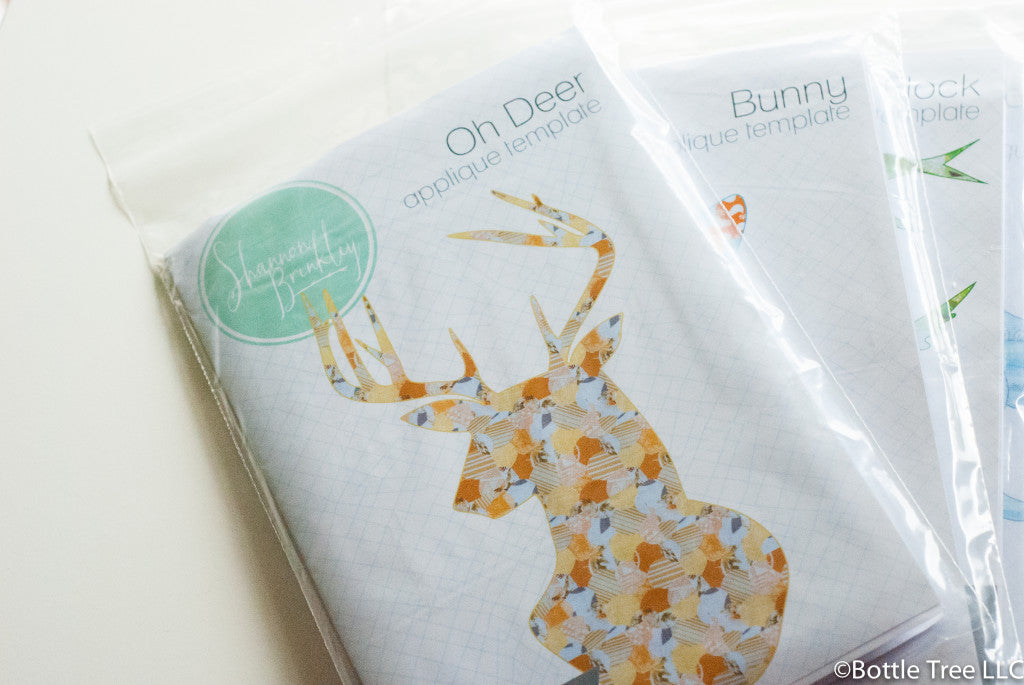 Choose from 6 different animal templates, available printed or as a PDF! Every pattern contains 3 different sized templates, allowing for over 6 different quilt sizes!
My goals as a designer is to provide you with the raw materials with which you can be free to create-- so YOU can be the designer and make a quilt that is totally original and unique to you. Put your applique piece on a solid or pieced background... make a wall hanging, pillow, crib quilt, king size... your choice!
Choose from 6 different animal templates, available printed or as a PDF! Every pattern contains 3 different sized templates, allowing for over 6 different quilt sizes!
My goals as a designer is to provide you with the raw materials with which you can be free to create-- so YOU can be the designer and make a quilt that is totally original and unique to you. Put your applique piece on a solid or pieced background... make a wall hanging, pillow, crib quilt, king size... your choice!
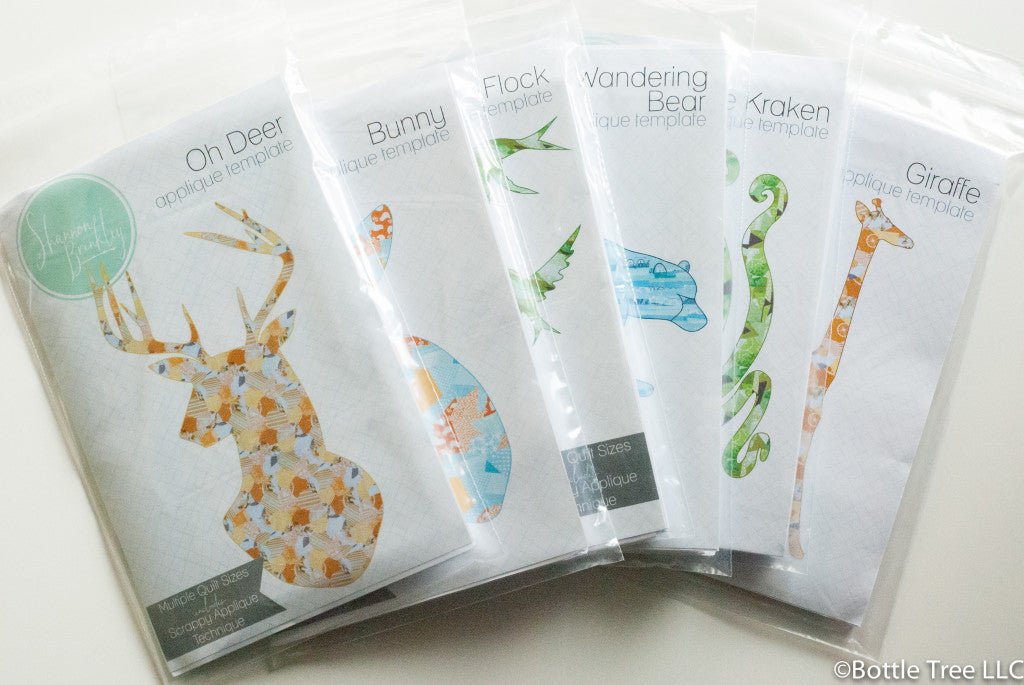 Each template contains step by step instructions for creating your fun, whimsical applique piece! For more options and details, grab a signed copy of my book (also on sale!)
I want to see your scrappy applique projects! Join our Flickr group Bottle Tree Makers, add your photo to the student gallery to earn a free pattern of your choice!
I can't wait to see what you all come up with!
]]>
Each template contains step by step instructions for creating your fun, whimsical applique piece! For more options and details, grab a signed copy of my book (also on sale!)
I want to see your scrappy applique projects! Join our Flickr group Bottle Tree Makers, add your photo to the student gallery to earn a free pattern of your choice!
I can't wait to see what you all come up with!
]]>
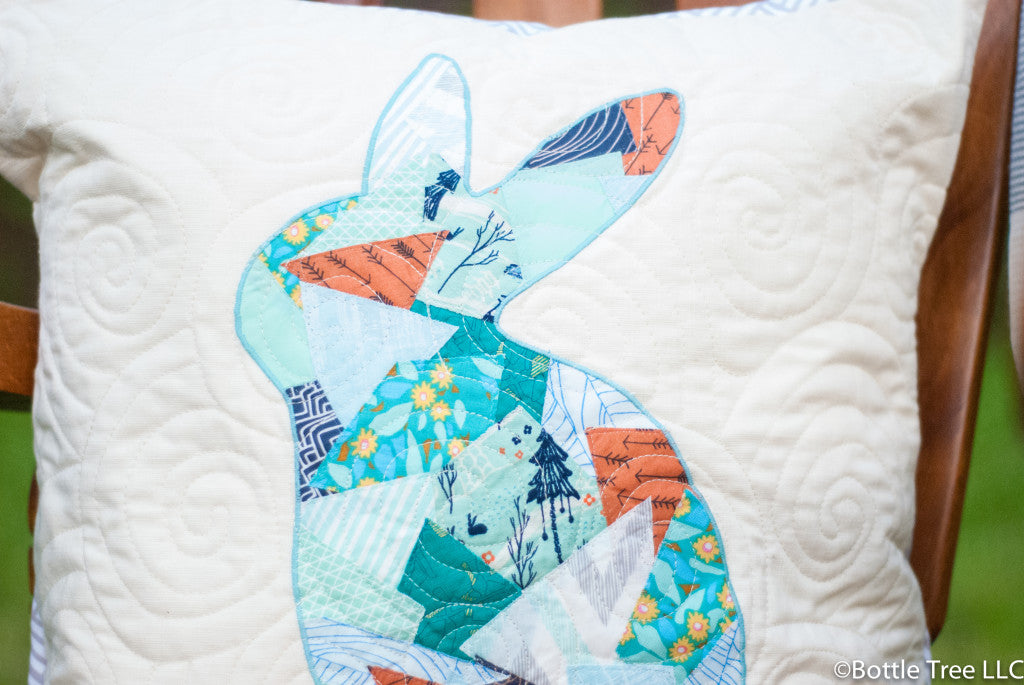 I used this fun swirl quilting pattern over the whole pillow.
 Check out my Instagram or Facebook page for a timelapse video of me making this sweet bunny! Be sure to like or follow if you'd like to see more or to stay up to date on Bottle Tree goings on.
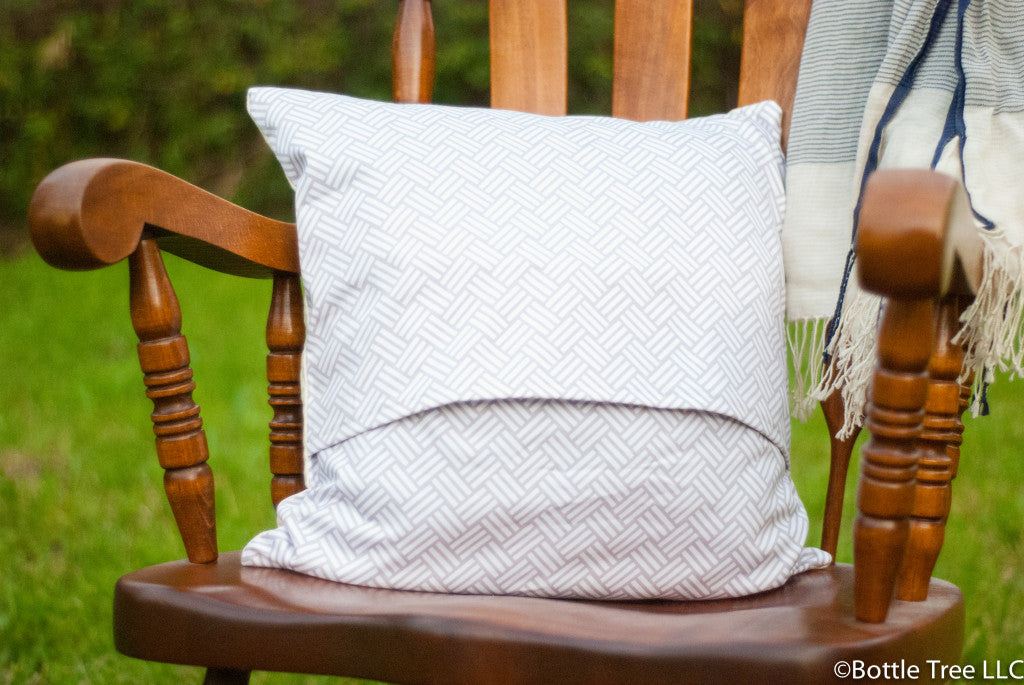 I used an easy envelope closure.


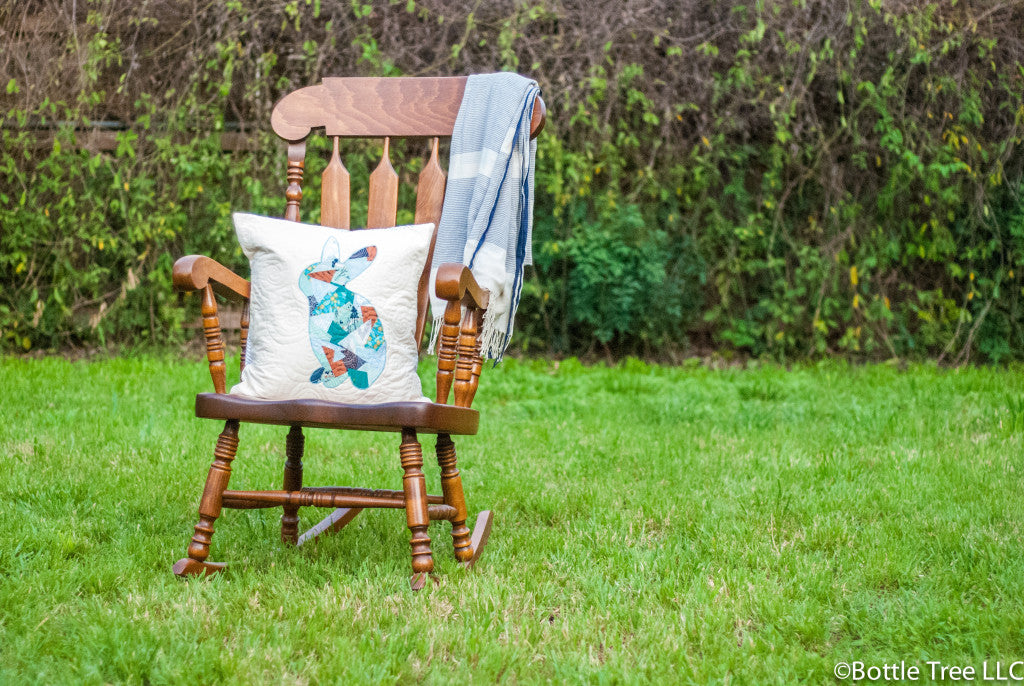 Any of my Applique Templates would make great throw pillows. This size is also perfect for a first time applique or scrappy applique project-- quick and fun!
Tell me your ideas! Would you add a quilted background? Choose a different animal or image?
]]>
Any of my Applique Templates would make great throw pillows. This size is also perfect for a first time applique or scrappy applique project-- quick and fun!
Tell me your ideas! Would you add a quilted background? Choose a different animal or image?
]]>
 ]]>
]]>