LiJie | eiJil2024-10-05T11:52:41Zhttps://lijie.org/feed/atom/WordPresseijil<![CDATA[Upgrading peertube to 6.0.1]]>https://lijie.org/?p=9172024-01-16T08:58:50Z2023-12-07T09:41:04ZOriginally posted at: https://eijil.com/t/upgrading-peertube-from-5-2-1-to-6-01/476
According to the changelog, upgrading peertube requires manually modifying some configuration files, first and formost, you need to upgrade nodejs to version 18.
Run the script
After you upgrade nodejs to version 18, run the upgrade script listed in the official upgrade doc.
cd /var/www/peertube/peertube-latest/scripts && sudo -H -u peertube ./upgrade.sh
sudo systemctl restart peertube # Or use your OS command to restart PeerTube if you don't use systemd
One the above script finished running, you’ll need to manually modify some configuration files.
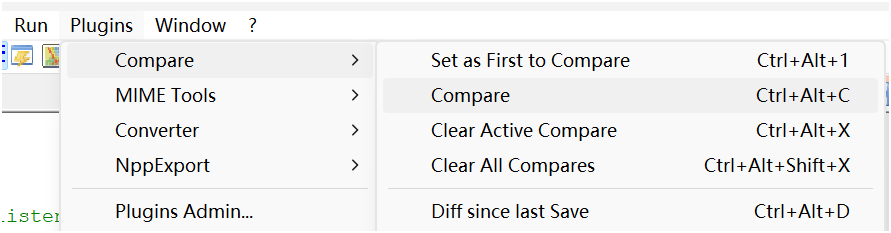
I’m using notepad++ with the plugin Compare to help me with the job.
Make sure to back up files before starting this task!
Change the production.yaml
The first file you need to modify manually is the new production.yaml.example which is located in /var/www/peertube/versions/peertube-v6.0.1/config, you’ll use the new file to overwrite the old one which is located in /var/www/peertube/config named production.yaml.
Download the new config file from the VPS and rename the new file production.yaml.example to 6.0.1.yaml and the old production.yaml to 5.2.1.yaml, this is not mandatory but is recommended to avoid confusion when modifying files later on.
Open both files with notepad++. Then click Plugins->Compare->Compare:
Notepad++ will display the two files side by side on the screen, and highlight the differences.
The new file is on the left side, which is the one you’ll be editing, and the old configuration file is on the right side. You’ll need to transfer some of the configuration information from the old file into the new one.
The things you need to change are related to your Peertube instance, such as domain name, keys, database details, redis, domain certificates etc. Be really careful during this process and double-check everything.
Once the old config infos were seccessfully migrated, rename the folder:
Since the folder name has been changed in the new production.yaml(6.0.1.yaml), so we need to change it manually.
Save the new file 6.0.1.yaml as production.yaml, upload and overwrite the old one(remember to make a back up!) located in /var/www/peertube/config
Pay attention to the file’s ownership. If it’s not already set to peertube, you can change it by running the command chown peertube production.yaml
Change the nginx file
This step is similar to the previous one, so I won’t repeat it. Just fill in the old configuration details into the new Nginx config file, and make sure to check it several times for accuracy! Make a back up before you overwrite the file.
Restart everything
That’s it! Now, all we need is to restart everything. You can simply reboot the server, or you can restart peertube and nginx manually:
]]>0eijil<![CDATA[Setting up your own Matrix Synapse service on VPS]]>https://lijie.org/?p=6762024-01-29T12:17:15Z2022-05-24T15:56:21ZFor the past one month, I’ve been digging around the internet about the decentralized fediverse community. Platforms like Mastodon, Matrix Synapse, Pixelfed etc are the open-source implementations of twitter, IMs like telegram Signal and instagram, and more importantly these platforms are all decentralized, which means your posts/pics/blog/account belongs to yourself, and won’t be deleted by those BIG companies for no reason, especially those stupid companies in China like weibo, bilibili, douyin etc. Ad-free, no user privacy tracking/leaking are also advantages of the fediverse platforms.
Up to now, I’ve tried my hand on Soapbox FE, Matrix Synapse and got them successfully running on my VPS. This post mainly focuses on the installation of Matrix Synapse which was written in Python. There is a Go version of Matrix – Dendrite. It’s more efficient and maybe the VPS hardware requirements aren’t that high. But it’s still in the beta version, not recommended for the production environment.
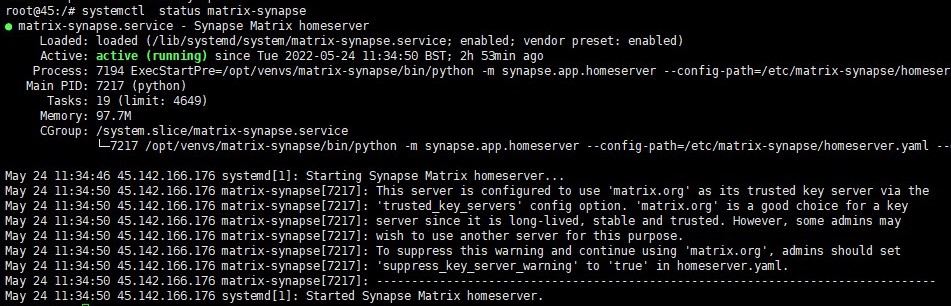
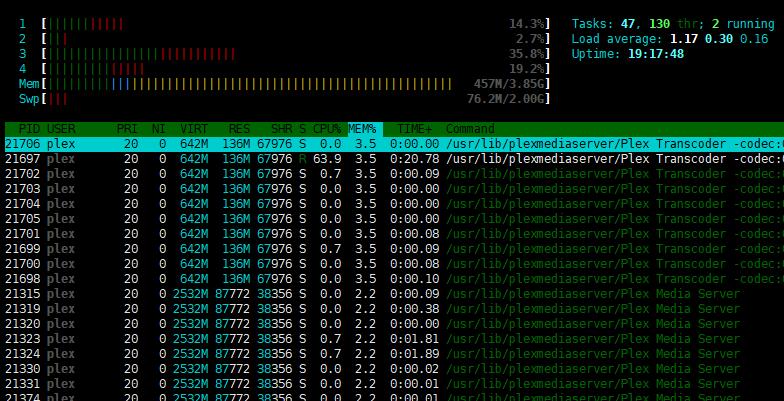
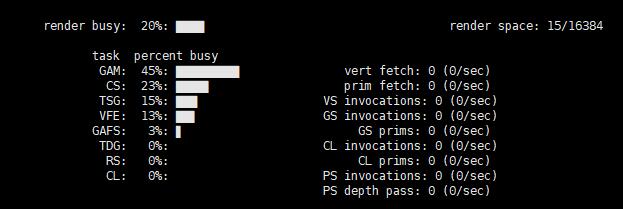
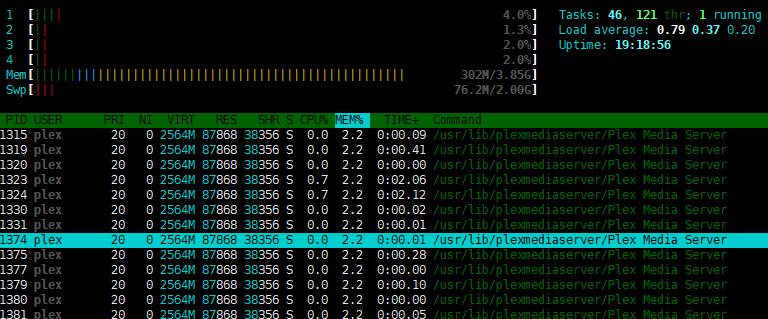
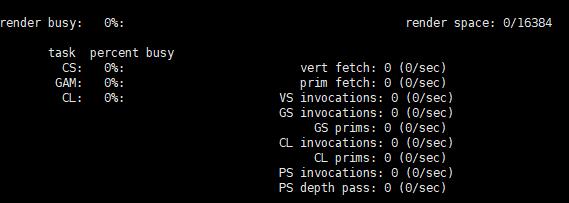
Minimal VPS Specs: 1-core vCPU, 1G of RAM, here is the utilization of Synapse running on my VPS(just 1 user), 2G RAM is recommended for users less than 20. The OS is Ubuntu 20.04.
I’ve made a test video call between my 2 phones, the CPU ( Intel(R) Xeon(R) CPU E5-2690 v4 @ 2.60GHz ) usage is around 25%, so a 2-core CPU is recommended.
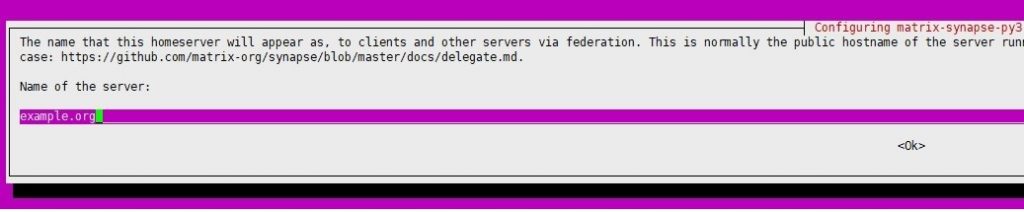
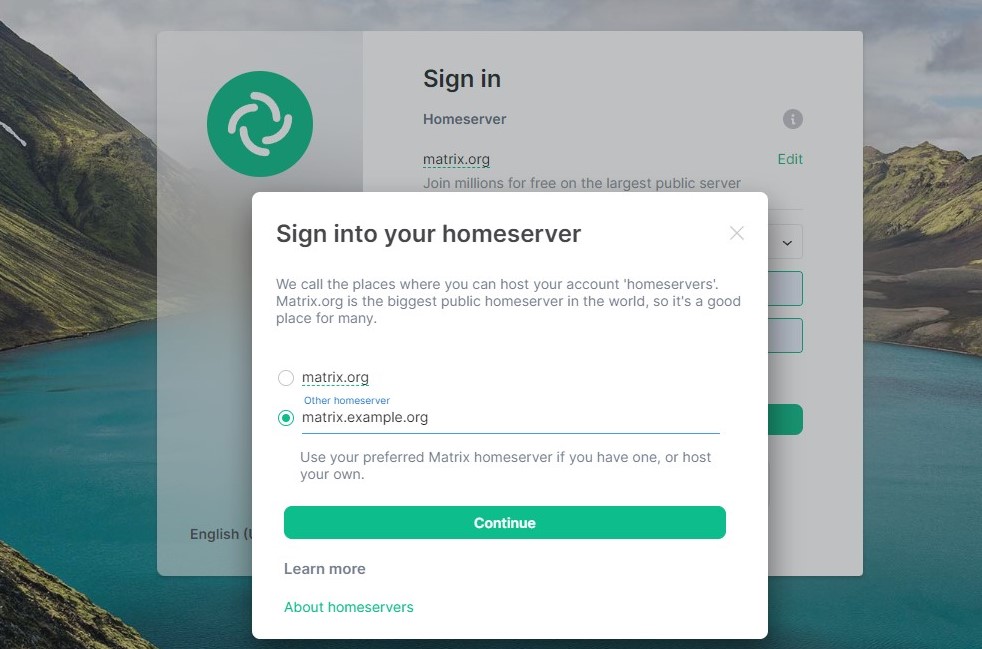
I want to use the base domain as part of the user name, like @user:example.org, instead of @user:matrix.example.org which is the actual server address. In this case, you can host other websites (like Mastodon) with the base domain example.org.
cd /etc/nginx/sites-available
sudo nano example.org
Change example.org to your domain name:
server {
root /var/www/example.org; # You can host another website here or do a reverse proxy.
# Add index.php to the list if you are using PHP
index index.html index.htm index.nginx-debian.html;
server_name example.org;
location / {
# First attempt to serve request as file, then
# as directory, then fall back to displaying a 404.
try_files $uri $uri/ =404;
}
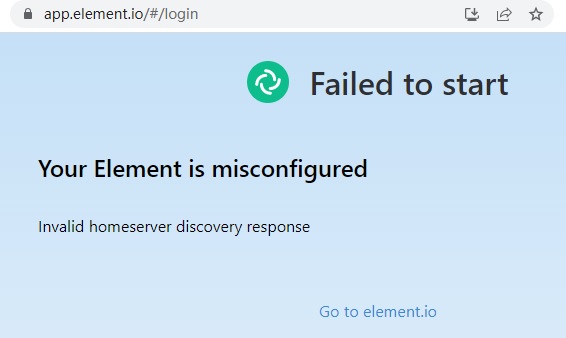
location /.well-known/matrix/client { # pay attention here, help client like element to find the actual address.
return 200 '{"m.homeserver": {"base_url": "matrix.example.org"}}';
default_type application/json;
add_header Access-Control-Allow-Origin *;
}
location /.well-known/matrix/server {
return 200 '{"m.server": "matrix.example.org:443"}';
default_type application/json;
add_header Access-Control-Allow-Origin *;
}
listen [::]:443 ssl ipv6only=on; # managed by Certbot
listen 443 ssl; # managed by Certbot
ssl_certificate /etc/letsencrypt/live/example.org/fullchain.pem; # managed by Certbot
ssl_certificate_key /etc/letsencrypt/live/example.org/privkey.pem; # managed by Certbot
include /etc/letsencrypt/options-ssl-nginx.conf; # managed by Certbot
ssl_dhparam /etc/letsencrypt/ssl-dhparams.pem; # managed by Certbot
}
server {
if ($host = example.org) {
return 301 https://$host$request_uri;
} # managed by Certbot
listen 80;
listen [::]:80;
server_name example.org;
return 404; # managed by Certbot
}
Create the matrix.example.org config file:
sudo nano matrix.example.org
Change the content to:
server {
    listen 443 ssl http2;
    listen [::]:443 ssl http2;

    # make your synapse instance federated.
    listen 8448 ssl http2;
    listen [::]:8448 ssl http2;

    server_name matrix.example.org;

    ssl_certificate /etc/letsencrypt/live/matrix.example.org/fullchain.pem;
    ssl_certificate_key /etc/letsencrypt/live/matrix.example.org/privkey.pem;

    ssl_protocols TLSv1.2 TLSv1.3;
    ssl_prefer_server_ciphers on;
    ssl_ciphers ECDHE-RSA-AES256-GCM-SHA512:DHE-RSA-AES256-GCM-SHA512:ECDHE-RSA-AES256-GCM-SHA384:DHE-RSA-AES256-GCM-SHA384:ECDHE-RSA-AES256-SHA384;
    ssl_session_timeout  10m;
    ssl_session_cache shared:SSL:10m;
    ssl_session_tickets on;
    ssl_stapling on;
    ssl_stapling_verify on;

    location ~ ^(/_matrix|/_synapse/client) {
        # note: do not add a path (even a single /) after the port in proxy_pass,
        # otherwise nginx will canonicalise the URI and cause signature verification
        # errors.
        proxy_pass http://127.0.0.1:8008;
        proxy_set_header X-Forwarded-For $remote_addr;
        proxy_set_header X-Forwarded-Proto $scheme;
        proxy_set_header Host $host;

        # Nginx by default only allows file uploads up to 1M in size
        # Increase client_max_body_size to match max_upload_size defined in homeserver.yaml
        # support file size up to 200MB.
        client_max_body_size 200M;
    }

    # make your synapse instance federated.
    location / {
        proxy_pass http://localhost:8008;
        proxy_set_header X-Forwarded-For $remote_addr;
    }
}
server {
    if ($host = matrix.example.org) {
        return 301 https://$host$request_uri;
    } # managed by Certbot

    listen 80;
    listen [::]:80;
    server_name matrix.example.org;
    return 404; # managed by Certbot
}
Link the config files to sites-enabled folder and restart nginx
sudo apt install postgresql postgresql-contrib
sudo -i -u postgres
psql
# Create an user and password, you shoud change the Password
CREATE USER "synapseuser" WITH PASSWORD 'Password';
CREATE DATABASE synapse ENCODING 'UTF8' LC_COLLATE='C' LC_CTYPE='C' template=template0 OWNER "synapseuser";
exit
exit # exit the current user
sudo apt install python3-psycopg2
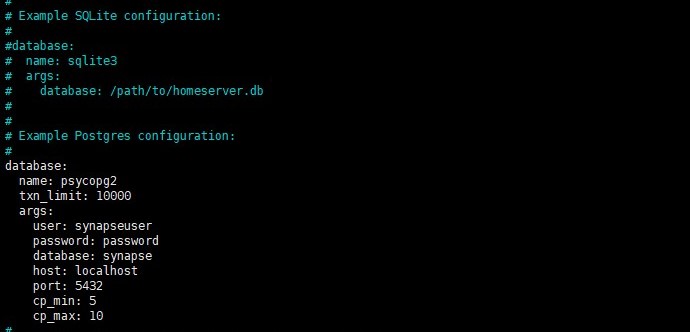
Edit synapse config file:
sudo nano /etc/matrix-synapse/homeserver.yaml
Since I’ll use PostgreSQL instead of sqlite3, comment out the following lines:
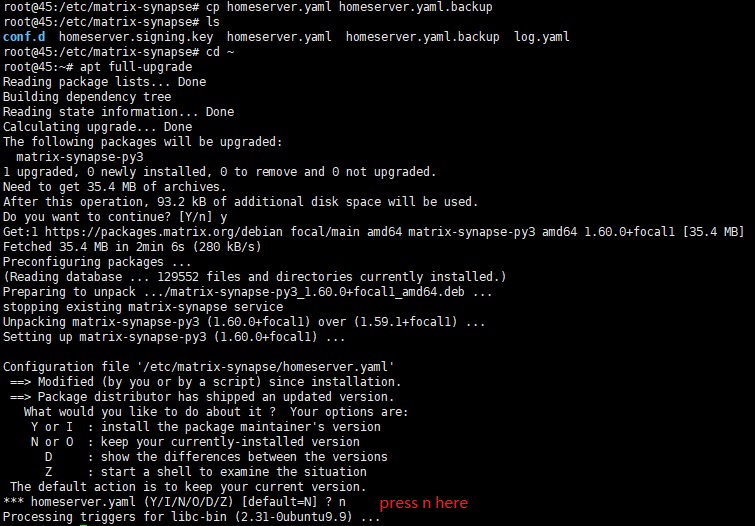
Upgrading synapse to the latest version is just like upgrading other softwares on ubuntu, Executing apt full-upgrade would do the job. But before doing that, make sure to backup your homeserver.yaml and then press n when asked wheather or not to replace the config file.
It’s not very complicated, but you can use ansible to deploy matrix which is much easier, especially when you want to bridge other IM tools like telegram or discord etc.
Please choose whether or not to redirect HTTP traffic to HTTPS, removing HTTP access. ——————————————————————————- 1: No redirect – Make no further changes to the webserver configuration. 2: Redirect – Make all requests redirect to secure HTTPS access. Choose this for new sites, or if you’re confident your site works on HTTPS. You can undo this change by editing your web server’s configuration. ——————————————————————————- Select the appropriate number [1-2] then [enter] (press ‘c’ to cancel):