The post Write Your Own File Uploader in Aurelia 2 appeared first on mobilemancer.
]]>I was looking at some code for some pure JS implementations and thought that it’s so much smoother in Aurelia 
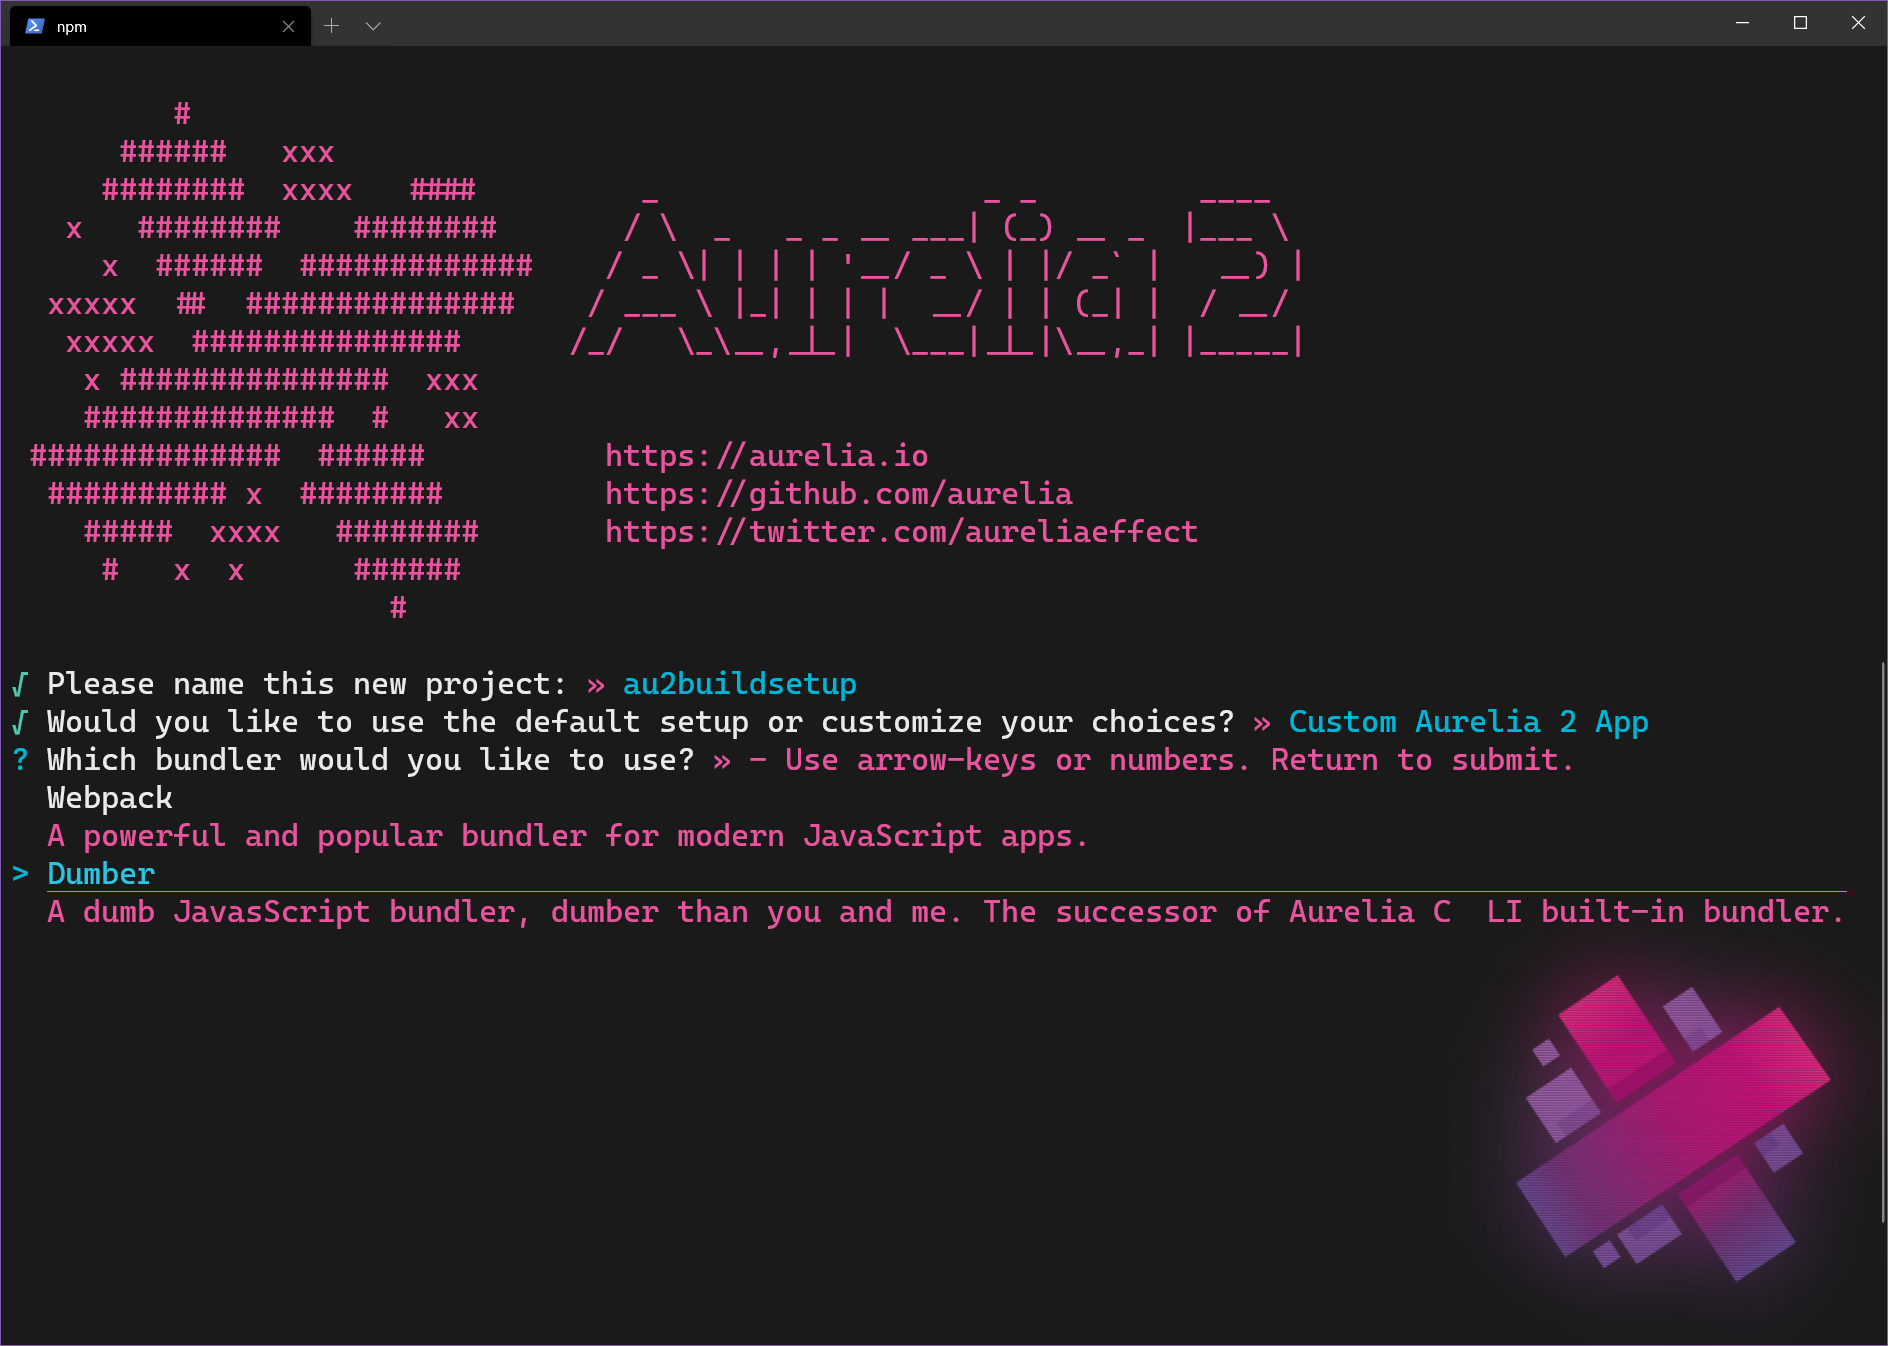
 Create the Project
Create the project using npx au2 new, then select to use TypeScript and plain CSS. For a more detailed description of setting up new Aurelia 2 projects check the post A Productive Aurelia 2 Build Setup.
 Create the Component
First off we need to create the component. With Aurelia’s conventions it’s as easy as creating a template file (html), a view model file (typescript) and a file for the styling (css). Let’s name the component file-uploader and create
file-uploader.tsfile-uploader.htmlfile-uploader.css
To enable global access to my components, I gather them all in a component registry file and then import that into the DI container when the app starts upp. so I create a conponentRegistry.ts file as well, and import that in main.ts.

componentRegistry.ts
export * from "./image-uploader/image-uploader";
main.ts
import Aurelia from "aurelia";

import { MyApp } from "./my-app";
import * as componentRegistry from "./componentRegistry";

Aurelia.register(componentRegistry).app(MyApp).start();
If you use VS Code and would like to automate component creation (TypeScript, HTML and CSS-files), check out the post Using VS Code Tasks to Create Template Files
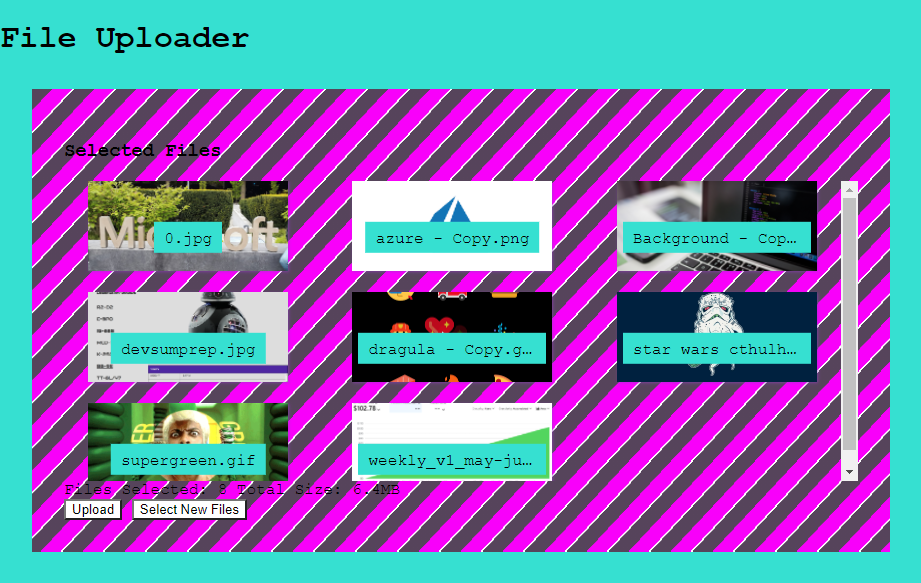
 Creating the Template
The workhorse of the component is the <input> element. You can configure this to accept a variety of file types, we’ll select images for this example.
Then we create a part that will show the thumbnails for any selected files, together with some stats about the files.
The full template looks like follows, image-uploader.html 
<div class="image-uploader">
  <input
    ref="fileInput"
    class="fileInput"
    type="file"
    name="file"
    multiple
    accept="image/*"
    style="display: none"
  />

  <div class="upload">
    <div if.bind="selectedFiles.length>0">
      <h3>Selected Files</h3>

      <div class="thumbnail-grid">
        <div class="img-container" repeat.for="file of selectedFiles">
          <img src.bind="file.url" title.bind="file.size" />
          <div class="label">
            <span class="file-name">${file.name}</span>
          </div>
        </div>
      </div>

      <div>
        Files Selected: <span>${fileCount}</span> Total Size: <span>${returnFileSize(totalSize)}</span>
      </div>
    </div>

    <div>
      <span if.bind="fileCount === 0">
        <button click.delegate="openFilePicker()">Select Files</button>
      </span>
      <span if.bind="fileCount > 0">
        <button click.delegate="upload()">Upload</button>
      </span>
      <span if.bind="fileCount > 0">
        <button click.delegate="openFilePicker()">Select New Files</button>
      </span>
    </div>
  </div>
</div>
As for the <input> element we are allowing several files to be selected bu adding the multiple argument. For allowing us easy access from the view model we’re using a ref tag. The ref tag will help bind the element to the view-model, as we’ll see later in the TypeScript file.
The thumbnail grid has a div with a repeat.for construct. This is the Aurelia of repeating template code for all elements of a collection. In our case we are repeating over all selected images and displaying a “thumbnail” for each.
At the end we are setting up the controlling buttons using some conditional templates with the if.bind="expression" construct. This will remove the block from the DOM if the expression is false.
 Creating the View-Model
The full view-model looks like follows, image-uploader.ts
export class ImageUploader {
  public fileInput: HTMLInputElement;
  public fileCount = 0;
  public totalSize = 0;
  public selectedFiles: Array<Record<string, unknown>> = [];

  public afterBind(): void {
    // bind to change event on the file input
    this.fileInput.addEventListener("change", () => this.fileSelectionChanged());
  }

  public openFilePicker(): void {
    this.clearSelection();

    // file input is hidden because of styling, open it with click()
    this.fileInput.click();
  }

  public async upload(): Promise<void> {
    // put the selected files in FormData
    const formData = new FormData();
    for (let i = 0; i < this.fileInput.files.length; i++) {
      const element = this.fileInput.files[i];
      formData.append("file", element);
    }

    // send formData  over the wire here
    console.log("data to send:");
    console.log(formData);
  }

  public fileSelectionChanged(): void {
    this.populateUI(this.fileInput);
  }

  public returnFileSize(number: number): string {
    // shamelessly borrowed from MDN
    if (number < 1024) {
      return number + "bytes";
    } else if (number >= 1024 && number < 1048576) {
      return (number / 1024).toFixed(1) + "KB";
    } else if (number >= 1048576) {
      return (number / 1048576).toFixed(1) + "MB";
    }
  }

  private populateUI(fileInput: HTMLInputElement): void {
    for (let i = 0; i < fileInput.files.length; i++) {
      this.fileCount += 1;
      this.totalSize += fileInput.files[i].size;

      this.selectedFiles.push({
        file: fileInput.files[i],
        name: fileInput.files[i].name,
        size: this.returnFileSize(fileInput.files[i].size),
        url: URL.createObjectURL(fileInput.files[i]),
      });
    }
  }

  private clearSelection(): void {
    this.fileInput.value = "";
    // clear any previously selected files
    this.fileCount = 0;
    this.totalSize = 0;
    this.selectedFiles = [];
  }
}
if (number < 1024) {
return number + "bytes";
} else if (number >= 1024 && number < 1048576) {
return (number / 1024).toFixed(1) + "KB";
} else if (number >= 1048576) {
return (number / 1048576).toFixed(1) + "MB";
}
}
private populateUI(fileInput: HTMLInputElement): void {
for (let i = 0; i < fileInput.files.length; i++) {
this.fileCount += 1;
this.totalSize += fileInput.files[i].size;
this.selectedFiles.push({
file: fileInput.files[i],
name: fileInput.files[i].name,
size: this.returnFileSize(fileInput.files[i].size),
url: URL.createObjectURL(fileInput.files[i]),
});
}
}
private clearSelection(): void {
this.fileInput.value = "";
// clear any previously selected files
this.fileCount = 0;
this.totalSize = 0;
this.selectedFiles = [];
}
}
In the afterBind method we add an eventhandler to the input element. The "change" this is what will be triggered when files are selected and what we will need to react too. There you can also see how easy Aurelia makes it to get a handle to the input element, since we added a ref attribute on it we just declare the element in the property on the view-model and can then access it as sound as the element is bound to the DOM.
Since the input element for file selection is notoriously hard to style, I’ve opted to hide it using style="display: none", and opening by calling click on it from a regular button. As can be seen in the openFilePicker method.
To actually upload the file and save it, you need a server and actually implementing the send part. I left that out in the post as I wanted to focus on the front end bits.
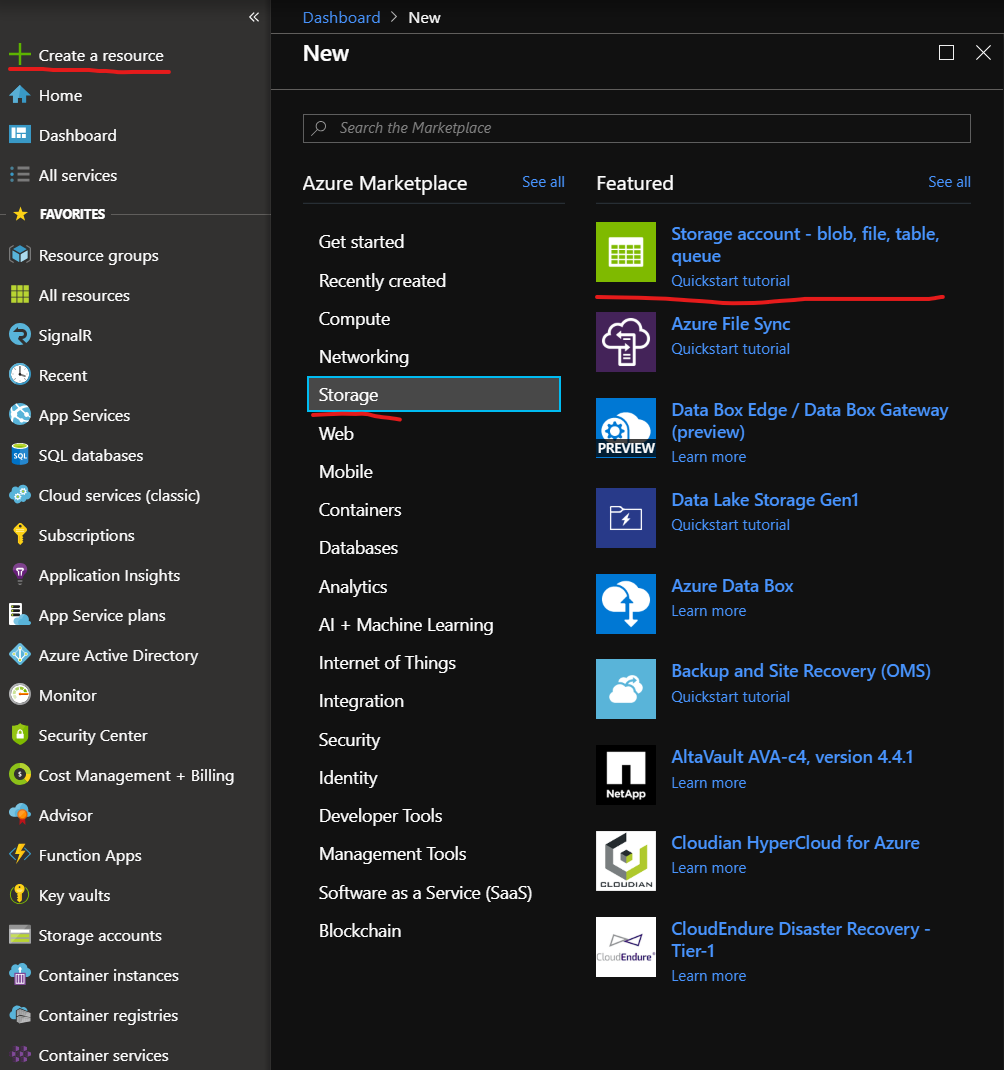
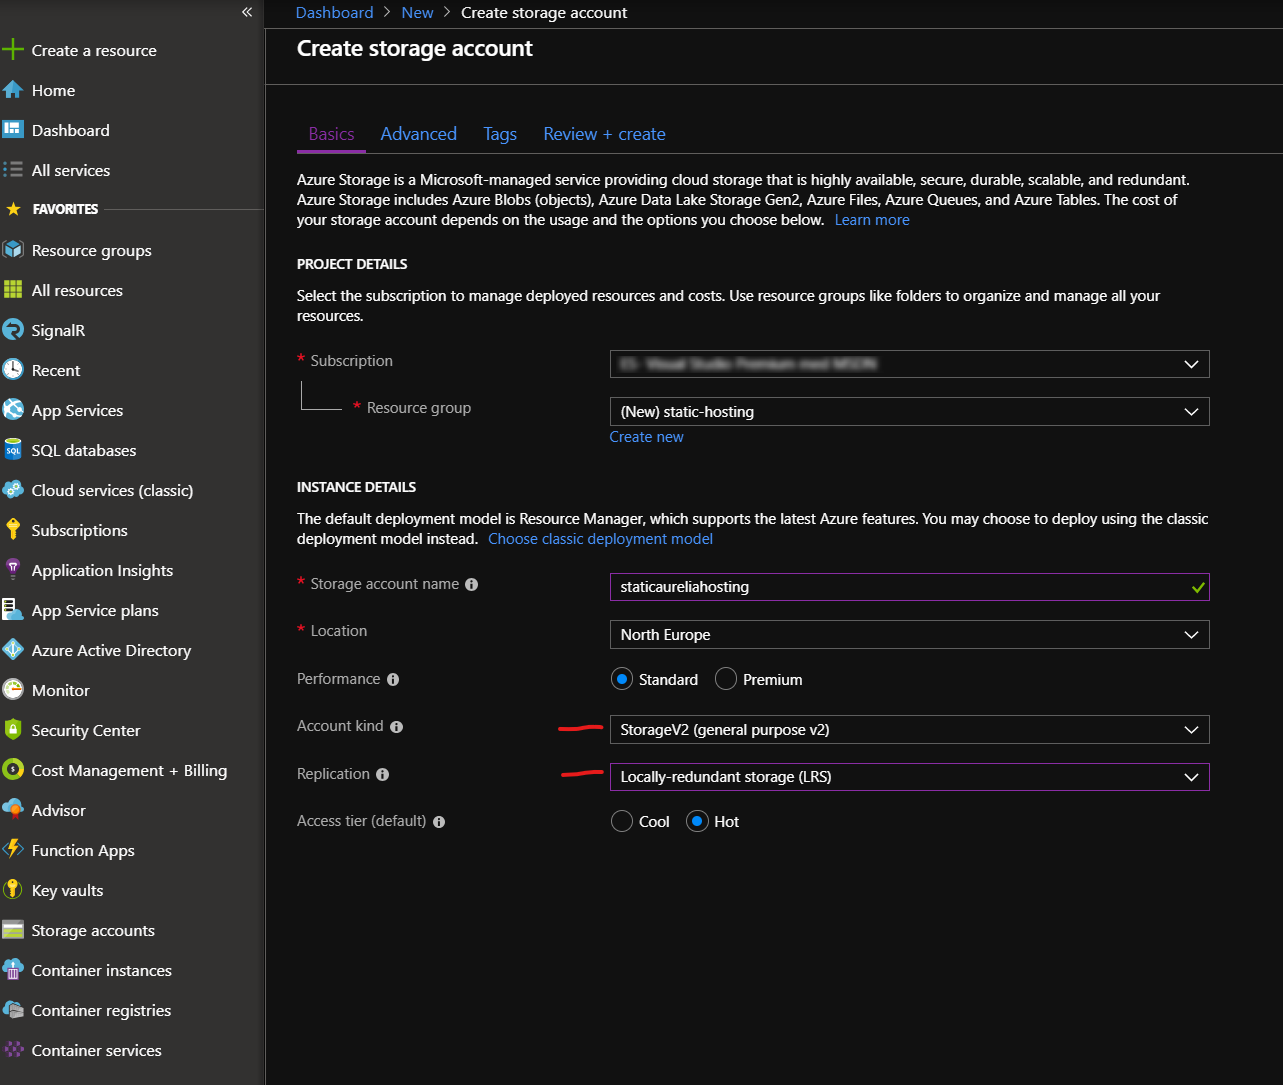
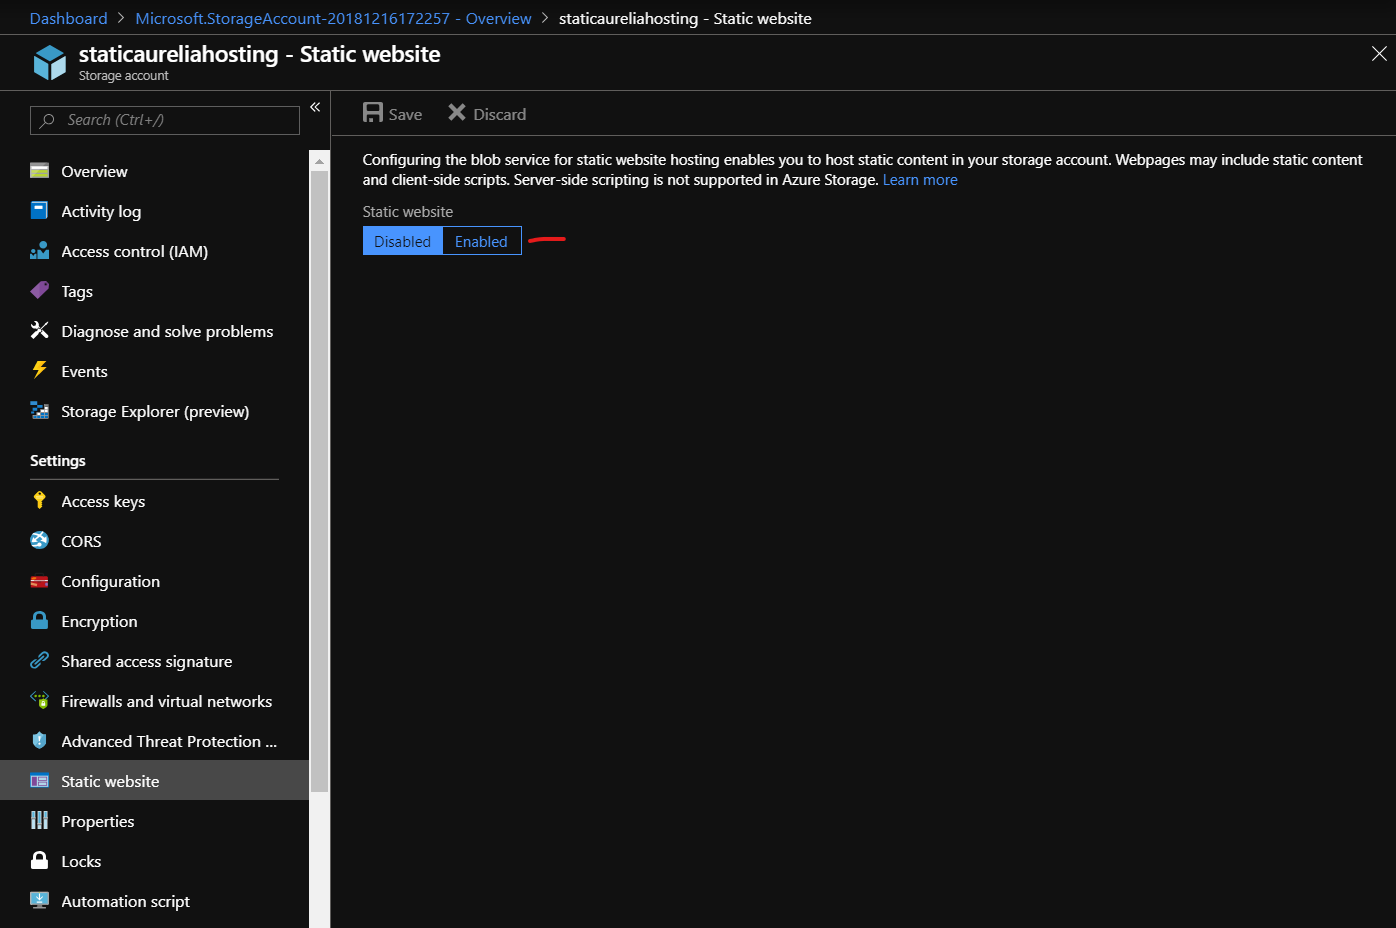
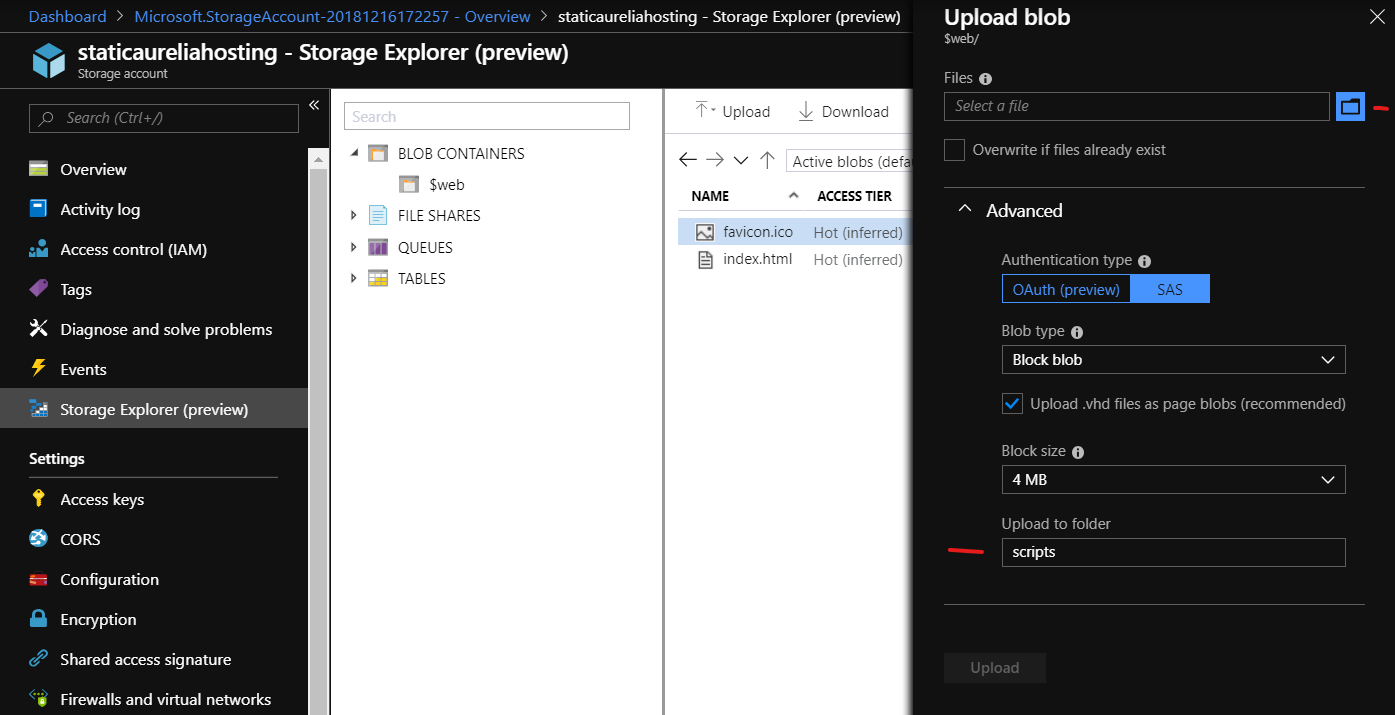
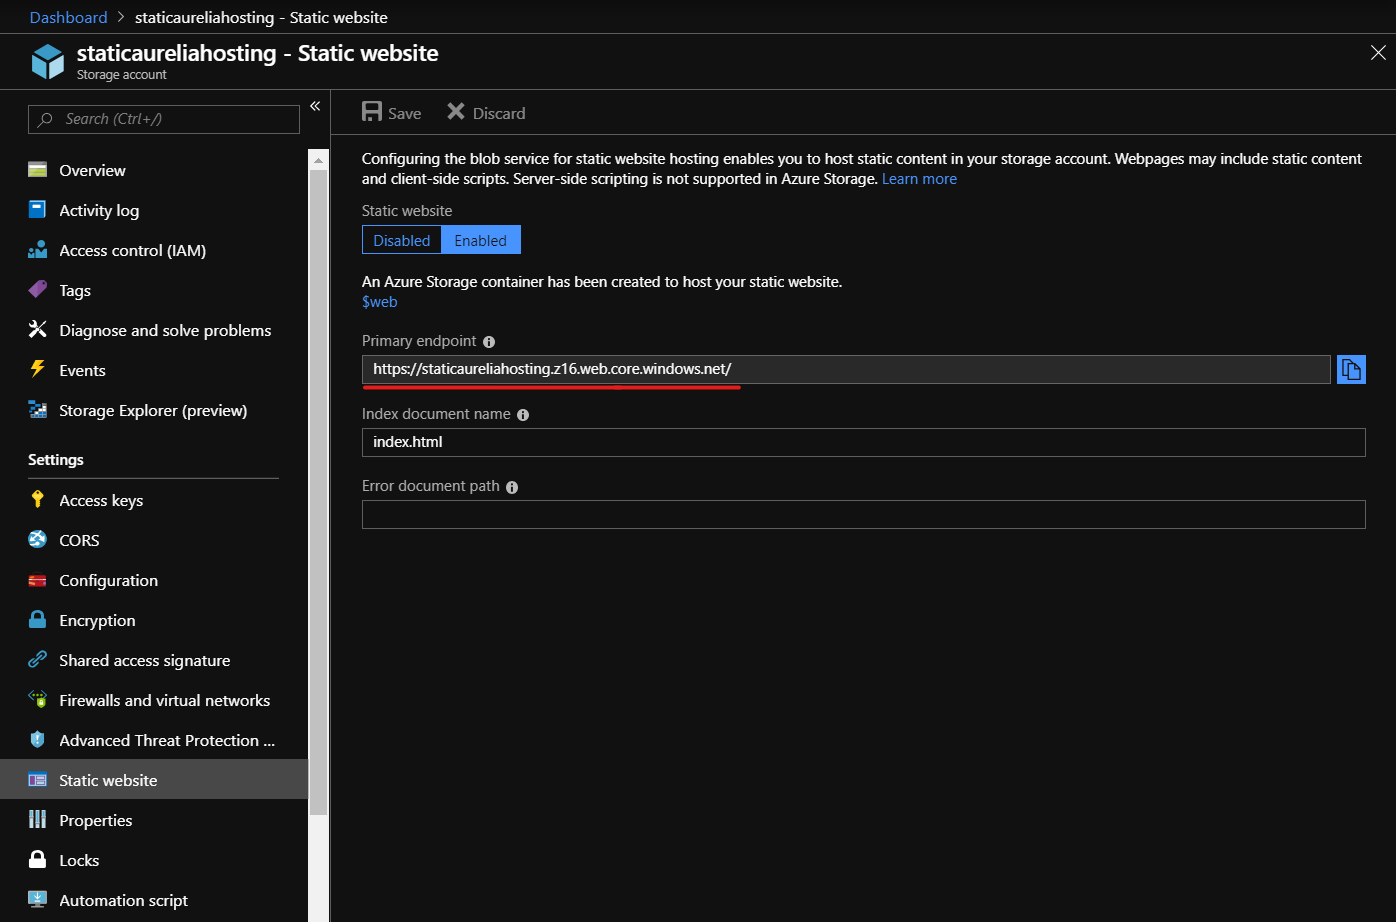
However, in one of my projects I used Azure Functions to receive files and then saved them in Blob Storage, which is really clean (and super cheap) cloud solution.
If there is interest, I can make a part two of this article and implement a server project too? Let me know in the comments below if you are interested in seeing a post about the Azure Functions server part!
 Conclusion
The strong templating features of Aurelia makes it so easy to control your custom element layouts. With the ability to conditionally toggle parts of the template, we save large amounts of TypeScript/JavaScript code from ever being written!
Aurelia 2 is stepping up the templating game further compared to v1, I’ll be sure to write a post about the new features as soon as alpha is released 
 Resources
The code for this small project can be found on my GitHub page
Setting up an Aurelia 2 project
Read more about Aurelia 2 on the docs site
Running Aurelia 2 apps in Azure like a boss
Happy Coding! 
The post Write Your Own File Uploader in Aurelia 2 appeared first on mobilemancer.
]]> Installing Dragula in Your Aurelia 2 Project
 Using Dragula with Aurelia 2
 </div>
<div>
</div>
<div> </div>
<div>
</div>
<div> </div>
<div>
</div>
<div> </div>
<div>
</div>
<div> </div>
<div>
</div>
<div> </div>
<div>
</div>
<div> </div>
<div>
</div>
<div> </div>
<div>
</div>
<div>


 Additions
 A Folder for Images, Config Files Etc.
 Another File to Add to the Watch Glob
 Add PurgeCSS to the Build Setup


 VS Code Tasks to the rescue!
 Aurelia Project Structure
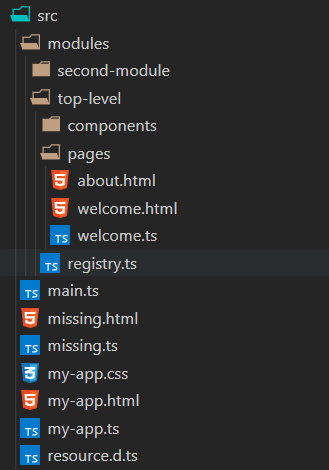
 PowerShell to the Rescue
 Running the Task
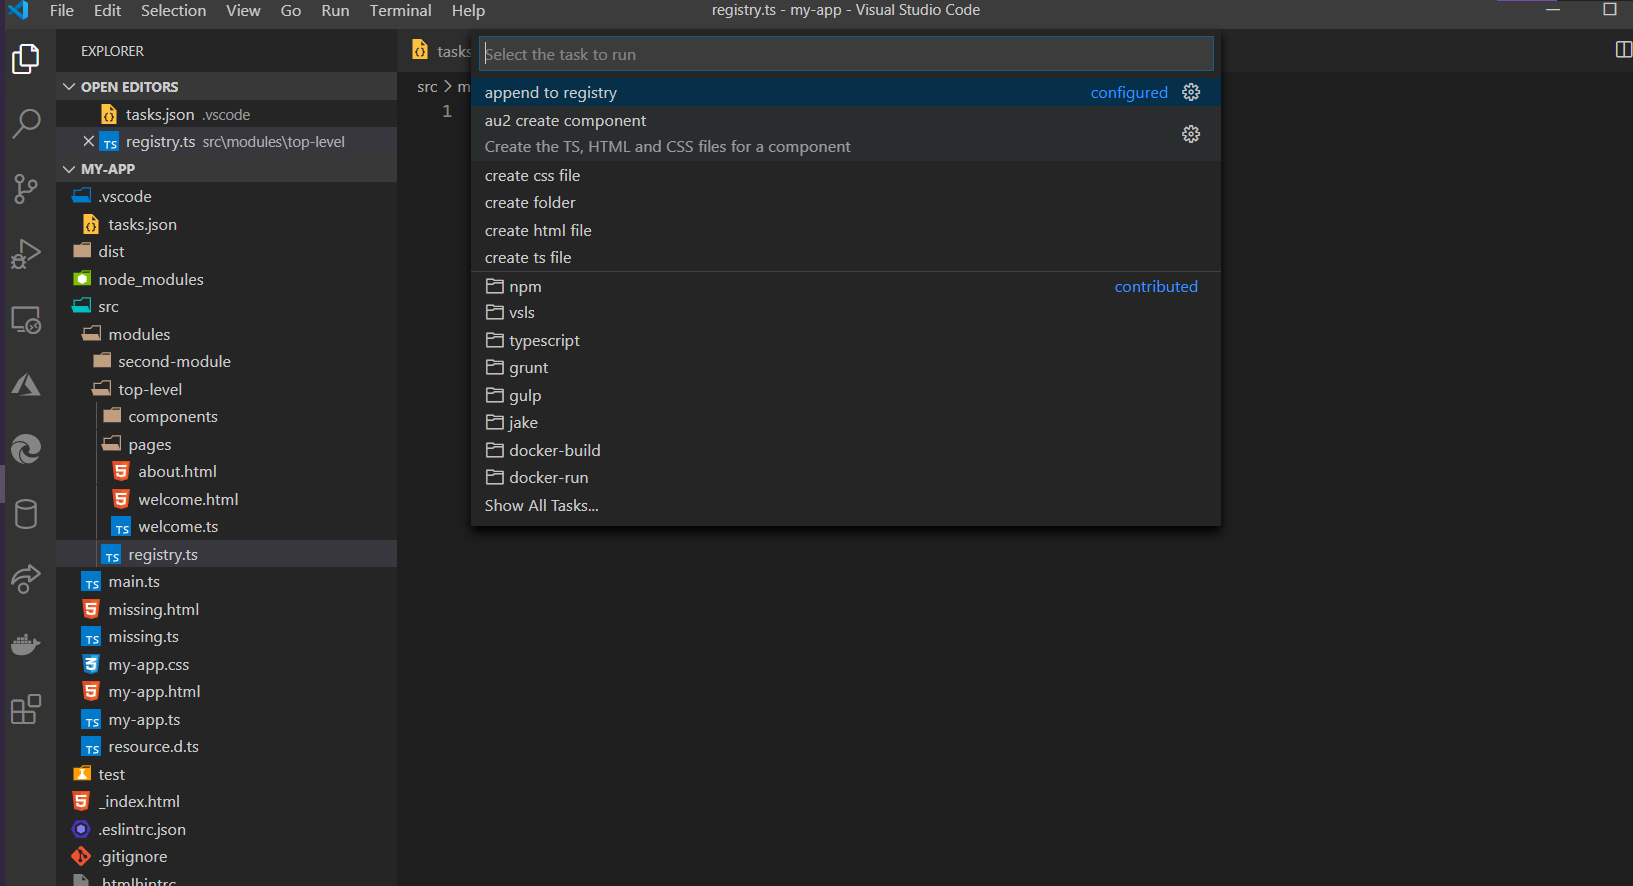
 Make sure to select the “main” task!
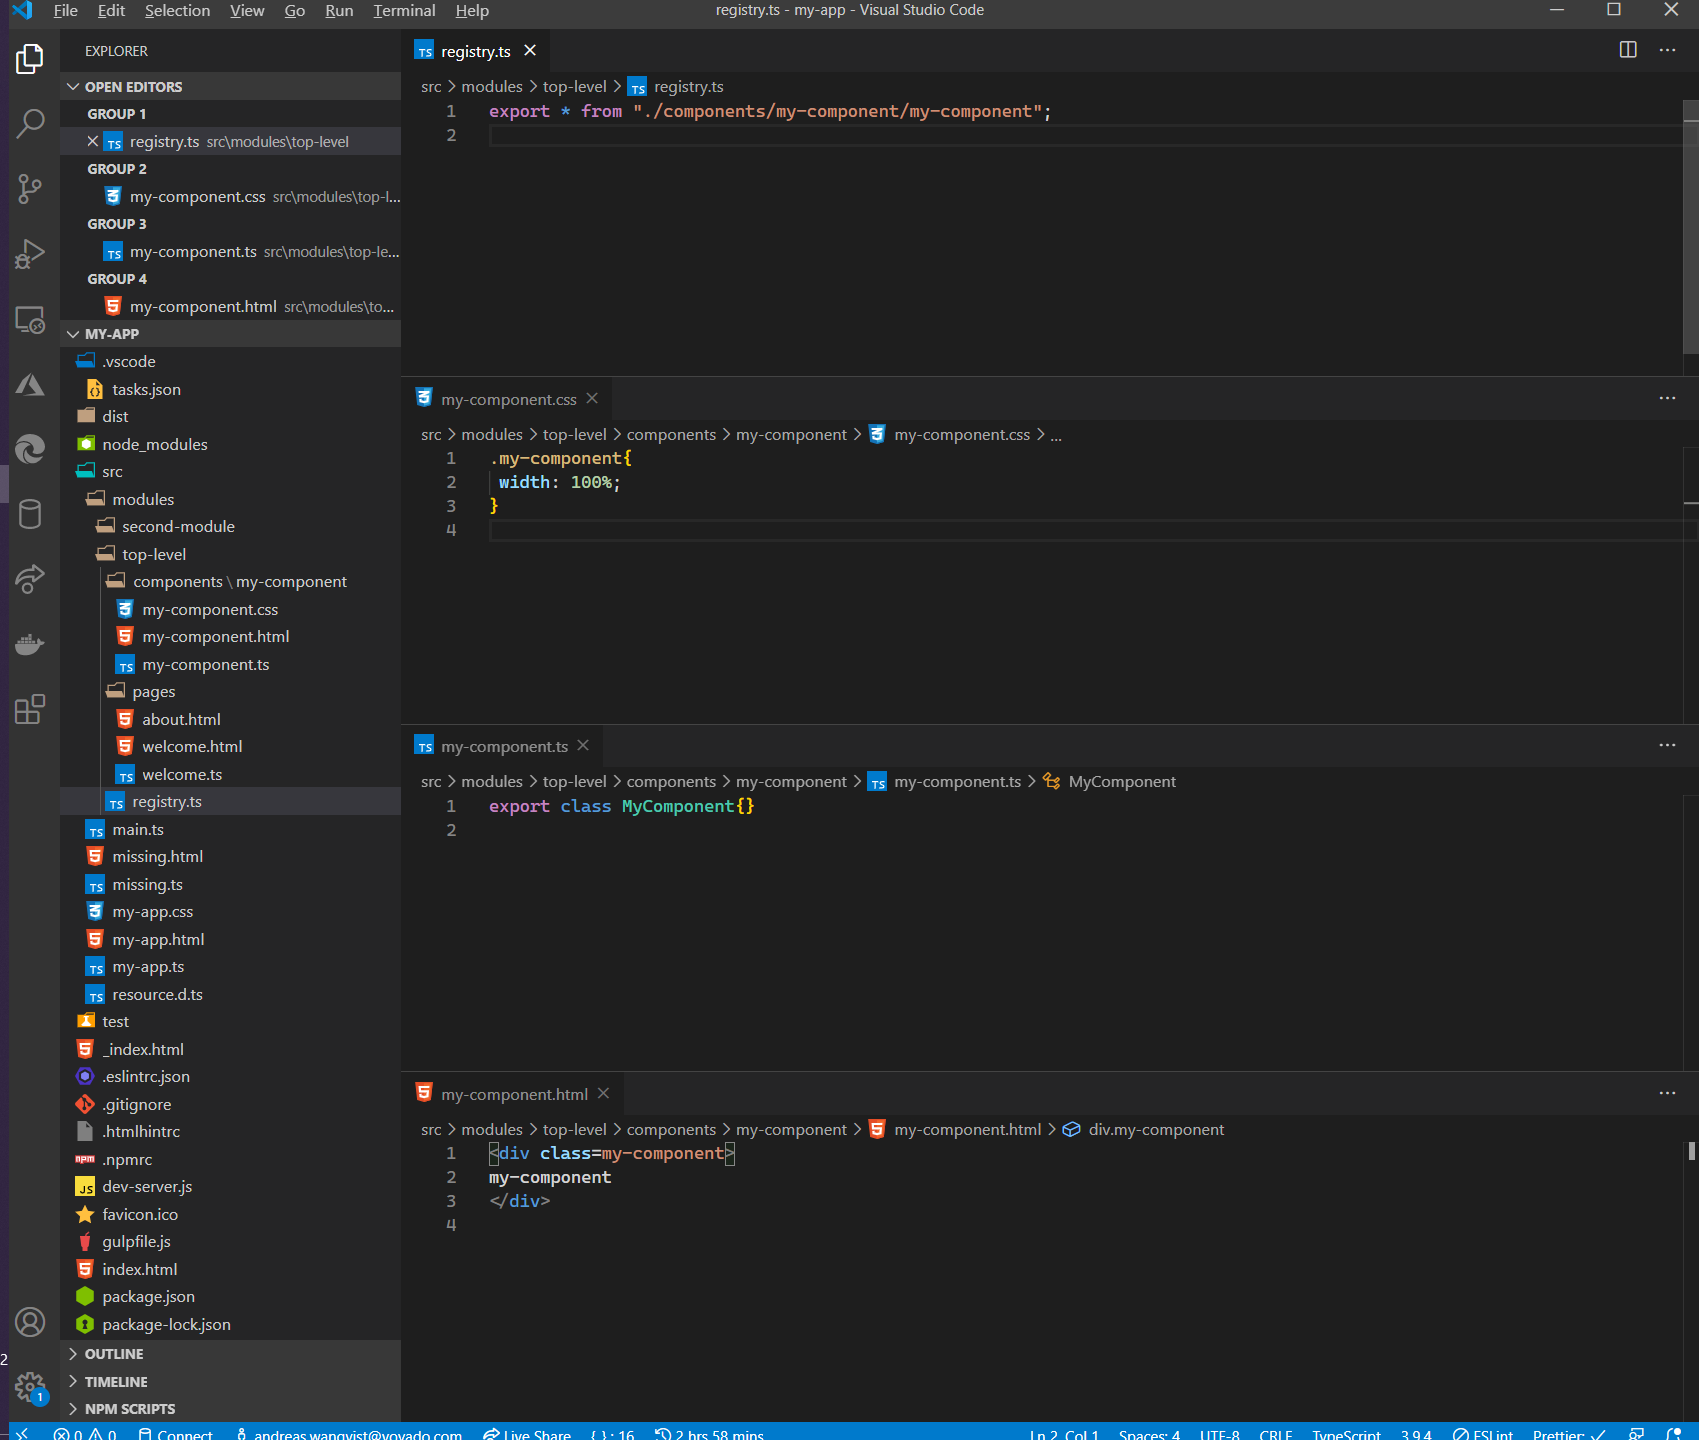
 Ta-da!
  Key Bind the Task!

 )
) Setting Up the Test
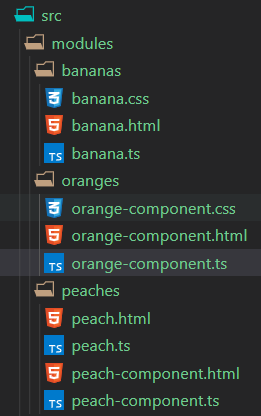
 The Base Bundle/Module Structure
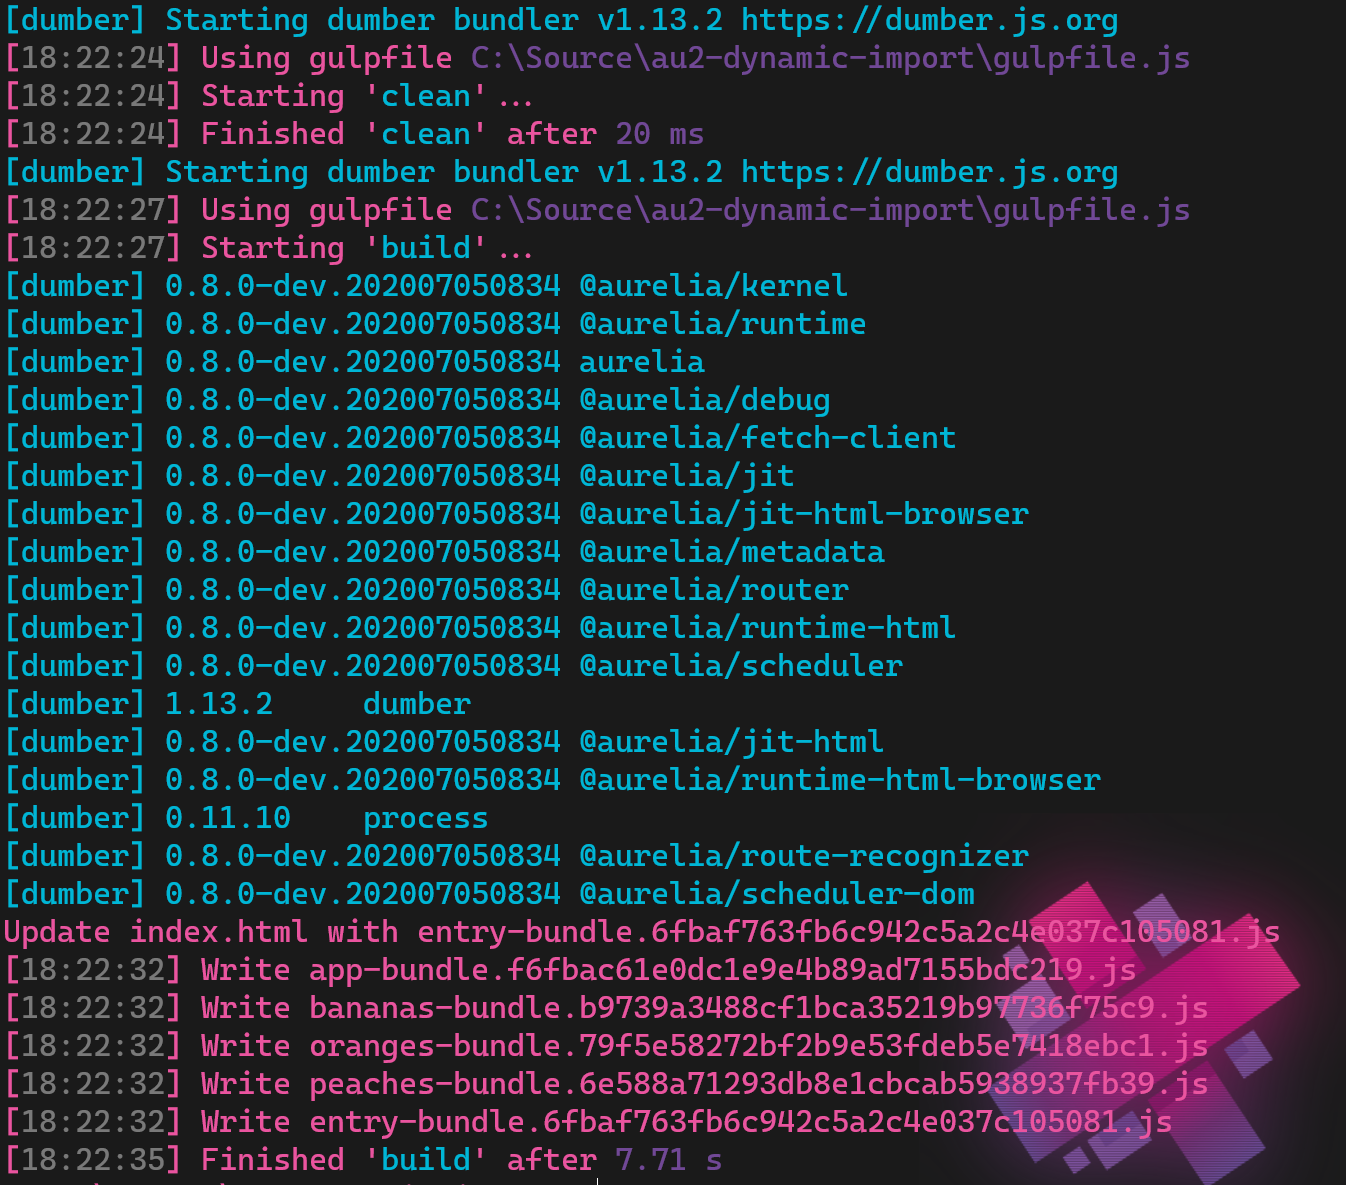
 Breaking Up Code in Different Bundles
 ,
,  &
&  !
!  Running the Application With the New Bundles


 Routing Drawback
 Fixing the Routing Drawback Using the Router
 A Better Way
 ");
}
public async enter(): Promise<void> {
const comp = await import("./modules/peaches/componentRegistry");
this.diContainer.register(comp);
this.router.goto("peach");
}
}
");
}
public async enter(): Promise<void> {
const comp = await import("./modules/peaches/componentRegistry");
this.diContainer.register(comp);
this.router.goto("peach");
}
}
 Aurelia2 Web Client – .NET Back-end
 gRPC protobuf
 Back-end .NET 5 gRPC c# Project Setup
 Compiling .proto files with Visual Studio
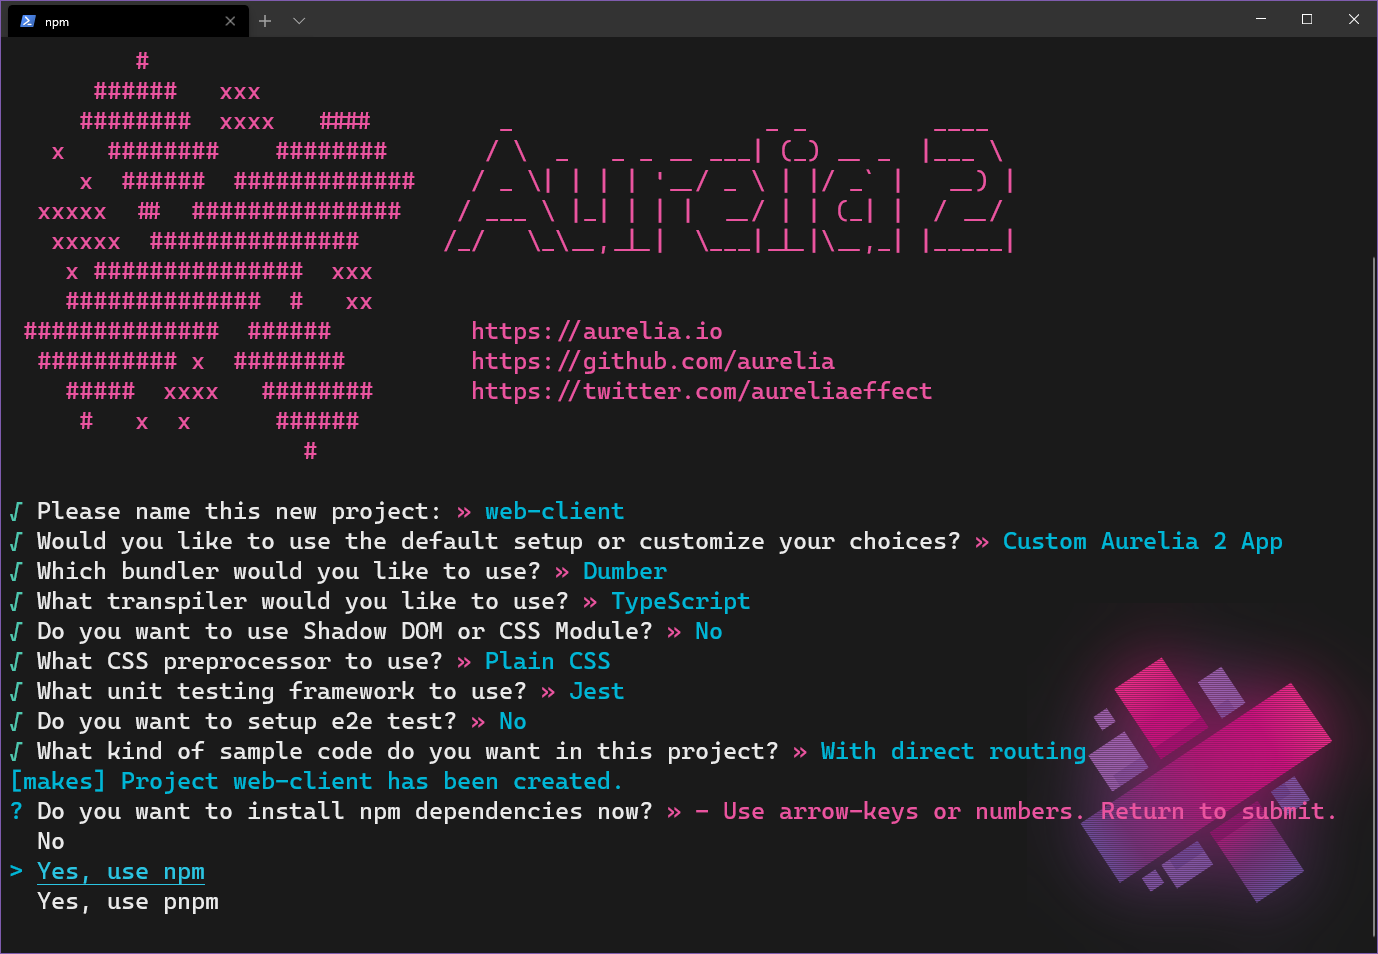
 this is still a beta feature and might have issues.
 Running the Project
 ”? Automating the protobuf compilation in the front-end project as well, making it a build step, would probably help a bit. Using the getters on the reply object also feels slightly off when binding to views in the front-end, but since it’s not necessary to use them I guess that’s ok.
 ). A total remake of AureliaWeekly.com! It’s what I’ve been spending most of my spare time on since early fall
 Front end written in au2
 Moving API to Azure Functions
 This was pretty straightforward as it was just upgrading the version of .NET Core used and some additional tweaks to use a
  This extension enables a per-endpoint authorization behavior, as well as handling claims etc. Big thanks to Vitaly Bibikov for this project
  Rewriting the data layer
 Adding an Index with Azure Cognitive Search
 Time to perf test!
 Hosting
 Next move – Azure CDN
 That’s a substantial increase in performance right there! Total blocking time is the only offender, and that drop in later Aurelia 2 versions as this is only the pre-beta release of au2
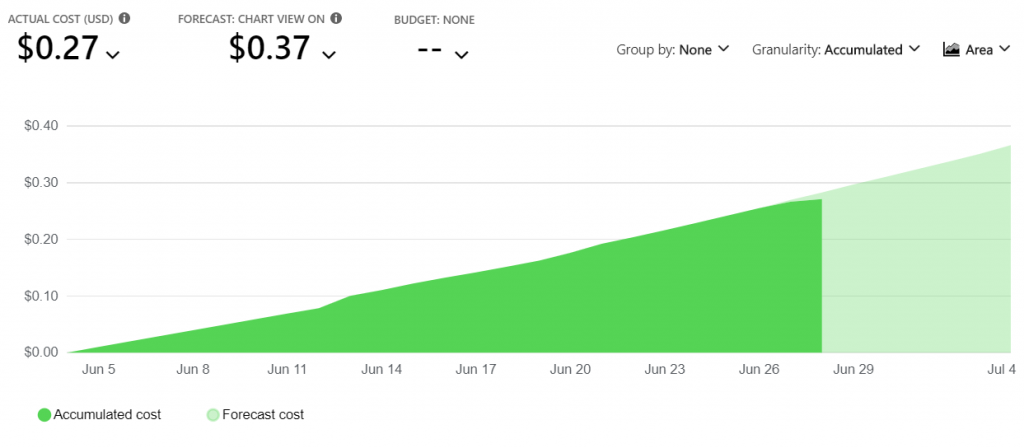
 Cost
Cost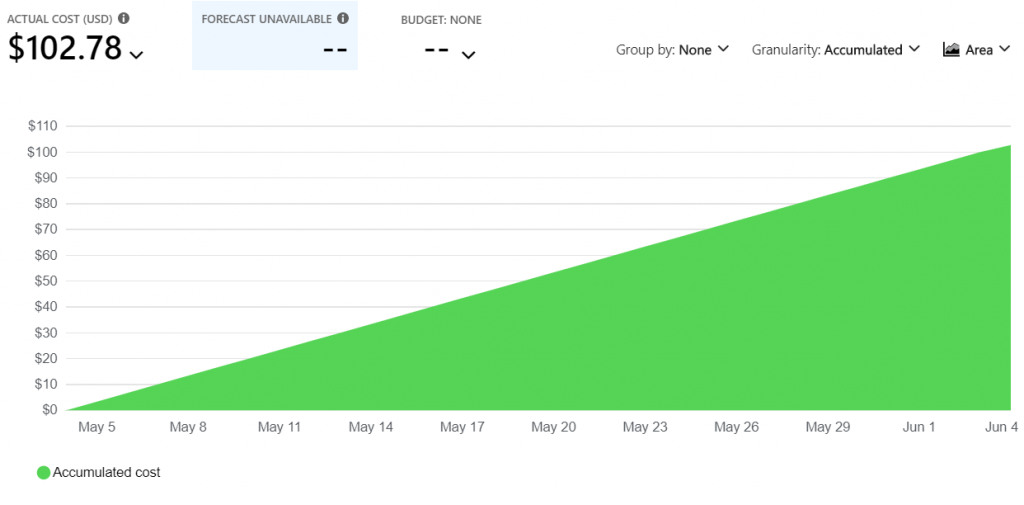
 Environmental aspect

 Principles.Green
 Key takeaways
 and hope you will enjoy it as much as I do


 , the backing view model of the layout’s is very simple and just contains an exposure of the
  </div>
</div>
<div slot="sideblock">
<div class="info-container">
<div class="info-text text-vert">
Side Block
</div>
</div>
</div>
<div slot="sideblock">
<div class="info-container">
<div class="info-text text-vert">
Side Block 
</div>
</div>
</div>
</template>
</div>
</div>
</div>
</template>