mypapit gnu/linux Free and Open Source blogger with an attitude2026-07-02T07:31:22Zhttps://blog.mypapit.net/feed/atomWordPresshttps://blog.mypapit.net/wp-content/uploads/2017/12/cropped-web_hi_res_512-32x32.pngMohammad Hafiz bin Ismail (mypapit)http://mypapit.net/<![CDATA[PolicyMaker: A Lightweight PHP Tool to Create Privacy Policy Pages for Android Apps]]>https://blog.mypapit.net/?p=26852026-07-02T07:31:22Z2026-07-06T00:25:00ZPolicyMaker is a lightweight web application for creating, managing, publishing, and displaying privacy policies for Android mobile applications. It is built using PHP and SQLite, so it does not need a heavy database server or complex deployment setup. The project is available on GitHub – https://github.com/mypapit/policymaker PolicyMaker Dashboard PolicyMaker Wizard The main idea behind PolicyMaker …
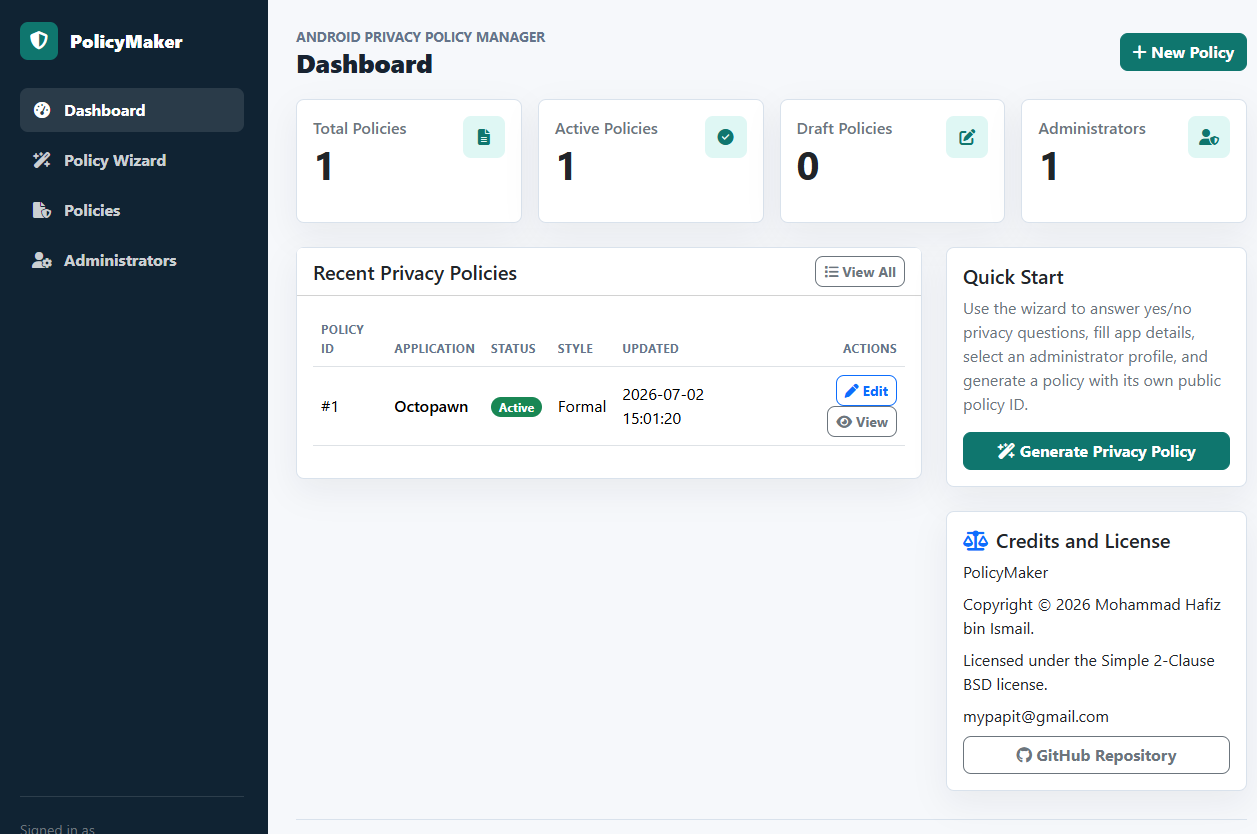
PolicyMaker is a lightweight web application for creating, managing, publishing, and displaying privacy policies for Android mobile applications. It is built using PHP and SQLite, so it does not need a heavy database server or complex deployment setup. The project is available on GitHub – https://github.com/mypapit/policymaker
PolicyMaker Dashboard
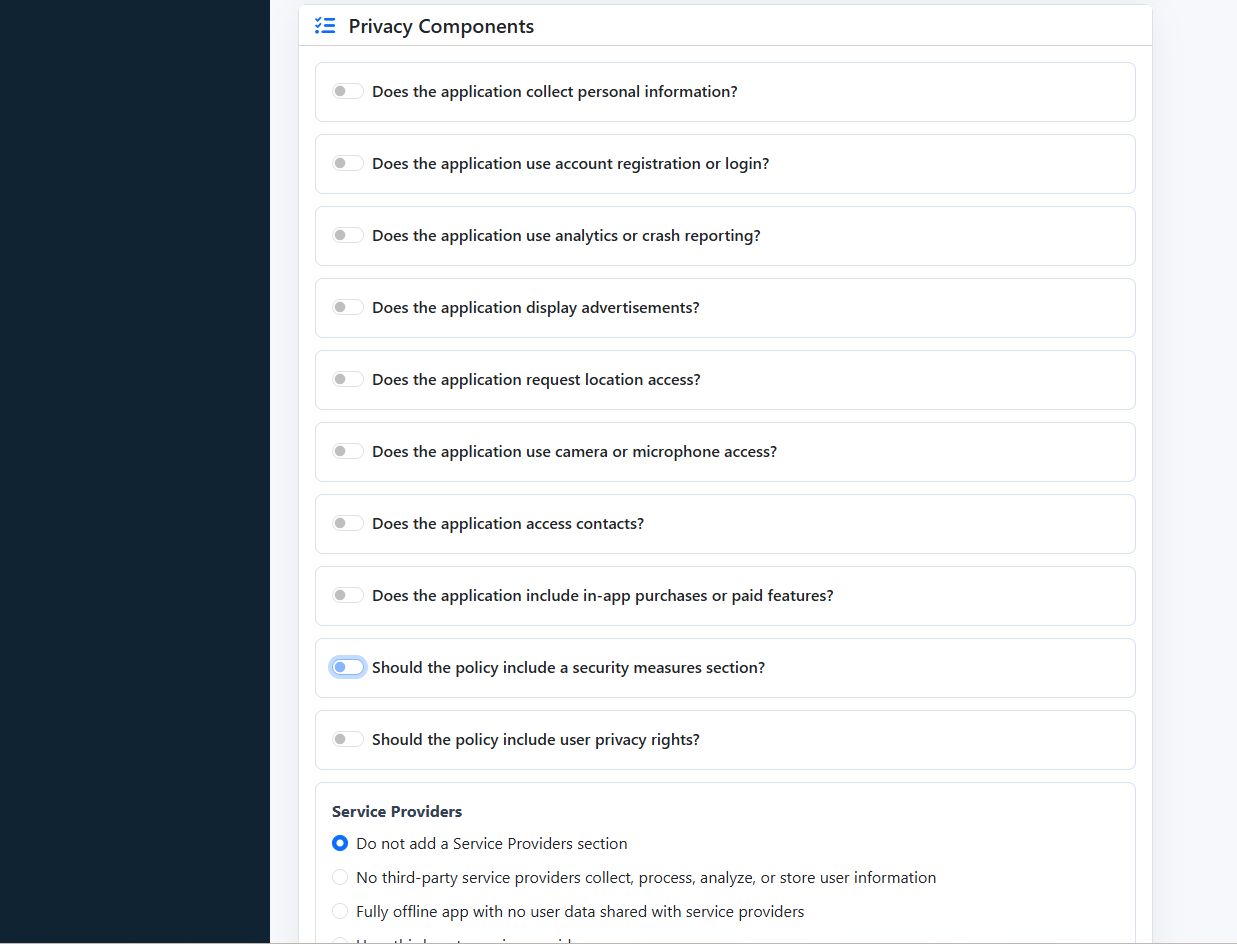
PolicyMaker Wizard
The main idea behind PolicyMaker is simple. Many Android developers need a public privacy policy page, especially when publishing applications to app stores. Instead of manually writing and formatting the same policy structure again and again, PolicyMaker provides an administrator-only wizard that helps generate structured privacy policy text from simple inputs.
The wizard supports yes/no choices, radio buttons, checkboxes, and text fields. It can collect details such as application name, package name, website, effective date, personal data collection, analytics, advertising, permissions, service providers, data retention, security, user rights, and children’s privacy.
PolicyMaker is useful for small developers, indie Android publishers, educators, and small organizations that manage several simple mobile apps. It is not meant to be a large enterprise compliance platform. Its strength is that it is small, direct, and easy to host. It only requires PHP 8.3 or newer with SQLite/PDO SQLite support. The installer creates the SQLite database and generates the first administrator password.
The public policy pages also include Schema.org JSON-LD metadata, which helps make the policy page more structured for search engines
PolicyMaker is licensed under the BSD 2-Clause license. This makes it practical for developers who want a small self-hosted privacy policy system that can be modified and deployed with minimal restriction.
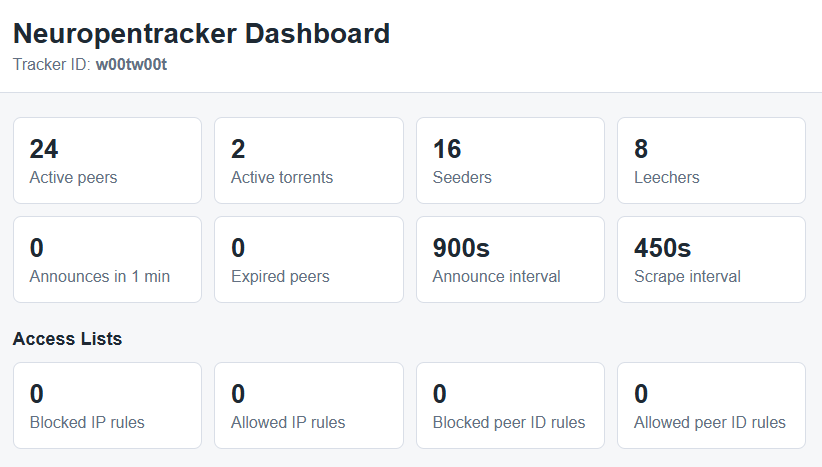
]]>0Mohammad Hafiz bin Ismail (mypapit)http://mypapit.net/<![CDATA[Neuropentracker: A Simple BitTorrent Tracker for Small Setups]]>https://blog.mypapit.net/?p=26802026-07-02T02:48:42Z2026-07-02T02:48:40ZI have published Neuropentracker, a simple BitTorrent tracker on GitHub:https://github.com/mypapit/neuropentracker Dashboard Screenshot What it is Neuropentracker is written in PHP and is designed for small setups. It is suitable for small organizations, small communities, labs, schools, or internal file-sharing environments. The main idea behind Neuropentracker is simplicity. It does not try to be a complete …
Neuropentracker is written in PHP and is designed for small setups. It is suitable for small organizations, small communities, labs, schools, or internal file-sharing environments.
The main idea behind Neuropentracker is simplicity. It does not try to be a complete torrent portal or a large public tracker. It only provides the basic tracker functions needed by BitTorrent clients, such as announce and scrape support
It is designed for small organization to reduce server load when sharing large files. Instead of every user downloading from one central server,
What it is not
It is not intended for large public torrent sites. It does not include advanced features such as user accounts, ratio tracking, moderation system, or full torrent management portal. Administrators still need to secure the server, database, and tracker configuration properly.
Parting words
Overall, Neuropentracker is a lightweight and practical BitTorrent tracker for small and controlled environments. It is best used when the requirement is simple peer tracking, not a full torrent community platform.
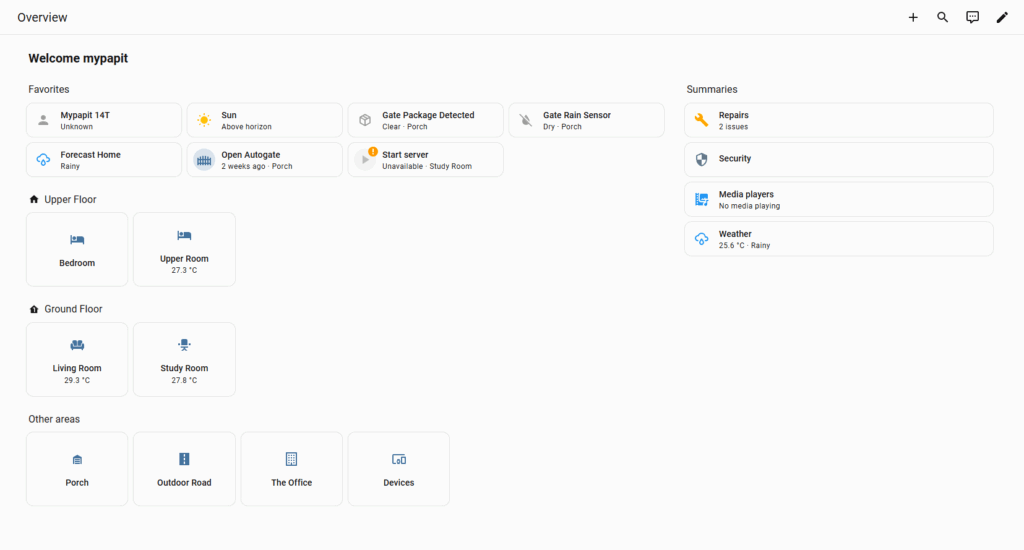
]]>0Mohammad Hafiz bin Ismail (mypapit)http://mypapit.net/<![CDATA[Setting Up Home Assistant on Ubuntu 26.04 Using Docker]]>https://blog.mypapit.net/?p=26742026-07-02T02:29:05Z2026-07-02T02:26:11ZHome Assistant is one of the most practical platforms for building a local smart home system. It can connect sensors, switches, cameras, MQTT devices, smart plugs, Zigbee devices, dashboards, and automation rules in one place. For Ubuntu 26.04, one clean way to install it is by using Home Assistant Container with Docker Compose. This keeps …
]]>Home Assistant is one of the most practical platforms for building a local smart home system. It can connect sensors, switches, cameras, MQTT devices, smart plugs, Zigbee devices, dashboards, and automation rules in one place.
For Ubuntu 26.04, one clean way to install it is by using Home Assistant Container with Docker Compose. This keeps the setup simple, portable, and easy to update. Home Assistant officially supports the container installation method, but note that this method does not include Home Assistant OS apps or Supervisor features. You manage the container yourself.
Docker’s official documentation lists Ubuntu 26.04 LTS as a supported Ubuntu release for Docker Engine, and recommends installing Docker from its official apt repository.
sudo systemctl status docker
Step 2 Create Home Assistant Folder
Create a folder to store the Home Assistant configuration:
Home Assistant recommends network_mode: host for the container setup, because many smart home integrations rely on local network discovery. The official container guide also shows the /config volume, D-Bus mapping, privileged mode, and Docker Compose structure
Start Home Assistant:
docker compose up -d
Check the logs:
docker logs -f homeassistant
Then you can try and access your Home Assistant from your browser
]]>0Mohammad Hafiz bin Ismail (mypapit)http://mypapit.net/<![CDATA[Instantly convert Text to Natural Speech with Basic TTS Web App]]>https://blog.mypapit.net/?p=26682026-06-18T17:59:43Z2026-06-18T17:59:43ZBasic TTS is a clean and easy-to-use web application that converts written text into natural-sounding speech. It is designed for users who want to test text-to-speech technology without installing complicated software or dealing with technical setup. The web app is powered by Piper TTS, a lightweight and capable text-to-speech system. With Basic TTS, users can …
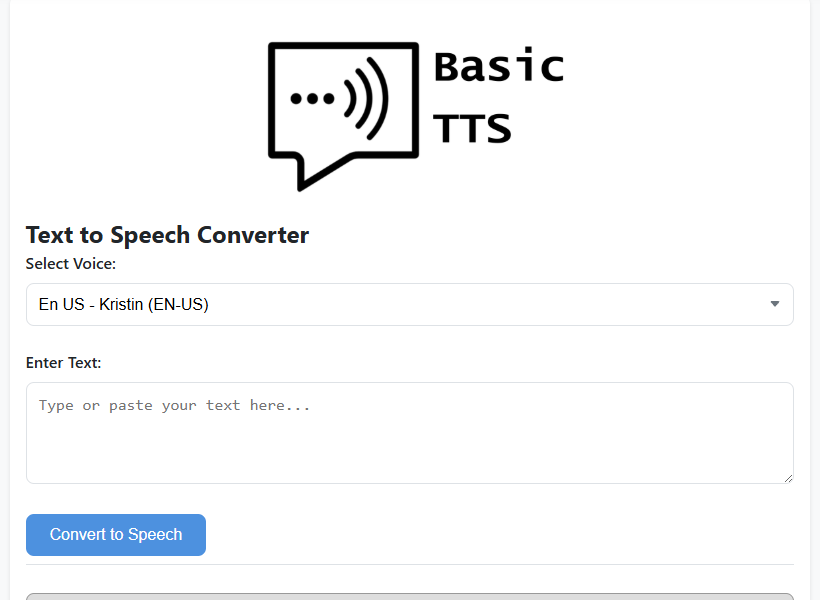
Basic TTS is a clean and easy-to-use web application that converts written text into natural-sounding speech. It is designed for users who want to test text-to-speech technology without installing complicated software or dealing with technical setup.
The web app is powered by Piper TTS, a lightweight and capable text-to-speech system. With Basic TTS, users can type their text, choose from several English voice models, and generate speech audio within seconds. Each voice has its own accent and speaking style, making it useful for testing different voice outputs.
One useful feature is its built-in audio control. After generating the speech, users can play, pause, change playback speed, or download the audio file for offline use. This makes Basic TTS suitable for simple voice experiments, accessibility testing, content creation, and quick audio generation.
]]>0Mohammad Hafiz bin Ismail (mypapit)http://mypapit.net/<![CDATA[Making Old DOS Games Sound Better in DOSBox-X with Shan SGM-Pro V5 SoundFont]]>https://blog.mypapit.net/?p=26662026-06-12T06:20:00Z2026-06-12T06:20:00ZOld DOS games are already great, but let us be honest, MIDI music can sound very rough if it is played through the default Windows MIDI synthesizer. Some games still sound okay, but many of them lose a lot of character because the instruments sound thin, cheap, or just plain boring. This is where SoundFonts …
]]>Old DOS games are already great, but let us be honest, MIDI music can sound very rough if it is played through the default Windows MIDI synthesizer. Some games still sound okay, but many of them lose a lot of character because the instruments sound thin, cheap, or just plain boring.
This is where SoundFonts come in.
A MIDI file does not actually contain recorded music like an MP3. It is more like a set of instructions. It tells the computer which notes to play, which instruments to use, how loud they are, and when they should start or stop. The final sound depends on the synthesizer and instrument bank used to play those instructions.
A SoundFont is basically an instrument bank, usually in .sf2 or .sf3 format. It gives the MIDI synthesizer better instrument samples to work with. So instead of your DOS game music sounding like basic Windows MIDI, it can sound fuller, clearer, and more dramatic.
For this setup, I used Shan SGM-Pro V40 SoundFont. It is based around the SGM-style General MIDI sound, which is popular among retro PC gaming users because it gives many DOS game soundtracks a bigger and more modern sound. More information about Shan SGM-Pro can be found at the VOGONS thread here:
DOSBox-X already supports MIDI configuration properly, and it can use FluidSynth to play MIDI through a SoundFont. This is cleaner than routing MIDI into another external program.
The basic idea is simple:
Put the SoundFont file somewhere permanent.
Tell DOSBox-X to use FluidSynth.
Point DOSBox-X to the .sf2 file.
Configure the old DOS game to use General MIDI, Roland Sound Canvas, or MPU-401, depending on what the game supports.
For my setup, I placed the SoundFont here:
/home/mypapit/midi/shan.sf2
You can use another folder if you want. Just make sure the path in the DOSBox-X config matches the actual file location.
DOSBox-X MIDI Configuration
# fluid.soundfont: Soundfont (.SF2 or .SF3) to use with Fluidsynth.
#                  One must be specified, for example GeneralUser_GS.sf2.

mpu401          = intelligent
mpubase         = 330
mididevice      = fluidsynth
midiconfig      =
samplerate      = 48000
mpuirq          = -1
mt32.romdir     =
mt32.model      = auto

fluid.driver    = pulseaudio
fluid.soundfont = "/home/mypapit/midi/shan.sf2"
fluid.reverb    = 20
fluid.chorus    = 16
Game Setup
After changing the DOSBox-X config, you still need to configure the DOS game itself.
In the game sound setup program, choose something like:
Music device: General MIDI
Port: 330
IRQ: 9 or default
Some games may show it as:
Roland MPU-401
Sound Canvas
General MIDI
For many DOS games from the 1990s, General MIDI is the correct choice. Examples include games like Doom, Duke Nukem 3D, Descent, Warcraft II, TIE Fighter, and many LucasArts titles.
Do not choose MT-32 unless the game soundtrack was actually made for MT-32. MT-32 and General MIDI are not the same thing. If you choose the wrong one, the music can sound strange, with incorrect instruments.
TIE-FIGHTER DEMO with SHAN SGM-PRO SoundFont
TIE Fighter is a good game to test this because its MIDI soundtrack benefits a lot from a stronger SoundFont. The music becomes more cinematic and less flat compared to the default Windows MIDI output.
Here is a YouTube video showing TIE Fighter using the Shan SGM-Pro SoundFont:
The difference is clear. The brass, strings, and percussion sound much heavier. It does not sound like original hardware, but that is not the goal here. The goal is to make old DOS MIDI music sound better, fuller, and more enjoyable on a modern machine.
Notes:
Keep the SoundFont file in a fixed folder. Do not put it in a temporary download folder because DOSBox-X will fail to load it if the file is moved.
Use a full path in the config file, especially on Windows.
Restart DOSBox-X after editing the config.
Make sure the game itself is configured for General MIDI or MPU-401 music output.
If there is no music, check the file path first. Most problems come from a wrong SoundFont path or a typo in the filename.
]]>0Mohammad Hafiz bin Ismail (mypapit)http://mypapit.net/<![CDATA[yt-dlp – a verstatile video downloader tool]]>https://blog.mypapit.net/?p=26582026-01-15T04:59:19Z2026-01-15T04:56:50Zyt-dlp is a command-line tool for which allows a user to download audio/video from thousands of sites. The project is a fork of youtube-dl, which is based on the now inactive youtube-dlc. yt-dlp can be installed using official releases or via package manager. Unix-like operating system To update yt-dlp in Unix-like operating system Homebrew MacOS …
]]>yt-dlp is a command-line tool for which allows a user to download audio/video from thousands of sites. The project is a fork of youtube-dl, which is based on the now inactive youtube-dlc.
yt-dlp can be installed using official releases or via package manager.
]]>0Mohammad Hafiz bin Ismail (mypapit)http://mypapit.net/<![CDATA[Semi-automatic bash script for triggering NVIDIA GPU fan in Linux]]>https://blog.mypapit.net/?p=26362025-07-26T10:06:29Z2025-07-25T03:59:17Zhttps://gist.github.com/mypapit/01770a1fa47826db1f50caf45f6a9035.js Hello everybody. I’m sharing a handy script I use to semi-automatically check my GPU temperature and turn on the fan if things get a bit too warm. I run this on my dedicated SoHo PC server, which hosts a modest LLM and a Minecraft server (yes, both at the same time). Feel free to …
]]>0Mohammad Hafiz bin Ismail (mypapit)http://mypapit.net/<![CDATA[Building Tensorflow Python Wheel for NVIDIA RTX50 series]]>https://blog.mypapit.net/?p=26262025-07-23T08:53:38Z2025-07-23T08:53:38ZIf you are adventurous, you can refer to wutzebaer/tensorflow-5090 for a guide on how to build Python Pip Wheel for RTX50 accelerated Tensorflow.
]]>Mohammad Hafiz bin Ismail (mypapit)http://mypapit.net/<![CDATA[Install Tensorflow with RTX 50 series GPU acceleration with Python wheel for Ubuntu 24.04 (and Windows WSL2)]]>https://blog.mypapit.net/?p=26102025-07-24T07:10:36Z2025-06-24T03:38:05ZIt seems that the Tensorflow acceleration is broken with the latest RTX50 series GPU, especially with the most cost effective RTX5060Ti 16GB card. This is a guide to install Tensorflow with RTX50 (Blackwell) card GPU acceleration with the python wheel. First you need to download this python wheel. It is compiled for Ubuntu 24.04 or …
Follow the instructions on the NVIDIA websites to install both cuda-12.8.1 and CUDNN 9.8.0
Install Nvidia Linux Driver (not required for WSL2)
Then you must install the latest NVIDIA Linux driver.
At the time of the writing, the latest driver is 570.169 (June 17, 2025)
The NVIDIA Linux driver is not required for Ubuntu 24.04 under WSL2. For that, you need to install Microsoft Windows NVIDIA driver available from NVIDIA App.
About the python wheel file:
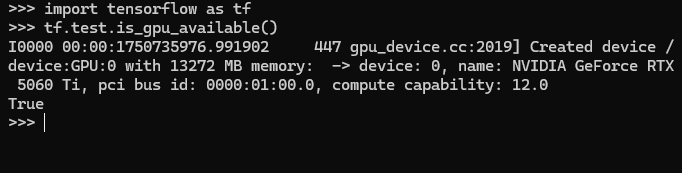
The python wheel file is compiled in Ubuntu 24.04 with llvm and CUDA Toolkit 12.8.1. It supports compute_86, compute_89 and compute_120 cuda devices, which correspond to NVIDIA GPU card with Turing, Ada and Blackwell architectures (or in layman terms: RTX 30, RTX 40 and RTX 50) series.
The python wheel file also comes with AVX, AVX2 and FMA support for both Intel and AMD cpu acceleration.
The Tensorflow version installed is the Tensorflow 2.20dev edition, nightly from :
]]>6Mohammad Hafiz bin Ismail (mypapit)http://mypapit.net/<![CDATA[How to get Tensorflow acceleration with NVIDIA RTX 50 series GPU with docker ( RTX5060Ti 16GB) for Ubuntu and Windows WSL2]]>https://blog.mypapit.net/?p=26052025-06-24T03:39:41Z2025-06-13T04:35:53ZIt seems that the Tensorflow acceleration is broken with the latest RTX50 series GPU, especially with the most cost effective RTX5060Ti 16GB card. This is a how to guide to re-enable the Tensorflow acceleration with the official Tensorflow docker image from NVIDIA Basically you need to install these four things: Docker Installing NVIDIA GPU Driver …
docker run --gpus all -it --rm nvcr.io/nvidia/tensorflow:xx.xx-tfx-py3
Replace the xx with the actualy version of the tensorflow containers, at the time of the writing it is:
docker run --gpus all -it --rm nvcr.io/nvidia/tensorflow:25.02-tf2-py3
If you want to run it inside the docker, and link your /home directory with the /workspace directory inside the docker image, you can just run :
docker run --gpus all -it --rm -v /home/username:/workspace nvcr.io/nvidia/tensorflow:25.02-tf2-py3
BONUS: How to install Spyder, Jupyterlab and additional Tensorflow/Keras libraries in NVIDIA docker image
I’ve prepared a Dockerfile to rebuild the NVIDIA Tensorflow docker container with GPU acceleration. Download the dockerfile and run “docker build” with this parameter
docker build -t my-nvidia-tf-ds .
Then you can run the container with GPU acceleration
docker run --gpus all -it --rm -v /root:/workspace my-nvidia-tf-ds
You can also expose the port and run Jupyterlab within the docker image. Just follow this step:
docker run --gpus all -p 8888:8888 -it my-nvidia-tf-ds \
jupyter lab --ip=0.0.0.0 --allow-root
Additionally, you can run Spyder in the docker image by forwarding xhost :
xhost +local:docker

docker run -it --gpus all -e DISPLAY=$DISPLAY -v /tmp/.X11-unix:/tmp/.X11-unix \
-v /root:/workspace my-nvidia-tf-ds

spyder
Hopefully this would help you run GPU accelerated Tensorflow with RTX50 series GPU card.
This also works under Microsoft Windows 11 / WSL2 environment too!
If you want to install Tensorflow with RTX 50 series support directly inside your Ubuntu environment, then refer to this post:
]]>Mohammad Hafiz bin Ismail (mypapit)http://mypapit.net/<![CDATA[How to install cockpit dashboard on older Raspberry Pi 3, running Bookworm]]>https://blog.mypapit.net/?p=25952025-03-29T15:47:56Z2025-03-29T15:40:21ZCockpit dashboard is a convenient dashboard for home user or enthusiasts for monitoring several SOHO servers. It supports multiple Linux based operating system, however there are some caveats in installing in Raspberry Pi 3 as it runs on older Bookworm based operating system. first your need to add bookworm-backports. Then you need to configure the …
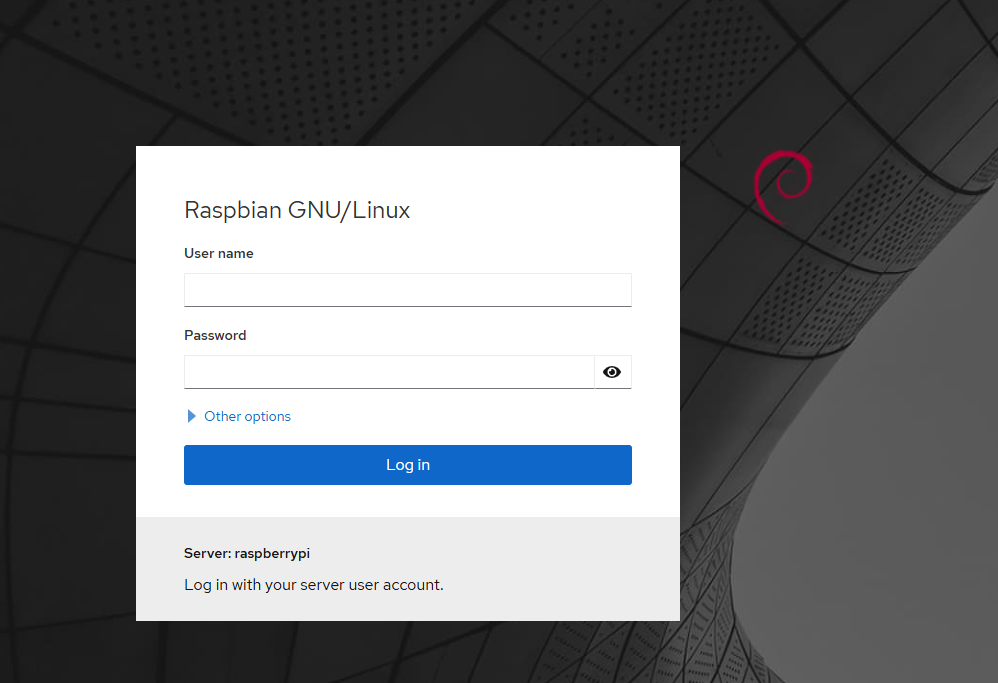
]]>Cockpit dashboard is a convenient dashboard for home user or enthusiasts for monitoring several SOHO servers. It supports multiple Linux based operating system, however there are some caveats in installing in Raspberry Pi 3 as it runs on older Bookworm based operating system.
first your need to add bookworm-backports.
echo "deb http://deb.debian.org/debian ${VERSION_CODENAME}-backports main" | sudo tee /etc/apt/sources.list.d/backports.list
]]>Mohammad Hafiz bin Ismail (mypapit)http://mypapit.net/<![CDATA[Command line to test disk speed in Linux]]>https://blog.mypapit.net/?p=25932025-03-25T05:33:44Z2025-03-25T05:33:44ZYou can use this code to test out the disk speed of your Linux system credit: https://github.com/ethereum/go-ethereum/issues/26174
]]>Mohammad Hafiz bin Ismail (mypapit)http://mypapit.net/<![CDATA[OVHCloud VPS Hosting : USD0.97/mo for 20GB SSD and 2GB RAM]]>https://blog.mypapit.net/?p=25882024-03-06T05:05:20Z2024-03-06T05:05:19ZGrab this opportunity. OVHCloud is offering VPS Hosting for USD 0.97/mo for this VPS spec: 20GB SSD Storage2GB RAM1vCore100Mbps unmetered This VPS / KVM option is available in several datacenters : Get the OVHcloud USD 0.97/mo offer here before it expired!
]]>Mohammad Hafiz bin Ismail (mypapit)http://mypapit.net/<![CDATA[nmap scanning for ip camera in the network]]>https://blog.mypapit.net/?p=25842024-02-12T05:02:47Z2024-02-12T04:58:08ZHere’s an nmap snippet for scanning for hidden cctv / ip camera in the network Or you can write as : Make sure you have permission to scan on the network!
]]>2Mohammad Hafiz bin Ismail (mypapit)http://mypapit.net/<![CDATA[Getting Rid of /.well-known/traffic-advice 404 errors in nginx web server]]>https://blog.mypapit.net/?p=25752024-02-09T23:51:45Z2024-02-09T23:43:16ZIt seems Google have implemented private prefetch proxy in Chrome for Android. The upside of this private prefetch proxy is improved browsing experience for mobile users by reducing waiting time for web pages to load. The downside is, as web server administrators – you might find a lot of 404 status in your web logs. …
]]>It seems Google have implemented private prefetch proxy in Chrome for Android.
The upside of this private prefetch proxy is improved browsing experience for mobile users by reducing waiting time for web pages to load.
The downside is, as web server administrators – you might find a lot of 404 status in your web logs.
To solve this, you could either :
Write directive to ignore 404 logs for “traffic-advice”
Create “/.well-known/traffic-advice file for each domain and set the file to be served with “application/trafficadvice+json” MIME type [source]
Solution
Luckily, TechTitBits have come up with a convenient solution which only involves adding a few lines in configuration files to enable Chrome for Android prefetched proxy in nginx.
]]>Mohammad Hafiz bin Ismail (mypapit)http://mypapit.net/<![CDATA[Bash code for analyzing web server traffic to determine which ip accessed the web server the most]]>https://blog.mypapit.net/?p=25682024-02-09T23:53:02Z2024-02-07T02:23:48ZThis handy script is useful for webserver traffic analysis task. It can be use to detect abusive IP address or spambots which accesses the webserver. ystem administrators can utilize the generated list of IP addresses to enhance webserver security by blocking those IPs deemed potentially harmful or suspicious.
This handy script is useful for webserver traffic analysis task. It can be use to detect abusive IP address or spambots which accesses the webserver.
ystem administrators can utilize the generated list of IP addresses to enhance webserver security by blocking those IPs deemed potentially harmful or suspicious.