<?xml version="1.0" encoding="UTF-8" standalone="no"?><feed xmlns="http://www.w3.org/2005/Atom" xmlns:opensearch="http://a9.com/-/spec/opensearch/1.1/" xmlns:s="http://jadedpixel.com/-/spec/shopify" xml:lang="en"><subtitle>The Official Studio Neat Blog: Musings from Tom and Dan.</subtitle>
  <id>https://www.studioneat.com/blogs/main.atom</id>
  <link href="https://www.studioneat.com/blogs/main" rel="alternate" type="text/html"/>
  <link href="https://www.studioneat.com/blogs/main.atom" rel="self" type="application/atom+xml"/>
  <title>Studio Neat Blog</title>
  <updated>2024-10-30T21:04:46-05:00</updated>
  <author>
    <name>Studio Neat</name>
  </author>
  <entry>
    <id>https://www.studioneat.com/blogs/main/the-mark-two-refill-guide</id>
    <published>2024-10-30T21:04:46-05:00</published>
    <updated>2024-10-30T21:04:46-05:00</updated>
    <link href="https://www.studioneat.com/blogs/main/the-mark-two-refill-guide" rel="alternate" type="text/html"/>
    <title>The Mark Two Refill Guide</title>
    <author>
      <name>Dan Provost</name>
    </author>
    <content type="html">
      <![CDATA[<p><a href="https://www.studioneat.com/products/marktwo">Mark Two</a>, our super durable, super compact pocket pen, ships with a mini version of the Schmidt 8126 rollerball refill. This is a fantastic refill, but if it's not your cup of tea, we've got you covered. We now make a <a href="https://www.studioneat.com/products/adapter-d1">simple adaptor</a> that allows you to use any D1 style refill with Mark Two. Read below to see all our recommendations for D1 refills. Or just watch the video:</p>
<p data-mce-fragment="1"><iframe width="100%" height="428" src="https://www.youtube.com/embed/ddaj4jiuYxM?si=0ZMIVmYc_qNFZpfw" title="YouTube video player" frameborder="0" allow="accelerometer; autoplay; clipboard-write; encrypted-media; gyroscope; picture-in-picture; web-share" referrerpolicy="strict-origin-when-cross-origin" allowfullscreen=""></iframe></p>
<p data-mce-fragment="1">Refills for Mark Two come in three categories: <strong>rollerball</strong>, <strong>gel</strong>, and <strong>ballpoint</strong>. All three types are essentially the same mechanism: a ball in the tip that is coated in ink and rolled along the page. The difference between the three is how the ink is formulated. </p>
<p><strong>Rollerball</strong> refills use a liquid ink that is a dye dissolved in water, similar to fountain pen inks. As such, the ink flows freely and requires very little pressure. But the paper choice is more critical because lower quality papers will exhibit feathering or bleed through.</p>
<p><strong>Gel</strong> refills use an ink that consists of a pigment suspended in a water-based gel. They are known for a lubricated, smooth writing experience, but can sometimes skip more than rollerball or ballpoint, and the drying time is longer than ballpoints.</p>
<p><strong>Ballpoint</strong> refills use an oil based ink, a mixture of dyes, alcohols and fatty acids. The ink is thick, so it works well on lower quality papers, but it requires the most pressure of the three to write. The lines are generally not as dark as rollerball or gel, but they are quick drying and waterproof.</p>
<p data-mce-fragment="1"><span class="Apple-converted-space"><span>The vast majority of D1 refills fall into the last category, ballpoint. Below are some refills that we have personally used and liked. All have been tested and confirmed to be compatible with Mark Two, with our D1 Adaptor.</span></span></p>
<p data-mce-fragment="1"><span class="Apple-converted-space"><span>One thing to keep in mind with D1 refills is, inherent in their small size, they hold quite a bit less ink than a normal refill. So expect to use them up faster than a traditional refill.</span></span></p>
<hr style="background-color: #adadad; border-width: 0; height: 1px;">
<p><strong>Schmidt 8126 Mini</strong> (<a href="https://www.studioneat.com/products/refill">Studio Neat</a>)<br>This is the refill that is included with Mark Two. Lays down a smooth, dark line. As far as we know, this is the only rollerball refill that will fit in Mark Two.</p>
<div style="text-align: start;"><img style="float: none;" alt="" src="https://cdn.shopify.com/s/files/1/0057/8492/files/DSC02508.jpg?v=1730299257"></div>
<p><strong>Zebra JSB Gel</strong> (<a href="https://www.jetpens.com/Zebra-JSB-Gel-Pen-Refills/ct/788?_gl=1*cnptj6*_up*MQ..&amp;gclid=Cj0KCQjwj4K5BhDYARIsAD1Ly2pULZXDEZGGM96tbSf_NohvLxeF4SSHogANA5SFQzB-NBaP0z5mVpEaAtAIEALw_wcB&amp;gbraid=0AAAAAD-ty4T3Rne4KvHFWlWTimYTscoOC">Jet Pens</a> | <a href="https://www.amazon.com/exec/obidos/ASIN/B01EA93WDI/ref=nosim&amp;tag=studioneatcom-20">Amazon</a>)<br>There are very few gel refills in the D1 size, so if that is your preference, this is a good one to get. Available in two sizes (0.4 and 0.5 mm) and five colors options.</p>
<div style="text-align: start;"><img style="float: none;" alt="" src="https://cdn.shopify.com/s/files/1/0057/8492/files/DSC02509_f461e940-5f74-4a3f-a4c8-eab18a6597c3.jpg?v=1730299584"></div>
<p><strong>Uni Jetstream SXR-200</strong> (<a href="https://www.jetpens.com/Uni-SXR-200-Jetstream-Ballpoint-Multi-Pen-Refills/ct/4427?_gl=1*1j4bvep*_up*MQ..&amp;gclid=Cj0KCQjwj4K5BhDYARIsAD1Ly2pULZXDEZGGM96tbSf_NohvLxeF4SSHogANA5SFQzB-NBaP0z5mVpEaAtAIEALw_wcB&amp;gbraid=0AAAAAD-ty4T3Rne4KvHFWlWTimYTscoOC">Jet Pens</a> | <a href="https://www.amazon.com/exec/obidos/ASIN/B01I7SKOP2/ref=nosim&amp;tag=studioneatcom-20">Amazon</a>)<br>A ubiquitous and popular D1 refill choice. Available in 0.5 and 0.7 mm. I found the smaller one a bit scratchy, but the 0.7 is nice.</p>
<div style="text-align: start;"><img style="float: none;" alt="" src="https://cdn.shopify.com/s/files/1/0057/8492/files/DSC02510.jpg?v=1730299610"></div>
<p><strong>Zebra 4C</strong> (<a href="https://www.jetpens.com/Zebra-4C-0.4-Ballpoint-Pen-Refill-D1-0.4-mm-Black/pd/3135?_gl=1*1j4bvep*_up*MQ..&amp;gclid=Cj0KCQjwj4K5BhDYARIsAD1Ly2pULZXDEZGGM96tbSf_NohvLxeF4SSHogANA5SFQzB-NBaP0z5mVpEaAtAIEALw_wcB&amp;gbraid=0AAAAAD-ty4T3Rne4KvHFWlWTimYTscoOC">Jet Pens</a> | <a href="https://www.amazon.com/exec/obidos/ASIN/B003VVWBD4/ref=nosim&amp;tag=studioneatcom-20">Amazon</a>)<br>Available in 0.4, 0.5, and 0.7 mm widths, making it the option with the finest tip. Again though, the smaller sizes are a bit rough on the page.</p>
<div style="text-align: start;"><img style="float: none;" alt="" src="https://cdn.shopify.com/s/files/1/0057/8492/files/DSC02511.jpg?v=1730299637"></div>
<p><strong>Pilot BRFS</strong> (<a href="https://www.jetpens.com/Pilot-BRFS-10-Ballpoint-Pen-Refills/ct/3813?_gl=1*1j4bvep*_up*MQ..&amp;gclid=Cj0KCQjwj4K5BhDYARIsAD1Ly2pULZXDEZGGM96tbSf_NohvLxeF4SSHogANA5SFQzB-NBaP0z5mVpEaAtAIEALw_wcB&amp;gbraid=0AAAAAD-ty4T3Rne4KvHFWlWTimYTscoOC">Jet Pens</a> | <a href="https://www.amazon.com/exec/obidos/ASIN/B01ARJUWNI/ref=nosim&amp;tag=studioneatcom-20">Amazon</a>)<br>A really solid ballpoint option, smooth and vibrant. Available in 4 colors.</p>
<div style="text-align: start;"><img style="float: none;" alt="" src="https://cdn.shopify.com/s/files/1/0057/8492/files/DSC02512.jpg?v=1730299668"></div>
<p><strong>Monteverde Soft Roll</strong> (<a href="https://www.jetpens.com/Monteverde-Soft-Roll-Ballpoint-Pen-Refills/ct/1519?_gl=1*bhoqgv*_up*MQ..&amp;gclid=Cj0KCQjwj4K5BhDYARIsAD1Ly2pULZXDEZGGM96tbSf_NohvLxeF4SSHogANA5SFQzB-NBaP0z5mVpEaAtAIEALw_wcB&amp;gbraid=0AAAAAD-ty4T3Rne4KvHFWlWTimYTscoOC">Jet Pens</a> | <a href="https://www.amazon.com/exec/obidos/ASIN/B08GP2XT7D/ref=nosim&amp;tag=studioneatcom-20?th=1">Amazon</a>)<br>Another really nice ballpoint, but best of all, it comes in 10 different color options.</p>
<div style="text-align: start;"><img style="float: none;" alt="" src="https://cdn.shopify.com/s/files/1/0057/8492/files/DSC02513.jpg?v=1730299691"></div>
<p><strong>Fisher SU4F Universal</strong> (<a href="https://www.spacepen.com/refills/u4f-black-ink-fine-point-pressurized-universal-cartridge">Fisher</a> | <a href="https://www.amazon.com/exec/obidos/ASIN/B007NLP26Q/ref=nosim&amp;tag=studioneatcom-20?th=1">Amazon</a>)<br>The classic pressurized space pen refill. This refill is sold in a longer form to fit various other pens, but you simply snap off the extra segments to get it down to a D1 size.</p>
<div style="text-align: start;"><img style="float: none;" alt="" src="https://cdn.shopify.com/s/files/1/0057/8492/files/DSC02514.jpg?v=1730299712"></div>
<p><strong>Kaweco D1</strong> (<a href="https://www.jetpens.com/Kaweco-Soul-D1-Ballpoint-Pen-Refill-1.2-mm-Black-Pack-of-5/pd/13980?_gl=1*1ti0j5u*_up*MQ..&amp;gclid=Cj0KCQjwj4K5BhDYARIsAD1Ly2pULZXDEZGGM96tbSf_NohvLxeF4SSHogANA5SFQzB-NBaP0z5mVpEaAtAIEALw_wcB&amp;gbraid=0AAAAAD-ty4T3Rne4KvHFWlWTimYTscoOC">Jet Pens</a> | <a href="https://www.amazon.com/exec/obidos/ASIN/B00DW749IC/ref=nosim&amp;tag=studioneatcom-20">Amazon</a>)<br>A reliable ballpoint option from a reputable brand.</p>
<div style="text-align: start;"><img style="float: none;" alt="" src="https://cdn.shopify.com/s/files/1/0057/8492/files/DSC02516.jpg?v=1730299732"></div>
<p><strong>Schmidt 635 Mini</strong> (<a href="https://www.amazon.com/exec/obidos/ASIN/B0102RFPG4/ref=nosim&amp;tag=studioneatcom-20?th=1">Amazon</a>)<br>Lays down a smooth, dark line, comparable to the Pilot and Monteverde.</p>
<div style="text-align: start;"><img style="float: none;" alt="" src="https://cdn.shopify.com/s/files/1/0057/8492/files/DSC02517.jpg?v=1730299764"></div>
<p><strong>OHTO R-4C7NP</strong> (<a href="https://www.jetpens.com/OHTO-R-4C7NP-Needle-Point-Ballpoint-Pen-Refill-D1-0.7-mm-Black/pd/2715?_gl=1*1smaszj*_up*MQ..&amp;gclid=Cj0KCQjwj4K5BhDYARIsAD1Ly2pULZXDEZGGM96tbSf_NohvLxeF4SSHogANA5SFQzB-NBaP0z5mVpEaAtAIEALw_wcB&amp;gbraid=0AAAAAD-ty4T3Rne4KvHFWlWTimYTscoOC">Jet Pens</a> | <a href="https://www.amazon.com/exec/obidos/ASIN/B01MRI1D22/ref=nosim&amp;tag=studioneatcom-20">Amazon</a>)<br>One of the few needlepoint D1 options, which gives the pen a cool look, almost like a mechanical pencil. Available in 0.5 and 0.7 sizes.</p>
<div style="text-align: start;"><img style="float: none;" alt="" src="https://cdn.shopify.com/s/files/1/0057/8492/files/DSC02518.jpg?v=1730299789"></div>
<p>Here are all the lines side by side, for comparison:</p>
<div style="text-align: start;"><img style="float: none;" alt="" src="https://cdn.shopify.com/s/files/1/0057/8492/files/DSC02519.jpg?v=1730299829"></div>
<hr style="background-color: #adadad; border-width: 0; height: 1px;">
<p><span data-mce-fragment="1">We hope this guide is a useful primer for the world of D1 ink refills for Mark Two. As always, </span><a href="mailto:hello@studioneat.com" data-mce-fragment="1" data-mce-href="mailto:hello@studioneat.com">email us</a><span data-mce-fragment="1"> with any questions!</span></p>]]>
    </content>
  </entry>
  <entry>
    <id>https://www.studioneat.com/blogs/main/mark-one-refill-guide</id>
    <published>2024-05-14T09:42:59-05:00</published>
    <updated>2024-10-30T13:00:36-05:00</updated>
    <link href="https://www.studioneat.com/blogs/main/mark-one-refill-guide" rel="alternate" type="text/html"/>
    <title>The Mark One Refill Guide</title>
    <author>
      <name>Dan Provost</name>
    </author>
    <content type="html">
      <![CDATA[<p data-mce-fragment="1"><a href="https://www.studioneat.com/products/markone">Mark One</a>, our best-selling retractable pen with a satisfying-as-heck click mechanism, ships with a branded version of the Schmidt P8126 rollerball ink refill. This refill is beloved by many, including us, which is why it is the default refill in Mark One. However, if this specific refill does not suit your preferences, you are in luck, as there are <i data-mce-fragment="1">tons</i> of compatible refills. <span data-mce-fragment="1">Below, you will find information about compatible refills for Mark One, and some of our top recommendations. Or, just watch the video:</span></p>
<p data-mce-fragment="1"><iframe width="100%" height="428" src="https://www.youtube.com/embed/pfFyWoOLCuA?si=WetR-CByR0JLHsIT" title="YouTube video player" frameborder="0" allow="accelerometer; autoplay; clipboard-write; encrypted-media; gyroscope; picture-in-picture; web-share" referrerpolicy="strict-origin-when-cross-origin" allowfullscreen=""></iframe></p>
<p data-mce-fragment="1">The world of pen refills can be a little confusing, especially to a newcomer, so we wanted to create this guide to give an overview of some of the ink refill options for Mark One. Refills for Mark One come in three categories: <strong>rollerball</strong>, <strong>gel</strong>, and <strong>ballpoint</strong>. All three types are essentially the same mechanism: a ball in the tip that is coated in ink and rolled along the page. The difference between the three is how the ink is formulated. </p>
<p><strong>Rollerball</strong> refills use a liquid ink that is a dye dissolved in water, similar to fountain pen inks. As such, the ink flows freely and requires very little pressure. But the paper choice is more critical because lower quality papers will exhibit feathering or bleed through.</p>
<p><strong>Gel</strong> refills use an ink that consists of a pigment suspended in a water-based gel. They are known for a lubricated, smooth writing experience, but can sometimes skip more than rollerball or ballpoint, and the drying time is longer than ballpoints.<span class="Apple-converted-space"> </span></p>
<p><strong>Ballpoint</strong> refills use an oil based ink, a mixture of dyes, alcohols and fatty acids. The ink is thick, so it works well on lower quality papers, but it requires the most pressure of the three to write. The lines are generally not as dark as rollerball or gel, but they are quick drying and waterproof.<span class="Apple-converted-space"> </span></p>
<p data-mce-fragment="1"><span class="Apple-converted-space"><span>Below are some refills from each category that we have personally used and liked. All have been tested and confirmed to be compatible with Mark One.</span></span></p>
<hr style="background-color: #adadad; border-width: 0; height: 1px;">
<h1 data-mce-fragment="1">Rollerball Refills</h1>
<p>Rollerball refills are most akin to a fountain pen: smooth, liquid ink that hardly takes any pressure to apply to the page. Our refills are made by Schmidt, a German company that has been making writing instruments for over 85 years. Their P8126 refill is what we include in the Mark One, but they make this refill in 4 different line widths: P8125 (0.5 mm), P8126 (0.6 mm), P8127 (0.7 mm) and P8120 (1.0 mm). Even though the thinnest tip, P8125, is listed in their product catalog, I have yet to see it for sale anywhere. It might be something that needs to be special ordered in large quantities. But the other three options are readily available:</p>
<p><strong>Schmidt P8126</strong> (<a href="https://www.studioneat.com/products/refill">Studio Neat</a> | <a href="https://www.jetpens.com/Schmidt-P8126-Capless-System-Rollerball-Pen-Refill-Fine-Point-Black/pd/10942">Jet Pens</a>)<br>The refill that comes with the Mark One. We sell a branded version in blue and black ink, and Jet Pens has green and red as well.</p>
<p><strong>Schmidt P8127</strong> (<a href="https://www.amazon.com/exec/obidos/ASIN/B00M2KPQH8/ref=nosim&amp;tag=studioneatcom-20">Amazon</a>)<br>A slighter thicker line, but otherwise the same. Offered in black, blue, red, and green.</p>
<p><strong>Schmidt P8120</strong> (<a href="https://www.amazon.com/exec/obidos/ASIN/B0102RELCS/ref=nosim&amp;tag=studioneatcom-20">Amazon</a>)<br>A super thick line. Blue and black ink options available.</p>
<div style="text-align: left;"><img src="https://cdn.shopify.com/s/files/1/0057/8492/files/MK1_RefillGuide_01_SchmidtRollerballs.jpg?v=1713293096" alt="" style="float: none;"></div>
<div style="text-align: left;"></div>
<hr style="background-color: #adadad; border-width: 0; height: 1px;">
<h1>Gel Refills</h1>
<p>Gel refills are a great option if you are looking for a smooth writing experience, where the pen feels like it’s gliding over the paper. Gel pens are notorious for sometimes skipping during writing, but the refills below are tested and work well, and are well regarded by pen nerds.<span class="Apple-converted-space"> </span></p>
<p><strong>Meister by Point</strong> (<a href="https://www.jetpens.com/Meister-by-Point-Gel-Pen-Refill-0.5-mm-Black/pd/33671">Jet Pens</a>)<br>A very nice gel refill, with a needlepoint tip. A smooth, consistent line.</p>
<div style="text-align: left;"><img src="https://cdn.shopify.com/s/files/1/0057/8492/files/MK1_RefillGuide_08_Meister.jpg?v=1713303905" alt="" style="float: none;"></div>
<p><strong>OHTO PG-M05NO Ceramic</strong> (<a href="https://www.jetpens.com/OHTO-PG-M05NP-Ceramic-Gel-Pen-Refill-0.5-mm-Black-Ink/pd/40661">Jet Pens</a> | <a href="https://www.amazon.com/exec/obidos/ASIN/B0CNJQ1JTL/ref=nosim&amp;tag=studioneatcom-20">Amazon</a>)<br>Another solid needlepoint gel refill, though quite expensive. Good line consistency.</p>
<div style="text-align: left;"><img src="https://cdn.shopify.com/s/files/1/0057/8492/files/MK1_RefillGuide_09_OHTOPG-M05NP.jpg?v=1713370294" alt="" style="float: none;"></div>
<p><strong>OHTO PG-105NP Flash Dry</strong> (<a href="https://www.jetpens.com/OHTO-Flash-Dry-Gel-Pen-Refill-Black/pd/22302#index=1">Jet Pens</a> | <a href="https://www.amazon.com/exec/obidos/ASIN/B07DL7P6T5/ref=nosim&amp;tag=studioneatcom-20?th=1">Amazon</a>)<br>A cheaper version of the refill above. Not quite as reliable as the ceramic version, especially on the first stoke.</p>
<div style="text-align: left;"><img src="https://cdn.shopify.com/s/files/1/0057/8492/files/MK1_RefillGuide_10_OHTOPG-105NP.jpg?v=1713379443" alt="" style="float: none;"></div>
<p><strong>Monteverde P41</strong> (<a href="https://www.amazon.com/exec/obidos/ASIN/B095L295T6/ref=nosim&amp;tag=studioneatcom-20">Amazon</a>)<br>Another popular needlepoint gel option. Available in black and blue.</p>
<div style="text-align: left;"><img src="https://cdn.shopify.com/s/files/1/0057/8492/files/MK1_RefillGuide_12_MonteverdeP41.jpg?v=1713397450" alt="" style="float: none;"></div>
<p><strong>Kaco G2</strong> (<a href="https://www.amazon.com/exec/obidos/ASIN/B07JNNVQGJ/ref=nosim&amp;tag=studioneatcom-20">Amazon</a>)<br>Another solid gel option, especially if you went a regular conical tip instead of a needlepoint. In black and blue.</p>
<div style="text-align: left;"><img src="https://cdn.shopify.com/s/files/1/0057/8492/files/MK1_RefillGuide_13_KacoG2.jpg?v=1713398096" alt="" style="float: none;"></div>
<p><strong>Kaweco Sport Gel Roller</strong> (<a href="https://www.jetpens.com/Kaweco-Sport-Gel-Roller-Pen-Refill-0.7-mm-Black/pd/8300">Amazon</a>)<br>The thickest gel refill tested, by far. If that’s what you’re after, this one is for you.</p>
<div style="text-align: left;"><img src="https://cdn.shopify.com/s/files/1/0057/8492/files/MK1_RefillGuide_14_KaweoSportGel.jpg?v=1713398365" alt="" style="float: none;"></div>
<hr style="background-color: #adadad; border-width: 0; height: 1px;">
<h1>Ballpoint Refills</h1>
<p>Ballpoint refills trade writing pleasure for robustness. They require the most pressure to get a consistent line, but they work well on any paper you throw at them, and dry quickly.</p>
<p><strong>Schmidt easyFLOW 9000</strong> (<a href="https://www.jetpens.com/Schmidt-EasyFlow-9000-Hybrid-Ballpoint-Pen-Refill-Medium-Point-Black/pd/20716">Jet Pens</a> | <a href="https://www.amazon.com/exec/obidos/ASIN/B00M0VVFMO/ref=nosim&amp;tag=studioneatcom-20">Amazon</a>)<b><br></b>Schmidt claims this is like a hybrid between a ballpoint and a rollerball. It would be a good option if the P8126 is a little too smooth for you and you’d prefer slightly more resistance. Available in Fine (F) and Medium (M).</p>
<div style="text-align: start;"><img src="https://cdn.shopify.com/s/files/1/0057/8492/files/MK1_RefillGuide_02_SchmidtEasyFlow9000.jpg?v=1713300983" alt="" style="float: none;"></div>
<div style="text-align: start;"></div>
<div style="text-align: start;" data-mce-style="text-align: start;">
<p><strong>Unibene Ballpoint</strong> (<a href="https://www.amazon.com/exec/obidos/ASIN/B07Q2Q2R5Q/ref=nosim&amp;tag=studioneatcom-20?th=1" data-mce-href="https://www.amazon.com/exec/obidos/ASIN/B07Q2Q2R5Q/ref=nosim&amp;tag=studioneatcom-20?th=1">Amazon</a>)<b><br></b>A solid ballpoint option, and my wife’s preferred refill in the Mark One. Quite cheap, less than $1 per refill, and comes in black and blue.</p>
<p><img style="float: none;" src="https://cdn.shopify.com/s/files/1/0057/8492/files/MK1_RefillGuide_03_UnibeneBallpoint.jpg?v=1713302882" data-mce-style="float: none;" data-mce-src="https://cdn.shopify.com/s/files/1/0057/8492/files/MK1_RefillGuide_03_UnibeneBallpoint.jpg?v=1713302882"></p>
<p><strong>Uni Jetstream SXR-600</strong> (<a href="https://www.jetpens.com/Uni-SXR-600-Jetstream-Ballpoint-Pen-Refill-0.38-mm-Black/pd/29527">Jet Pens</a> | <a href="https://www.amazon.com/exec/obidos/ASIN/B07L8K32HG/ref=nosim&amp;tag=studioneatcom-20?th=1">Amazon</a>)<br>A very popular ballpoint refill option. This is the pick if you prefer a <em>very</em> thin line. Comes in 0.38 mm, 0.5 mm, and 0.7 mm.</p>
<div><img alt="" src="https://cdn.shopify.com/s/files/1/0057/8492/files/MK1_RefillGuide_11_UniJetstream.jpg?v=1713379793"></div>
</div>
<div style="text-align: start;" data-mce-style="text-align: start;">
<strong>Fisher Pressurized Ballpoint</strong> (<a href="https://www.spacepen.com/refills">Fisher</a> | <a href="https://www.jetpens.com/Fisher-Space-Pen-PR-Series-Pressurized-Ballpoint-Pen-Refill-Fine-Point-Black/pd/7914">Jet Pens</a>)<br>
<p data-mce-fragment="1">The classic space pen refill. Available in fine, medium, and bold points, and tons of colors. Make sure you use the included adaptor, which turns it into a Parker compatible refill.</p>
<p data-mce-fragment="1"><img style="float: none;" src="https://cdn.shopify.com/s/files/1/0057/8492/files/MK1_RefillGuide_04_Fisher.jpg?v=1713398865"></p>
<strong>Schmidt P900</strong> (<a href="https://www.jetpens.com/Schmidt-Standard-P900-Ballpoint-Pen-Refill-Fine-Point-Black/pd/20724">Jet Pens</a> | <a href="https://www.amazon.com/exec/obidos/ASIN/B00M2KSWVU/ref=nosim&amp;tag=studioneatcom-20">Amazon</a>)<br>Another solid option from Schmidt. Available in 3 tip widths (Fine, Medium, and Bold) and tons of colors.</div>
<div style="text-align: start;" data-mce-style="text-align: start;"><img style="float: none;" src="https://cdn.shopify.com/s/files/1/0057/8492/files/MK1_RefillGuide_05_SchmidtP900F.jpg?v=1713399091"></div>
<div style="text-align: start;" data-mce-style="text-align: start;">Here are all the inks compared side by side, grouped by rollerball, gel, and ballpoint: </div>
<div style="text-align: start;" data-mce-style="text-align: start;"><img style="float: none;" src="https://cdn.shopify.com/s/files/1/0057/8492/files/MK1_RefillGuide_InkComparison_sm.jpg?v=1713403561"></div>
<div style="text-align: start;" data-mce-style="text-align: start;">
<hr style="background-color: #adadad; border-width: 0; height: 1px;">
<h1>A Note About “Parker Style” Refills</h1>
<p>“Parker Style” refills are sometimes referred to as G2 refills, which is confusing because they are not compatible with Pilot G2 pens. However, Parker Style refills are easy to spot because they have this toothy looking plastic part at the end of the refill:</p>
<div><img alt="" src="https://cdn.shopify.com/s/files/1/0057/8492/files/MK1_RefillGuide_20_ParkerEndDetail.jpg?v=1713302132" data-mce-src="https://cdn.shopify.com/s/files/1/0057/8492/files/MK1_RefillGuide_20_ParkerEndDetail.jpg?v=1713302132"></div>
<p>In Parker pens, this plastic bit actually engages with the teeth of the mechanism, but in Mark One that bit is not needed for our custom mechanism, so it is simply ignored.</p>
<p>You can put a Parker Style refill straight into a Mark One, and it will fit and work perfectly fine. However, we recommend one minor modification. Parker refills are actually every-so-slightly longer than a Schmidt refill, due to the little nub that protrudes out of the back end. When engaged, the tip of the refill sticks out of the Mark One slightly more than ideal. The fix, however, is easy: simplify slice off that little nub. Any blade will do the trick.</p>
<div><img alt="" src="https://cdn.shopify.com/s/files/1/0057/8492/files/MK1_RefillGuide_18_SlicingNub.jpg?v=1713302157" data-mce-src="https://cdn.shopify.com/s/files/1/0057/8492/files/MK1_RefillGuide_18_SlicingNub.jpg?v=1713302157"></div>
<p>Here is what the refill looks like, before and after slicing that little piece off the back end:</p>
<div><img alt="" src="https://cdn.shopify.com/s/files/1/0057/8492/files/MK1_RefillGuide_19_NubCompare.jpg?v=1713302189" data-mce-src="https://cdn.shopify.com/s/files/1/0057/8492/files/MK1_RefillGuide_19_NubCompare.jpg?v=1713302189"></div>
<div></div>
<div></div>
<div>
<hr style="background-color: #adadad; border-width: 0; height: 1px;">
<h1>A Note About the Spring</h1>
<p>The spring that is included with Mark One will certainly work with any refill you swap into the pen, however if the neck is a different length than on the Schmidt P8126, it will affect how the click feels. Feel free to experiment with other springs if you are not happy with the feel, perhaps harvesting one from a different pen.</p>
<hr style="background-color: #adadad; border-width: 0; height: 1px;">
<p>When we were first getting into the world of pens, <a href="https://www.wellappointeddesk.com/2014/06/epic-refill-guide-rollerball-gel-and-ballpoints/">this refill guide</a> from Well Appointed Desk was immensely helpful. It’s a great place to start if you want to see a list of compatible refills. <a href="https://www.jetpens.com/blog/The-Ultimate-Guide-to-Pen-Refills/pt/231">This guide</a> from Jet Pens is also a good reference.</p>
</div>
<div>
<p>We hope this guide is a useful primer for the world of ink refills for Mark One. As always, <a href="mailto:hello@studioneat.com">email us</a> with any questions!</p>
</div>
<p> </p>
</div>]]>
    </content>
  </entry>
  <entry>
    <id>https://www.studioneat.com/blogs/main/atp-x-studio-neat-chicken-hat-collab</id>
    <published>2022-10-26T18:37:19-05:00</published>
    <updated>2022-11-01T14:21:36-05:00</updated>
    <link href="https://www.studioneat.com/blogs/main/atp-x-studio-neat-chicken-hat-collab" rel="alternate" type="text/html"/>
    <title>ATP × Studio Neat Chicken Hat Collab</title>
    <author>
      <name>Dan Provost</name>
    </author>
    <content type="html">
      <![CDATA[<p>So here’s a weird one.<span class="Apple-converted-space"> </span></p>
<p>I’m a big fan of the Accidental Tech Podcast, hosted by Casey Liss, Marco Arment, and John Siracusa. You are probably familiar (I’d imagine there is a pretty big overlap in audience between Studio Neat and ATP), but if you’ve never listened, <a href="https://atp.fm">check it out</a>!<span class="Apple-converted-space"> </span></p>
<p>In an episode last year, John was lamenting not being able to find a replacement for his beloved winter hat. This hat is not just any ‘ol beanie, it’s a hat of unknown origin (it might have been his dad’s?) that he calls a “chicken hat,” presumably due to the way the extra material on top looks sort of like the <a href="https://en.wikipedia.org/wiki/Comb_(anatomy)">comb</a> on the head of a gallinaceous bird. You can listen to the <a href="https://overcast.fm/+R7DWGX-PQ/1:36:29">timestamped segment here</a>.</p>
<p>For as much as John loves and prefers this style of winter hat, for whatever reason it seems to be completely out of circulation. No one makes this style of hat anymore. I’m not sure why; although “chicken hat” is a silly name I think the hat looks quite nice.<span class="Apple-converted-space"> </span></p>
<p><img src="https://cdn.shopify.com/s/files/1/0057/8492/files/chicken-hat.jpg?v=1666806191" alt='John Siracusa wearing this original "Chicken Hat."'></p>
<p style="text-align: center;"><span style="color: #b3b3b3;"><em>John Siracusa wearing his original chicken hat.<span class="Apple-converted-space"> </span></em></span></p>
<p>In the spirit of backups and redundancy, John was understandably uneasy about his hat being the only hat of its type in existence. So we had the idea, how hard would it be to make one of these?</p>
<p>And that’s what we did! It was actually really fun going back and forth with John, doing some detective work to find the right material and getting the dimensions just right. The hat turned out great; the felt material is soft and warm, and a woven ATP label is added to the rim of the hat. This thing looks nice!</p>
<p><img src="https://cdn.shopify.com/s/files/1/0057/8492/files/DSC06311_7dcc366d-2872-4d74-b70f-e8fe3d3a79c0.jpg?v=1666806864" alt="The ATP Chicken Hat"></p>
<p>The ATP guys are selling the hat in their <a href="https://cottonbureau.com/people/accidental-tech-podcast">merch store</a> for the next couple weeks, or until it sells out. I have a $1 bet with Casey on how many will sell, so if you are looking for a new, stylish way to keep your noggin warm this winter, <a href="https://cottonbureau.com/p/SY2GC8/hat/atp-chicken-hat">check it out</a>.</p>]]>
    </content>
  </entry>
  <entry>
    <id>https://www.studioneat.com/blogs/main/a-new-podcast</id>
    <published>2022-08-02T11:56:02-05:00</published>
    <updated>2022-08-02T11:56:02-05:00</updated>
    <link href="https://www.studioneat.com/blogs/main/a-new-podcast" rel="alternate" type="text/html"/>
    <title>Introducing: The Last Detail</title>
    <author>
      <name>Dan Provost</name>
    </author>
    <content type="html">
      <![CDATA[<p>We are excited today to announce a new podcast, sort of. It’s more like a “side quest” or an offshoot show, and it will be a part of the regular Thoroughly Considered feed. It’s called <a href="https://www.relay.fm/tc/83">The Last Detail</a>.</p>
<p>For each episode Tom and I will chat with a different guest about a physical object that is meaningful to them. We dive deep into that object, discussing the design, the manufacturing process, the good, and bad, and everything in-between. The show gets its title from one of Dieter Rams’s <a href="https://en.wikipedia.org/wiki/Dieter_Rams#%22Good_design%22_principles">design principles</a>, “Good Design is Thorough Down to the Last Detail.”</p>
<p>The regular <a href="https://www.relay.fm/tc">Thoroughly Considered</a> show with Myke Hurley will continue as it always has, in which we chat about the ups and downs of running a small indie business. We’ve been recording that show for 7(!) years and we love making it. Those episodes come out roughly once a month, so we figured there was some space in the feed to try something new.</p>
<p>The first episode of The Last Detail is <a href="https://www.relay.fm/tc/83">now available</a>, featuring our dear friend Adam Lisagor. Adam is the founder of Sandwich, and one of the kindest and most thoughtful people we know. We couldn’t have chosen a better person to be the inaugural guest.</p>
<p>We hope you give it a try!</p>]]>
    </content>
  </entry>
  <entry>
    <id>https://www.studioneat.com/blogs/main/november-9-2016-one-thousand-cranes</id>
    <published>2020-08-28T11:41:00-05:00</published>
    <updated>2020-08-28T11:41:22-05:00</updated>
    <link href="https://www.studioneat.com/blogs/main/november-9-2016-one-thousand-cranes" rel="alternate" type="text/html"/>
    <title>November 9, 2016 (One Thousand Cranes)</title>
    <author>
      <name>Dan Provost</name>
    </author>
    <content type="html">
      <![CDATA[Our second mentee to launch a Kickstarter project did so earlier this week, and it’s a good one. <a href="https://www.kickstarter.com/projects/brentnakamoto/november-9-2016-one-thousand-cranes-a-photo-book" title="Kickstarter page for November 9, 2016 (One Thousand Cranes)">November 9, 2016 (One Thousand Cranes)</a> is an art / photo book by Brent Nakamoto. After the 2016 election, Brent took the November 9th edition of the New York Times and folded it into 1000 paper cranes, as a means of personal mediation and contemplation after the, well, shit show that had just gone down. <br><br>I love the concept behind the project, and it carries special significance for me, as my first son was born on November 9, 2016 (yes, that was crazy). The photo book looks gorgeous, and $80 for a signed copy is a steal. I know I will cherish my copy for years to come.<br><br>Please check out the project and do consider <a href="https://www.kickstarter.com/projects/brentnakamoto/november-9-2016-one-thousand-cranes-a-photo-book" title="Kickstarter page for November 9, 2016 (One Thousand Cranes)">becoming a backer</a>.]]>
    </content>
  </entry>
  <entry>
    <id>https://www.studioneat.com/blogs/main/driveslide</id>
    <published>2020-08-04T13:12:00-05:00</published>
    <updated>2020-08-04T13:12:55-05:00</updated>
    <link href="https://www.studioneat.com/blogs/main/driveslide" rel="alternate" type="text/html"/>
    <title>DriveSlide</title>
    <author>
      <name>Dan Provost</name>
    </author>
    <content type="html">
      <![CDATA[A couple months ago we launched the <a href="https://www.studioneat.com/pages/mentorship-program" title="Studio Neat Mentorship Program">Studio Neat Mentorship Program</a>, and it’s been a blast so far. We’ve gotten to chat (and hopefully help) tons of different folks at varying stages in the product development cycle. One such person, Anna Jay, was quite far along when she came to us, and <a href="https://www.kickstarter.com/projects/driveslide/driveslide-a-secure-home-for-your-laptop-accessories" title="DriveSlide on Kickstarter">her project</a> launched on Kickstarter today. The first mentee to launch something new! <br><br>The project is called <a href="https://www.kickstarter.com/projects/driveslide/driveslide-a-secure-home-for-your-laptop-accessories" title="DriveSlide on Kickstarter">DriveSlide</a>. It is an apparatus for affixing an external hard drive to the back of your laptop lid, so it’s easy to move around without a hard drive flopping everywhere. <br><br>The product itself is clever, simple, and thoughtfully designed. The project is giving me warm fuzzy feelings thinking back to when we launched the <a href="https://www.kickstarter.com/projects/danprovost/glif-iphone-4-tripod-mount-and-stand" title="The Glif on Kickstarter">Glif</a> 10 years ago. It’s a simple piece of plastic with no moving parts that solves a common problem, and the two person team (Anna is working with her brother Eli) need the funding to pay for injection molding. They both work other jobs and this is their first physical product. Sound familiar?<br><br>If DriveSlide sounds like something that would be useful to you, do <a href="https://www.kickstarter.com/projects/driveslide/driveslide-a-secure-home-for-your-laptop-accessories" title="DriveSlide on Kickstarter">consider backing</a>. Let’s blow past the funding goal.]]>
    </content>
  </entry>
  <entry>
    <id>https://www.studioneat.com/blogs/main/saying-goodbye-to-the-neat-ice-kit</id>
    <published>2019-10-07T10:17:00-05:00</published>
    <updated>2019-10-07T10:29:46-05:00</updated>
    <link href="https://www.studioneat.com/blogs/main/saying-goodbye-to-the-neat-ice-kit" rel="alternate" type="text/html"/>
    <title>Saying Goodbye to the Neat Ice Kit</title>
    <author>
      <name>Dan Provost</name>
    </author>
    <content type="html">
      <![CDATA[On April 28, 2013, we launched the <a href="https://www.kickstarter.com/projects/danprovost/neat-ice-kit/" title="The Neat Ice Kit project on Kickstarter. ">Neat Ice Kit on Kickstarter</a>. At the time, it was a new direction for us; all of our previous products were either directly or tangentially related to Apple. With an amplified level of the usual nervousness that accompanies new product launches, we pressed the big green button on Kickstarter, and 30 days later we had our most funded projected to date. It felt really good to know we could stretch outside of the Apple world and still find success. <br><br>Now, over 6 years and a few complimentary products (Simple Syrup Kit, Cocktail Rimming Tray, Highball) later, we have decided to discontinue selling the Neat Ice Kit. The decision was relatively simple, but bittersweet nonetheless. The Neat Ice Kit still sells, just not in large enough numbers to justify placing another order for more parts. Such is the nature of having a company like ours, sometimes it no longer becomes feasible to continue selling a product and we have to say goodbye. <br><br>To everyone who backed the Kickstarter or purchased a Neat Ice Kit in the past, we can’t thank you enough for your support. I know we say that all the time, but really, the design process for the Neat Ice Kit was a struggle filled with doubts, false starts, and nearly giving up multiple times. Your support meant the world to us and showed you wanted us to keep trying new things at Studio Neat. <br><br>Although we will no longer be selling the Neat Ice Kit, thankfully the clear ice market has grown and matured in the last six years, so you have some options. The folks at <a href="https://www.wintersmiths.com/collections/shop" title="Wintersmiths online shop.">Wintersmiths</a> have been making clear ice kits for as long as we have, and they have some interesting options for sale in their shop. If you are looking for something that was a little more, ahem, influenced by the Neat Ice Kit, check out <a href="https://wandpdesign.com/products/clear-ice-mold?variant=28962461955" title="Clear Ice Mold by W&amp;P.">this mold</a> from W&amp;P. Or, of course, just buy a <a href="https://www.cnet.com/news/clear-ice-is-lgs-killer-new-fridge-feature/" title="CNET: LG refrigerator that makes clear ice. ">new refrigerator</a>. <br><br>On to the next thing!]]>
    </content>
  </entry>
  <entry>
    <id>https://www.studioneat.com/blogs/main/mark-one-apollo-edition</id>
    <published>2019-07-17T13:54:00-05:00</published>
    <updated>2019-07-17T14:33:06-05:00</updated>
    <link href="https://www.studioneat.com/blogs/main/mark-one-apollo-edition" rel="alternate" type="text/html"/>
    <title>Mark One: Apollo Edition</title>
    <author>
      <name>Dan Provost</name>
    </author>
    <content type="html">
      <![CDATA[<p class="p1"><span class="s1">Two years ago, we recorded a special <a href="https://www.relay.fm/membership" title="Relay.fm Membership">member’s only</a> episode of our podcast, discussing the as-yet-unreleased <a href="https://www.studioneat.com/products/markone" title="Mark One by Studio Neat">Mark One</a>. During the show, we talked about wanting to make a special edition of the Mark One to commemorate the 50th anniversary of the Apollo 11 moon landing. It was just an idea casually tossed out, but I am really pleased we actually decided to do it. </span></p>
<p class="p1"><span class="s1"><a href="https://kickstarter.com/projects/danprovost/mark-one-apollo-11-limited-edition-space-pen" title="Mark One: Apollo Edition on Kickstarter">Mark One: Apollo Edition</a> is different from the regular Mark One in a few key ways:</span></p>
<ul class="ul1">
<li class="li1">
<span class="s2"></span><span class="s1">It is made out of stainless steel instead of aluminum, so it weighs twice as much as the regular Mark One and is even tougher. </span>
</li>
<li class="li1">
<span class="s2"></span><span class="s1">Instead of cerakote, the body (and knock) are polished to a mirror finish and coated with PVD. </span>
</li>
<li class="li1">
<span class="s2"></span><span class="s1">Ships with a Fisher pressurized refill instead of the Schmidt P8126. </span>
</li>
<li class="li1">
<span class="s2"></span><span class="s1">Has a subtle laser engraving of the command, service, and lunar modules, based loosely on the line drawings from the Apollo 11 flight manual.</span>
</li>
</ul>
<p class="p1"><span class="s1">We’ve never done a limited edition product before. At least not intentionally. But given the commemorative nature of this product, we thought it would be fun to give it a shot. This pen is ONLY available during our 8 day Kickstarter campaign, which syncs exactly (launch to splashdown) with the 50th anniversary of the Apollo 11 mission. Once the campaign ends on July 24th, there will be no other way to get the pen. </span></p>
<p class="p1"><span class="s1">We launched yesterday and have already doubled our funding goal (thank you everyone!). If you’d like your own pen, <a href="https://kickstarter.com/projects/danprovost/mark-one-apollo-11-limited-edition-space-pen" title="Mark One: Apollo Edition on Kickstarter">act quickly</a>! </span></p>]]>
    </content>
  </entry>
  <entry>
    <id>https://www.studioneat.com/blogs/main/dual-lens-switching-on-the-iphone-x</id>
    <published>2017-11-20T10:37:00-06:00</published>
    <updated>2017-11-20T10:58:09-06:00</updated>
    <link href="https://www.studioneat.com/blogs/main/dual-lens-switching-on-the-iphone-x" rel="alternate" type="text/html"/>
    <title>Dual Lens Switching on iPhone X</title>
    <author>
      <name>Dan Provost</name>
    </author>
    <content type="html">
      <![CDATA[Last year, when the iPhone 7 Plus was released, Glenn Fleishman wrote a <a href="https://www.macworld.com/article/3121661/apple-phone/blow-up-iphone-7-plus-uses-digital-zoom-instead-of-optical-more-often-than-youd-expect.html" title="Blow up: iPhone 7 Plus uses digital zoom instead of optical more often than you'd expect">terrific piece</a> for Macworld about how the dual lens camera system works. In short, when you zoom-in to 2X, the camera does not always switch to the telephoto lens. In some cases (typically in low light scenarios), you will be presented with a cropped image from the wide angle lens instead. This was sacrilege to camera nerds, but Apple would argue that if the cropped image looks better in those low light situations, then that is the correct approach.<br><br>With the improved sensor, wider aperture, and added optical image stabilization on the telephoto lens in the iPhone X, I wanted to see if Apple’s frequency of presenting a cropped image at 2X was reduced at all. The answer: yes. But by how much?<br><br>I created a test to hopefully get a rough idea of how much light is required before an iPhone 7 Plus and iPhone X decide to switch to their respective telephoto lenses in 2X mode. I placed an object (in this case, an old Rolleiflex camera) on a white backdrop, and flanked it on both sides with two LED studio lights. I set up the iPhone 7 Plus and iPhone X on tripods (using the <a href="https://www.studioneat.com/products/glif" title="The Glif product page">Glif</a>, natch) and positioned them to keep the framing as similar as possible. Then, starting from a completely dark room, I slowly raised the light levels and observed when the lens switched on each camera. <br><br>The results are in the video below. <br><br>
<div class="vid-wrapper"><iframe src="//player.vimeo.com/video/243475449?title=0&amp;byline=0&amp;portrait=0&amp;color=87bfcc" width="880" height="495" frameborder="0" webkitallowfullscreen="" mozallowfullscreen="" allowfullscreen=""></iframe></div>
<br>As you can see, the iPhone X required very little light before it decided to use the telephoto lens. The iPhone 7 Plus required quite a bit more. I used the app <a href="https://itunes.apple.com/us/app/light-meter-lux-and-foot-candle-measurement-tool/id1037610013?mt=8" title="Light Meter App Store ">Light Meter</a> to measure the light at each interval, which I denote in the video. The app measures the <a href="https://en.wikipedia.org/wiki/Lux" title="Wikipedia page for lux">lux</a>, which is a measure of illuminance equal to one lumen per square meter. (I measured from both devices and averaged the results, as the readings were slightly different. I wouldn’t expect an app to function as well as a true light meter, but this probably gets us in the ball park). <br><br>I also used the manual camera app <a href="http://halide.cam" title="Halide iPhone app">Halide</a> to get an ISO and shutter speed reading at the various light levels, and came to the conclusion that <strong>the iPhone X requires roughly 2 fewer stops of light before switching to the telephoto lens, as compared to the iPhone 7 Plus.</strong> This is obviously great news, and speaks to how improved the second lens is after just one year. In my own use of the phone for the past couple weeks, it does indeed seem to be the case that I am very rarely presented with a 2X cropped image. As Glenn points out in the aforementioned piece, the easiest way to test which lens is in use is simply by covering it with your finger. <br><br>And while we’re on the topic of the dual lens camera system, one stray observation. Previously, while shooting video, you could jump freely between lenses during a recording (it would do a very quick zoom and switch to the other lens at the tail end of the animation). This is still the case, except when recording 4K at 60 FPS. In that mode, you must select which lens you want to use before recording, and then you can only digitally zoom while recording. I think there is a pretty clear explanation for this: in order to switch freely between lenses while recording, both sensors need to be “on,” and 4K 60 FPS is simply too much for the phone to handle two streams at once. Perhaps in a year or two this will become an option again.]]>
    </content>
  </entry>
  <entry>
    <id>https://www.studioneat.com/blogs/main/58474948-introducing-apple-tv-remote-stand</id>
    <published>2015-10-26T10:09:00-05:00</published>
    <updated>2015-10-26T10:08:37-05:00</updated>
    <link href="https://www.studioneat.com/blogs/main/58474948-introducing-apple-tv-remote-stand" rel="alternate" type="text/html"/>
    <title>Introducing: Apple TV Remote Stand</title>
    <author>
      <name>Dan Provost</name>
    </author>
    <content type="html">
      <![CDATA[<p>The new Apple TV has been a long time coming. I have been rocking the 2nd generation 720p version for the past five years, and it is definitely showing its age. Needless to say, I ordered one today.</p>
<p>This new black box is improved in nearly every way from its predecessor, including the remote, which now features a touch pad and a microphone for Siri input. Less heralded is the ability to use the remote to change the volume and turn the TV on and off. For many cord-cutters, the Apple TV Remote may be the only remote they need. This is certainly true for me.</p>
<p>With all of this added functionality, the new remote is surprisingly not much bigger than the old Apple TV remote. In other words, it’s pretty small and you’re probably going to lose it.</p>
<p>Which is why Tom and I made this little walnut stand for the remote. Consider it “home base” for your remote. If you always have a spot for it, maybe you won’t lose it. And the walnut is quite handsome, if you’ll allow me to say. The stand stays in place with a magic “micro-suction” material that holds firm to any flat surface, but doesn’t leave a gooey residue when you remove it. It’s pretty nifty.</p>
<p>This product provides an opportunity for a new approach for us, as we are manufacturing it in-house. And when I say “in-house,” I mean that literally. We are making these in Tom’s garage. We purchased an X-Carve machine to CNC mill these out of raw walnut boards, and each piece will be hand finished by either Tom or me. Making the Remote Stand in-house does not necessarily signal a shift in direction for Studio Neat, but rather just provides another option for products we conceive of that are simple enough to fabricate ourselves. And, like owning a 3D printer, we think having a CNC machine on-hand will do wonders for quick prototyping of ideas.</p>
<p>The Apple TV Remote Stand is <a href="http://www.studioneat.com/products/remote" title="Product page for Apple TV Remote Stand on Studio Neat. ">available today</a>, and we will start shipping them out next week. If you ordered an Apple TV today (or plan to get one), why not get one of these to go along with it? We think you’ll dig it.</p>]]>
    </content>
  </entry>
  <entry>
    <id>https://www.studioneat.com/blogs/main/55337732-a-back-to-the-future-theory</id>
    <published>2015-10-21T08:12:00-05:00</published>
    <updated>2015-10-21T08:15:07-05:00</updated>
    <link href="https://www.studioneat.com/blogs/main/55337732-a-back-to-the-future-theory" rel="alternate" type="text/html"/>
    <title>A Back to the Future Theory</title>
    <author>
      <name>Dan Provost</name>
    </author>
    <content type="html">
      <![CDATA[<p><em>October 21, 2015</em>. Today’s date, the same day Doc and Marty travel to in <em>Back to the Future II</em>. Many have taken today as an opportunity to celebrate one of the greatest movie franchises of all time, and rightly so. I have seen the films countless times, and after a while, you begin to notice things. Over time I have developed a hypothesis surrounding the central characters in the first film. While this theory is not nearly as “out there” as suggesting <a href="http://fantheories.wikia.com/wiki/Ferris_Bueller's_Day_Off">Ferris is a figment of Cameron’s imagination</a>, I think it provides an interesting lens to view the original film through.</p>
<p><strong>Posit #1: Doc and Marty’s friendship is a paradox.</strong></p>
<p><strong>Posit #2: The existence of the time machine itself is a paradox.</strong></p>
<p>Just to make sure we are all on the same page before I begin, when I speak of a paradox, I am referring to how it is often understood in time travel science fiction. Read up on the <a href="https://en.wikipedia.org/wiki/Grandfather_paradox">grandfather paradox</a> if you are unfamiliar with this trope. In short, a paradox is something that does not have a clear beginning or end. The proverbial <a href="https://en.wikipedia.org/wiki/Ouroboros">snake eating its own tail</a>.</p>
<p>When viewing <em>Back to the Future</em>, for the first time or the 50th, the friendship between Doc Brown and Marty McFly is never questioned by the viewer. This is a testament to the excellent writing and acting; their relationship feels natural and comfortable. If you stand back for a moment, it really is strange though, isn’t it? I’m not suggesting anything nefarious, but cool-ass teenaged boys usually don’t make friends with “crazy, wild-eyed scientists.” Perhaps you could argue a more professional relationship, a trading of goods and services. Doc gets access to Marty’s camcorder (who also acts as cameraman), and Marty can use Doc’s sick guitar amp whenever he wants. As flimsy as this explanation is (they are clearly friends and not just work associates), it raises another question: how did Doc and Marty even meet? How does a friendship like that even begin? The answer, of course, is the first paradox: Doc and Marty’s friendship “begins” in 1955. They go on an adventure together, learning things about themselves and each other along the way. They solve problems, they overcome obstacles. They save each other’s lives. What better foundation for a friendship?</p>
<p>Which brings me to a second paradox: the existence of the time machine itself. When Marty travels back to 1955, he finds Doc in a sad state. A failed inventor. Certainly not someone on the cusp of inventing a machine for traversing the space-time continuum. True, at this point he had already slipped on the toilet, hit his head, and drawn up the rough sketch for the flux capacitor, but that’s a long way from having a working time machine. My contention is that Doc <em>needed</em> to see the functioning time machine in order to have the confidence to go forth and actually build it. Doc’s words: “It works! It works! I finally invented something that works!” Paradox number two.</p>
<p>Now, whether these paradoxes were intentional, or simply my fun interpretation of the film, well, I suppose only Bob Gale and Robert Zemeckis hold the key to that riddle. (Update: It turns out Bob Gale did give <a href="http://mentalfloss.com/article/28526/back-future-co-creator-bob-gale-explains-how-marty-and-doc-became-friends">an explanation</a> for the origin of Doc and Marty's friendship in 2011). They obviously didn’t shy away from paradoxes elsewhere in the film, as evidenced by the <a href="https://www.youtube.com/watch?v=S1i5coU-0_Q">Marvin Berry</a> joke, or when George and Lorraine hint they will name their future son “Marty.” In fact, the working title for the sequels was simply <a href="http://backtothefuture.wikia.com/wiki/Paradox_script"><em>Paradox</em></a>.</p>
<p>What do you think? Am I off my rocker, or is there something to this? Any more paradoxes that I didn’t find? Let me know on <a href="https://twitter.com/danprovost/">Twitter</a>.</p>]]>
    </content>
  </entry>
  <entry>
    <id>https://www.studioneat.com/blogs/main/52176836-fixing-safari-view-controller</id>
    <published>2015-10-06T10:39:00-05:00</published>
    <updated>2015-10-06T10:39:21-05:00</updated>
    <link href="https://www.studioneat.com/blogs/main/52176836-fixing-safari-view-controller" rel="alternate" type="text/html"/>
    <title>Fixing Safari View Controller</title>
    <author>
      <name>Dan Provost</name>
    </author>
    <content type="html">
      <![CDATA[<p>With iOS 9, Apple introduced something called the <a href="https://developer.apple.com/videos/play/wwdc2015-504/">Safari View Controller</a>. It is, essentially, a plug-and-play web view that developers can use in lieu of building their own web viewer. The benefits of this are numerous: much less coding and maintenance for developers, a unified experience across apps for users, and the Safari View Controller can take advantage of the same privileges of Safari proper, such as saved passwords and content blockers.</p>
<p>The UI, however, has one serious flaw. It is a pain in the ass to dismiss.</p>
<p>I became acutely aware of this problem upon installation of Tweetbot 4 (a great app, <a href="http://tapbots.com/tweetbot/">buy it</a>). Previously, in Tweetbot 3, when a user tapped a web link in the timeline, the website slid in from the right. Getting back to the timeline was simple: either tap the always-present back button in the upper left corner, or, use a swipe-to-the-right gesture from the left edge (my preferred method). This made it incredibly easy to pop in and out of links within the timeline.</p>
<p class="thinImg"><img src="//cdn.shopify.com/s/files/1/0057/8492/files/Tweetbot3.PNG?13849834086420164567" alt="Screenshot of Tweetbot 3 web viewer. "></p>
<p>Tweetbot 4 now takes advantage of the Safari View Controller (and I don’t blame them). However, there is only one way to dismiss the view: the Done button waaaayyyy up in the upper right corner.</p>
<p class="thinImg"><img src="//cdn.shopify.com/s/files/1/0057/8492/files/CurrentSVC.PNG?14712385393829231356" alt="Screenshot of Safari View Controller, unscrolled. "></p>
<p>But here is the egregious error: when you scroll, the Done button <em>goes away</em>. That’s right: your only escape hatch is hidden as soon as you move.</p>
<p class="thinImg"><img src="//cdn.shopify.com/s/files/1/0057/8492/files/CurrentSVC_scrolled.PNG?3707132927512523533" alt="Screenshot of Safari View Controller, scrolled. "></p>
<p>The hard-to-reach-and-sometimes-hidden Done button makes browsing links in Tweetbot <em>way</em> slower. I have even turned Reachability back on in an effort to make things a little easier. The horror.</p>
<p>Thankfully, I think there is a pretty easy fix that I hope Apple would consider.</p>
<p>Step 1: Do not hide the UI chrome when scrolling. Our phones are huge now. The real estate is less precious. Whatever benefit is derived from those few extra pixels is immediately lost by, you know, not having buttons anymore.</p>
<p>Step 2: Remove the Done button from the top nav bar, and add a Close button to the bottom toolbar. Ahh. So reachable.</p>
<p class="thinImg"><img src="//cdn.shopify.com/s/files/1/0057/8492/files/SVC_Fix.png?4018074793351507580" alt="Screenshot of Safari View Controller UI proposal. "></p>
<p>You might think this problem could be solved simply by adding a back swipe gesture to the existing Safari View Controller. This raises a couple problems though, namely that that gesture needs to be saved for navigating back from within the Safari web view.</p>
<p><a href="https://twitter.com/danprovost/">I’d love to hear what you think</a>. Am I overlooking something obvious? If not, let’s make it happen Apple!</p>]]>
    </content>
  </entry>
  <entry>
    <id>https://www.studioneat.com/blogs/main/51383300-apple-watch-charging-clip</id>
    <published>2015-10-02T14:45:00-05:00</published>
    <updated>2015-10-02T14:18:28-05:00</updated>
    <link href="https://www.studioneat.com/blogs/main/51383300-apple-watch-charging-clip" rel="alternate" type="text/html"/>
    <title>Apple Watch Charging Clip</title>
    <author>
      <name>Dan Provost</name>
    </author>
    <content type="html">
      <![CDATA[<div class="vid-wrapper"><iframe src="//player.vimeo.com/video/141196433?title=0&amp;byline=0&amp;portrait=0&amp;color=87bfcc" width="880" height="495" frameborder="0" webkitallowfullscreen="" mozallowfullscreen="" allowfullscreen=""></iframe></div>
<p> </p>
<p>The magnetic induction charger for the Apple Watch is nice. It works as designed; there is never a problem aligning it, and it precludes the need for an unseemly exposed port.</p>
<p>The magnetic connection, however, is not as firm as you may suspect. It pales in comparison to say, the connection between a MagSafe charger and a MacBook, or a Smart Cover and an iPad. If the Watch and / or charging cord are jostled in the slightest, the connection will be broken. This is not too big of an issue if your watch is charging gently on your nightstand, but what if you are charging your watch on the go (with an external battery pack), or you simply want a more secure connection between the charging puck and the watch?</p>
<p>A few weeks ago <a href="https://twitter.com/Panzer">Matthew Panzarino</a> emailed us a photo of a crude setup: a rubber band wrapped around the face of the watch, holding the puck securely as a sort of seat belt. He had been using the watch extensively during the day and needed to charge while out and about. He wanted to simply throw the charging watch in his bag, and this was his MacGyver’d solution.</p>
<p><img src="//cdn.shopify.com/s/files/1/0057/8492/files/MacGyver.jpg?16870908518664475890" alt="MacGyver"></p>
<p>Tom and I decided to take a pass at designing a better solution. What we came up with is essentially a clip. It affixes to the puck of the charging cable, and then snaps to the back of the watch with a satisfying click. With the clip in place, it would take quite a force to dislodge the puck from the watch.</p>
<p>We have no idea if anyone wants this thing. But that is the beauty of the modern era we are living in. The clip is 3D printed, and you can purchase your own 3D print directly from <a href="http://www.shapeways.com">Shapeways</a>. You can even choose your favorite color. Apple has two charging pucks, plastic and metal, which are different thicknesses, so make sure you order the correct model for your corresponding watch size and puck style:</p>
<ul>
<li><a href="http://shpws.me/Kh8u">Plastic (Sport) Charger, 42mm Apple Watch</a></li>
<li><a href="http://shpws.me/Kh8y">Plastic (Sport) Charger, 38mm Apple Watch</a></li>
<li><a href="http://shpws.me/Kh9I">Metal Charger, 42mm Apple Watch</a></li>
<li><a href="http://shpws.me/Khao">Metal Charger, 38mm Apple Watch</a></li>
</ul>
<p><img src="//cdn.shopify.com/s/files/1/0057/8492/files/PA026347_sm.jpg?14583757480036304625" alt="Photo of Apple Watch with charging clip. "></p>
<p><img src="//cdn.shopify.com/s/files/1/0057/8492/files/PA026346_crop.jpg?9147418538608185685" alt="Close up of the charging clip attached to the Apple Watch. "></p>
<p>We’ve been using this thing for a couple weeks and it’s actually quite nice, especially when traveling. The “click” sound ensures the watch is indeed charging safely on the hotel floor on the other side of the room, where of course the only free outlet is located.</p>
<p>We’d love to hear what you think, let us know on <a href="www.twitter.com/studioneat">Twitter</a>!</p>]]>
    </content>
  </entry>
  <entry>
    <id>https://www.studioneat.com/blogs/main/49094020-introducing-obi-and-thoroughly-considered</id>
    <published>2015-09-21T10:31:00-05:00</published>
    <updated>2016-05-20T14:45:45-05:00</updated>
    <link href="https://www.studioneat.com/blogs/main/49094020-introducing-obi-and-thoroughly-considered" rel="alternate" type="text/html"/>
    <title>Introducing: Obi and Thoroughly Considered</title>
    <author>
      <name>Dan Provost</name>
    </author>
    <content type="html">
      <![CDATA[Today is a huge day for us. We are launching not one, but two new projects today. <br><br>The first is <a href="https://www.kickstarter.com/projects/danprovost/obi-a-smart-laser-toy-for-pets" title="Kickstarter: Obi">Obi</a>, a smart laser toy for pets. The idea for Obi originated about a year ago, when my wife and I adopted our first cat, Mr. Littlejeans. It became clear almost immediately that we wanted a toy that could entertain him in some kind of automated way without being a total eyesore. The Kickstarter <a href="https://www.kickstarter.com/projects/danprovost/obi-a-smart-laser-toy-for-pets" title="Kickstarter: Obi">project page</a> and video give a good overview of everything Obi can do. Tom and I have been working on Obi for about 7 months and couldn't be more excited to finally reveal it. This is new territory for us, combining both electronics and software, and is certainly our most ambitious project to date. <br><br>Alongside Obi, we are also launching a new podcast, <a href="http://www.relay.fm/tc" title="Throughly Considered on Relay FM">Thoroughly Considered</a>. We are producing this together with our friend Myke Hurley from <a href="http://www.relay.fm/" title="Relay FM">Relay FM</a>, and it will trace the journey of bringing Obi into existence. Our highest aspiration is for the podcast to be like <em>Startup</em>, but for a hardware product. Tom and I have recorded nearly every conversation we've had since the inception of the idea, and those recordings will be woven together with questions and narration by Myke. We hope this podcast provides an honest look at what it takes to develop an idea, run a Kickstarter campaign, manufacture a product, and ship it to customers. Warts and all, as they say. The first episode is already available to download, and please, consider subscribing as well. <br><br>For a while now, Tom and I have wanted to create a product that combined electronics and software, as well as a vague desire to start a podcast, so it is kind of overwhelming we are attempting it all in one fell swoop. This is our most ambitious project to date, by far, and we definitely can't do it without your help. <br><br>Check out our <a href="https://www.kickstarter.com/projects/danprovost/obi-a-smart-laser-toy-for-pets" title="Kickstarter: Obi">Kickstarter page</a> and please consider backing. Even if you don't want or need an Obi, your support will help bring the podcast to life. And don't forget to tell your friends with pets!]]>
    </content>
  </entry>
  <entry>
    <id>https://www.studioneat.com/blogs/main/34516164-the-best-tripods-to-use-with-the-glif</id>
    <published>2015-06-24T12:47:00-05:00</published>
    <updated>2015-06-24T12:35:05-05:00</updated>
    <link href="https://www.studioneat.com/blogs/main/34516164-the-best-tripods-to-use-with-the-glif" rel="alternate" type="text/html"/>
    <title>The Best Tripod(s) to Use With the Glif</title>
    <author>
      <name>Dan Provost</name>
    </author>
    <content type="html">
      <![CDATA[<p>People often ask us to recommend a tripod for use with the Glif. There is not a single straightforward answer, but rather a few really great options to consider based on your needs. And because the Glif has a universal 1/4"–20 tripod thread, it will connect to any standard tripod.</p>
<p><strong>Best Small, Portable Tripod: <a href="http://www.amazon.com/exec/obidos/ASIN/B00D76RNLS/ref=nosim&amp;tag=studioneatcom-20">Manfrotto Pixi Mini Tripod</a></strong><br> The Glif is small and portable, so it makes a lot of sense to pair it with a tripod of similar ilk. The <a href="http://www.amazon.com/exec/obidos/ASIN/B00D76RNLS/ref=nosim&amp;tag=studioneatcom-20">Manfrotto</a> mini tripod is fantastic. It’s built like a tank, and the ball head works quite well. It’s even sturdy enough to support a DSLS or Micro 4/3s camera, provided it doesn’t have a huge lens attached. A fantastic and in-depth review can be found at <a href="http://toolsandtoys.net/reviews/manfrotto-pixi-mini-tripod/">Tools &amp; Toys</a>. Side note: many folks ask us where they can get the mini tripod found at the top of the <a href="http://www.studioneat.com/products/glif">Glif product page</a>. This tripod is white labeled so it’s sold by many companies, including <a href="http://www.amazon.com/exec/obidos/ASIN/B00M78G2VO/ref=nosim&amp;tag=studioneatcom-20">Amazon</a>. While cute, this tripod is pretty cheap feeling and not super sturdy. We definitely recommend a Manfrotto in lieu of it.</p>
<p><img src="//cdn.shopify.com/s/files/1/0057/8492/files/blog_manfrotto.jpg?6013892195415525030"></p>
<p><strong>Best Full Size Tripod - <a href="http://www.amazon.com/exec/obidos/ASIN/B003WKOENO/ref=nosim&amp;tag=studioneatcom-20">Vanguard Alta Pro</a></strong><br> A few months ago I was in the market for a new full sized tripod, to use with my Glif as well as my Olympus E-P5. I trusted the Wirecutter’s recommendation, and it does not disappoint. Check out their <a href="http://thewirecutter.com/reviews/best-tripod/">full review</a>. I expect this tripod to last for years to come. And you should definitely spring for the <a href="http://www.amazon.com/exec/obidos/ASIN/B003WKOENO/ref=nosim&amp;tag=studioneatcom-20">combo pack</a> that includes the ball head.</p>
<p><img src="//cdn.shopify.com/s/files/1/0057/8492/files/blog_vanguard.jpg?6013892195415525030"></p>
<p><strong>Best Teeny Tiny Tripod - <a href="http://www.amazon.com/exec/obidos/ASIN/B005HY4U5A/ref=nosim&amp;tag=studioneatcom-20">Joby Micro Tripod</a></strong><br> This one is a bit of an odd ball, but it really is quite nifty for how small it is. I could see this as being the ideal tripod for backpackers and the outdoorsy type. Heck, this tripod is about the size and weight of the Glif itself. Obviously it’s not going to give you any additional height, so it needs to be propped on top of something, but the legs and swivel head allow you to get the angle just right.</p>
<p><img src="//cdn.shopify.com/s/files/1/0057/8492/files/blog_micro.jpg?6013892195415525030"></p>
<p><strong>Addendum - Shooting in Portrait</strong><br> The adjustable Glif can resize to fit nearly any smartphone, ranging in size from the iPhone 5 all the way up to the iPhone 6 Plus. The Glif grips the device in “landscape” mode, the most typical orientation when shooting photos and video. That doesn’t mean you can’t shoot portrait, however, which has become more common with live streaming apps like Periscope. You simply need a tripod with a head that can tilt 90 degrees (like the aforementioned <a href="http://www.amazon.com/exec/obidos/ASIN/B003WKOENO/ref=nosim&amp;tag=studioneatcom-20">Vanguard</a>). The Glif will hold secure in that orientation.</p>
<p><img src="//cdn.shopify.com/s/files/1/0057/8492/files/blog_portrait.jpg?6013892195415525030"></p>]]>
    </content>
  </entry>
  <entry>
    <id>https://www.studioneat.com/blogs/main/18098872-how-to-make-clear-ice</id>
    <published>2015-04-29T11:35:00-05:00</published>
    <updated>2015-04-22T18:13:14-05:00</updated>
    <link href="https://www.studioneat.com/blogs/main/18098872-how-to-make-clear-ice" rel="alternate" type="text/html"/>
    <title>How to Make Clear Ice</title>
    <author>
      <name>Dan Provost</name>
    </author>
    <content type="html">
      <![CDATA[<p>Clear ice is a mythical creature. If you’ve ever been to a fancy cocktail bar, you may have noticed the perfectly clear ice they serve in the drinks. Cocktail bars of this caliber achieve this high quality ice by procuring (or creating their own) large bricks of ice with <a href="https://www.youtube.com/watch?v=jcwfB4j-HDA">large machines</a>, which they then chop into chunks suitable to fit in a glass.</p>
<p>Achieving this clear ice at home, however, is a different beast entirely.</p>
<p>In designing what ultimately became the <a href="http://www.studioneat.com/products/neaticekit">Neat Ice Kit</a>, we tried everything. This post will illuminate some of the common myths and misconceptions about achieving clear ice at home, and outline the one true path to clear ice bliss.</p>
<h3>Why Clear Ice?</h3>
<p>So, why even go through the trouble of making clear ice? If you are the type that enjoys making cocktails at home, the small amount of extra effort makes a huge difference. For one, it looks awesome. Cocktails are thoughtfully constructed, and, in our eyes, it’s fun to be a little bit fussy about them. For some people, it is extremely satisfying to put some care and attention into something. Think: trimming a bonsai tree. Or being fussy with your coffee. It ticks a box for a certain personality type. And you can’t argue with the result; a perfectly clear ice cube is a thing of beauty.</p>
<p>In short, many will think clear ice is not “worth it,” but we find both the process of making it, and the end result, rewarding.</p>
<h3>The Boiled Water Myth</h3>
<p>In the quest for clear ice at home, we first started by simply boiling the water before freezing. I can’t tell you how many times we’ve seen this myth online. “Just boil the water before you freeze it and it will be perfectly clear!” No. We’ve tried it any number of ways, and the results are disappointing.</p>
<p><img src="//cdn.shopify.com/s/files/1/0057/8492/files/boiled_ice.jpg?17666192494604934399"></p>
<p>Just look at this subpar ice. The leftmost ice was made with room temperature water. The ice in the middle was made with boiled water, placed into the freezer hot. The ice on the right was boiled, allowed to cool, boiled again, then placed in the freezer after cooling once again. I don’t see much of a difference, do you? And one thing is for sure: they are cloudy as shit.</p>
<h3>The Distilled Water Myth</h3>
<p>Another popular myth online is that using distilled water will yield clear ice. It is true that different water types do have some effect on the resulting ice, but it may not be what you expect.</p>
<p><img src="//cdn.shopify.com/s/files/1/0057/8492/files/distilled_ice.jpg?13189143289524237569"></p>
<p>From left to right: generic distilled water, generic purified water, and Ozarka bottled water. As you can see, the distilled water is by far the worse. In every experiment we’ve run, distilled water is incredibly “streaky.” So I think it’s safe to squash the “distilled water yields clear ice” myth. </p>
<p>The important thing to take away from this experiment is that water type <em>does</em> matter, to a degree. The Ozarka water is less cloudy than the other two. But the water alone is not what determines if the ice freezes clear or not. </p>
<h3>The Science of How Ice Freezes</h3>
<p>Stated simply, water freezes from the outside in. The part of the water exposed to the cold outside air freezes first, and slowly moves inward until all the water is frozen.</p>
<p><img src="//cdn.shopify.com/s/files/1/0057/8492/files/IceFreezing_02.gif?1233406797040919325"></p>
<p>This process is what yields cloudy ice. Because the exterior freezes first, a shell is essentially created, which traps all the impurities and air found in the water. As the freezing moves inward, they are trapped in the middle, creating an unappealing milky white cloud in the center.</p>
<h3>The True Path to Clarity</h3>
<p>After months of research, we found that the key to creating clear ice at home is to control the direction the ice freezes. Rather than freezing from the outside in, forcing the ice to freeze top to bottom pushes all of the impurities and air to the bottom. This same principle is why ice from a <a href="https://www.youtube.com/watch?v=8WBqX7MSqWw">frozen lake</a> is clear on top.</p>
<p>The way we achieved that is an insulated mold. The water is exposed to the cold air on top, but insulated with foam on the sides and bottom. The result is a brick of ice that is crystal clear in the top half, as the cruft is pushed into the bottom half of the brick.</p>
<p><img src="//cdn.shopify.com/s/files/1/0057/8492/files/InsulatedIceFreezing.gif?17666192494604934399"></p>
<p>Using the chisel and club from the <a href="http://www.studioneat.com/products/neaticekit">Neat Ice Kit</a>, you can then lop this brick in half, and you’re left with a huge, perfectly clear ice cube.</p>
<p><img src="//cdn.shopify.com/s/files/1/0057/8492/files/holding_ice.jpg?17666192494604934399"></p>
<p>Hopefully this post helped dispel some of the myths behind making clear ice, and show some of the science of how the <a href="http://www.studioneat.com/products/neaticekit">Neat Ice Kit</a> works.</p>
<p> </p>
<ul></ul>]]>
    </content>
  </entry>
  <entry>
    <id>https://www.studioneat.com/blogs/main/17985764-introducing-highball</id>
    <published>2015-04-07T11:15:00-05:00</published>
    <updated>2015-04-06T17:37:42-05:00</updated>
    <link href="https://www.studioneat.com/blogs/main/17985764-introducing-highball" rel="alternate" type="text/html"/>
    <title>Introducing: Highball</title>
    <author>
      <name>Dan Provost</name>
    </author>
    <content type="html">
      <![CDATA[<p>We are pumped to launch a new iPhone app today. It’s called Highball, and it’s for sharing and collecting cocktail recipes. It’s also free, so you should <a href="https://itunes.apple.com/app/id973319934">download it now</a>! Then come back to read the rest of this post.</p>
<p>Tom and I, independently and coincidentally, starting getting into making cocktails at home about two years ago. Over that time, we’ve slowly built up our cocktail repertoire, but cocktail recipes, while simple, are difficult to remember precisely (eg. did that Whiskey Sour call for 1 oz lemon juice or 3/4 oz?). Exacerbating the problem further, the recipes we were finding were spread across many disparate sources, namely books and the internet. It would be useful indeed to have all of our recipes in one centralized place.</p>
<p>Additionally, we wanted to create an easy way to share recipes. When you stumble upon something tasty, the inclination is to share it. There were many paths we could have gone down in regards to sharing, but we took the simple one, with a twist. When you share a recipe, the app generates an image of a “recipe card,” which is super easy to share on Twitter or iMessage or email or whatever. The image is 16x9, orientated in portrait, so it is designed to look great on mobile.</p>
<p><img src="//cdn.shopify.com/s/files/1/0057/8492/files/highball_screenshot_iPhone_2.jpg?5260750037946813788"></p>
<p>So, that’s all fine and good, but sharing text in an image presents some problems, namely that it is not selectable or editable. We solved this with QR codes. Yes, QR codes. Now, when one of these recipe card images is imported into Highball, the app reads the QR code, which contains all the recipe data (via a url to a database entry), and imports it as a fully editable recipe, rather than a flat image. We think this solution allows us to have our cake and eat it too. Images are tremendously easy to share on social networks, so we are able to take advantage of that without trapping the data in the image.</p>
<p>If you still haven’t <a href="https://itunes.apple.com/app/id973319934">downloaded the app</a> yet (what are you waiting for?!) this video gives a brief overview:</p>
<div class="vid-wrapper"><iframe src="//player.vimeo.com/video/123639045?title=0&amp;byline=0&amp;portrait=0&amp;color=87bfcc" width="880" height="495" frameborder="0" webkitallowfullscreen="" mozallowfullscreen="" allowfullscreen=""></iframe></div>
<br>
<p>If you were one of the <a href="https://www.kickstarter.com/projects/danprovost/neat-ice-kit">original backers</a> on Kickstarter for the <a href="http://www.studioneat.com/products/neaticekit">Neat Ice Kit</a>, the visual design of Highball should look familiar. With each original Kit we included <a href="https://www.kickstarter.com/projects/danprovost/neat-ice-kit/posts/777192">three recipe cards</a>, and our backers loved them. Highball is a natural extension of those cards, and caries the metaphor throughout. In fact, the three “starter” recipes that we ship with the app are the same three from the Neat Ice Kit.</p>
<p><a href="http://www.studioneat.com/blogs/main/15828468-a-new-business-model-for-slow-fast-slow">As we’ve done</a> with <a href="http://www.studioneat.com/products/slowfast">Slow Fast Slow</a>, Highball is free, with “ads.” We are hoping it serves as an effective marketing platform for the <a href="http://www.studioneat.com/products/neaticekit">Neat Ice Kit</a> and the <a href="http://www.studioneat.com/products/simplesyrupkit">Simple Syrup Kit</a>. In addition to those two products being available to purchase within the app via Apple Pay, we also added a Tip Jar, for those that want to support us without buying a product. Hat tip to <a href="https://twitter.com/_davidsmith/">David Smith</a> for the inspiration.</p>
<p>We hope you give <a href="https://itunes.apple.com/app/id973319934">Highball</a> a try and enjoy using it. And share your recipes with us on <a href="https://twitter.com/studioneat">Twitter</a>!</p>]]>
    </content>
  </entry>
  <entry>
    <id>https://www.studioneat.com/blogs/main/17800616-a-word-on-simple-bracket</id>
    <published>2015-03-17T12:30:00-05:00</published>
    <updated>2015-03-17T12:28:21-05:00</updated>
    <link href="https://www.studioneat.com/blogs/main/17800616-a-word-on-simple-bracket" rel="alternate" type="text/html"/>
    <title>A Word on Simple Bracket</title>
    <author>
      <name>Dan Provost</name>
    </author>
    <content type="html">
      <![CDATA[<p>Once again, March Madness is upon us, which has prompted many to ask if <a href="https://www.kickstarter.com/projects/danprovost/simple-bracket">Simple Bracket</a> will be making a triumphant return. The answer, in short, is no. The reason, however, is a bit more nuanced.</p>
<p>We launched Simple Bracket on <a href="https://www.kickstarter.com/projects/danprovost/simple-bracket">Kickstarter</a> two years ago. We set a funding goal of $10,000, which honestly didn’t even begin to cover the work we had already put into the app (assuming a modest salary for the two of us). We ended up raising about $12k. Even with some additional great press from <a href="http://daringfireball.net/linked/2013/03/18/simple-bracket">Daring Fireball</a>, <a href="http://uncrate.com/stuff/simple-bracket/">Uncrate</a>, and a few other places, the first year had about 6000 users.</p>
<p>It became clear almost immediately that this wasn’t going to be sustainable. Assuming a similarly sized user base the following year, 6000 users multiplied by $0.99 per app sold minus Apple’s 30% cut did not come close to covering the amount of work that needs to be put into the app, even just to run it during the tournament with minimal updates. We considered various alternatives, such as raising the price, or making it free with ads or sponsorships, but nothing seemed like the answer. The introduction of iOS 7 complicated things further, demanding a more intense visual refresh if it were to keep with the times. So, this time last year, we decided to put Simple Bracket on hiatus and reevaluate the next year.</p>
<p>And here we are, another year later. Design is about making choices. As much fun as we had making Simple Bracket, and seeing people use and enjoy it, we have to accept the reality that it doesn’t make sense for our business. By intentionally keeping our business small and nimble, we sometimes have to make brutal choices about how best to spend our time. Simple Bracket, unfortunately, fell on the chopping block. It should also be said that running Simple Bracket during the tournament was <em>incredibly</em> stressful. Live events tied to a constantly updated backend are not for a faint of heart, even with the relatively modest amount of users we had.</p>
<p>There is also something that has been weighing on me ever since we came up with the idea for Simple Bracket. The elephant in the room, as it were. The NCAA, to put it kindly, is not great. There is something incongruent about a billion dollar industry profiting (and thriving) off unpaid labor. But don’t take my word for it; John Oliver had an <a href="http://deadspin.com/let-john-oliver-remind-you-that-march-madness-and-the-n-1691659310">excellent segment</a> about it in the most recent episode of Last Week Tonight. It wouldn’t be correct to say this is the reason we have abandoned Simple Bracket, but it certainly makes the decision less painful.</p>
<p>All that said, we are still extraordinarily proud of what we created. The UI for navigating the bracket was indeed innovative, as evidenced by ESPN and Yahoo both imitating it fairly liberally in their current bracket apps. Not as solid as our implementation, though, if you’ll permit me to say.</p>
<p>Since we’ve decided to effectively abandon the app, we are putting a call out to interested parties. If you are a developer that is interested in carrying the Simple Bracket torch, please do <a href="mailto:hello@studioneat.com">get in touch</a>.</p>]]>
    </content>
  </entry>
  <entry>
    <id>https://www.studioneat.com/blogs/main/17250808-how-to-kickstarter</id>
    <published>2015-02-18T09:43:00-06:00</published>
    <updated>2015-03-16T18:39:14-05:00</updated>
    <link href="https://www.studioneat.com/blogs/main/17250808-how-to-kickstarter" rel="alternate" type="text/html"/>
    <title>How to Kickstarter</title>
    <author>
      <name>Dan Provost</name>
    </author>
    <content type="html">
      <![CDATA[<p>To date, we (Tom and Dan, aka Studio Neat) have launched and successfully funded <a href="https://www.kickstarter.com/profile/danprovost/created" title="Kickstarter profile page for Dan Provost &amp; Tom Gerhardt">five Kickstarter projects</a>, raising nearly half a million dollars in total. We were one of the first product design projects on the site, with the <a href="https://www.kickstarter.com/projects/danprovost/glif-iphone-4-tripod-mount-and-stand" title="Kickstarter project page for the Glif">Glif</a> way back in 2010, and we’ve continued to use the platform to launch new products, <a href="https://www.kickstarter.com/projects/danprovost/simple-syrup-kit" title="Kickstarter project page for the Simple Syrup Kit">most recently</a> just a few months ago. It’s pretty clear to us that Kickstarter is not a bubble, nor a flash in the pan, but a sustainable platform that is here to stay. As such, we wanted to unload all of the knowledge we have accrued in running those five projects in one mega-post, with the hope of it being helpful to future and/or aspiring Kickstarters.</p>
<p><em>(Note: If you read our book, <a href="http://www.studioneat.com/products/exhilarating" title="Studio Neat page for It Will Be Exhilarating">It Will Be Exhilarating</a>, some of this will seem familiar. This post is a greatly expanded, revised, and updated version of the Crowd Funding chapter.)</em></p>
<h3>What is Kickstarter?</h3>
<p>For the uninitiated, <a href="https://www.kickstarter.com" title="Kickstarter">Kickstarter</a> is “the world’s largest funding platform for creative projects.” The concept is simple: a person has an idea for a creative project, but does not have the money to make it. By using Kickstarter, that person can try to get “pledges” from “backers” on the internet. This is known as crowd funding. A pledge is kind of like a monetary donation, but with most projects, the backer receives something tangible in return for their pledge, known as a “reward.” The important twist is that every project on Kickstarter has a funding goal, i.e., how much money is needed for the project to be able to be carried out. If the goal is not met, the project does not move forward and nobody’s credit cards are charged. If the goal is met, everyone’s credit card is charged, the money is transferred to the project creator, the project creator is able to make the creative project, the backers get cool rewards, and high-fives are distributed accordingly.</p>
<p>Kickstarter has helped fund projects of all shapes and sizes. The range of project types is quite extraordinary, including music albums, films, video games, potato salads, dance videos, and pretty much anything that is considered a creative project. The only real rules are that you can’t have a project that raises money for charity, and you can’t have a project that offers equity in the creation of a business (the latter has recently become legal due to the <a href="http://en.wikipedia.org/wiki/Jumpstart_Our_Business_Startups_Act" title="Wikipedia page for JOBS Act">JOBS act</a>, but Kickstarter has stated that don’t have an interest in this type of crowd funding).</p>
<p>Kickstarter represents an exciting way to bootstrap ideas. Rather than seeking outside funding or a bank loan, Kickstarter allows you to collect money from individuals that believe in what you’re doing and want to support it. It’s also a great way to test the viability of your idea. People vote with their dollars. If the project fails, the only real downside is sadness, but at least you didn’t invest a huge amount of your own time and money to execute a project that didn’t have legs to begin with. And on the upside, you may learn why people weren’t interested, and how you can make improvements in the future.</p>
<h3>A Brief Summary of Our Kickstarter Projects</h3>
<meta charset="utf-8">
<p>Since they will be referenced throughout the post, here is a brief summary of our Kickstarter projects.</p>
<p><img src="//cdn.shopify.com/s/files/1/0057/8492/files/circle_projects_2x3.jpg?13333158720026760770"></p>
<p><a href="https://www.kickstarter.com/projects/danprovost/glif-iphone-4-tripod-mount-and-stand" title="Kickstarter: Glif - iPhone 4 Tripod Mount &amp; Stand">The Glif</a><br> A Tripod Mount &amp; Stand for iPhone 4.<br> Launched October 3, 2010<br> Ended November 2, 2010<br> Goal: $10,000<br> $137,417 pledged<br> 5,273 backers<br> Started shipping to backers in early December, 2010.</p>
<div id="glfChart" style="width: 100%; height: 400px;"></div>
<p><a href="https://www.kickstarter.com/projects/danprovost/the-cosmonaut-a-wide-grip-stylus-for-touch-screens" title="Kickstarter: Cosmonaut - Wide-grip Stylus for Touch Screens">The Cosmonaut</a><br> A Wide-Grip Stylus for Touch Screens.<br> Launched March 28, 2011<br> Ended April 20, 2011<br> Goal: $50,000<br> $134,236 pledged<br> 6,192 backers<br> Started shipping to backers in December, 2011.</p>
<div id="cosChart" style="width: 100%; height: 400px;"></div>
<p><a href="https://www.kickstarter.com/projects/danprovost/simple-bracket" title="Kickstarter: Simple Bracket">Simple Bracket</a><br> An iPhone app for filling in March Madness brackets.<br> Launched February 5th, 2013<br> Ended March 5th, 2013<br> Goal: $10,000<br> $12,442 pledged<br> 1,211 backers<br> Delivered in time for the March 2013 tournament.</p>
<div id="sbChart" style="width: 100%; height: 400px;"></div>
<p><a href="https://www.kickstarter.com/projects/danprovost/neat-ice-kit" title="Kickstarter: Neat Ice Kit">Neat Ice Kit</a><br> A set of tools to create beautifully clear ice for a variety of cocktails.<br> Launched August 28, 2013<br> Ended September 27, 2013<br> Goal: $50,000<br> $155,519 pledged<br> 2,274 backers<br> Started shipping to backers in July, 2014.</p>
<div id="nikChart" style="width: 100%; height: 400px;"></div>
<p><a href="https://www.kickstarter.com/projects/danprovost/simple-syrup-kit" title="Kickstarter: Simple Syrup Kit">Simple Syrup Kit</a><br> A kit for making and storing your own simple syrup.<br> Launched August 20, 2014<br> Ended September 19, 2014<br> Goal: $25,000<br> $31,414 pledged<br> 994 backers<br> Started shipping to backers in December, 2014.</p>
<div id="sskChart" style="width: 100%; height: 400px;"></div>
<h3>Is Kickstarter Right For You?</h3>
<p>Kickstarter is one of the main reasons, if not the reason, Studio Neat is in business today. It’s an incredible platform that continues to explode in popularity, and there is a great variety in the types of projects featured on the site. That does not mean Kickstarter is for everyone, however. Not all ideas make sense as a Kickstarter project.</p>
<p>Kickstarter may not be right for you simply because of the type of project you’re working on. If you have a big, sprawling concept that involves building up a large social network, or lots of upfront work to make a proof-of-concept, seeking outside investment or venture capital funding may indeed be the better path. Kickstarter works well with smaller, self-contained ideas. On that note, if you make handmade, bespoke items, a platform like the wonderful <a href="https://www.etsy.com" title="Etsy">Etsy</a> might be a better choice. <a href="https://www.quirky.com/shop" title="Quirky">Quirky</a>, the crowdsourcing design platform, is a better fit if you have a great idea but no idea of how to execute. Additionally, if you are located outside of one of the few countries where Kickstarter is available for project creators, then you are out of luck. In those cases, <a href="https://www.indiegogo.com" title="Indiegogo">Indiegogo</a> seems to be the go-to option.</p>
<p>Some people feel the need to dictate what should and should not be on Kickstarter. For example, remember the shit-storm when Zach Braff funded <a href="https://www.kickstarter.com/projects/1869987317/wish-i-was-here-1" title="Kickstarter: Wish I Was Here">his movie</a> on the site? People felt that because Braff did not “need” the funds (i.e. he is a wealthy celebrity), he shouldn’t have funded the film on Kickstarter. We think this stance is, frankly, ridiculous. Kickstarter is for everyone, and it is so much more than just funding. It’s about creating a community around the process of bringing something to life. It’s also about idea validation, and mitigating risk.</p>
<p>After the success of our first Kickstarter project, raising much more than we anticipated, we were hesitant to return to the platform. We had the same fear that Braff ended up facing: people accusing us of being greedy and misusing the platform. After chatting with several people, including some folks at Kickstarter, we were strongly encouraged to give it a go. And it turns out, there was not one naysayer upon our return to Kickstarter. People were simply excited there was a cool new thing to be a part of.</p>
<h3>Estimating Cost</h3>
<p>One of the first things you will need to do is estimate the cost of your project, to determine your funding goal. This can be tricky, especially if it’s in an area outside of your expertise (e.g., manufacturing). Talk to as many people as you can before starting your campaign to make sure you have reasonable expectations of how much things will cost.</p>
<p>Kickstarter collects 5% of your funding total, and Stripe (previously Amazon) grabs another ~3% as the payment gateway. Also, factor in about 5% dropped backers, meaning backers whose credit cards are denied when the campaign ends.</p>
<p>One of the biggest “gotchas” from our first campaign was how much it costs to ship things worldwide. We find that project creators consistently underestimate this cost. Be sure to keep this is mind as you shape your reward tiers and funding goal.</p>
<p>Lastly, be mindful of Uncle Sam. Any money you raise on Kickstarter is considered taxable income for the calendar year in which your project is funded. The money you sink back into the project (like manufacturing and fulfillment costs) can help reduce your tax burden, but everything else is taxable. As with things of this nature, speak to an expert. Glenn Fleishman wrote an <a href="https://medium.com/the-magazine/pay-caesar-his-due-b6481c44c3ff" title="Pay Caesar His Due">excellent and thorough piece</a> about his own experience with crowd funding and taxes.</p>
<p>With all that in mind, it is a good idea to overestimate your funding goal, as there will be plenty of little unexpected costs, and maybe a few bigger ones, along the way.</p>
<h3>When to Launch</h3>
<p>Say you’re working on an idea that you’re really excited about, and you want to launch on Kickstarter. At what point in the design process is it safe to press that big green LAUNCH button?</p>
<p>We have launched five Kickstarter projects at varying degrees of “readiness,” but we can be blunt about this part: a napkin sketch is not enough. If you are making a physical piece of hardware, a working prototype is a must. Also, it’s important to start conversations with manufacturers beforehand to make sure your design is not impossible (or extremely difficult) to manufacture. In our general impression, projects that are successfully funded but fail to deliver (in timely manner, or at all) are a result of not doing the necessary legwork up front. Our experience being in the hardware and software categories, it’s harder to speak to other project categories, like film or dance, but the same general lesson should apply. Have a plan. Don’t wing it.</p>
<p>It is going to be <em>very</em> tempting to launch the project as soon as possible. We’ve found the weeks leading up to a launch to be a particularly anxious time. “What if someone swoops in and launches a project just like ours right before we do?” Take a breath, and try to resist the urge to launch prematurely. You will thank yourself in the end.</p>
<p>No matter how prepared you are up front, unexpected hiccups will occur. This is normal. Actually, you should be worried if no hiccups occur. No amount of planning will solve that. Just roll with the punches.</p>
<h3>Formatting Your Campaign</h3>
<p>If you’ve made it this far, you’ve decided to go forth and create a Kickstarter campaign. Well done. You are about to embark on a journey both strange and wonderful.</p>
<p>Opinion varies on the ideal length of time for the campaign. Conventional wisdom would deem the longer the better, allowing more days to receive funds. However, this line of thinking is not necessarily true, and we have found that shorter is actually better: the campaign stays fresh and relevant, and doesn’t appear to drag on forever. Remember, people have short attention spans on the internet. Thirty days seems to be the sweet spot for campaign funding duration, but plenty of projects have found success with even shorter funding periods.</p>
<p>In setting up reward tiers, simplicity is key. Kickstarter now allows for shipping costs to be added on top of the tier price, which is nice. This wasn’t an option when we launched our first campaign, and it was a pain in the ass to try to collect shipping costs after the campaign had ended. For simplicity, we now include the cost of U.S. shipping in the pledge price (essentially giving free shipping to U.S. backers), and there is an additional cost if you are located overseas. Also, it’s going to be tempting, but don’t get carried away with too many reward tiers. Variety is nice, but don’t overwhelm your potential supporters with too many options, otherwise the burden of choice might deter them from backing your project altogether. Be wary of “swag;” your time is better spent working on the project rather than shipping out stickers and t-shirts. That said, don’t be afraid to have some fun with your reward tiers. Ze Frank is the poster child for this (love that <a href="https://www.kickstarter.com/projects/zefrank/a-show-with-ze-frank" title="Kickstarter: A Show With Ze Frank">$69 reward tier</a>), although taking the tiers to that extreme is usually better suited for projects, well, by Ze Frank.</p>
<p>There is definitely room for creativity in the way you format your campaign. For the Cosmonaut campaign, we decided to try something different. Rather than launching with traditional tiers, we instituted a “pay-what-you-want” system, inspired by how Radiohead released <a href="http://en.wikipedia.org/wiki/In_Rainbows#Release" title="Wikipedia: In Rainbows">In Rainbows</a>. Tongue firmly in cheek, we also liked the socialism tie-in with the Cosmonaut branding (“pay whatever you can afford!”). There was a key distinction between our campaign and other pay-what-you-want projects, however. We had a funding goal ($50,000) and a limited number of slots (3000). This created a natural tension that was quite fascinating to observe. If too many people “under-pledged,” the funding goal would not be met, and no one would receive a Cosmonaut. People who had pledged a “fair” amount had to decide either to pledge more, or use the comments page to coax/harass the under-pledgers into giving more.</p>
<p>Initially we sold out of the 3000 slots within the first 48 hours, and were about $5000 shy of the $50,000 funding goal. After some brief deliberation, we decided to open up new, unlimited tiers, to ensure the funding goal was met and make sure everyone who wanted a Cosmonaut could get one. The final product was more important than our game theory experiment, after all.</p>
<p>At the end of the day, was the pay-what-you-want experiment worth it? We think so, although that doesn’t mean we would do it again (and indeed, we haven’t), nor would we necessarily recommend it. It was a tool to generate some great press and excitement for the project, but we don’t see it as a sustainable funding method on Kickstarter.</p>
<p>All of our projects, with one exception (Simple Bracket), were hardware projects, but the way a project is formatted can vary greatly depending on the category it falls under. It’s a good idea to look at other successful campaigns for products that are similar to yours, and see what they did right. Checking out unsuccessful projects to learn from their mistakes can be helpful as well.</p>
<h3>Stretch Goals</h3>
<p>Like the hashtag on Twitter, stretch goals on Kickstarter were created and embraced by the community without initial support from the company. Unlike Twitter, however, Kickstarter doesn’t seem likely to officially embrace this community hack any time soon. In a post on the official Kickstarter blog, CEO Yancey Strickler <a href="https://www.kickstarter.com/blog/think-before-you-stretch" title="Kickstarter blog: Think Before You Stretch">makes a compelling case</a> for why stretch goals are generally a bad idea, and we tend to agree with his assessment.</p>
<p>Yancey defines stretch goals as “unofficial targets beyond a project’s funding goal, with promises of new rewards or other incentives if they are reached.” It’s not surprising that stretch goals are popular; if your project has quickly exceeded your initial funding goal, it makes sense to try to find ways to keep the good times rolling, as it were.</p>
<p>The problem is, these stretch goals risk “muddying the water.” Kickstarter projects are elegant in their simplicity, and things can get out of control quickly with the addition of stretch goals. The last thing you want to do is create confusion for a backer. Worse, stretch goals are a slippery slope that can lead to biting off more than you can chew. Sketch goals are writing checks that your body can’t cash. How many more metaphors can I cram into this paragraph?</p>
<p>That’s not to say there is never a place for stretch goals. I recently backed a <a href="https://www.kickstarter.com/projects/2116548608/notes-on-a-case-of-melancholia-or-a-little-death" title="Kickstarter page for Notes on a Case">project for a book</a> from the creator of <a href="http://www.pbfcomics.com" title="PBF Comics">Perry Bible Fellowship</a> comics. Nicholas introduced stretch goals after he blew past his initial funding goal, but rather than offering other rewards, the goals were simply to improve the quality of the initial offering: the book. For example, if X amount of dollars are raised, it would now be cost effective to print on higher quality, recycled paper. In this scenario, everyone wins. Current backers are encouraged to share the project, as any additional pledge will result in the thing they already backed improving in quality. I love that almost as much as I love this <a href="http://www.pbfcomics.com/271/" title="Perry Bible Fellowship - Spelling">PBF comic</a>.</p>
<h3>A Word on Patents</h3>
<p>One of the most common questions we get regards patents. Should you get one? Obtaining patents for our products is something that at first seemed like a good idea. I remember when our first project, the Glif, started to blow up, and I was freaked out we didn’t have a patent on the design.</p>
<p>As with things of this nature, make sure you contact an expert rather than relying solely on the advice from two dudes with no legal expertise. However, it is our understanding that the path to obtaining a patent is a black hole that sucks up money and spits out sadness. Many people seem to have the misconception that patents are magical things that act like a force field around your product, preventing anyone from ever ripping it off. Sadly, this is not how they work.</p>
<p>Here are a few things we’ve learned about patents:</p>
<ul>
<li>They are very expensive.</li>
<li>There are different varieties of patents. A design patent, which is the “cheapest” to obtain, only protects the visual ornamentation of an object, not its function. A classic example of this is the glass Coca Cola bottle. They can patent the specific shape and design of the bottle, but obviously they don’t have a patent on a “container that holds liquid.” Utility patents, which do include the function, are much more expensive (and are sometimes impossible) to obtain.</li>
<li>Most patents only protect infringement within the United States. There are international patents, but these are even more costly to obtain.</li>
<li>Patents do nothing to prevent people from stealing your idea. All they do is give you the legal authority to take action if you believe someone is infringing. You would still need to hire a lawyer to take the perp to court. This point may seem obvious, but it’s easy to overlook the cost of pursuing legal action, on top of the cost of the patent itself.</li>
</ul>
<p>Ultimately, we have realized that patents are basically designed to protect large corporations, and the idea of a small company of two people obtaining a patent is fairly ridiculous. We decided to pass.</p>
<p>To put things in perspective, since launching the Glif, there have been a few <a href="http://www.amazon.com/Black-Sidekic-Iphone-Tripod-Mount/dp/B00C11ASSA/ref=sr_1_1?ie=UTF8&amp;qid=1423440038&amp;sr=8-1&amp;keywords=sidekic" title="Glif ripoff on Amazon">direct</a> <a href="http://www.amazon.co.uk/Apfeltrend-GmbH-iclyp/dp/B004RZD2W2" title="Glif ripoff on Amazon">imitations</a> that have cropped up, out of Germany and Taiwan. There is not much we can do, other than shrug our shoulders and carry on. Let’s imagine for a moment we did have a heavy-duty international utility patent. How would that change things? Would we really be willing to sink the time and money into going after them? Our guess is no. We’d rather just spend that time designing more great products. As long as our brand remains strong, we think enough customers will choose the real deal versus the knockoff.</p>
<h3>Video</h3>
<p>The most important aspect of a Kickstarter campaign, besides a great project, is the video. Video is the language of Kickstarter. It is generally the first impression a potential backer will have when they view your project.</p>
<p>So, what makes a good video? Kickstarter videos vary widely, but they all contain some key elements. Here is what we have found to work well:</p>
<p>1) Keep it short. Your video should be about 2 minutes or less, and should show the project you are pitching within the first 15 seconds. Be as economical with time as possible; people have short attention spans on the internet.</p>
<p>2) Be personal. Share your story. Nearly all successful Kickstarter videos feature the project creator(s) speaking directly to the camera, and there is a reason for this. People want to see your passion for the project, and this is the most direct way to do that. If you are not comfortable in front of a camera, it can be incredibly difficult, but it’s necessary. We found that taking a couple shots of whiskey helps take the edge off. Keep the camera rolling and do several takes, eventually the passion and excitement (and booze) will overcome the awkwardness.</p>
<p>3) Be honest. You are not a huge corporation, so don’t make a fancy video that tries to imitate one. Speak directly to the viewer/potential backer, and let your passion for the project shine though. By all means, your video should be polished and well crafted, but keep your audience in mind. Don’t use hyperbolic language or marketing terms, just be clear, concise, and honest.</p>
<p>Our project videos are generally like a <a href="http://en.wikipedia.org/wiki/Pixies#Musical_style" title="Wikipedia: Pixies">Pixies</a> song: quiet, loud, quiet. We start with a quick talking head of us introducing the product, quickly cut to a montage of the product in action, demonstrating various use cases, and then close the video with another talking head, this time addressing why we need the funding. It’s a format that has worked well for us, but your mileage may vary. Don’t be afraid to try something new.</p>
<p>I’d like to point out two project videos, that represent opposite ends of the spectrum. The first is <a href="https://www.kickstarter.com/projects/1306413684/flag-the-app-that-prints-and-mails-your-photos-for" title="Kickstarter Project page for Flag">Flag</a>. This video was produced by <a href="http://sandwichvideo.com" title="Sandwich Video">Sandwich Video</a>, and it’s as good as it gets. It’s professional, tight, and funny, and comes across as genuine. If you’ve got the budget (or know-how) to produce something like this, go for it. The beauty of Kickstarter, however, is that a video of this professional quality is not required to have a successful project. Our friends <a href="http://cwandt.com" title="CW&amp;T">CW&amp;T</a> produced a great video for their Kickstarter project, the <a href="https://www.kickstarter.com/projects/cwandt/pen-type-a-a-minimal-pen" title="Pen Type-A Kickstarter project page">Pen Type-A</a>. They recorded the talking bit in one take from what looks like a Macbook iSight camera, and it is ridiculously charming. If that doesn’t come across as authentic, I don’t know what does. Sure, they get a little bit fancy with the side by side video footage, but this video does a good job of illustrating how lo-fi a video can be, but still succeed at conveying the project goals in an honest way.</p>
<p>Here are some more Kickstarter videos we really dig:</p>
<p><a href="https://www.kickstarter.com/projects/joylabs/makey-makey-an-invention-kit-for-everyone" title="Kickstarter: Makey Makey">MaKey MaKey</a><br> <a href="https://www.kickstarter.com/projects/fchimero/the-shape-of-design" title="Kickstarter: The Shape of Design">The Shape of Design</a><br> <a href="https://www.kickstarter.com/projects/doublefine/double-fine-adventure" title="Kickstarter: Double Fine Adventure">Double Fine Adventure</a></p>
<h3>Music in Your Video</h3>
<p>Now comes the part that is a little uncomfortable to talk about. An ethical grey area, if you will. Can you use copyrighted music in your Kickstarter video? The answer, pretty plainly, is no, although that hasn’t stopped many people. Including us, sheepishly.</p>
<p>If I had to hazard a guess why others (and ourselves) do this, it comes from a belief that it does no harm. You could even construct an argument that it is beneficial to lesser known artists, providing exposure if the project becomes popular. Further, I have yet to learn of a Kickstarter project video getting a take-down request due to the music used.</p>
<p>However flimsy these arguments, the bottom line is you probably shouldn’t be using copyrighted music. Thankfully, there are couple good resources for licensing music guilt-free, namely <a href="https://www.marmosetmusic.com" title="Marmoset Music">Marmoset</a> and <a href="https://www.musicbed.com" title="The Music Bed">The Music Bed</a>. Both of those services are paid, but things like <a href="http://vimeo.com/musicstore" title="Vimeo Music Store">Vimeo Music Store</a> have some Creative Commons selections that can be used for free.</p>
<p>We will strive to be better internet citizens in the future. Join us?</p>
<h3>Promotion</h3>
<p>Many people make the mistake of thinking that once their project launches on Kickstarter, their work is done, and they can sit back as the money rolls in. This couldn’t be further from the truth. In reality, launching a project is the moment the real work begins.</p>
<p>Kickstarter has a few ways to feature projects, namely on their homepage or in their weekly email newsletter. However, these shouldn’t be relied on. It’s your responsibility to get people to discover your project, not Kickstarter’s. Having a Kickstarter project is a lot like having an app in the App Store: that fact, in itself, does not make it interesting. The novelty of both has for the most part worn off, and the quality and originality of the product is what needs to stand out.</p>
<p>When you are running a Kickstarter campaign, it’s a bit weird to be spending money on advertising when you are trying to raise it to make your thing, but there are plenty of ways to get “free” publicity, as illustrated below.</p>
<h3>Internet Famous</h3>
<p>One of the most valuable (and humorous) classes I took while in grad school at Parsons was called Internet Famous. It was taught by <a href="http://en.wikipedia.org/wiki/Jamie_Wilkinson" title="Wikipedia: Jamie Wilkenson">Jamie Wilkenson</a>, <a href="http://en.wikipedia.org/wiki/James_Powderly" title="Wikipedia: James Powderly">James Powderly</a>, and <a href="http://en.wikipedia.org/wiki/Evan_Roth" title="Wikipedia: Evan Roth">Evan Roth</a>, no strangers to the Internet fame game. The goal of the class was simple: to try to get noticed on the Internet. As silly and narcissistic as that sounds, it provided an invaluable exercise in attempting to understand what makes the web tick, and more specifically, how to get traffic without spending money. The key lesson, in a nut shell, is to be proactive. The bloggers will rarely come to you; it is your task to make their job easier by seeking them out and providing the pertinent information.</p>
<p>If you are looking to promote your project, it likely falls into a niche category that is covered by an influential blogger, and you probably already follow and are huge fans of them. Send them an email, but not just a blanket, copy and pasted PR statement. Write to them directly. Make it personal. Keep it short and sweet, but try to convey why you think that writer, specifically, might be interested in your project. It is often a good idea to reference something they have posted in the past, by way of explaining why your project is a good fit for their blog. Some bloggers also like for you to include a link to press images, thus saving them some legwork.</p>
<p>If a writer posts a link to your project, send them a short note of thanks. Use those manners your mother taught you.</p>
<p>Over the years we have built up a fairly extensive press contact spreadsheet in Google docs, and would recommend the same. This makes it easier to reach out to the right people when you have something new to promote.</p>
<h3>The Gruber Effect</h3>
<p>
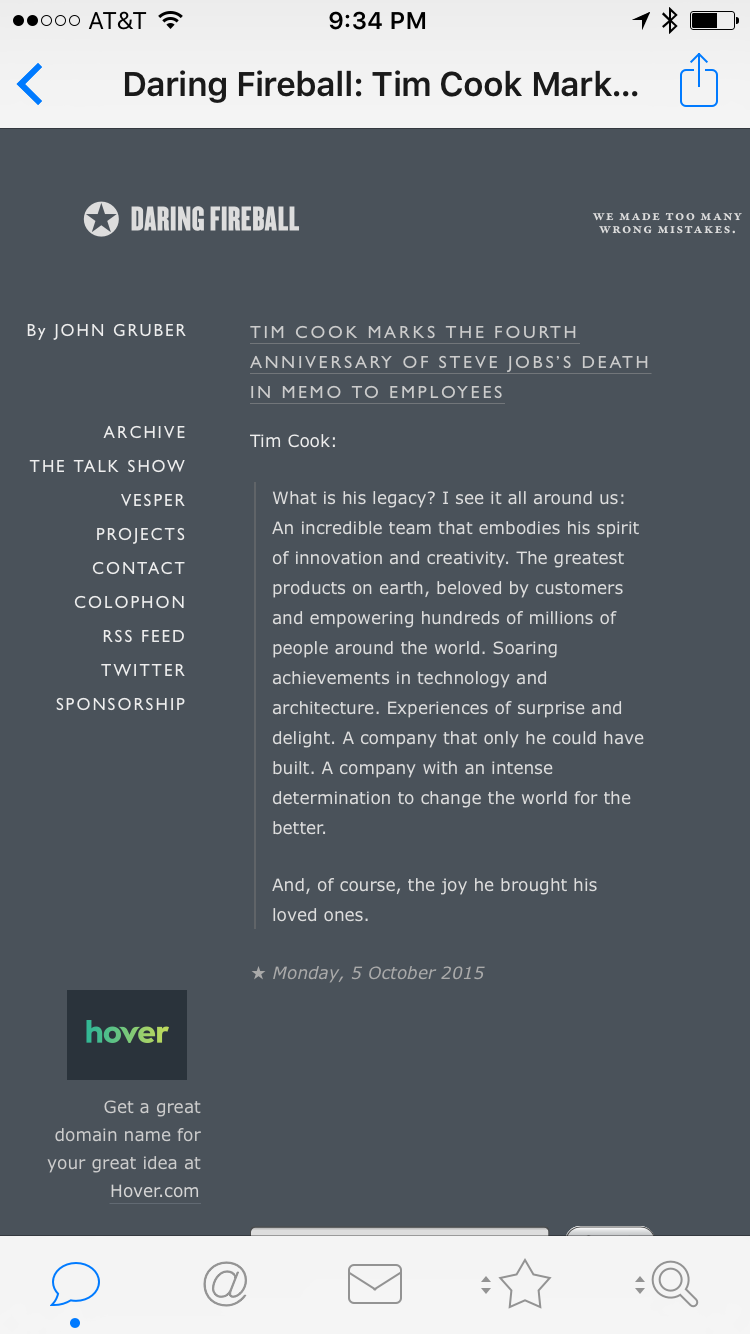
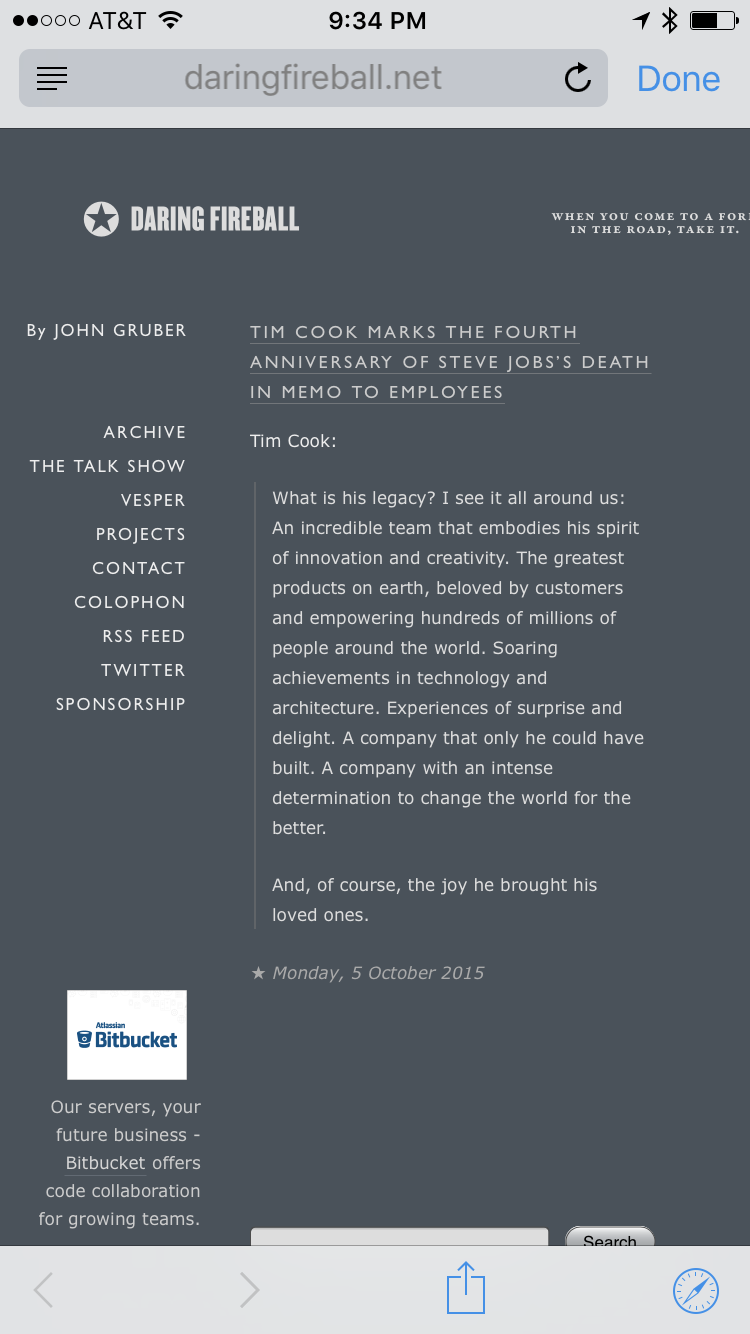
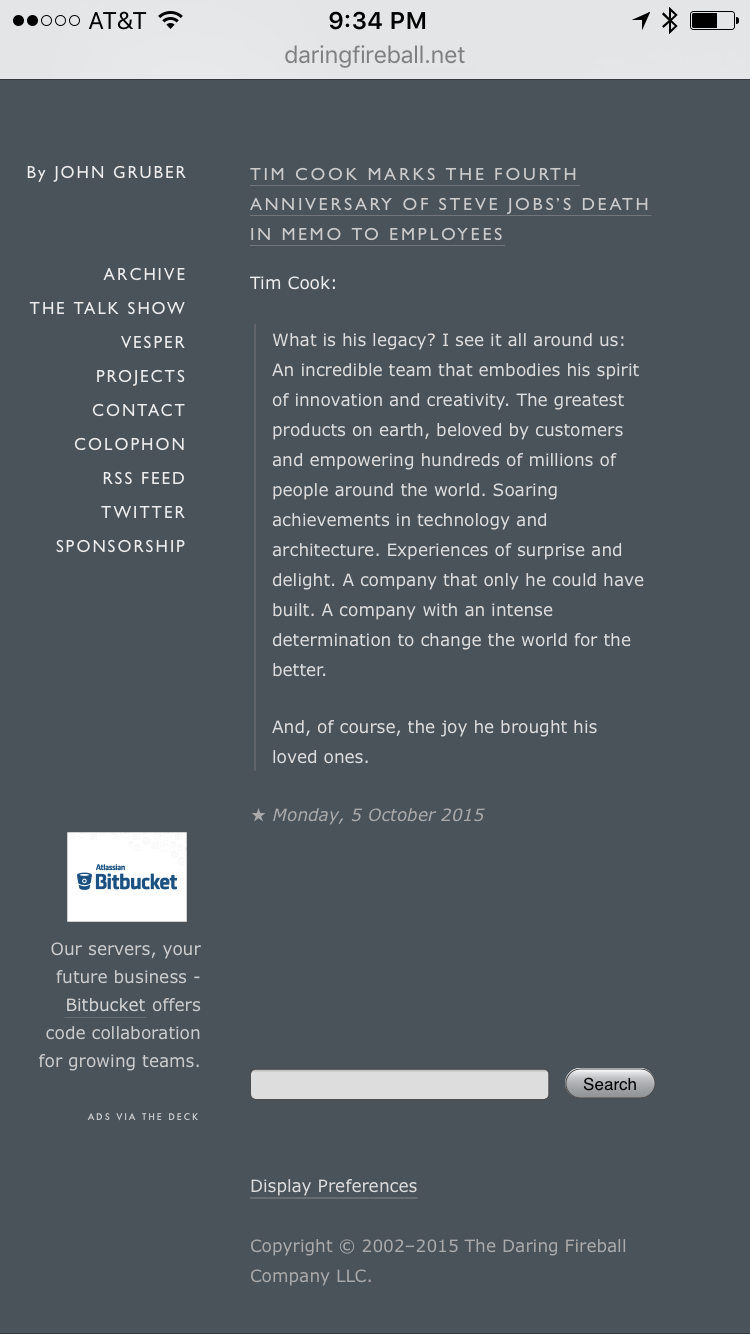
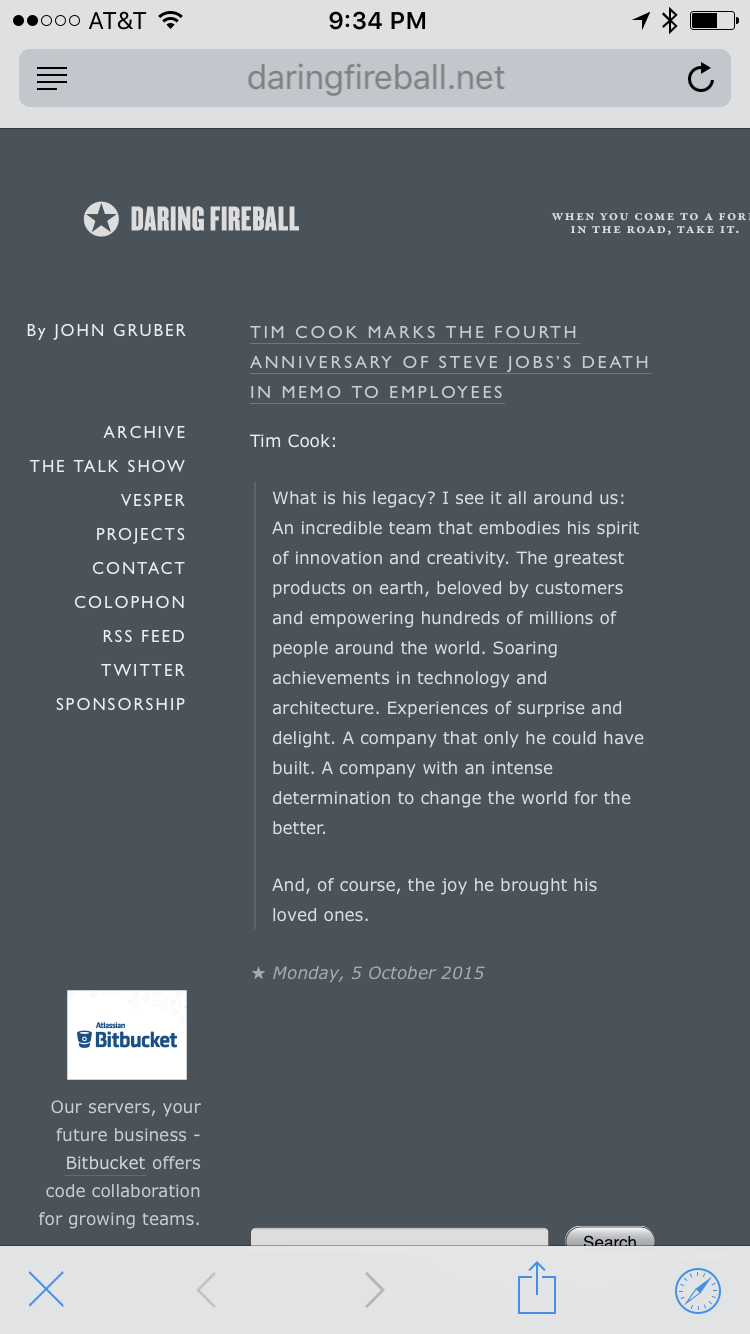
John Gruber is a man of exquisite taste who writes for <a href="http://daringfireball.net" title="Daring Fireball">Daring Fireball</a>, a website focusing on technology and design through the lens of Apple products. He has an enormous following; anyone with more than a passing interest in Apple likely subscribes to his RSS feed. Remember back in the 90’s when Oprah would add a book to her Book Club and it would immediately become a best seller? Gruber has that type of influence in the tech community.</p>
<p>We had the good fortune of having a modest rapport with John, as he had linked to my <a href="http://therussiansusedapencil.com" title="The Russians Used a Pencil">old blog</a> a couple of times in the past. The day we launched the Glif campaign, we sent him an email with a link to the project page, and offered to send him a prototype to check it out early.</p>
<p>On the morning of October 4th, 2010, John Gruber linked to our Kickstarter campaign on Daring Fireball. The <a href="http://daringfireball.net/linked/2010/10/04/glif" title="Daring Fireball: Glif">post</a> was innocent enough, only 167 characters. 1 hour and 25 minutes after the post went live, we surpassed our funding goal of $10,000, and finished the day with over $25,000.</p>
<p>The point of this anecdote is not to tell you to email John Gruber so your project will be successful. Don’t do that, in fact, as we’re sure he’s inundated with Kickstarter related emails at this point. The point is, communities often have “tastemakers” that set the conversation. Malcolm Gladwell refers to these people as “Mavens.” For all things Apple, that person is John Gruber, but there is likely someone similar for the community to which your product belongs. These individuals are often more influential, in this context, than larger publications like The New York Times. Three cheers for the Internet being the great equalizer.</p>
<h3>The Kottke Boost</h3>
<p>As we mentioned earlier, if you are trying to raise money on Kickstarter, it might feel a little weird to be spending money on advertising. There is one exception, however, that we highly recommend: <a href="http://kottke.org/boost/" title="Kickstarter Boost">The Kottke Boost</a>.</p>
<p>If you are somehow unaware, Kottke.org is one of the best blogs on the internet, and has been chugging along for well over a decade. In Jason’s words: “The editorial direction of the site is all over the place but clusters around a pair of hand-wavy ideas: the liberal arts 2.0 and people are awesome.” In other words, the audience for his site and people that like to back interesting Kickstarter projects are two circles nestled neatly inside one another.</p>
<p>Not long ago, Jason <a href="http://kottke.org/boost/" title="Kickstarter Boost">began to offer</a> a special kind of sponsorship post, available only to Kickstarter projects, for the absurdly low price of $500. And if that wasn’t good enough, the payment terms work just like Kickstarter, in that, if your project ends up not meeting your funding goal in spite of the boost on Kottke.org, you don’t pay the $500.</p>
<p>Because this is a fairly new offering, we’ve only been able to use it once, with our latest project, the Simple Syrup Kit. Kickstarter analytics tells us traffic directly from Kottke.org created $900 in pledges, but that doesn’t account for traffic from the Kottke twitter account, or people that saw the post but backed the project indirectly. So, in short, it easily paid for itself, and then some. Definitely a buy.</p>
<h3>Project Updates</h3>
<p>While you will likely send project updates to backers while funding is occurring, the vast majority will be sent after funding has closed. Project updates are the second most important aspect of any successfully run Kickstarter campaign, after the video. The majority of backers did not just buy in to a product idea, they want to be along for the ride, and it’s your job to provide that experience. This is what makes Kickstarter a unique consumer experience: everyone is let in on the “behind the scenes” action. Amazingly, people actually do want to see how the sausage is made.</p>
<p>We love to create “making of” videos for our products. Aside from the fact that they are a blast to make, they are a polished and concise way to present the creation of a product. We <a href="https://www.kickstarter.com/projects/danprovost/glif-iphone-4-tripod-mount-and-stand/posts/38888" title="Glif Update Video">created</a> a <a href="https://www.kickstarter.com/projects/danprovost/glif-iphone-4-tripod-mount-and-stand/posts/41389" title="Glif Update Video">couple</a> for our Glif campaign, and they were our most popular updates for that project. Likewise, our <a href="https://www.kickstarter.com/projects/danprovost/the-cosmonaut-a-wide-grip-stylus-for-touch-screens/posts/147581" title="Mr. Rogers Cosmonaut Video">Mr. Rogers</a> Cosmonaut video was a big hit. For the Neat Ice Kit, we made <a href="https://www.kickstarter.com/projects/danprovost/neat-ice-kit/posts/647608" title="Lewis bag video">short</a> <a href="https://www.kickstarter.com/projects/danprovost/neat-ice-kit/posts/671833" title="Silicone video">little</a> <a href="https://www.kickstarter.com/projects/danprovost/neat-ice-kit/posts/777192" title="Card printing video">videos</a> for nearly every piece that was manufactured. And again, these to do not need to be super professional. For the <a href="https://www.kickstarter.com/projects/danprovost/neat-ice-kit/posts/721997" title="Wooden muddler video">making of the wooden muddler</a> for the Neat Ice Kit, for example, we weren’t able to make it to the factory, so our contact there simply recorded the manufacturing process with his iPhone, Dropboxed us the footage, and we cut it together.</p>
<p>One tricky part of updates is finding the right cadence. If you send too many it becomes spammy and they are largely ignored. Send too few, and backers become anxious. We generally like to wait until we have a lot of things to report, and then bundle them up into a meaty update. Keep in mind, the update is sent to every backers’ email inbox, so be mindful and respectful of the number of updates you are sending.</p>
<h3>Managing Expectations</h3>
<p>Having 5000 backers is a gift. It is, however, like having 5000 bosses. They are not literal investors, but a strange relationship is created between a project creator and the backers.</p>
<p>Our Glif campaign went astoundingly well, especially in hindsight. Funding ended on November 2nd, 2010, and backers began receiving their Glifs in the mail a little over a month later, in time for the holidays. We skated through the production process unscathed; all of our material choices and tolerances were right on the money, so nothing needed to be redone. Part of that is to our credit for intentionally designing a very simple product, but beginner’s luck must have been a factor as well. Unfortunately, we used up all our luck on the Glif project, leaving little for our next project, the Cosmonaut.</p>
<p>We learned a lot from the Cosmonaut project, specifically when it came to managing expectations. The campaign launched in late March, and we set an initial goal of delivery in June, which seemed totally reasonable based on our experience with the Glif. After several manufacturing delays too painful to go in to, June turned to “late summer,” which turned to “fall,” and we ultimately delivered at the beginning of December. We cringed each time we had to send a project update to the backers notifying them of the delay, but obviously it’s better to bite the bullet and be honest than to leave backers in the dark.</p>
<p>When we experienced delays with another project, the Neat Ice Kit, we felt much better prepared, since we had faced it once before. For starters, we gave ourself a very generous timeline, so we ended up only delivering a couple months late. By keeping the communication channels open and delivering consistent and interesting campaign updates, we experienced <em>much</em> less backlash than we did with the Cosmonaut campaign.</p>
<p>There still needs to be more widespread understanding about what Kickstarter is, exactly, although it is has been getting better. This isn’t surprising, given that it’s a newish platform with an unconventional mix of commerce and patronage. One thing we noticed in running our Cosmonaut campaign was that there seemed to be a real split among our backers. The majority “got” Kickstarter, and totally understood that delays and manufacturing complications were all part of the process (and frankly, one of the selling points of backing projects, in that you get to observe how a product is made, warts and all). A vocal minority, however, expected a more traditional, Amazon-style experience. When delays occurred, they would get upset, and even demand refunds. Thankfully, we noticed with the Neat Ice Kit campaign that much fewer people had their expectations set unreasonably, so things seem to be getting better.</p>
<p>Based on our own experience as well as observations of other Kickstarter projects, rewards tend to be delivered late. Delays and snags are inevitable, and first-time project creators seem to set ambitious (and perhaps naïve) delivery schedules. However long you think the project will take to complete, you may do well to simply double that estimate. After all, it’s better to overestimate and exceed expectations, rather than the opposite. Under-promise and over-deliver, as they say.</p>
<h3>Capturing Attention</h3>
<p>When your Kickstarter campaign ends, you will obviously no longer be accepting pledges from people interested in your project, but you should find a way to capture the people that missed out on the campaign but are still interested in what you’re doing.</p>
<p>We did this by setting up a simple webpage with a form field, which allowed the user to enter their email address so that they could be notified when the product became available for general sale. Creating Twitter and Facebook profiles is another wise move. This may seem obvious, but you want to make it as easy as possible for interested people to connect with you.</p>
<p>Most recently, we tried using a service called <a href="https://www.trycelery.com" title="Celery">Celery</a> to continue collecting pre-orders on our website after the campaign ended, and it seemed to work well. The nice thing about a service like this is it integrated with our already existing e-commerce site, so it was a cinch to implement.</p>
<p>Others have used and recommend a service called <a href="https://www.backerkit.com" title="Backerkit">Backerkit</a>, but we have never personally used it. It is meant as sort of a replacement to Kickstarter’s built in survey, and makes it easier to manage backer information, as well as sell additional rewards after the campaign ends. We have not quite felt the need for something like this, but I could see it being useful for huge campaigns with many different rewards that need to be fulfilled. The <a href="https://www.backerkit.com/pricing" title="Backerkit Pricing">fees</a> also seem to suggest it is better suited for larger campaigns.</p>
<h3>Delivering</h3>
<p>There is nothing quite like the satisfaction of finally getting your project into backers’ hands.</p>
<p>The first step to delivering your project to your backers is sending out a “backer survey.” This is done through Kickstarter, and it sends an email to all your backers directing them to the site to fill in their shipping address and other pertinent information. This whole survey process used to be one of Kickstarter’s real weaknesses, as it was quite kludgy, but it has gotten better in recent years. The aforementioned Backerkit can be used if your project is so huge it warrants it.</p>
<p>We recommend holding off on sending the backer survey until as late in the game as you can. Ideally, just a few weeks before you are ready to start shipping. If you send it too early, some people will inevitably move and manually managing address changes can get quite cumbersome. Also, don’t annoy backers with additional, unnecessary questions on the survey, e.g., “What do you plan on using Product X for?!” Save that for a different and optional survey, if you feel it’s necessary. The Kickstarter survey should be about the brass tacks, such as getting the backer’s shipping information and reward preferences.</p>
<p>Once all of the survey results are in, you can easily export all the results as a spreadsheet, which can then be used as a checklist if you are fulfilling orders manually, or uploaded directly to your fulfillment service if you take that route. Kickstarter also has some built-in features to “check-off” orders that have been shipped.</p>
<p>If you have physical rewards that need to be shipped out to backers, the decision of whether to handle that yourself or utilize a fulfillment service really comes down to numbers. For our first campaign, we hand-mailed 500 Glif prototypes to backers, and in my opinion that represents the upper limit of what you should expect to sanely do yourself. Anything higher, and consider a fulfillment service.</p>
<p>So what exactly is an “order fulfillment service?” Remember watching late night TV ads where the product would cost X dollars plus Shipping and Handling? Order fulfillment is the Handling part of that equation. You send a fulfillment company your inventory, bulk packed from your manufacturer. They stock your inventory, and when an order comes in (either through your e-commerce site, or bulk uploaded as after a Kickstarter campaign) they process it, pack it up, and ship it to the customer.</p>
<p>Ever since our first campaign, we have used <a href="https://www.shipwire.com" title="Shipwire">Shipwire</a>, and they’ve been a fantastic partner. They have six warehouses across the world (we stock inventory in three of them), which makes it easy to grow without inordinate complication and headache. Depending on the quantity shipped per month, Shipwire takes around $2 per item shipped plus the cost of the packing materials and shipping. This is a pretty standard rate for fulfillment services. They also charge a small monthly fee for renting space for your inventory in their warehouse.</p>
<p>For the Neat Ice Kit, we needed a fulfillment service that could assemble all the disparate parts into the completed kit, and we ended up going with <a href="http://amplifier.com" title="Amplifier">Amplifier</a> for that. They are local here in Austin so it has been nice to be able to physically visit the warehouse, to make sure things are going smoothly and the kits are being assembled correctly. They now handle fulfillment of the Simple Syrup Kit as well.</p>
<p>Ideally, we wouldn’t have two different order fulfillment companies, as it does add some complication and causes some problems with our e-commerce site. So if you can avoid that, try finding one that can do everything for you, and has room to grow.</p>
<p>During this whole shipping process, communication with your backers is key. Keep them up to date on delivery schedules. If you need to send the rewards out in batches rather than all at once, communicate that, ideally in a way that properly sets the expectations for when backers should receive their reward. With both the Glif and Cosmonaut campaigns, we were able to send all of the rewards out at once, which is great if you’re able to swing it, but not a big deal if not. The Neat Ice Kit orders ended up going out in batches over the course of a month or so, which was fine, so long as we communicated that clearly to our backers.</p>
<p>When everything has been delivered, take a deep breath. You have run a successful campaign, and you should feel pretty chuffed. There are going to be some stragglers who never filled in the survey, so be prepared to handle those ad hoc for the next year or so (seriously) after the initial delivery. Aside from that, have a drink. You deserve it.</p>
<h3>Beyond</h3>
<p>Hopefully, funding a project on Kickstarter will lead to something more than just the completion of that project. For us, it was the foundation of our business, and we have continued to sell and evolve our products since our first launch in 2010. The Glif, for example, has add three incarnations, including most recently, an <a href="http://www.studioneat.com/products/glif" title="Studio Neat: The Glif">adjustable version</a>.</p>
<p>If you are selling physical or digital goods, you will in all likelihood want a website to sell those products. We have used <a href="http://www.shopify.com" title="Shopify">Shopify</a> since the very beginning, and have been happy with them. There are many other options for setting up shop online, including <a href="http://www.squarespace.com/home/commerce/" title="Squarespace Commerce">Squarespace</a>, <a href="https://stripe.com" title="Stripe">Stripe</a>, and <a href="https://gumroad.com" title="Gumroad">Gumroad</a>.</p>
<p>While selling directly on your own site is a no-brainer, choosing to sell in retail or Amazon is a trickier proposition. Jason Stoddard, the founder of <a href="http://schiit.com" title="Schiit">Schiit Audio</a>, has written an <a href="http://www.head-fi.org/t/701900/schiit-happened-the-story-of-the-worlds-most-improbable-start-up/4695#post_11198852" title="The Trials and Tribulations of Amazon">excellent piece</a> that discusses the pros and cons of each. We have chosen to forego traditional retail for many of the reasons he states, but we do sell on Amazon.</p>
<p>The closing of your Kickstarter campaign should be the beginning of your journey, not the end.</p>
<h3>Additional Reading</h3>
<p>We hope this post has been illuminating, but obviously there is only so much our experience can cover. These excellent pieces below will help fill in some of the cracks.</p>
<p><a href="https://www.kickstarter.com/help/handbook" title="Creator Handbook">Kickstarter Creator Handbook</a><br> Nice overview for building your project campaign, straight from the horse’s mouth.</p>
<p><a href="http://craigmod.com/journal/kickstartup/" title="Kickstartup">Kickstartup</a>, by Craig Mod.<br> Invaluable post we referenced prior to launching our first campaign.</p>
<p><a href="http://momentlens.co/momentist/2014/04/09/how-we-raised-450k-on-kickstarter/" title="How We Raised $450k on Kickstarter">How We Raised $450k on Kickstarter</a>, by Marc Marros.<br> Sage advice from the folks at Moment, the very popular iPhone lens attachment.</p>
<p><a href="https://medium.com/the-magazine/pay-caesar-his-due-b6481c44c3ff" title="Pay Caesar His Due">Pay Caesar His Due</a>, by Glenn Fleishman.<br> Sorting out all the tax issues that arise when raising money on Kickstarter.</p>
<p><a href="http://www.head-fi.org/t/701900/schiit-happened-the-story-of-the-worlds-most-improbable-start-up/4695#post_11198852" title="The Trials and Tribulations of Amazon">The Trials and Tribulations of Amazon</a>, by Jason Stoddard.<br> In-depth overview of the pros and cons of selling your product on Amazon.</p>
<script type="text/javascript" src="https://www.google.com/jsapi"></script>
<script type="text/javascript">// <![CDATA[
google.load("visualization", '1', {packages:['corechart']});
google.setOnLoadCallback(drawChart);
var KS_Charts = {};
function drawChart() {
  var queryGLF = new google.visualization.Query( 'http://spreadsheets.google.com/a/google.com/tq?key=1OiK-laMyEQ6kbCXv_GCwLrdIPmWpfdlllvcgf8IDvKo&sheet=Glif&range=A2:A33,B2:B33' );
  queryGLF.send(handleQueryResponse_GLF);
  var queryCOS = new google.visualization.Query( 'http://spreadsheets.google.com/a/google.com/tq?key=1OiK-laMyEQ6kbCXv_GCwLrdIPmWpfdlllvcgf8IDvKo&sheet=Cosmo&&range=A2:A26,B2:B26' );
  queryCOS.send(handleQueryResponse_COS);
  var querySB = new google.visualization.Query( 'http://spreadsheets.google.com/a/google.com/tq?key=1OiK-laMyEQ6kbCXv_GCwLrdIPmWpfdlllvcgf8IDvKo&sheet=SB&&range=A2:A31,B2:B31' );
  querySB.send(handleQueryResponse_SB);
  var queryNIK = new google.visualization.Query( 'http://spreadsheets.google.com/a/google.com/tq?key=1OiK-laMyEQ6kbCXv_GCwLrdIPmWpfdlllvcgf8IDvKo&sheet=NIK&&range=A2:A33,B2:B33' );
  queryNIK.send(handleQueryResponse_NIK);
  var querySSK = new google.visualization.Query( 'http://spreadsheets.google.com/a/google.com/tq?key=1OiK-laMyEQ6kbCXv_GCwLrdIPmWpfdlllvcgf8IDvKo&sheet=SSK&&range=A2:A33,B2:B33' );
  querySSK.send(handleQueryResponse_SSK);
}
function handleQueryResponse_GLF(response) {
  if (response.isError()) {
    alert('Error in query: ' + response.getMessage() + ' ' + response.getDetailedMessage());
    return;
  }
  KS_Charts.glfData = response.getDataTable();
  KS_Charts.glfOptions = {
          title: 'Funding Graph: Glif',
          titleTextStyle: { color:'#333', fontSize: 18 },
          legend: { position: 'none' },
          backgroundColor: 'transparent',
          colors: ['#229318'],
          vAxis: {format: '$#'},
          hAxis: {format: 'MM/dd/yy'},
          fontName: 'Verlag A,Verlag B,HelveticaNeue,Arial',
          chartArea:{left:'12%',top:'12%',width:'80%',height:'70%'},
          width: '100%',
          height: '100%'
        };
  KS_Charts.glfChart = new google.visualization.AreaChart(document.getElementById('glfChart'));
  KS_Charts.glfChart.draw(KS_Charts.glfData, KS_Charts.glfOptions);
}
function handleQueryResponse_COS(response) {
  if (response.isError()) {
    alert('Error in query: ' + response.getMessage() + ' ' + response.getDetailedMessage());
    return;
  }
  KS_Charts.cosData = response.getDataTable();
  KS_Charts.cosOptions = {
          title: 'Funding Graph: Cosmonaut',
          titleTextStyle: { color:'#333', fontSize: 18 },
          legend: { position: 'none' },
          backgroundColor: 'transparent',
          colors: ['#229318'],
          vAxis: {format: '$#'},
          hAxis: {format: 'MM/dd/yy'},
          fontName: 'Verlag A,Verlag B,HelveticaNeue,Arial',
          chartArea:{left:'12%',top:'12%',width:'80%',height:'70%'},
          width: '100%',
          height: '100%'
        };
  KS_Charts.cosChart = new google.visualization.AreaChart(document.getElementById('cosChart'));
  KS_Charts.cosChart.draw(KS_Charts.cosData, KS_Charts.cosOptions);
}
function handleQueryResponse_SB(response) {
  if (response.isError()) {
    alert('Error in query: ' + response.getMessage() + ' ' + response.getDetailedMessage());
    return;
  }
  KS_Charts.sbData = response.getDataTable();
  KS_Charts.sbOptions = {
          title: 'Funding Graph: Simple Bracket',
          titleTextStyle: { color:'#333', fontSize: 18 },
          legend: { position: 'none' },
          backgroundColor: 'transparent',
          colors: ['#229318'],
          vAxis: {format: '$#'},
          hAxis: {format: 'MM/dd/yy'},
          fontName: 'Verlag A,Verlag B,HelveticaNeue,Arial',
          chartArea:{left:'12%',top:'12%',width:'80%',height:'70%'},
          width: '100%',
          height: '100%'
        };
  KS_Charts.sbChart = new google.visualization.AreaChart(document.getElementById('sbChart'));
  KS_Charts.sbChart.draw(KS_Charts.sbData, KS_Charts.sbOptions);
}
function handleQueryResponse_NIK(response) {
  if (response.isError()) {
    alert('Error in query: ' + response.getMessage() + ' ' + response.getDetailedMessage());
    return;
  }
  KS_Charts.nikData = response.getDataTable();
  KS_Charts.nikOptions = {
          title: 'Funding Graph: Neat Ice Kit',
          titleTextStyle: { color:'#333', fontSize: 18 },
          legend: { position: 'none' },
          backgroundColor: 'transparent',
          colors: ['#229318'],
          vAxis: {format: '$#'},
          hAxis: {format: 'MM/dd/yy'},
          fontName: 'Verlag A,Verlag B,HelveticaNeue,Arial',
          chartArea:{left:'12%',top:'12%',width:'80%',height:'70%'},
          width: '100%',
          height: '100%'
        };
  KS_Charts.nikChart = new google.visualization.AreaChart(document.getElementById('nikChart'));
  KS_Charts.nikChart.draw(KS_Charts.nikData, KS_Charts.nikOptions);
}
function handleQueryResponse_SSK(response) {
  if (response.isError()) {
    alert('Error in query: ' + response.getMessage() + ' ' + response.getDetailedMessage());
    return;
  }
  KS_Charts.sskData = response.getDataTable();
  KS_Charts.sskOptions = {
          title: 'Funding Graph: Simple Syrup Kit',
          titleTextStyle: { color:'#333', fontSize: 18 },
          legend: { position: 'none' },
          backgroundColor: 'transparent',
          colors: ['#229318'],
          vAxis: {format: '$#'},
          hAxis: {format: 'MM/dd/yy'},
          fontName: 'Verlag A,Verlag B,HelveticaNeue,Arial',
          chartArea:{left:'12%',top:'12%',width:'80%',height:'70%'},
          width: '100%',
          height: '100%'
        };
  KS_Charts.sskChart = new google.visualization.AreaChart(document.getElementById('sskChart'));
  KS_Charts.sskChart.draw(KS_Charts.sskData, KS_Charts.sskOptions);
}
$(window).resize(function(){
	KS_Charts.glfChart.draw(KS_Charts.glfData, KS_Charts.glfOptions);
	KS_Charts.cosChart.draw(KS_Charts.cosData, KS_Charts.cosOptions);
    KS_Charts.sbChart.draw(KS_Charts.sbData, KS_Charts.sbOptions);
    KS_Charts.nikChart.draw(KS_Charts.nikData, KS_Charts.nikOptions);
    KS_Charts.sskChart.draw(KS_Charts.sskData, KS_Charts.sskOptions);
  });
// ]]]]><![CDATA[></script>]]>
    </content>
  </entry>
  <entry>
    <id>https://www.studioneat.com/blogs/main/16984064-hidden-uses-of-slow-fast-slow</id>
    <published>2015-02-03T14:07:00-06:00</published>
    <updated>2015-03-16T18:38:58-05:00</updated>
    <link href="https://www.studioneat.com/blogs/main/16984064-hidden-uses-of-slow-fast-slow" rel="alternate" type="text/html"/>
    <title>Hidden Uses of Slow Fast Slow</title>
    <author>
      <name>Dan Provost</name>
    </author>
    <content type="html">
      <![CDATA[<p><a href="https://itunes.apple.com/us/app/slow-fast-slow-control-speed/id727309825?mt=8" title="App Store link to Slow Fast Slow.">Slow Fast Slow</a> is our (<a href="http://www.studioneat.com/blogs/main/15828468-a-new-business-model-for-slow-fast-slow" title="Studio Neat blog post about Slow Fast Slow going free.">free!</a>) app for controlling the speed of videos you shoot on your iPhone. Its typical use is to change the speed of slow motion videos, but there are actually a few non-obvious uses of Slow Fast Slow, making it a useful tool in other contexts.</p>
<p><strong>Converting a slo-mo video to normal speed.</strong><br> Normal video and Slo-mo video are adjacent to one another in the Camera app mode selector, so it is not uncommon to accidentally shoot a slo-mo video, when all you wanted was a regular video. Slow Fast Slow makes it incredibly easy to convert this video to a normal speed video. Simply import the video, then export it without altering the timeline. It will export as a normal speed video at 30 fps. Easy!</p>
<p><strong>Sharing an uncropped video on Instagram or Vine.</strong><br> Instagram, famously, displays photos and videos in a square format. There are several apps available for adding letterboxing to your photos, but the same can’t be said for videos. If you shoot a video (slo-mo or otherwise), and don’t want it to be cropped into a square, import into Slow Fast Slow, and then when exporting, choose the “Square (Uncropped)” option. This will keep your video uncropped, with black letterboxes.</p>
<p><strong>Speeding up a Hyperlapse or iOS time-lapse.</strong><br> <a href="http://blog.instagram.com/post/95829278497/hyperlapse-from-instagram" title="Instagram blog post about Hyperlapse.">Hyperlapse</a> is an incredible app, if only for its stabilization feature. Likewise, the built in iOS time-lapse mode is handy if you want to shoot a time-lapse without fussing with options and settings. Both have limitations, though. Hyperlapse only lets you speed things up to 12x, and the iOS time-lapse mode <a href="http://www.studioneat.com/blogs/main/15467765-how-does-the-ios-8-time-lapse-feature-work" title="Studio Neat blog post about the iOS 8 time-lapse feature.">doesn’t let you control the speed at all</a>. After shooting video in either app, import to Slow Fast Slow to have control over the final speed of your video.</p>]]>
    </content>
  </entry>
  <entry>
    <id>https://www.studioneat.com/blogs/main/16606572-an-update-on-slow-fast-slow</id>
    <published>2015-01-12T11:07:00-06:00</published>
    <updated>2015-03-16T18:38:46-05:00</updated>
    <link href="https://www.studioneat.com/blogs/main/16606572-an-update-on-slow-fast-slow" rel="alternate" type="text/html"/>
    <title>An Update on Slow Fast Slow</title>
    <author>
      <name>Dan Provost</name>
    </author>
    <content type="html">
      <![CDATA[<p class="p1"><span class="s1">A couple months ago, we shifted the business model for our video-speed-control iPhone app <a href="https://itunes.apple.com/us/app/slow-fast-slow-control-speed/id727309825?mt=8" title="App Store page for Slow Fast Slow">Slow Fast Slow</a> from a paid model to a “free with ads” model, in which the ad is for our own product, the <a href="http://www.studioneat.com/products/glif" title="Studio Neat product page for the Glif">Glif</a>. You can read more about why we made the change <a href="http://www.studioneat.com/blogs/main/15828468-a-new-business-model-for-slow-fast-slow" title="Studio Neat blog post: A New Business Model for Slow Fast Slow">here</a>. </span></p>
<p class="p1"><span class="s1">So, how is it going so far?</span></p>
<p class="p1"><span class="s1">In short, pretty good! We had a great launch, and were featured in the “Best New Apps” section of the App Store front page. Slow Fast Slow was also featured in both the “Best New Apps” and “Make Great Videos” sections of the Photo &amp; Video category, where it has remained, inexplicably, to this day (thanks Apple!).  We also got some great press, namely from <a href="http://daringfireball.net/linked/2014/11/11/app-calling-card" title="Daring Fireball: App as Calling Card">Daring Fireball</a> and <a href="http://www.producthunt.com/posts/slow-fast-slow" title="Slow Fast Slow on Product Hunt">Product Hunt</a>. </span></p>
<p class="p1"><span class="s1">We stated in the aforementioned post that “if we can generate only one sale of a Glif (or any of our products, really) per day as a result of this ad, it will be worth it.” It is too early to know if the app will continue to drive traffic to <span class="s2">studioneat.com</span> once it is no longer featured in the App Store. But, as you can see from the graph below, revenue clearly saw an uptick when we switched to the free model and started directing traffic to <span class="s2">studioneat.com</span>.</span></p>
<div id="revChart" style="width: 100%; height: 400px;"></div>
<div id="downChart" style="width: 100%; height: 400px;"></div>
<p class="p1"><span class="s1">A couple things to note. One, this isn’t a super fair comparison, because it’s comparing the long tail of version 1.0 with the spike of a new release of version 2.0. It will be interesting to see where this graph eventually settles. Secondly, we are only able to track traffic coming directly from clicks through the app. So, who knows how many people see the ad, but decide they would rather visit the site or buy the Glif at a later date, perhaps wanting to use a desktop computer to enter their credit card information. </span></p>
<p class="p1"><span class="s1">Slow Fast Slow was a paid download ($1.99) for 379 days, at which point we switched to the free model. During that span, it was downloaded 6,760 times, for about $9,464 in revenue. </span></p>
<p class="p1"><span class="s1">In the roughly two months that Slow Fast Slow has been free, it has been downloaded roughly 430,000 times. During this time, 63,800 unique users visited <span class="s2">studioneat.com</span> from the app, which constituted about 20% of our overall traffic to <span class="s2">studioneat.com</span>. </span></p>
<div id="sfsChart" style="width: 100%; height: 400px;"></div>
<div id="conChart" style="width: 100%; height: 400px;"></div>
<div style="color: #777; text-align: center; font-style: italic; margin-top: -40px; margin-bottom: 40px;">(Thanks to Crashlytics for pulling this data for us)</div>
<p class="p1"><span class="s1">This traffic led to $5,591.35 in direct revenue. Unsurprisingly, sales of the <a href="http://www.studioneat.com/products/glif" title="Product page for the Glif">Glif</a> accounted for 77% of the total revenue. The <a href="http://www.studioneat.com/products/neaticekit" title="Product page for the Neat Ice Kit">Neat Ice Kit</a> brought in 17.6%, and the <a href="http://www.studioneat.com/products/cosmonaut" title="Product page for the Cosmonaut">Cosmonaut</a> accounted for about 5%. </span></p>
<p class="p1"><span class="s1">All in all, we are happy with the results, and already have a couple ideas for some new apps utilizing this same business model. And on top of that, it’s just plain cool that an app we made has been downloaded almost half a million times. </span></p>
<p class="p1"><strong><span class="s1">Apple Pay Integration</span></strong></p>
<p class="p1"><span class="s1">We had a real head-slapping moment a few weeks ago: why didn’t we use Apple Pay?! It seemed like the perfect use-case, so indeed, we have done just that in version 2.2, available today in the App Store. If you have an iPhone 6 or 6 Plus, you can now purchase a Glif directly in the app using your fingerprint. The future is now. </span></p>
<p class="p1"><span class="s1">Integrating Apple Pay into the app wasn’t too difficult, but it wasn’t trivial, either. In a future post we will dive into the nuts and bolts of how we implemented Apple Pay. As far as we know, we are the first “indie” company to utilize it in an app. </span></p>
<p class="p1"><span class="s1">We are excited to see how this integration affects sales. In theory, it is now <em>much</em> easier to purchase a Glif, so hopefully sales will trend upward, even as traffic to our site moves downward. We are also offering free shipping on the Glif, if purchased with Apple Pay; to grease the wheels, as it were. If you want to check out the redesigned ad with Apple Pay integration, simply tap the S/N logo on the home screen of Slow Fast Slow. If you are on a device that doesn’t support Apple Pay, the buy button is replaced with a button to <span class="s2">studioneat.com</span>.</span></p>
<p class="p1"><span class="s1">In addition to Apple Pay integration, version 2.2 adds a couple small but useful features. Adjacent points on the timeline now snap to the same vertical position, which makes it easier to have sections of your timeline at a flat, consistent speed. Also, when you move any point on the timeline, an overlay appears, showing the speed at that point, as well as overall duration of the video. This is useful if you are anal (like me) about hitting a specific framerate, or if you need to get the clip under 15 seconds for sharing on Instagram. </span></p>
<p class="p1"><span class="s1">Version 2.2 is now live in the App Store. <a href="https://itunes.apple.com/us/app/slow-fast-slow-control-speed/id727309825?mt=8" title="App Store link to Slow Fast Slow">Check it out!</a></span></p>
<script type="text/javascript" src="https://www.google.com/jsapi"></script>
<script type="text/javascript">// <![CDATA[
google.load("visualization", '1', {packages:['corechart']});
google.setOnLoadCallback(drawChart);
var SFS_Charts = {};
function drawChart() {
  var queryR = new google.visualization.Query( 'http://spreadsheets.google.com/a/google.com/tq?key=1B64iZ7lln1E1rsWXpWgaaSk2uAO99r0pN-ci2javIlQ&range=A2:A119,G2:G119' );
  queryR.send(handleQueryResponse_Revenue);
  var querySFS = new google.visualization.Query( 'http://spreadsheets.google.com/a/google.com/tq?key=1B64iZ7lln1E1rsWXpWgaaSk2uAO99r0pN-ci2javIlQ&range=A64:A119,H64:H119' );
  querySFS.send(handleQueryResponse_SFS);
  var queryCON = new google.visualization.Query( 'http://spreadsheets.google.com/a/google.com/tq?key=1B64iZ7lln1E1rsWXpWgaaSk2uAO99r0pN-ci2javIlQ&range=A64:A119,I64:I119' );
  queryCON.send(handleQueryResponse_CON);
  var queryDOWN = new google.visualization.Query( 'http://spreadsheets.google.com/a/google.com/tq?key=1B64iZ7lln1E1rsWXpWgaaSk2uAO99r0pN-ci2javIlQ&range=A2:A119,J2:J119' );
  queryDOWN.send(handleQueryResponse_DOWN);
}
function handleQueryResponse_Revenue(response) {
  if (response.isError()) {
    alert('Error in query: ' + response.getMessage() + ' ' + response.getDetailedMessage());
    return;
  }
  SFS_Charts.revData = response.getDataTable();
  SFS_Charts.revOptions = {
          title: 'Slow Fast Slow Revenue (App Sales and Product Purchases)',
          titleTextStyle: { color:'#333', fontSize: 18 },
          legend: { position: 'none' },
          backgroundColor: 'transparent',
          colors: ['#229318'],
          vAxis: {format: '$#'},
          hAxis: {format: 'MM/dd/yy'},
          fontName: 'Verlag A,Verlag B,HelveticaNeue,Arial',
          chartArea:{left:'12%',top:'12%',width:'80%',height:'70%'},
          width: '100%',
          height: '100%'
        };
  SFS_Charts.revChart = new google.visualization.AreaChart(document.getElementById('revChart'));
  SFS_Charts.revChart.draw(SFS_Charts.revData, SFS_Charts.revOptions);
}
function handleQueryResponse_SFS(response) {
  if (response.isError()) {
    alert('Error in query: ' + response.getMessage() + ' ' + response.getDetailedMessage());
    return;
  }
  SFS_Charts.sfsData = response.getDataTable();
  SFS_Charts.sfsOptions = {
          title: 'Percentage of Studioneat.com Traffic from Slow Fast Slow',
          titleTextStyle: { color:'#333', fontSize: 18 },
          legend: { position: 'none' },
          backgroundColor: 'transparent',
          colors: ['#ee5b28'],
          vAxis: {format: '#.##%'},
          hAxis: {format: 'MM/dd/yy'},
          fontName: 'Verlag A,Verlag B,HelveticaNeue,Arial',
          chartArea:{left:'12%',top:'12%',width:'80%',height:'70%'},
          width: '100%',
          height: '100%'
        };
  SFS_Charts.sfsChart = new google.visualization.AreaChart(document.getElementById('sfsChart'));
  SFS_Charts.sfsChart.draw(SFS_Charts.sfsData, SFS_Charts.sfsOptions);
}
function handleQueryResponse_CON(response) {
  if (response.isError()) {
    alert('Error in query: ' + response.getMessage() + ' ' + response.getDetailedMessage());
    return;
  }
  SFS_Charts.conData = response.getDataTable();
  SFS_Charts.conOptions = {
          title: 'Percentage of Daily Slow Fast Slow Users that Visit Studioneat.com',
          titleTextStyle: { color:'#333', fontSize: 18 },
          legend: { position: 'none' },
          backgroundColor: 'transparent',
          colors: ['#87bfcc'],
          vAxis: {format: '#.##%'},
          hAxis: {format: 'MM/dd/yy'},
          fontName: 'Verlag A,Verlag B,HelveticaNeue,Arial',
          chartArea:{left:'12%',top:'12%',width:'80%',height:'70%'},
          width: '100%',
          height: '100%'
        };
  SFS_Charts.conChart = new google.visualization.AreaChart(document.getElementById('conChart'));
  SFS_Charts.conChart.draw(SFS_Charts.conData, SFS_Charts.conOptions);
}
function handleQueryResponse_DOWN(response) {
  if (response.isError()) {
    alert('Error in query: ' + response.getMessage() + ' ' + response.getDetailedMessage());
    return;
  }
  SFS_Charts.downData = response.getDataTable();
  SFS_Charts.downOptions = {
          title: 'Daily Slow Fast Slow Downloads',
          titleTextStyle: { color:'#333', fontSize: 18 },
          legend: { position: 'none' },
          backgroundColor: 'transparent',
          colors: ['#C32FD5'],
          vAxis: {format: '#,###'},
          hAxis: {format: 'MM/dd/yy'},
          fontName: 'Verlag A,Verlag B,HelveticaNeue,Arial',
          chartArea:{left:'12%',top:'12%',width:'80%',height:'70%'},
          width: '100%',
          height: '100%'
        };
  SFS_Charts.downChart = new google.visualization.AreaChart(document.getElementById('downChart'));
  SFS_Charts.downChart.draw(SFS_Charts.downData, SFS_Charts.downOptions);
}
$(window).resize(function(){
	SFS_Charts.revChart.draw(SFS_Charts.revData, SFS_Charts.revOptions);
	SFS_Charts.sfsChart.draw(SFS_Charts.sfsData, SFS_Charts.sfsOptions);
        SFS_Charts.conChart.draw(SFS_Charts.conData, SFS_Charts.conOptions);
        SFS_Charts.downChart.draw(SFS_Charts.downData, SFS_Charts.downOptions);
  });
// ]]]]><![CDATA[></script>]]>
    </content>
  </entry>
  <entry>
    <id>https://www.studioneat.com/blogs/main/16157564-how-we-made-the-simple-syrup-kit-video</id>
    <published>2014-12-08T11:34:00-06:00</published>
    <updated>2015-03-16T18:38:23-05:00</updated>
    <link href="https://www.studioneat.com/blogs/main/16157564-how-we-made-the-simple-syrup-kit-video" rel="alternate" type="text/html"/>
    <title>How We Made the Simple Syrup Kit Video</title>
    <author>
      <name>Dan Provost</name>
    </author>
    <content type="html">
      <![CDATA[There is something endearing about stop motion. Inanimate objects dance around on the screen, in jerky, imperfect movements. It’s a special effect that’s been around as long as film itself, and even in an era of astounding computer graphics, stop motion is still <a href="https://en.wikipedia.org/wiki/Fantastic_Mr._Fox_(film)" title="Wikipedia page for Fantastic Mr. Fox (film).">occasionally called upon</a>.<br><br>There are two things that I love about stop motion. It is super approachable; a five-year-old could make a stop motion movie. The other thing I love is, inherently, you see the creator’s hand (not literally) in the work. The visual of stop motion somehow allows you to understand it was crafted by a person, painstakingly. <br><br>Making stop motion movies is tremendously fun, although tedious and time consuming at times. It was one of the reasons we created <a href="http://www.studioneat.com/products/frameographer" title="Product page for Frameographer on studioneat.com.">Frameographer</a>, to ease the process and make it accessible to anyone. We had a lot of fun making the <a href="https://vimeo.com/80167804" title="Vimeo video for the Glif. ">Glif promo video</a> last year, so we deciding to try again with something a little more ambitious. <br><br>In case you haven’t seen the Simple Syrup Kit video yet, here it is:<br><br>
<div class="vid-wrapper"><iframe src="//player.vimeo.com/video/106630036?title=0&amp;byline=0&amp;portrait=0&amp;color=87bfcc" width="880" height="495" frameborder="0" webkitallowfullscreen="" mozallowfullscreen="" allowfullscreen=""></iframe></div>
<br>Making simple syrup with the kit is a straightforward process, and it happens in a linear sequence, so I decided to shoot it as one continuous shot. Eat your heart out, <a href="https://en.wikipedia.org/wiki/Birdman_(film)" title="Wikipedia page for Birdman (film). ">Iñárritu</a>. It was shot in my kitchen, with natural light from the windows and one artificial lighting kit. Using natural light is generally dangerous for stop motion movies, as the light changes over the duration of filming (in this case, about 2 hours). I was ok with this, as I suspected the subtle color shifts due to the light changing would help disguise the Photoshop edits. I regret shooting with a reflective background (the glossy kitchen tile), as it added a bit too much visual distraction when the light changed or I shifted position, but live and learn, I guess. On the upside, this visual noise helped disguise the Photoshop edits, as well. <br><br><img src="//cdn.shopify.com/s/files/1/0057/8492/files/blog_sskgear_sm.jpg?22141"><br><br>For the gear nerds, I shot with my <a href="https://en.wikipedia.org/wiki/Olympus_PEN_E-P5" title="Wikipedia page for the Olympus PEN E-P5 camera. ">Olympus E-P5</a> Micro Four Thirds camera with an <a href="https://en.wikipedia.org/wiki/M._Zuiko_Digital_ED_45mm_f1.8" title="Wikipedia page for the M. Zuiko 45mm lens. ">M. Zuiko 45mm lens</a> at f2.2. It’s a great camera for this sort of thing, but its one shortcoming is not having an input for a shutter release cable. I attempted to account for that by setting a 2 second shutter delay to prevent camera shake, but there are still a couple moments when the scene shifts slightly due to my unintentional nudging of the camera. Part of stop motion is embracing the imperfections, though, so I rolled with it. <br><br>While shooting, figuring out the timing (i.e. how much to move each object between shots) is really a matter of experience and winging it. You can adjust the timing some in post after the fact, but you want to get it pretty close on the first go. I knew I wanted the final video to play back at 10 frames per second, so that gave me a general feel for the timing I should aim for (e.g. if an object needs to move from point A to point B in about a second, it should take 10 frames to get there). <br><br>Having objects move around on a surface is easy; the biggest challenge is when things need to be suspended in mid air. The solution is simple, and unglamorous: wire coat hangers, makeshift handles, and human hands. <a href="http://sugru.com/" title="Home page for Sugru.">Sugru</a> is an incredibly useful material; I used it to build a handle on the back of the bottle for a few shots, and it was used elsewhere to attach the wire to various objects. <br><br>Below is a video of all the images I shot, straight from the camera, unedited. <br><br>
<div class="vid-wrapper fourthirds"><iframe src="//player.vimeo.com/video/113747525?title=0&amp;byline=0&amp;portrait=0&amp;color=87bfcc" width="880" height="660" frameborder="0" webkitallowfullscreen="" mozallowfullscreen="" allowfullscreen=""></iframe></div>
<br>Once all the frames were shot (575 images over a span of about 2 hours), it was time to Photoshop out all of the parts that would ruin the illusion. Each individual frame doesn’t require too much work, but when added in aggregate (around 200 frames needed editing in some form) it ended up taking about 15 hours. <br><br>Editing out the wires and hands is actually simple. Instead of using the clone brush tool in Photoshop, it’s better to just copy and paste background fragments from adjacent frames. One part that did trip me up, however, was when the bottle tilts to pour into the jigger. I wasn’t thinking at the time, but when the bottle is pouring you can obviously see my hand through the clear part of the bottle. Photoshopping the other hand parts was easy using the aforementioned background masking, but that wouldn’t work for the hand behind the bottle. <br><br><img src="//cdn.shopify.com/s/files/1/0057/8492/files/blog_ssk_edits.gif?22141"><br><br>What I ended up doing is totally crude, and would not pass the eye test if studied as an individual frame, but it doesn’t matter because the frames advance so quickly. I essentially just selected the fleshly hand part and adjusted the hue, saturation, and lightness until is was close to matching the surrounding elements. So just know, as you are watching the video, a bit of my grey alien hand is present during that shot. <br><br>When all the frames were edited, it was time to bring them all into After Effects. After renaming the files in Finder to have a sequential naming scheme, I imported them into After Effects as an image sequence, set to 10 frames per second. I used time-remapping to tweak the timing of a few sequences, and then added the camera zooms. Crucially, the composition was set to 10 fps (as opposed to 30 fps), so the zooms were in step with the movement of the objects. If I were to zoom at 30 fps, it would appear too smooth, and it’d be obvious the effect was added in post. By sticking to the same frame rate as the animation, the viewer can almost be convinced that the zooms were done in camera. <br><br>Beyond that, just some minor color correction, adding the titles and music, and the video was complete. Whew. <br><br>Although stop motion is an antiquated technique, the delight it creates means we will likely return to it again and again. Hopefully this post has been illuminating. Why not try your own stop motion movie?]]>
    </content>
  </entry>
  <entry>
    <id>https://www.studioneat.com/blogs/main/15828468-a-new-business-model-for-slow-fast-slow</id>
    <published>2014-11-11T12:57:00-06:00</published>
    <updated>2015-03-16T18:37:49-05:00</updated>
    <link href="https://www.studioneat.com/blogs/main/15828468-a-new-business-model-for-slow-fast-slow" rel="alternate" type="text/html"/>
    <title>A New Business Model For Slow Fast Slow</title>
    <author>
      <name>Dan Provost</name>
    </author>
    <content type="html">
      <![CDATA[When the App Store launched in 2008, there was something simple and attractive about the business model for independent developers: create something of value, charge a fair price, and you will be rewarded handsomely. Marco Arment summed this up nicely in his appearance on <a href="http://www.npr.org/blogs/money/2012/01/31/146152273/the-tuesday-podcast-the-app-economy" title="Episode of Planet Money featuring Marco Arment.">Planet Money</a>: “People always ask me what my business model is, and it’s very disappointingly simple to them. It’s ‘I sell something for money.’”<br><br>We love making apps. Prior to Studio Neat, Tom worked as a software engineer and I worked as a UI designer, so you could argue software is a more natural fit for us than all the hardware stuff. We had created two physical products, and <a href="http://www.studioneat.com/products/glif" title="Studio Neat product page for the Glif.">Glif</a> and the <a href="http://www.studioneat.com/products/cosmonaut" title="Studio Neat product page for the Cosmonaut.">Cosmonaut</a>, before we launched our first app, <a href="http://www.studioneat.com/products/frameographer" title="Studio Neat product page for Frameographer.">Frameographer</a>, in early 2012. It was launched with much excitement, and we got some great press, but it became clear from the start that it would not bring in nearly the same revenue as our hardware products. It would be very challenging for Studio Neat to exist if we made <em>only</em> apps. <br><br>Regardless, we continued to make apps, including <a href="https://www.kickstarter.com/projects/danprovost/simple-bracket" title="Kickstarter project page for Simple Bracket.">Simple Bracket</a> and <a href="http://www.studioneat.com/products/slowfast" title="Studio Neat product page for Slow Fast Slow. ">Slow Fast Slow</a>, because we really enjoy making them. But it has become increasingly hard to justify the time we put in to them, with our current business model of charging an upfront cost. <br><br>In the App Store today, there are essentially four different business models: paid (a single upfront cost), paid subscription (recurring cost), free with in-app purchase, and free with ads. Many have argued that paid-up-front apps are becoming increasingly more difficult to sell, as the App Store is much more competitive than it was in 2008. There are <a href="http://williamwilkinson.com/post/100937037306" title="William Wilkinson's post about the first month of sales of Manual. ">exceptions</a>, of course, but free with in-app purchase seems to be the way things are headed for most indie developers. Even Marco has evolved his stance as the App Store has shifted, stating in a <a href="http://atp.fm/episodes/89" title="Episode 89 of Accidental Tech Podcast.">recent episode</a> of ATP: "If you can avoid making your app paid upfront, you should. [...] It's so obvious that Apple really wants people to just make the apps free upfront and figure out the monetization some other way." (<a href="https://overcast.fm/" title="Splash page for Overcast.">Overcast</a>, Marco's latest app, is offered free with a $4.99 in-app purchase to unlock advanced features). <br><br>Tom and I have been reading and thinking about these things for a while, and a few months ago we had a realization. Studio Neat is in a unique position. We are not just app developers, we also sell physical products. Products that are meant to work with the apps in a way that enhances both, as is the case with the Glif and Slow Fast Slow or Frameographer. What if we make apps that are free with "ads", but the ad is simply for our other products? You know, the products that actually make money?<br><br>It was an intriguing enough idea that we decided to try it, first with Slow Fast Slow. As of today, you can <a href="https://itunes.apple.com/us/app/slow-fast-slow/id727309825?mt=8" title="App Store link to Slow Fast Slow. ">download</a> Slow Fast Slow for free. If you are unaware, Slow Fast Slow is our app for manipulating the speed of videos with our interactive timeline. It works amazingly well with the new 240 fps videos on the iPhones 6. <br><br>When you launch Slow Fast Slow for the first time, you are presented with our “ad” for the Glif. It consists of five screens that you swipe through, showing off the features of the Glif with text and looping videos. A link to studioneat.com to learn more and hopefully consider purchasing the Glif is included towards the end.<br><br><img src="https://cdn.shopify.com/s/files/1/0057/8492/files/oobe_screens.png?19195"><br><br>This ad is only presented once, and we never bug you again (no modal pop-ups or anything like that). On the main navigation bar on the home screen, a subtle version of our logo is present; tapping this will bring up the ad, in case you wanted to see it again or forgot our website URL. <br><br>We have no idea if this experiment will work. At the previous price of $1.99, Slow Fast Slow was only making about $10 a day, if that. If we can generate only one sale of a Glif (or any of our products, really) per day as a result of this ad, it will be worth it. And if it is even more successful, we may have found a way to continue making apps. <br><br>There are other benefits to making the app free, as well. The app might not be generating sales, but by being free it is exposing many more people to “Studio Neat Design,” as it were. In a way, it can be thought of as a marketing tool.<br><br>Aside from the shift in business model for Slow Fast Slow, this is actually a huge update. The design has been updated to accommodate the larger screen sizes of the iPhone 6 and 6 Plus, and you can now import any type of video, not just slo-mo videos (this is great if you need to speed up a time-lapse you shot in the built-in app). And, we added the ability to add and remove points on the timeline, one of the most requested features. Oh, and the icon is way better now!<br><br>Slow Fast Slow is available now, in the <a href="https://itunes.apple.com/us/app/slow-fast-slow/id727309825?mt=8" title="App Store link to Slow Fast Slow.">App Store</a>, for free. We’d love to hear what you think.]]>
    </content>
  </entry>
  <entry>
    <id>https://www.studioneat.com/blogs/main/15615332-this-behaviors-not-unique</id>
    <published>2014-10-09T16:29:00-05:00</published>
    <updated>2015-03-16T18:36:44-05:00</updated>
    <link href="https://www.studioneat.com/blogs/main/15615332-this-behaviors-not-unique" rel="alternate" type="text/html"/>
    <title>This Behavior's Not Unique</title>
    <author>
      <name>Dan Provost</name>
    </author>
    <content type="html">
      <![CDATA[In high school, I was obsessed with Pearl Jam. Perhaps obsessed is putting it lightly. I collected bootleg recordings of their concerts, and had over 200 audio recordings and over 50 video recordings. I bought my first guitar, a dark green Squire Stratocaster, so I could learn Corduroy (and eventually the rest of the catalogue). I even bought my first DVD player just so I could watch <a href="http://en.wikipedia.org/wiki/Touring_Band_2000" title="Wikipedia entry for Touring Band 2000">Touring Band 2000</a>. I organized a road trip with three of my friends to see Pearl Jam live in six different cities across America's heartland. Their unique, screen printed concert posters adorned my walls. I even saw <a href="http://www.youtube.com/watch?v=s-j31YoEeRU" title='YouTube video of a clip from the film "Singles."'>Singles</a>.<br><br>Looking back, I suppose I should be mildly embarrassed by this obsession. And I would be, if it weren't for my belief that my fondness for Pearl Jam has either directly or indirectly led me to where I am today. Let me explain. <br><br>I collected and traded bootleg concert recordings during a technological transitional period at the start of the 21st century. Home CD-R burning was somewhat common (4x baby), but high speed Internet was not yet widespread. As such, trading was done through the postal service. Collectors would create personal websites that listed what bootlegs they had, and you could email the collector, send them your list of bootlegs, and offer a trade. You would then each burn the respective shows on CD-R and trade through the mail. I had the list of all my bootlegs organized nicely in .txt files, but that wasn't very discoverable by the world at large. I was always the one approaching others for a trade, but what if someone wanted to approach me? I needed a public presence. I needed a webpage. <br><br>I had no idea how to make a webpage, so I checked a book out from the library and learned HTML. I didn't learn HTML for fun or for the challenge of it, I learned it to solve a specific problem tied to my obsession with Pearl Jam. This distinction is important.<br><br>Right around this time, a group called The Video Mission (TVM for short) set out to create definitive Pearl Jam video bootlegs by pairing the best video source (usually a low generation VHS tape) with the best audio source (in ideal cases, a recording plugged directly into the soundboard) and burning the mix to a <a href="http://en.wikipedia.org/wiki/Video_CD" title="Wikipedia entry for Video CD.">VCD</a> (remember those? Essentially a low-res DVD but on a CD-R). I was obviously excited about this project, and volunteered to try my hand at video and audio production. So, through this effort, I became quite comfortable with video and audio editing software, skills that I continue to put into use today. One of the key strengths of Studio Neat, I believe, is our ability to produce all our videos in house. <br><br>Naturally, no one wants a bunch of binders full of plain ol' CD-R bootlegs, so it was quite common at the time to create and share custom artwork for each show that could be printed and put into jewel cases so your bootleg collection looked nice on the shelf. So it goes without saying, I learned Photoshop. And again, connecting the dots, almost all of the packaging and other visual design for Studio Neat’s products are designed by Tom and I in the same program. Heck, you could even argue the simple design of their <a href="http://en.wikipedia.org/wiki/Pearl_Jam_Official_Bootlegs#mediaviewer/File:PearlJamBootleg2003StateCollege.jpg" title="Wikipedia image of a Pearl Jam Official Bootleg.">Official Bootlegs</a> has directly influenced <a href="https://www.flickr.com/photos/studioneat/8228364388/in/set-72157632126805810" title="Photo of our original packaging for the Cosmonaut. ">our packaging design</a>.<br><br>It's clear my obsession with Pearl Jam led to an acquisition of technical skills that I still use today. But I think the obsession affected my life in more nuanced ways as well. Collecting bootlegs often requires an extreme attention to detail. Recordings must be combed for any trace of pops, clicks, or glitches to make sure they are “safe” to trade. The community demands a strict quality standard, and it is imperative to keep an organized list of all your shows, including the recording equipment used and the generation number (if recorded analogue). It is all very meticulous. <br><br>Perhaps I have always been an obsessive, detail oriented person, and the whole Pearl Jam thing was a sweet, sweet release. Correlation does not imply causation, but I'd like to think the reverse is true: that my obsession with Pearl Jam <em>trained</em> me to focus, and pay attention to the details. Or at least hone this trait. <br><br>It's also interesting to look back and observe how Pearl Jam's style and philosophy have influenced my life and specifically, our business. Pearl Jam have always looked out for their fans, famously testifying in court against <a href="http://en.wikipedia.org/wiki/Ticketmaster#Issues_and_hearings_regarding_anti-competitive_practices" title="Wikipedia anchor link about Tickermaster's anti-competitive practices.">Ticketmaster</a> and their egregious fees. There is also an honesty and simplicity to their approach that I really connected with. Their live shows are free of crazy pyrotechnics or other frivolous eye candy, and generally consist of a simple lighting setup and five dudes on stage playing some rock n' roll music. I like to think their approach has influenced the way we run things at Studio Neat. <br><br>Furthermore, I would argue that my deep dive into The Jam (nobody calls them that) in high school ultimately expanded my horizons. It was around this time when I started to pay attention to government and politics, as their fan newsletters and many of their songs carried political undertones. <br><br>After graduating high school, my interest in Pearl Jam faded considerably, and I now only occasionally listen to them for nostalgic reasons. But their impact remains.<br><br>There are two key takeaways here. The first point is to learn by doing. There are many skills that I learned and honed during my formative Pearl Jam years that I continue to use today. I learned these things because I had real, practical applications right off the bat. There is a Stanley Kubrick quote that I love to pull out when such an occasion calls for it: “Perhaps it sounds ridiculous, but the best thing that young filmmakers should do is to get hold of a camera and some film and make a movie of any kind at all.”<br><br>The second, larger point is a pro-geek argument. It’s ok to be geeky about things. It’s ok to take things really seriously. It’s ok to fuss over the details. John Siracusa, in his <a href="http://hypercritical.co/2014/01/14/the-road-to-geekdom" title="John Siracusa: The Road to Geekdom.">excellent piece</a> about geekdom, defines a geek as simply needing to posses two things: knowledge and enthusiasm. <em>Knowledge and enthusiasm</em>. In my experience, the latter drives the former, and eventually it becomes a virtuous cycle. And you never know where it will lead.]]>
    </content>
  </entry>
  <entry>
    <id>https://www.studioneat.com/blogs/main/15467765-how-does-the-ios-8-time-lapse-feature-work</id>
    <published>2014-09-23T09:35:00-05:00</published>
    <updated>2015-03-16T18:35:20-05:00</updated>
    <link href="https://www.studioneat.com/blogs/main/15467765-how-does-the-ios-8-time-lapse-feature-work" rel="alternate" type="text/html"/>
    <title>How Does the iOS 8 Time-lapse Feature Work?</title>
    <author>
      <name>Dan Provost</name>
    </author>
    <content type="html">
      <![CDATA[<p>In iOS 8, Apple added a new feature to the built-in Camera app: Time-lapse. The announcement at WWDC earlier this year brought an initial wave of panic to Tom and I. As the makers of a stop motion and time-lapse app (<a href="http://www.studioneat.com/products/frameographer" title="Frameographer - Time-Lapse and Stop Motion Movies on your iPhone, by Studio Neat">Frameographer</a>), we thought we had just been <a href="http://www.urbandictionary.com/define.php?term=sherlocked" title='Definition for the term "sherlock."'>sherlocked</a>. Fortunately, this doesn't seem to be the case, as the time-lapse mode Apple introduced lacks any features or options. Which raises the question: how does the time-lapse mode actually work?<br><br>In the Camera app, Time-lapse is a new mode you can toggle to (it's located furthest to the left on the mode selector). Aside from the focus and exposure options available in all modes in the Camera app, Time-lapse mode just has a single button, to start and stop a time-lapse. As such, everything about the time-lapse you are creating is completely obfuscated. How many frames per second are being captured? How fast is the video being sped up relative to real time? What is the framerate of the resulting video? These questions demand answers!<br><br>On Apple's <a href="http://www.apple.com/iphone-6/cameras/" title="Information about the iPhone 6 camera on Apple.com">website</a>, they claim that in time-lapse mode, "iOS 8 does all the work, snapping photos at dynamically selected intervals." When I first read this, I thought they were doing something super fancy, like monitoring the frame for movement and only snapping a picture when something changes. On deeper reflection, this would be a bad idea. Time-lapse videos look best when they are buttery smooth, and dynamically selecting intervals in this fashion would create a jittery and jerky video. So what does Apple mean by "dynamically selected intervals"?<br><br>Turns out, what Apple is doing is quite simple, and indeed, pretty clever. I ran several tests, shooting time-lapse videos for various durations. You can view a spreadsheet of all the tests I ran <a href="https://docs.google.com/spreadsheets/d/1Cfdd_nVpVav_NtxfVyDfLRITTT9ZV4-F-f1PWIe1oyY/edit?usp=sharing" title="A Google Docs spreadsheet of iOS 8 Time-lapse tests.">here</a>. <br><br>What Apple means by "dynamically selected intervals" is they are doubling the speed of the time-lapse and taking half as many pictures per second as the recording duration doubles. Sounds complex, but it's actually very simple.</p>
<table width="100%">
<tbody>
<tr>
<td><strong>Recording Duration</strong></td>
<td><strong>Frame Capture Rate</strong></td>
<td><strong>Speed Relative to Real Time</strong></td>
</tr>
<tr>
<td>Less than 10 minutes</td>
<td>2 frames every second</td>
<td>15x</td>
</tr>
<tr>
<td>10 minutes to 20 minutes</td>
<td>1 frame every second</td>
<td>30x</td>
</tr>
<tr>
<td>20 minutes to 40 minutes</td>
<td>1 frame every 2 seconds</td>
<td>60x</td>
</tr>
<tr>
<td>40 minutes to 1 hour 20 minutes</td>
<td>1 frame every 4 seconds</td>
<td>120x</td>
</tr>
<tr>
<td>1 hour 20 minutes to 2 hours 40 minutes</td>
<td>1 frame every 8 seconds</td>
<td>240x</td>
</tr>
</tbody>
</table>
<p><br>This is an efficient way to assemble a time-lapse. When you start recording a time-lapse, the app only captures 2 frames per second. If the recording period extends beyond 10 minutes, the app switches to capturing only 1 frame per second, and deletes every other frame it had captured in the first 10 minutes. When the recording duration doubles (20 minutes), the same thing happens. Now the app is only capturing 1 frame every 2 seconds, and previous frames are dropped to match this tempo. And so forth. The longest video I recorded was 8 hours, but presumably using this method you could record for much longer (Apple's website casually mentions 30 hours). Because the app is being so efficient with frame capture and storage, you don't need to worry about your phone capacity filling up. <br><br>The result of this method is that anything you shoot will generally end up being between 20 and 40 seconds long, an ideal shareable length. Also worth mentioning, the resulting video is always 30 fps, the standard framerate for video. No surprises there.<br><br>I found a nice lookout in Austin with my <a href="http://www.studioneat.com/products/glif" title="Glif - A Tripod Mount and Stand for Smartphones.">Glif</a>, new iPhone 6, and tripod, to shoot some examples.<br><br></p>
<div class="vid-wrapper"><iframe src="//player.vimeo.com/video/106877883?title=0&amp;byline=0&amp;portrait=0&amp;color=87bfcc" width="880" height="495" frameborder="0" webkitallowfullscreen="" mozallowfullscreen="" allowfullscreen=""></iframe></div>
<br>This video was recorded for 5 minutes in time-lapse mode. The resulting video is 20 seconds long at 30 fps. <br><br>
<div class="vid-wrapper"><iframe src="//player.vimeo.com/video/106877886?title=0&amp;byline=0&amp;portrait=0&amp;color=87bfcc" width="880" height="495" frameborder="0" webkitallowfullscreen="" mozallowfullscreen="" allowfullscreen=""></iframe></div>
<br>This video was recorded for 40 minutes in time-lapse mode. The resulting video is also 20 seconds long at 30 fps, but it is 8 times faster than the 5 minute video, and 120 times faster than real time. Note the speed of the clouds for the most obvious difference. I also shot videos at <a href="https://vimeo.com/106877884" title="iOS 8 Time-lapse Test - 10 minute Recording Duration">10 minutes</a> and <a href="https://vimeo.com/106877885" title="iOS 8 Time-lapse Test - 20 minute Recording Duration">20 minutes</a>. All of the videos were shot on an iPhone 6, and are unedited.<br><br>So, when would you use the Time-lapse mode in the built-in Camera app, as opposed to <a href="http://blog.instagram.com/post/95829278497/hyperlapse-from-instagram" title="Instagram blog post introducing Hyperlapse.">Hyperlapse</a> or <a href="http://www.studioneat.com/products/frameographer" title="Frameographer - Time-Lapse and Stop Motion Movies on your iPhone, by Studio Neat">Frameographer</a>? In true Apple fashion, the Time-lapse mode is dead simple, with no options to mess with. Hyperlapse, however, is also dead simple, and features the incredible <a href="https://vimeo.com/104410054" title="A video showing off Hyperlapse's video stabilization.">video stabilization</a>. It's a great choice for quick and casual time-lapses, or for when the camera is not stabilized on a tripod. If you are making a less casual time-lapse that will take half an hour or more to record, I would definitely recommend something like Frameographer in lieu of the built in Time-lapse feature. I am biased, obviously, but I am of the opinion that if you are putting that much time into the creation of your time-lapse, you should have some say over the final output. Apps like Frameographer allow you to adjust the speed and framerate after all the frames are shot. <br><br>That said, we are thrilled Apple has decided to include Time-lapse as a new camera mode, as it will hopefully introduce many people to how fun and easy it is to make time-lapses.
<p> </p>]]>
    </content>
  </entry>
</feed>