V-RtifactsWhen Virtual Reality Was Always Virtual2026-07-07T21:12:32Zhttps://vrtifacts.com/feed/atom/Tonehttps://vrtifacts.com<![CDATA[The $200 Headset Sega Killed for Being “Too Real]]>https://vrtifacts.com/?p=42392026-07-07T21:12:32Z2026-07-07T21:12:29ZIn 1993 Sega cancelled its $200 VR headset and blamed the product for being "too realistic." The truth, per the Stanford Research Institute: it made kids sick. Decades later, the one game it was too scared to ship finally runs — on somebody else's headset.
In 1993, Sega stood in front of the world’s press, showed off a $200 virtual reality headset for the Genesis, and then quietly strangled it in a back room. The official cause of death — and I need you to sit with this — was that it workedtoo well.The experience was so realistic, so dangerously immersive, that players might leap up mid-game and hurt themselves. Sega, in essence, cancelled its own product for being too good for you.
It is the greatest humblebrag in the history of consumer electronics. It is also, of course, complete nonsense.
Here’s what actually happened. Sega sent the thing to the Stanford Research Institute, and SRI came back with the unglamorous truth: the headset gave people headaches, made them dizzy, and made them sick — children especially. Years later, then-CEO Tom Kalinske confirmed it flatly. The Sega VR wasn’t shelved for being too immersive. It was shelved for making eleven-year-olds want to throw up. “Too realistic” simply tested better in a press release.
The genuine tragedy is that the hardware was, on paper, clever. Two LCD screens and a high-frequency inertial tracker sourced from a company called Ono-Sendai — yes, the cyberdeck brand lifted straight out ofNeuromancer, because 1993 could not stop itself — a tracker that reportedly cost about a dollar a unit to make. Two hundred dollars for a home VR headset, while the arcade rigs across town ran well into five figures. On the spec sheet, Sega had lapped the entire industry.
Four games were lined up: Nuclear Rush, Iron Hammer, Matrix Runner, Outlaw Racing. Hovercrafts, gunships, cyberpunk. Nobody outside a trade-show booth ever got to touch them.
Except now they can. Decades later, the Video Game History Foundation got its hands on a CD-ROM — dated August 6, 1994 — holding the complete source code to Nuclear Rush. Rich Whitehouse rebuilt the game, reverse-engineered the headset’s communication protocol, and wired the whole thing to a modern VR rig. The one game Sega was too scared to ship is now playable on a Quest. It only took twenty-seven years and a headset Sega never actually made.
And here’s the part that should make every modern VR executive shift in their chair. The thing that killed the Sega VR in 1993 — motion sickness — was never solved. It wasmanaged.It got comfort settings and teleport locomotion and vignette tunnels and a little warning card you scroll past. Sega’s cancellation memo, stripped of the face-saving, reads exactly like the health-and-safety insert in every VR box shipped since. The 1993 excuse note is still, thirty years on, the industry’s quietest open secret.
Sega didn’t lie about everything. The headset really was ahead of its time — it just dragged all of that time’s problems along with it, early and undiluted. The screens were real. The dollar tracker was real. The nausea was extremely real. What Sega actually shipped, in the end, was the excuse.
]]>Tonehttps://vrtifacts.com<![CDATA[The $49,000 Goggles: How VPL Pawned the Future to a French Arms Dealer]]>https://vrtifacts.com/?p=42282026-07-07T21:02:34Z2026-07-07T21:00:48ZVPL Research sold $49,000 goggles, coined the term "virtual reality," and still went broke — after pledging its entire patent portfolio to a French arms company and missing the payment. The gear was real. The receipts went to someone else.
Before the future had a price tag, VPL Research printed one anyway:$49,000.That was the EyePhone HRX, the deluxe model. The standard EyePhone was a comparatively thrifty $9,400, and the DataGlove — the one that let you point at things that weren’t there — ran about the price of a car. Assemble the whole rig, computers included, and you were looking at a quarter of a million dollars to stand in a beige room and wave at a floating teapot.
VPL, founded by Jaron Lanier in the mid-1980s, was the company that coined “virtual reality” and then tried to sell it by the crate. It built the goggles, the glove, the DataSuit, and most of the vocabulary the industry still runs on. What it never quite built was a customer who wasn’t a defense lab with a discretionary budget the size of a house.
The tell is the Power Glove. Mattel licensed VPL’s glove technology, filed off the price, and shipped it to Nintendo kids for $90 — where it moved 1.3 million units. The cut-rate knockoff of the $9,000 glove was the only version anyone actually bought. That should have been the memo. It was not read.
Instead, cash-strapped and true to the era’s boundless optimism, Lanier pledged VPL’sentireintellectual property portfolio as collateral on some small bridge loans from Thomson-CSF — a French military contractor, part-owned by the French government. Here is a thing worth knowing before you use the future as collateral: when you miss a payment, the arms company keeps the future. Which is roughly what happened. Thomson walked off with the crown jewels around 1992, and in 1993 VPL’s largest shareholder forced the husk into bankruptcy — reportedly to reach the very patents already signed away.
The gear, meanwhile, was having a better year than the company. The actual VPL EyePhone and DataSuit starred inThe Lawnmower Manin 1992, achieving cinematic immortality the same year the hardware was quietly losing its maker. The props outlived the payroll.
The patents drifted for the rest of the decade and, at its end, landed at Sun Microsystems — the foundational VR patents filed away in a workstation company’s cabinet, where they sat gathering dust while the dream itself waited another twenty years for hardware cheap enough to matter.
There’s a lesson in here that every VR era relearns from scratch, apparently by law: the technology was never the hard part. VPL had the goggles, the glove, the suit, the whole grammar of immersion, in 1989. What it couldn’t manufacture was a reason for anyone outside a $250,000 research budget to care. Swap Thomson-CSF for a social network, swap the $49,000 for “free, with your data,” and the arrangement is identical. Someone always ends up holding the paper on the future you strapped to your face.
VPL didn’t die because the dream was wrong. It died because it was early, overpriced, and touchingly naive about who owns the collateral when the money runs out. The goggles were real. The glove was real. The receipts, as ever, went to somebody else.
]]>Tonehttps://vrtifacts.com<![CDATA[They Sold the Future for $9,400 in 1990. It Weighed Five Pounds]]>https://vrtifacts.com/?p=42142026-07-07T20:46:12Z2026-07-07T20:39:17ZIn 1990, NHK's Today's Japan strapped a nation into the future: Jaron Lanier, VPL's EyePhone, and a $9,400 headset that weighed five pounds. The pitch hasn't changed since — only the housing color and who gets to own your face.
In 1990, NHK’sToday’s Japanaired a dispatch from tomorrow. Tomorrow, it turns out, looked like a man in beige goggles waving a gloved hand at objects only he could see, while a narrator gently explained “artificial reality” to a nation that had wisely not yet paid for it.
The man is Jaron Lanier, and the gear is VPL Research’s greatest hits: the EyePhone and the DataGlove. The EyePhone weighed 5.5 pounds and cost $9,400 — roughly a used car’s worth of headache, delivered directly to your cervical spine. You didn’t wear it so much as enter into a hostage negotiation with it. And that was thecheapone; the deluxe HRX model ran to $49,000, a figure that assumes your face is a capital expenditure.
Then there’s the DataGlove, which the segment presents as the key to touching a world that isn’t there. It’s a beautiful object — genuinely, it is — and it also perfectly captures the era’s core move: build one astonishing demo, film it under studio lights, and let everyone at home fill in the ninety percent that doesn’t work yet. The glove could point. The glove could grab. The glove could not, whatever the narrator implied, hand you the future. But it photographed like it could, and in 1990 that was the entire industry.
Lanier does what Lanier does, promising to “transport your sensory system into a reality that can be of any description.” Magnificent. Bulletproof. Also completely unfalsifiable, which is precisely why the same sentence has survived thirty-five years of keynote stages without a single edit. Matte-black the housing, lop two zeros off the price, and you could ship this script to a product launch next week and nobody would flinch. The vocabulary has been sanded down — “immersive,” “presence,” “spatial computing” — but the promise underneath is word-for-word identical: come inside, leave your body at the door, we’ll take it from here.
What the NHK crew couldn’t have known is how the story ends, or rather how it keeps ending. VPL — the company that coined “virtual reality,” that supplied the actual hardware forThe Lawnmower Mantwo years later — was already circling the drain even as this segment aired, and would spend the decade sliding toward bankruptcy while its patents were eventually scooped up by Sun. The most photographed VR company on Earth couldn’t make the math work. The gear was real. The wonder was real. The business was a rumor.
And that’s the part worth sitting with. Watch the volunteer’s slow, careful head-turns, the way everyone in frame treats a low-res wireframe cube like a moon landing, and you’re not watching primitive technology fail to keep a promise. You’re watching the promise getmade, fully formed, in its final shape. Everything since — every resolution bump, every foveated whatsit, every “no really, this time it’s ready” — has been an argument about the hardware, not the pitch. The pitch was finished in 1990. We’ve just been waiting for the goggles to catch up to a sentence.
For those of us who were there, footage like this isn’t nostalgia. It’s a receipt. It’s proof of what we were sold, at what price, in what font, before most of the people currently reinventing this stuff had learned to walk. The wave came in, left its wreckage, and went back out — and it’s out there now, gathering itself for the next run at the beach.
]]>Tonehttps://vrtifacts.com<![CDATA[Fuji Real 3D W1 – top or flop?]]>http://www.VRtifacts.com/?p=17712021-10-03T15:14:41Z2018-05-09T14:26:59ZThe post Fuji Real 3D W1 – top or flop? appeared first on V-Rtifacts.
]]>
The Fuji W1 already hit shelves in japan last year, but it took a while untill you could see it everywhere else. Now i got my very own one and tested it a bit. OK it is not really directly related to Virtual Reality and also not really an artifact i used my good old 1995 iGlasses to watch the movies recorded with the camera. regard it as a screensaver production kit for your old VR helmets while we wait eagerly for new hot VR stuff.
At first shame on the idiots on Akihabara news who had the honor to be among the first people who got a demo unit lent by Fuji themselves and wrote that devastating review. After reading their review (“Worst product ever, don’t buy!”) and having had some time to play with the camera myself it became clear that it’s safe to say whatever idiot wrote that article was a one-eyed kid with mental problems.
Okay, but let’s start with the first impressions. Just quickly prey open the box or shred it to tears to get to the precious piece and power it on. Even being one of the old guys you usually can’t impress with 3D i was a bit impressed when i held it in my hands and was greeted by a nice 3D Logo on that tiny screen. No glasses, no tricks – 3D hands free. But the limitations of that technology also become quite clear after a few seconds – the angle of view is extremely limited with this technology – just twist the camera a few degrees and the 3D effect is gone – you have to look straight 90 degree on the display or the parallax barrier simply won’t work.
Unlike the guy from akihabara news i neither became sick, got headache or dropped dead – my guess is that he just smoked old tires before writing his review.
The Cameras menu is quite tidy and also has a neat 3D effect. If you ever owned a digital camera you won’t have any problems. I am also that kind of guy who never reads manuals, but i was nearly instantly able to find what i was looking for. Why that guy from Akihabara news needed 3 hours to find the option to manually set the shutter is beyond my understanding. My guess is that he is from a remote indian tribe that never had contact with the civilization before he wrote that review. I am not even saying he should have read the manual – he would probably have thought it’s something edible anyways.
Well but let’s get to the core of the whole thing – taking pictures with the thing. There are 2D video and picture modes which are fairly uninteresting for a 3D camera. Not surprising is that Akihabara news mainly based their review result on the 2D pictures.
A camera without a viewfinder is not really that new since digital cameras have displays on their back and I’d say if you ever handled a digital camera without using the viewfinder it will not be a problem. That the Display displays the current picture in “live” 3D is a bit irritating in the first few minutes but you will quickly get used to it – what you see is what you get.
The picture quality is as expected – if you know a bit about digital photography you can guess how great the “10 megapixel” CCD are – as usual in this price class you have to set the camera to “fine” quality and downscale the pictures to around 5 megapixel to get rid of the typical “10 mp sensor noise”, so as with nearly all consumer cameras the 10 Megapixel are great for marketing but barely usable in their natural resolution. I guess we all expected that – but this one guy, you probably know who i mean.
Probably one of the cameras coolest features is the ability to manually set the parallax value, so you can set the “3D focus” even after you made the picture – this is really helpfull to adjust the 3D effect just as you like or need it.
The 3D pictures simply look great (unless you leave them in “normal” quality and 10 MP) and are really fun to watch. The camera display is of course too small to watch them on, but with a VR headset or converted to anaglyph they are really fun to watch and always give this “Wow” effect. The autofocus is working quite well and the count of “blurry crap” pictures is quite low if you compare to other cameras, you just have to live with the fact that it’s comparably slow.
One of the most important features – recording 3D movies- is unfortunately also the one which is quickly filling your SD card. A 1 Gigabyte SD card can not even hold 7 minutes of 3D video in 640×480. So if you plan on recording loads of movies you better grab one of these large 16 or even 32 GB SDHC cards (Which luckily became quite affordable). Videos can not be larger than 2 GB (Due to the card formatting), but that is around 14 minutes which should be more than sufficient for ” one scene”.
From today’s standards 640×480 as a maximum video resolution is rather poor, but still well enough for most hobbyist or home applications. After all the resolution of a DVD movie is just slightly higher and facing the lack of alternative consumer products i think it’s okay to go on without too much ranting.
The videos it records are surprisingly crisp and have a quite natural range of colours. The camera also operates quite well under low-light conditions. I was unfair enough to let it compete against a 1989 Toshiba SK-3D7K, a vintage VHS-C based camcorder – still today the only consumer 3D camcorder ever made. While the picture quality is quite comparable it quickly became apparent that the classic camcorder might be heavier and bulkier it is a more ergonomic approach. While it is quite obvious how to hold a classic camcorder it isn’t that trivial with the Fuji W1. I guess most people naturally tend to hold the W1 with both hands -which does not feel very natural for “camcorder” standards. AFter a while and countless “fingers on lens” videos you will somehow get used to it, but i would still prefer the good old one-handed camera holding style which is impractical to impossible with a digital camera of this shape size and weight.
The sound recorded on the movies is in stereo (Ironically the Toshiba SK-3D7K records sound in mono), but although it does not suffer from mechanic movement noise like the SK-3D7K it still sounds like “it could be improved”, the microphone setup is imho not really alligned optimal for stereo recordings, but i understand that if they placed them at the sides you’d not just cover the lenses with your fingers but also the microphones, so it was probably the best compromise.
The cameras autofocus speed is a bit slow, even if you set it to “fast” (The even slower setting is supposed to preserve battery power). If there is anything left to rant about it is probably the quite high weight of the camera, for its rather tiny size it is feeling rather “surprisingly massive”, but that they designed some key components like the lid over the USB port in metal sure is no bad decision regarding how often you have these fall off as they cheap plastic had worn out.
A must-have is the firmware update to 2.0 which fixes many issues and also finally adds 16:9 format (How they could forget that in previous versions is beyond my understanding). If you wanna show the pictures to friends without having the camera or a VR helmet in reach you can also vouch to have Fuji print the pictures in lenticular format (Like you know it from these cheap 3D postcards that were trendy in the 80s) or buy the matching Fuji V1 picture frame which is basically just a bloated-up version of the cameras display, unfortunately having the same limitations regarding angle of view, but if you can live with that the effect is stunning.
After all I’d rate the camera 4 of 5 stars and the perfect gift for the family’s VR geek.
]]>0Tonehttps://vrtifacts.com<![CDATA[A VR Who’s Who From 1994 – uniVRsum]]>https://vrtifacts.com/?p=34712018-05-08T15:03:04Z2016-03-08T18:05:55Z1994 marks the peak of what many view as the first “Big Bubble” in VR popularity. There were literally hundreds of (mostly) entrepreneurial startups taking a wild fling and what seemed to be a game-changing technology. You could strike sparks anywhere! By 1997 most had either vanished or transformed themselves. If you stood in just […]
]]>1994 marks the peak of what many view as the first “Big Bubble” in VR popularity. There were literally hundreds of (mostly) entrepreneurial startups taking a wild fling and what seemed to be a game-changing technology. You could strike sparks anywhere! By 1997 most had either vanished or transformed themselves. If you stood in just the right place, with the right kind of eyes, you could almost see the high water mark — that place where the wave finally broke, and rolled back. (Thanks HST!)
In the first half of 1994 a group of students, with the limited support of a few industry players, known as VRASP (Virtual Reality Alliance of Students and Professionals) embarked on the uniVRsum project to integrate the diverse and incompatible VR technologies flooding the market. This was to culminate in a presentation at Siggraph ’94, the premiere computer graphics conference and trade show.
One of uniVRsum’s first steps was to compile a database of the VR company/product universe. As one of the few industry supporters, I had access, thanks to Karin August at VRASP, to a copy of this fascinating compendium. Twenty-two years later, it resurfaced in an old file box.
Here’s a fairly comprehensive survey of 120 companies active in the VR marketplace in early 1994. A few remain, but most are lost, “like tears… in the rain.”
]]>0Tonehttps://vrtifacts.com<![CDATA[Oculus DK2 Lens – Characteristics]]>https://vrtifacts.com/?p=33802015-06-01T00:14:16Z2015-05-31T16:45:26ZThe Oculus DK2 is a remarkable VR headset, producing a remarkably wide field of view with very inexpensive single element optics. VRtifacts was curious about the characteristics of the Oculus DK2 lens: what size, what material, and what focal length? The lenses themselves have quite a bit of chromatic aberration, giving the impression that they […]
]]>The Oculus DK2 is a remarkable VR headset, producing a remarkably wide field of view with very inexpensive single element optics. VRtifacts was curious about the characteristics of the Oculus DK2 lens: what size, what material, and what focal length? The lenses themselves have quite a bit of chromatic aberration, giving the impression that they are very low cost simple lenses. The diameter is 41mm and focal length (of the “B” lens) is approximately 45mm.
Distortion and Chromatic Aberration
This is a fairly high degree of magnification which produces significant distortion and chromatic aberration (color fringing near the lens periphery.) Oculus takes full advantage of modern day graphics cards using OpenGL to pre-distort opposite to the lens distortion, and to individually distort the red, green, and blue channels to (imperfectly) correct for chromatic aberration. The color fringing correction is imperfect because the lens bends different frequency light by different amounts. The process in the lens is a continuous curve across the color spectrum, while the graphics card only corrects at 3 discrete frequencies corresponding to red, green, and blue… essentially a step function. However, since the display emits moderately narrow bands red, green and blue, we perceive good chromatic aberration correction.
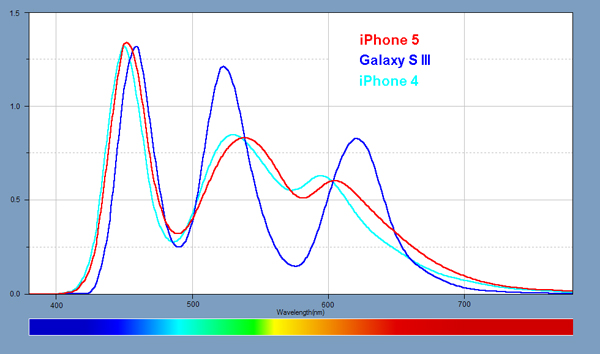
AMOLEDs (DK2 uses a Samsung Galaxy Note 3 Full HD Super AMOLED) use organic electroluminescent materials which do not emit single frequency red, green, and blue colors. Instead they emit a range of light frequencies consisting of a spectral curve for each color primary. AMOLED spectral curves are narrower than produced by IPS LCDs (used in Apple retina displays), but the width of the frequency range for each primary is not a single frequency. The Oculus chromatic aberration correction technique only works perfectly at the exact center frequencies of each (RGB) emission curve. Since the AMOLED emissions spread around these ideal Oculus corrected center frequencies, chromatic fringing can not be totally eliminated by the Oculus technique.
Spectrum plot for Apple iPhone 4 and 5 vs. Samsung AMOLED (older version than Note 3)
Now, let’s narrow down the material the lens is made of of. We know they’re not glass. Glass would be way too heavy. For inexpensive lenses there are three choices: CR39 (used in eyeglasses), polycarbonate, or acrylic. The last two are the least expensive and acrylic, is the cheapest. The easiest way to determine which is to first determine the lens specific gravity. Specific gravity is the ratio of the material’s density vs. water, i.e. grams per cubic centimeter. For the 3 material candidates the specific gravity’s are:
CR39 – 1.32
Polycarbonate – 1.21
Acrylic – 1.19
The easiest way to determine specific gravity is to use a cup of water as a reference weight, measured with and without the lens dunked into the water (but not touching the container.) A small digital scale is used. We also weigh the lens alone. The specific gravity is simply the lens weight divided by the change in water cup weight when the lens is dunked.
Our lens is actually 16.7 grams, although the scale doesn’t have the tenth’s digit. The cup of water is 206 grams, and the cup of water with the lens dunked is 220 grams, a 14 gram difference.
Thus the specific gravity of the lens is 16.7 divided by 14 which is 1.19. Looks like we’ve got acrylic, but the specific gravity is only about 2% off that of polycarbonate, which would be 1.21.
A final test is in order. Heating the plastic will reveal whether it’s polycarbonate or acrylic. Acrylic bubbles but does not emit much smoke, whereas polycarbonate chars and produces dark smoke. The video below shows what happens.
AND…. It’s acrylic, the least expensive material!
Acrylic (Lucite) is much softer, scratch prone, and breakable than polycarbonate (Lexan), by a factor of 50:1 or even 100:1 depending on the formulation. Acrylic transmits more light that polycarbonate: 89-92% vs. 86-89% for poly. Poly has a slightly higher refractive index (thinner lens with same magnification.)
In quantity from China they’re about 25 cents each.
This video shows the relative fragility of acrylic vs polycarbonate:
]]>0Tonehttps://vrtifacts.com<![CDATA[The State Of Consumer VR]]>https://vrtifacts.com/?p=33742018-05-08T15:01:46Z2015-02-12T22:32:36ZThe post The State Of Consumer VR appeared first on V-Rtifacts.
]]>
Two milkshakes make the whole issue of virtual reality motion sickness moot. There’s not much more commentary to add here…
]]>0Tonehttps://vrtifacts.com<![CDATA[Recent Job Posting: Seeking – Principal Teledildonics Integration Engineer]]>https://vrtifacts.com/?p=33622015-01-17T17:52:20Z2015-01-17T17:49:36ZAccording to several women writers, a hot hi-tech hiring wave will be seeking: Teledildonics Integration Engineers and API Programmers (FAPs.) While porn has been trying to edge into Virtual Reality Sex, and VR keeps trying to penetrate the porn market, maybe the moment for this market to explode has finally come. As with most provocative blogs, […]
]]>According to several women writers, a hot hi-tech hiring wave will be seeking: Teledildonics Integration Engineers and API Programmers (FAPs.) While porn has been trying to edge into Virtual Reality Sex, and VR keeps trying to penetrate the porn market, maybe the moment for this market to explode has finally come. As with most provocative blogs, the real meat of interest is in the comments sections of these posts. Let’s just say it’s a sausage fest.
We all know what enabled the VCR to become ubiquitous. One marketing school of thought foresees being virtually jacked-in as the app which will put a Rift in every home.
The porn of the future is titillating. As virtual reality matures, we’ll be aroused in three-dimensional immersive alternative realities, interacting with super-lifelike porn stars customized to our taste. People will look back on our passive and lonely 2D smut and pity us.
A webcam girl could offer a “hands on” interactive session without ever having to leave the bedroom or swap bodily fluids. A porn star could give an explicit how-to tutorial to a couple a thousand miles away. The world of porn is about to change… All joking aside, what was once considered an expensive gimmick (VR) is on the verge of going mainstream.
Geek lovers combine a well-developed and oft-exercised erotic imagination with their physical technique. It isn’t a big leap from “I’m a level-13 thief, evil-aligned” to “I’m the prison warden and you’re the new detainee.”
]]>0Tonehttps://vrtifacts.com<![CDATA[Bookshelf: Sex, Drugs and Tessellation]]>https://vrtifacts.com/?p=33542018-05-08T15:58:57Z2014-11-26T23:12:06ZHot off the press is Ben Delaney’s authoritative new book, Sex, Drugs, and Tessellation which collects 6 years of wisdom from Ben’s CyberEdge Journal, the go-to virtual reality publication from 1991 through 1996. Ben has always been both a proponent of, and realist about VR, offering insightful market insights and lucid explanations of ofttimes opaque technology. Both students […]
]]>Hot off the press is Ben Delaney’s authoritative new book, Sex, Drugs, and Tessellation which collects 6 years of wisdom from Ben’s CyberEdge Journal, the go-to virtual reality publication from 1991 through 1996. Ben has always been both a proponent of, and realist about VR, offering insightful market insights and lucid explanations of ofttimes opaque technology. Both students of VR and grizzled veterans will find Ben’s writing to be illuminating. You may remember his appearance on the PBS series Newton’s Apple where he explains the workings of the Virtual Research Flight Helmet.
An abbreviated “book jacket” summary:
Did you ever wonder who built the first head-mounted display? Who first detailed a coherent theory of Cyberspace? Who wrote about cybersex and the challenges it creates? Who worried about addiction to VR? Did anyone ever cure cyber-sickness?
From 1991 to 1996, CyberEdge Journal covered these stories and hundreds more … … Appreciated for its “No VR Hype” attitude, CyberEdge Journal was the publication of record for the VR industry in the 90’s….
Now that VR is enjoying a renaissance, it’s time to understand where it came from, and avoid making the same mistakes that were made in the first golden age of VR, the 1990’s. It’s also a good time to remember the excitement and sense of adventure that characterized those time.
Sex, Drugs, and Tessellation describes not just some of the hot topics of VR, but also the origins, issues, and solutions that were chronicled in the pages of CyberEdge Journal. Complemented by over 100 photos and drawings, there is a surprisingly contemporary feel to these old articles. In addition, more than a dozen VR pioneers have contributed new reminiscences of their work in VR.
]]>0Tonehttps://vrtifacts.com<![CDATA[Why Sell Out? Oculus -> Facebook]]>https://vrtifacts.com/?p=32662018-05-08T16:06:50Z2014-03-26T01:37:43ZA lot of people are fuming over today’s announcement that Facebook would be buying Palmer Luckey’s Oculus. Palmer and company produced two mainstream marketed development kit head mounted displays which became darlings of the grassroots VR/Gamer community. Starting with Kickstarter, Oculus, channeled through Palmer’s and later John Carmack’s charisma and a hacker friendly attitude, built […]
]]>A lot of people are fuming over today’s announcement that Facebook would be buying Palmer Luckey’s Oculus. Palmer and company produced two mainstream marketed development kit head mounted displays which became darlings of the grassroots VR/Gamer community. Starting with Kickstarter, Oculus, channeled through Palmer’s and later John Carmack’s charisma and a hacker friendly attitude, built a loyal and vocal user base, one that championed the ethos of open source and quasi-community development.
Tonight, there’s a lot of disappointment and vitrol that Oculus has abandoned the community, and worse yet (from their perspective), sold out to the Devil incarnate. How could Palmer, who just announced the deal on Reddit, have turned his back on the admiring crowds? Who would have thought the Oculus enthusiasts could be turned into a howling mob in the course of a single afternoon?
Were they betrayed? And by who?
It’s easy to forget that Oculus funding didn’t end with Kickstarter. There’s the Venture Capitalists. Unlike the Kickstarter money-for-prototype funding, the VCs were getting equity, board seats, and a preferential position in the decision making process. VCs don’t take major stakes unless they receive major control of their target.
So when Oculus was offered $400m in cash plus $1.6B in Facebook stock (plus another $300m incentive bonus), was Palmer really making that call alone? After multiple VC funding rounds and stock incentives to key employees, Palmer must have relatively small minority stake in Oculus, although even so the deal involves a considerable sum for him. But a minority share and non-preferred stock means that his vote is in no way decisive… the Venture Capitalists, led by Andreessen Horowitz, make the big time financial decisions. They invest based on their strategic relationships with potential buyers like Facebook (Andreessen sits on the board of Facebook… no small thing.)
It’s only natural that the VCs would push hard for the deal. Inasmuch as Oculus never really had a strategy to rake in 9 figure profits cash on the barrel at huge multiples of their original investment, what’s an investor to do? Let’s hypothetically (and generously) say that there would have been a 50% chance that Oculus could generate $2B in profits (or other liquid value) within the next 4 years. If the investors were to allow Oculus to remain independent they’d be giving up a certain $2B right now, in exchange for a potential payout down the road. How big would that payout need to be? Well…, in this make-believe scenario the investors are essentially deferring their $2B as a high risk loan. They should then receive interest payments on their loan (the time value of money.) But when you risk other-peoples’-money you must pay the vig. Let’s assume 20% per year (that’s low… I promise!) So… discounting for the 50% risk and the vig, the VCs need more than $5B in profit on the future bet. That significantly decreases their (50%) chance of success.
Time to take the money and run!
Does that make Palmer Luckey the bad guy? No, it just makes him the guy who took the VC money without realizing that control had also been surrendered. This is a dance that occurs with every venture capital deal; the term sheets have the control clauses permanently etched.
Is the Facebook deal a bad thing? Good thing? Oculus developed technically well conceived and implemented head mounted displays. The VR displays are/were wildly popular with a community of up to 75,000, doubtless enhanced by the ultra-low $300 price tag. They would need to sell tens of millions of units at this price point in order to realize anything like the $2B Facebook offer. Realistically, the price point needed to be double (or triple) in order to have margins comparable to normal consumer electronic gear. I don’t see them achieving millions of units sold at $600-$900/unit. Pundits have suggested other unspecified, service based, revenue streams. Lacking the clout of a Facebook/Google sized borg, I don’t feel like they could ever reach a critical mass capable of bringing in $5B+ in value (other than equity.)
While the Facebook ethic is the nightmare scenario for the highly independent Oculus community, their alternatives were limited. VCs always rely on the profitability of equity not of product. What will FB do with Oculus? Unknown. But if the Oculus product never makes a single cent, it nonetheless will not die an ugly and horrible cash flow strangulation death; what would certainly have been their fate absent being made part of the borg.
]]>0Tonehttps://vrtifacts.com<![CDATA[W-Industries Unscripted]]>https://vrtifacts.com/?p=32632018-05-08T16:11:41Z2014-03-22T00:32:37ZThe post W-Industries Unscripted appeared first on V-Rtifacts.
]]>
W-Industries (Virtuality) always seemed to have a PR person riding herd on any video material that was released about the company or products. Everything the public saw was tightly scripted and edited. But… here’s a 1992 video from inside the factory that’s more of a home movie cum operations tutorial. We are guided through some of the guts of the Series 1000, the pre-play systems, and the assembly area.
Don’t forget to turn on the YouTube subtitles, the audio track is in Swedish.
ABC Primetime covers the VR scene in Sept. 1991. Although this news report conflates computer animation footage with Virtual Reality, it also features interviews with Jon Waldern, Fred Brooks, Howard Rheingold, Mike McGreevey, and C L Dodgson (virtually, of course.) With the advantage of hindsight, it’s interesting to see which predictions from 23 years ago have panned out and which are way out in left field.
… and from the where-are-they-now club, we get a brief glimpse of video footage from Symbolics Inc. (remember LISP?), a hot up-and-comer in computer graphics back in the day.
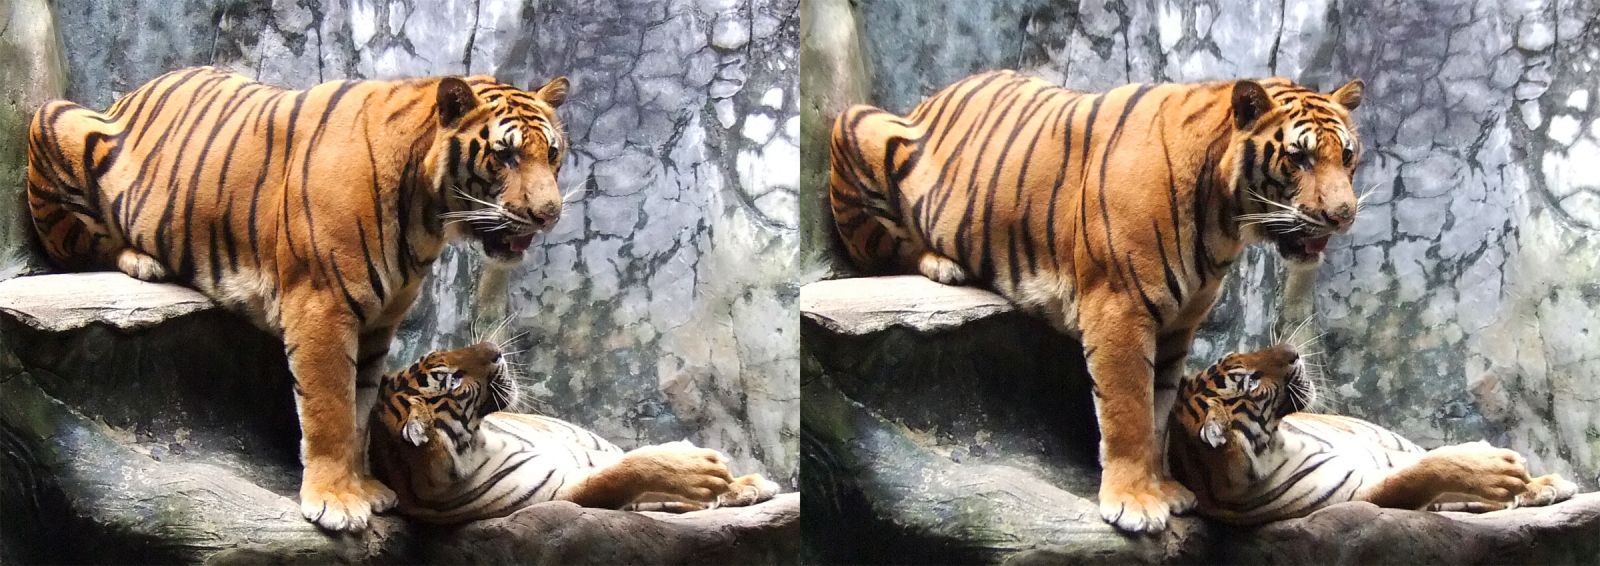
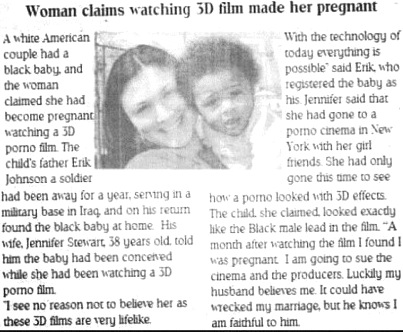
]]>0Tonehttps://vrtifacts.com<![CDATA[The Realism Of 3D Movies]]>http://VRtifacts.com/?p=32502018-05-08T19:38:39Z2014-01-02T21:56:43ZThe post The Realism Of 3D Movies appeared first on V-Rtifacts.
]]>
]]>0Tonehttps://vrtifacts.com<![CDATA[The Great Bubble]]>http://www.VRtifacts.com/?p=32272018-05-08T19:40:54Z2013-11-14T23:13:06ZThe post The Great Bubble appeared first on V-Rtifacts.
]]>
2013 has brought much excitement to the VR world, especially the perception of great breakthroughs in Head Mounted Display products. Can we take a deep breath, then hold up a distant mirror to the cautionary history of VR from 1993-1998. Back then there also was a fever pitch of excitement as companies pitched great breakthroughs, attracted outsize investments from private and public markets, and yet, the best of them crashed and burned, taking their investors, customers, and vendors down with them.
I invite you to review this chronological collection of VR news reports beginning with the fire sale of VPL’s much vaunted patent portfolio. The reports follow the rise and fall of three VR industry giants: Virtuality, IO Systems, and Superscape. I present these as examples, but they’re not alone. Very few VR firms escaped the 90’s. Sadly the VR bubble burst long before the late 90’s tech bubble burst. It wasn’t the economy – stupid!
]]>0Tonehttps://vrtifacts.com<![CDATA[Vintage VR-4 Head Mounted Display Teardown]]>http://www.VRtifacts.com/?p=32222018-05-08T19:43:19Z2013-11-14T21:55:29ZThe post Vintage VR-4 Head Mounted Display Teardown appeared first on V-Rtifacts.
]]>
Here’s a much more detailed tear down of the Virtual Research VR-4 Head Mounted Display, done by one of the engineers at VR sometime in 1994. He shows us how to remove the back light inverter and the main PCB.
‘Scuse the vintage VHS EP mode recording. I was trying to save on video tape costs; a 6 hour tape cost $1.50!
]]>0Tonehttps://vrtifacts.com<![CDATA[Digital VR Rehab]]>http://www.VRtifacts.com/?p=31662018-05-08T19:52:04Z2013-04-24T14:31:27ZFor years, therapists would attempt to treat smokers and alcoholics using real-life triggers. Let addicts see a lighter or an empty bottle, or even a photo of something smoking or drinking related, to trigger cravings, then teach them coping strategies. It was limited because patients could tell they were in a lab and their new […]
]]>For years, therapists would attempt to treat smokers and alcoholics using real-life triggers. Let addicts see a lighter or an empty bottle, or even a photo of something smoking or drinking related, to trigger cravings, then teach them coping strategies. It was limited because patients could tell they were in a lab and their new found coping skills were not always transferrable to the real world. Enter Virtual Reality:
The theory being that the immersive VR world better approximates the real world, allowing better skills transference and allowing researchers to easily AB test different scenarios. A pilot program at Duke run by assistant professor Zach Rosenthal with funding from the National Institute on Drug Abuse and the Department of Defense has already run about 90 people through this VR rehab trial. No formal conclusions have been reached, but preliminary data suggests effectiveness. More reading here.
Professional wide field of view Virtual Reality optics for less than the price of a couple of double lattes! A while back I demonstrated a design for Leep On The Cheap, a proof of concept for wide field of view optics on 3″ to 4″ display panels. Trouble was… there was quite a bit of distortion and chromatic aberration. However, it sparked quite a bit of thought and development in the VR DIY community. They’re the ones doing all the heavy lifting.
So… it’s time to come back with another optical design for wide field of view VR, but this time the optical qualities are first rate and remarkably inexpensive. Of course there are a new set of trade-offs: field of view is limited to about 65 deg. (not bad, but not totally immersive), and I rely on somewhat smaller display panels, about 1″ to 1.5″ diagonal. This is roughly the same as the: Nvision Datavisor LCD, Visette Pro, and Virtual Research VR4/V6/V8.
This design, and many commercial versions, rely a the unique characteristic of telescope eyepieces: that they can be directly used as HMD optics without modification. Even better, they’re made in fairly large quantity, with a large selection of optical characteristics and quality, and somebody else has already solved the issues of distortion, chromatic aberration, internal reflections, coatings, and aspheric design. Did I mention that they’re inexpensive. The sweet spot are either Erfle or Plossl designs; Erfle offers wider field of view. Even wider fields can be achieved with variations on the Nagler design, but the weight becomes prohibitively high.
It’s easier to give the tour by video… viddy this my droogies:
]]>0Tonehttps://vrtifacts.com<![CDATA[Dump Those Silly Colored 3D Glasses]]>https://vrtifacts.com/?p=34322018-05-08T19:57:47Z2012-07-08T22:14:08ZThe post Dump Those Silly Colored 3D Glasses appeared first on V-Rtifacts.
]]>
They say you’re not a true 3D enthusiast until you’ve got a shelf full of red/cyan and green/magenta anaglyph 3D glasses. I’m ready to dump mine in the waste bin, but there’s this little problem; two more shelves of anaglyph DVD, BluRay and VHS movies collected over the years. Soon the studios will start to release the latest blockbusters in full color BluRay 3D, but somehow I doubt they’ll find the time or budget to convert “Comin’ At Ya” or “The Stewardesses” from anaglyph to full color 3D. Who knows, maybe the full color film prints are lost forever.
For a couple of years there were two online purveyors of converted movies; they both did a creditable job, but recently dropped out of sight. My suspicion is that the films’ copyright holders got wise and shut them down for selling unlicensed copies. I doubt the sin had anything to do with 3D, just that they were selling unauthorized copies of the studios’ movies.
However, for those of us who purchase legitimate anaglyph 3D movies from Amazon or our local video store, the courts have strongly affirmed that we can watch them any way we choose, in private, whether we watch standing on our head, projected on a fishbowl, reflected off the water in our toilet, or even in full color 3D! In other words, if we have a gadget at home that translates anaglyph movies into full color and we use it solely to privately watch the legitimate 3D movies we own, we’re well within our legal rights.
And here’s how!
Anaglyph movies come in a number of flavors. This post deals with red/cyan and green/magenta anaglyphs which cover the majority of releases available. The goal is to create full color left and right video streams from these anaglyph releases. To keep things simple, this post describes a method to output either side-by-side or top-bottom formatted full color stereoscopic video in a single file. The tools used are open source: AVISynth and VirtualDubMod, as is the code I’ve contributed (refer to the license that accompanies the code.) To keep things simple, there’s download links for everything needed at the end of this post.
This post is not a cookbook for the uninitiated. If you are comfortable with AVISynth and VirtualDubMod, or are willing to learn these two programs, you’ll be fine. You don’t need to be a coder, you just need to be experienced in using these programs. Similarly, you need to have a basic knowledge of 3D formats and some experience critically viewing 3D. If you’re a 3D enthusiast or a professional, you’re already there.
Prepare your computer
First thing is to get your system ready. Sadly there’s no AVISynth for ‘nix or Mac, so we’re talking PC with XP, Vista, or Win7. The conversion process should run on any PC capable of running these OS’s, but it won’t be much fun without a Dual Core and 2gb+ of memory. I’ve done my testing on an I5-750 with 4gb. Your mileage may vary.
At a minimum, install AVISynth, VirtualDubMod, and the K-Lite Codec Pack. Since AVISynth only ingests AVI, WMV, MPG, and MKV files, you’ll almost certainly want to install software that converts your DVDs and BluRays to one of these formats. For DVD, I recommend VOB2MPG (and if you need to access encrypted DVDs, add DVD Decryptor.) For BluRay, I recommend MakeMKV.
The MOST IMPORTANT thing in getting your DVDs and BluRays into a computer format is that the ripping process should not re-encode (i.e. decompress and then recompress) your video. Anaglyph colors are very delicate and each compression generation makes your 3D conversion ever so much more difficult. VOB2MPG3 and MakeMKV both can do the conversion without recompression.
How the code works
The actual 3D anaglyph-to-full color conversion logic is contained in two AVISynth scripts (.AVS files.) The core logic is in AnaExtract.AVS; unless you’re a coder, you probably won’t fool with this. Just tuck the file away in a safe folder somewhere. The other script is where you set all the parameters for a particular movie you’re converting. I like to name these files: XX-DeAna.avs, where the XX is replaced by the name of the movie. However, you can name each copy of the file anything you like.
The video near the top of this post demonstrates how to use AVISynth, VirtualDubMod, and the parameter file to convert an anaglyph movie. While that should be enough to get you going, the gory technical details begin now. I’ll get back to the parameter .AVS file later on, but first let’s pick apart the actual core processing module: AnaExtract.AVS. You probably will never have to change anything in this section of code; it’s always “included” with your parameter script which is described later in this post. But, if you want to see what goes on under the hood, keep reading this section.
Yes, the code is open source
# AnaExtract.avs

# Tone at VRtifacts.com

# V 0.9 June 27, 2010

#

# Copyright (C) 2010 Tony Asch

#

# This program is free software: you can redistribute it and/or modify

# it under the terms of the GNU General Public License as published by

# the Free Software Foundation, either version 3 of the License, or

# (at your option) any later version.

#

# This program is distributed in the hope that it will be useful,

# but WITHOUT ANY WARRANTY; without even the implied warranty of

# MERCHANTABILITY or FITNESS FOR A PARTICULAR PURPOSE. See the

# GNU General Public License for more details.

#

# You should have received a copy of the GNU General Public License

# along with this program. If not, see
<https://www.gnu.org/licenses/>
The main points are: There’s no warranty, feel free to modify and distribute, but you must include the source in any distribution.
Since many 3D DVDs come with both a 2D and a 3D copy of the same movie, it is often the case that the 2D version is a perfect reproduction of either the left or right eye view. If that is the case, we’ve cut our work in half, and are assured of one eye’s view being perfect. The block of code above separates the two anaglyph colors and produces independent left and right video streams, albeit that it’s primarily luminance information that we get once they are transformed to greyscale. If we already have something from the 2D copy, then we don’t need to extract an imperfect copy of that eye’s view from the anaglyph. Cool! In the case of RC, I found the blue channel to be quite noisy and even though cyan is a combination of blue and green, I just grabbed the green and used it as luminance information. If you don’t have a 2D version you will set the parameter isMono = “monoNone”, the parameter vidOrig will be set to “nothing” or some other string, and will not be used by any of the code.
Prepare the full color information
# Prepare color information by resizing the image down and back up,

# creating a blurred version of the source for color restoration

# Note: the decimateHoriz/Vert values are percentages (1-100)

# defining the size of the shrunken version. Small numbers give more blur

# Code has a hack to make sure the shrunk version dimensions are even numbers

vidColor = DirectShowSource(PureColName)

vidColor = BicubicResize(vidColor, Int((width(vidL) * decimateHoriz) / 200.0) * 2, Int((height(vidL) * decimateVert) / 200.0) * 2)

vidColor = BicubicResize(vidColor, width(vidL), height(vidL))
In the prior step we extracted greyscale copies of the left and right video streams. In preparation to re-coloring them, we need to calculate the colors to apply. Since the left and right videos are very similar, perhaps offset horizontally in places, and knowing that the human eye perceives much more detail in luminance than it does in chroma, we can apply color with a very blurred paint brush. Back in the parameter .AVS file we defined the name and path of the best video file to use for extracting color information. This would be the 2D version, if we have it; otherwise it will be the anaglyph version.
In AVISynth, the quickest way to blur is to resize a video to a very small size and then resize it back up to full size. For the convenience of users, the parameter file specifies this independently for the width and height, both in percentage terms (1-100.) The code with ” * 200 / 2″ scales from percentage to fraction and also assures that width and height will be an even number (required by AVISynth.)
Horizontal and Vertical color blurring are specified independently because anaglyph 3D images are offset primarily along the horizontal dimension and we need much more blurring horizontally than vertically. Nonetheless, many movies are shot with imprecise 3D cameras which are not perfectly aligned and may exhibit dissimilar lens distortions between the left and right lens. Vertical color blurring can help to cover these problems. Also, remember that we are not yet blurring the luminance, which is where we perceive image detail.
Correct for any leakage between left and right
# Undoubtedly a little bit of the wrong eye has leaked over during the Anaglyph encoding process

# Subtract out a bit of the wrong eye. Specified in percentage (0-100)

vidL = Overlay(vidL, vidR, mode="subtract", opacity=(leakCorrectL / 100.0))

vidL = Levels(vidL, 0, 1.0, Int(255 * (1.0 - (leakCorrectL / 100.0))), 0, 255, coring=false)
vidR = Overlay(vidR, vidL, mode="subtract", opacity=(leakCorrectR / 100.0))

vidR = Levels(vidR, 0, 1.0, Int(255 * (1.0 - (leakCorrectR / 100.0))), 0, 255, coring=false)
Often there is leakage between the left and right anaglyph images (and thus the left and right luminance images we’ve calculated here), produced by the mastering or encoding. This bit of code corrects for this leakage by subtracting the opposite eye in small amounts (specified in the parameter file.) Since the subtraction is clamped at zero, we then rescale to full range: 0-255 luminance (8 bits.)
Reduce color fringing
# Horizontally blur if needed - reduces fringing from excessive video peaking.

# Skip if = 1.0 (no blur). Otherwise larger value produce more blur

blurRight != 1.0 ? Eval("""

vidR = BicubicResize(vidR, Int(width(vidOrig) / (blurRight * 2.0)) * 2, height(vidOrig))

vidR = BicubicResize(vidR, width(vidOrig), height(vidOrig))

""") : Eval(""" """)

blurLeft != 1.0 ? Eval("""

vidL = BicubicResize(vidL, Int(width(vidOrig) / (blurLeft * 2.0)) * 2, height(vidOrig))

vidL = BicubicResize(vidL, width(vidOrig), height(vidOrig))

""") : Eval(""" """)
In an attempt to make DVDs look sharper, some anaglyph movies have excessive peaking, a video process to enhance detail. This leaves thin white fringes on the edges of color and luminance boundaries. The boundaries of our red/cyan or green/magenta areas are particularly susceptible. While there are doubtless more sophisticated ways to deal with these fringes, in the interest of processing (and coding) speed, an optional horizontal blur is applied to the offending luminance stream(s.)
Convert to YUV Color Space
# YUV color space for chroma operations

vidR = ConvertToYV12(vidR)

vidL = ConvertToYV12(vidL)

vidColor = ConvertToYV12(vidColor)
Although we’ve tried to keep our processing in RGB space as much as possible, AVISynth likes to paint in color on YV12 color space, and so we convert.
Restore the color
# Use our blurred color video to restore colors to greyscale Right and Left videos

# Skip if we've already got a Mono Right source

isMono != "monoRight" ? Eval("""

vidR = mergechroma(vidR, vidColor)

""") : (""" """)

# Skip if we've already got a Mono Left source

isMono != "monoLeft" ? Eval("""

vidL = mergeChroma(vidL, vidColor)

""") : (""" """)
At long last we apply color to the two luminance video streams, except in the case where we already have a perfectly serviceable stream from the 2D version off the DVD or BluRay.
Do some final color correction
# Final brightness and contrast tweak

vidR = Tweak(vidR, bright=tweakBrightR, cont=tweakContR, sat=tweakSatR, coring=false)

vidL = Tweak(vidL, bright=tweakBrightL, cont=tweakContL, sat=tweakSatL, coring=false)
Chances are good that we may want to do a bit of brightness, contrast, and color saturation correction on each of the two video streams.
Process an existing 2D version
# Maybe we already have a 2D version for one of the eyes

isMono == "monoRight" ? Eval("""

vidR = ConvertToRGB(DirectShowSource(monoName))

""") : Eval("""

vidR = ConvertToRGB(vidR)

""")
isMono == "monoLeft" ? Eval("""

vidL = ConvertToRGB(DirectShowSource(monoName))

""") : Eval("""

vidL = ConvertToRGB(vidL)

""")
If we had that handy 2D version, we avoided processing the left or right stream that corresponds to that 2D view. Now it’s time to insert our 2D video in its proper place.
The user might want us to swap the left and right video streams. Just doing this to be polite!
Build the side-by-side or top-bottom output
# Build the Side by Side (SBS) or Top Bottom (TB) combination of Left and Right video

outputFormat == "SBS_Left_First" ? Eval("""

StackHorizontal(vidL, vidR)

""") : Eval(""" """)
outputFormat == "SBS_Right_First" ? Eval("""

StackHorizontal(vidR, vidL)

""") : Eval(""" """)
outputFormat == "TB_Left_Top" ? Eval("""

StackVertical(vidL, vidR)

""") : Eval(""" """)
outputFormat == "TB_Right_Top" ? Eval("""

StackVertical(vidR, vidL)

""") : Eval(""" """)
Assemble both video streams into a single video, either side-by-side or top-bottom, with the choice of whether left or right comes first (left/top.)
Resize the output if needed
# Optionally resize the output video

outputResize == "Yes" ? Eval("""

BicubicResize(outputWidth, outputHeight)

""") : Eval(""" """)
The user might want to resize the final video smaller or larger. Here’s where it happens. The specified sizes are for the final combined single video stream.
Dub in the audio track
# Dub in the sound

AudioDub(vidsound)
And add the sound back in. If the proper codecs are installed, AVISynth should handle PCM, MP3, AC3, 5.1, 7.1, etc…
The Parameter File
The Parameter file is where you tell AVISynth where your Anaglyph movie is located in your file system, and where you set the conversion parameters for a specific movie. You’ll want to have a copy of this file for every movie you want to convert because you’ll be editing parameters that control the conversion of a single move. This is the file you load with File->Open Video in VirtualDubMod. It tells AVISynth how you want the movie converted. At the end of the parameter file, the core processing code is “included” and invoked. Although we walk through each parameter in the video at the top of this post, let’s have another run through.
Name the files
# Setup our input files

anaglyphName = "F:/3D Conversions/MovieFolder/YourMovie-GM.avi" # Anaglyph video

PureColName = "F:/3D Conversions/MovieFolder/YourMovie-2D.avi" # Video with color info (either Anaglyph or 2D)

monoName = "F:/3D Conversions/MovieFolder/YourMovie-2D.avi" # Possible 2D video for one eye, if not set to "nothing"

SoundName = "F:/3D Conversions/MovieFolder/YourMovie-2D.avi" # Video with the sound track we want
# Maybe we already have one eye's version in 2D already,

# i.e. the DVD or BR has both 2D and 3D versions

# Set to: monoRight or monoLeft or monoNone

isMono = "monoLeft"
This section tells the conversion process where all the input files are located. Most important is the anaglyph file. Second is the video with our color information. If we’ve got a 2D copy, that’s the best source for color; otherwise you can get reasonable color by using the anaglyph video. If we have a 2D video and we want to use it for either the left or right eye view, the third line is where to specify it. If not, you can put anything in this parameter (string.) The fourth file tells the conversion where to get the audio tracks. Typically this will be either the 2D version or the anaglyph version, but you could use any video file with a sound track.
WARNING: all of these files must be synced to frame accuracy. Sometimes the 2D version and the 3D version are not exactly the same, often being different in the opening credits. You should pre-process the files to be frame accurate before running this conversion!
The next parameter: isMono, tells our conversion whether we already have a 2D version that corresponds to one of the eye’s views. You can set this to monoLeft or monoRight to tell the conversion that you have a 2D copy that should be used as the left or right output. If you don’t have a 2D version or don’t want to use it, set isMono = monoNone.
Format the output file
# Swap eyes: either Yes or No

# Note: it is industry standard to put Red on the left eye for RC glasses

# and Green on the left eye for GM glasses

# It would be unusual to set this parameter to Yes

# since the un-swapped arrangement is either Red=Left or Green=Left

swapAnaglyph = "No"
# Output formatting:

# Choices are:

# SBS_Left_First, SBS_Right_First, TB_Left_Top, TB_Right_Top

#

# Meaning Side-by-Side (SBS) or Top-Bottom (TB)

# And choosing which eye is in which position

# This happens after the optional swap (above)

# and is somewhat redundant, but makes the eye choices clearer.

outputFormat = "SBS_Left_First"
# Resize the output video? Either Yes or No

# If set to No, then the output video is either

# twice the width of the input (for SBS)

# or twice the height of the input (for TB)

outputResize = "No"
# If we are resizing the output, specify the dimensions (Int)

# These dimensions apply to the stacked video size

outputWidth = 500

outputHeight = 200
This section deals with the output file. Although you name the output file in VirtualDubMod (File->Save As…), the layout of that file is determined here. If you want to swap the left and right videos in the output, set swapAnaglyph = “Yes”; otherwise it should be “No”.
Next you you need to tell the conversion whether the two output videos should be arranged side-by-side or stacked vertically. In addition you’ll indicate whether you want the left video first (i.e. on the left of a side-by-side, or top of a vertical stack), or the right video first. The swapAnaglyph parameter reverses the meaning of this order.
If outputResize = “No”, then the width and height of the output video is taken from the input videos (which all must be the same size!) For side-by-side format, the output will be twice as wide as the input, but exactly the same height. For a vertical stack, the output will be exactly as wide as the input, but twice as tall.
If outputResize = “Yes”, then you can specify the output width and height.
Be careful with very large dimensions, especially the width, as some codecs can’t handle really big sizes (>2k.)
Prepare the color information
# How much to blur the color information (Int or Float)

# This is done by shrinking the color video down in size

# and then resizing it back up to full resolution

# producing a blurred full resolution image

# The two decimate numbers are expressed as percentages

# i.e. a percentage of the full resolution to calculate

# the shrunk size. 100 means no shrink, 10 means 1/10 the

# resolution of the original, etc.

# Anaglyphs are only offset horizontally, so the color blur

# should be strong horizontally, but weak vertically

# For films where the cameras were misaligned vertically

# you will need to make the vertical blur greater.

decimateHoriz = 5.0 # Horizontal shrinkage

decimateVert = 20.0 # Vertical shrinkage - can usually be much bigger than decimateHoriz
As part of the conversion, the videos will be re-colored. This color is extracted from the file you assigned to PureColName. Because the anaglyph will have left and right videos shifted horizontally depending on the depth and strength of the 3D, we can’t be exactly sure where to re-color. Instead we blur the colors so that they approximate the proper location, relying on human’s perceptual weakness for color detail. The blur is achieved by shrinking down the color video and then expanding it back up to full size. There are separate parameters for horizontal and vertical shrink because 3D anaglyphs are displaced mostly in the horizontal direction and therefore more horizontal blurring is needed. The vertical blurring can help to compensate for vertical misalignment of the cameras, lens distortions and other vertical artifacts.
Deal with left-right leakage and color fringing
# In case one anaglyph eye has leaked into the other

# We can try to remove that leakage by subtraction

# Expressed as percentage (int or float) (-100 to 100) (0 means none)

leakCorrectR = 10 # Leakage of left into the right eye

leakCorrectL = 0 # Leakage of right into the left eye
# Option to horizontally blur the left and right videos,

# just before the color is restored (before optional LR swap)

# Helps remove some of the fringing that appears in poor DVD encodes

# Set to exactly 1.0 for no processing (faster!!),

# > 1.0 blurs... try 1.5 to 4.0

blurLeft = 1.0

blurRight = 2.0
Here we attempt to correct for leakage of left into right and visa-versa. If you see ghosts of one side appearing in the other side, try subtly adjusting these parameters. Of course, with a great BluRay anaglyph, no correction may be needed at all.
Some anaglyph videos, especially those from DVD or VHS sources will show some fringing around the anaglyph color boundaries after separation by this conversion process. The fringes can be minimized by a slight horizontal blurring.
A final round of color correction
# Final brightness and contrast adjustments

tweakBrightL = 0 # Left brightness, integer to add to each pixel (pixels are 0-255)

tweakContL = 1.0 # Left contrast adjustment (1.0 means no contrast adjustment)

tweakSatL = 1.0 # Left saturation adjustment (1.0 means no saturation adjustment)
tweakBrightR = -50 # Right brightness, integer to add to each pixel (pixels are 0-255)

tweakContR = 1.35 # Right contrast adjustment

tweakSatR = 1.3 # Right saturation adjustment
Often the anaglyph conversion process will leave the videos looking a bit washed out, or dark, or desaturated. Here is your opportunity to do some basic color correction on either the left or right video (or both!)
Load the actual conversion code
# Common code to do the conversion

# Make sure this file path points to

# the file on your system.

import("F:\3D Conversions\AnaExtract.avs")
And finally at the end of the parameter file, the actual conversion code is invoked. Just make sure the path to AnaExtract.AVS is correct for your system configuration. You can put it where ever you want, but you’ll need to change the final line of the parameter file to point to the proper location in your file system.
Much of this code was inspired by prior AVISynth anaglyph converters from Olivier Amato and The Lone Wandering Soul. You probably will see some similarities in a few areas. That’s not coincidental. My thanks to both of them.
]]>0Tonehttps://vrtifacts.com<![CDATA[The Cart Before The Horse, Once Again – Project Glass]]>http://www.VRtifacts.com/?p=30962018-05-08T19:59:30Z2012-05-23T01:26:27ZThe post The Cart Before The Horse, Once Again – Project Glass appeared first on V-Rtifacts.
]]>
Google has been tearing through the bandwidth over at the Patent Office in defense of Project Glass, April’s much touted announcement of Google’s entry into the world of augmented reality and head mounted displays. One especially clever patent covers their bases on the use of glasses nose-bridge as a power switch.
Trouble is: where’s the beef? ReadWriteWeb nicely summarizes just why Google stressed that their promo video was just a “concept”, not anything we should expect in the foreseeable future. A few well aimed snippets from their article:
What a disappointment! Google’s prototype heads-up display glasses do not have the Terminator-style graphics shown in the concept video. They just show a simple readout above the user’s line of sight for now. That’s no fun.
After the video came out, Google execs immediately started showing up at conferences and on talk shows wearing Google glasses. But they were vague about the actual capabilities of these prototypes. When Sebastian Thrun dared to demo the camera while live on the Charlie Rose show, the result was pretty harrowing.
Concept videos cross the line when the company can’t deliver the goods. That’s why it’s risky to make them. As writer John Gruber is fond of pointing out, that’s why Apple stopped making such videos. Apple learned its lesson. Now it ships the devices of the future before it ever shows them off, leaving its competitors looking like they’re trying too hard.
Sega (all hail Sonic!): 1991 brought the announcement of Sega VR, a $200 headset for the Genesis console, a prototype finally shown at summer CES 1993, and consigned to the trash heap of VR in 1994, before any units shipped. Sega claimed that the helmet experience was just too realistic for young children to handle, but the real scoop from researchers showed that 40% of users suffered from cybersickness and headaches. It’s fair to say that Sega undoubtedly anticipated a sea of lawsuits; as one pundit in the industry put it: “It will be like the Pinto’s exploding gas tank.”
Perfectly capturing the annoying VR hype of the era is Alan Hunter’s (MTV) summer 1993 CES intro of Sega VR:
Money quote from a teen featured in the promo: “I thought I was going to have to wait till I was old… like 30, to get VR at home!” It’s now 2012, he’s closing in on 40, and still waiting.
Much more info can be found in Ken Horowitz’s 1994 review. Four games were produced especially for Sega VR, never to be released.
Here’s some sense of the much feared “realism” which provoked Sega to pull the plug on production:
Much to Sega’s credit, their VR fail was at least an original marketing effort, whereas later in the 1990’s, Nintendo’s Virtual Boy and Atari’s (Virtuality designed) Jaguar VR crashed and burned in much the same mode (although at far greater expense.)