There are many tutorials how to sharp images for web, and I tested majority of them. Finally I found the one which works best for me. I did not invent the algorithm, big thanks to smart Russian guy, photographer Pavel Kosenko for his research, summarizing the knowledge and finally action he created. I use this action couple years already and very happy with result.
I am not a theorist I only filter and use the best on the marker:-). So if you are interested in theory, please read books and another blogs for the explanation on how and why every step works this way. Here I give you only a practical part. This action works best for web size images from 300 х 200 px to 1200 x 800 px.
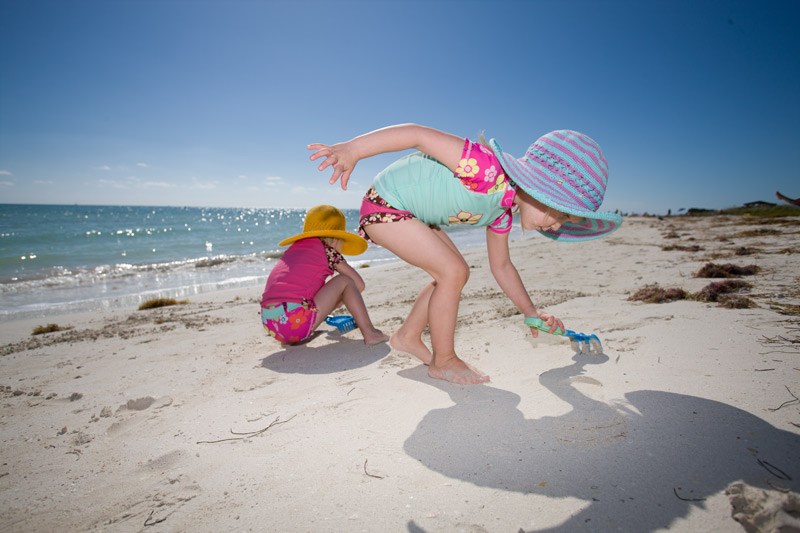
Below one of the examples of how this actions works. Mouse Over to see Before and After
Advanced sharpening in Photoshop for web.
Now, the sharpening process, step by step (or you can download Action at the bottom of this article):
I was asked couple times what the strange mode I used in my video. So, here is the answer:
I used curves presets to see differences in gradients and colors. When I apply various curves even slight difference in color or brightness become extremely visible. Here are two examples:
1. On this image I want to see clearly every tiny dust piece on the black background. It highlights it very well by using such curve:
I have been asked many times about the post production I do for a landscape photography. This post should answer some of the questions, as I’ll show you how and what I did on the images from our trip to Key West, FL. Funny thing that there is no Photoshop (by it’s common meaning): I’ve used RAW converter to do all (except sharping) the job. This is why Alex shoot always RAW, and I like to work with RAW files. It is much faster and cleaner to use a RAW converter and a batch processing to get a perfectly adjusted large stack of the photos.
Below I show you several screen shots, so you can see what adjustments I did in RAW Converter for the particular image. You can’t simply apply these settings for your picture, as they may not work in your case, but you can see the idea and experiment with your own image by moving sliders and see the difference.
A recorded LIVE broadcast from the product photography masterclass you can find at Alex's blog. Here is a post production part with some explanations what I did. Hope you will find it interesting:-)
Mouse Over to see Before and After retouching
Product photography retouching, video.
Thank you for looking. Any feedback and suggestions are very welcome! If you like our work, you can subscribe to our RSS feed and "Like" our AKELstudio page on Facebook:-) All the best, Genia
I am glad to start a first post in New Year with our recent creative shot for our good customer, a company called aDesign. The assignment was to create an image for the front page of the company website, and should look WOW!
It was really fun to work on such project and play with the lighting. We did several different variations and I choose these two photos to show them here, at my blog:
It was such a pleasure to jump in the middle of the summer, especially when outside is a cold, freezing and going to snow. I love summer, I love sun and palms:-) I really hope we move to live in a such “always summer” place. I am talking about our week vacation on Key West, Florida. It was a true joy to spend a week there, with our friends.
And now, in a cold Atlanta I enjoy to work with these warm pictures we brought from Key West .
As always, I experiment with the post production: now trying to do a most work in RAW converter and then a little touch-up in Photoshop. Working with RAW in converter gives me the most from the image (speaking of the quality), as I want to make sure I can use my experience in a commercial work as well. Below the set, use your mouse to see before and after.
This video shows my post production process in photoshop. This is my first video, I think water and product retouching is hard to find, and I am sure my video will be very interesting for those who do products.
Some time ago I start to record retouching process of almost every image I work on. So more interesting post production videos to come! stay tuned:-)
It’s funny: As soon as we have decided to remove the architecture portfolio from our portfolios and concentrate only on a product photography, we got such interest in our architecture photography:-)
Me and Alex like architecture, but for now a studio photography is much more interesting for us: concentrating only in a studio work we’ll have more chances to become “world best” in what we do.. and we both won’t accept less:-) But any way that’s cool!
Finally we updated our old stock web site. Now there will be only a water and things related to a water. No children, animals, nature or architecture – only water. Water, water everywhere….
This site has a long history. Alex, as a programmer, crated it when we even don’t think about professional photography business, created simply because we had a huge collection of nice photos, and we wanted to leverage some money from our expensive hobby. Even though we knew that to be successful, small stock sites should have a very narrow niche (by the subject of the photography), but that time we thought that our photos are so exceptional (probably every amateur gets through this stage that our photography is going to be selling like a Christmas trees in December:-)
So, we loaded all the different collections on the www.akelphoto.com, virtually everything we had: kids, landscapes, transportation etc. But quite fast we found that there is no way we can compete with monsters like Alamy, Getty, Corbis. Then, in few years, microstock agencies came into a play, and we finally understood that being very dedicated to a specific subject is the only way to get at least a small piece from the stock photography pie. So now we leave water and only water. And I believe our water photos are exceptional:-)
The site was re-designed, improved and cleaned. Welcome to www.akelphoto.com
Stock images are licensed on a Royalty-Free basis*, we provide instant download right after a secure payment will be processed.
I am sure there will be a lot of designers who would be happy to have access to our water stock collection, so please share the info.
All the best, Genia
*Royalty-free means that you pay a one-time flat fee for an image. It can then be used for multiple projects over an unlimited period of time. Royalty-free images are licensed on a non-exclusive basis. As a result, you would typically use an RF image in a project where you are not concerned about a competitive conflict or where the image may not be the primary focus of the piece.


Get blog updates:
Subscribe with RSS or by E-mail