ROCm文档:https://rocm.docs.amd.com
启用WSL
WSL是Windows Subsystem for Linux,现在已经让Windows变成了“最佳Linux发行版”了。要启用WSL,Windows 11的步骤如下:
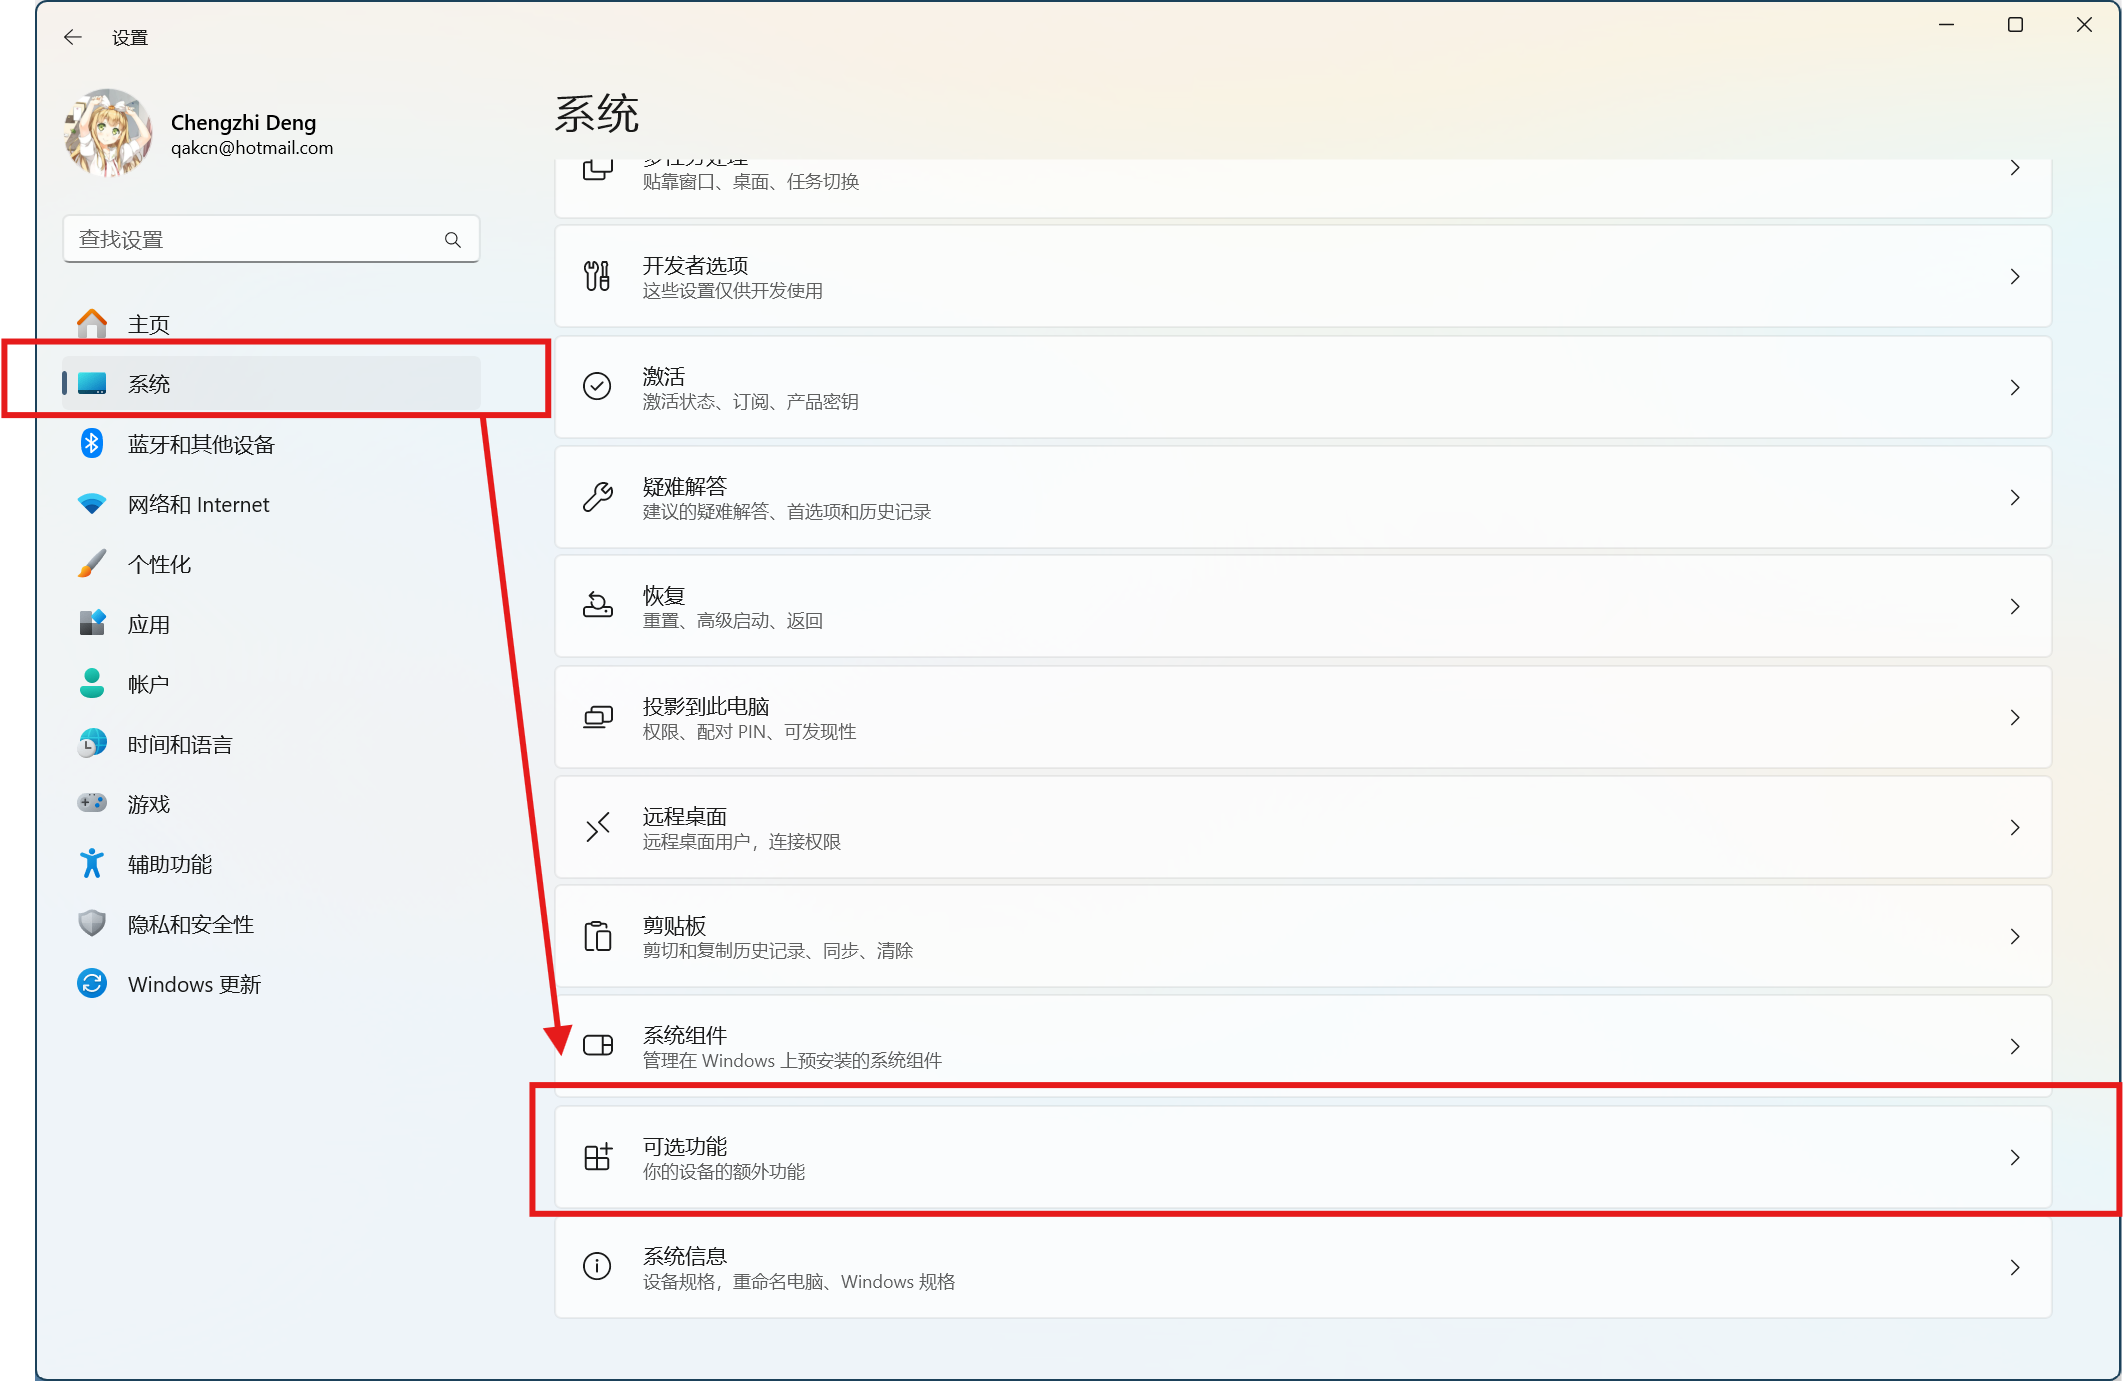
首先,打开设置,选择系统,往下找到可选功能。
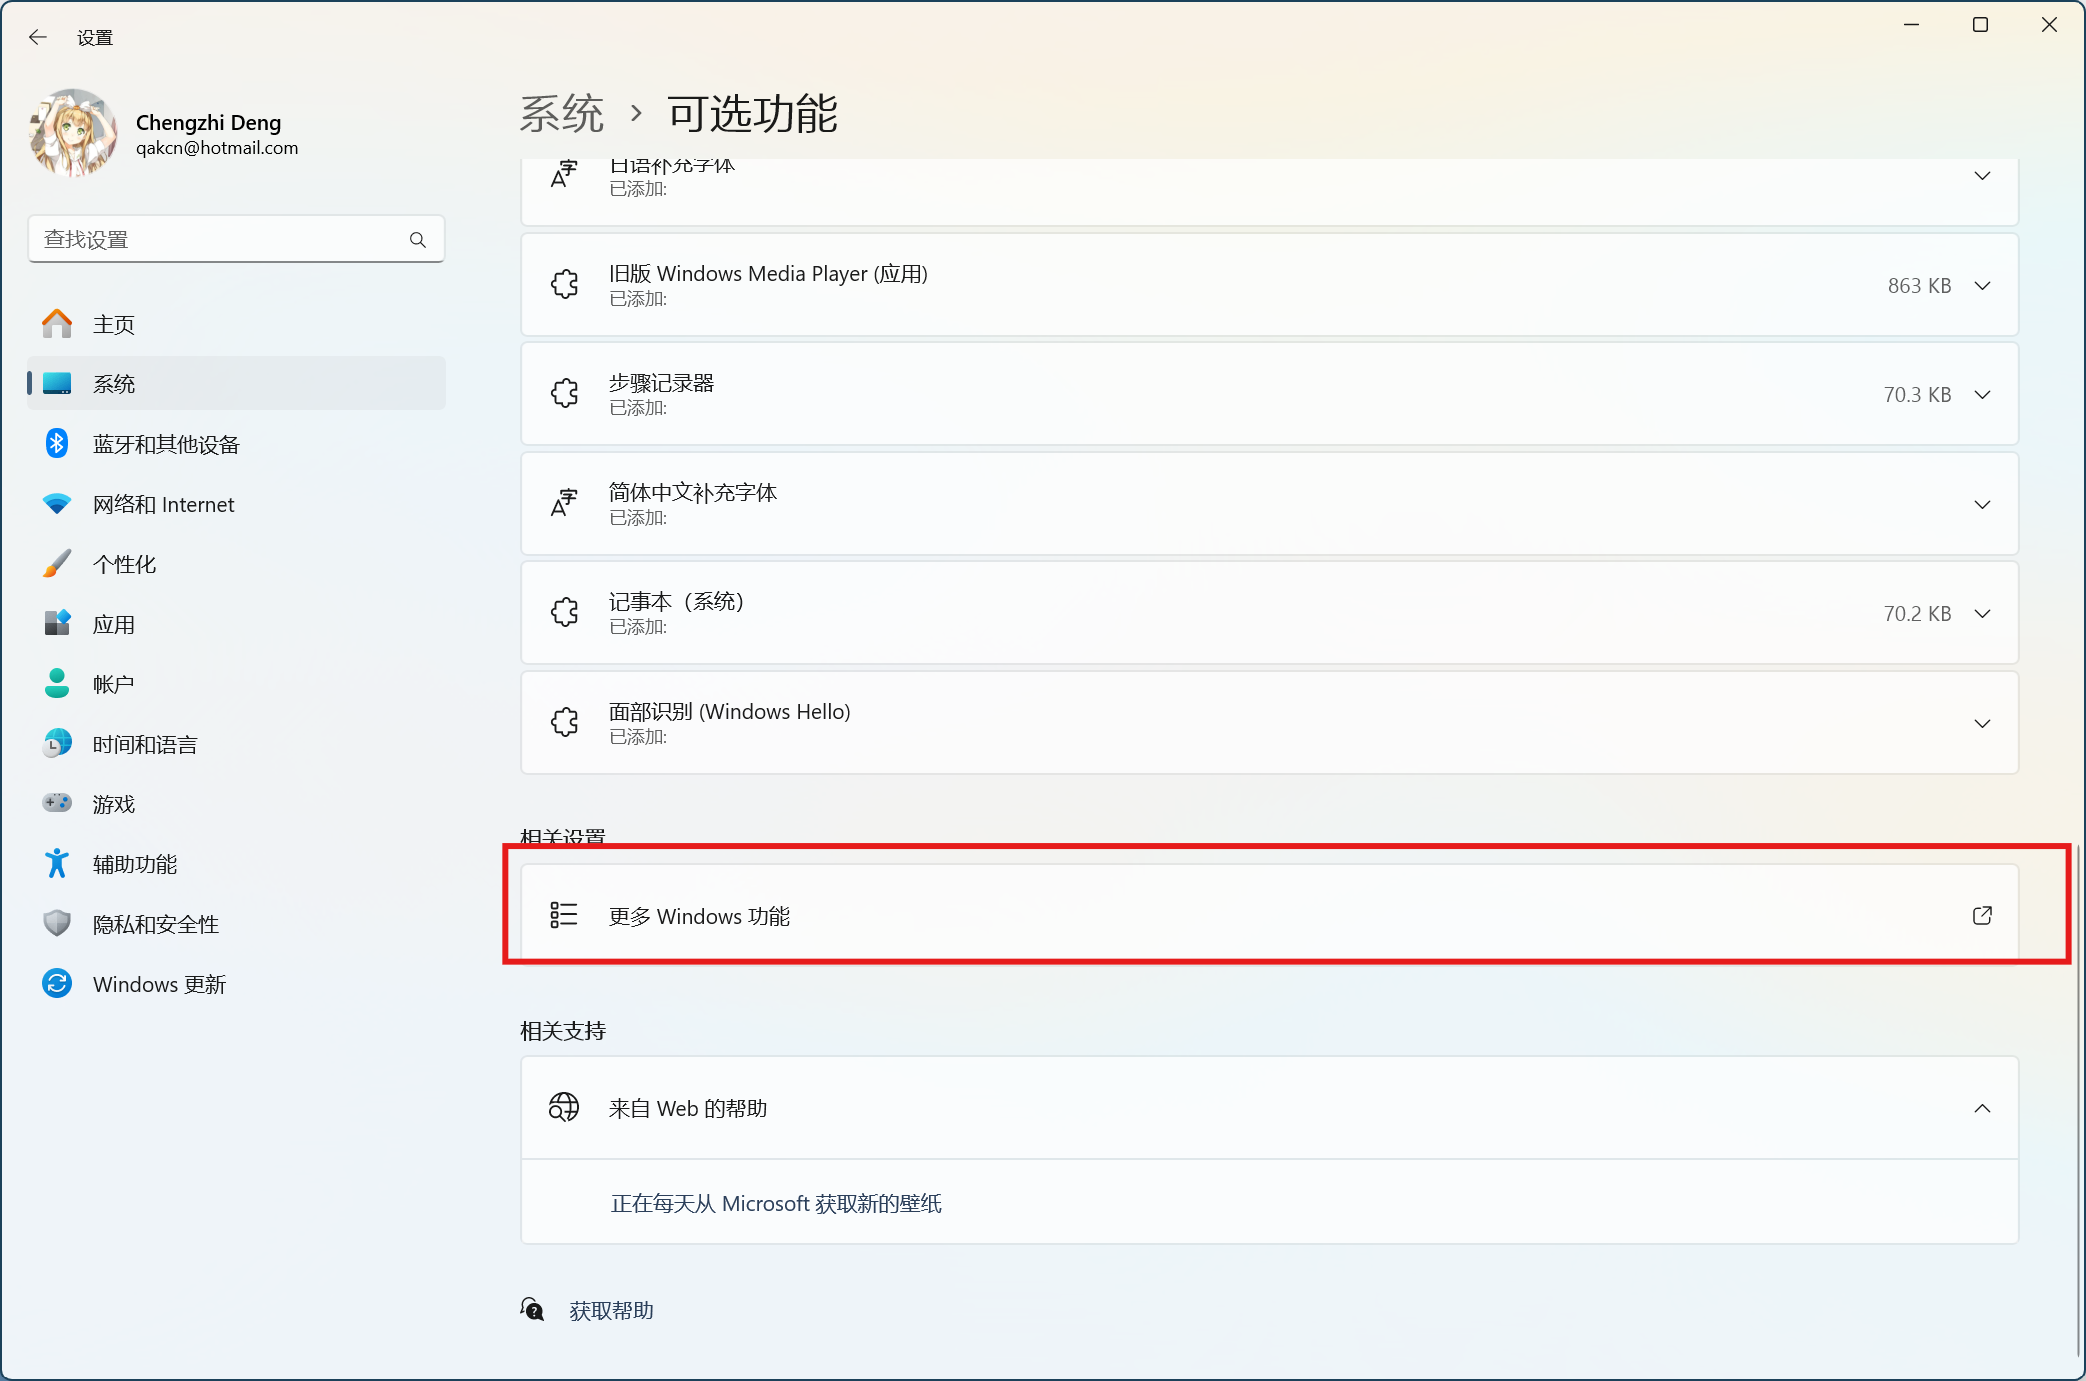
然后在可选功能中,往下找到更多Windows功能。
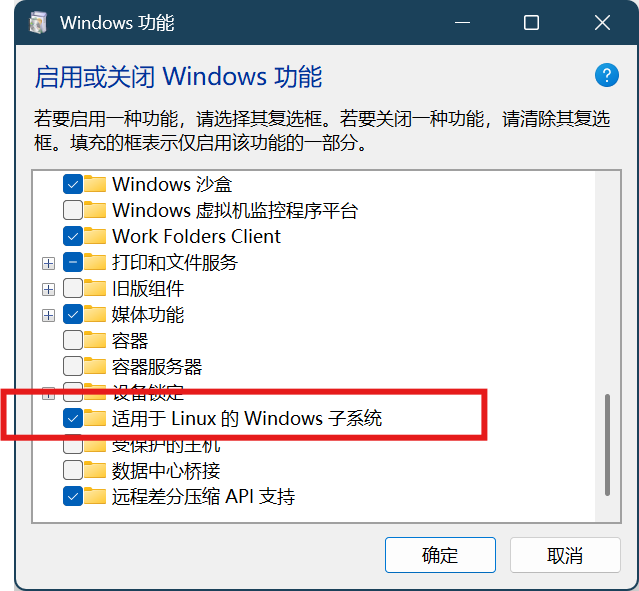
在打开的Windows功能对话框中,往下找到适用于Linux的Windows子系统,勾选然后确定。
安装好之后重启即可。
另外商店中也有WSL的应用,但不知道安装效果和上面的步骤一不一样,请自行尝试。Windows 10的启用方法请自行上网查找。
在WSL中安装Ubuntu 24.04
为了稳定,我们最好使用长期支持(Long Term Support,LTS)版本的系统,Ubuntu 24.04就是最新的LTS版本。下文中安装的是测试版ROCm,现在正式版ROCm 6.4.3的WSL支持只有Ubuntu 22.04 LTS,请自行举一反三。
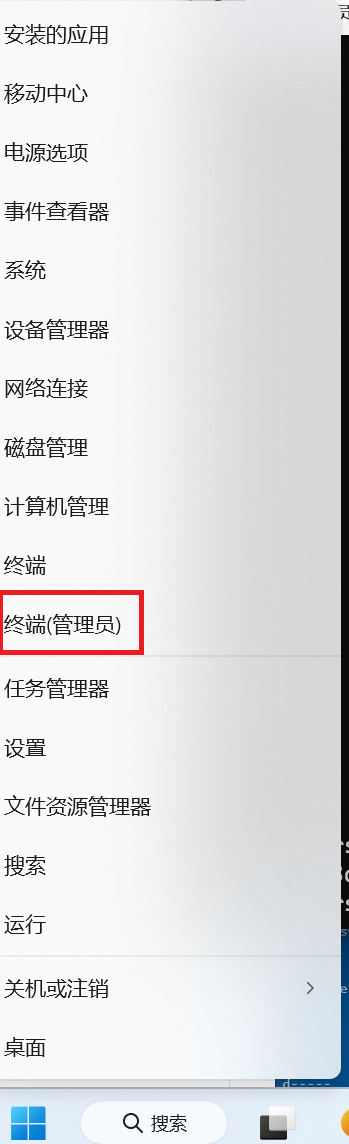
首先打开PowerShell终端,可以在开始按钮上点右键,然后点击终端打开。会打开Windows Terminal终端应用,默认即PowerShell。
在打开的终端中输入如下命令,并回车Enter执行(如无特殊说明,命令都是回车执行,下面不再赘述)。
wsl --update
如果之前安装使用过WSL,上面的命令就是确保WSL升级到最新版。
wsl --set-default-version 2
这条命令是将WSL默认版本设为2,即WSL2。只有WSL2支持GPU应用,为了避免后期转换,直接设置安装时就使用WSL2。
接下来要安装Ubuntu 24.04。
wsl --install Ubuntu-24.04
安装时会询问用户名和密码,按要求设置即可。
如果想安装其他版本或其它系统,可以用wsl -l -o来查看可以安装的发行版。安装好后用wsl -l -v可以查看当前安装的发行版。
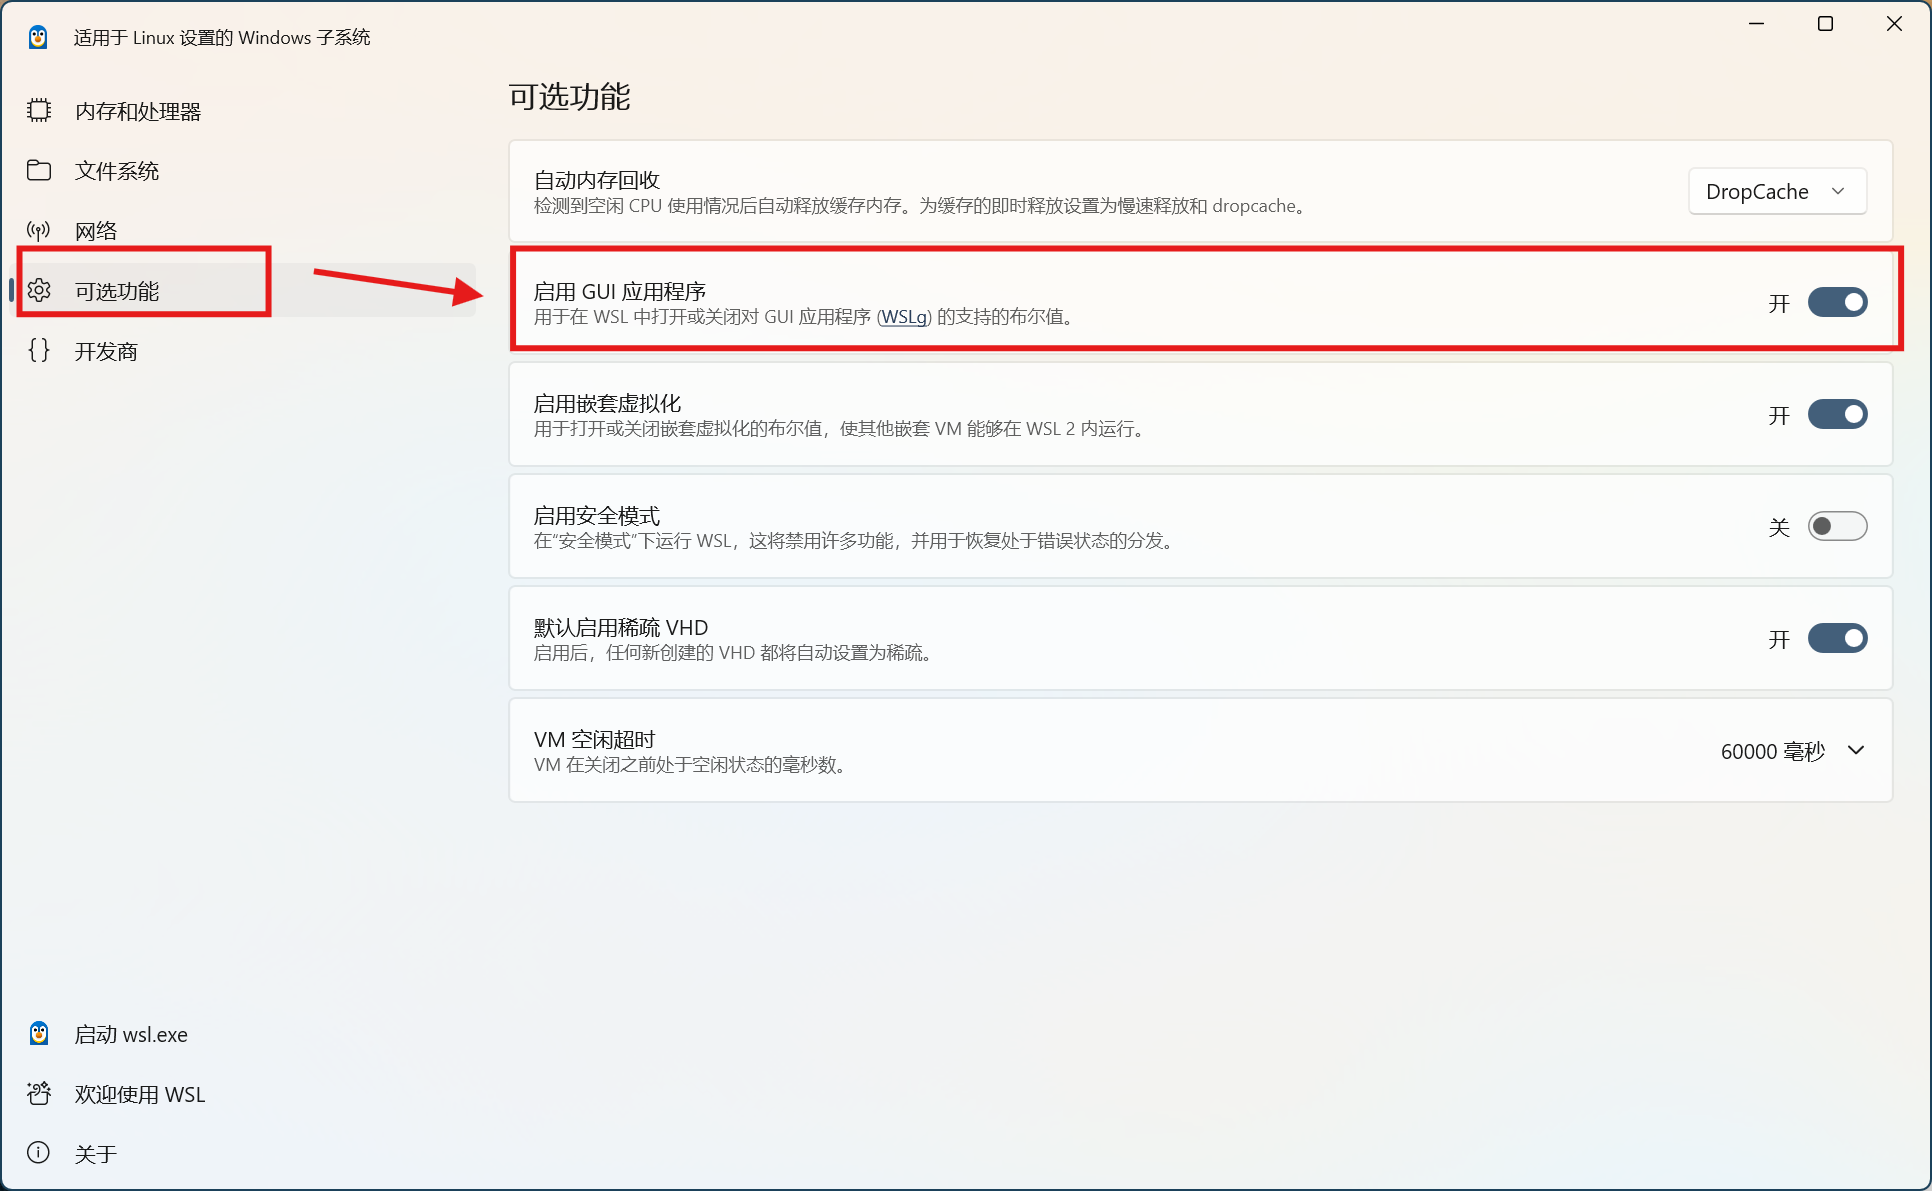
另外,为了成功使用GPU应用,需要启用WSLg支持。在开始菜单中找到WSL Settings,并确保可选功能中的启用GUI应用程序打开(默认应该是启用的,如果出问题可以来检查设置)。
安装后设置
安装好之后,就可以在终端应用的新建窗口的下拉菜单中找到Ubuntu 24.04了。在开始菜单中也有对应的项目,可以直接打开。
下面的命令如无特殊说明,都是在Ubuntu 24.04下执行的。
修改软件源并更新
要将Ubuntu的系统软件源修改为国内镜像。使用如下命令打开软件源:
sudo vim /etc/apt/sources.list.d/ubuntu.sources
打开往下翻页会看到两处URIs设置,将两处URIs后的内容都改成http://mirrors.tuna.tsinghua.edu.cn/ubuntu/即可,其他行不要动。
关于Vim的操作方法,可以看Vim简易操作指南。
修改好之后,进行更新。下面每行一条命令,每条命令执行完成后再执行下一条,后面多行命令如无特殊说明均如此。
sudo apt update
sudo apt dist-upgrade
(可选)一些方便设置
为了方便使用,可以安装一些软件包:
sudo apt install zsh git language-pack-zh-hans
分别安装了Zsh(一个好用的Shell)、Git(代码版本控制软件)和中文语言包。
安装语言包后需要重新设置locales包:
sudo dpkg-reconfigure locales
会弹出交互界面,在列表中找到zh_CN.UTF8 UTF8一项,按空格选中,然后按Tab切换到OK回车确认;再下一页选中zh_CN.UTF8,,然后按Tab切换到OK回车确认。等它配置完后重启终端即可。
为了能访问GitHub,需要给Git设置代理:
git config --global http.https://github.com.proxy "http://127.0.0.1:8080"
http://127.0.0.1:8080这部分根据自己使用的代理设置,协议支持http、https和socks5。
为了Zsh更好用,可以安装配置框架Oh My Zsh。
sh -c "$(wget https://raw.githubusercontent.com/ohmyzsh/ohmyzsh/master/tools/install.sh -O -)"
要设置Git的GitHub代理,否则有可能失败。安装好后会询问是否设置默认Shell为Zsh,确认即可。修改默认Shell之后,要关闭终端(标签页)再打开才能看到生效。
安装AMD GPU驱动
参考引用来源1(后续新版本可以到此页面的ROCm installation一节查看最新命令,请注意选择正确的Ubuntu版本以免后续出错),首先下载并安装AMD GPU驱动管理工具。
wget https://repo.radeon.com/amdgpu-install/6.4.1/ubuntu/noble/amdgpu-install_6.4.60401-1_all.deb
sudo apt install ./amdgpu-install_6.4.60401-1_all.deb
为了后续使用不出错,最好把当前用户加入video和render组:
sudo usermod -a -G render,video $LOGNAME
然后根据需要安装驱动,可以先列出用例。
amdgpu-install --list-usecase
然后安装所需要的用例。
amdgpu-install --usecase=wsl,rocm --no-dkms
因为是WSL下安装,所以需要安装wsl用例,并且要安装rocm用例,如果有其他需求可以参考上面列出的用例,用英文逗号,分隔。
装好之后可以用如下命令查看是否成功:
rocminfo
如果列出的内容中有正在使用的显卡(一般是在Agent 2下面),那么就表示成功了。
卸载
卸载驱动
在Ubuntu中执行命令即可。
amdgpu-uninstall
删除WSL实例
在PowerShell终端中执行命令即可。
wsl --unregister Ubuntu-24.04
此处Ubutu-24.04是发行版名称,可以用wsl -l -v查看。
如果以后不再使用WSL,可以直接删除WSL。
wsl --uninstall
在WSL中使用PyTorch
以下所有命令均在Ubuntu中执行。
安装Miniconda
这一步是为了方便管理虚拟环境,如果使用其他的虚拟环境管理工具,可以跳过。参考Linux(包括WSL)安装Miniconda教程即可。
创建新虚拟环境
使用Miniconda创建一个虚拟环境。
conda create -n pytorch python
pytorch是虚拟环境的名称,请自行设定。python表示初始安装Python包。
完成后激活虚拟环境,后面操作都是在激活的虚拟环境中进行。
conda activate pytorch
安装PyTorch
到PyTorch官网页面查看安装命令。下面是选择Preview (Nightly)(若稳定版支持新版ROCm了可以选择Stable)、Linux、Pip、Python、ROCm 6.4(若选择Stable后这个选项没有删除线且版本大于等于6.4则表示稳定版已经支持)的结果,理论上稳定版的ROCm 6.3应该也能运行。
pip3 install --pre torch torchvision torchaudio --index-url https://download.pytorch.org/whl/nightly/rocm6.4
根据提示等待安装成功。
一些修正
2025年8月30日更新:最新的PyTorch版本和ROCm 6.4.3已经修正了此问题,若运行没有出错可以不用参考本节内容。
在引用来源2中提到,因为PyTorch自带的libhsa有问题,需要替换,但经过我的测试,直接删除即可。具体可以先用下一节的测试方法测试之后再来修正。
location=`pip show torch | grep Location | awk -F ": " '{print $2}'`
cd ${location}/torch/lib/
rm libhsa-runtime64.so*
如果要替换可以在上面的命令执行完后再执行一条:
cp /opt/rocm/lib/libhsa-runtime64.so.1.15.60401 libhsa-runtime64.so
这里文件名后的1.15.60401是库文件版本,根据自己的实际情况修改,可以用Tab键自动补全。
但这样还是有可能出错,因为Miniconda安装的Python自带的libstdc++.so可能太旧。用下一节的方法测试会提示如下错误:
/home/qakcn/miniconda3/envs/pytorch/bin/../lib/libstdc++.so.6: version `GLIBCXX_
3.4.32' not found (required by /home/qakcn/miniconda3/envs/pytorch/lib/python3.1
3/site-packages/torch/lib/libhsa-runtime64.so)
一般系统自带的都是新的,所以我们这里也可以直接删除,根据上面提示的文件路径删除即可:
rm /home/qakcn/miniconda3/envs/pytorch/lib/libstdc++.so.6
这里的路径要根据实际情况修改。提示的文件名是/home/qakcn/miniconda3/envs/pytorch/bin/../lib/libstdc++.so.6,其中..表示上级目录,/home/qakcn/miniconda3/envs/pyg/bin/的上级目录就是/home/qakcn/miniconda3/envs/pytorch/,把..后的路径接上就行了。也可以直接定位到Miniconda安装目录的envs/<虚拟环境名>/lib目录下(可以直接使用环境变量$CONDA_PREFIX来获取)。
测试PyTorch
用下面几条命令验证PyTorch是否成功:
python3 -c 'import torch' 2> /dev/null && echo 'Success' || echo 'Failure'
python3 -c 'import torch; print(torch.cuda.is_available())'
python3 -c "import torch; print(f'device name [0]:', torch.cuda.get_device_name(0))"
第一条测试PyTorch是否安装成功,输出Success(成功)或Failure(失败)。第二条测试ROCm是否能成功调用,输出True(成功)或False(失败)。第三条测试调用的是否是AMD显卡,输出显卡型号名称。
下面再给出三个Python脚本,用于简单测试性能。
flops.py
import torch
from torch.utils import benchmark

typ = torch.float16 # 可以修改成float32或float64来测试单精度或双精度浮点性能
n = 1024 * 16
a = torch.randn(n, n).type(typ).cuda()
b = torch.randn(n, n).type(typ).cuda()

t = benchmark.Timer(
      stmt='a @ b',
      globals={'a': a, 'b': b})

x = t.timeit(50)
print(2*n**3 / x.median /1e12) # 输出结果单位是TFLOPS
test.py
vimport time
import torch

# 测试gpu计算耗时
A = torch.ones(5000, 5000).to('cuda')
B = torch.ones(5000, 5000).to('cuda')
startTime2 = time.time()
for i in range(100):
    C = torch.matmul(A, B)
endTime2 = time.time()
print('gpu计算总时长:', round((endTime2 - startTime2) * 1000, 2), 'ms')

# 测试cpu计算耗时
A = torch.ones(5000, 5000)
B = torch.ones(5000, 5000)
startTime1 = time.time()
for i in range(100):
    C = torch.matmul(A, B)
endTime1 = time.time()
print('cpu计算总时长:', round((endTime1 - startTime1) * 1000, 2), 'ms')
testscript.py
# converted to convenient script form
# just run python -m testscript
# it should go without saying that you need a CUDA-enabled PyTorch installation before running this will work
# I mean, that's the whole point of this script, to test that very installation

# Imports
import time
import torch

# functions
def timeFun(f, dim, iterations, device='cpu'):
  iterations = iterations
  t_total = 0
  for _ in range(iterations):
    start = time.time()
    f(dim, device)
    end = time.time()
    t_total += end - start

  if device == 'cpu':
    print(f"time taken for {iterations} iterations of {f.__name__}({dim}, {device}): {t_total:.5f}")
  else:
    print(f"time taken for {iterations} iterations of {f.__name__}({dim}, {device}): {t_total:.5f}")

def set_device():
  device = "cuda" if torch.cuda.is_available() else "cpu"
  if device != "cuda":
    print("GPU is not available")
  else:
    print("GPU is available")

  return device

def simpleFun(dim, device):
  """
  Args:
    dim: integer
    device: "cpu" or "cuda"
  Returns:
    Nothing.
  """

  # 2D tensor filled with uniform random numbers in [0,1), dim x dim
  x = torch.rand(dim,dim,device=device) # don't use "to". just make it a cuda-native array (with device='cuda') and it'll go way faster because you'll be abolishing the transfer overhead!
  # 2D tensor filled with uniform random numbers in [0,1), dim x dim
  y = torch.rand_like(x,device=device)
  # 2D tensor filled with the scalar value 2, dim x dim
  z = 2*torch.ones_like(x,device=device)

  # elementwise multiplication of x and y
  a = x * y
  # matrix multiplication of x and y
  b = x @ y

  del x
  del y
  del z
  del a
  del b

# set device
DEVICE = set_device()

# params for timeFun
dim = 10000
iterations = 1

# test your GPU matrix multiplication against a CPU benchmark
timeFun(f=simpleFun, dim=dim, iterations=iterations, device='cpu')
timeFun(f=simpleFun, dim=dim, iterations=iterations, device=DEVICE)