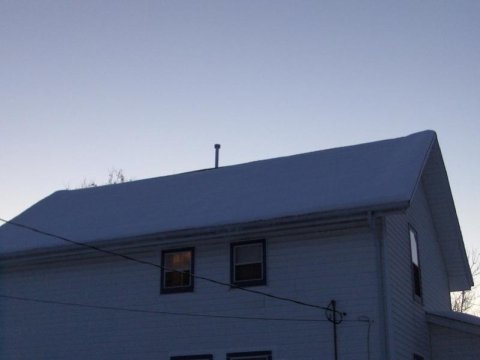
Its been a few weeks since we cleaned and sealed the attic in Part 1 of our series. This is how the roof looked in the middle of December. As you can see, the eves have more snow on them than the middle of the roof. This is a clear indication of heat loss through the attic.
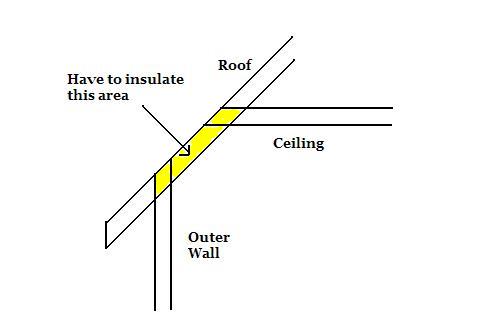
As I mentioned in part 1, there were some odd areas to insulate. So, let me explain further. In my house, the roof doesn’t meet the walls at the top of the ceiling of the second story as it would with a normal two story house. Instead, it comes down about a foot and a half. The above picture is a rough cross section.

So, I need to insulate the yellow area as much as possible since it is only about five to six inches thick. I ended up choosing to use polyisocyanurate (polyiso) rigid foam as it has the highest r-value I could find (6.5 per inch). Two one inch thick sheets would be put down over the rock wool insulation that was already put down. This would give me approximately ~R-16 in that area. This will still allow roughly a 1″ gap above the rigid foam for an air passage which is a necessity.

The actual fitment of the rigid foam boards was quite easy. I used 4’x8′ sheets and cut them equally into four pieces. Then, to make everything fit, I needed to cut a small strip off of the end so it would slide down fully. You can see this in the lower right of the picture. To ensure that there was a sufficient air gap, I used the cut off strip and slid it in above the foam board as a spacer. It fit perfectly, and things are almost ready for the cellulose.


Comments on this entry are closed.